Introduction
Air dry clay is one of the easiest materials you and I can use to create beautiful handmade decor.
You do not need a kiln, expensive pottery equipment, or professional training.
With just a few simple tools and a little creativity, you can make stunning bowls in a single afternoon.
I love working with air dry clay because it is beginner friendly and incredibly versatile.
You can shape it, texture it, paint it, and turn it into decorative pieces that look like they came from a boutique store.
Even better, these projects are relaxing and fun, which makes them perfect for a weekend craft session.
In this guide, I will share 15 beautiful air dry clay bowl ideas you can make in an afternoon.
These designs are simple enough for beginners but stylish enough to display around your home or give as thoughtful handmade gifts.
Why Air Dry Clay Bowls Are So Popular
Handmade clay crafts have become incredibly popular in recent years, especially among DIY lovers and home decor enthusiasts.
One reason is that air dry clay removes many of the barriers that traditional pottery has.
Instead of needing a pottery wheel or a kiln, you simply shape the clay and allow it to dry naturally. This makes the process accessible for anyone who enjoys crafting.
Another reason people love these bowls is their versatility. You can use them in many ways around your home.
For example, you can use clay bowls to:
- Hold jewelry like rings and earrings
- Store keys near the entryway
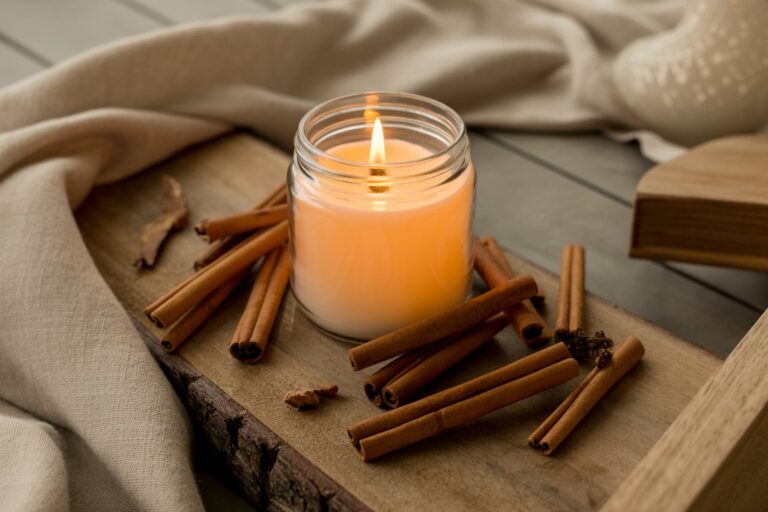
- Display candles or decorative stones
- Organize small office supplies
- Add handmade decor to shelves and coffee tables
I often make several bowls at once and place them in different areas of the house. They instantly add personality and warmth to a space.
Supplies You Will Need to Make Air Dry Clay Bowls
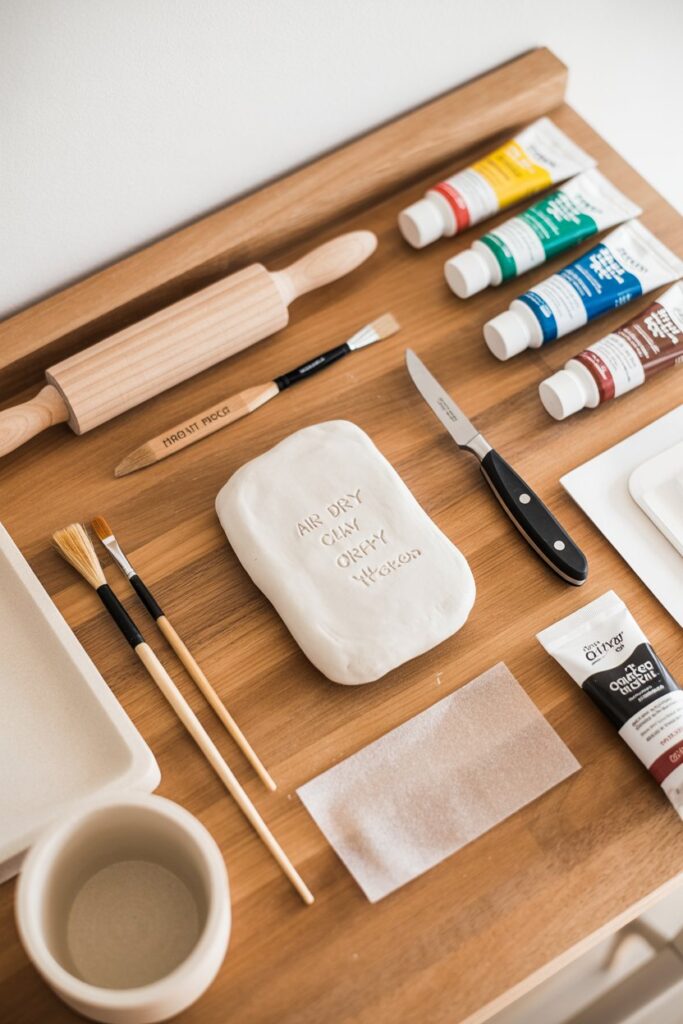
Before starting your project, it helps to gather a few basic tools and materials. The good news is that most of these supplies are affordable and easy to find.
When I first started making clay bowls, I only used a few simple items and they worked perfectly.
Here are the essential supplies that make the process easier.
Air Dry Clay
The most important material is, of course, the clay itself. Good quality air dry clay is smooth, easy to shape, and dries without too many cracks.
Choose a clay that is soft and easy to mold, especially if you are a beginner.
Rolling Pin
A rolling pin helps flatten the clay evenly. If you do not have one, a smooth bottle can work just as well.
Craft Knife or Clay Tools
These tools help you cut shapes and refine the edges of your bowl.
Sandpaper
Once the bowl is completely dry, sandpaper helps smooth out rough edges and imperfections.
Acrylic Paint
Paint allows you to customize your bowls with different colors, patterns, and finishes.
Clear Sealant or Varnish
This step protects the clay and makes the bowl more durable. A sealant also gives the bowl a polished finish.
Helpful Tips Before You Start
After making many clay bowls myself, I learned a few simple tricks that make a big difference in the final result.
First, always work on a clean surface. This prevents dust and debris from sticking to the clay.
Second, roll the clay evenly so the bowl thickness stays consistent. If one area is too thin, it may crack while drying.
Another helpful tip is to let the clay dry slowly. Most air dry clay projects need around 24 to 48 hours to fully harden.
Finally, do not worry if your first bowl is not perfect. Handmade crafts often look better with a little personality and uniqueness.
Now that you have your supplies ready, let’s explore some beautiful bowl ideas you can create in just an afternoon.
How to Make an Air Dry Clay Bowl (Beginner Step by Step Guide)
Before trying the different bowl designs, I always recommend learning the basic process. Once you understand these steps, you and I can easily create many different styles.
The good news is that making an air dry clay bowl is surprisingly simple.
Step 1: Prepare Your Work Surface
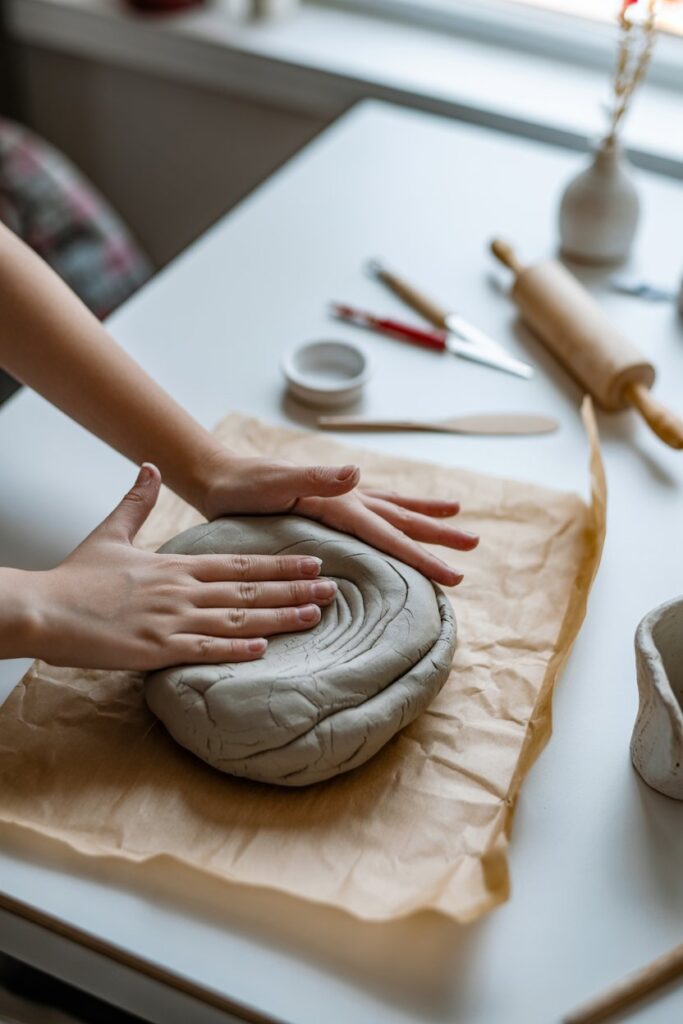
Start by working on a clean and flat surface. I usually place parchment paper or a silicone mat on the table so the clay does not stick.
Knead the clay for a minute or two to soften it. This removes air bubbles and makes the clay easier to shape.
Step 2: Roll the Clay
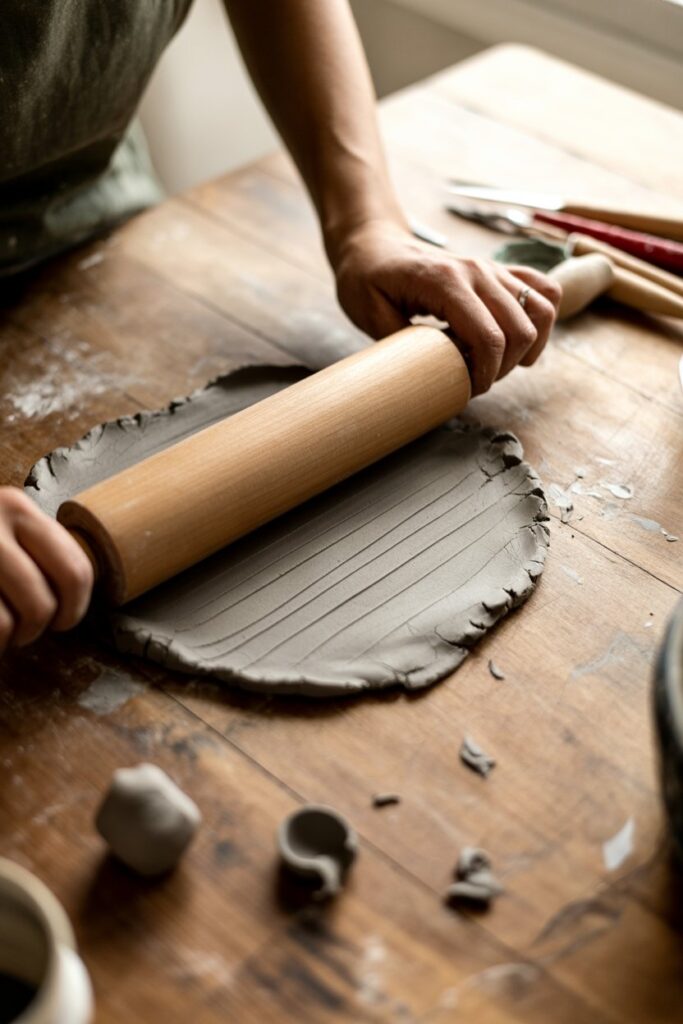
Use a rolling pin to flatten the clay.
Try to keep the thickness even. A good thickness is about 0.5 cm to 1 cm. If the clay is too thin, the bowl may crack while drying.
Roll slowly and evenly until the clay forms a flat sheet.
Step 3: Cut the Bowl Shape
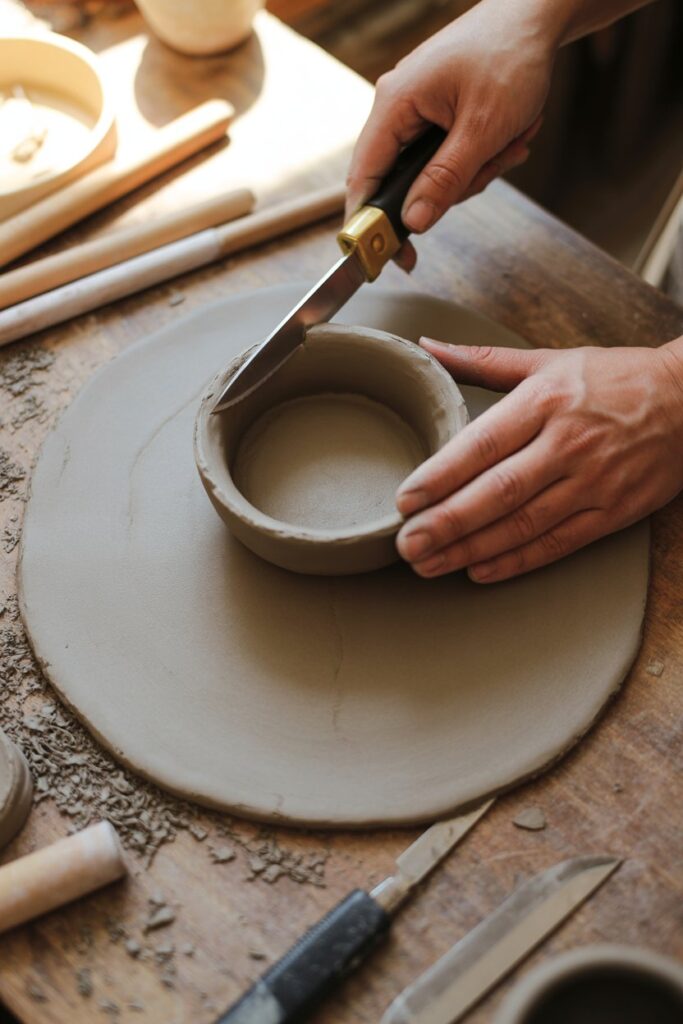
Use a round object such as a small plate or bowl to trace a circle on the clay.
Cut the circle carefully using a craft knife.
This circle will become the base of your bowl.
Step 4: Shape the Bowl
Take your clay circle and gently place it over an upside down bowl.
Press the clay lightly so it forms around the mold.
Do not press too hard. You just want the clay to take the shape naturally.
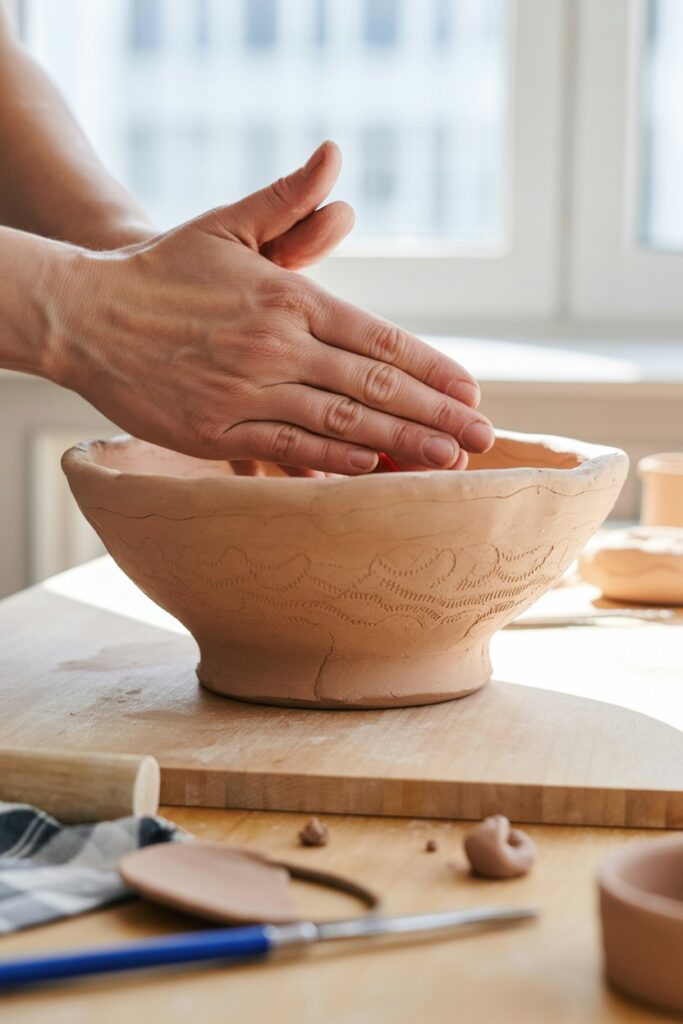
Step 5: Smooth the Edges
Use your fingers with a small amount of water to smooth the edges of the clay.
If you want decorative edges such as scallops or waves, you can shape them at this stage.
Step 6: Let the Clay Dry
Leave the bowl on the mold and allow it to dry.
Most air dry clay needs 24 to 48 hours to fully harden.
Avoid moving it too much while drying because it may lose its shape.
Step 7: Sand the Surface
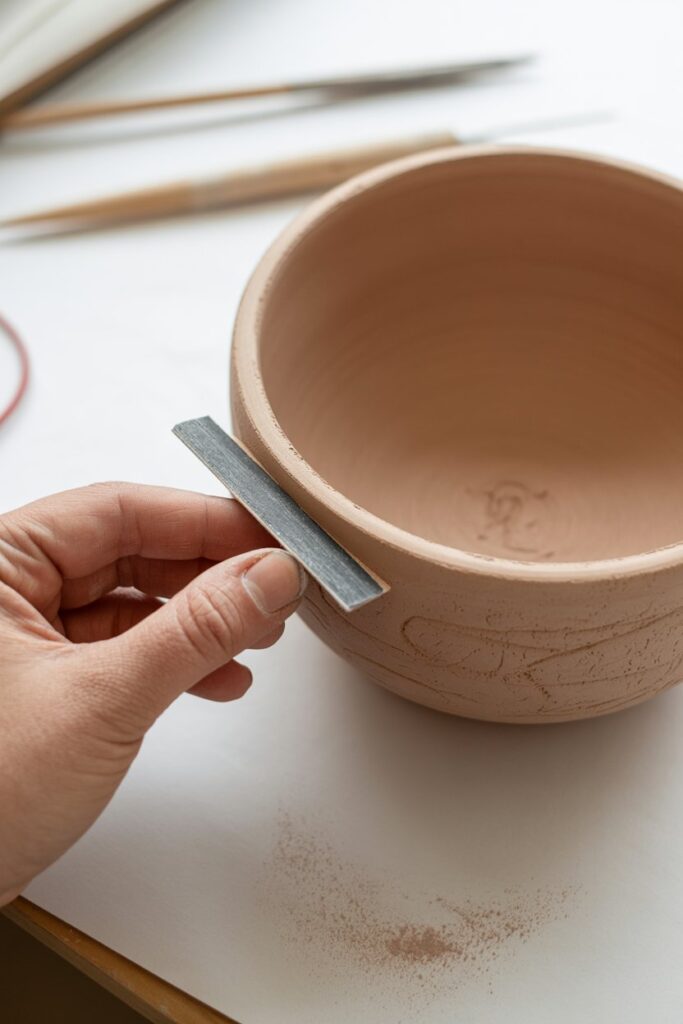
Once the bowl is completely dry, gently sand the edges with fine sandpaper.
This helps remove rough spots and gives the bowl a smooth finish.
Step 8: Paint and Seal the Bowl
Now comes the fun part.
You can paint the bowl with acrylic paint in any color or pattern you like. After the paint dries, apply a clear sealant or varnish.
This protects the clay and makes the bowl last longer.
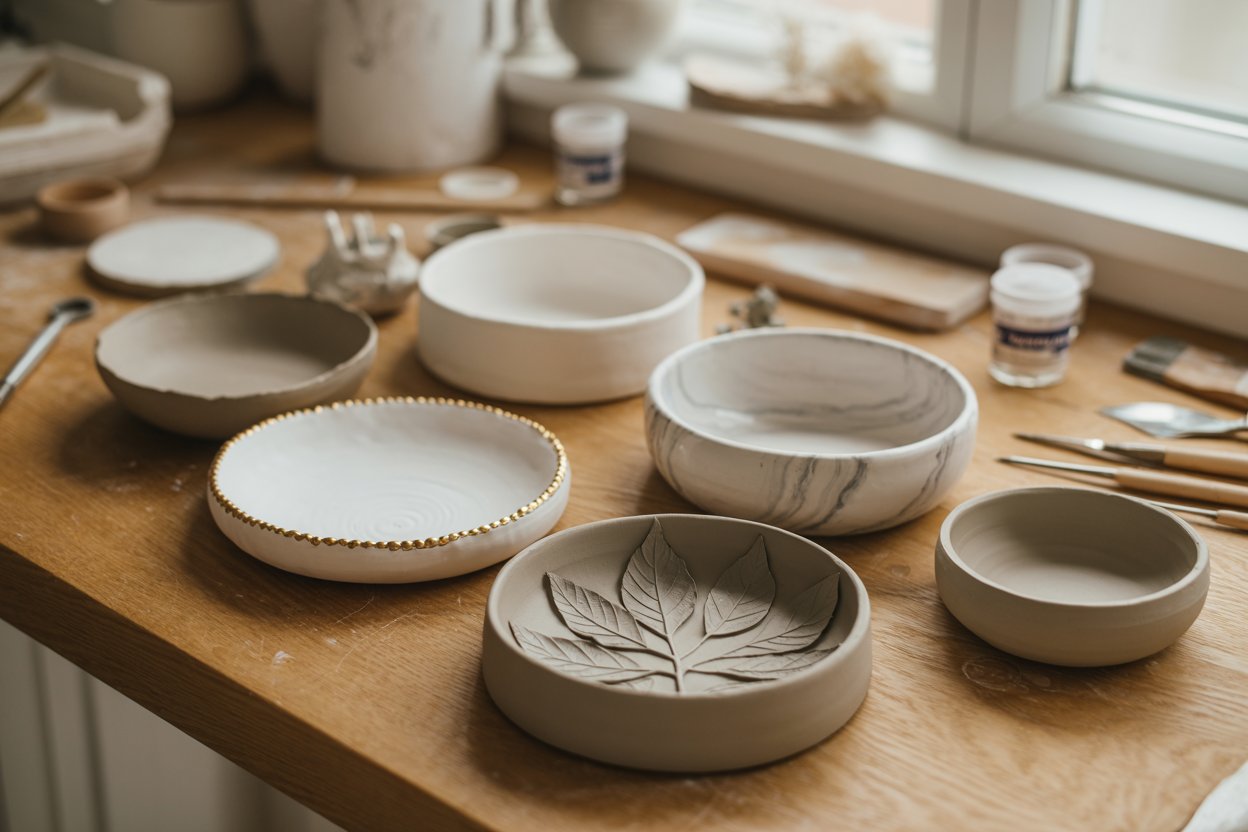
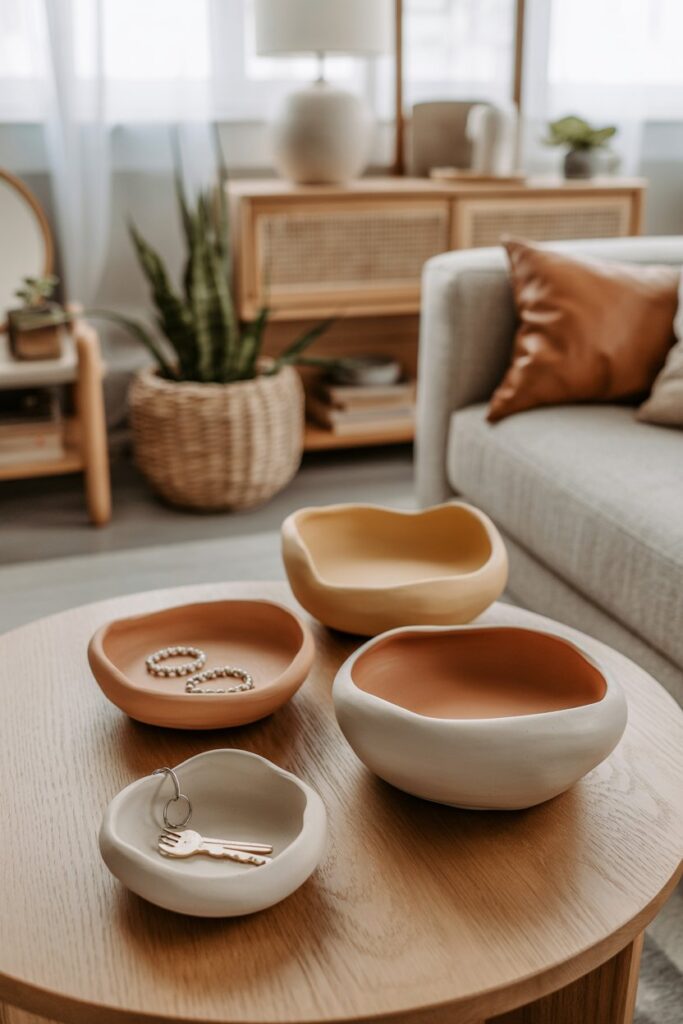
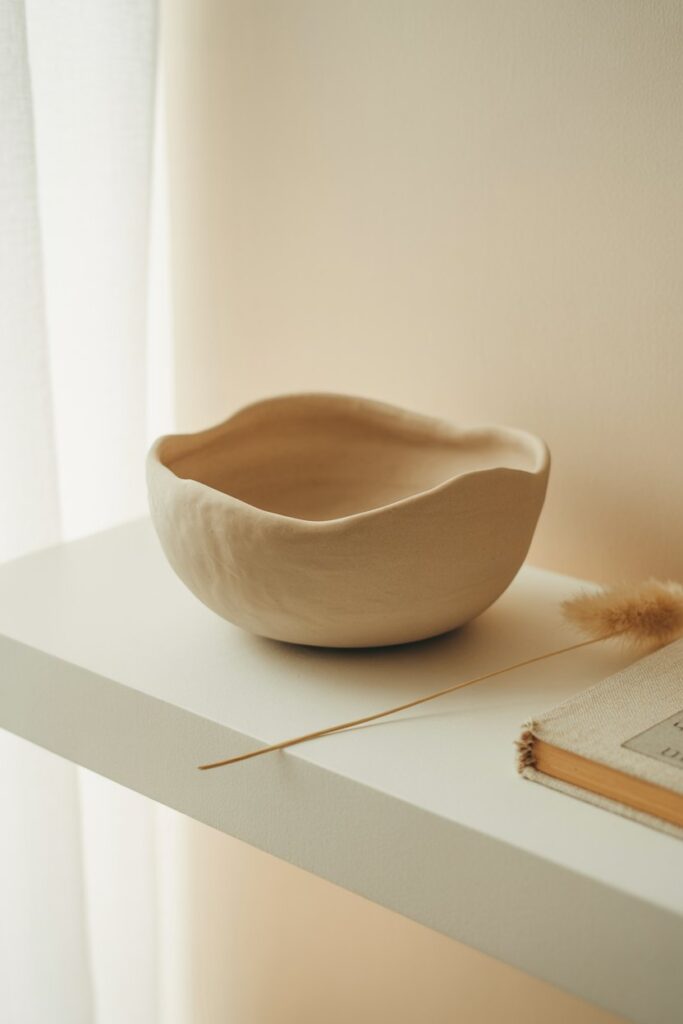
1. Minimalist White Clay Bowl
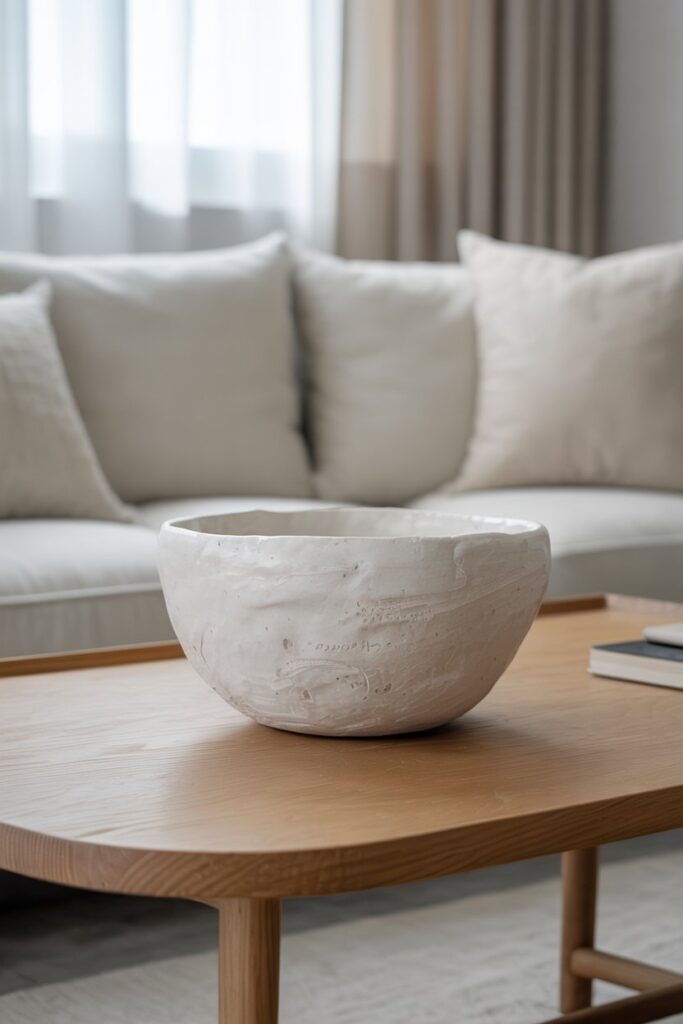
If you love clean and modern home decor, a minimalist bowl is a perfect place to start. I often recommend this design to beginners because it is simple but still looks elegant.
To make this bowl, roll out your clay evenly and gently place it over an upside down bowl to create the shape. Once it dries, remove it and smooth the edges with sandpaper.
You can leave the bowl natural or paint it a soft white color for a minimal look. I like placing this type of bowl on a coffee table or bedside table to hold small items like rings or keys.
2. Gold Rim Decorative Bowl
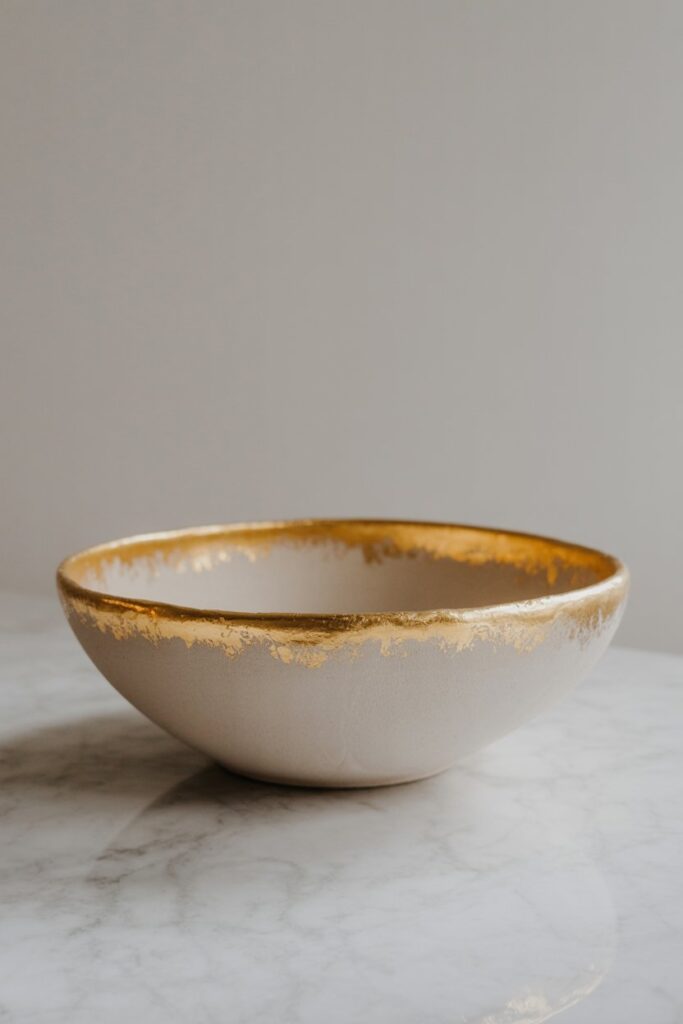
This bowl looks surprisingly luxurious even though it is easy to make.
Start by shaping a simple round bowl and allow it to dry completely. After that, paint the entire bowl in a neutral color such as white, beige, or light gray.
Once the paint dries, carefully add a thin line of metallic gold paint around the rim. This small detail instantly elevates the design and gives it a boutique style finish.
I often use this type of bowl for jewelry storage because it feels both decorative and functional.
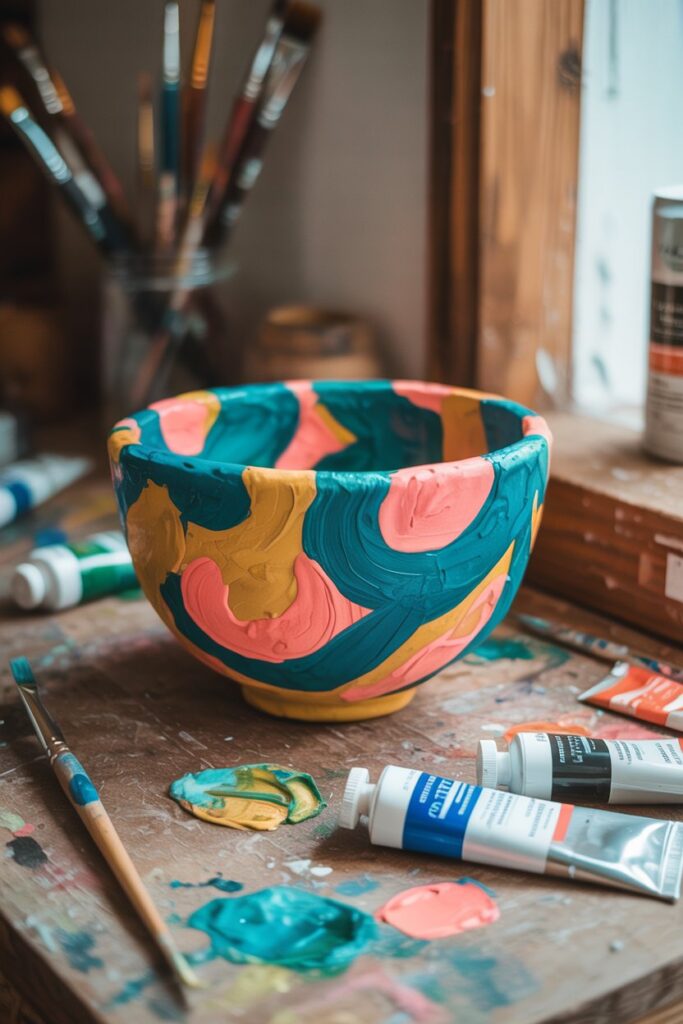
3. Marble Effect Clay Bowl
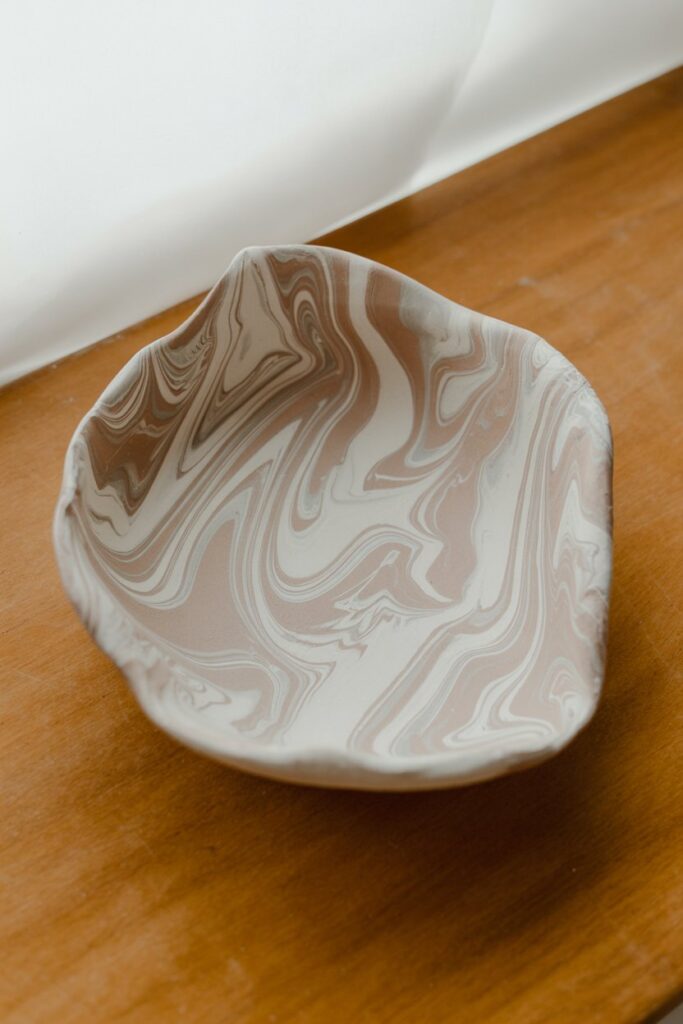
Marble patterns are timeless and beautiful. The best part is that they are easy to create with air dry clay.
To achieve this effect, take two different colors of clay and gently twist them together. Do not mix them completely because you want the colors to stay partially separate.
When you roll the clay flat, the swirling marble pattern appears naturally. Shape the clay into a bowl and let it dry.
Every bowl will have a slightly different pattern, which makes each piece unique.
4. Leaf Imprint Bowl
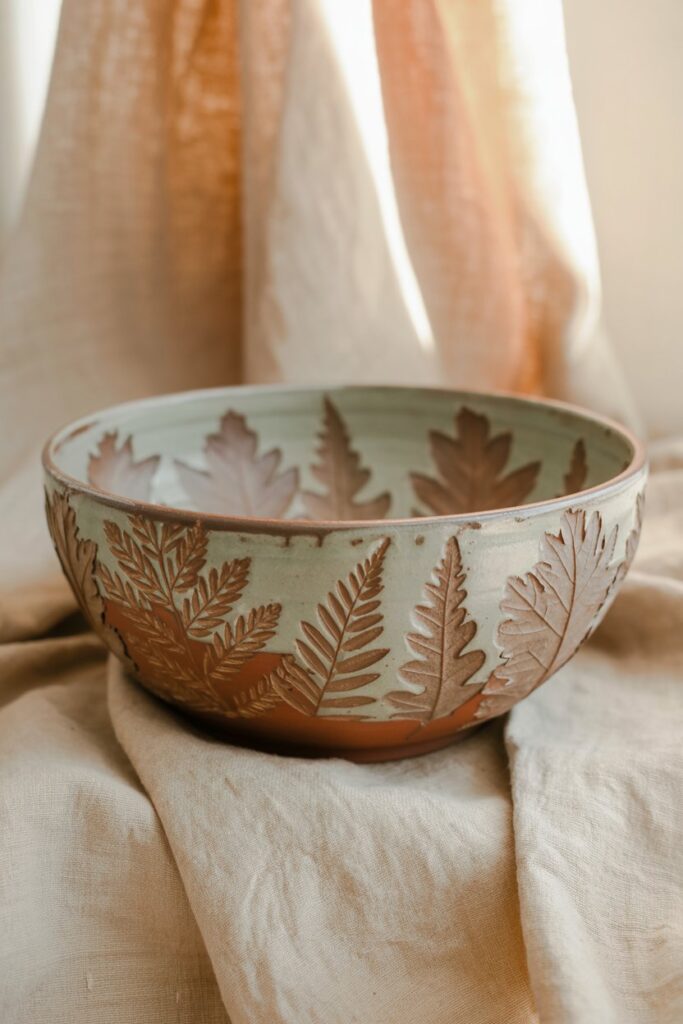
Nature inspired designs are always beautiful in home decor. This bowl captures the delicate texture of real leaves.
Roll your clay flat and place a leaf on the surface. Gently press it into the clay using a rolling pin or your fingers.
When you remove the leaf, it leaves behind a detailed imprint of the veins. Shape the clay into a bowl and allow it to dry.
You can paint the bowl a soft earthy color like sage green or cream to highlight the natural design.
5. Speckled Ceramic Style Bowl
If you like pottery that looks handmade and rustic, a speckled bowl is a great option.
After shaping and drying the bowl, paint it with a neutral base color such as white or beige. Once the paint dries, dip a small brush into dark paint and lightly flick it across the bowl.
This creates tiny speckles that mimic the look of handmade ceramic pottery.
I like using this style in kitchens or living rooms because it blends well with natural decor.
6. Scalloped Edge Bowl
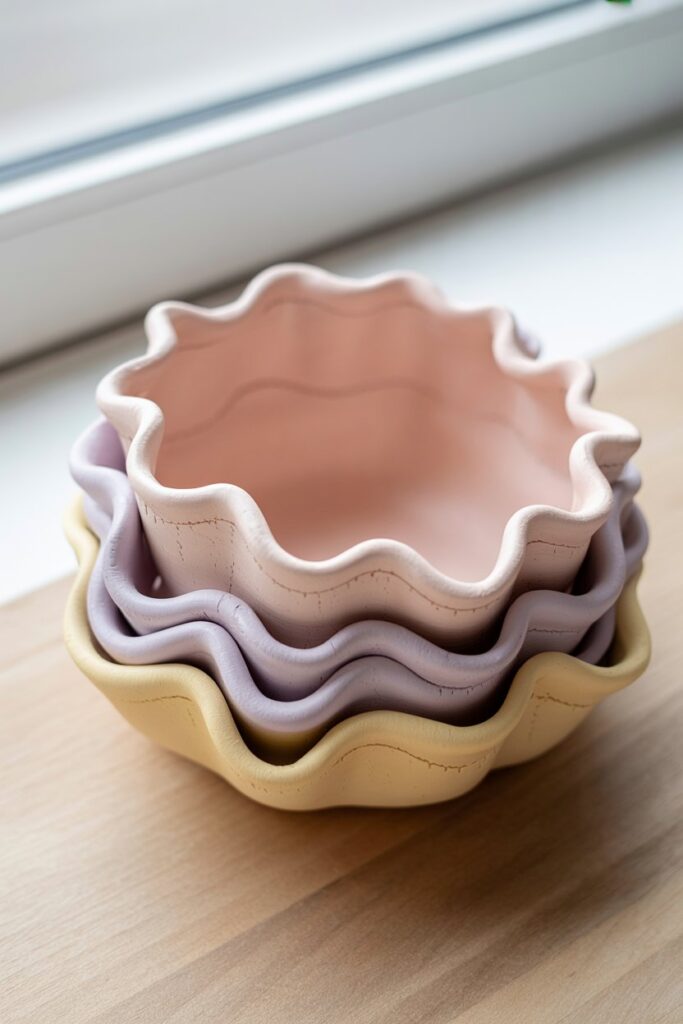
A scalloped edge bowl has a soft and decorative shape that feels playful and elegant.
Start by rolling the clay flat and cutting a circle. Before shaping the bowl, gently pinch or press the edges to create small waves.
Place the clay over an upside down bowl to maintain the shape while drying.
Once finished, you can paint the bowl pastel colors or keep it neutral depending on your home decor style.
7. Textured Pattern Bowl
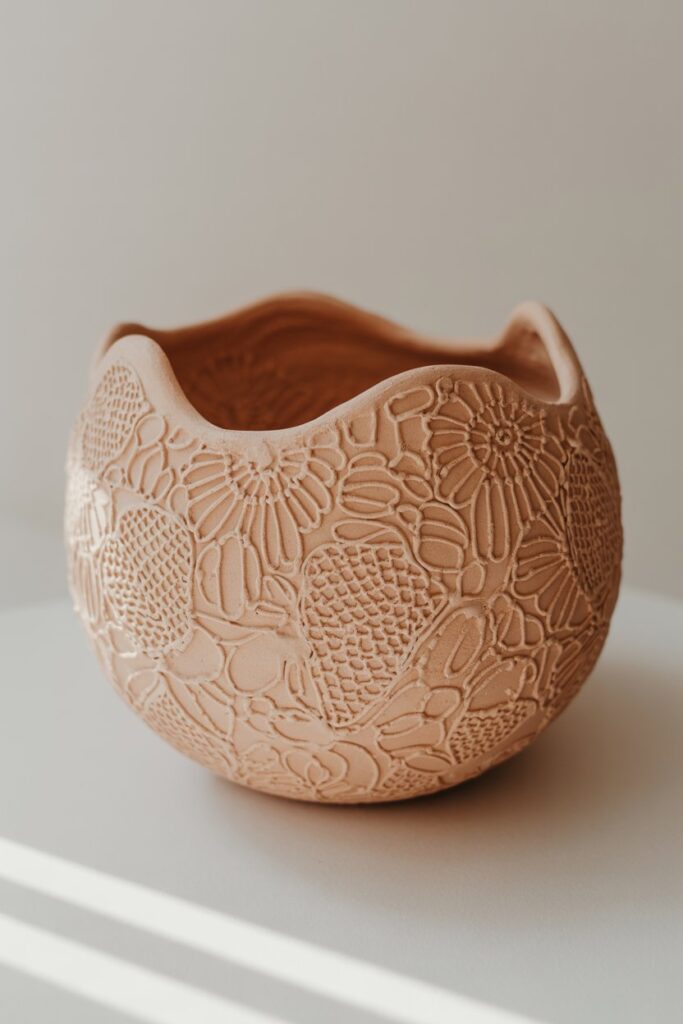
Adding texture is one of the easiest ways to make your clay bowls stand out.
Before shaping the bowl, press textured items into the clay. For example, you can use lace, fabric, woven placemats, or even stamps.
These textures leave interesting patterns that make the bowl look artistic and handmade.
After drying, lightly paint over the raised areas to highlight the texture.
8. Ombre Painted Bowl
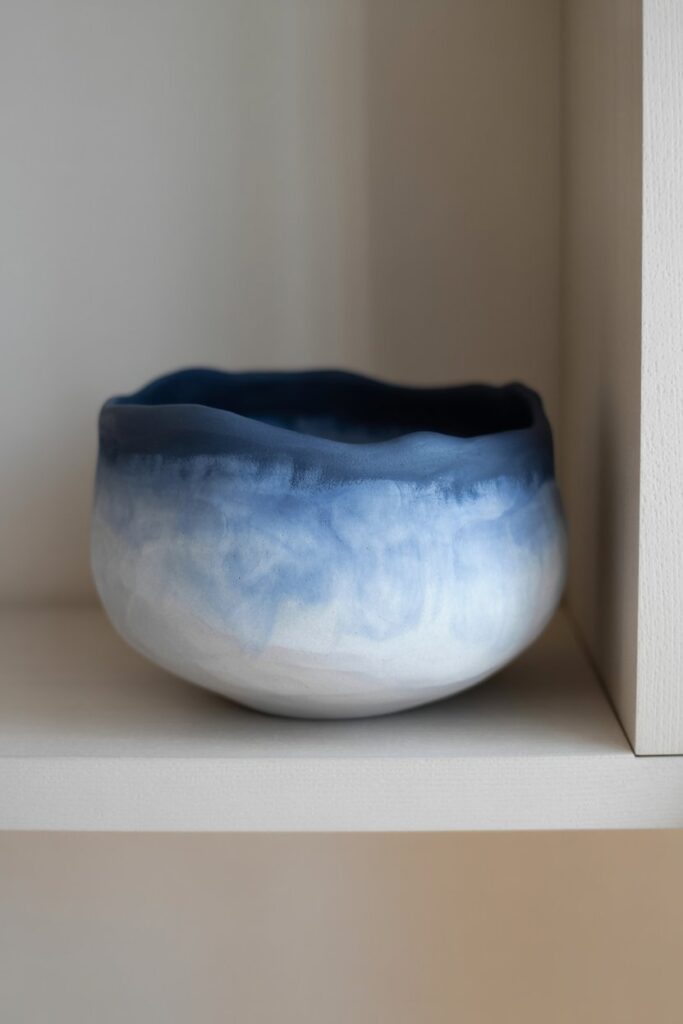
Ombre designs create a beautiful gradient effect that feels modern and artistic.
Once your bowl has dried, choose two or three shades of the same color. Start painting the darkest shade at the bottom of the bowl and gradually blend into lighter shades toward the rim.
This soft transition between colors creates a stylish decorative piece.
I often display ombre bowls on open shelves because they add color to a room.
9. Geometric Design Bowl
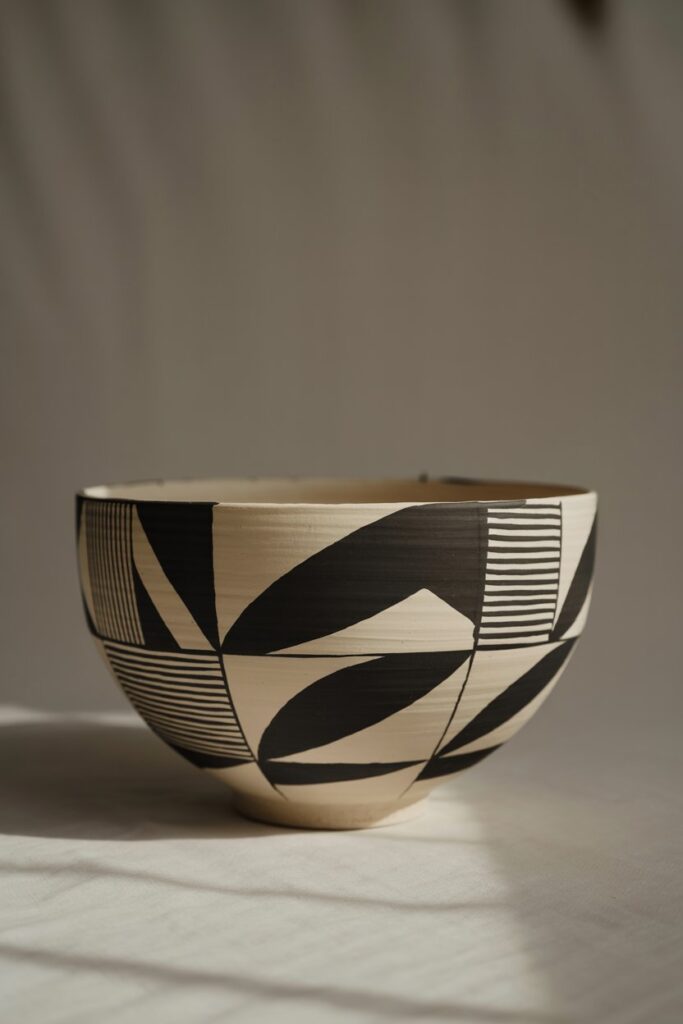
Geometric designs work well for modern and minimalist homes.
After shaping and drying the bowl, use painter’s tape to create geometric sections. Paint each section with different colors such as white, gray, black, or pastel tones.
When you remove the tape, the bowl reveals clean lines and bold patterns.
This design looks great in offices or contemporary living spaces.
10. Rustic Hand Pinched Bowl
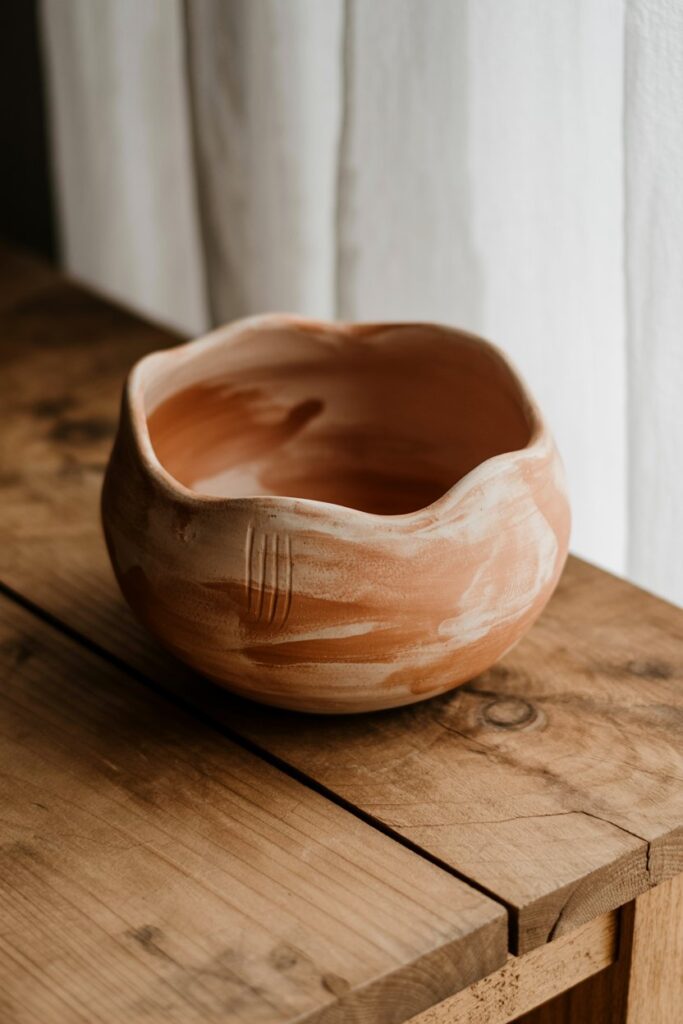
Sometimes the simplest designs are the most charming.
Instead of using molds, shape the bowl entirely with your hands. Gently pinch the sides and smooth the interior with your fingers.
This method creates a slightly uneven shape that highlights the handmade look.
I like leaving these bowls natural with just a clear sealant so the clay texture remains visible.
11. Heart Shaped Trinket Bowl
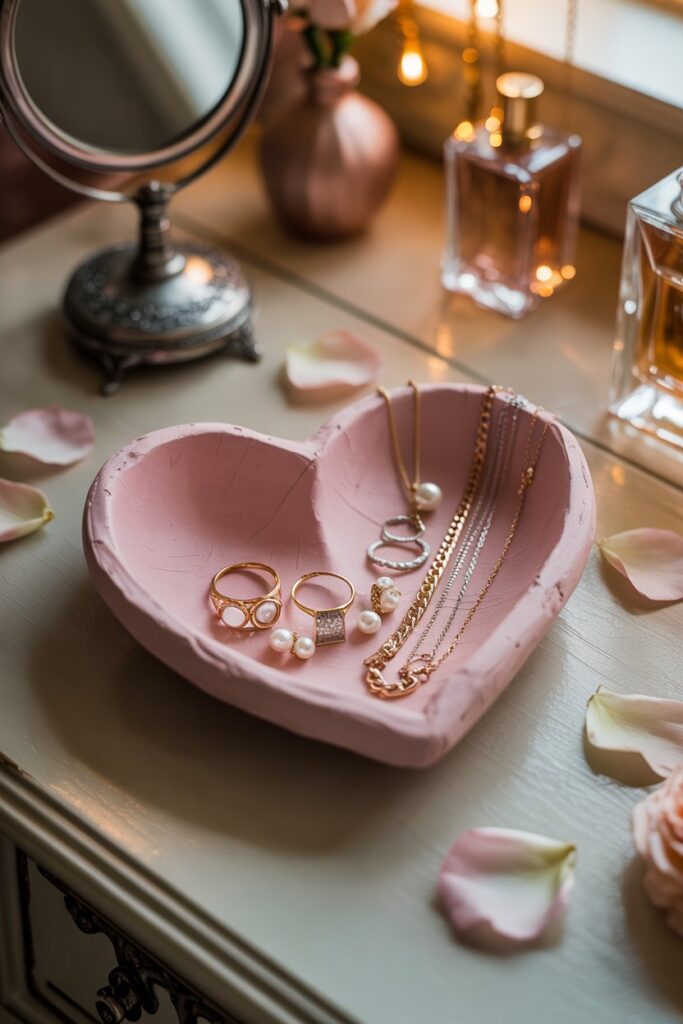
A heart shaped bowl makes a wonderful handmade gift.
Start by cutting a heart shape from rolled clay. Place the clay over a small mold to form the bowl and slightly pinch the top to emphasize the heart shape.
After drying, paint it soft pink, white, or red.
These bowls are perfect for holding jewelry or small keepsakes.
12. Boho Style Clay Bowl
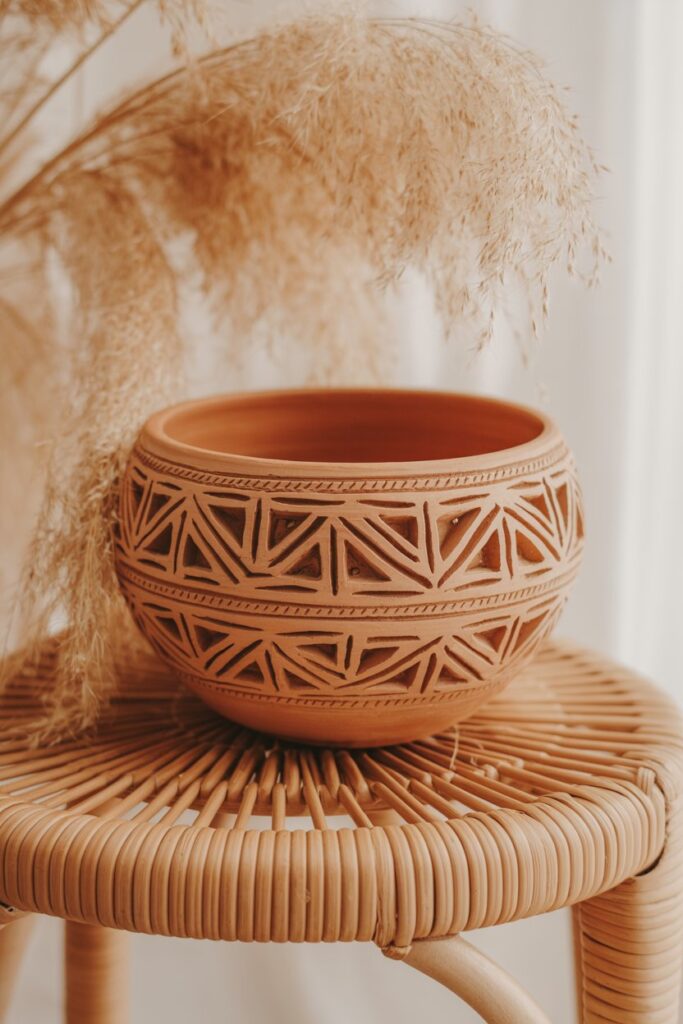
Boho inspired decor is very popular, and clay bowls fit perfectly with this aesthetic.
Create a simple bowl and add small etched patterns around the rim. You can draw tiny lines, dots, or tribal inspired shapes.
Once dry, paint the bowl earthy tones like terracotta, beige, or warm brown.
This style pairs beautifully with natural materials like wood and woven decor.
13. Pressed Flower Bowl
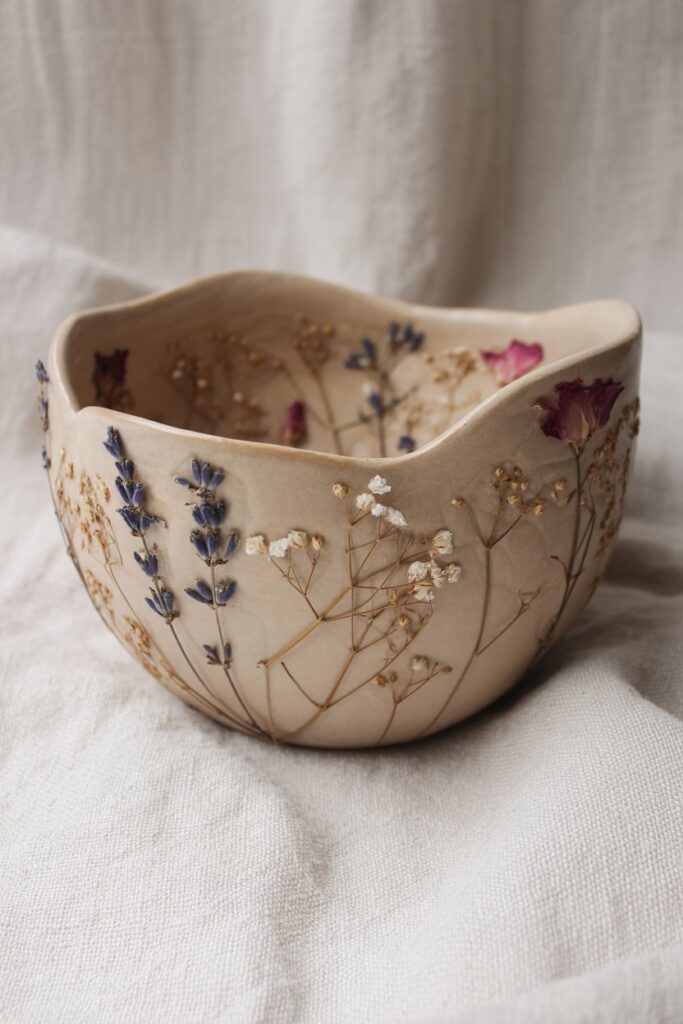
Pressed flowers create delicate and romantic designs.
Before the clay dries completely, gently press small dried flowers into the surface. Once the bowl dries, seal it carefully to protect the flowers.
This creates a beautiful decorative bowl that feels artistic and unique.
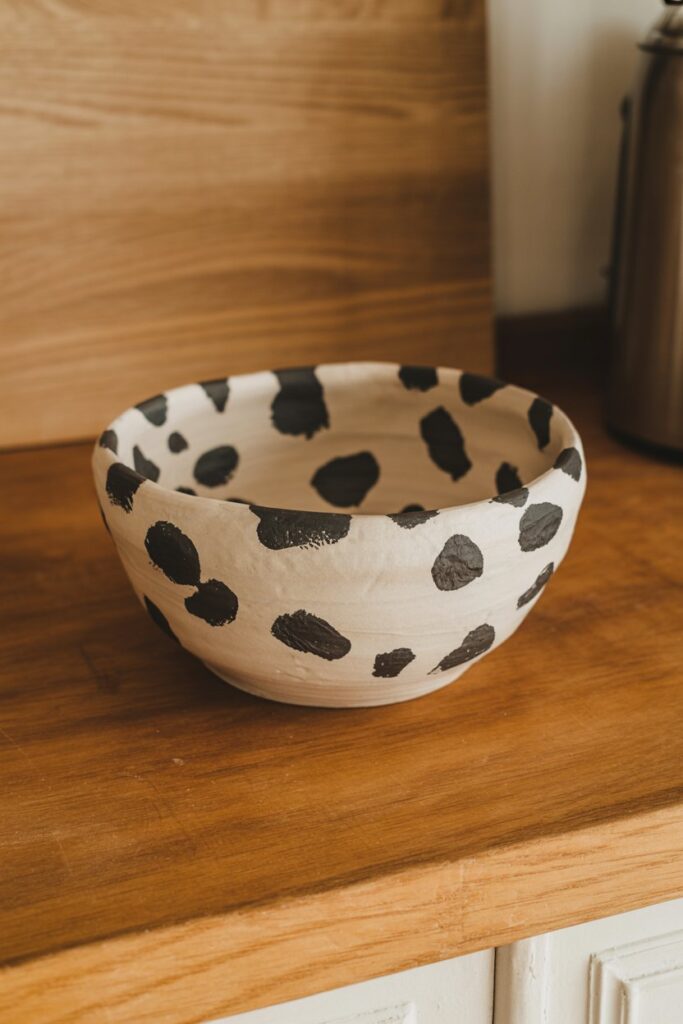
14. Painted Abstract Art Bowl
If you enjoy painting, this bowl allows you to experiment with creative designs.
After shaping and drying the bowl, use acrylic paint to create abstract patterns. You can add brush strokes, dots, or flowing shapes.
No two bowls will ever look the same, which makes the project fun and expressive.
15. Matte Neutral Decorative Bowl
Neutral tones always look sophisticated.
Paint your bowl in shades like beige, cream, clay brown, or soft gray. Finish it with a matte sealant to create a modern ceramic look.
These bowls blend easily into almost any room in the house.
How to Seal Air Dry Clay Bowls
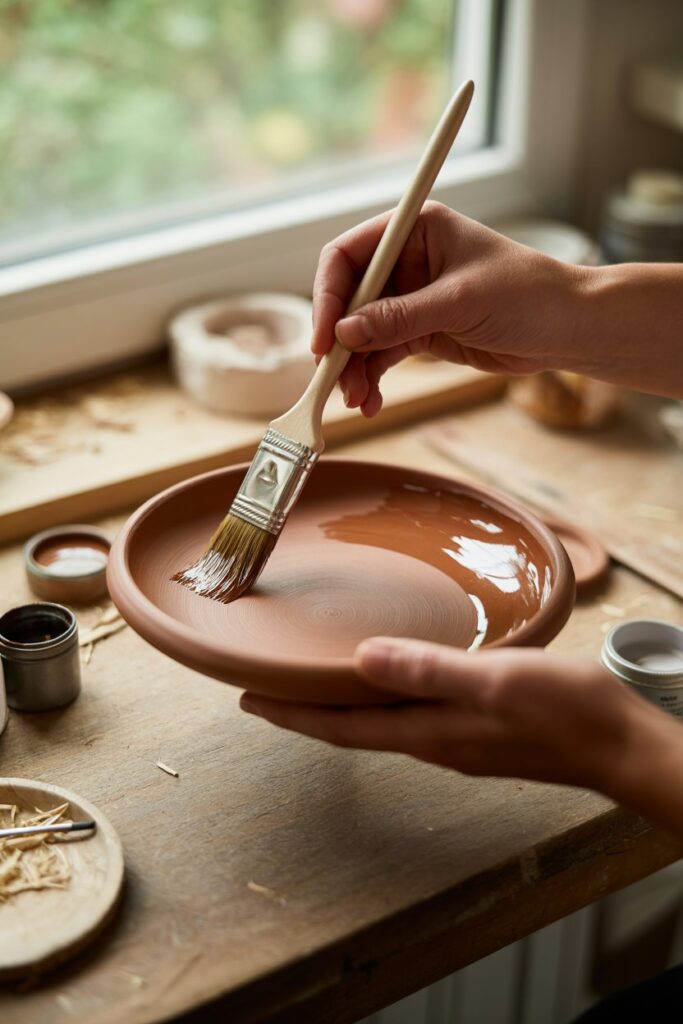
Sealing your clay bowls is an important step because it protects them from moisture and helps them last longer.
Once the bowl has dried completely, apply a clear sealant or varnish. Use a brush to apply a thin even layer across the surface.
Let the first layer dry and then apply a second coat if needed.
This simple step gives the bowl a smooth finish and makes it more durable.
Final Thoughts
Making air dry clay bowls is one of the most enjoyable DIY projects you can try. The process is simple, relaxing, and incredibly creative.
In just one afternoon you can make beautiful handmade pieces that add personality to your home. I also love giving clay bowls as gifts because they feel thoughtful and unique.
If you are new to crafting, start with a simple design and experiment as you go. The more you practice, the more confident you will become.