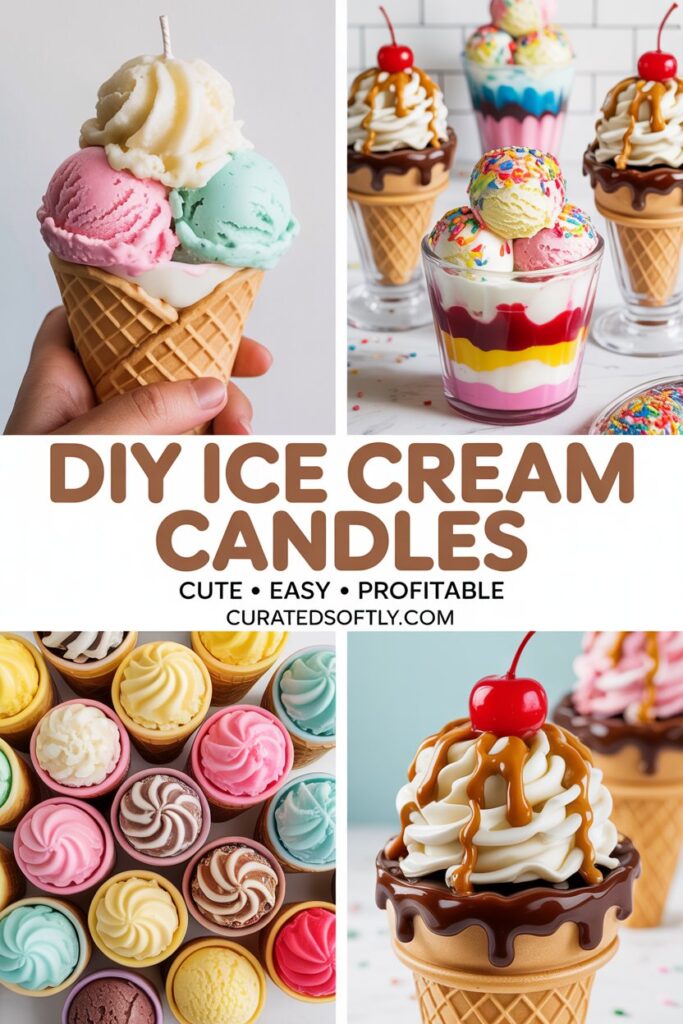
If you have ever seen candles that look exactly like real desserts, you already know how eye-catching they are. Ice cream candles are one of those projects that instantly make people stop and ask, “wait, is that real?”
I remember the first time I tried making one. I honestly thought it would be complicated, but once I understood the process, it became one of the most fun candle projects I have ever done.
And the best part is this. You do not need to be an expert to get it right.
With the right technique, you can create candles that look like scoops of ice cream, smell amazing, and are perfect for gifts, decor, or even selling.
In this guide, I am going to walk you through everything you need to know so you can make your own DIY ice cream candles at home, even if you are a complete beginner.
Why I Love Making Ice Cream Candles
There is something really satisfying about turning simple wax into something that looks like a real dessert.
For me, ice cream candles stand out for a few reasons.
First, they are incredibly unique. Regular candles are nice, but ice cream candles grab attention immediately. They are perfect if you want something different.
Second, they are great for gifts. Anytime I make these for friends or family, the reaction is always the same. People are surprised and impressed because they look so realistic.
Third, they are actually fun to make. This is not just a basic pour and done kind of candle. You get to be creative with colors, textures, and layers.
And if you are thinking about selling candles, this type of design can stand out in a crowded market.
What You Need to Get Started
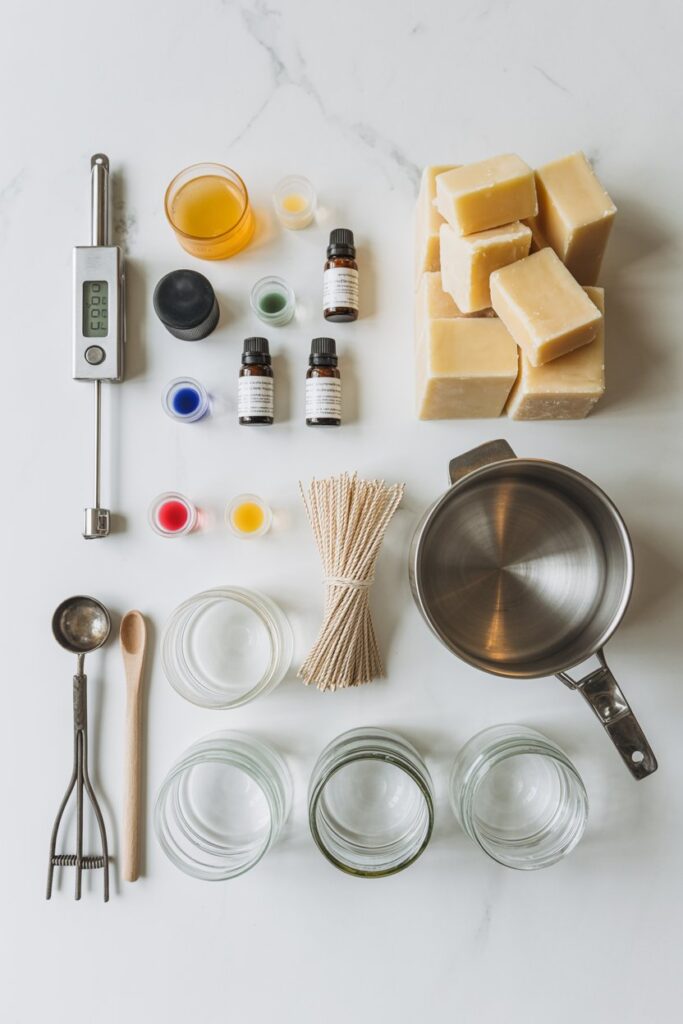
Before you start, I always recommend getting everything ready first. It makes the process smoother and helps you avoid mistakes.
Here is what I personally use:
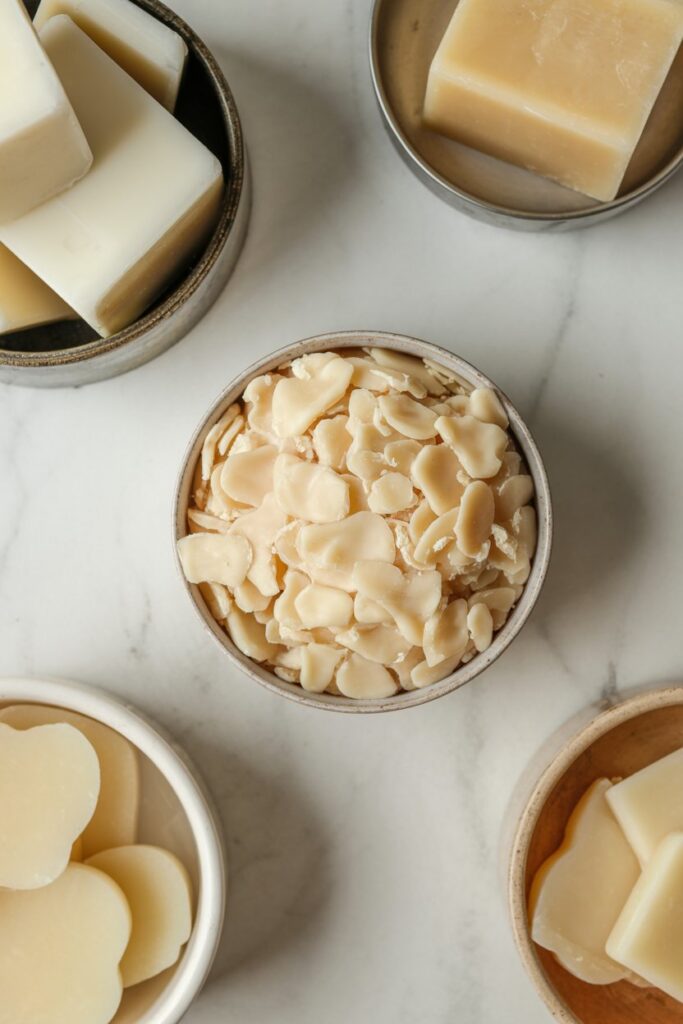
- Soy wax or paraffin wax
- Candle wicks
- Candle-safe fragrance oil
- Candle dye or crayons for color
- Ice cream scoop or spoon
- Heat-safe containers or jars
- Double boiler or pouring pot
- Thermometer
- Mixing spoon or spatula
If you are going for that realistic ice cream look, the scoop tool really makes a difference. I tried using a regular spoon at first, and it worked, but the shape was not as clean.
Choosing the Right Wax for Ice Cream Candles
This part matters more than you might think.
When I first started, I used whatever wax I had, and the texture was not right. It either melted too fast or did not hold the shape I wanted.
Here is what I have learned:
- Soy wax is great if you want a smoother, creamy texture
- Paraffin wax works better if you want a firmer scoop that holds shape well
- A blend of both can give you the best of both worlds
If you are a beginner, I would suggest starting with soy wax because it is easier to work with. Once you get comfortable, you can experiment with blends.
Step 1: Prepare Your Workspace

Before you melt anything, take a few minutes to set up your space.
I always cover my table because wax spills happen, especially when you are scooping and shaping.
Place your containers or jars where you want them and secure your wicks in the center. If you skip this step or rush it, your candle can end up uneven.
Make sure everything you need is within reach. Once the wax is ready, you do not want to be searching for tools.
Step 2: Melt the Wax
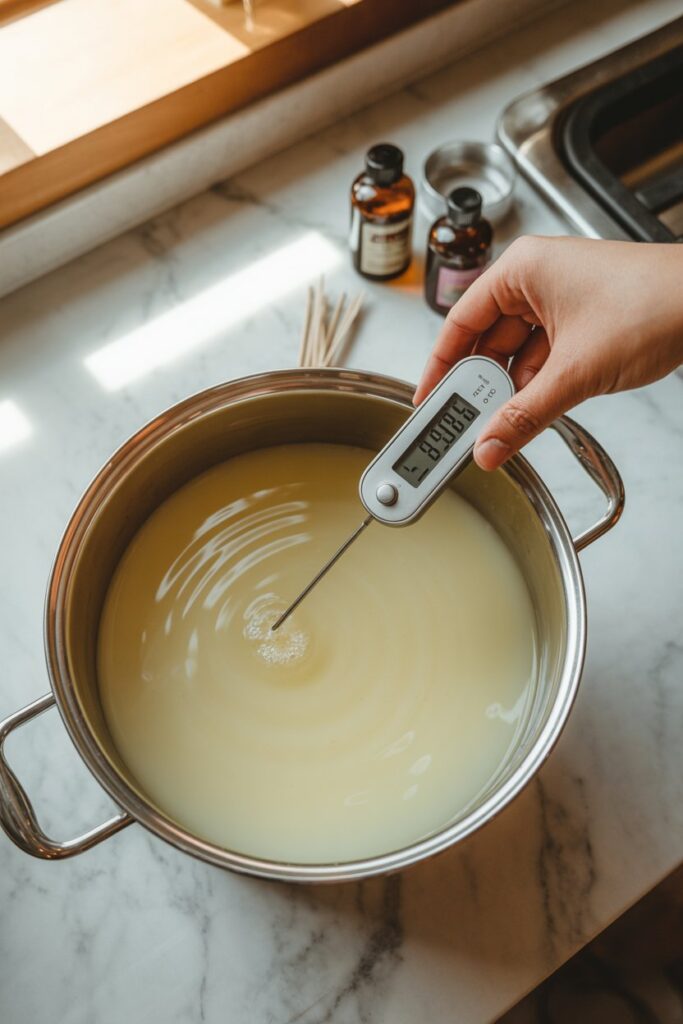
Now comes the base of your candle.
Use a double boiler or a heat-safe pouring pot to melt your wax slowly. I always avoid direct heat because it can burn the wax and affect the final result.
Stir gently as it melts and keep an eye on the temperature.
For most waxes, you want to stay around 170 to 180 degrees Fahrenheit before adding fragrance.
Taking your time here is important. When I rush this step, the texture never turns out as good.
Step 3: Add Fragrance and Color
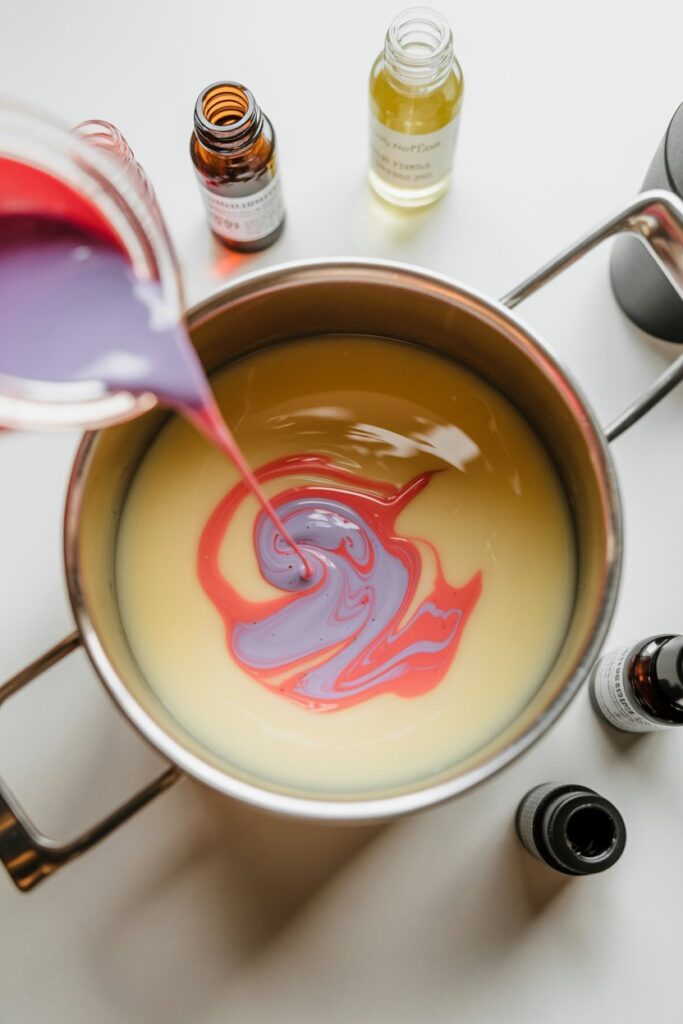
This is where your candle starts to come to life.
Add your fragrance oil once the wax reaches the right temperature. I usually go for about six to ten percent of the wax weight for a strong scent.
Then add your color.
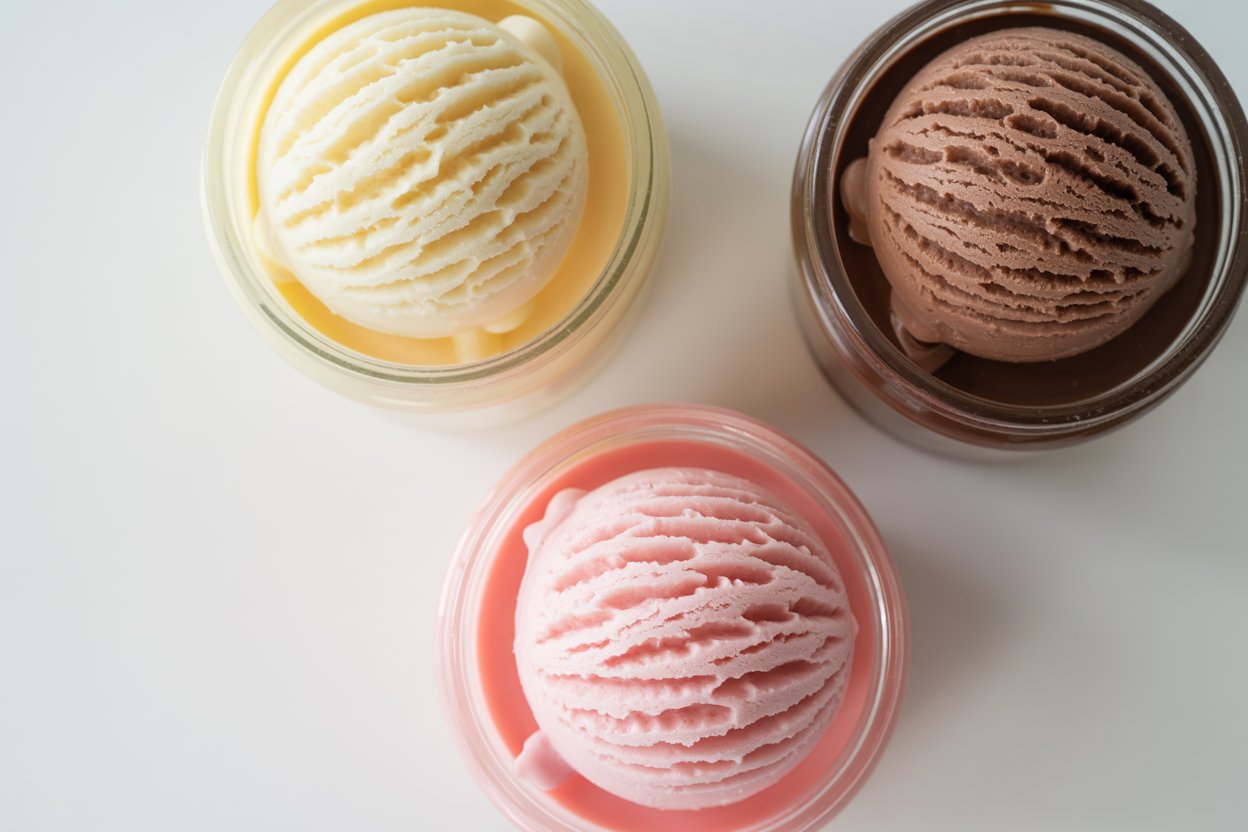
If you are making vanilla or plain ice cream candles, you can keep it a soft cream color. If you want something fun, you can go for pink, chocolate brown, or even pastel shades.
Mix everything slowly and evenly so the scent and color are fully combined.
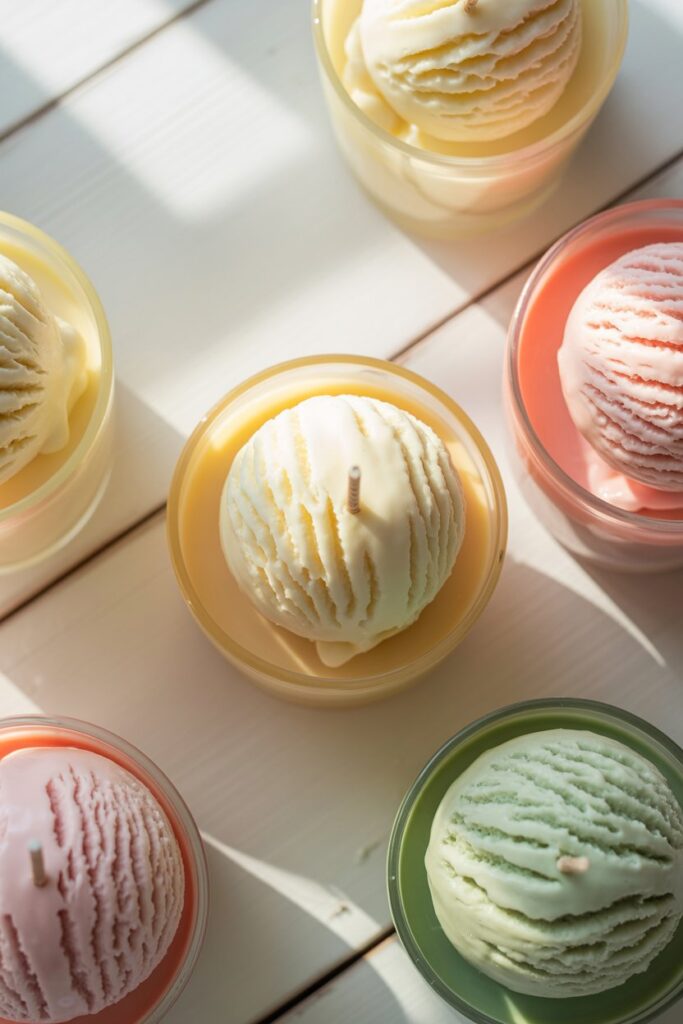
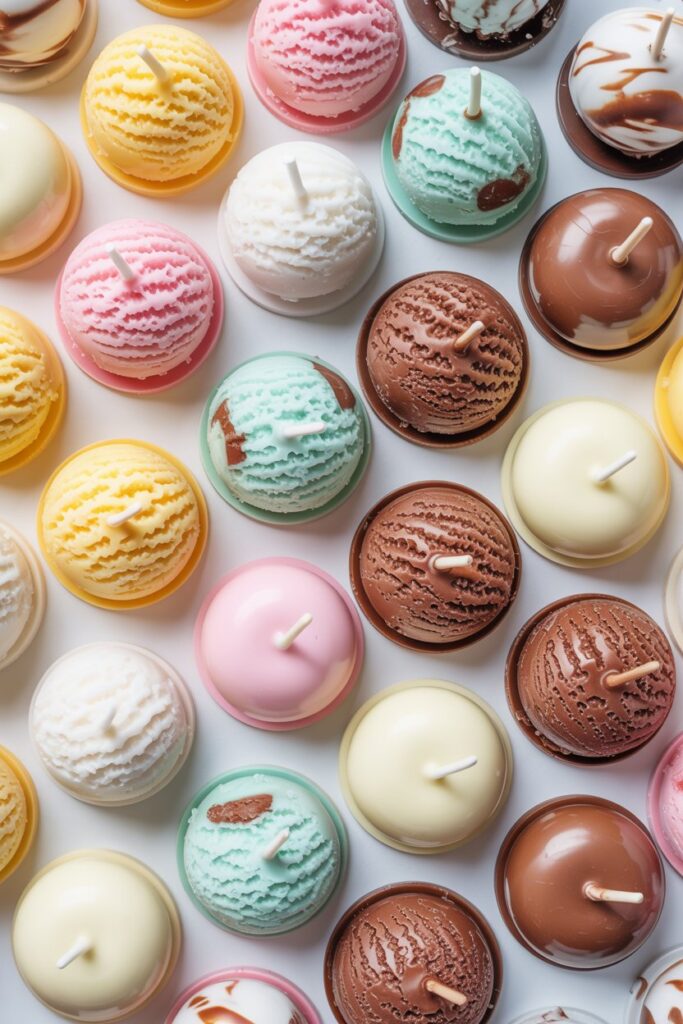
Step 4: Create the Ice Cream Scoop Effect
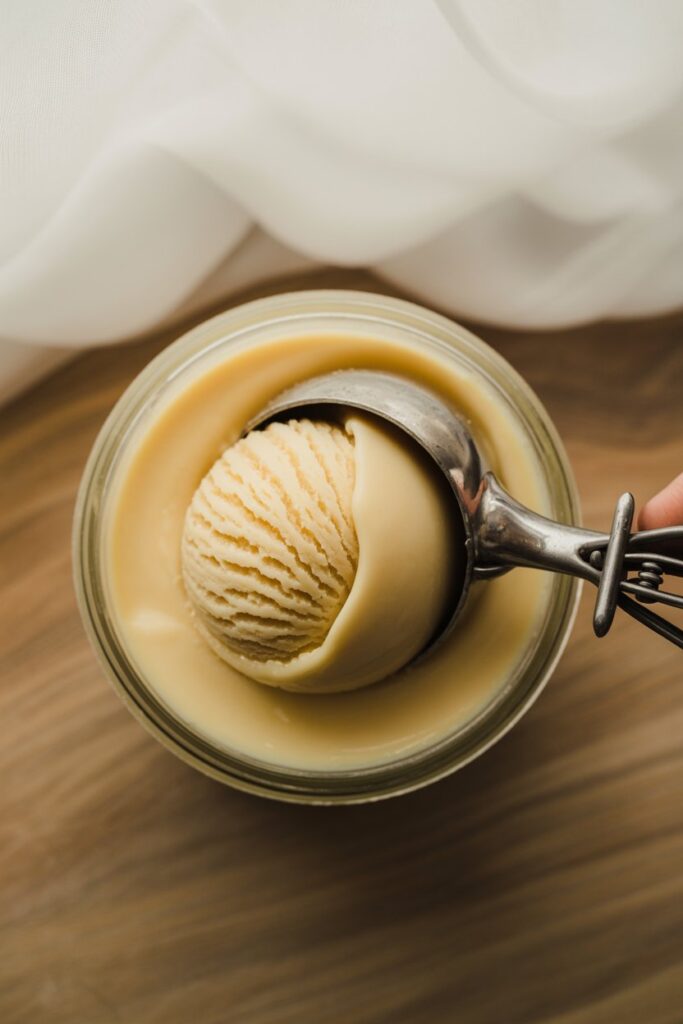
This is the part that makes the candle look like real ice cream, and honestly, it is my favorite step.
Once your wax starts to cool slightly, you want it to thicken to a soft, scoopable texture. It should not be fully hard, but also not too runny.
I usually wait until the wax looks a bit creamy and holds shape when stirred.
Then I take a spoon or ice cream scoop and gently scoop the wax. Place it on top of your base layer or directly into your container.
Do not overthink this part. Real ice cream is not perfectly shaped, so a slightly uneven scoop actually makes your candle look more realistic.
If the wax is too hot, it will flatten. If it is too cold, it will not scoop properly. You will get a feel for the timing after your first try.
Step 5: Build Layers for a Realistic Look
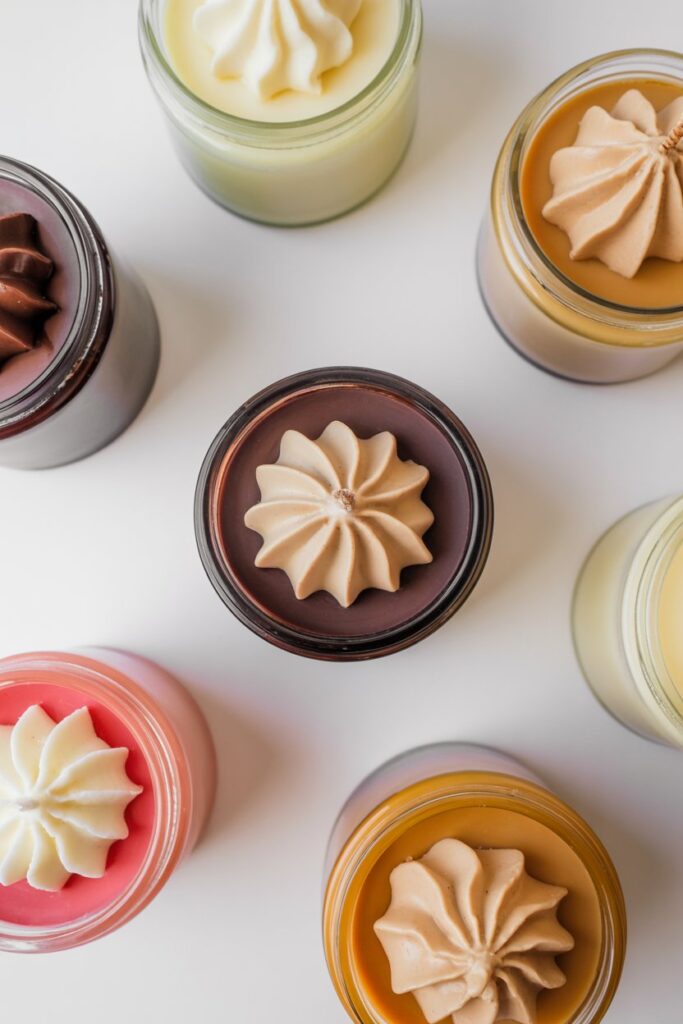
If you want your candle to stand out, layering makes a big difference.
I like to start with a base layer at the bottom of the jar. This could be a simple color like cream or a “flavor” like chocolate or strawberry.
Let that layer set slightly before adding your scoops on top.
You can also mix colors to create different “flavors.” For example:
- Light brown for chocolate
- Soft pink for strawberry
- Off-white for vanilla
Sometimes I even swirl colors together to create a more realistic, handcrafted look.
The more you experiment, the better your candles will look.
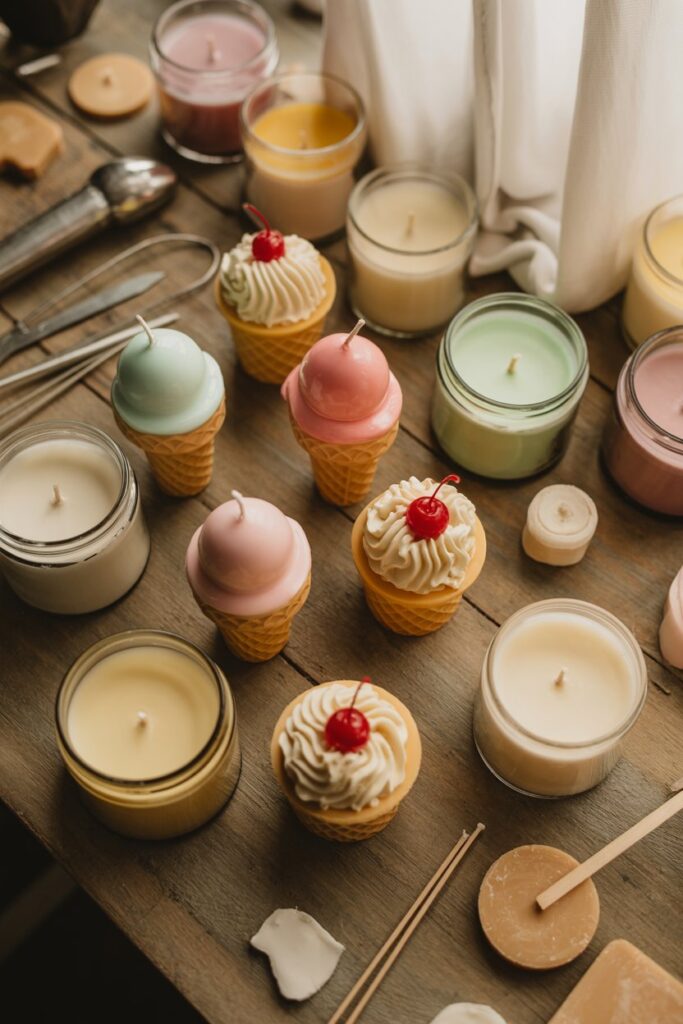
Step 6: Add Final Details
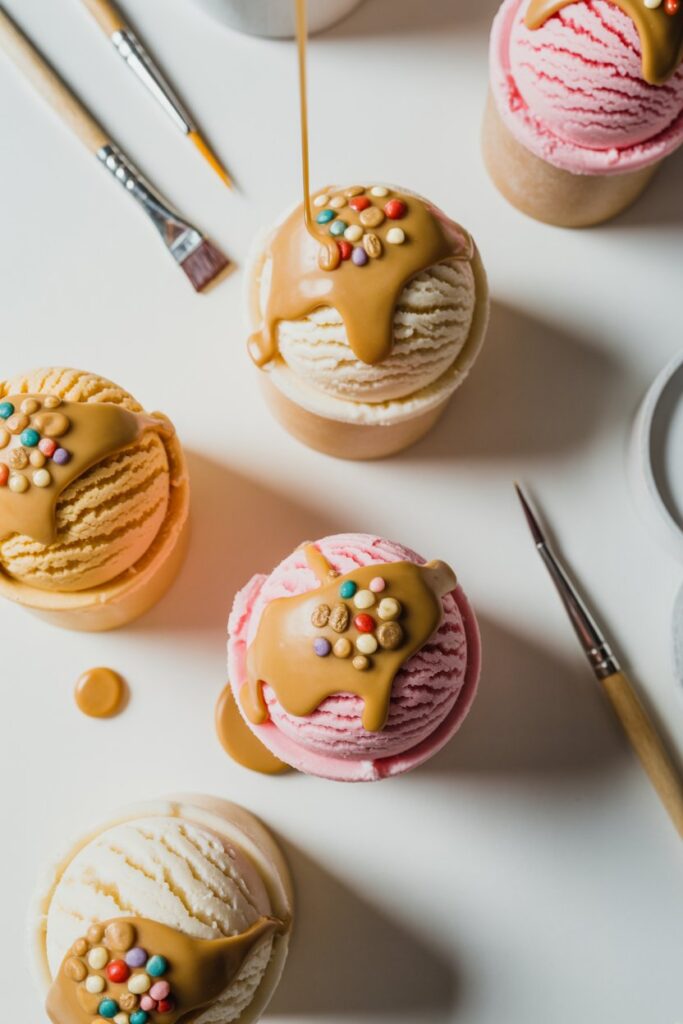
This is where you can get creative and really make your candle stand out.
I like to add small touches that make it look like a real dessert.
You can try:
- Drizzling a thin layer of melted wax on top to look like syrup
- Adding small wax chunks to mimic toppings
- Using a slightly darker color for a “chocolate drizzle” effect
Just make sure everything you add is candle-safe.
These small details can take your candle from simple to something that looks like it came from a store.
Step 7: Let It Set and Cure
After you are done shaping and decorating, let your candle sit at room temperature.
I usually leave mine undisturbed for a few hours until it fully hardens.
Then I let it cure for at least 24 to 48 hours before lighting it. This helps the scent settle into the wax and improves how strong it smells when burned.
I used to skip this step, and my candles never smelled as strong as I wanted. Once I started curing them properly, the difference was clear.
Step 8: Trim the Wick and Test Your Candle
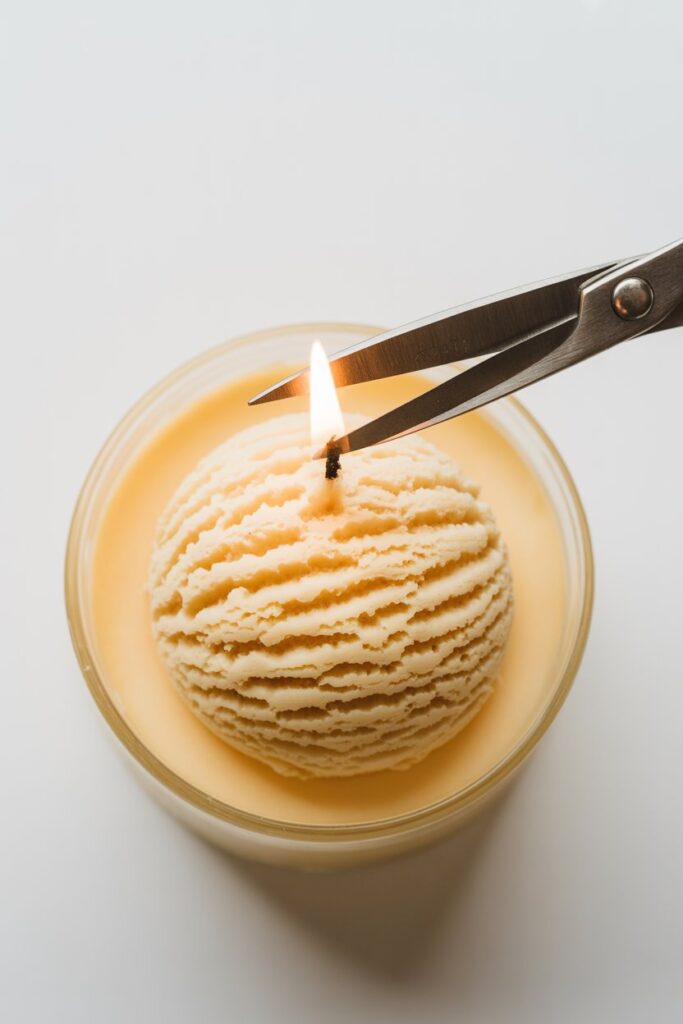
Before lighting your candle, trim the wick to about half an inch.
This helps your candle burn evenly and prevents too much smoke.
The first time you light it, let it burn long enough for the top layer to melt evenly. This helps avoid tunneling and keeps your candle looking good as it burns.
Tips to Make Your Ice Cream Candles Look Real
Over time, I have picked up a few tips that really make a difference.
- Do not rush the scooping stage. The texture of the wax is everything
- Use soft, natural colors instead of very bright ones for a realistic look
- Layer your wax slowly to avoid mixing colors too much
- Test different scoop sizes to see what looks best
- Keep practicing. Each candle will look better than the last
Common Mistakes to Avoid
If your candle does not turn out perfect the first time, that is completely normal. Here are a few mistakes I made early on that you should avoid:
- Scooping wax that is too hot, which causes it to collapse
- Waiting too long and ending up with wax that is too hard to shape
- Using too much dye, which makes the candle look unnatural
- Not securing the wick properly, causing it to lean
- Skipping the curing process, which affects scent strength
Once you avoid these, your results will improve quickly.
Final Thoughts
Making DIY ice cream candles is one of the most fun candle projects you can try.
What I like most about it is that you can be creative without needing advanced skills. You can start simple and improve with each candle you make.
Whether you are making these for your home, as gifts, or even to sell, they are guaranteed to stand out.
Take your time, enjoy the process, and do not worry about getting everything perfect on your first try.
The more you practice, the better your candles will look and smell.