DIY Clay Wall Hangings: Easy Handmade Decor Ideas You Can Make at Home
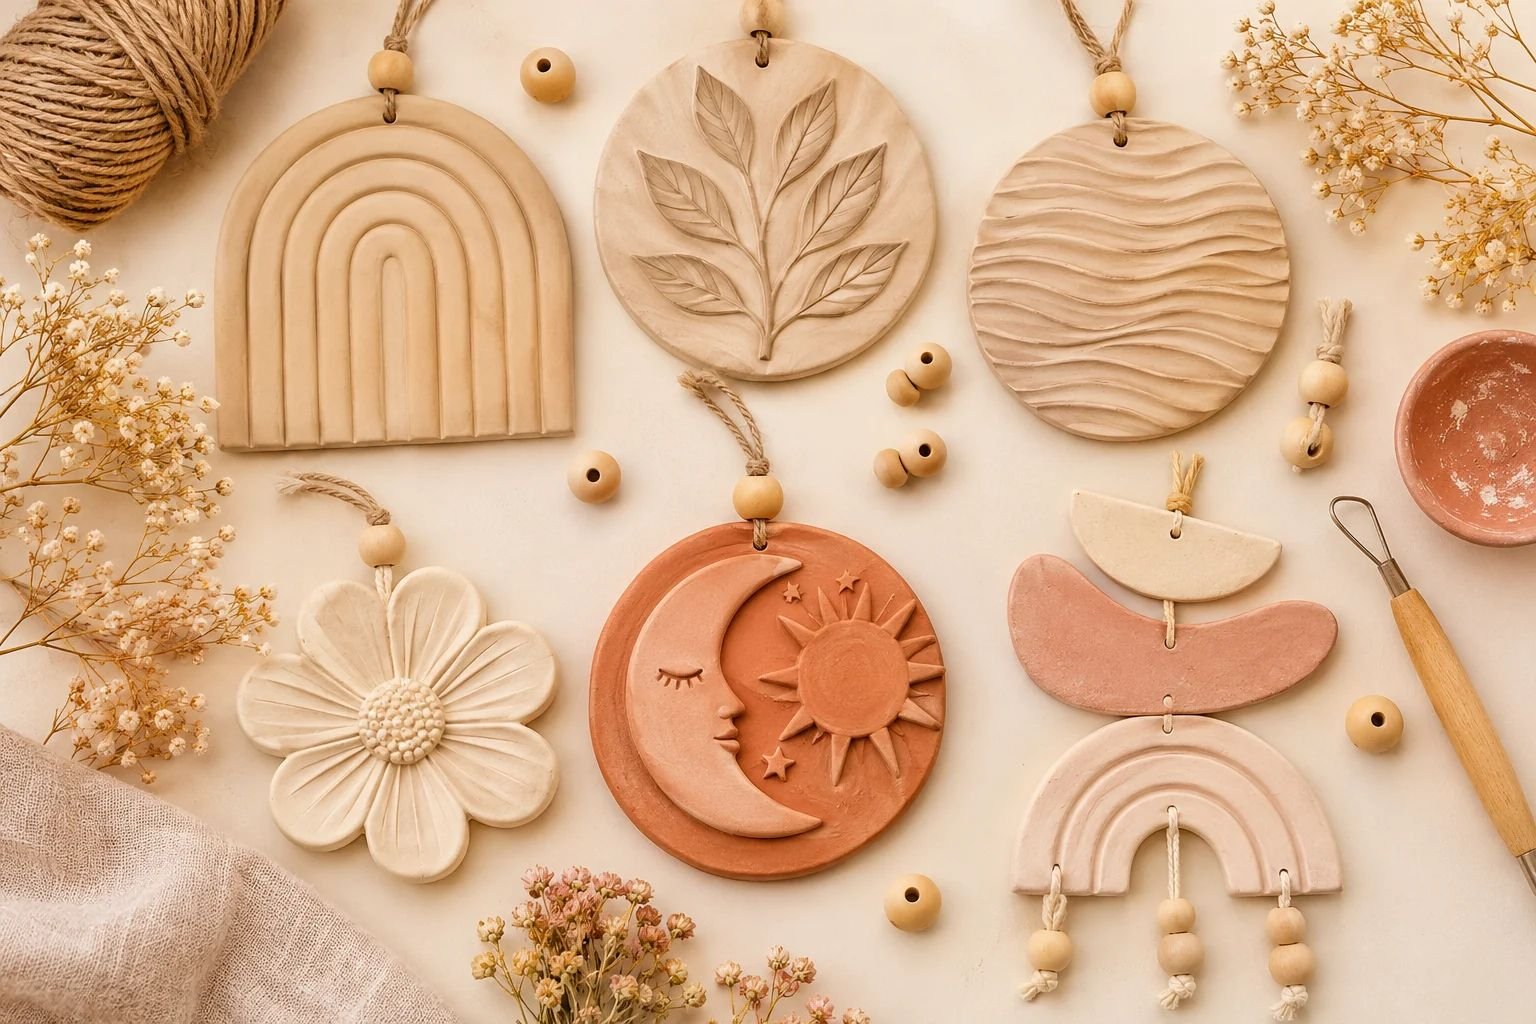
If you love decorating your home with handmade pieces, DIY clay wall hangings are such a lovely project to try. They are simple to customize, surprisingly affordable to make, and a beautiful way to add something personal to your walls without buying expensive decor.
I especially love how versatile air-dry clay is for projects like this. You can shape it into organic arches, little flowers, textured leaves, abstract designs, or even personalized wall plaques.
You don’t need a pottery wheel, kiln, or a lot of special equipment. A few basic supplies and a little creativity are enough to get started.

The best part is that you can make your clay wall hanging suit almost any decorating style. Think warm neutrals, soft earthy colors, minimalist shapes, botanical details, or pretty textured designs that look beautiful in a cozy bedroom, living room, hallway, or craft room.
In this post, I’m sharing several DIY clay wall hanging ideas you can make at home, along with the supplies you’ll need and simple instructions to help you create your own.
Why You’ll Love Making DIY Clay Wall Hangings
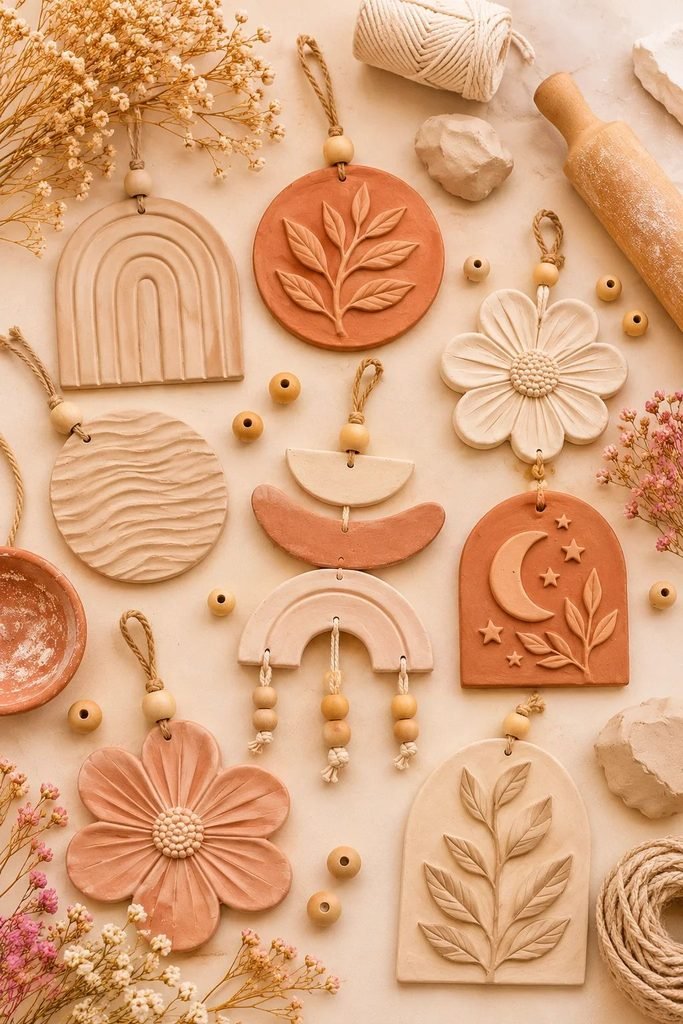
There are so many reasons to try making your own clay wall decor, especially if you enjoy simple DIY home projects.
First, you can customize every detail. You get to choose the shape, size, color, texture, and overall design, which means your finished piece can match your home perfectly.
I also love that air-dry clay doesn’t require a kiln. You can shape your project, let it dry naturally, and decorate it once it’s completely dry. This makes it a great option for beginners who want to experiment with clay without investing in expensive pottery equipment.
Another reason to try this project is that handmade wall decor makes a room feel more personal. Instead of hanging another mass-produced decoration, you can create something with your own hands that feels unique to your space.
And if you enjoy making crafts to sell, clay wall hangings can also be a fun product to experiment with. You can create different collections, offer personalized designs, or make small matching sets.
Supplies You’ll Need to Make Clay Wall Hangings
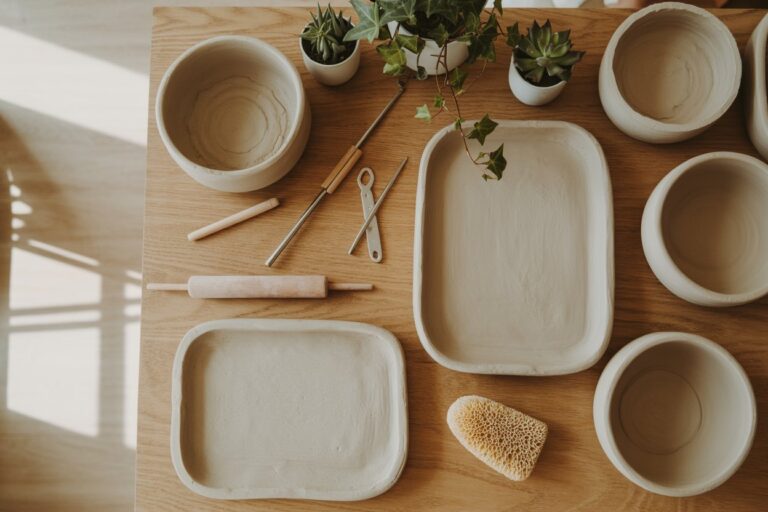
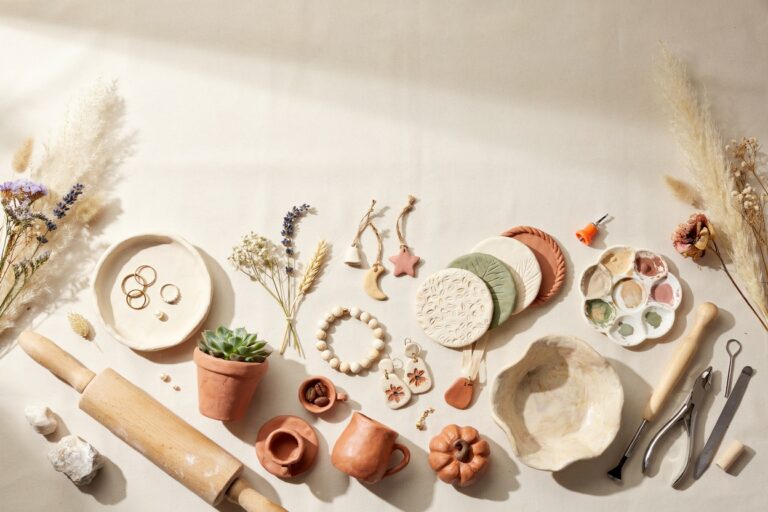
You don’t need a complicated collection of tools to get started. Most of these supplies are easy to find, and you may already have a few at home.
Basic materials:
- Air-dry clay
- Rolling pin or smooth clay roller
- Parchment paper or a non-stick craft mat
- Craft knife or clay cutting tool
- Small bowl of water
- Sandpaper or sanding sponge
- Straw or wooden skewer for making hanging holes
- Acrylic paint
- Paintbrushes
- Clear acrylic sealer or suitable clay varnish
- Cotton cord, jute twine, or decorative ribbon
- Wooden dowel or small wooden beads, depending on your design
Optional decorating supplies:
- Lace or textured fabric for impressions
- Dried leaves and flowers for imprinting
- Letter stamps
- Clay sculpting tools
- Small rolling texture tools
- Gold or metallic acrylic paint
- Wooden beads
- Small natural branches
You can keep your first project very simple. I recommend starting with a small design before moving on to larger or more detailed pieces.
10 DIY Clay Wall Hanging Ideas to Make at Home
Here are some beautiful clay wall hanging ideas you can customize with your favorite colors, shapes, and textures.
1. Minimalist Arch Clay Wall Hanging
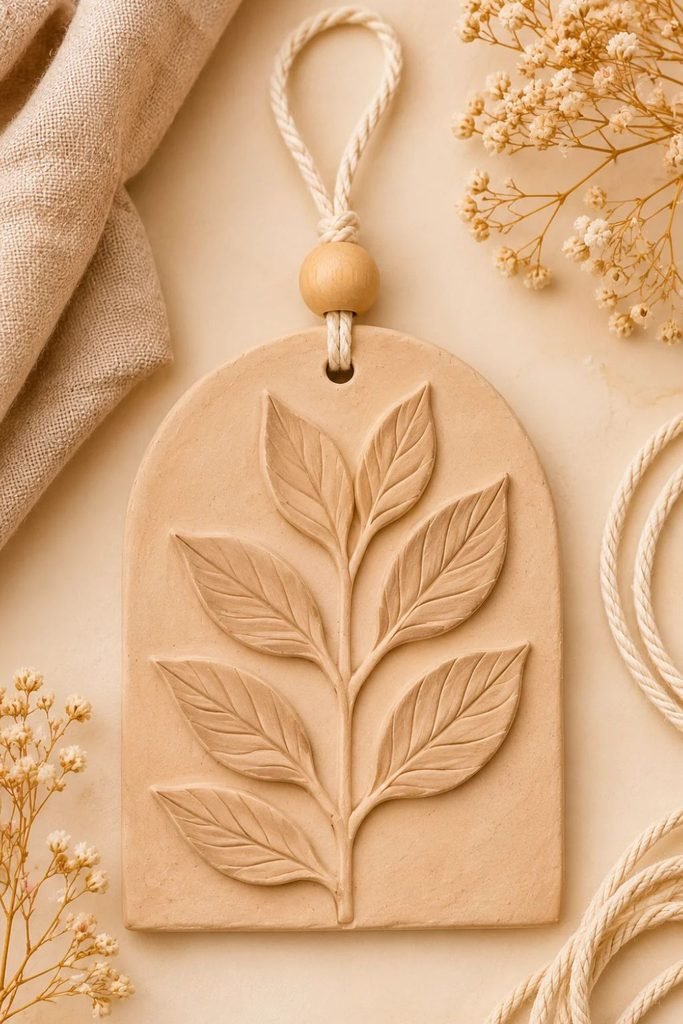
A minimalist arch wall hanging is one of my favorite designs because it looks beautiful without needing lots of decoration. Its simple shape works especially well with neutral home decor, modern interiors, and cozy minimalist spaces.
What you’ll need:
- Air-dry clay
- Rolling pin
- Craft knife
- Straw or skewer
- Acrylic paint in beige, cream, or terracotta
- Cotton cord
How to make it:
Start by rolling your clay into an even slab about ¼ inch thick. Use a ruler and craft knife to cut a simple rectangular shape with a rounded arch at the top.
Smooth the edges with a little water and your fingers. Make a small hole near the top before the clay dries so you can attach your hanging cord later.
Allow the piece to dry completely, turning it carefully if necessary so both sides can dry evenly. Once dry, sand any rough edges and paint it in a warm neutral shade.
Thread cotton cord through the hole and tie a secure knot. You can leave it plain for a minimalist finish or add a few small painted details.
My tip: Try making three arches in different sizes and hanging them together for a coordinated wall display.
2. Botanical Leaf Imprint Wall Hanging
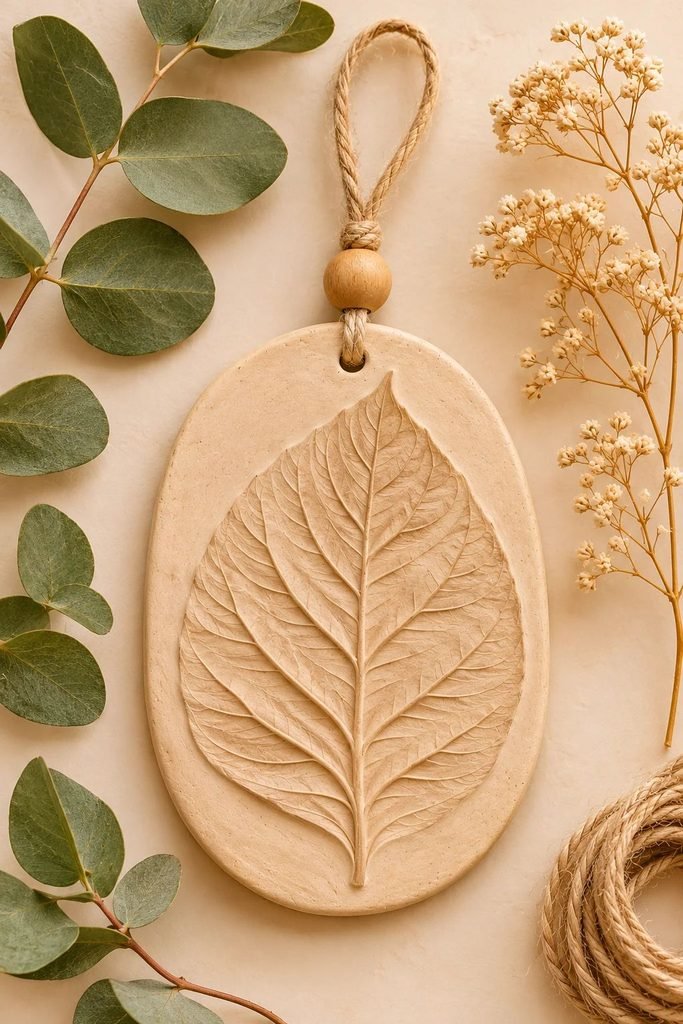
If you love natural textures, a botanical clay wall hanging is a beautiful project to try. Real leaves create delicate impressions in the clay, giving your finished piece a lovely organic look.
What you’ll need:
- Air-dry clay
- Fresh leaves with visible veins
- Rolling pin
- Craft knife
- Straw
- Acrylic paint or clear clay sealer
- Twine
How to make it:
Roll your clay into a smooth slab. Place a leaf on top and gently roll over it to transfer the veins and natural texture into the surface.
Carefully lift the leaf away. You should see its pattern pressed into the clay. Cut around the imprint into a simple oval, circle, or organic shape.
Make a small hole near the top for hanging and smooth the edges. Let the clay dry fully before decorating.
You can leave the piece natural, brush a little white paint over the raised details, or paint the entire surface in a soft earthy shade.
My tip: Leaves with clearly defined veins tend to create the prettiest impressions. Try fern leaves, eucalyptus, or other sturdy leaves with interesting shapes.
3. Textured Neutral Clay Wall Plaque
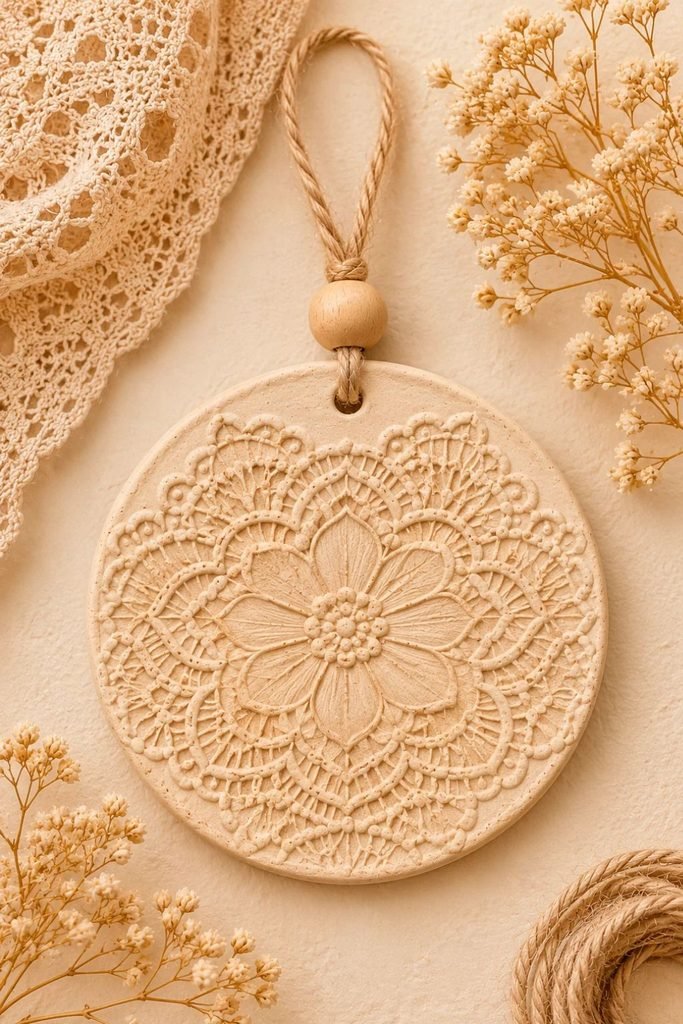
This is a lovely option if you want something that looks like a piece of handmade ceramic art. Instead of relying on painted decorations, the design comes from texture.
What you’ll need:
- Air-dry clay
- Rolling pin
- Textured fabric, lace, or a texture roller
- Craft knife
- Straw
- Beige, ivory, or taupe acrylic paint
How to make it:
Roll your clay into a slab and cut it into a circle, oval, or irregular organic shape.
Place your chosen textured material over the surface and gently press it into the clay. Lift it carefully to reveal the pattern.
Smooth the edges and create a hanging hole before leaving the piece to dry. Once fully dry, apply a thin coat of paint. You can gently wipe away some of the paint from the raised areas to make the texture more noticeable.
Finish with a suitable clear sealer once the paint has dried.
My tip: Use a subtle texture rather than pressing too deeply. A delicate pattern often gives neutral clay decor a more refined finish.
4. DIY Clay Flower Wall Hanging
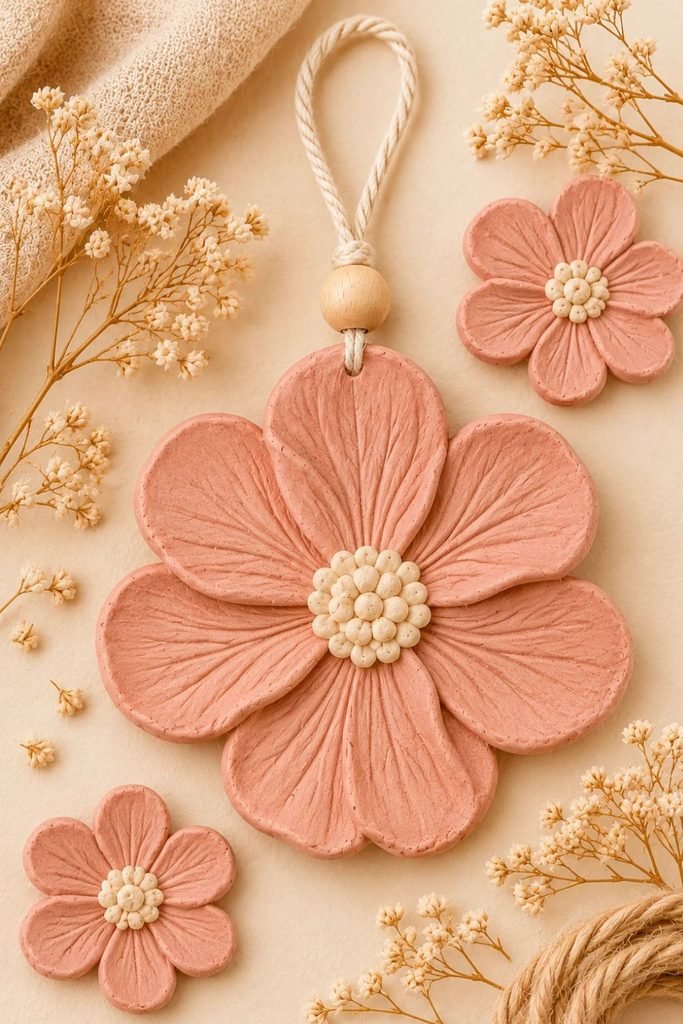
A clay flower wall hanging is perfect if you want something soft, pretty, and slightly more decorative. You can make one large flower as a statement piece or several small flowers for a gallery-style arrangement.
What you’ll need:
- Air-dry clay
- Rolling pin
- Small round cutter or craft knife
- Clay sculpting tool
- Acrylic paint
- Twine or cotton cord
How to make it:
Roll out your clay and cut several small petal shapes. Gently pinch and curve each petal to give it a natural appearance.
Arrange the petals in a circle, overlapping them slightly to form a flower. Add a small clay ball in the center and press it gently into place.
Use a sculpting tool to add subtle lines or texture to the petals. If you are joining separate clay pieces, lightly score the surfaces and use a small amount of clay slip or water as appropriate to help them attach.
Make a hanging hole or plan a suitable attachment before the clay dries. Allow the flower to dry completely, then paint it in your preferred colors.
My tip: Soft cream, dusty pink, muted terracotta, and pale yellow are beautiful choices for handmade floral wall decor.
5. Abstract Organic Shape Clay Wall Hanging
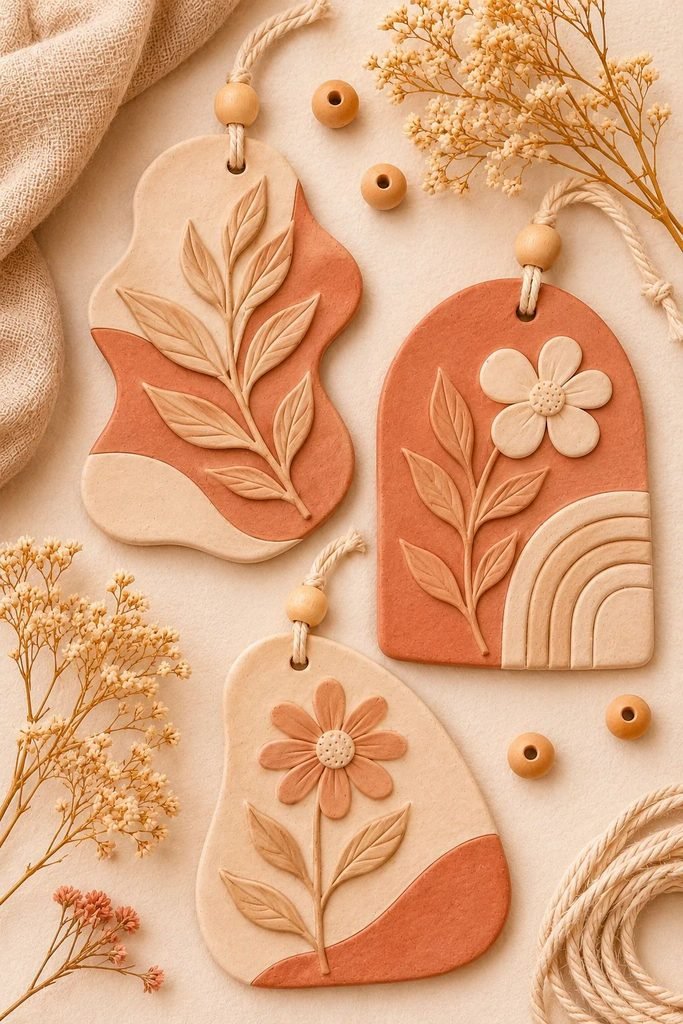
You don’t have to make a recognizable object to create beautiful wall decor. Abstract clay pieces are a lovely way to experiment with shapes and textures.
What you’ll need:
- Air-dry clay
- Rolling pin
- Craft knife
- Straw
- Acrylic paint
- Cotton cord
How to make it:
Roll your clay into an even slab and cut out an irregular organic shape. You can make it wavy, curved, asymmetrical, or inspired by abstract modern art.
Smooth the edges with a little water and create a small hanging hole. Add a few shallow lines or textured marks if you want more detail.
Let the piece dry completely before sanding and painting. Neutral shades work beautifully, but you can also use a combination of two or three complementary colors.
My tip: Make a few different abstract shapes and display them together. They don’t need to match perfectly; keeping the color palette consistent helps the collection feel coordinated.
6. Personalized Clay Name Wall Hanging
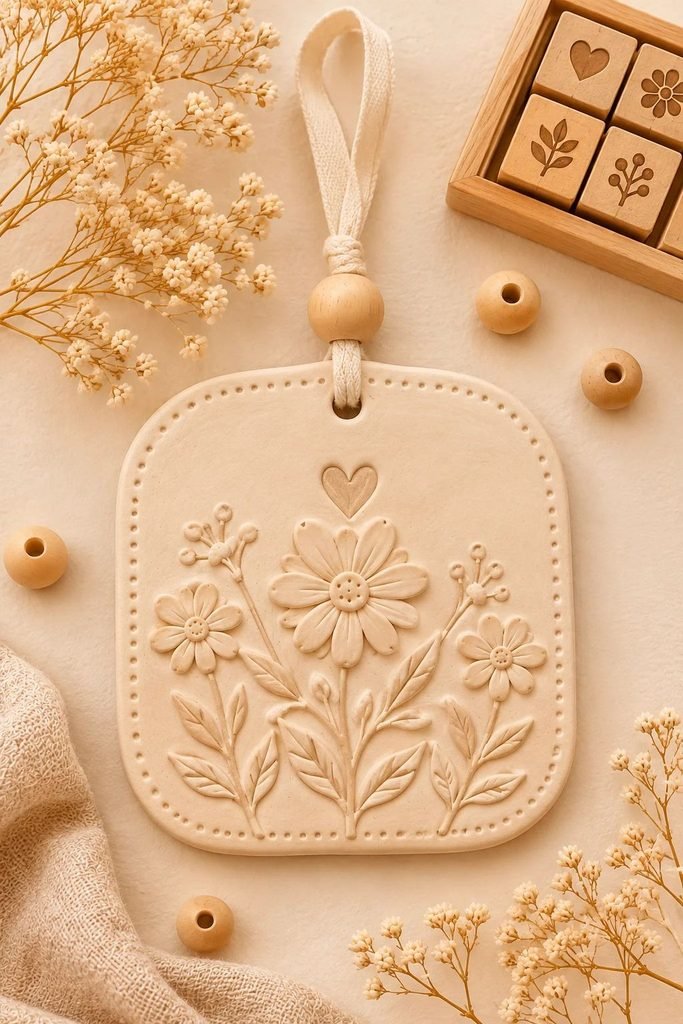
A personalized clay wall hanging is a sweet idea for a bedroom, nursery, craft room, or handmade gift. You can add a name, initials, a short word, or a meaningful date.
What you’ll need:
- Air-dry clay
- Rolling pin
- Alphabet stamps or letter cutters
- Craft knife
- Straw
- Acrylic paint
- Ribbon or cotton cord
How to make it:
Roll out your clay and cut it into a plaque shape. A rounded rectangle, arch, or oval works nicely.
Before the clay dries, gently press your letters into the surface. Take your time with spacing so the words look balanced.
Make two small holes near the top if you want to hang the plaque with a cord or ribbon. Allow it to dry completely before painting.
You can paint the letters in a contrasting shade or keep the entire plaque one color for a simple handmade look.
My tip: If you’re using letter stamps, practice the layout on paper first. This helps you avoid uneven spacing or letters that are too close to the edge.
7. Sun and Moon Clay Wall Hanging
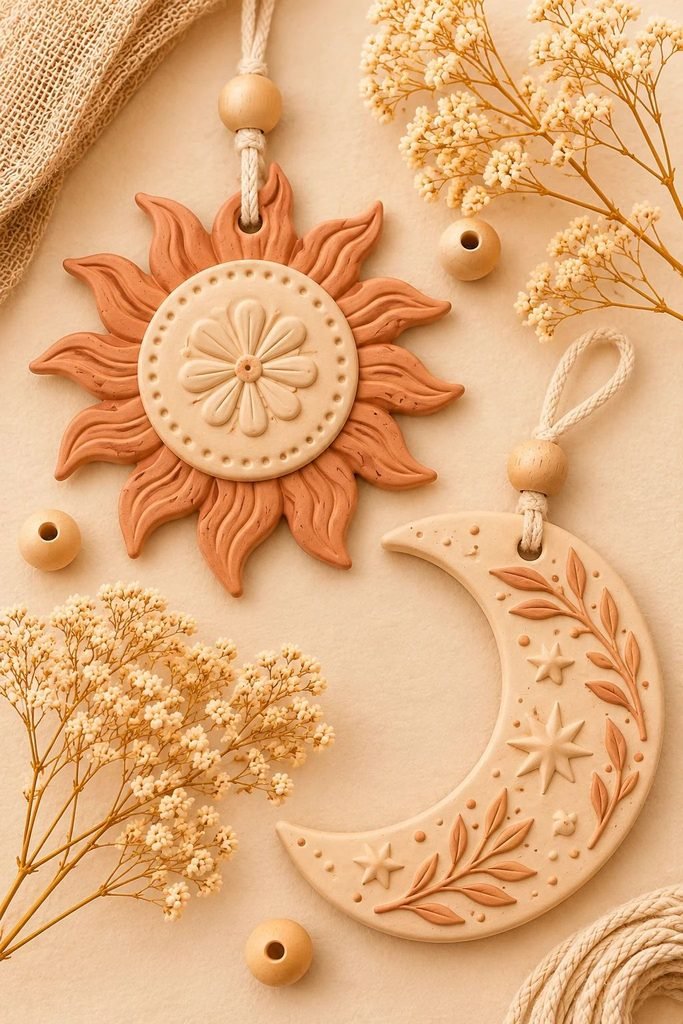
Sun and moon designs are timeless decorative motifs and look especially pretty in earthy, bohemian-inspired interiors.
What you’ll need:
- Air-dry clay
- Rolling pin
- Craft knife
- Small sculpting tools
- Straw
- Acrylic paint
- Twine
How to make it:
Roll your clay into a slab and cut out a sun, crescent moon, or a combination of both shapes.
For the sun, create a simple round center and add short clay rays around the edges. For the moon, cut a crescent shape and gently smooth the curved edges.
Add small lines, dots, or shallow details using a sculpting tool. Make hanging holes before drying and allow the pieces to dry completely.
Paint them in warm cream, muted gold, terracotta, or soft brown.
My tip: Make a sun and crescent moon as separate pieces and hang them at slightly different heights for a lovely layered display.
8. Clay Rainbow Wall Hanging
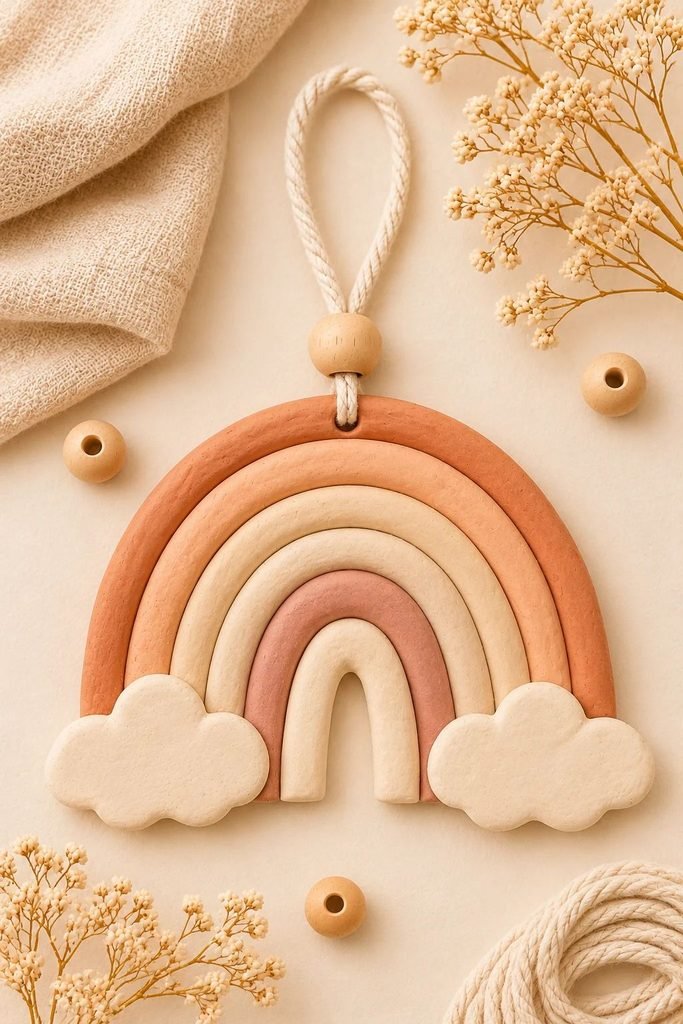
A clay rainbow wall hanging is a cheerful project that works beautifully in a nursery, playroom, or creative space. You can make it colorful or keep it neutral for a more subtle look.
What you’ll need:
- Air-dry clay
- Rolling pin
- Craft knife
- Ruler
- Straw or skewer
- Acrylic paint
- Cotton cord
How to make it:
Roll your clay into a slab and cut out a rainbow shape. You can create the curved outline by cutting around a paper template.
Use a sculpting tool to mark curved lines across the rainbow, creating separate sections for painting. Make a small hole at the top or plan another suitable hanging attachment.
Allow the clay to dry completely. Sand the edges gently and paint each section in your chosen colors.
My tip: For a neutral version, use cream, beige, dusty rose, and muted brown instead of bright rainbow colors.
9. Clay Wall Hanging with Dried Flower Imprints
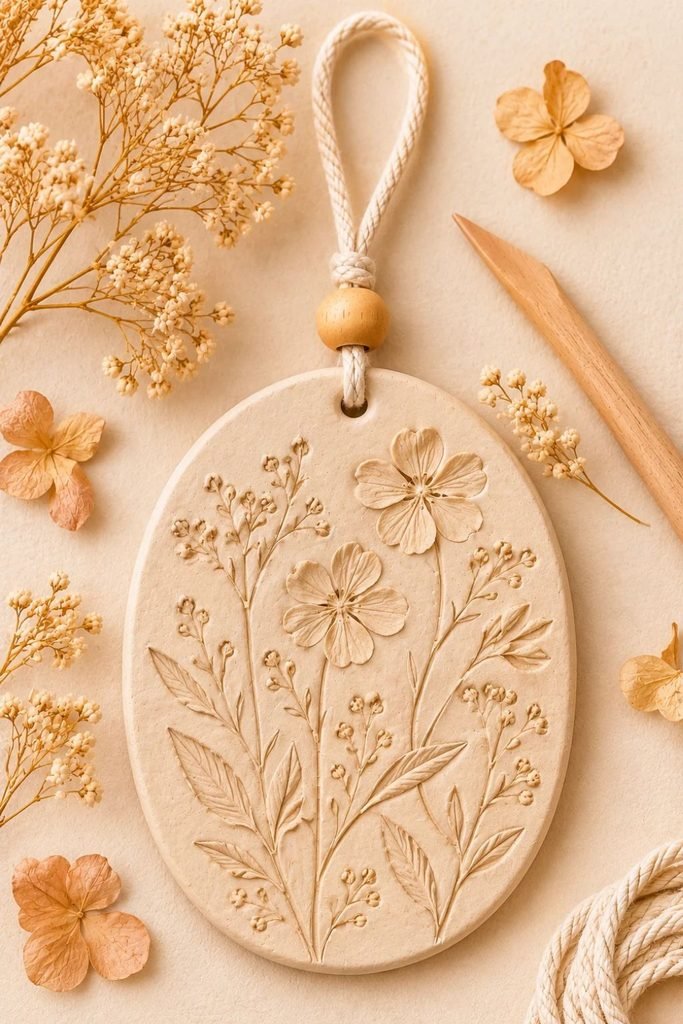
This design is perfect for anyone who loves botanical crafts. Pressing small flowers into clay creates a delicate decorative pattern that feels natural and handmade.
What you’ll need:
- Air-dry clay
- Small dried flowers or sturdy petals
- Rolling pin
- Craft knife
- Straw
- Soft paintbrush
- Acrylic paint or suitable sealer
How to make it:
Roll your clay into a smooth slab and arrange your dried flowers on the surface.
Gently press them into the clay using your fingertips or a flat piece of parchment paper. Remove the flowers carefully if you want an imprint, or leave them embedded only if they are suitable for your intended design and the clay can dry properly around them.
Cut the clay into a circle or oval and make a hanging hole. Allow it to dry completely before applying any paint or finish.
My tip: Small flowers and delicate petals usually create a more balanced design than large, bulky flowers.
10. Layered Clay Wall Hanging with Wooden Beads
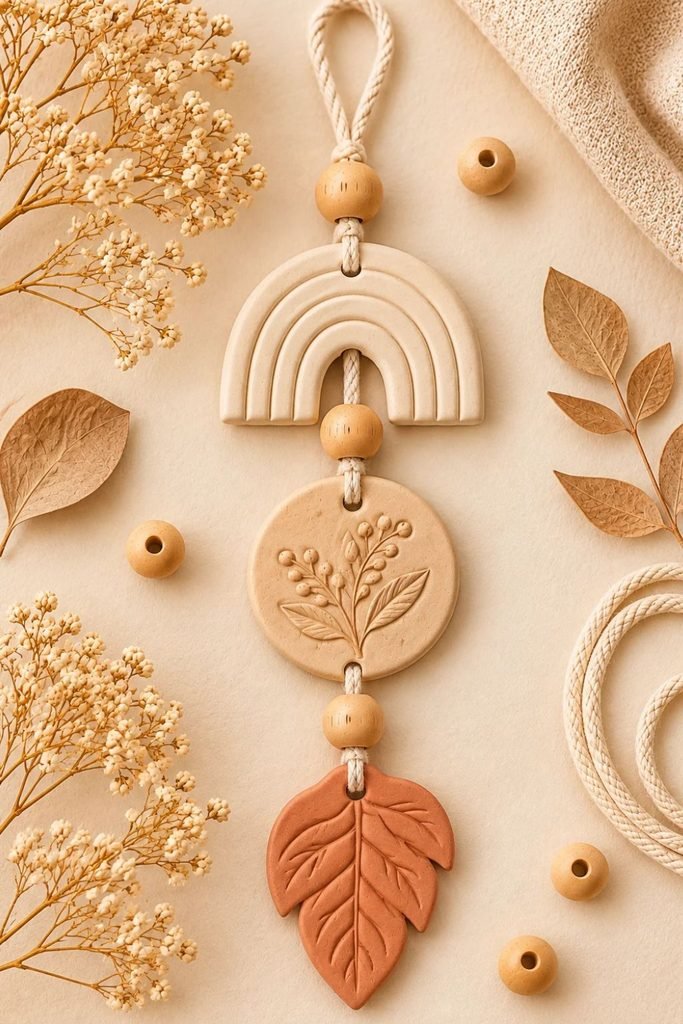
If you want a wall hanging with a little more dimension, combine clay shapes with wooden beads and cotton cord. The mixture of materials creates a warm, natural look.
What you’ll need:
- Air-dry clay
- Rolling pin
- Craft knife
- Straw
- Wooden beads
- Cotton cord or jute twine
- Acrylic paint
How to make it:
Create two or three simple clay shapes, such as small arches, circles, or leaves. Make holes in the pieces before drying so you can attach them later.
Let every clay piece dry completely. Sand the edges and paint them in a coordinated color palette.
Cut a length of cotton cord and arrange the clay shapes with wooden beads between them. Tie secure knots to keep the pieces in position.
You can attach the finished hanging to a small wooden dowel or a natural branch.
My tip: Keep the number of colors limited. Cream clay, natural wood, and beige cord make a beautiful combination.
How to Make a Basic Air-Dry Clay Wall Hanging
If you’re completely new to working with clay, here’s the simple process I recommend following for most flat clay wall hangings.
Step 1: Prepare your workspace
Cover your work surface with parchment paper or a suitable non-stick craft mat. Keep your rolling pin, clay, cutting tools, and a little water nearby.
Step 2: Roll out the clay
Knead your clay gently until it feels workable. Roll it into an even slab. Around ¼ inch thick is a useful starting point for many small decorative pieces, although thicker or larger designs may need adjustments.
Step 3: Cut your design
Use a craft knife, clay cutter, or paper template to create your chosen shape. Smooth the edges with slightly damp fingers.
Step 4: Add texture and details
Press leaves, fabric, stamps, or sculpting tools into the surface. If you’re adding letters or decorative details, do this before the clay dries.
Step 5: Make the hanging holes
Use a straw or wooden skewer to create holes while the clay is still workable. Make sure the holes are large enough for your chosen cord, but not so close to the edge that the clay could break.
Step 6: Let the clay dry completely
Place the piece on a flat surface and follow the drying instructions for your clay brand. Larger or thicker pieces may take longer. Turn the piece carefully when appropriate to help both sides dry evenly.
Step 7: Sand, paint, and seal
Once completely dry, smooth any rough edges with fine-grit sandpaper. Remove the dust before painting. Apply acrylic paint if desired, then use a compatible clear sealer according to its instructions.
Step 8: Attach your hanging cord
Once the finish has dried and cured as directed, thread your cord through the holes and secure it with knots. Check that the attachment is strong before hanging your finished piece.
How to Decorate Clay Wall Hangings
One of the best things about making clay wall hangings is that you can experiment with different finishes.
Here are a few simple decorating techniques I would try:
- Neutral painting: Use ivory, beige, taupe, or warm white for a minimalist look.
- Terracotta finish: Paint your pieces in warm clay-inspired shades for an earthy feel.
- Raised details: Add small clay shapes, dots, or petals to create dimension.
- Botanical impressions: Press leaves, flowers, or textured stems into the surface.
- Metallic accents: Add a little gold or bronze acrylic paint to selected details.
- Two-tone designs: Paint the base in one shade and use another color for the raised patterns.
You don’t need to decorate every piece heavily. Sometimes a simple shape with a beautiful texture is all you need.
Tips for Making Strong and Beautiful Clay Wall Hangings
A few small details can make a big difference in how your finished project looks and how well it holds up.
Keep the clay thickness even. If one side is much thicker than another, the piece may dry unevenly. Try to maintain a consistent thickness as you roll it out.
Don’t make the hanging holes too close to the edge. Leave enough clay around each hole to reduce the chance of cracking or breaking when you attach the cord.
Smooth the edges before drying. It’s much easier to shape and smooth the clay while it is still workable than to fix rough edges later.
Allow enough drying time. Don’t rush to paint or seal your project. The clay needs to dry completely first, including the thicker areas.
Be careful with large pieces. Air-dry clay can be fragile, especially when used for thin or oversized wall decor. Start with smaller pieces and make sure your design has enough support.
Use a suitable hanging method. A small decorative piece may work with a cord threaded through holes, while a larger or heavier plaque may need a more secure attachment. Always check the weight and strength of the finished piece before hanging it.
Common Mistakes to Avoid When Making Clay Wall Decor
If this is your first time working with air-dry clay, there are a few mistakes worth avoiding.
- Making the clay too thin: Very thin pieces can become fragile and break more easily.
- Adding too much water: Excess water can make the clay sticky and difficult to handle. Use only a little when smoothing.
- Forgetting the hanging holes: Remember to make your holes before the clay dries.
- Painting before the clay is dry: Trapped moisture can affect the finish. Wait until the piece is completely dry.
- Using too much pressure when adding texture: Press gently so you don’t distort the shape.
- Expecting air-dry clay to be waterproof: Most air-dry clay projects are decorative and should be kept away from moisture unless the specific product and finish are rated for the conditions.
How to Hang and Display Your DIY Clay Wall Hangings
Once your clay pieces are finished, you can display them in several ways.
For smaller designs, cotton cord, jute twine, or ribbon can be threaded through the holes you made before drying. You can also attach multiple pieces to a wooden dowel or natural branch to create a layered hanging.
If you’ve made several matching pieces, try arranging them together as a small gallery wall. Mixing different shapes while keeping the same color palette can make the display feel intentional.
For larger plaques, use a secure hanging attachment appropriate for the weight and design. Avoid relying on a small cord or weak adhesive for a heavy piece.
I also recommend displaying air-dry clay decor indoors, away from damp areas, direct splashes, and places where it could easily be knocked off the wall.
Can You Sell Handmade Clay Wall Hangings?
Yes! Handmade clay wall hangings can be a lovely addition to a small craft business, especially if you enjoy creating home decor.
You could start with a few simple designs, such as botanical plaques, personalized name signs, neutral arches, and sun-and-moon decorations.
I would begin with smaller designs that are easier to make consistently. Once you understand how much time and material each piece requires, you can work out your pricing.
You can also experiment with collections. For example, a botanical collection could include leaf-imprint plaques, flower designs, and matching mini wall hangings.
If you plan to sell your pieces, make sure your product descriptions clearly explain that they are decorative, especially if they’re made with air-dry clay. Avoid describing them as waterproof or suitable for outdoor use unless your materials have been specifically tested and rated for that purpose.
Frequently Asked Questions
Can you use air-dry clay to make wall hangings?
Yes. Air-dry clay works well for small decorative wall hangings, plaques, and lightweight designs. Keep the pieces a suitable thickness, allow them to dry completely, and use an appropriate hanging method.
How thick should clay wall hangings be?
Around ¼ inch is a useful starting point for many small flat designs. However, the best thickness depends on the size and shape of your project. Larger pieces may need extra thickness or support to reduce the risk of breaking.
Do clay wall hangings need to be sealed?
Sealing is optional for some decorative projects, but a compatible clear finish can help protect the painted surface and improve its appearance. Always follow the clay and sealer manufacturer’s instructions.
Can you paint air-dry clay wall hangings?
Yes. Acrylic paint is commonly used to decorate fully dried air-dry clay. Let the paint dry before applying a compatible clear finish, if desired.
Are air-dry clay wall hangings waterproof?
No, ordinary air-dry clay should not be assumed to be waterproof. A surface sealer does not automatically make the entire piece waterproof. Keep your wall hangings indoors and away from moisture.
What can I use to hang clay wall decor?
For small lightweight pieces, you can use cotton cord, jute twine, or ribbon threaded through holes made before drying. Larger or heavier pieces need a more secure attachment suited to their weight.
Can beginners make clay wall hangings?
Absolutely! Simple arches, circles, botanical imprints, and abstract shapes are all beginner-friendly designs. Start with a small project and practice rolling, cutting, smoothing, and drying before trying more detailed pieces.
Final Thoughts on DIY Clay Wall Hangings
Making your own DIY clay wall hangings is such a lovely way to bring handmade decor into your home. You can keep the designs simple and neutral, experiment with botanical textures, or create personalized pieces that make thoughtful gifts.
I would start with a small arch or leaf-imprint design if you’re new to air-dry clay. Both are easy to customize, don’t require many supplies, and give you plenty of room to experiment with colors and textures.
Once you get comfortable with the process, you can try combining different shapes, adding wooden beads, or creating a whole collection of handmade wall decor.
The best part is that no two pieces have to look exactly alike. You get to make something that reflects your own style, and that’s what makes handmade decor so special.