Easy Crochet Cellphone Crossbody Bag: A Beginner-Friendly Tutorial
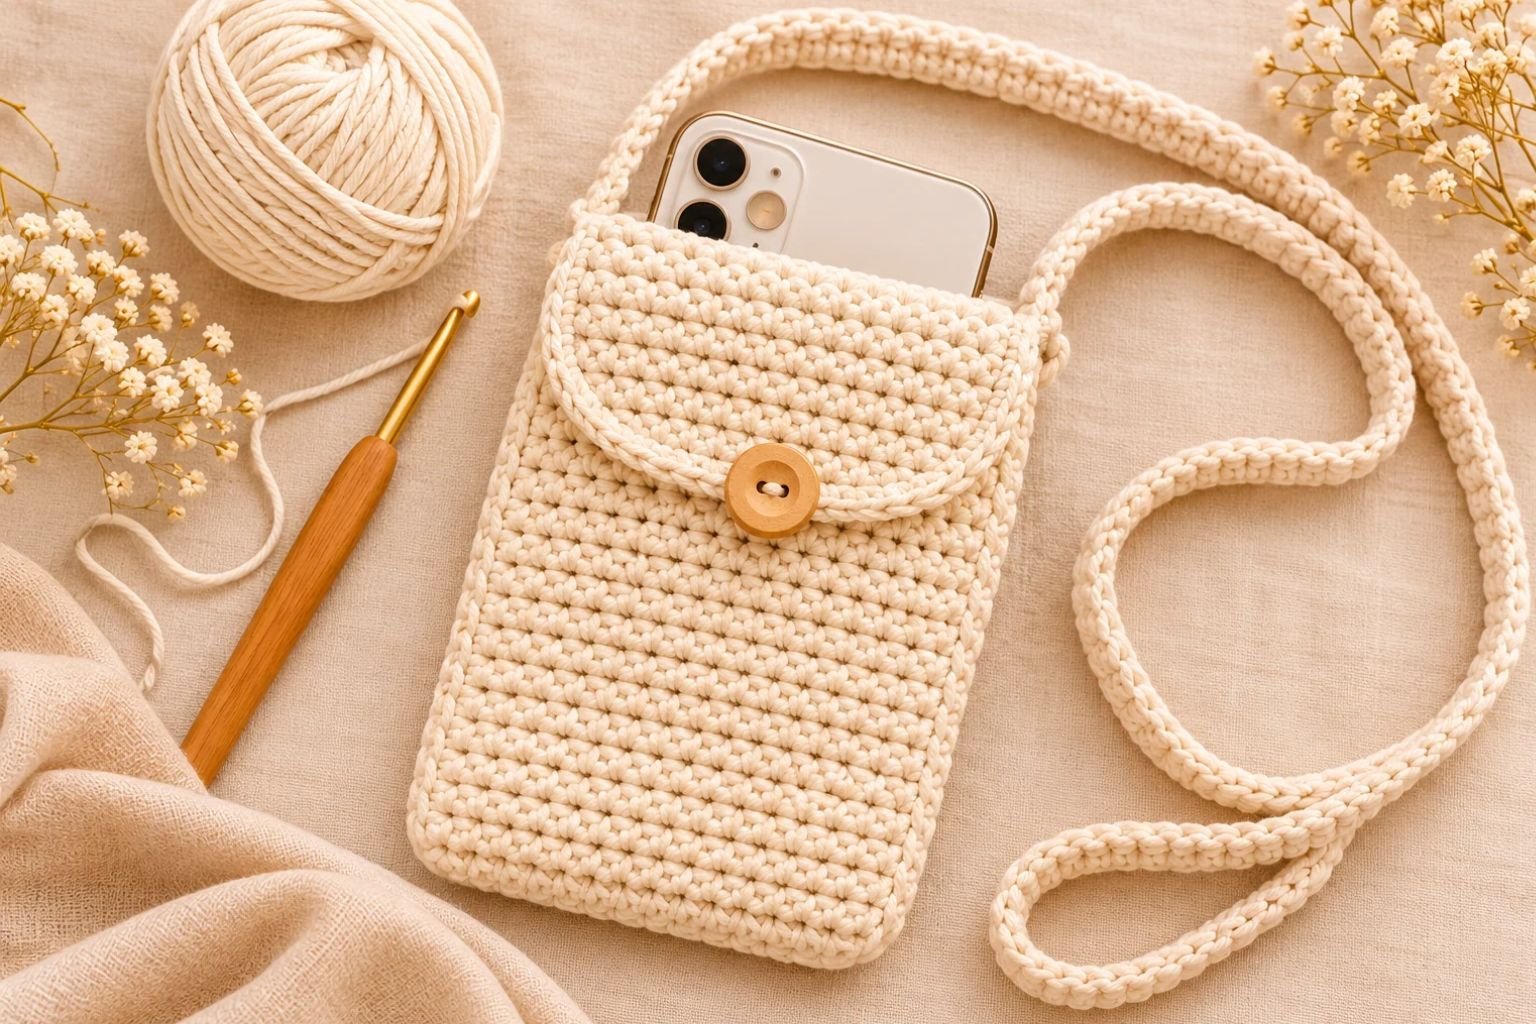
If you’ve been looking for a cute crochet accessory that’s actually useful, this cellphone crossbody bag is such a fun project to make. It’s small, practical, and perfect for carrying your phone when you don’t feel like taking a large handbag everywhere.
I love crochet projects like this because they don’t require a huge amount of yarn, and you can customize almost every detail.
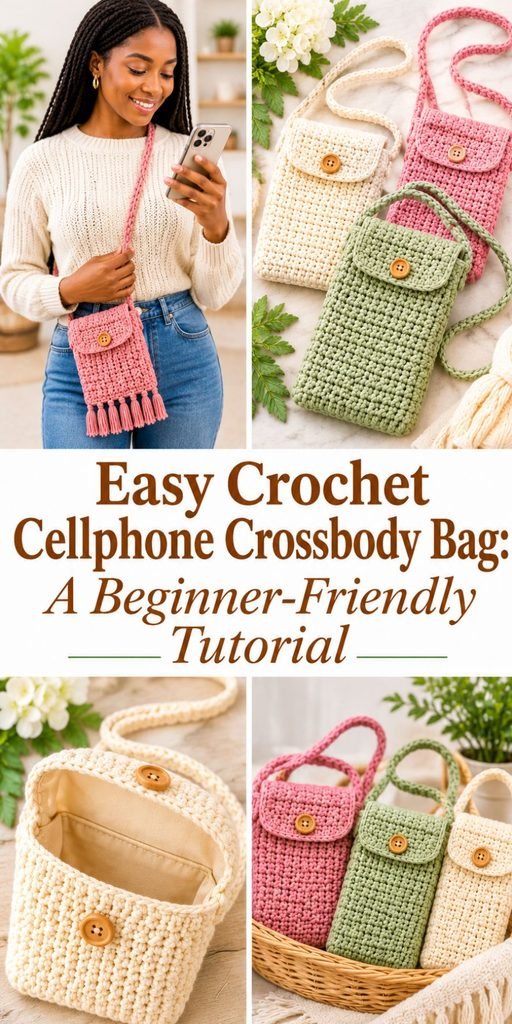
You can make a simple neutral phone bag for everyday use, choose a pretty pastel shade, add a button closure, or even use two colors to create stripes.
This design uses a simple rectangular crochet piece that folds into a pouch. You’ll crochet the body, sew the sides together, add a small flap, and finish it with a long crochet strap. There’s no complicated shaping, which makes it a lovely project if you’re still building your crochet skills.
If you enjoy making handmade accessories, you might also like my DIY Polymer Clay Bead Bracelet Tutorial, another fun way to create something personal to wear.
In this tutorial, I’ll walk you through the supplies, measurements, stitches, and each step of making your own crochet cellphone crossbody bag.
Why You’ll Love This Crochet Phone Bag
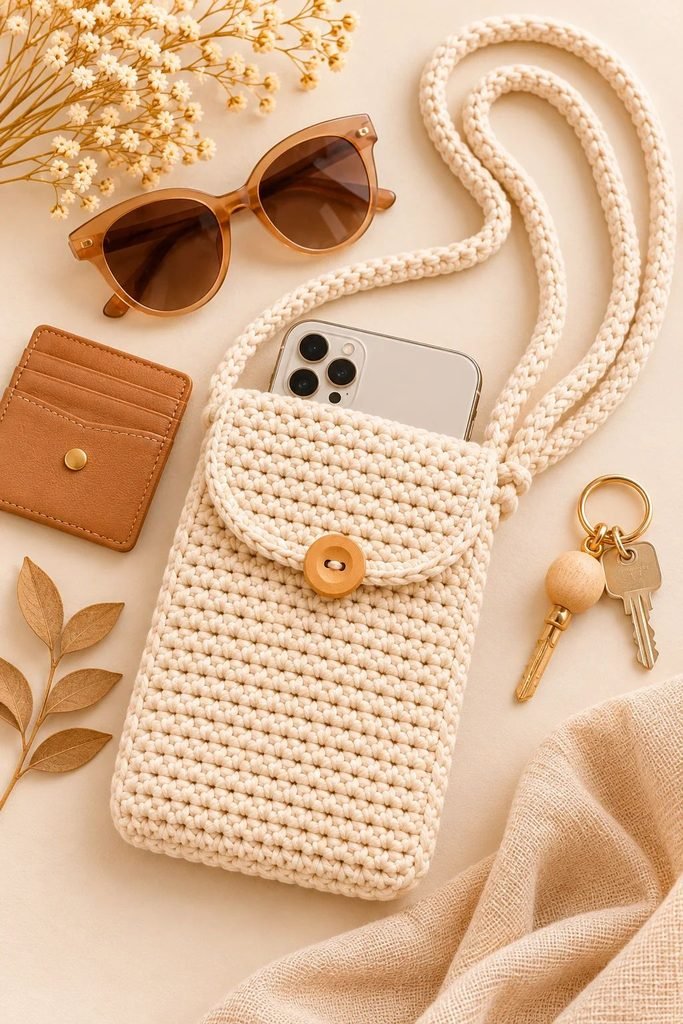
One of the things I like most about this project is that it’s genuinely practical. You can use it for quick errands, walks, shopping trips, holidays, or days when you only need your phone and a few small essentials.
The simple construction also makes it easy to customize. Once you understand how the rectangular body is folded and assembled, you can experiment with different yarn colors, add a front pocket, or change the flap shape.
It’s also a lovely handmade gift idea. You can make one in someone’s favorite color, add a decorative button, or pair it with other small handmade accessories. If you enjoy putting together thoughtful presents, take a look at my 10 Best Stocking Stuffer Ideas for Husband or Boyfriend for more inspiration.
What You’ll Need
For this tutorial, I’m using medium-weight cotton yarn because it creates a firm fabric with good stitch definition. A phone bag needs to hold its shape, especially when you add a phone, so I prefer a yarn that doesn’t stretch too easily.
Gather the following supplies before you begin:
- Approximately 100–150 yards of worsted-weight cotton yarn
- 4 mm crochet hook
- Yarn needle for sewing the sides and weaving in ends
- Scissors
- Stitch markers
- Measuring tape
- One medium-sized button for the flap
- Optional: fabric for lining the bag
You can use acrylic or a cotton blend if that’s what you have available, but remember that a softer, stretchier yarn may make the finished bag less structured.
I also recommend choosing your button before you start. This makes it easier to decide how large the flap and button loop should be.
Finished Measurements
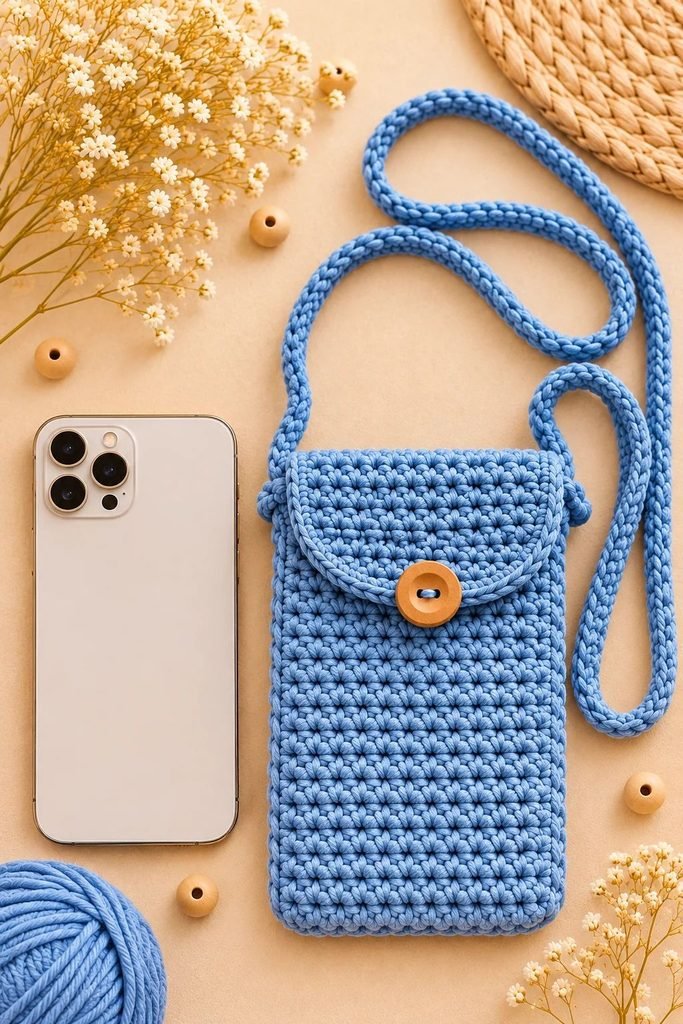
The sample bag is designed to have an approximate finished size of:
- Width: 4½ inches
- Height: 7½ inches
- Flap: approximately 1½ inches
- Strap: approximately 45 inches
These are approximate measurements, not fixed phone dimensions. Your finished size will depend on your yarn, hook, tension, and side seams.
Before crocheting, measure your phone with its case on. You want enough room for it to slide in and out without stretching the stitches.
If you have a particularly large phone or a bulky protective case, increase the width of the crochet rectangle before beginning.
Crochet Abbreviations
This pattern uses standard US crochet terminology.
- ch: Chain
- sc: Single crochet
- st: Stitch
- sl st: Slip stitch
- BLO: Back loop only
- FO: Fasten off
The main body uses single crochet stitches throughout, so you don’t need to know complicated stitch combinations.
Before You Start: Check Your Crochet Gauge
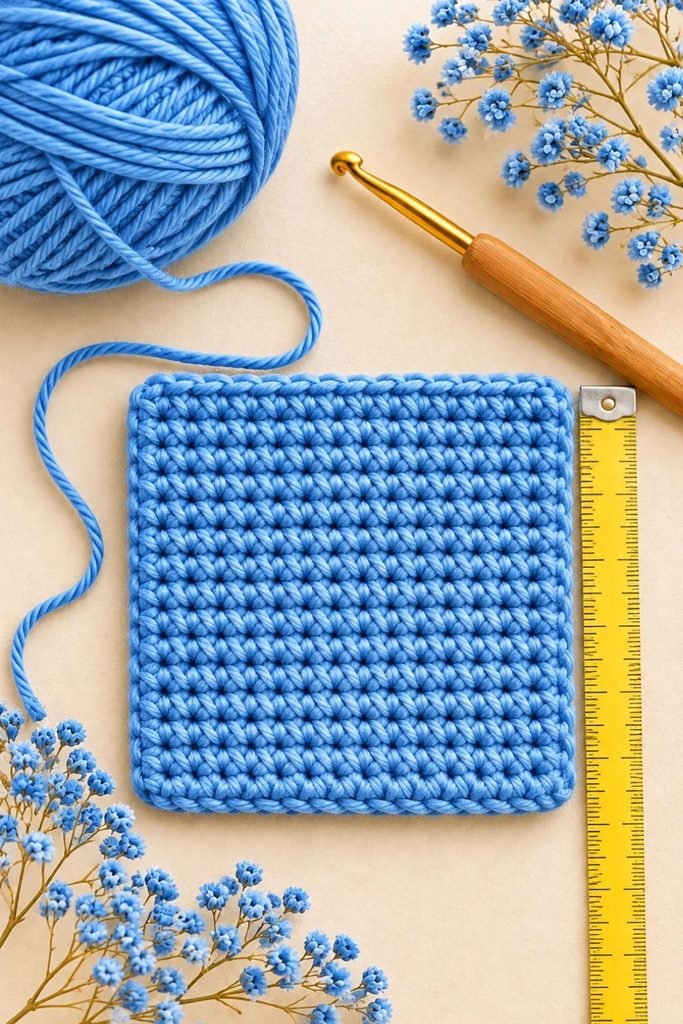
Gauge is important because it determines how large your finished phone bag will be.
For this sample, aim for approximately 16 single crochet stitches and 18 rows over 4 inches using worsted-weight cotton yarn and a 4 mm crochet hook.
To check yours, crochet a small square of single crochet stitches, measure the center section, and compare it with the gauge above.
If your stitches are too large, try a smaller hook. If they’re too small, try a slightly larger hook.
You don’t need to match the sample perfectly, but checking your gauge will make it much easier to get the right phone pouch size.
How to Crochet the Cellphone Crossbody Bag
Now let’s make the actual bag.
The body is worked as one long rectangle. Once it’s finished, you’ll fold the bottom section upward to create the pouch and leave the remaining length as a small flap.
I recommend keeping a tape measure nearby so you can check the length as you work instead of relying only on the row count.
Step 1: Make the Crochet Bag Body
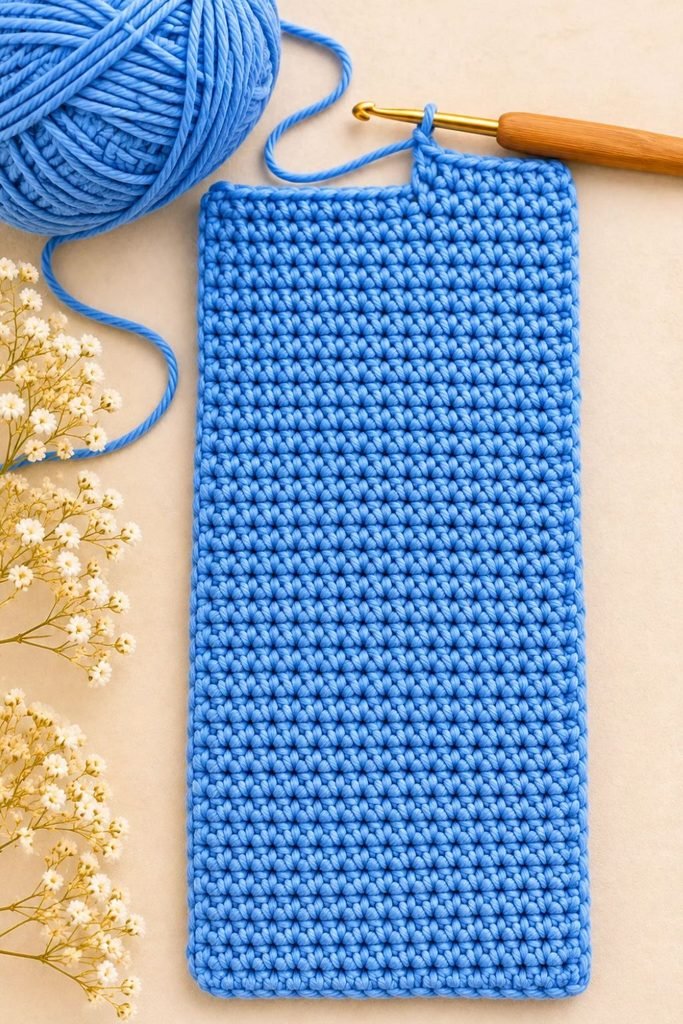
Start by making a slip knot and placing it on your crochet hook.
Chain 21 stitches. This gives you 20 stitches to work into for the sample width.
If you’re adjusting the bag for a wider phone, add chains until your foundation chain gives you the width you need. Remember to account for the side seams when deciding how much room to leave.
Insert your hook into the second chain from the hook. Work one single crochet into that chain, then continue making one single crochet into every chain across.
You should have 20 single crochet stitches.
Chain 1 and turn your work.
For the next row, work one single crochet into every stitch across. Chain 1, turn, and repeat.
Continue working one single crochet into every stitch until your rectangle measures approximately 16 to 16½ inches long.
At the sample gauge, this will be around 72–74 rows in total, including the first row. Your piece should look like a long, neat rectangle with straight sides and an even stitch pattern.
I know repeating the same stitch can feel a little boring, but this is one of the easiest parts of the project. You can work through the rows while watching a show or listening to something.
My tip: Count your stitches occasionally. If you accidentally skip a stitch at the end of a row, the bag can gradually become narrower, making it difficult to fit your phone later.
Before moving on, lay your rectangle flat and check the measurements. For the sample design, you’re aiming for approximately 5 inches wide and 16–16½ inches long. Place your phone beside the crochet piece and check that the width will comfortably accommodate it once the side seams are sewn.
If the rectangle is too narrow, add a few foundation chains and start again. If the length is slightly short, continue crocheting additional rows. This is much easier to correct before assembling the bag.
Once you’re happy with the measurements, fasten off and leave a long yarn tail if you plan to use it for sewing one of the side seams.
Step 2: Fold and Sew the Bag
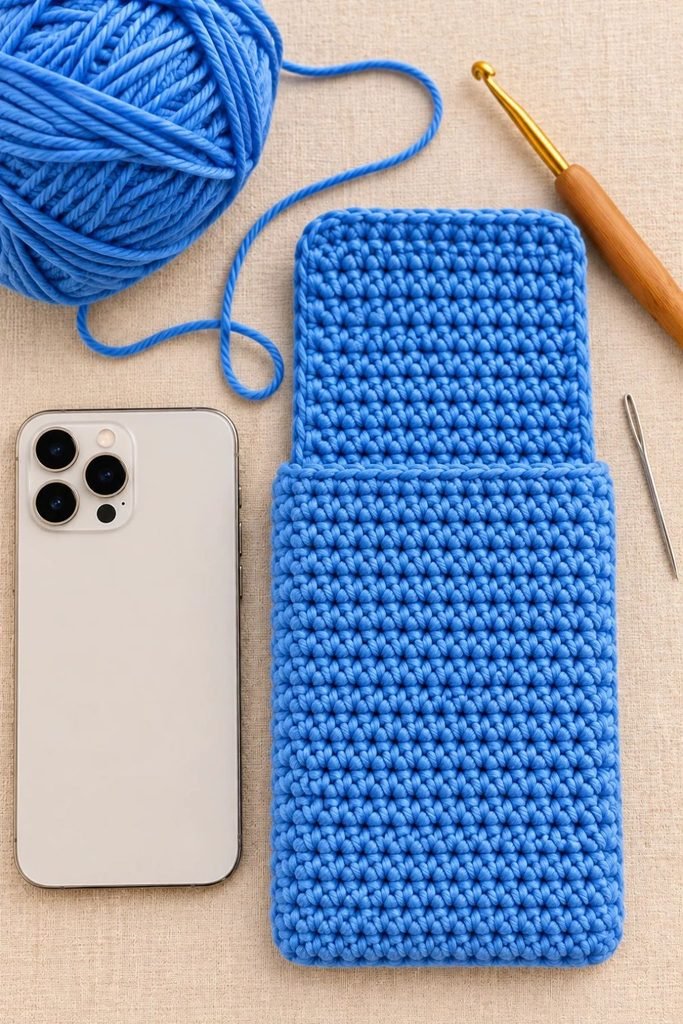
This is where the flat crochet rectangle starts to look like an actual cellphone bag.
Lay your rectangle horizontally with the wrong side facing upward.
Fold the bottom short edge upward, leaving approximately 1½ inches of the upper section free to become the flap. For the sample measurements, the folded pouch section should be around 7½ inches tall.
Make sure the folded sides line up evenly. You can use stitch markers to hold the edges in place before sewing.
Try placing your phone inside the folded section temporarily. It should fit comfortably without forcing the crochet fabric to stretch.
Thread your yarn needle with the long yarn tail. Starting at the bottom fold, sew the first side edge upward toward the opening using a whip stitch or mattress stitch.
Repeat on the opposite side.
Try to keep your stitches evenly spaced and avoid pulling the yarn too tightly. If you pull too hard, the side seams may gather and make the bag narrower than you intended.
Once both sides are sewn, turn the pouch right side out. You should now have a small rectangular crochet bag with an open top and a flap extending from the back.
Step 3: Finish the Opening and Flap
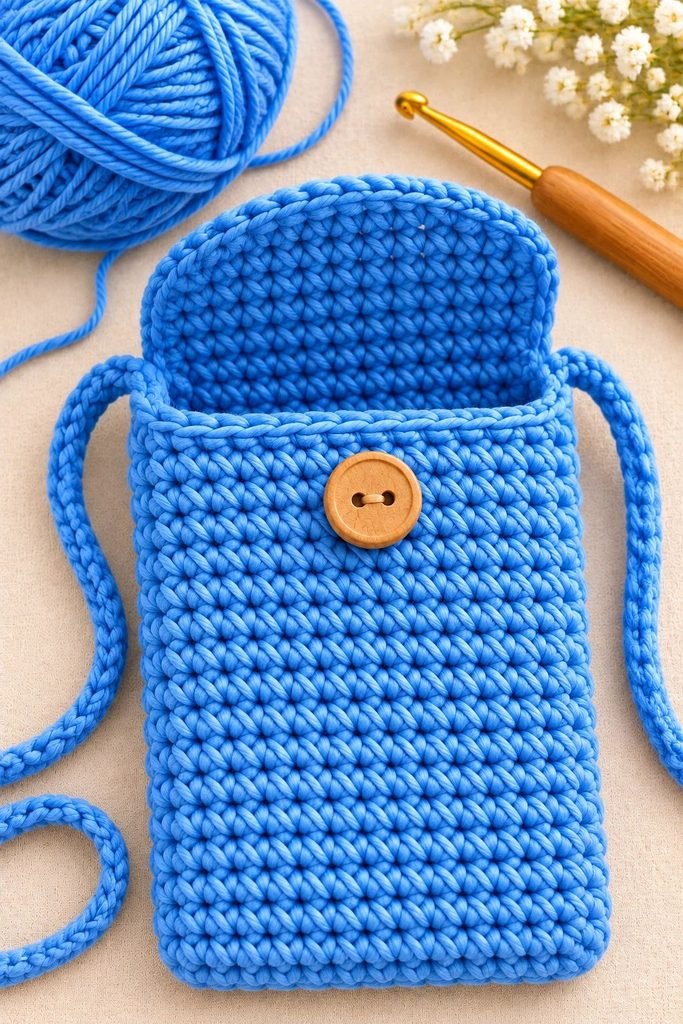
A simple crochet border makes the opening look much more finished and helps reinforce the top edge.
Attach your yarn to one side of the opening. Chain 1, then work single crochet stitches evenly around the top edge of the bag.
When you reach the starting point, join with a slip stitch. Fasten off and weave in the loose end.
You can use the same yarn color for a subtle finish or choose a contrasting shade if you want the border to stand out.
Now let’s finish the flap. The remaining 1½ inches of the rectangle should already form a simple flap at the back of the bag.
If you want a straight rectangular flap, you can leave it as it is. For a slightly rounded flap, attach your yarn to one corner and work single crochet stitches evenly around the edges. At each lower corner, work a small decrease if needed to soften the shape.
Finish with a slip stitch and weave in the ends.
I personally like a simple rounded flap because it gives the bag a softer, more finished appearance without making the pattern complicated.
Step 4: Add the Button Closure
A button closure helps keep your phone from slipping out when you’re walking around.
Fold the flap over the front of the bag and decide where you want the button to sit.
Attach your yarn to the center edge of the flap. Chain approximately 6–8 stitches, depending on the size of your button, then slip stitch back into the same area to form a small loop.
Before fastening off, test the loop around your chosen button. It should be secure enough to hold the flap closed but loose enough to open without pulling the crochet stitches.
Sew the button onto the front of the bag, directly underneath the loop.
If you prefer a simpler finish, you can also sew on a small magnetic snap designed for fabric bags.
Step 5: Crochet the Crossbody Strap
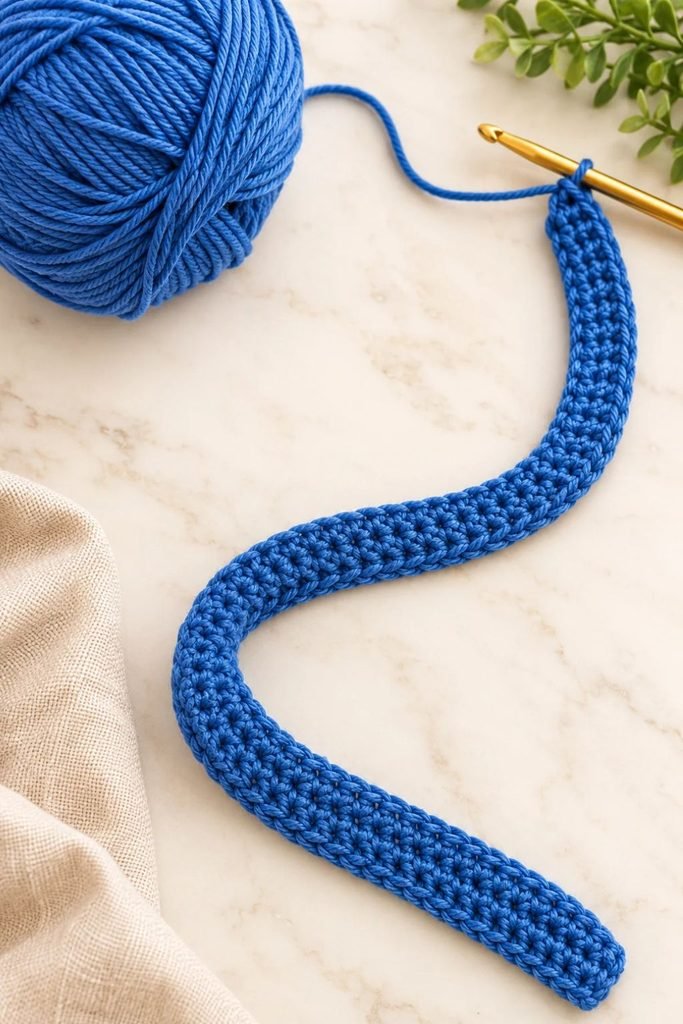
The strap is what makes this a crossbody bag rather than an ordinary phone pouch.
For a comfortable strap, I recommend making a narrow crochet band rather than using a long chain by itself. A chain-only strap can stretch and become uncomfortable when the bag is carrying a phone.
Start by making a foundation chain long enough to reach your preferred strap length. For the sample, aim for approximately 45 inches before attaching it to the bag.
To make a sturdy strap, chain 5.
Work one single crochet into the second chain from the hook and into each remaining chain across. You should have 4 stitches.
Chain 1, turn, and work one single crochet into each stitch across.
Continue repeating these rows until the strap reaches your desired length.
For a strap around 45 inches long, you’ll need to work approximately 200 rows at the sample gauge. Measure the strap as you go because tension can change the finished length.
Once it reaches the desired length, fasten off and leave a long yarn tail at each end for attaching it to the bag.
Step 6: Attach the Strap and Finish Your Bag
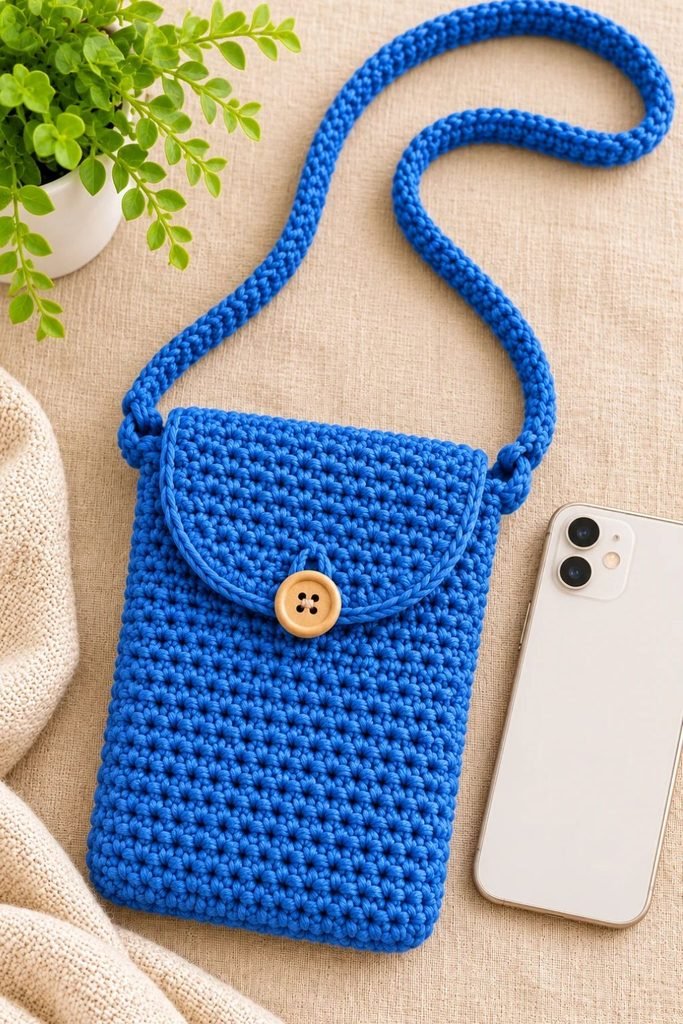
Lay your bag flat and decide where you want the strap to sit.
I recommend attaching each end to the upper side corners of the bag, just below the opening.
Thread the yarn tail through your yarn needle and sew the strap securely to the bag. Don’t attach it with only one or two stitches. Go through several stitches on the strap and bag, reinforcing the connection point so it can support the weight of your phone.
Repeat on the opposite side.
If you prefer a removable strap, you can attach small D-rings to the upper corners and use crochet-friendly bag clips.
Use your yarn needle to weave in all remaining loose ends. Work each tail through several stitches on the wrong side of the fabric so it stays secure. Trim the excess yarn carefully.
Check the seams, button, strap, and flap one more time. If you notice any loose stitches, reinforce them before using the bag.
You can lightly shape the finished pouch with your hands and let it rest flat.
And that’s it! Your handmade crochet cellphone crossbody bag is ready to use.
How to Customize Your Crochet Phone Bag
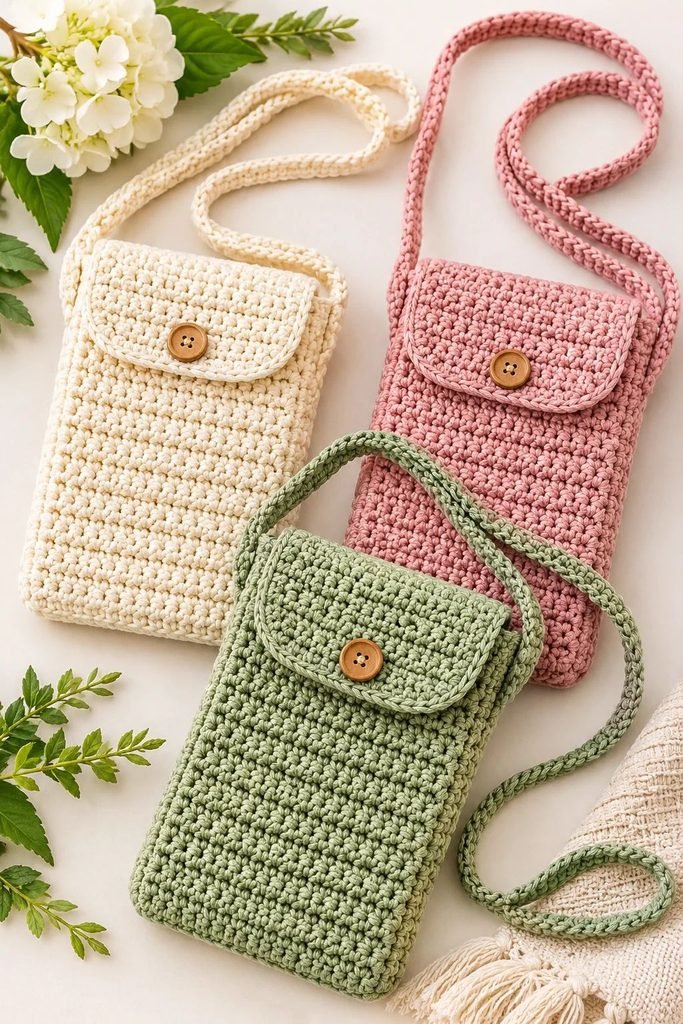
One of my favorite things about a simple crochet pattern is that you can change the look without changing the entire construction.
If you want something minimalist, choose cream, beige, oatmeal, or soft brown cotton yarn. These shades look beautiful with everyday outfits and give the bag a clean handmade appearance.
For something more playful, try pastel pink, lavender, sage green, or a combination of two contrasting colors. You can also crochet stripes by changing yarn colors every few rows.
If you love decorative accessories, add a small crochet flower to the front of the bag or attach a tassel to the button loop.
You could even make a matching little pouch for cards or earbuds. For another small handmade accessory project, my DIY Polymer Clay Bead Bracelet Tutorial is a fun project to try alongside your crochet work.
How to Make Your Crochet Phone Bag More Structured
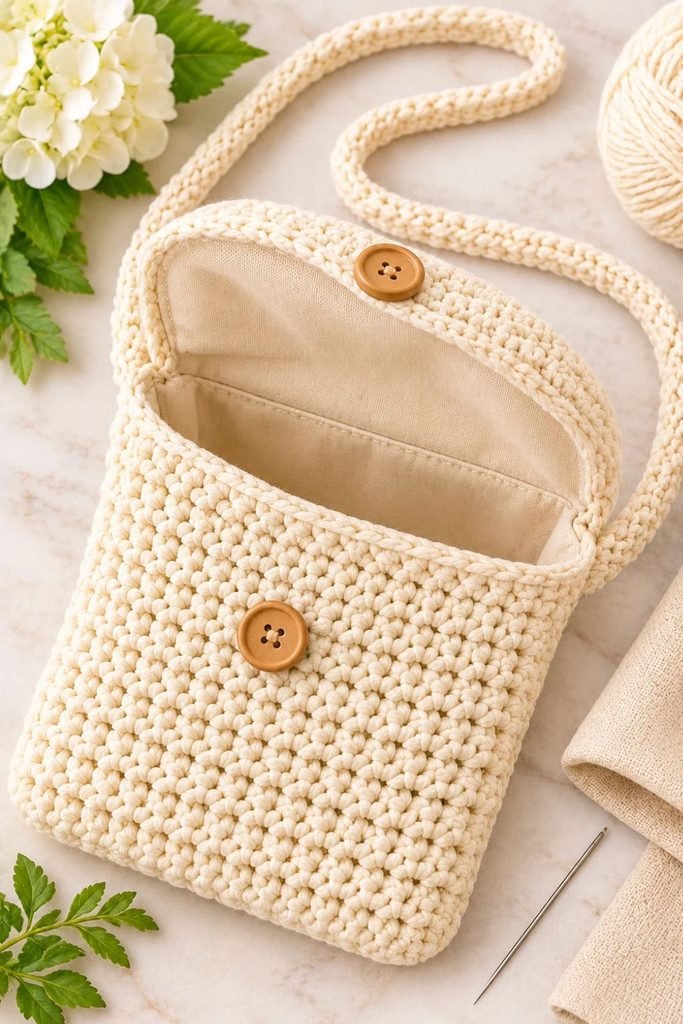
A phone bag needs to hold its shape, especially when it’s carrying something heavier than a few small accessories.
If your finished bag feels too floppy, there are a few things you can do.
First, check your stitch tension. Single crochet stitches should be firm and close together, without being so tight that they’re difficult to work.
You can also use a slightly smaller hook if your fabric feels too loose. Make a small swatch first so you can check how the change affects the measurements.
Another option is adding a fabric lining. A simple cotton lining can make the inside of the bag neater and help prevent the crochet fabric from stretching as much.
To add a lining, measure the inside of the finished pouch, cut a piece of fabric to fit, and sew the fabric into a small pouch with the seams turned inward. Hand-stitch the top edge of the lining to the inside of the crochet bag just below the opening.
Don’t pull the lining too tightly. It should sit comfortably inside the bag without changing its shape.
Common Mistakes to Avoid
One mistake I would avoid is crocheting too loosely. A phone bag made with loose stitches can stretch once you place your phone inside, especially if you’re using a yarn with a lot of elasticity.
Another common problem is not measuring the phone before starting. Phones come in different sizes, and even a protective case can make a noticeable difference. Always measure your phone with the case attached.
It’s also easy to underestimate how much a long strap can stretch. That’s why I recommend making a firm crochet strap rather than relying on a loose chain.
Finally, don’t rush the side seams. Uneven seams can make the bag look crooked, even if the crochet rectangle itself is perfectly straight.
Take your time during assembly. A few extra minutes spent lining up the edges can make the finished bag look much neater.
How to Care for Your Crochet Cellphone Bag
The best way to care for your finished bag depends on the yarn you used.
For cotton yarn, gentle hand washing in cool or lukewarm water is usually a good option, provided the yarn label allows it.
Avoid twisting or wringing the bag because this can distort the shape and stretch the strap.
After washing, gently press out excess water with a clean towel and reshape the bag while damp. Leave it to dry flat rather than hanging it by the strap.
If you’ve added a fabric lining, button, or metal hardware, check the care instructions for those materials too.
Frequently Asked Questions
Is this crochet cellphone bag beginner friendly?
Yes! The main body uses basic single crochet stitches worked in rows. You’ll also need to know how to chain, turn your work, fasten off, and sew crochet pieces together. The construction is straightforward once you understand how the rectangle folds into the pouch.
How much yarn do I need for a crochet phone bag?
For the sample design, approximately 100–150 yards of medium-weight yarn should be a useful starting estimate. The exact amount depends on your phone size, strap length, yarn weight, and stitch tension.
What is the best yarn for a crochet cellphone crossbody bag?
Cotton yarn is a good choice because it generally creates a firm fabric with clear stitch definition. A cotton blend can also work well. If you use acrylic yarn, check that the finished fabric isn’t too stretchy.
Can I make the crochet phone bag bigger?
Absolutely. Measure your phone with its case and adjust the foundation chain to create a wider pouch. You can also add more rows to increase the height.
Can I make a shorter shoulder strap?
Yes. Simply crochet the strap to your preferred length. Try measuring it while wearing the bag across your body or over one shoulder before attaching it permanently.
Do I need to add a lining?
No. A lining is optional, but it can help the bag feel more structured and give the inside a neater finish.
Can I add a zipper instead of a button?
Yes. A small zipper can be sewn along the opening if you prefer a more secure closure. Make sure it fits the width of your finished bag and doesn’t pull the crochet fabric out of shape.
Can I sell the finished crochet bags?
Yes, you can sell your finished handmade bags, but always check the terms of any pattern you use. If you’re following your own design, keep track of the yarn, hardware, packaging, and time involved when working out your price.
Final Thoughts
This crochet cellphone crossbody bag is one of those little projects that proves you don’t need a complicated pattern to make something useful and pretty.
I love that the main body is just a simple rectangle. Once you’ve crocheted it, the folding and assembly are straightforward, and you can personalize the finished bag with different colors, buttons, straps, and decorative details.
If you’re making your first one, I’d recommend starting with a neutral cotton yarn and following the sample measurements before experimenting with different sizes.
Once you’ve made one, you can easily create another in a completely different color or add a little pocket for cards and other small essentials.
It’s a lovely handmade accessory to keep for yourself, give as a thoughtful gift, or even add to a small crochet collection.