I started making exfoliating sugar scrub soap bars during a period when my skin constantly felt dry, rough, and tired, no matter how well I thought I was caring for it.
I was doing everything I believed was right. I moisturized daily, I drank water, and I bought exfoliating products that promised smooth skin. Yet nothing truly worked long term.
What frustrated me most was that store bought scrubs either felt too harsh or left my skin coated in a greasy layer that I did not enjoy.
I wanted something gentle, effective, and simple. One afternoon, with a few basic ingredients and a lot of curiosity, I decided to make my own body scrub bars at home.
That first batch completely changed how I approach exfoliation. My skin felt clean, soft, and balanced instead of irritated.
I realized that exfoliating does not need to be aggressive to be effective. Since then, these easy exfoliating sugar scrub soap bars have become a permanent part of my routine, and I am excited to walk you through exactly how you can make them too.
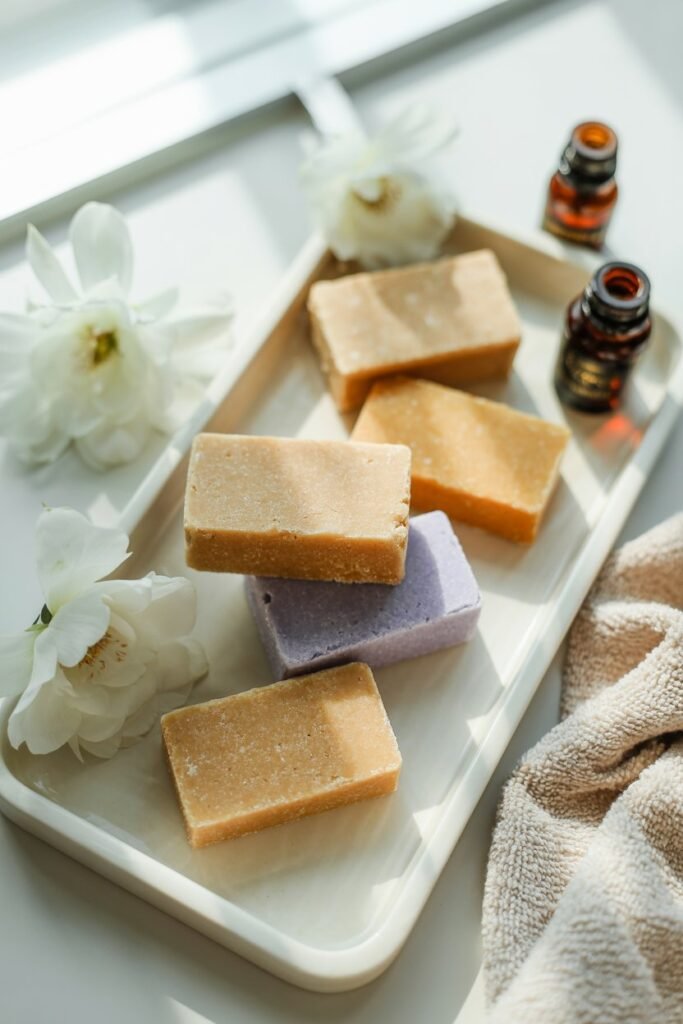
What Are Exfoliating Sugar Scrub Soap Bars
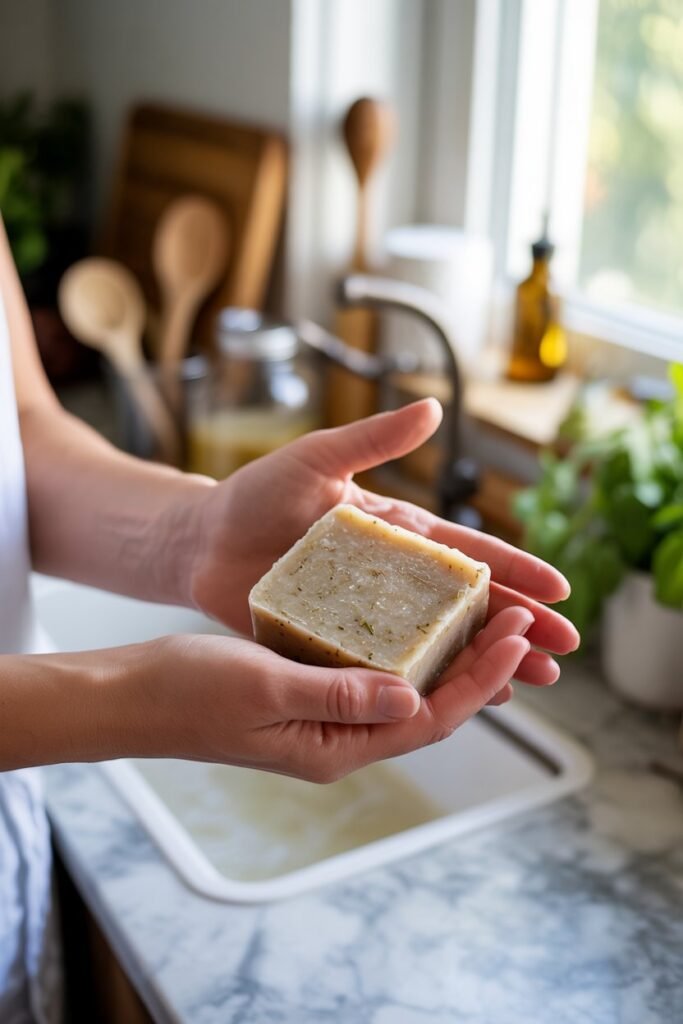
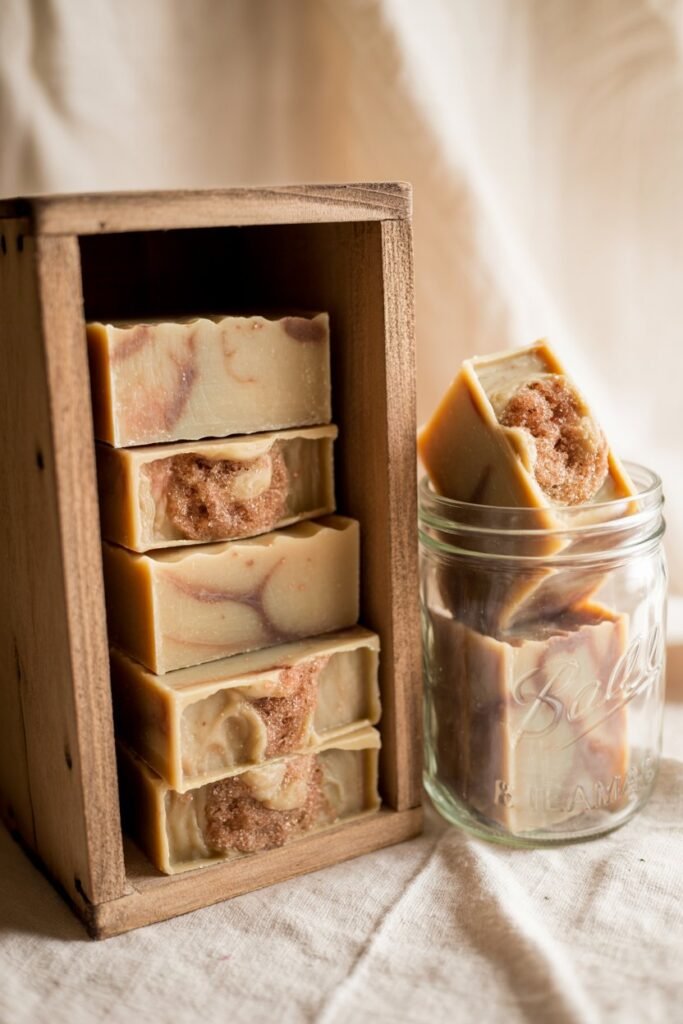
Exfoliating sugar scrub soap bars are solid bars that combine cleansing, exfoliation, and moisture into one simple product.
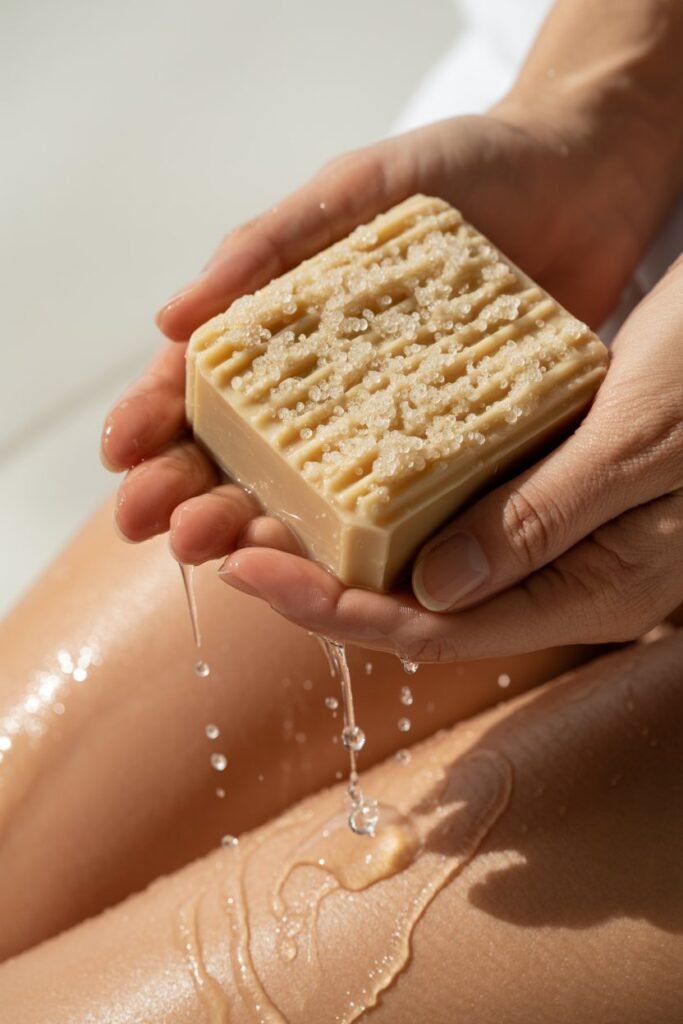
Instead of using a loose scrub that can be messy and wasteful, you hold the bar directly in your hand and massage it onto wet skin.
I love this format because it is practical and efficient. The soap base gently cleanses, the sugar exfoliates dead skin cells, and the oils nourish your skin all at the same time.
Another reason these bars work so well is consistency.
Because they are easy to use, you are more likely to exfoliate regularly, which leads to better long-term skin texture instead of short bursts of improvement.
Why I Prefer Homemade Body Scrub Bars
When I began paying attention to ingredient labels, I noticed that many commercial body scrubs contained artificial fragrances, unnecessary fillers, and exfoliants that were far too abrasive.
My skin reacted by becoming irritated instead of smoother.
Making homemade scrub bars allows you to control every ingredient. You decide how gentle or exfoliating the bar should be, which oils work best for your skin, and what scent feels relaxing to you.
I also appreciate the peace of mind that comes from knowing exactly what I am putting on my skin. There is something empowering about creating a product that supports your body instead of overwhelming it.
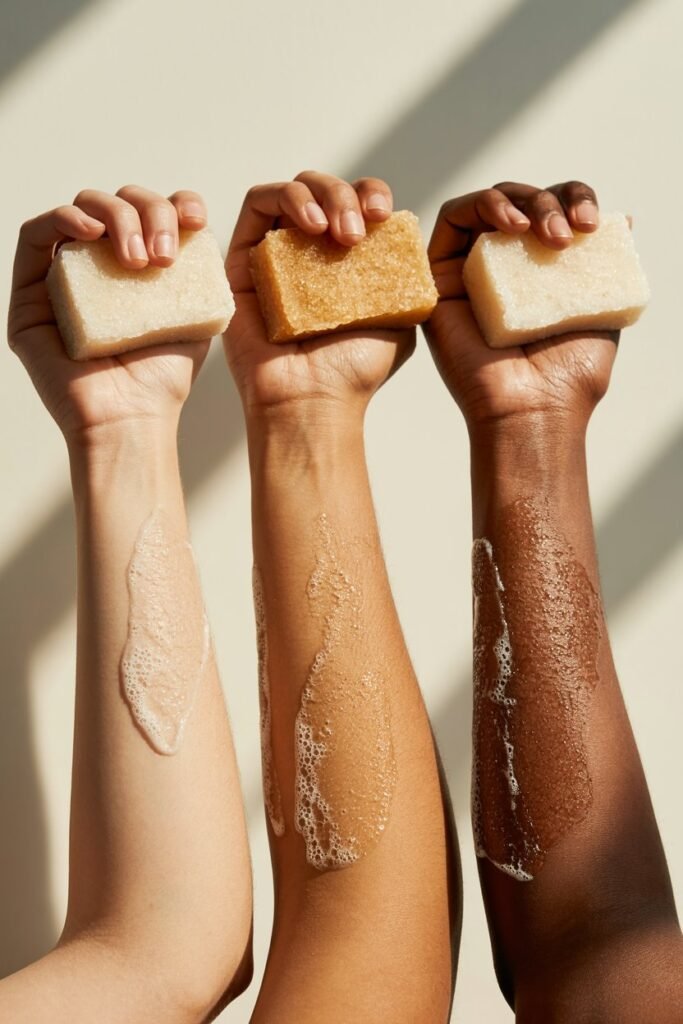
Skin Benefits of Sugar Scrub Soap Bars
Using sugar scrub soap bars consistently has noticeably improved how my skin looks and feels. Sugar is a natural exfoliant that helps remove dead skin cells without scratching the skin barrier.

As the sugar gently buffs the skin, it encourages better circulation and helps skincare products absorb more effectively afterward.
Over time, this leads to brighter looking skin, fewer rough patches, and a smoother overall texture that feels healthy rather than overworked.
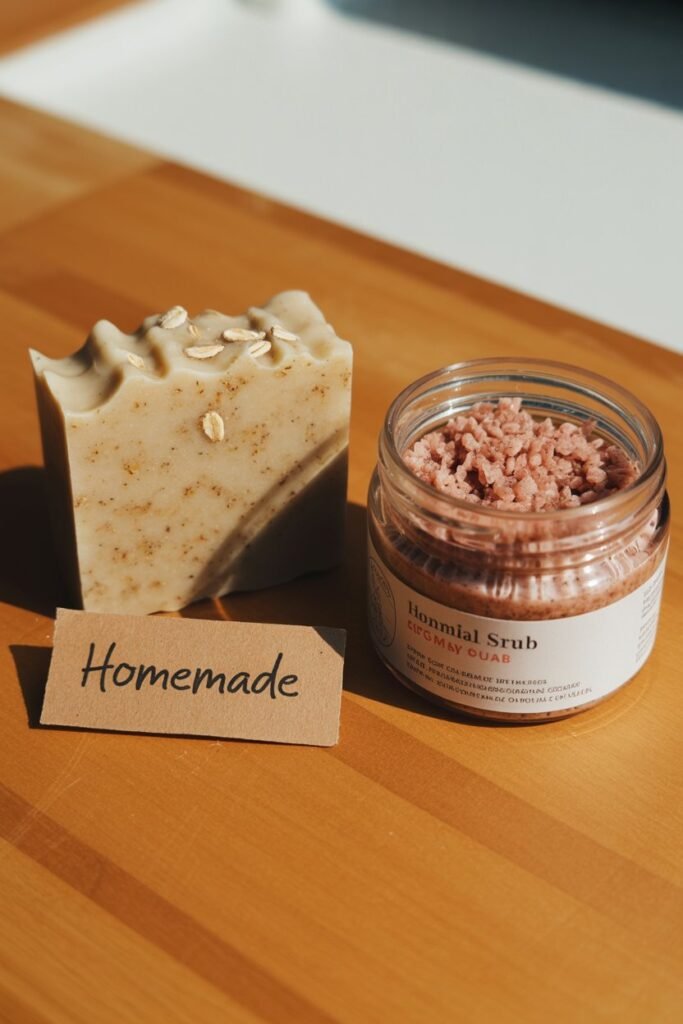
Ingredients You Will Need
This recipe uses simple, beginner friendly ingredients that work together to create a balanced exfoliating bar.

Main Ingredients
- Melt and pour soap base for gentle cleansing
- Granulated sugar for natural exfoliation
- Carrier oil such as coconut oil, olive oil, or sweet almond oil for moisture
- Essential oils for scent and aromatherapy benefits
Optional Add Ins
- Vitamin E oil for added skin nourishment
- Natural colorants for visual appeal
- Dried herbs or botanicals for texture and decoration
Keeping the ingredient list simple helps reduce irritation and makes the bars suitable for a wide range of skin types.
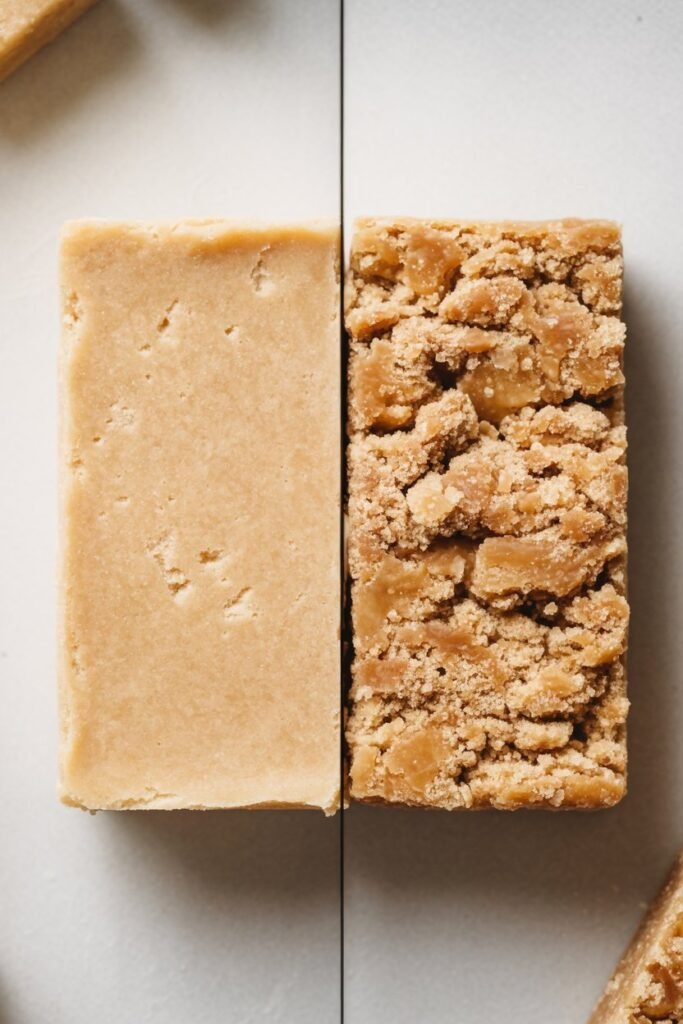
Choosing the Best Sugar for Exfoliation
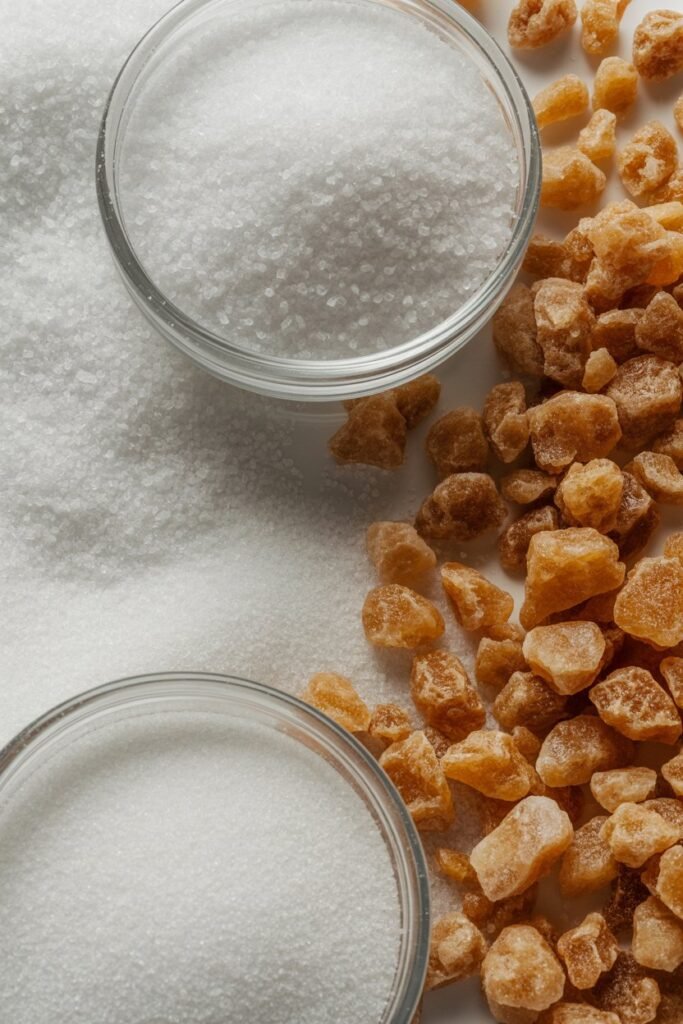
Not all sugar feels the same on the skin, and I learned this through testing.
Fine white sugar is my preferred choice for most body areas because it exfoliates gently and dissolves slightly with water, reducing irritation.
Raw sugar provides a slightly stronger exfoliation and works well on rougher areas like heels, knees, and elbows.
Matching the sugar type to the body area you are exfoliating helps you get results without stressing your skin.
Step by Step DIY Sugar Scrub Soap Bars Recipe

This is the exact method I use every time to ensure consistent results.
Tools You Will Need
- Silicone soap mold
- Microwave safe bowl
- Spoon or spatula
Instructions
First, I cut the melt and pour soap base into small cubes so it melts evenly. I place it in a microwave safe bowl and heat it in short bursts, stirring between each interval until fully melted.
Once melted, I allow it to cool slightly before adding the carrier oil and essential oils. This helps preserve their benefits.
I then gently fold in the sugar, mixing slowly to keep it evenly distributed without dissolving.
Taking your time during mixing helps create bars that feel smooth and evenly exfoliating instead of gritty or uneven.
I pour the mixture into soap molds and tap them gently on the counter to remove air bubbles. The bars are left to cool and harden completely before unmolding.
How I Use Sugar Scrub Soap Bars

When I use these bars, I start with wet skin and gently glide the bar in circular motions. I let the sugar do the work rather than applying pressure.
I focus on areas that tend to feel dry or rough, such as arms, legs, and elbows.
Using slow, consistent movements makes exfoliation more effective and more enjoyable.
How Often You Should Exfoliate Your Skin

Exfoliating too frequently can weaken the skin barrier, so moderation is important. I use sugar scrub soap bars two to three times a week depending on my skin condition.
If your skin is sensitive, start with once a week and gradually increase.
Your skin will always tell you what it needs, and adjusting frequency helps maintain balance.
Customizing Your Homemade Scrub Bars
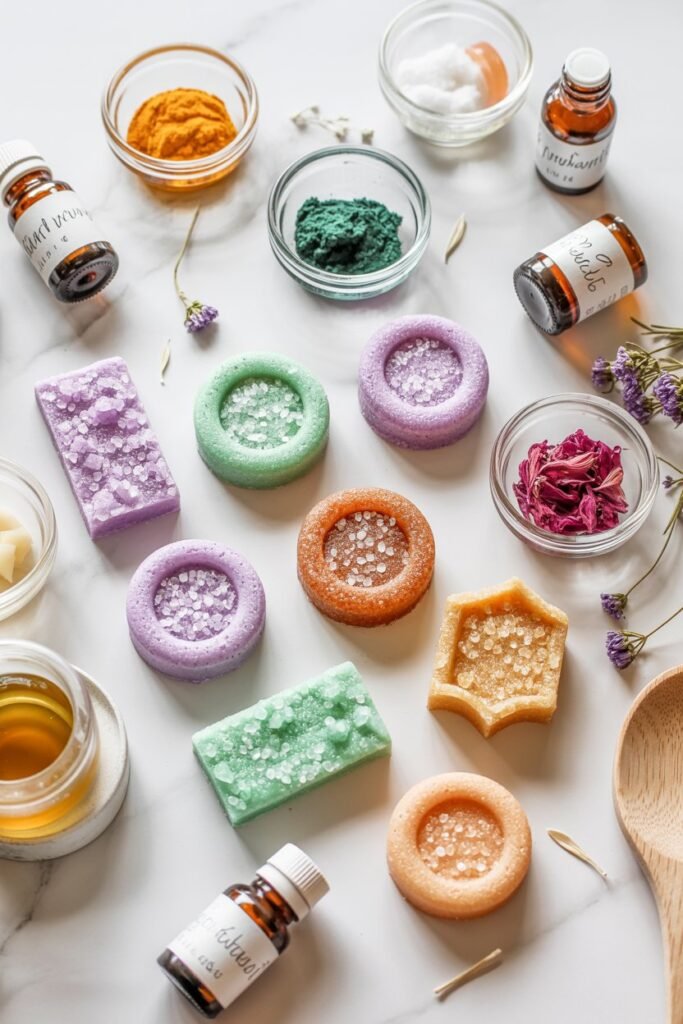
One of my favorite parts of making scrub bars is personalization. You can adjust the sugar amount for lighter or stronger exfoliation, change oils to suit dry or oily skin, and experiment with essential oil blends.
This flexibility allows you to create a scrub bar that truly works for you.
Customization also makes the process more enjoyable and encourages creativity.
Storage, Shelf Life, and Safety Tips
I store my sugar scrub soap bars in a dry area between uses so they can harden properly. Allowing the bars to dry fully helps them last longer.
When stored correctly, these homemade body scrub bars can last several months.
Simple habits like proper drying significantly extend shelf life and performance.
Common Mistakes I Learned to Avoid
Over time, I learned a few lessons that made a big difference in the final result.
Adding sugar when the soap base is too hot can cause it to dissolve. Using too much sugar can make the bars crumble. Skipping oils can lead to dryness.
Understanding these small details saves time and ingredients in the long run.
Understanding Skin Types and How These Bars Help
Before I ever paid attention to exfoliation, I did not realize how much skin type matters. Dry skin, oily skin, and sensitive skin all react differently to exfoliating products.
If you have dry skin, the added oils help replenish moisture while gently removing flakes. If your skin is oily, exfoliation helps unclog pores without stripping.
Adjusting ingredients based on your skin type improves comfort and results.
The Science Behind Gentle Exfoliation
Exfoliation works by removing dead skin cells that naturally build up on the surface of your skin.
Sugar is a humectant, meaning it helps draw moisture into the skin, which is why I prefer it over salt.
This balance of exfoliation and hydration supports long-term skin health.
Why Melt and Pour Soap Base Works Best
I experimented with different bases before settling on melt and pour soap. It is beginner friendly, predictable, and safe to use at home.
This base blends well with oils and sugar when handled correctly.
Its reliability makes it ideal for consistent, repeatable results.
How Temperature Affects Your Scrub Bars
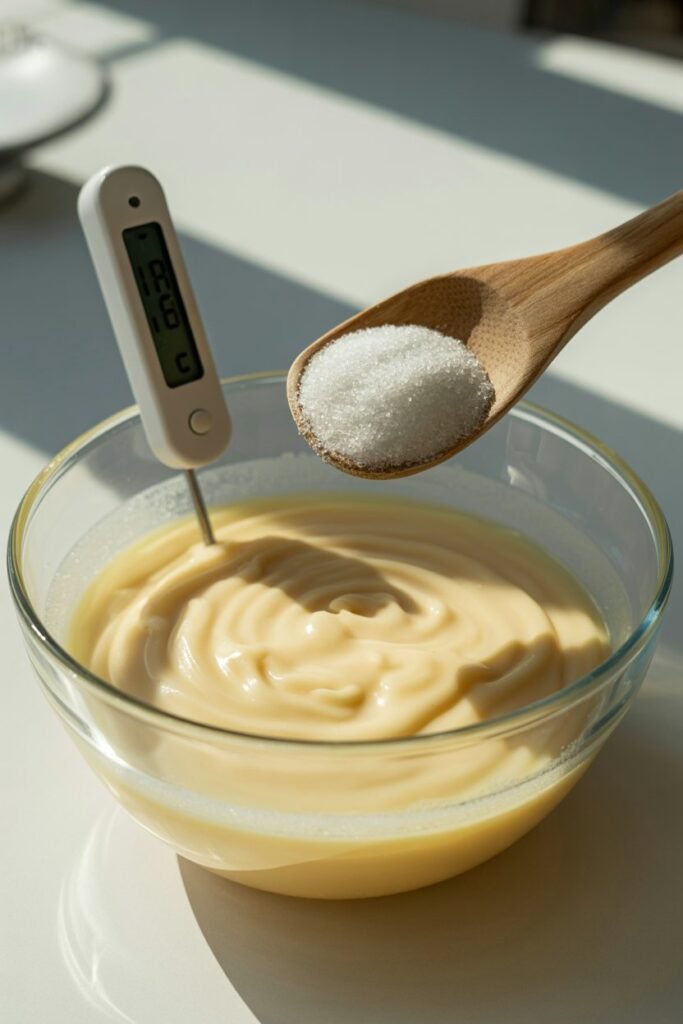
Temperature plays a bigger role than most people realize. When the soap base is too hot, sugar begins to dissolve.
Letting the base cool slightly protects texture and scent.
This small step greatly improves bar quality.
Making These Bars for Gifting or Selling

When I started sharing these scrub bars with friends, the response surprised me.
Presentation and clear labeling elevate the final product.
Thoughtful details make the bars feel premium and trustworthy.
How Long It Takes to See Results
Smoother skin is noticeable after the first use.
Long-term improvement comes from consistency over weeks.
Patience always produces better results than aggressive routines.
Safety, Patch Testing, and Skin Awareness
I always recommend patch testing before full use.
Listening to your skin prevents irritation.
Skincare should support your body, not stress it.
Final Thoughts: Transform Your Skincare Routine
Making your own exfoliating sugar scrub soap bars is more than just a DIY project—it’s a simple way to take control of your skincare and enjoy the satisfaction of using something you created yourself.
When you combine gentle exfoliation with nourishing oils, you are not just smoothing your skin—you are supporting its natural health and glow.
The beauty of this recipe is how flexible it is. You can adjust the sugar, oils, and scents to fit your unique skin needs, creating a bar that feels personalized every time you use it.
Consistency and mindful care are key, and these bars make it effortless to turn self-care into a weekly habit.
I encourage you to give this recipe a try, experiment with your favorite scents, and discover the difference that gentle, homemade exfoliation can make.
Once you experience the soft, refreshed, and radiant skin these bars provide, you’ll wonder why you ever settled for anything less.