Bathroom Organization Ideas That Actually Work
Bathrooms have to be the hardest room in the house to keep organized. There’s almost never enough storage, half of what you own is small and easy to lose, and everything from skincare to cleaning supplies somehow ends up crammed under one tiny sink.
I’ve reorganized my own bathroom more times than I’d like to admit, usually right after digging through a drawer for two minutes looking for a nail clipper I know I own.
What finally worked wasn’t buying more bins. It was rethinking how I was using the space I already had, the back of the door, the inside of cabinets, the dead zone under the sink, the wasted gap between the toilet and the wall.
Once I started using those spots intentionally instead of ignoring them, the whole room got easier to live in, and it stayed that way instead of slowly sliding back into a pile of loose bottles a few weeks later.
These are the ideas that actually stuck, the ones I still use months later instead of the ones that looked nice for a week and then quietly fell apart.
I’ve broken each one down with exactly how I set it up, what to actually buy, and the small mistakes that made me redo a few of these the first time around.
If your under-sink cabinet is the main offender, my Under Sink Organization Ideas post goes much deeper into that specific space.
Before You Start: Why Bathrooms Get Cluttered So Fast
Bathrooms have a few built-in problems most other rooms don’t, and they’re worth understanding before you buy a single thing. A living room gets messy because things pile up. A bathroom gets messy because the room itself is working against you.
From my experience, the biggest culprits are:
- Very little built-in storage compared to how many small items need a home. A single vanity cabinet has to hold everything from cleaning supplies to backup toiletries to first aid basics, categories that would get their own closet in any other room.
- Moisture, which rules out some materials and makes cardboard or fabric bins a bad idea. Humidity from showers and sinks warps cardboard, grows mold on fabric, and rusts uncoated metal over time.
- A constant rotation of near-empty products that get shoved to the back instead of tossed. Nobody wants to throw away a bottle with a little bit of product left, so it just gets pushed further back every time you reach past it.
- Multiple people sharing one small space, all with their own routines and products. A single-person bathroom and a shared family bathroom need genuinely different systems, and using one person’s system for a shared space is a common reason organization efforts fail within weeks.
Before buying anything, empty out one drawer or cabinet at a time and actually sort what’s in it.
Toss anything expired or nearly empty, and group what’s left by category. Once you can see what you’re really storing, and how much of it you actually use, the ideas below will make a lot more sense for your specific space.
What to Gather Before You Start
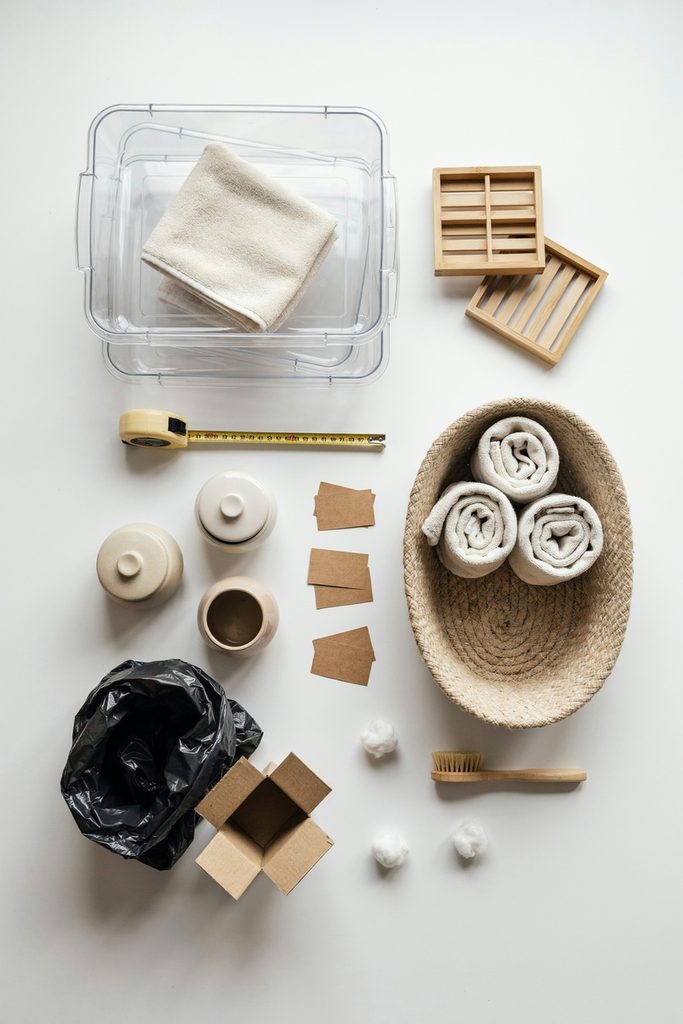
You don’t need to buy everything on this list at once, but having a few basics on hand makes the process go a lot faster and keeps you from making buying decisions in the middle of a half-emptied cabinet.
- A trash bag and a box. One for tossing expired products, one for anything you’re keeping but relocating elsewhere in the house. Having both ready means you’re not standing there deciding item by item where things go.
- A measuring tape. Measure cabinets, drawers, and wall space before buying anything. Guessing is how you end up with bins that don’t fit, and returning bulky organizers is more of a hassle than measuring twice up front.
- A few basic containers. Even mismatched bins from around the house work fine for a first sort. Use this initial pass to figure out roughly how many containers you actually need and what sizes, then buy the matching set once you know.
- Labels or a marker. Even a simple piece of tape with handwriting keeps a system working long after the initial organizing burst of motivation fades. Systems fail less from bad bins and more from nobody remembering what goes where.
1. Use Stackable Bins Inside Cabinets
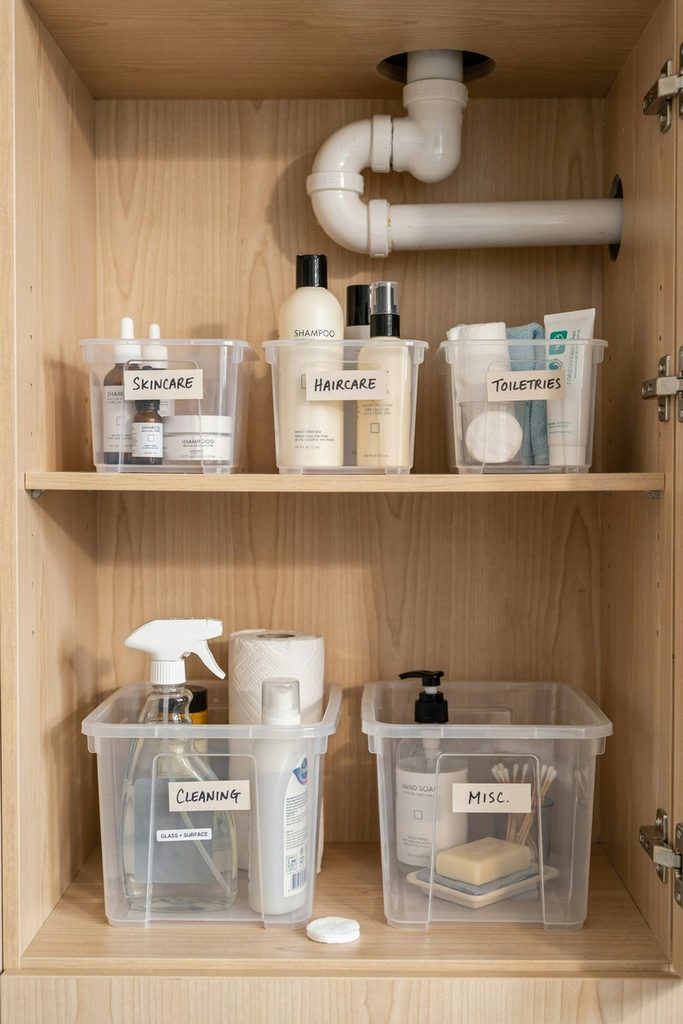
Cabinet space under the sink or in a linen closet gets wasted fast when everything is just piled in loose.
A deep cabinet without any internal structure basically becomes one giant catch-all, and once that happens, finding anything means unloading half the shelf.
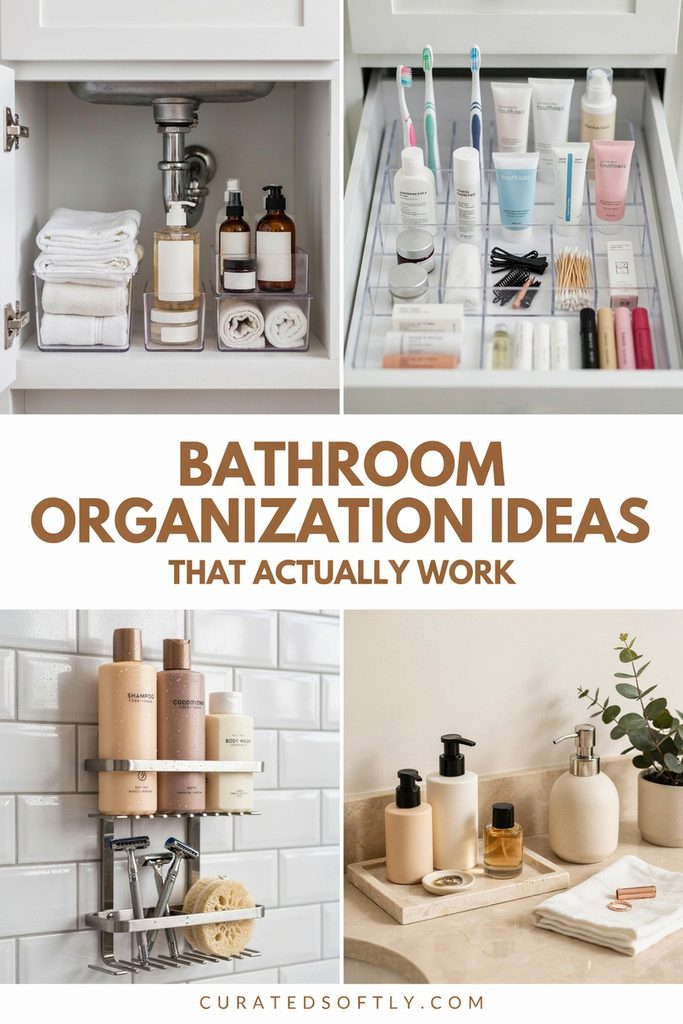
Stackable bins turn one deep shelf into two or three usable levels, and grouping items by category (skincare, haircare, cleaning supplies) means you’re not digging through everything just to find one bottle.
How to style it
Choose bins in a consistent size and color so the cabinet looks intentional even when the door’s open.
Clear bins make it easy to see what’s inside without pulling each one out, which matters more than it sounds like it should when you’re in a hurry.
Measure the full height of your cabinet before stacking, leaving at least an inch of clearance so bins don’t jam against the shelf above when you slide them out.
Pro tip
Label bins if more than one person shares the space. It’s the easiest way to keep things from sliding back into a pile within a week, since a labeled system removes the guesswork that causes people to just set things down wherever there’s room.
2. Add a Tension Rod Under the Sink for Spray Bottles
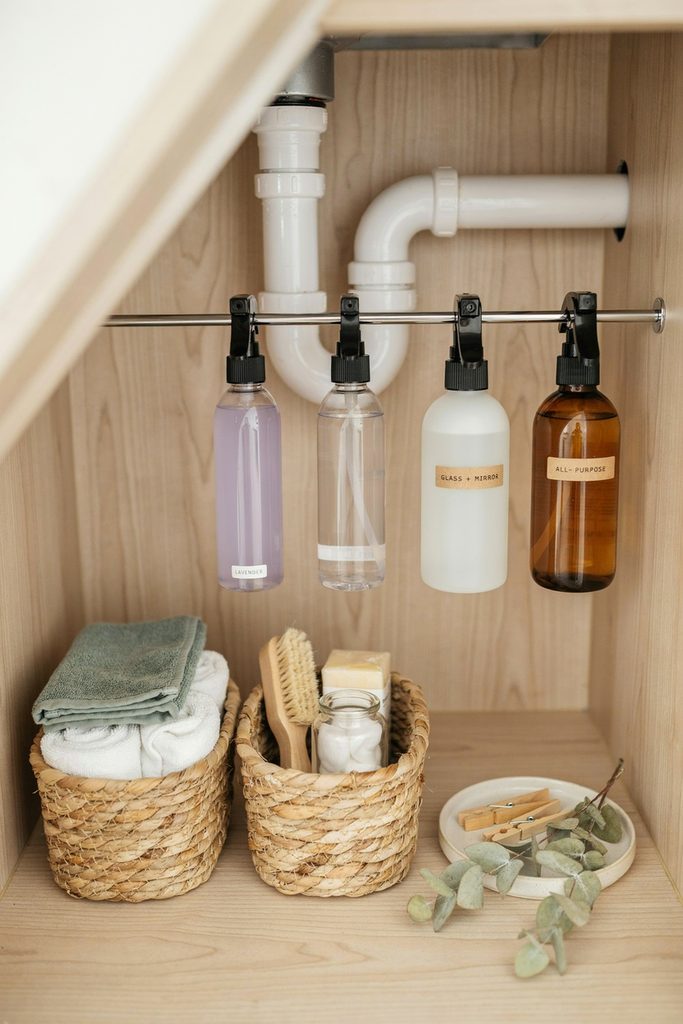
This is one of the cheapest fixes on this whole list, and it makes the biggest difference in a bathroom cabinet specifically.
Bathroom cleaning sprays are notorious for tipping over, leaking onto everything below them, and taking up a disproportionate amount of floor space for how often they’re actually used.
A tension rod installed a few inches below the top of the cabinet lets you hang cleaning sprays by their trigger handles, which frees up the entire floor for bins and stacked items.
How to style it
Position the rod so bottles hang without touching the shelf or floor below, leaving enough clearance that the heaviest bottle in your rotation still swings freely.
A second rod toward the back works well if the cabinet is deep enough, letting you separate everyday sprays from backups without them competing for the same hanging space.
Pro tip
Buy a rod rated for slightly more weight than you think you need. A rod that’s too light will sag once a few full bottles are hanging from it, and a sagging rod is both annoying to deal with and eventually likely to fail altogether.
3. Mount a Door-Back Organizer
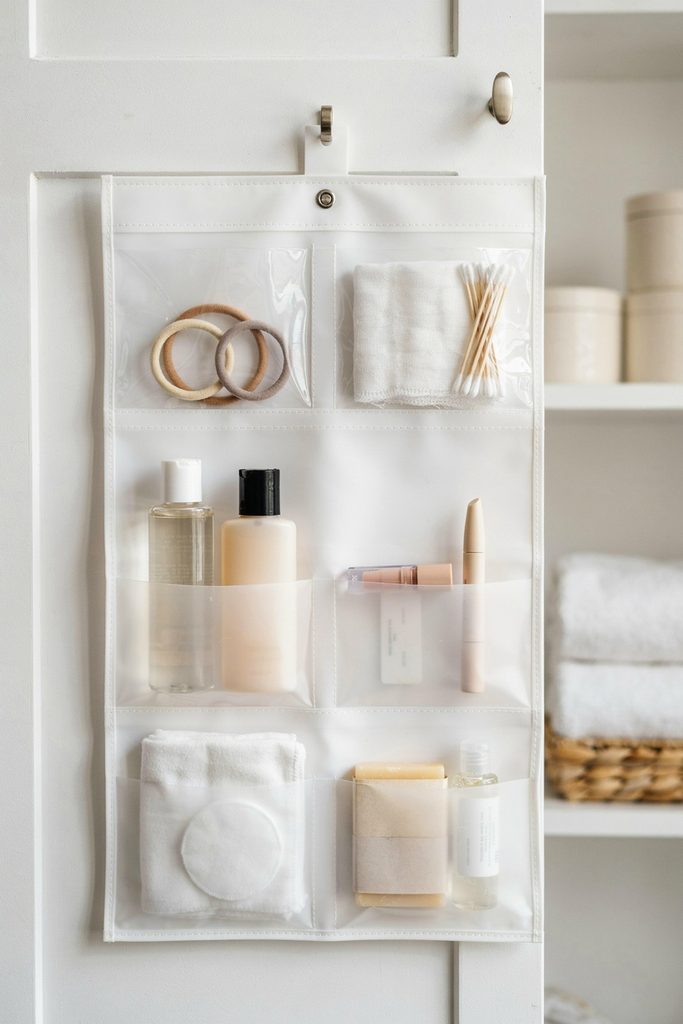
The inside of a bathroom cabinet or closet door is almost always wasted space, and it’s one of the easiest wins on this list because it adds real storage without touching your existing shelves at all.
A hanging or mounted organizer with pockets gives you a spot for hair tools, first aid items, or extra toiletries without taking up a single inch of shelf space, which matters a lot in a room where shelf space is already tight.
How to style it
Measure the door and cabinet depth before buying. A bulky organizer can block the door from closing fully or bump into shelves inside, which is an easy mistake to make if you’re shopping by photo alone rather than actual dimensions.
Mesh or clear vinyl pockets make it easier to see contents at a glance than solid fabric ones.
Pro tip
Keep only lightweight items in a door organizer. Heavier bottles pull on the hooks over time and can eventually damage the door or tear through the pocket fabric, so save this spot for things like hair ties, travel-size products, and first aid basics.
4. Use Drawer Dividers for Small Essentials
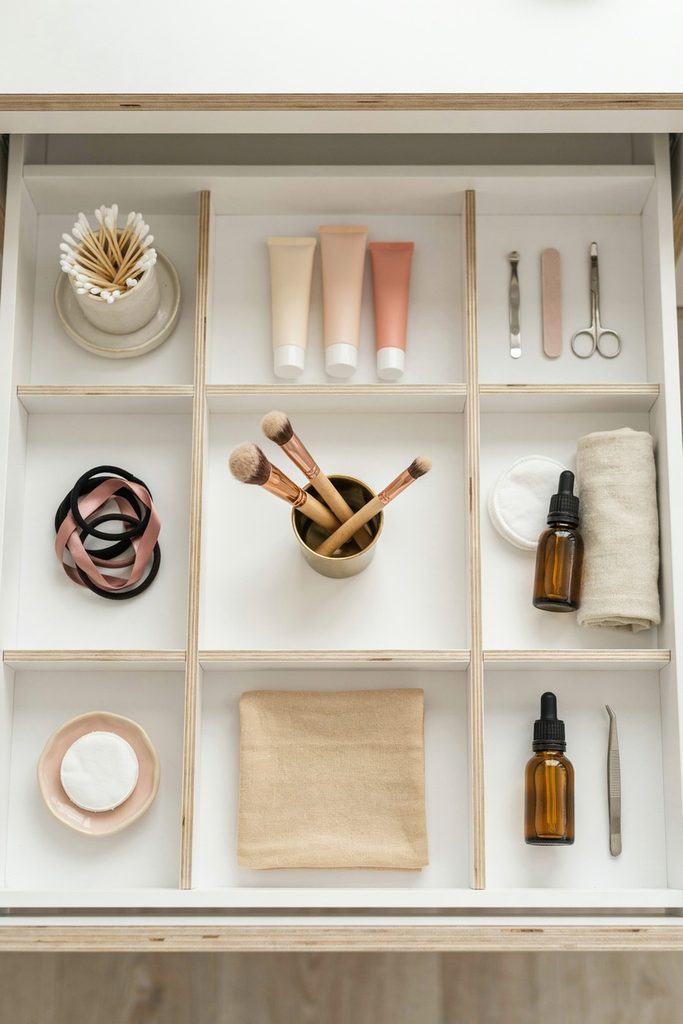
Bathroom drawers are notorious for turning into a jumble of bobby pins, cotton swabs, and half-used tubes the moment nothing is separating them.
Unlike a cabinet, where you can at least stack bins, a shallow drawer needs horizontal dividers to actually create structure.
Simple drawer dividers or small trays keep everything in its own lane, so you can actually see what you have at a glance instead of rifling through a mixed pile every time.
How to style it
Measure your drawer before buying dividers, since bathroom drawers tend to be shallower than kitchen ones and standard kitchen organizers often don’t fit.
Adjustable trays are worth the extra cost if your drawer sizes vary between the vanity and any other storage furniture in the room, since one set can then work across multiple spots.
Pro tip
Group items by how often you use them. Daily essentials go in the front section, backups and rarely used items go toward the back, so your hand naturally lands on what you need most without having to search the whole drawer every morning.
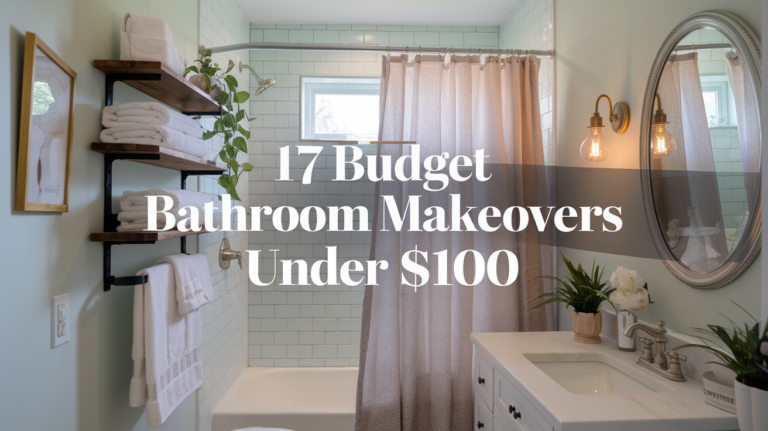
5. Install Floating Shelves Above the Toilet
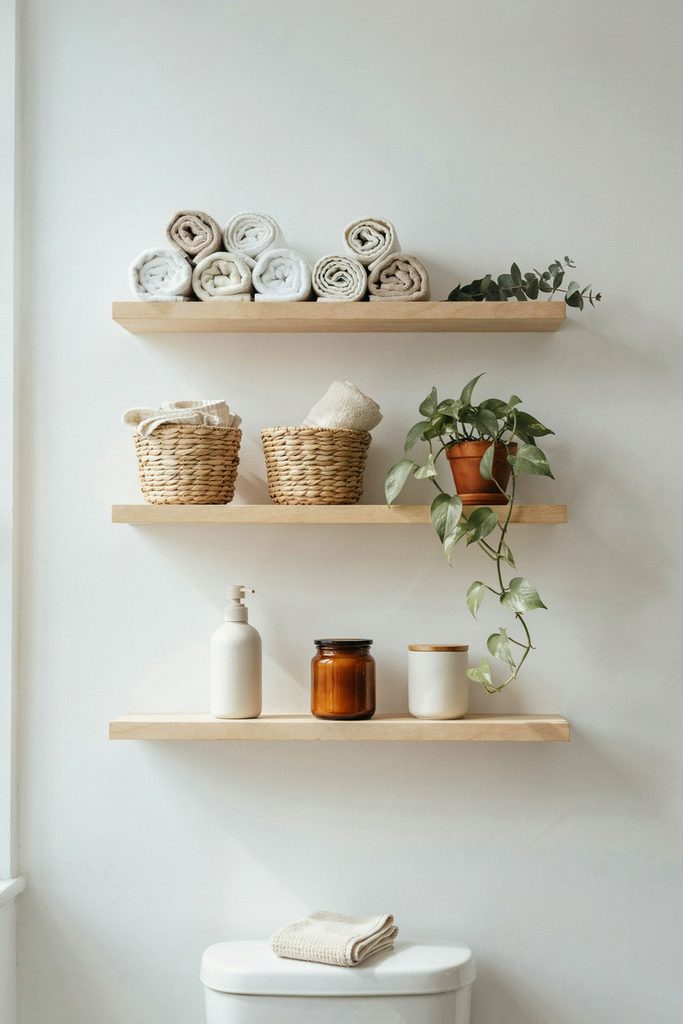
The wall above the toilet is one of the most underused spots in most bathrooms, largely because it’s easy to overlook once you’re used to seeing it empty.
A set of floating shelves turns that dead space into real storage for towels, baskets, or extra toiletries, and it keeps countertops clearer at the same time by giving overflow items somewhere else to go.
How to style it
Use matching baskets on each shelf to keep loose items from looking cluttered, since open shelving shows everything, unlike a closed cabinet.
Rolled towels add both function and a spa-like visual touch, and stacking them by size (largest on the bottom shelf) keeps the whole display looking intentional rather than just stacked.
Pro tip
Anchor shelves into wall studs whenever possible, especially if you plan to store anything heavier than towels and toiletries. Drywall anchors alone can hold light decor, but they’re not reliable long-term for a shelf that will see daily use.
6. Add a Shower Caddy That Actually Drains
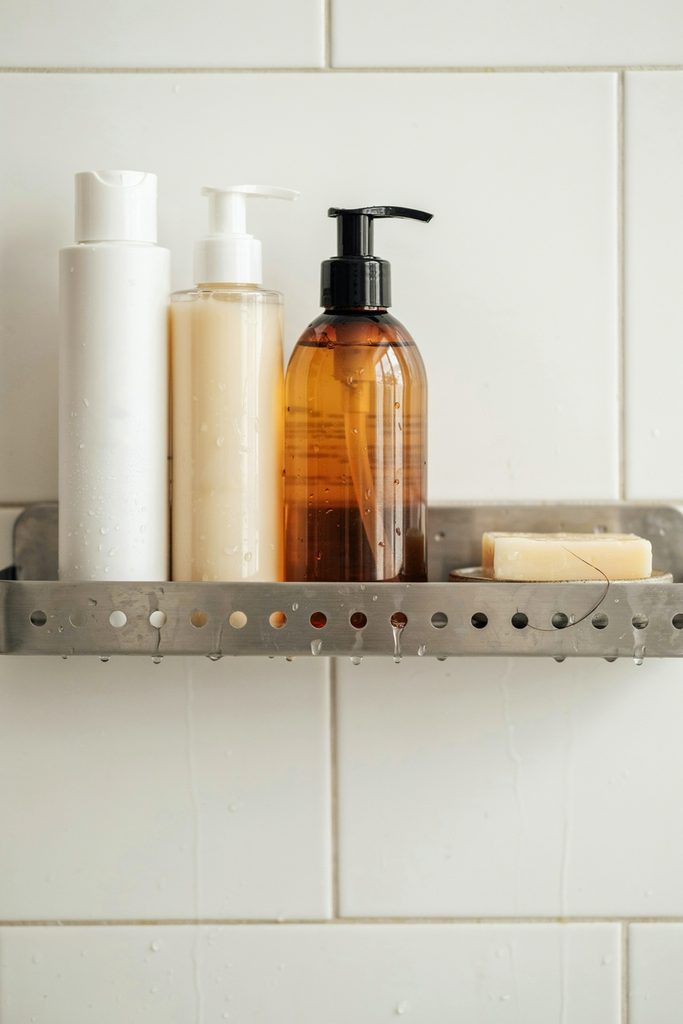
A shower caddy sounds like an obvious fix, but the wrong one turns into a slimy mess within weeks.
Flat-bottomed caddies trap water underneath every bottle, and that standing water is exactly what causes the pink and black buildup that makes a caddy look grimy no matter how often you wipe it down.
Look for caddies with proper drainage holes instead of flat shelves, since drainage is really the entire function this product needs to perform well.
How to style it
Hang the caddy from the shower head or mount it with suction or adhesive hooks rated for wet environments, checking the weight rating against how many full bottles you plan to store.
Keep it to daily essentials only, backups belong elsewhere, since an overloaded caddy is both a maintenance headache and, eventually, a safety issue if it comes loose.
Pro tip
Wipe the caddy down weekly instead of waiting for visible buildup. It’s a lot faster to maintain than it is to deep clean later, and a quick wipe takes seconds compared to scrubbing off buildup that’s had weeks to set in.
7. Use a Lazy Susan for Under-Sink Corners
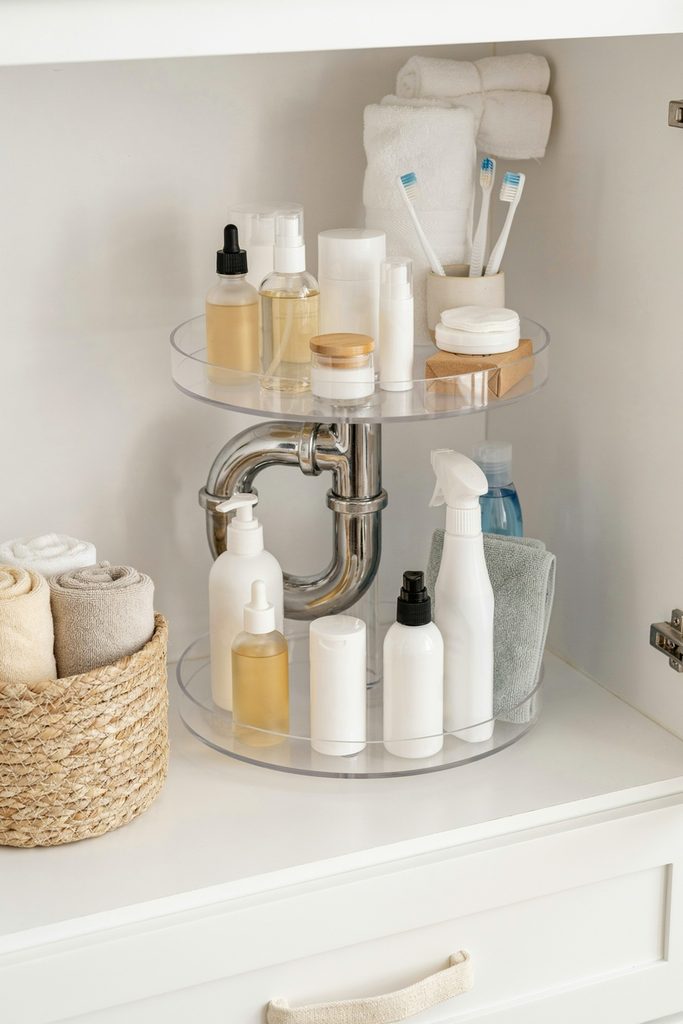
If your under-sink cabinet has an awkward back corner, which is common around plumbing, a Lazy Susan makes those forgotten corners usable again.
Corners behind pipes are exactly the kind of space that gets used as a dumping ground, since reaching back there properly is awkward enough that most people just shove things in and forget about them.
Spin it, grab what you need, spin it back, no more digging blind toward the back of the cabinet.
How to style it
Size the turntable to your cabinet’s depth, not just its width, so it doesn’t catch on the cabinet walls or the pipe itself when spinning.
A two-tier turntable is worth the extra cost if your cabinet has the vertical clearance, since it effectively doubles the usable storage in that one corner.
Pro tip
Keep daily items toward the front edge so you can grab them without spinning the whole thing.
Save the rotation for backups and occasional-use products, so the everyday reach stays fast and the turntable earns its keep for the harder-to-access items.
8. Store Backstock in Clear, Labeled Bins
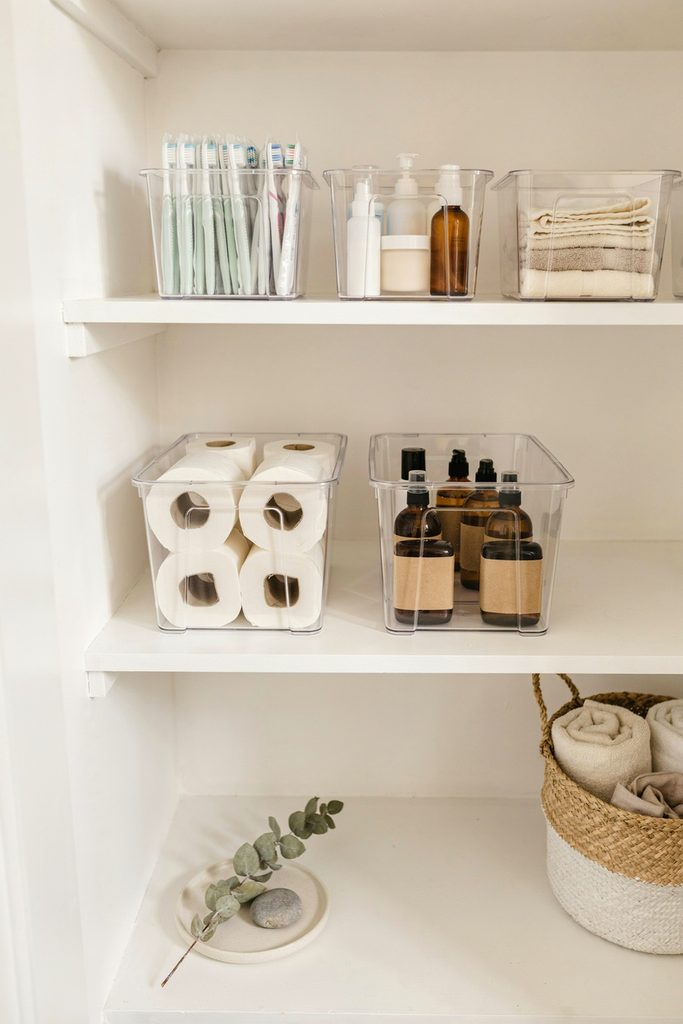
Every bathroom has backstock, extra toilet paper, spare toothbrushes, backup skincare, and it tends to get shoved wherever there’s room instead of stored intentionally.
Without a dedicated spot, backstock ends up scattered across multiple cabinets, which is exactly how you end up buying a third bottle of something you already own two of. Clear, labeled bins keep backstock contained and easy to check at a glance.
How to style it
Store backstock in a linen closet or the back of the under-sink cabinet, keeping everyday items in the more accessible front spots.
Group backstock by category rather than by when it was purchased, so a quick glance tells you exactly what you’re running low on and what you’re fully stocked on.
Pro tip
Do a quick backstock check every time you restock groceries or toiletries. It’s a lot easier to maintain a running inventory than to rebuild the whole system from scratch every few months once it’s fallen out of sync with what you actually have.
9. Use a Vanity Tray to Corral the Counter
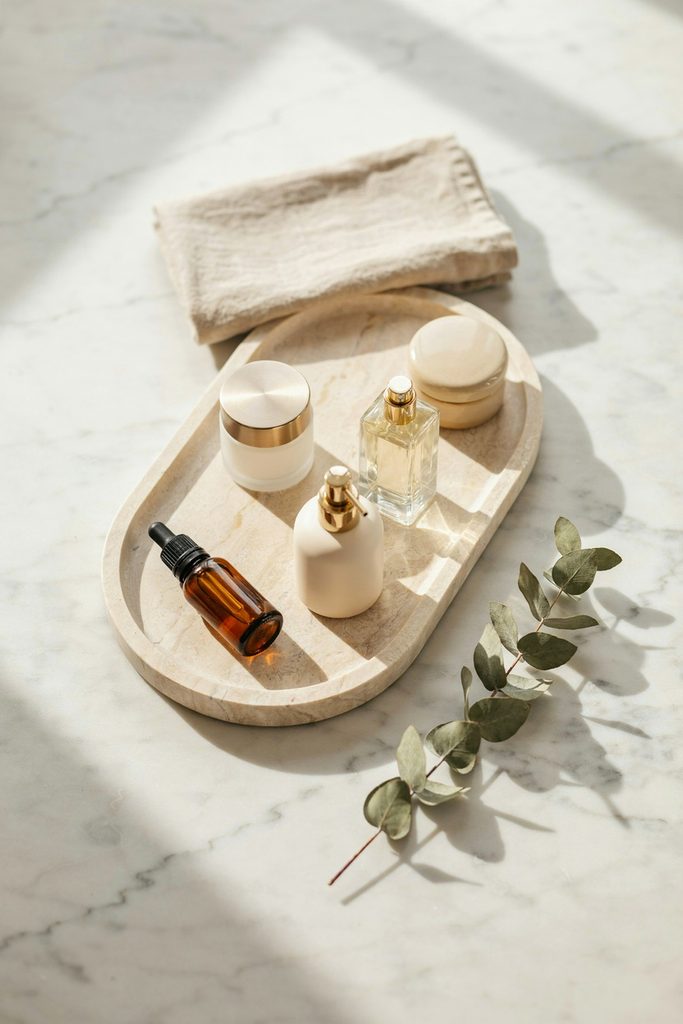
Loose bottles and tubes on a bathroom counter almost always end up looking cluttered, even when there aren’t that many of them, simply because nothing is containing them into a defined area.
A single tray keeps daily essentials contained in one spot, which makes the whole counter look tidier without actually removing anything, and it also makes wiping down the counter faster since you’re moving one tray instead of several loose items.
How to style it
Choose a tray in a material that handles moisture well, like ceramic, marble, or metal, since a porous or untreated material will eventually water-stain from daily splashes.
Group items by height, tallest in the back, so everything stays visible instead of shorter items getting hidden behind taller ones. My Stylish Bathroom Tray Decor Ideas post goes deeper into styling this specific piece.
Pro tip
Limit the tray to items you use daily. Everything else belongs in a drawer or cabinet, not on display, since the moment a tray becomes a catch-all for everything, it stops doing its actual job of keeping the counter visually calm.
10. Add a Rolling Cart for Extra Storage
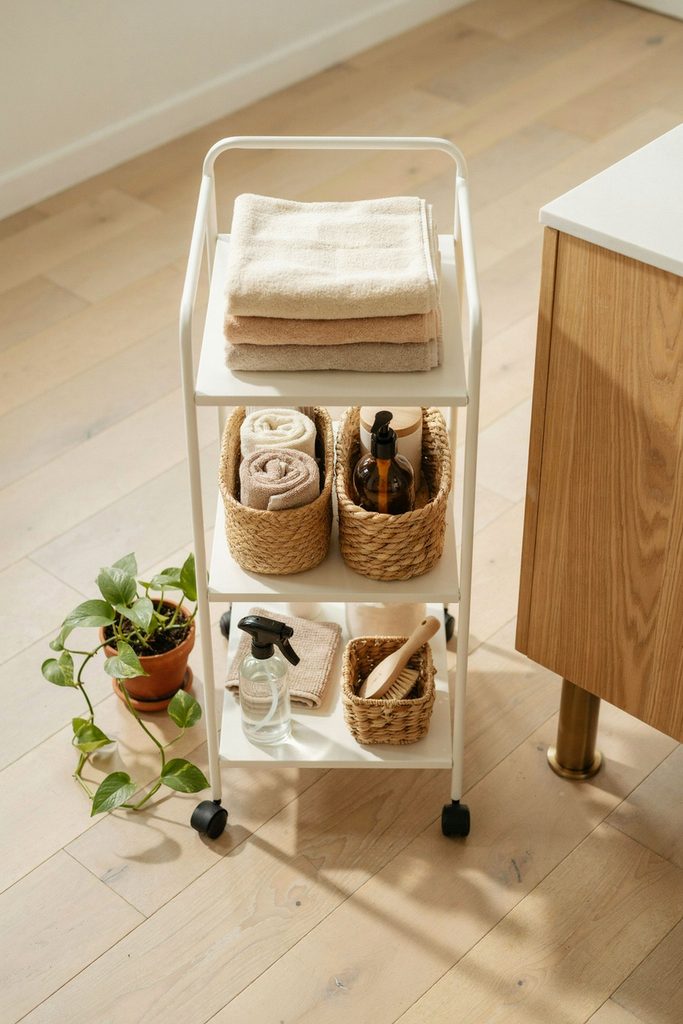
If your bathroom has even a foot of empty floor space, a slim rolling cart is one of the most flexible storage additions you can make.
Unlike built-in storage, it can move wherever you need it, next to the shower for towels, beside the toilet for extra paper, or tucked into a corner as a mini linen closet, and it can be reconfigured entirely if your storage needs change later.
How to style it
Choose a cart with a narrow footprint (12 to 15 inches wide works in most tight bathrooms) and at least one basket-style tier so loose items don’t roll around when you move it.
Metal wire carts hold up better to humidity than particleboard versions, which can swell and warp over time in a wet room.
Pro tip
Add small furniture pads to the wheels’ contact points if you’re on tile or hardwood, since constant rolling on hard flooring can scuff it over time, especially if the cart gets moved daily rather than staying in one fixed spot.
11. Use Labeled Glass Jars for Countertop Items
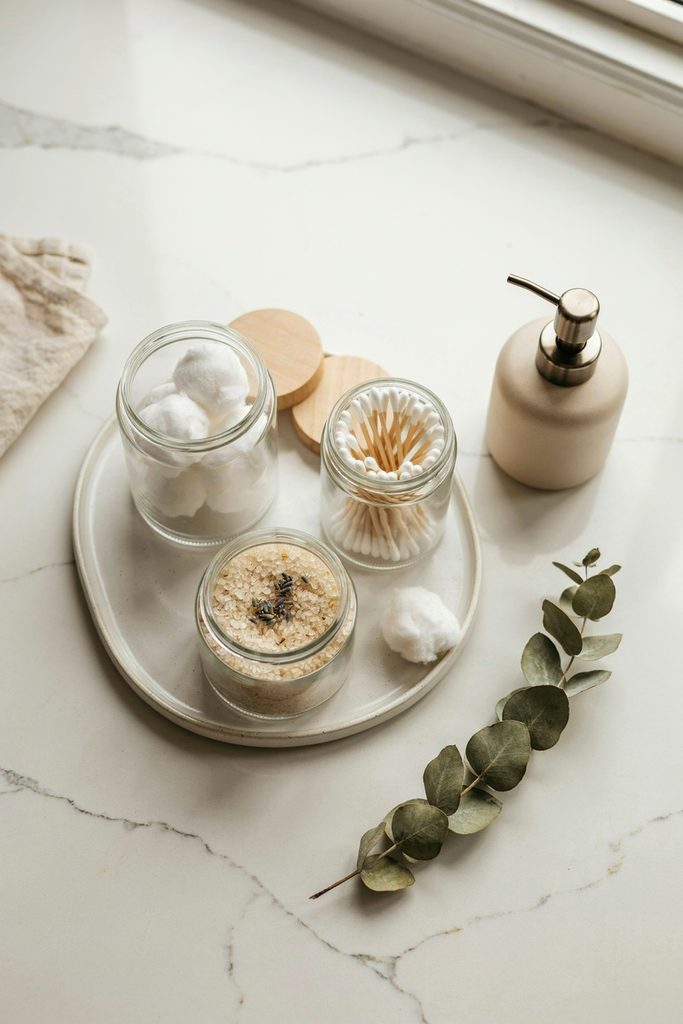
Cotton balls, bath salts, and cotton swabs look chaotic loose on a counter but surprisingly polished in a matching set of labeled glass jars.
It’s a small swap, but it’s one of the easiest ways to make everyday clutter look intentional instead of messy, and it has the side benefit of keeping these items visibly stocked so you notice when you’re running low.
How to style it
Stick to two or three jar sizes max so the counter doesn’t feel cluttered with mismatched containers, and choose jars with airtight lids for anything that could absorb bathroom humidity over time.
Simple, minimal labels read as more decor and less “storage bin,” which keeps the whole setup feeling styled rather than purely functional.
Pro tip
Refill jars from backstock rather than buying products specifically sized to fit them. It keeps the system flexible if you switch brands later, so you’re never locked into buying a particular size just to keep the jars full.
12. Install a Hook Rail for Towels and Robes
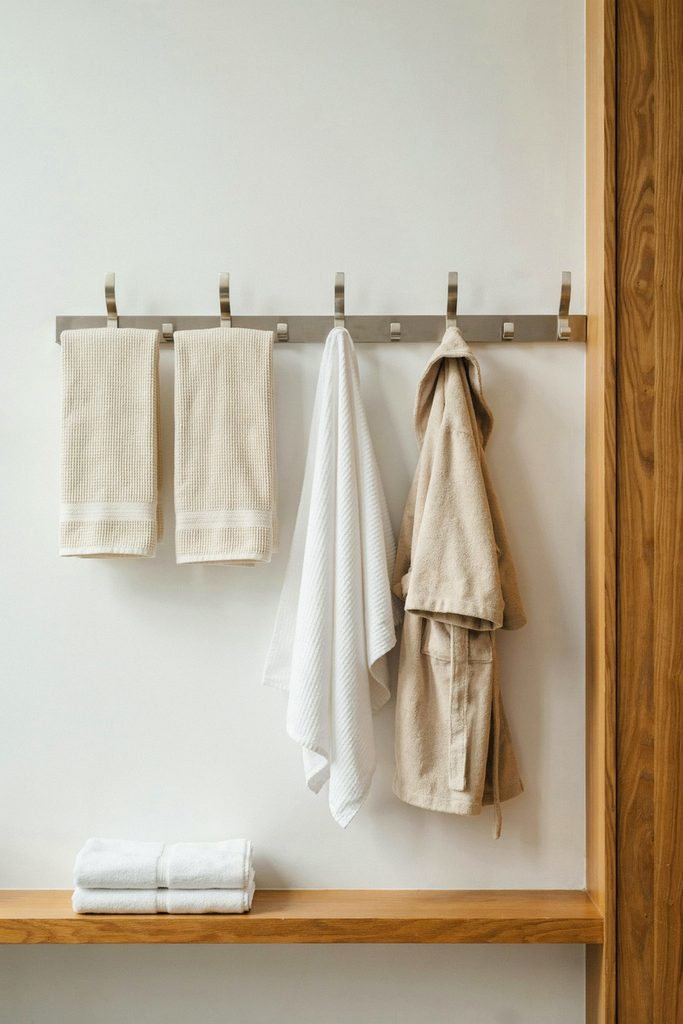
Towel bars hold exactly one towel well and everything else awkwardly, since a second towel draped over the first one rarely dries properly.
A row of hooks, by contrast, handles towels, robes, and shower caddies without anything sliding onto the floor, and it’s also faster to use, which matters more than it sounds like it should on a busy morning when nobody wants to fold a towel over a bar just right.
How to style it
Space hooks 6 to 8 inches apart and mount them at a height that works for the shortest regular user of the bathroom, since a hook mounted too high just becomes another spot towels get thrown near rather than actually hung on.
Matching finishes on the hooks and any other bathroom hardware keeps the look cohesive rather than looking like an afterthought addition.
Pro tip
Add one or two extra hooks beyond what you think you need. Guests and extra loads of wet towels always show up eventually, and having a spare hook ready means you’re not stuck draping a towel over the shower door in the meantime.
13. Corral Hair Tools with a Heat-Safe Organizer
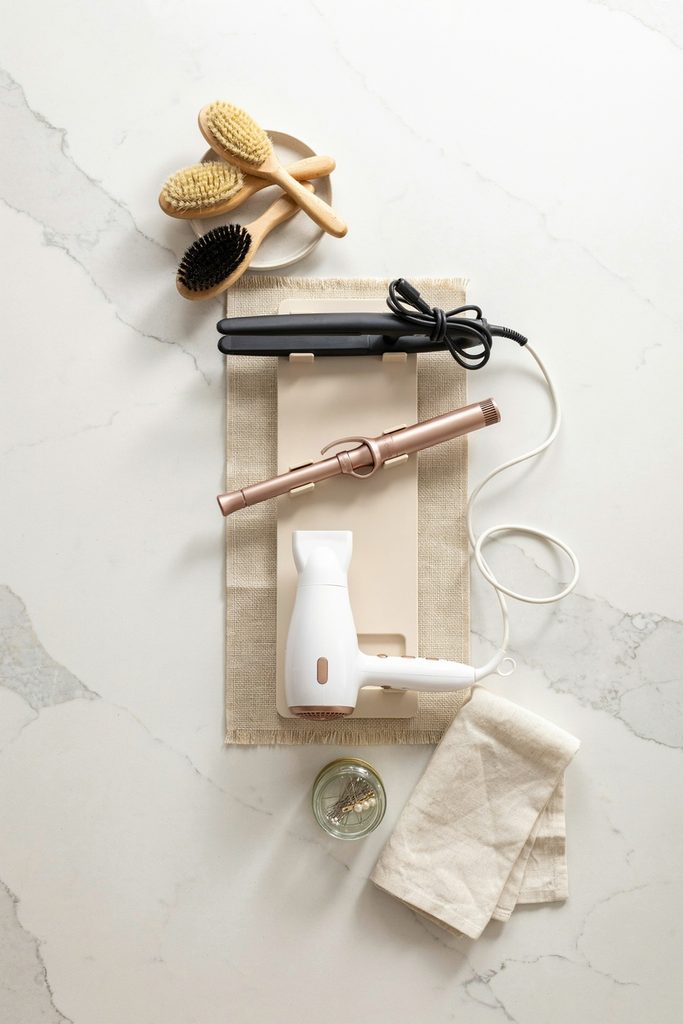
Flat irons and curling wands left loose in a drawer are a genuine safety risk if they haven’t fully cooled, and they tend to tangle their cords into a knot in the meantime, which makes them annoying to grab quickly on a busy morning.
A wall-mounted or drawer-insert heat-safe holder keeps hot tools contained and cooling safely instead of resting directly on a counter or in a drawer where they can scorch a surface or tangle with everything else.
How to style it
Mount holders close to an outlet so the cord reaches without stretching across the counter, and check that the holder’s heat rating actually matches the tools you’re using, since not all heat-safe materials are rated the same.
A holder with a heat-resistant pad underneath protects laminate or wood surfaces from scorching even during the cooling-down period.
Pro tip
Wrap cords loosely rather than tightly coiling them. Tight coils stress the internal wiring over time and shorten the tool’s lifespan, so a loose figure-eight wrap is both gentler on the cord and just as tidy in the drawer.
A Zone-by-Zone Breakdown
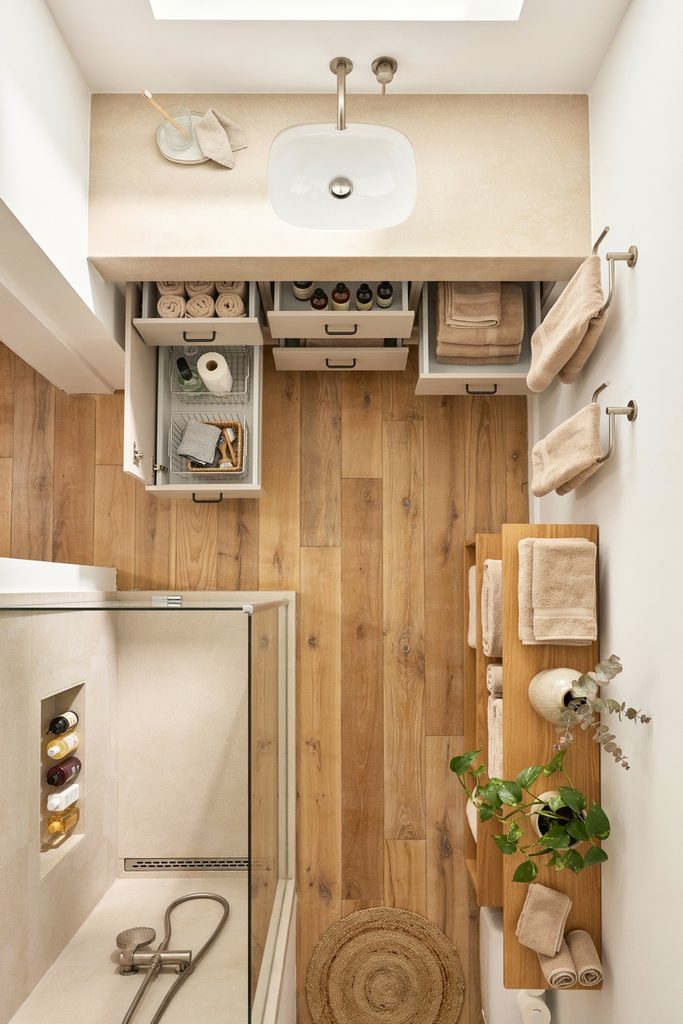
It helps to think of a bathroom as a handful of smaller zones rather than one big room to tackle at once. Trying to organize the whole space in a single pass is overwhelming and usually results in a half-finished system. Here’s how I approach each zone individually:
The vanity and counter. Keep this zone to daily essentials only, a tray, a soap dispenser, maybe a toothbrush holder. Everything else belongs in a drawer or cabinet.
This is the zone people see first, so keeping it minimal has an outsized effect on how organized the whole room feels.
Under the sink. The workhorse zone. This is where cleaning supplies, backstock, and bulkier items live.
Use the tension rod, bins, and Lazy Susan tricks above to make the most of it, since this is usually the deepest, most awkward storage in the room and benefits the most from a deliberate system.
The shower or tub. Keep this to what’s used daily. A draining caddy or built-in shelf handles shampoo, conditioner, and soap without letting bottles multiply, and anything not used at least weekly should be moved out to backstock storage instead of taking up caddy space.
The drawers. Best for small, loose items, hair accessories, nail tools, skincare. Dividers are non-negotiable here, since a drawer with no internal structure reverts to a jumbled pile within days no matter how carefully you organize it the first time.
The walls. The most overlooked storage in the whole room. Floating shelves, hooks, and door-back organizers all live here and cost you zero floor space, making this the zone with the best return for bathrooms that are tight on room to begin with.
Budget Breakdown: What to Prioritize First
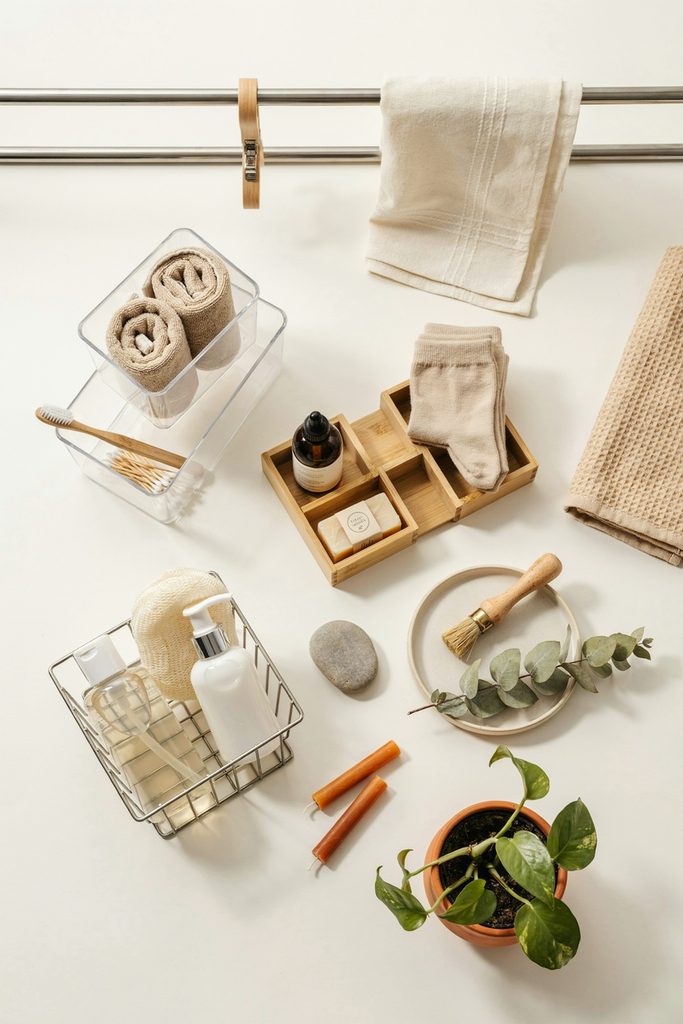
If you’re working with a limited budget, not every idea on this list needs to happen at once, and trying to do all of it in one weekend usually just leads to overspending on things you didn’t actually need yet.
Here’s roughly how I’d prioritize spending, starting with the fixes that solve the most common pain points for the least money:
Under $15 (start here): A tension rod, a set of drawer dividers, or a few repurposed containers from around the house.
These solve the most common pain points, tipping bottles and jumbled drawers, for almost nothing, and they’re a good first step before you know exactly what bigger organizers you’ll actually need.
$15 to $40 (next): Stackable bins, a proper draining shower caddy, or a vanity tray. These add real structure once the basics are handled, and by this point you’ll have a much clearer sense of what sizes and quantities actually fit your space.
$40 and up (when you’re ready): Floating shelves, a rolling cart, or a full matching bin system.
These are the finishing touches that make the room feel pulled together, but they’re the least urgent for actually solving clutter, so it’s worth waiting until the cheaper fixes are in place and working before investing here.
Mistakes I’ve Made (So You Don’t Have To)
I used to buy bins based on how they looked in photos instead of actually measuring my cabinets first, and ended up with a stack of pretty bins that didn’t fit anywhere, some too tall for the shelf, others too wide to sit two across.
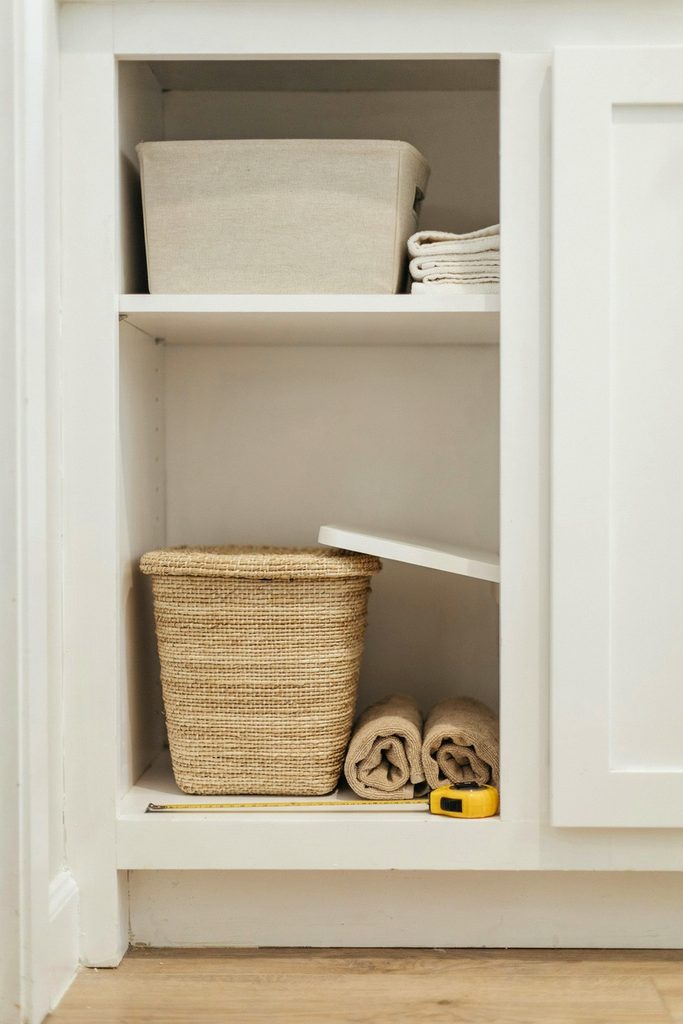
Now I measure everything, cabinet width, depth, and height, before I buy a single container, and I’ve never had to return an organizer since.
I also used to keep backup products mixed in with the ones I was actively using, which meant I never actually knew when I was running low on something until I was completely out and standing in the shower with an empty bottle.
Separating “in use” from “backstock” fixed that almost overnight, since a quick glance at the backstock bin now tells me exactly what to add to my next shopping list.
The other big one: buying a shower caddy without drainage holes. It looked sleek in the store, but within a few weeks it was holding a puddle of water under every bottle, and no amount of wiping it down kept up with how fast that buildup returned.
Drainage isn’t optional in a wet space, it’s the whole point, and I now check for it before buying anything meant to hold wet bottles.
How to Maintain It Long-Term
Organizing a bathroom once is the easy part. Keeping it that way is what actually matters, and it’s also the part most organizing advice skips over entirely.
- Do a 5-minute reset weekly. Put anything that’s drifted out of place back in its bin or drawer. This alone prevents 90% of the slow slide back into clutter, since small amounts of drift are easy to fix but compound quickly if left alone for weeks.
- Do a full product purge every few months. Expired sunscreen, dried-out nail polish, and half-used sample sizes build up fast. A quarterly check keeps things from quietly filling back up with products you’ll never actually use again.
- Restock as you go, not when you run out. If you notice you’re down to the last bit of something, add it to your list right away instead of waiting until it’s gone and you’re digging through backstock in a hurry, usually at the least convenient possible moment.
- Reassess once a year. Routines and products change. What worked for your bathroom a year ago might not fit how you’re actually using the space now, especially if a new person has moved in, a routine has shifted, or you’ve simply accumulated more than the original system was built to hold.
Key Takeaways
- Use vertical and hidden space first: door backs, under-sink corners, and the wall above the toilet are usually wasted.
- A tension rod and a few stackable bins solve most under-sink chaos on their own, and they’re the cheapest fixes on this entire list.
- Separate everyday items from backstock so the most-used spots stay easy to grab from, and so you always know what you’re actually running low on.
- Choose materials built for moisture, especially for anything living near the shower or sink, since the wrong material undoes an otherwise good system within weeks.
- A quick, regular reset keeps an organized bathroom from sliding back into clutter far better than any one-time deep clean ever will.
Frequently Asked Questions
What’s the cheapest way to start organizing a bathroom? A tension rod under the sink and a few repurposed containers from around the house cost almost nothing and solve the two biggest problems: tipping bottles and loose clutter. Start there before spending on anything else.
How often should I reorganize my bathroom? A quick weekly reset keeps things tidy day to day, but plan on a deeper product purge every few months and a full reassessment once a year as your routine changes.
What storage materials hold up best in a bathroom? Plastic, ceramic, metal, and sealed wood all handle humidity well. Avoid cardboard, unsealed wood, and fabric bins near the sink or shower, since moisture breaks them down quickly and often introduces mold over time.
How do I organize a bathroom with no cabinet at all? Lean on floating shelves, an over-the-door organizer, and a rolling cart if there’s floor space to spare. My 10 Storage Solutions for Small Spaces post has more ideas built specifically for rooms without built-in storage.
Where should I start if my whole bathroom feels overwhelming? Pick the single most-used zone, usually the vanity or under the sink, and finish that one completely before moving to the next. Trying to tackle the whole room at once is the fastest way to lose momentum halfway through.
Final Thoughts
Bathroom organization isn’t really about buying more storage. It’s about using the space you already have more intentionally, the door, the walls, the awkward corners most people ignore.
Once I started treating those spots as real storage instead of dead space, the rest of the room got a lot easier to manage, and it’s stayed that way with just a few minutes of upkeep a week.
Start small. Pick one drawer, one cabinet, or one wall, and build from there instead of trying to overhaul the whole room in a weekend. A little bit of intentional structure goes a long way in a room this small, and it compounds fast once a few of these systems are actually in place.
If You Want More Home Organization Ideas to Try: