Free Crochet Tote Bag Pattern for Practical Everyday Use
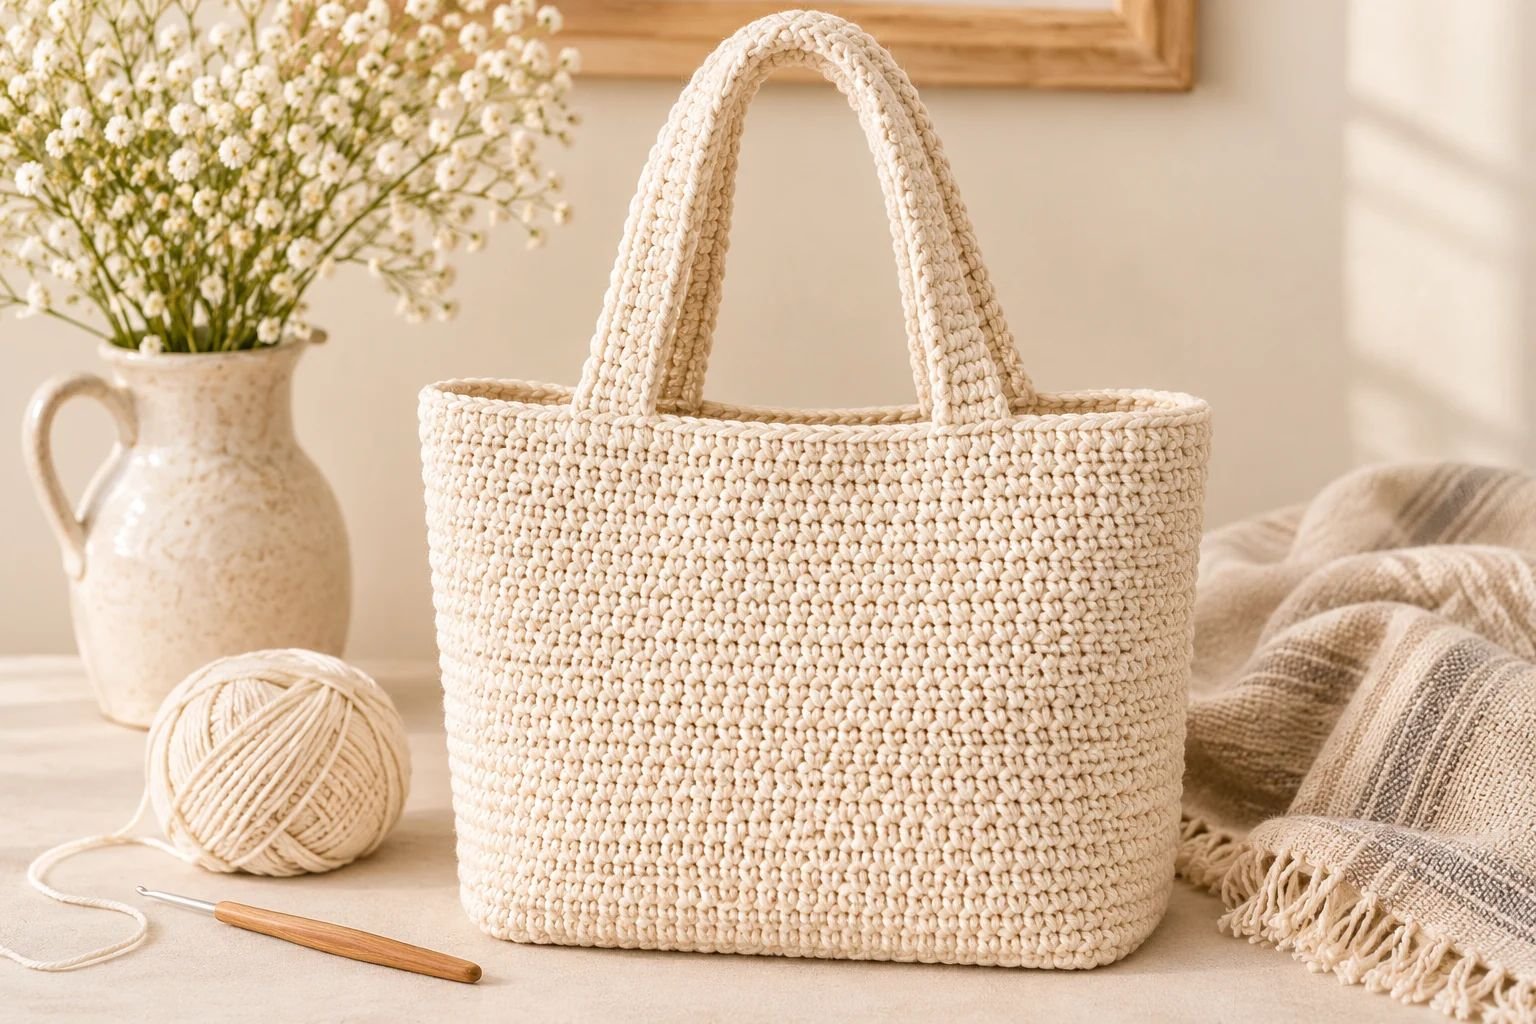
A crochet tote bag is one of those handmade projects that is just as useful as it is enjoyable to make. Whether you’re heading to the grocery store, carrying books, packing a few things for a day out, or keeping your current crochet project together, a simple handmade tote can quickly become something you reach for every day.
What I particularly love about crochet bags is that you can make them in colors and sizes that suit your lifestyle. You don’t have to spend a lot on fancy yarn or complicated supplies, either.
With affordable cotton yarn, a crochet hook, and a little patience, you can make a practical bag that looks beautiful and holds your everyday essentials.
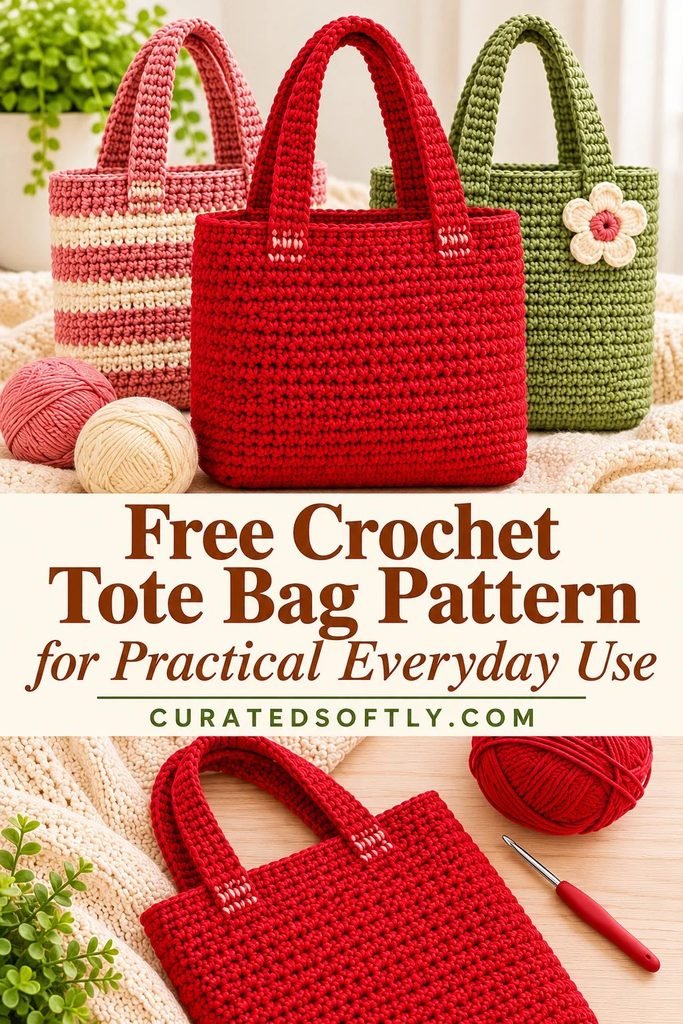
This budget-friendly crochet tote bag pattern is designed with simplicity in mind. It has a sturdy rectangular base, a roomy body, and two comfortable handles.
The basic construction makes it a lovely project if you’re ready to move beyond small crochet accessories and try making something you can actually use.
I’ll walk you through the materials, stitches, measurements, and construction step by step. You can follow the suggested size or adjust the width and height to make a smaller everyday purse or a larger shopping tote.
If you enjoy making useful handmade projects, you might also like exploring my collection of thoughtful air-dry clay gift ideas for more inspiration when creating personal gifts.
Why You’ll Love This Crochet Tote Bag
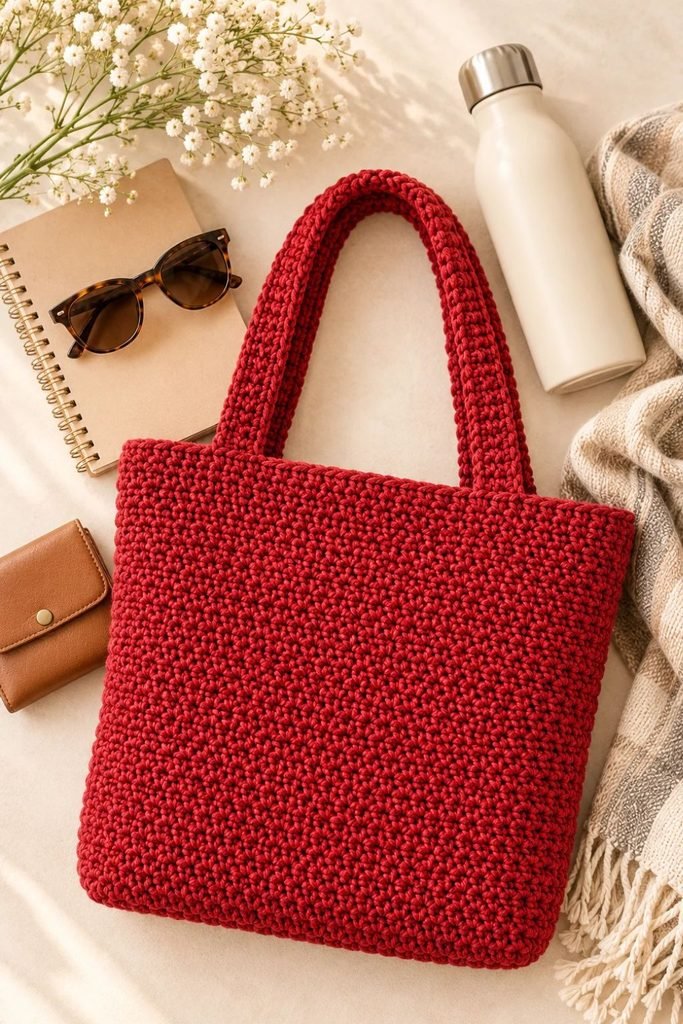
There are plenty of reasons to add a handmade crochet tote to your project list.
- Budget-friendly materials: You can make the bag with affordable yarn and a few basic crochet tools.
- Practical for everyday use: The roomy shape makes it useful for groceries, books, craft supplies, and personal essentials.
- Beginner-friendly stitches: The main construction uses basic stitches that are easy to practice.
- Customizable size: You can make the base wider, the body taller, or the handles longer.
- Reusable alternative: A sturdy crochet tote can be used repeatedly instead of relying on disposable shopping bags.
- Lovely handmade gift: A finished tote makes a thoughtful present for someone who appreciates useful handmade accessories.
I also like that you can make this bag in a neutral color for everyday outfits or choose a brighter shade when you want something more playful.
Materials You’ll Need
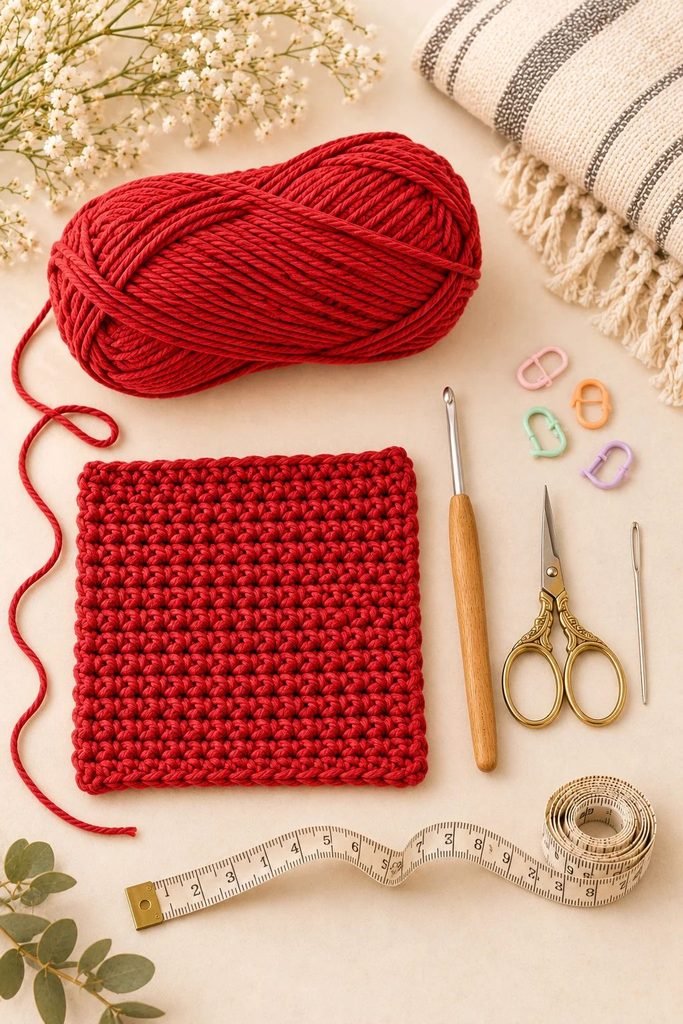
You don’t need a long list of supplies to make this crochet tote. Most of the materials are basic crochet essentials, and you may already have some of them.
1. Yarn
Choose approximately 300–400 yards of medium-weight cotton yarn (worsted weight, category 4) for the suggested medium-sized bag.
Cotton is a good choice for a tote because it generally stretches less than acrylic yarn and creates a practical fabric for carrying everyday items.
Good color options include:
- Natural cream
- Beige or oatmeal
- Sage green
- Dusty rose
- Terracotta
- Chocolate brown
- Classic black
If you’re trying to keep costs down, check how much yarn you already have before buying new skeins. You can also use two coordinating colors to create simple stripes.
2. Crochet Hook
Use a 4 mm crochet hook as a starting point. Your tension and yarn thickness may mean you need to adjust the hook size.
A slightly smaller hook can help create a firmer fabric, which is useful for a bag that needs to hold its shape.
3. Other Supplies
- Scissors
- Tapestry needle for weaving in yarn ends
- Stitch markers
- Measuring tape
- Optional fabric for lining
- Optional button or magnetic snap for closure
You don’t need a sewing machine or any expensive equipment for the basic crochet version.
Skill Level and Finished Measurements
Skill level: Beginner to confident beginner
Construction: Flat rectangular base, crocheted body, and separate handles
Suggested finished measurements:
| Part | Approximate measurement |
|---|---|
| Base width | 10 inches |
| Base depth | 3 inches |
| Bag body height | 12 inches |
| Handle drop | 9–10 inches |
These are approximate measurements rather than guaranteed finished dimensions. Your yarn, hook, and personal tension will affect the final size.
Crochet Abbreviations (US Terms)
This pattern uses US crochet terminology.
| Abbreviation | Meaning |
|---|---|
| ch | Chain |
| sc | Single crochet |
| sl st | Slip stitch |
| st | Stitch |
| sts | Stitches |
| rep | Repeat |
| FO | Fasten off |
Stitches You’ll Need to Know
Chain (ch): Yarn over and pull the yarn through the loop on your hook.
Single crochet (sc): Insert your hook into the stitch, yarn over, pull up a loop, yarn over again, and pull through both loops.
Slip stitch (sl st): Insert your hook into the stitch, yarn over, and pull through both the stitch and the loop already on your hook.
The single crochet stitch creates a relatively dense fabric, which is helpful when making a practical tote bag.
Before You Begin: Make a Small Gauge Swatch
Before starting the bag, I recommend making a small crochet swatch using your chosen yarn and hook.
Work a small square of single crochet and measure it. Check whether the fabric feels firm enough for a tote.
If the stitches are too loose and the fabric feels floppy, try a smaller hook. If the fabric is too stiff and difficult to work into, try a slightly larger hook.
You want a fabric that feels sturdy without being uncomfortable to crochet.
Budget-Friendly Free Crochet Tote Bag Pattern
This version uses a simple rectangular base worked in rows, followed by a body worked around the base. The handles are crocheted separately and attached securely to the finished bag.
Part 1: Crochet the Rectangular Base
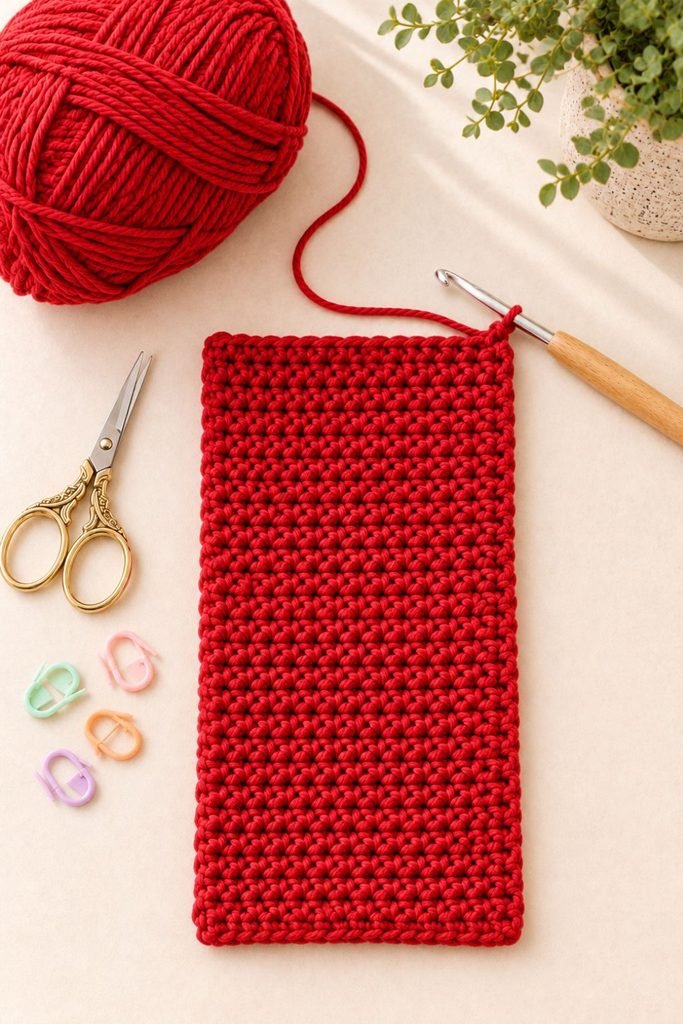
The base is the foundation of your tote, so take your time with this section. A neat, even base helps the finished bag sit more comfortably.
Step 1: Create the Foundation Chain
Using your chosen yarn and 4 mm crochet hook, make a slip knot.
Chain 31.
This gives you 30 stitches to work across, because the first chain from the hook is skipped.
Step 2: Work the First Row
Insert your hook into the second chain from the hook.
Work 1 single crochet into that chain.
Continue working 1 single crochet into each chain across.
You should have 30 single crochet stitches.
Chain 1 and turn your work.
Step 3: Build the Base
Work 1 single crochet into each stitch across the row.
At the end, chain 1 and turn.
Repeat this process until you have completed 8 rows in total.
Your base should now be a small rectangle approximately 10 inches long and 3 inches wide, depending on your tension.
If you want a wider tote, you can begin with a longer foundation chain. If you want a deeper base, simply add a few more rows.
Fasten off and weave in the loose end.
Part 2: Crochet Around the Base to Begin the Body
Now that your rectangular base is ready, you’ll begin working around its edges to create the sides of the tote.
Step 1: Attach Your Yarn
Choose one of the shorter edges of your rectangle.
Attach your yarn with a slip stitch in the corner.
Chain 1. This chain does not count as a stitch.
Step 2: Work Around the Rectangle
Work single crochet stitches along the first long edge, placing approximately one stitch into the side of each base row.
When you reach the corner, work 2 single crochet stitches into the corner area to help turn neatly.
Continue working single crochet stitches across the opposite long edge of the foundation chain.
At the next corner, work 2 single crochet stitches into the corner area again.
Work single crochet stitches along the remaining short edge, placing approximately one stitch into the side of each row.
Join with a slip stitch to the first single crochet.
You should now have a continuous border around the rectangular base.
My tip: The number of stitches along the sides can vary depending on your tension. Try to distribute them evenly so the base doesn’t pull or ripple.
Part 3: Build the Tote Bag Body
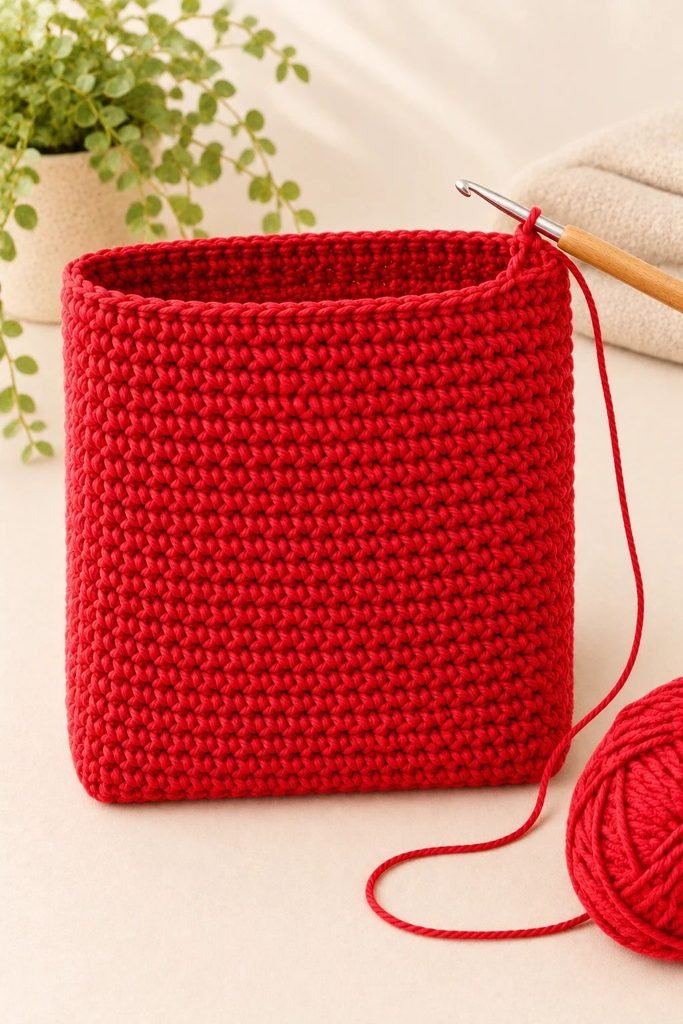
This is the easiest part of the project because you’ll repeat the same basic stitch around the bag.
Step 1: Start the First Body Round
Chain 1.
Work 1 single crochet into each stitch around the base.
Join with a slip stitch to the first single crochet.
Step 2: Continue Building the Sides
Chain 1 and work 1 single crochet into every stitch around.
Join at the end of the round.
Repeat this process until your bag body measures approximately 12 inches from the bottom of the base.
You can make it shorter for a compact everyday tote or add more rounds if you prefer a taller shopping bag.
Keep checking the height as you work. It’s much easier to adjust the length now than after attaching the handles.
Step 3: Finish the Top Edge
Once the body reaches your preferred height, work one final round of single crochet around the top edge.
Join with a slip stitch and fasten off.
Weave in the loose yarn ends neatly.
You should now have a simple open-top crochet tote with a rectangular base and straight sides.
Part 4: Crochet the Handles
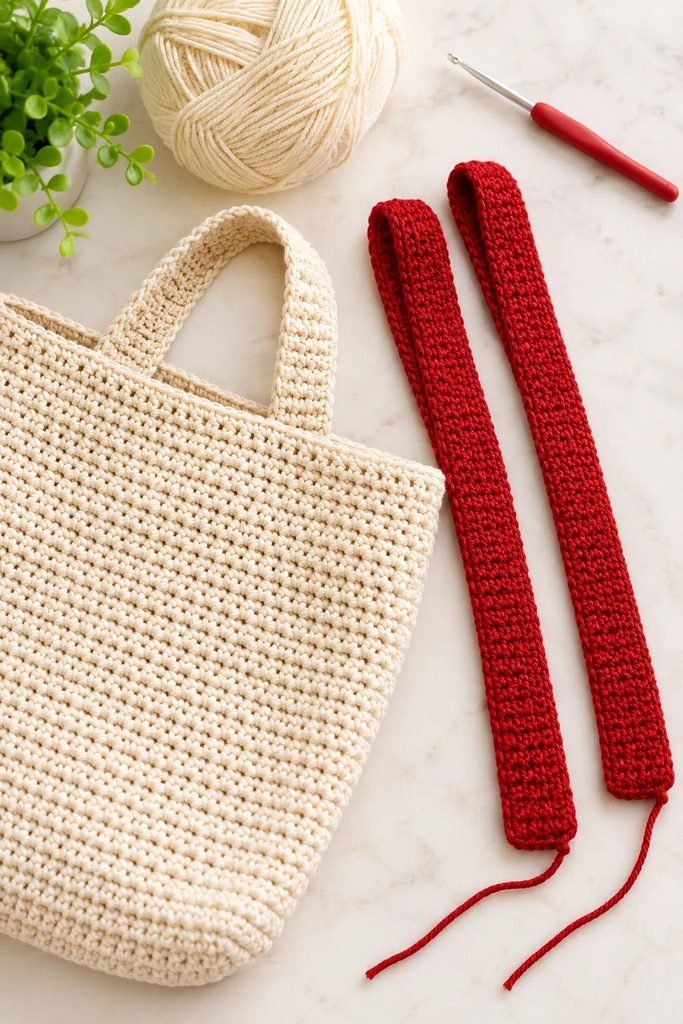
The handles are important because they need to support the weight of whatever you put inside the bag.
For this design, we’ll make two separate sturdy straps and attach them securely.
Step 1: Make the First Handle
Create a slip knot and chain 7.
Work 1 single crochet into the second chain from your hook.
Continue working 1 single crochet into each chain across. You should have 6 stitches.
Chain 1 and turn.
Step 2: Build the Handle Length
Work 1 single crochet into each stitch across.
Chain 1 and turn.
Repeat until your handle measures approximately 20 inches long.
You can make the handle longer if you prefer to carry your tote over your shoulder.
Step 3: Finish the First Handle
Fasten off, leaving a long yarn tail for sewing.
Use your tapestry needle to weave in the starting end.
Repeat the same steps to make the second handle.
Try to make both handles the same length and width so your tote hangs evenly.
Part 5: Attach the Handles
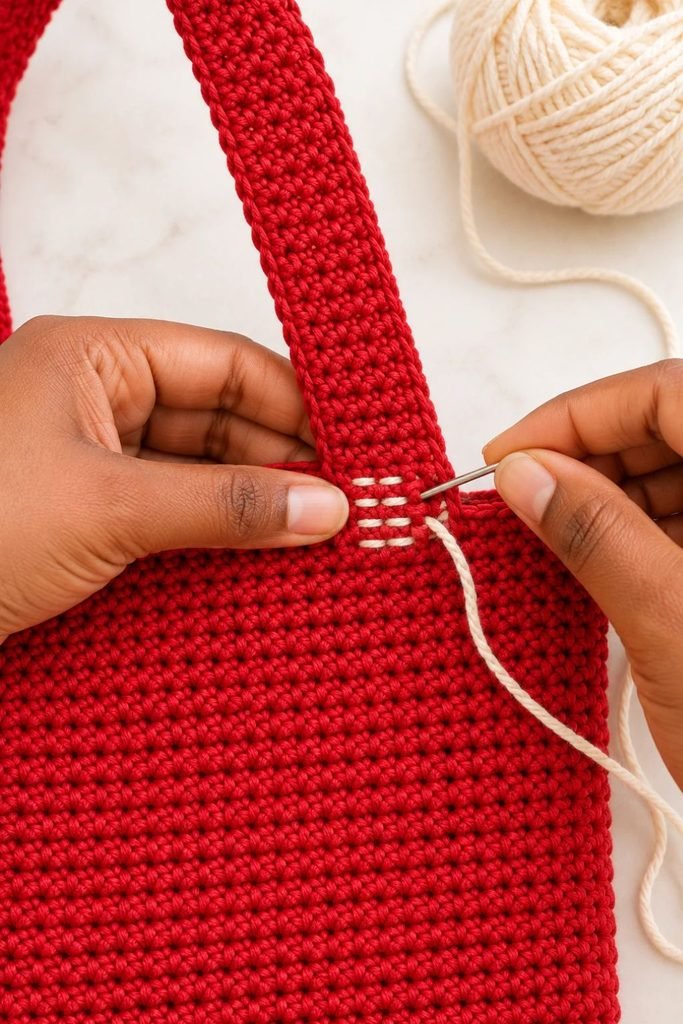
Lay your bag flat and identify where you want the handles to sit.
For a balanced tote, place one handle near each side of the opening.
Use stitch markers to hold the handles in position before sewing.
Make sure the handles are not twisted and that their ends are evenly spaced.
Thread your tapestry needle with the long yarn tail from one handle.
Sew the handle securely to the inside of the bag using several passes through the handle and the top edge of the tote.
Repeat this process at the other end of the handle.
Attach the second handle in the same way on the opposite side.
Take your time with this step. Handles experience a lot of pulling when the bag is in use, so secure stitching is important.
Once all four handle ends are attached, weave in the remaining yarn tails.
Your crochet tote bag is now complete!
How to Make Your Crochet Tote Bag Stronger
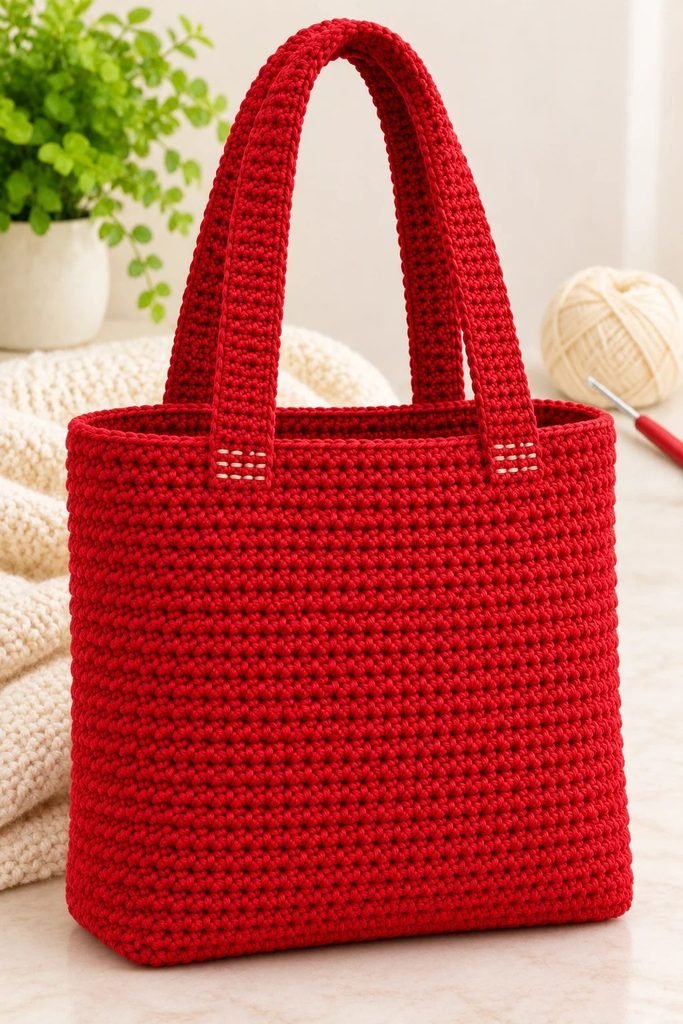
A crochet tote is useful, but its durability depends on the yarn, stitch tension, base, and handles.
Here are a few ways I would improve the structure before using the bag regularly.
Choose Cotton Yarn
Cotton yarn is a good option because it generally holds its shape better under everyday use than many soft acrylic yarns.
If you want a bag for carrying books or shopping, avoid yarn that feels extremely stretchy.
Use a Smaller Hook if Necessary
If your stitches are too loose, try a smaller hook to create a denser fabric.
You don’t want large gaps between stitches if you plan to carry small items.
Reinforce the Handles
The handles are one of the most important parts of the bag.
Sew each handle end securely, using several passes through the stitches. You can also crochet a second layer for each strap if you want extra thickness.
Add a Fabric Lining
A fabric lining is optional, but it can make the tote more practical.
A lining helps prevent small objects from slipping through stitch gaps and reduces the amount of stretching caused by heavier items.
Choose a lightweight cotton fabric and sew it into a simple bag shape that fits inside your crochet tote.
Attach it by hand with small stitches around the upper edge.
Test the Bag Before Carrying Heavy Items
Before using your tote for shopping or books, place a few lightweight items inside and check how the base and handles respond.
Increase the reinforcement if the bag stretches too much or the handle attachments feel loose.
A handmade crochet tote is best treated according to the strength of its construction rather than assuming it can carry unlimited weight.
Easy Ways to Customize Your Crochet Tote Bag
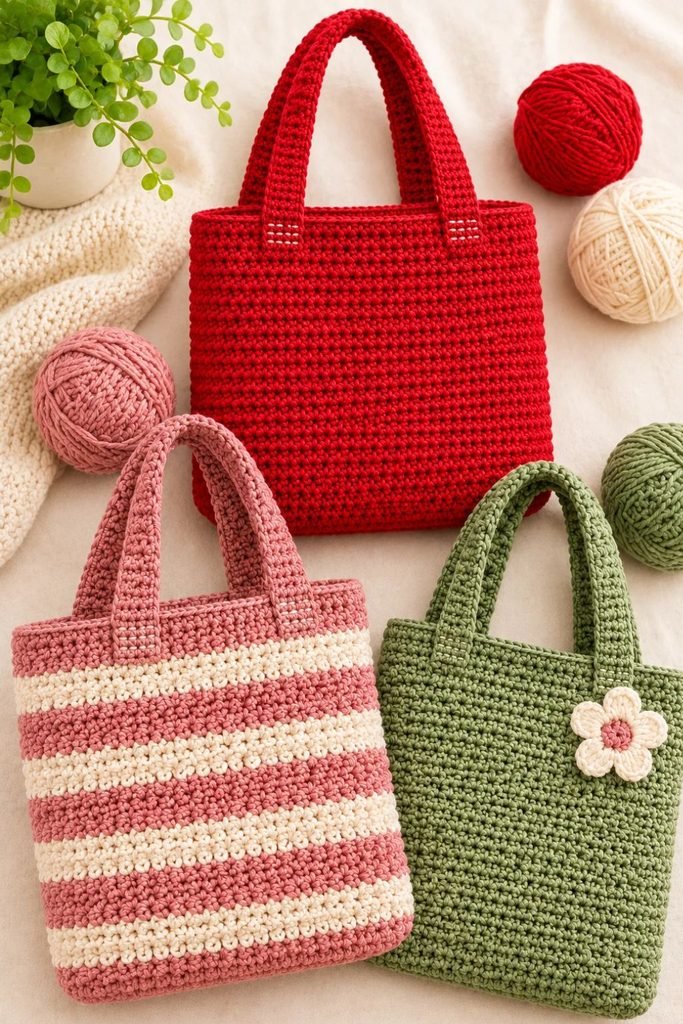
One of my favorite things about making a basic crochet tote is how easy it is to change the final look without learning an entirely new pattern.
1. Make a Neutral Everyday Tote
Use cream, oatmeal, beige, or soft taupe yarn for a simple bag that goes with almost everything.
These shades look especially lovely with casual outfits and neutral home accessories.
2. Add Stripes
You can introduce a second yarn color every few rounds to create horizontal stripes.
For example, make most of the bag in cream and add a few dusty rose or sage green rounds near the top.
This is a simple way to make the bag look more personalized.
3. Add a Crochet Flower
A small crochet flower sewn onto one corner of the tote can make the design feel more decorative.
Choose a contrasting color so the flower stands out against the main bag.
4. Make the Handles Longer
If you prefer shoulder bags, make the handles longer before attaching them.
Try the handles against your shoulder before finishing the ends so you can check the drop.
5. Add a Button Closure
If you want to keep the top of your bag more secure, sew a button near the center of the opening and crochet a small chain loop on the opposite side.
This is an optional addition, but it can be useful for carrying everyday essentials.
What Can You Carry in a Crochet Tote Bag?
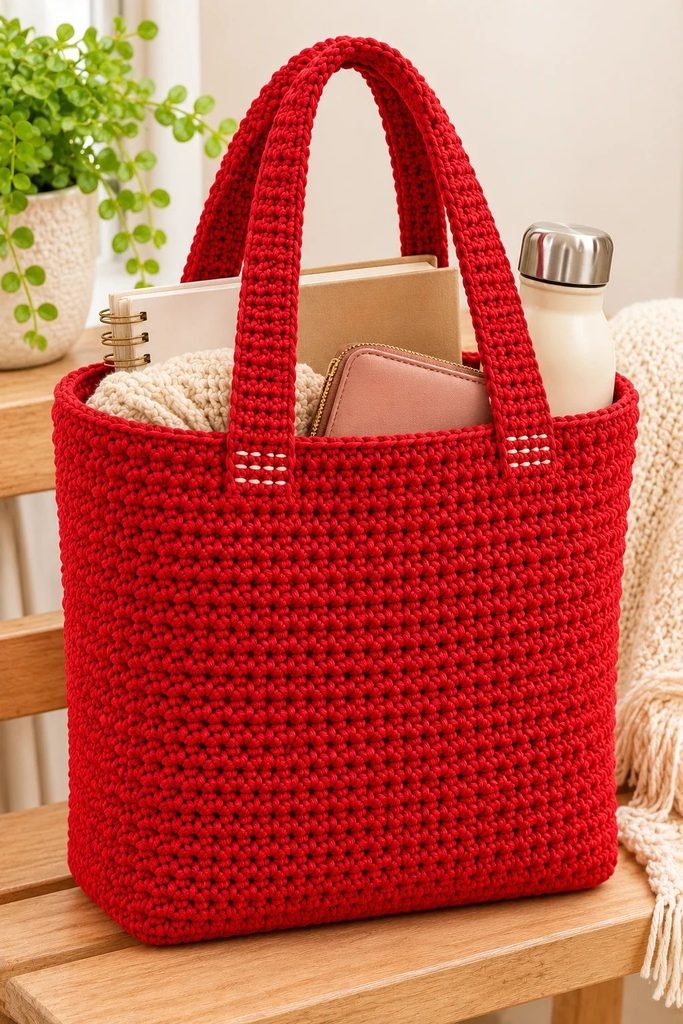
This is one of the reasons I like practical crochet projects. You can make something attractive and actually use it outside the house.
Here are a few ways to use your finished tote:
- Carry books, notebooks, and stationery.
- Pack a few groceries or market purchases.
- Keep yarn and crochet supplies together.
- Carry a water bottle, wallet, and everyday essentials.
- Use it as a casual beach or picnic bag.
- Pack a change of clothes for a short outing.
- Carry small gifts for a friend.
You could even make a matching set in different sizes: a smaller bag for everyday essentials and a larger version for shopping.
Common Mistakes to Avoid When Crocheting a Tote Bag
1. Using Yarn That Is Too Stretchy
A soft, stretchy yarn may look lovely, but it can make a tote sag when you put things inside.
Cotton yarn is a practical starting point for this type of project.
2. Crocheting Too Loosely
Loose stitches can leave noticeable gaps and make the bag less supportive.
Check your tension regularly and adjust your hook if needed.
3. Making the Base Uneven
If the base is uneven, the bag may not sit properly.
Count your stitches in each row and try to keep the edges straight.
4. Attaching the Handles Without Reinforcement
A few loose stitches may not be enough to support a bag that gets regular use.
Secure the handle ends carefully and reinforce them if you intend to carry heavier items.
5. Forgetting to Check the Finished Size
A tote can look much smaller or larger than expected depending on yarn thickness and tension.
Measure the base and body as you work rather than waiting until the end.
How to Care for Your Crochet Tote Bag
With regular use, your tote may collect dust, dirt, or marks from everyday items.
Always check the yarn label before washing because different fibers have different care requirements.
For a cotton crochet tote:
- Remove any items from the bag.
- Check for loose stitches or damaged handle attachments.
- Hand wash gently in cool or lukewarm water with a mild detergent, if the yarn label allows.
- Avoid twisting or wringing the bag.
- Press out excess water using a clean towel.
- Reshape the bag and allow it to dry flat.
Avoid hanging a wet tote by its handles because the weight of the water can stretch the fabric.
Is a Crochet Tote Bag a Good Handmade Gift?
Absolutely! A practical crochet tote makes a lovely gift because it is both decorative and useful.
You can make one in the recipient’s favorite color or choose a neutral shade that works with almost any outfit.
For a more complete present, fill the tote with a few small items such as:
- A notebook and pen
- A reusable water bottle
- Hand cream
- A small pouch
- A book
- A few self-care treats
If you enjoy creating gift sets, my guide to small gift basket ideas that look expensive but aren’t has more ideas for combining simple items into a thoughtful present.
You could even use a finished crochet tote as the reusable packaging for a handmade gift box. If that idea interests you, take a look at my guide on how to start a gift box business.
Can You Sell Handmade Crochet Tote Bags?
Yes, crochet tote bags can be a lovely handmade product to sell, especially when you offer practical designs in colors people can use regularly.
Before setting a price, calculate:
- The cost of the yarn.
- Any additional materials, such as lining or buttons.
- The time it takes to crochet and assemble the bag.
- Packaging expenses.
- Selling platform or payment fees.
Don’t price your work based only on the cost of yarn. Your time and the care that goes into making each bag are part of its value.
You can also offer different sizes, color combinations, and optional lining to give customers more choices.
Frequently Asked Questions
Is a crochet tote bag suitable for beginners?
Yes. This basic design uses simple stitches and straightforward construction. If you already know how to chain and single crochet, you can work through the pattern at your own pace.
What is the best yarn for a crochet tote bag?
Cotton yarn is a good choice because it is generally durable and less stretchy than many acrylic yarns. Medium-weight cotton is a practical starting point for an everyday tote.
How much yarn do I need?
For the suggested medium-sized design, allow approximately 300–400 yards of medium-weight yarn. The exact amount depends on your hook, tension, handle length, and finished bag size.
Can I make the tote bag bigger?
Yes. Increase the foundation chain to make the base wider, add more base rows to make it deeper, or crochet additional rounds to make the body taller.
Will a crochet tote bag stretch?
It can, especially when made with stretchy yarn or loose stitches. Cotton yarn, firm tension, reinforced handles, and an optional lining can help reduce stretching.
Can I add a lining to my crochet tote?
Yes. A simple cotton lining can make the bag more practical by helping prevent small items from slipping through the stitches.
Can I make the handles longer?
Yes. Simply crochet more rows for each handle before attaching it. Check the length against your shoulder so the finished bag sits comfortably.
Can I use leftover yarn?
You can use leftover yarn as long as it is suitable for a bag and you have enough to complete the project. You could also create stripes by changing colors between rounds.
How long does it take to crochet a tote bag?
It depends on your crochet speed, yarn thickness, and the size of the bag. You may finish a simple tote over a few evenings or spread the project across several days.
Final Thoughts
I love crochet projects that combine creativity with everyday usefulness, and a simple tote bag is a perfect example.
You don’t need complicated stitches or expensive supplies to make something you’ll enjoy using. With affordable cotton yarn, a crochet hook, and a little patience, you can create a bag that works for shopping, carrying books, organizing craft supplies, or giving as a handmade gift.
The best part is that you can make the design your own. Experiment with colors, adjust the size, add a lining, or make the handles longer until you have a tote that suits your needs.
If this is your first crochet bag, start with the suggested medium size and take your time with the base and handles. Once you finish one, you’ll have a useful handmade accessory and a good foundation for trying more crochet bag designs.
Happy crocheting!