If you’re anything like me, I know you love crafts that are simple, inexpensive, and give you something beautiful to display or gift. Salt dough ornaments are one of my favorite go-to projects because they are easy to make, completely customizable, and perfect for adding a personal touch to your home, holidays, or special occasions.
What I love most is how satisfying it feels to take just a few basic ingredients, like flour, salt, and water, and turn them into charming, lasting ornaments.
You can create any shape you want, paint them, add glitter, or even personalize them with names or dates. They are not only fun to make but also make thoughtful gifts for friends and family.

Salt dough ornaments are also a fantastic activity to do with kids. I’ve spent hours in the kitchen with little hands shaping stars, hearts, and trees, and it’s always a mix of fun, creativity, and a little flour mess everywhere.
In this post, I’m going to share my step-by-step method for making perfect salt dough ornaments, including tips for shaping, baking, and finishing them so they last for years.
By the end, you’ll be ready to make your own personalized decorations that are fun, beautiful, and completely your own.
Why Salt Dough Ornaments Are So Fun and Versatile

Salt dough is one of my favorite crafting materials because it is simple, inexpensive, and gives you endless creative possibilities. You can shape it into stars, hearts, animals, letters, or anything you imagine.
I love that salt dough is kid-friendly.
Little hands can knead, roll, and cut shapes safely while learning about textures and creativity. It’s also a great way to make personalized gifts, decorations, or keepsakes that last for years.
Another reason I love salt dough is how customizable it is. You can tint the dough with food coloring, add spices or scents for a festive touch, and finish the ornaments with paint, glitter, or sealant.

Once baked or air-dried, your creations are durable and ready to display or gift.
Salt dough isn’t just fun; it’s also a practical craft. You don’t need fancy tools or expensive materials. All you need are a few ingredients from your kitchen, some creativity, and a little time.
Ingredients You’ll Need for Salt Dough Ornaments
One of the best things about salt dough ornaments is how simple and inexpensive the ingredients are. You probably already have everything in your kitchen.
I like to keep my list clear and straightforward so you can start crafting without any extra trips to the store.
Basic Ingredients
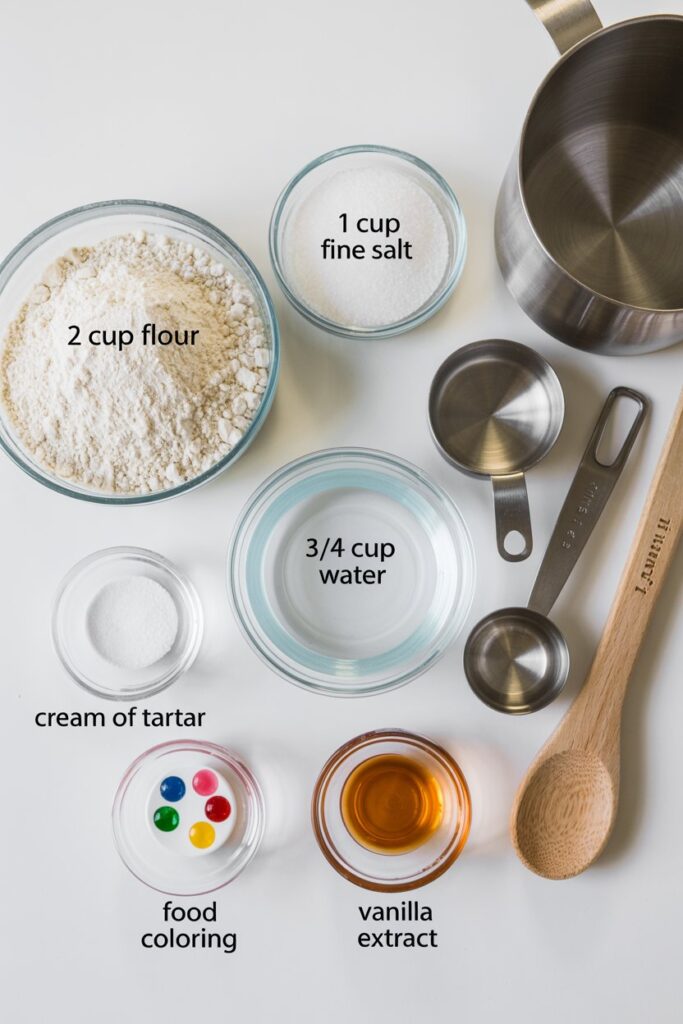
- 2 cups all-purpose flour – This is the main structure of the dough. I find that using all-purpose flour gives the dough the perfect balance of pliability and strength.
- 1 cup fine salt – Salt not only adds texture but also helps preserve the dough, making your ornaments last longer. Fine salt blends more evenly than coarse salt.
- 3/4 cup water – Start with this amount and add gradually if needed. Water brings the dough together, but too much can make it sticky, so I always add it slowly.
Optional Ingredients for Better Results
- 1 teaspoon cream of tartar – This helps make the dough more elastic and less prone to cracking while drying or baking. I always include it for ornaments I plan to keep long-term.
- Food coloring – If you want colorful dough without painting afterward, gel food coloring works best. I divide the dough into small portions and knead in a few drops for even color.
- Essential oils or vanilla extract – For scented ornaments, a few drops add a subtle fragrance that makes your creations smell as good as they look.
Tools You’ll Need
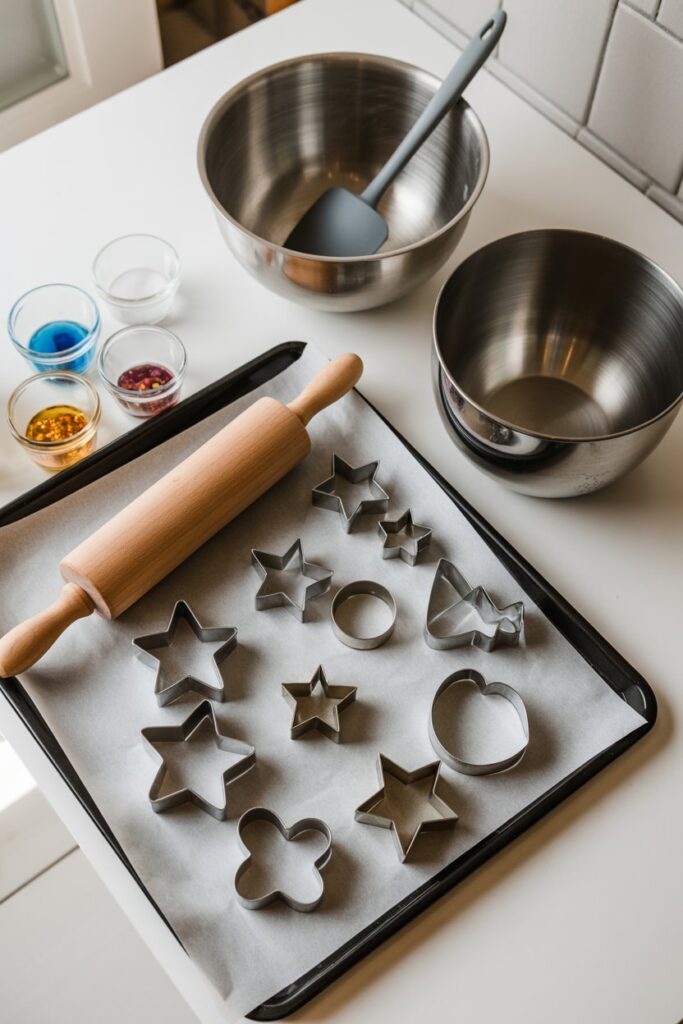
- Large mixing bowl
- Spoon or spatula for initial mixing
- Rolling pin
- Cookie cutters or shaping tools
- Baking sheet or air-drying surface
- Parchment paper
These ingredients and tools give you everything you need to make smooth, pliable dough ready for shaping into beautiful ornaments.
I always like to have a little extra flour on hand to prevent sticking while rolling, and a clean, flat surface makes working with the dough much easier.
How to Make the Perfect Salt Dough
Making salt dough is simple, but a few tricks make all the difference between a smooth, pliable dough and one that cracks or sticks. Here’s exactly how I do it:
Step 1: Combine Dry Ingredients
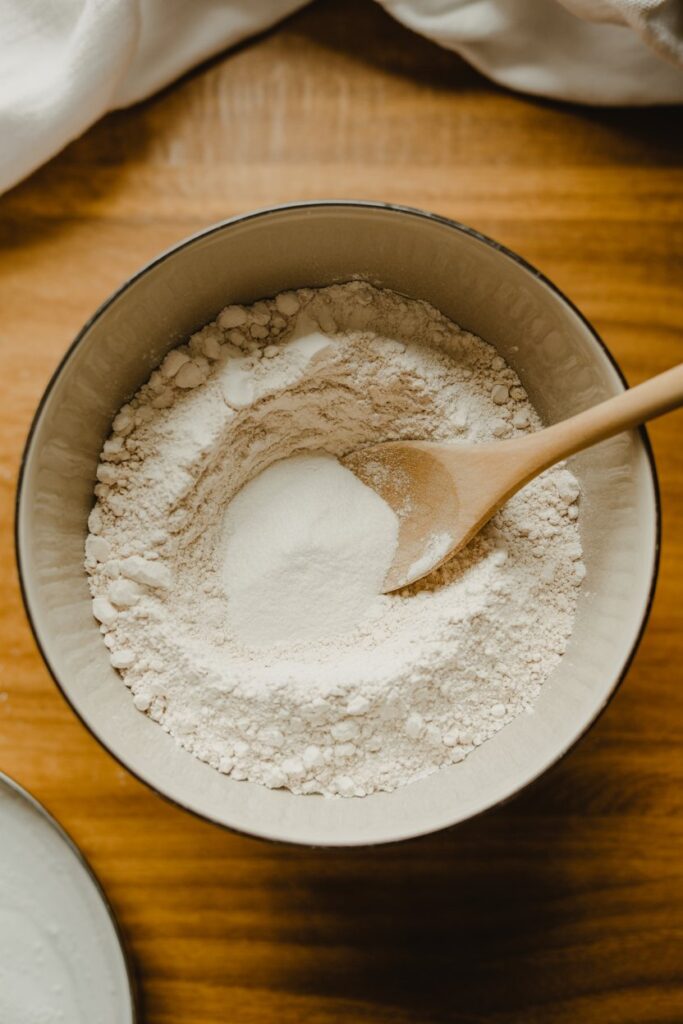
I start by adding 2 cups of all-purpose flour, 1 cup of fine salt, and 1 teaspoon of cream of tartar (if using) into a large mixing bowl.
I mix everything together with a spoon until the ingredients are evenly distributed.
This ensures your dough has a uniform texture and will hold together well when shaped.
Step 2: Gradually Add Water
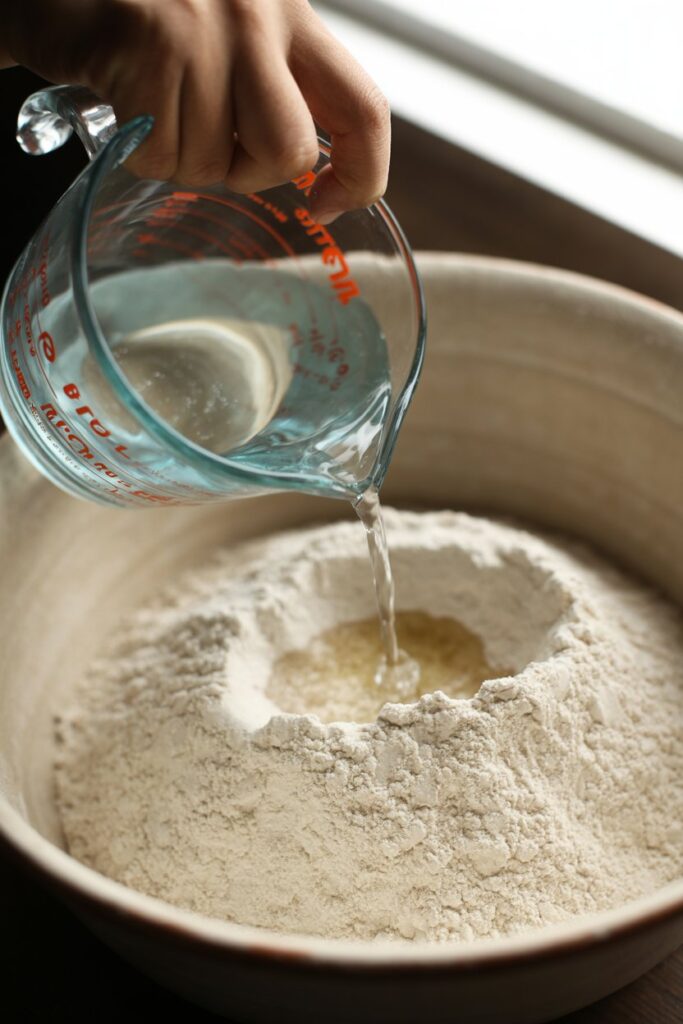
Next, I slowly pour in about 3/4 cup of water. I like to add it a little at a time while stirring, so the dough comes together without becoming sticky.
Sometimes you need a tiny bit more or less water depending on your flour or room humidity. The key is to watch and feel the dough as you go.
Step 3: Knead the Dough
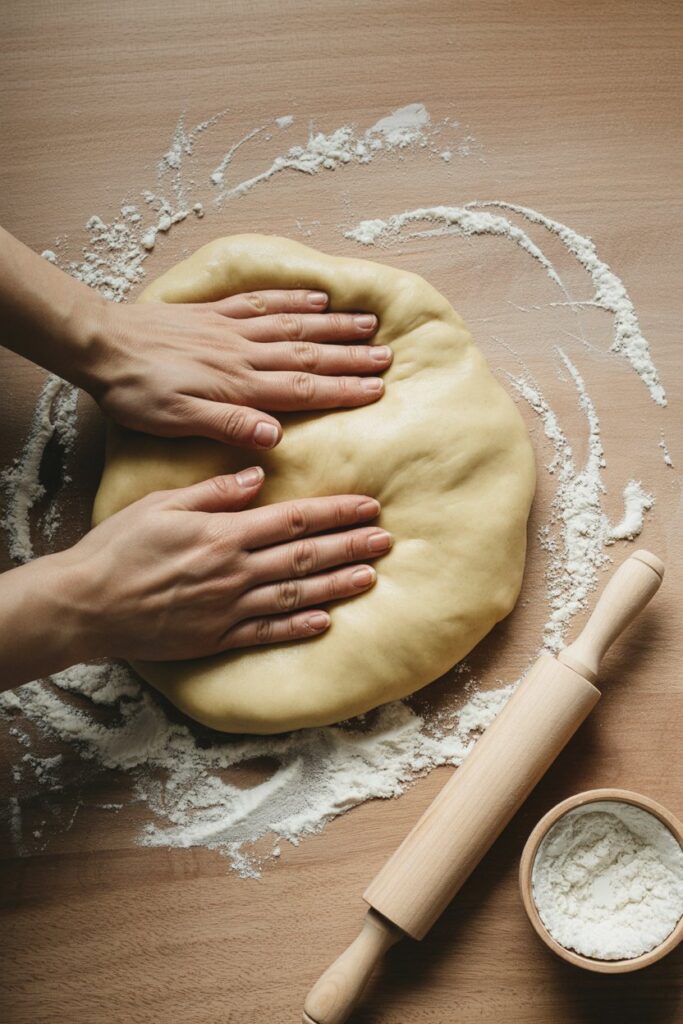
Once the dough begins to form, I transfer it to a clean, lightly floured surface. I knead it with my hands for 5 to 10 minutes until it feels soft, smooth, and elastic.
Kneading helps develop a consistent texture and makes the dough easier to shape. If it’s too sticky, I sprinkle in a little more flour; if it’s too dry, I add a teaspoon of water at a time.
Step 4: Add Color or Scent (Optional)
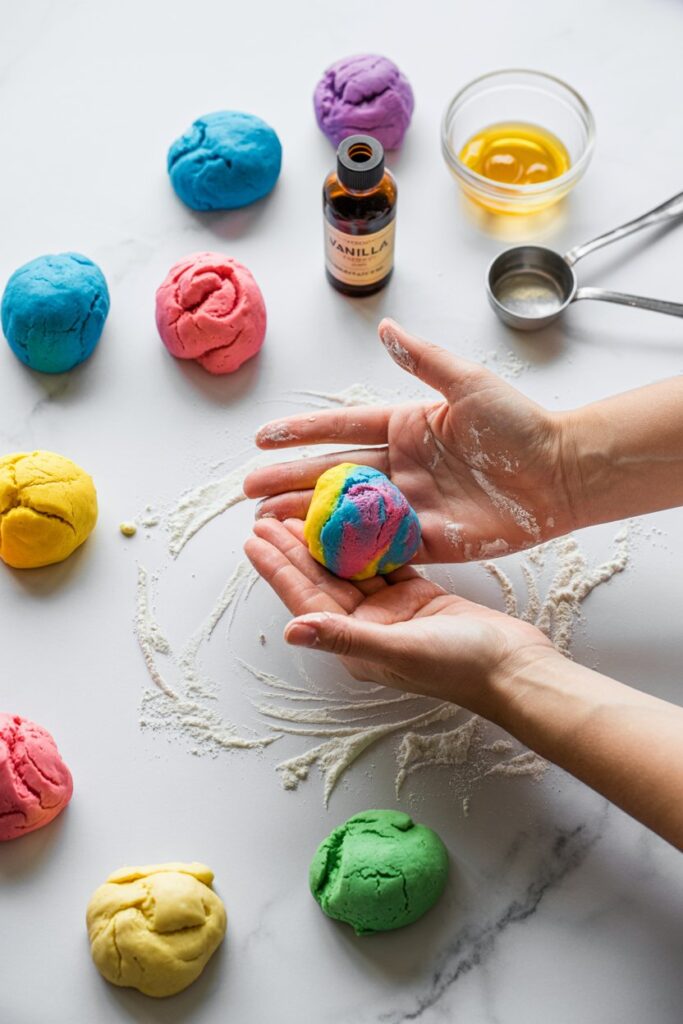
If I want colored ornaments, I divide the dough into smaller portions and knead in a few drops of gel food coloring until evenly blended.
For scented dough, I add a few drops of vanilla extract or essential oils. These extras make the ornaments more fun and personalized.
Step 5: Let the Dough Rest (Optional)
I sometimes let the dough rest for 10 to 15 minutes. It isn’t required, but it can make the dough easier to roll and shape, especially if I’m making intricate designs.
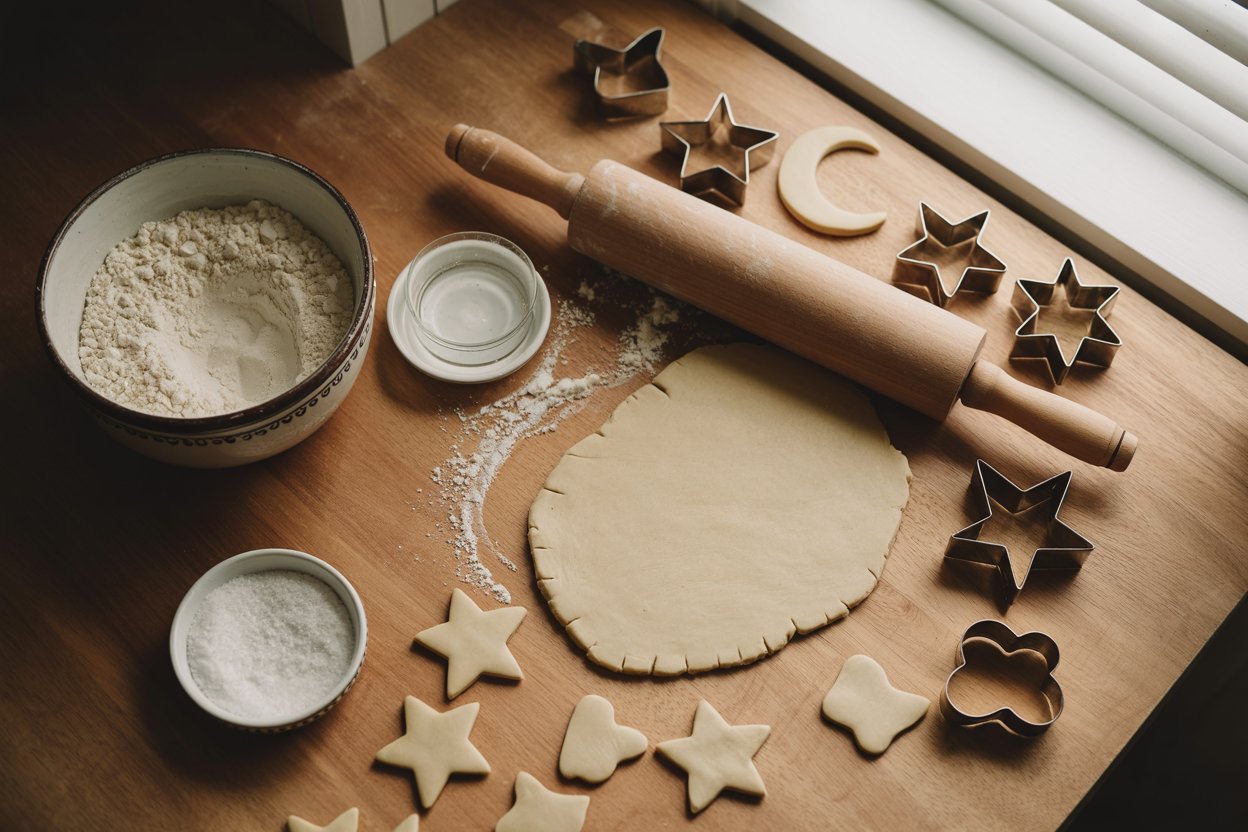
Shaping Your Salt Dough Ornaments
Once your dough is ready, the fun part begins—shaping your ornaments. This is where your creativity comes to life.
I like to make mine simple but beautiful, and I always involve kids when possible because it’s so much fun to see what they create.
Roll Out the Dough
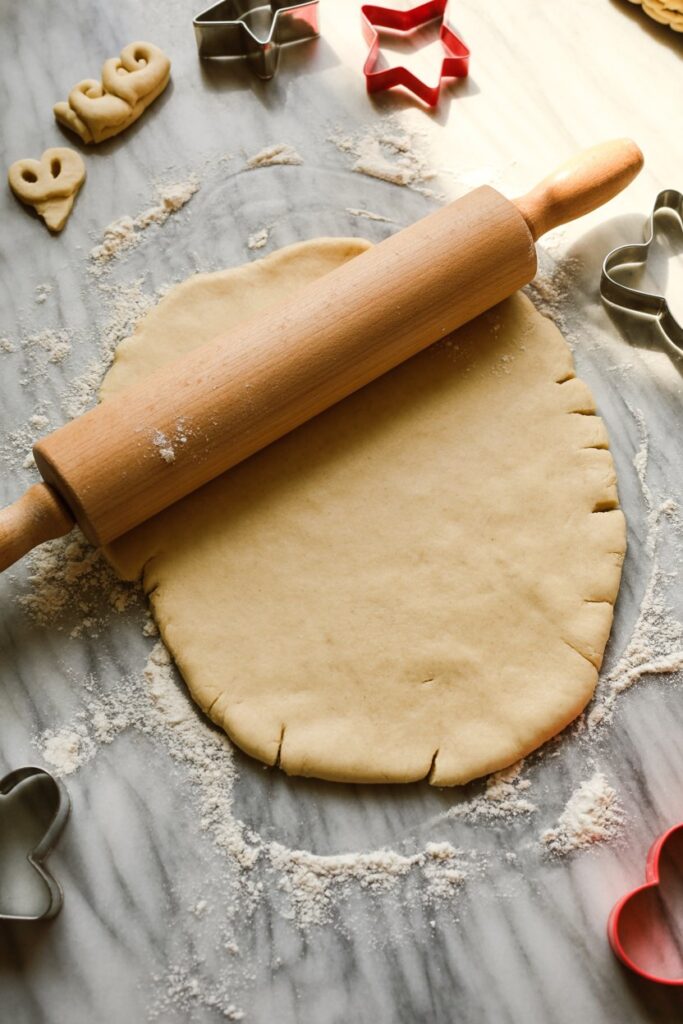
I lightly flour my workspace and rolling pin, then roll the dough to about 1/4-inch thickness.
This is thick enough to hold its shape but thin enough to bake or air-dry without cracking. If the dough sticks, I sprinkle a little extra flour on top and under the rolling pin.
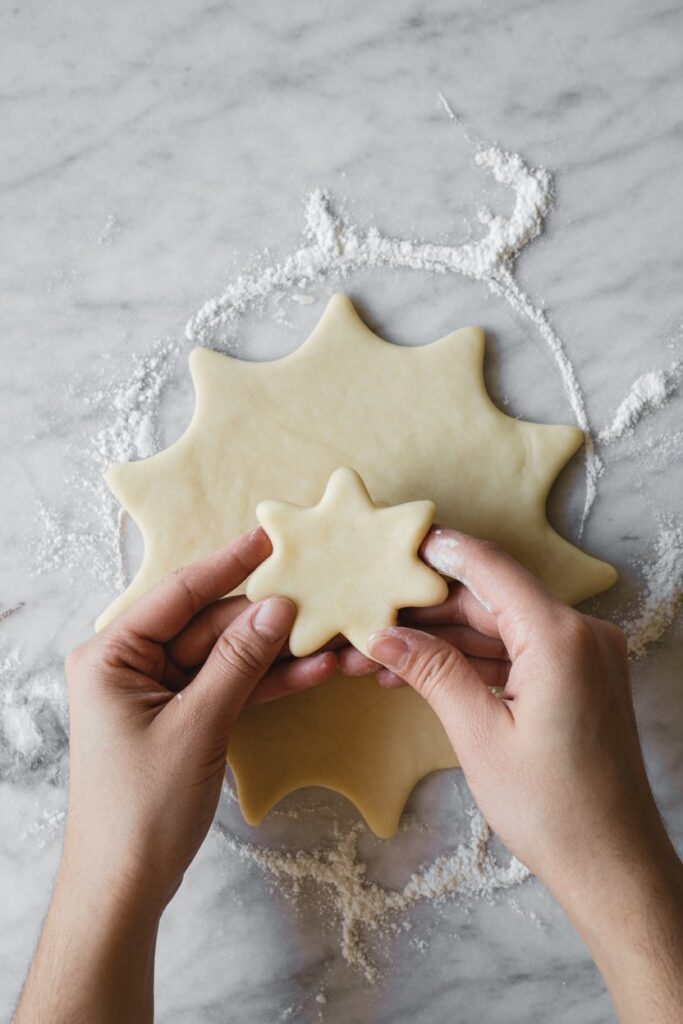
Cut Out Shapes

This is where cookie cutters shine. I usually use stars, hearts, trees, or letters for personalization.
Press the cutters firmly into the dough and gently lift the shapes. If you like freehand designs, a small knife or modeling tool works perfectly.
Create Hanging Holes
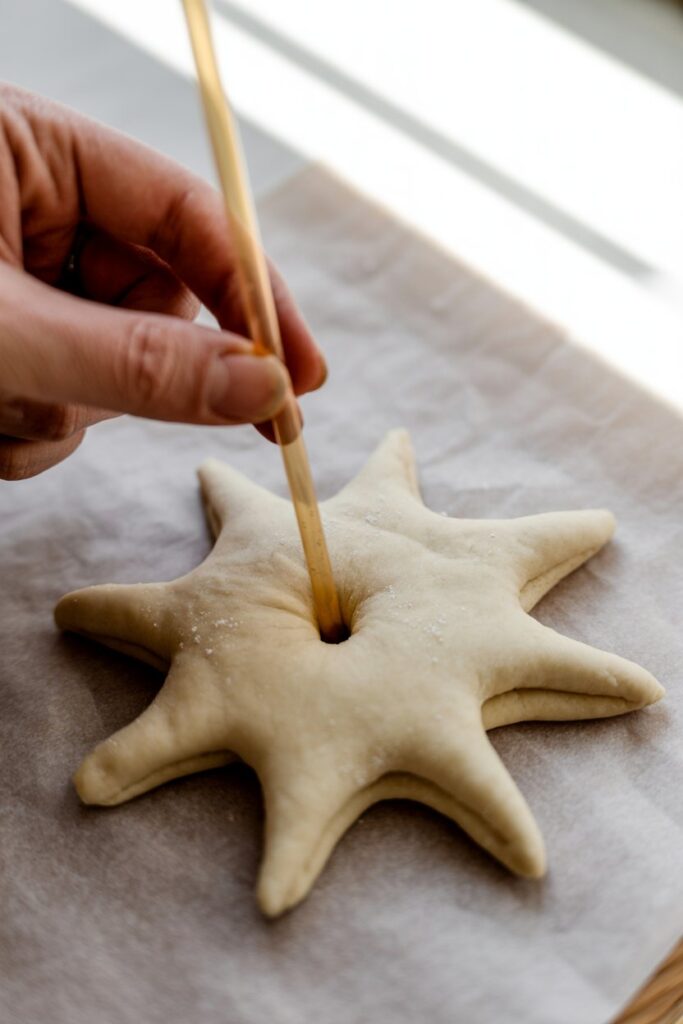
If you want to hang your ornaments, I use a straw or skewer to make a small hole near the top of each shape.
Make sure the hole is big enough for ribbon or string but not too close to the edge to prevent breaking later.
Smooth Edges
I gently smooth the edges with my fingers or a slightly damp fingertip. This removes rough spots and gives the ornament a polished look before baking or drying.
Add Texture or Imprints (Optional)
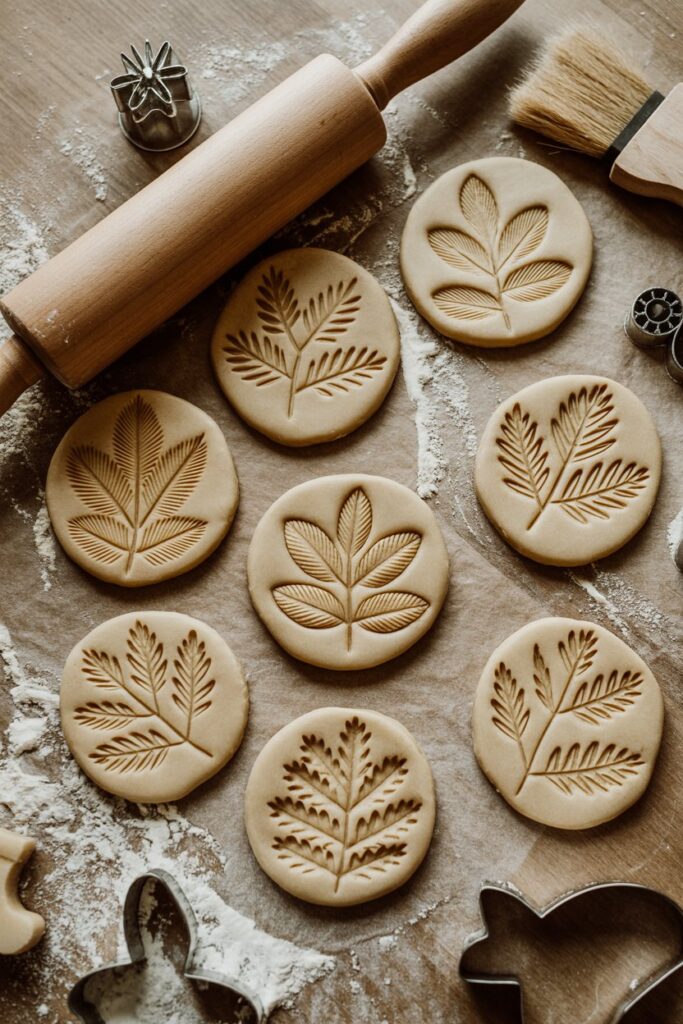
I sometimes press stamps, cookie textures, or even natural elements like leaves into the dough to add patterns. This is a great way to make each ornament unique.
Pro Tip: Work in small batches. Salt dough can dry out if left exposed for too long, so I only roll out as much as I can shape in a few minutes.
Baking or Air-Drying Your Salt Dough Ornaments
Once your ornaments are shaped, the next step is to harden them so they last. You can either bake them in the oven or air-dry, depending on your preference and time.
Air-Drying Method

If you have time and want to avoid heat, air-drying works perfectly. I place the ornaments on a parchment-lined tray and leave them in a cool, dry spot for 24 to 48 hours.
- Turn them halfway through to ensure both sides dry evenly.
- Air-dried ornaments are less likely to brown, giving you a nice pale canvas to paint on later.
Baking Method
For faster results, I bake my ornaments in the oven at 200°F (93°C) for 2 to 3 hours, depending on their thickness.
- Place the ornaments on a parchment-lined baking sheet.
- Check every hour, and flip them if needed to avoid warping.
- Once hard, let them cool completely before handling.
Check for Hardness
No matter the method, the ornaments should feel firm and dry all the way through. If they’re soft in the center, they may crack later when painted or hung. Patience is key!
Pro Tip:
Thicker ornaments take longer to dry or bake. If you’re making layered shapes or large designs, consider reducing thickness slightly or extending drying time to avoid cracks.
Finishing Touches: Painting, Sealing, and Decorating Your Ornaments
After your salt dough ornaments are fully dried or baked, it’s time to bring them to life with color, shine, and fun details. I love this part because it lets you get creative and make each ornament unique.
Painting Your Ornaments
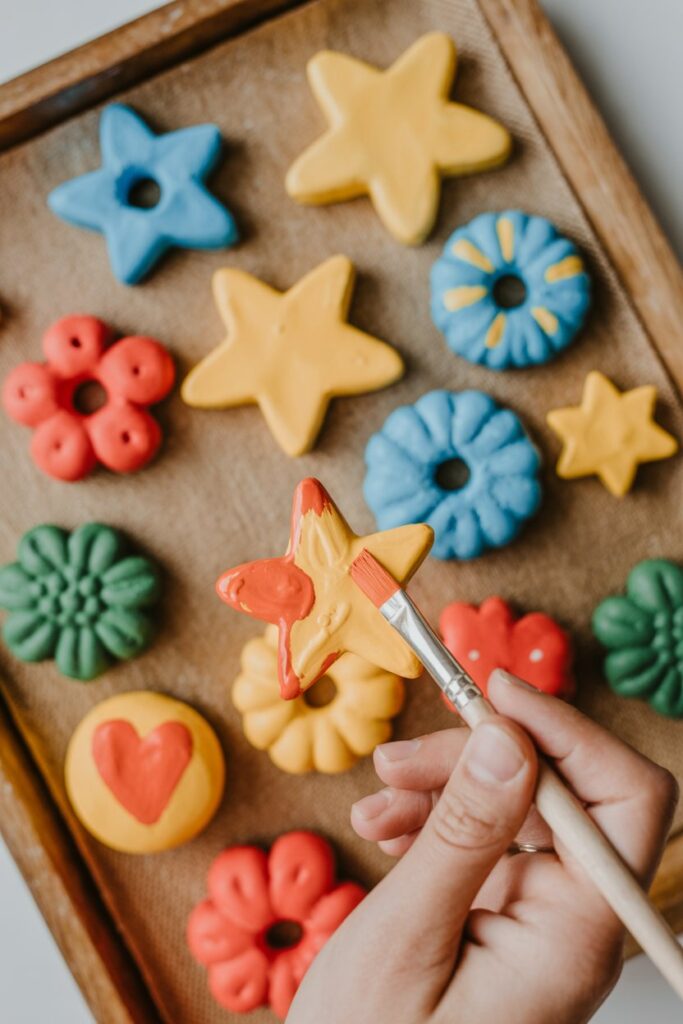
Once cooled, I start by painting the base colors with acrylic paints. I usually use a small brush for precision and a larger brush for filling in bigger areas.
- Apply thin layers of paint rather than one thick coat to prevent the paint from pooling or cracking.
- Let each layer dry completely before adding another.
- If you want metallic or glitter effects, I add them after the base layer dries.
Adding Details
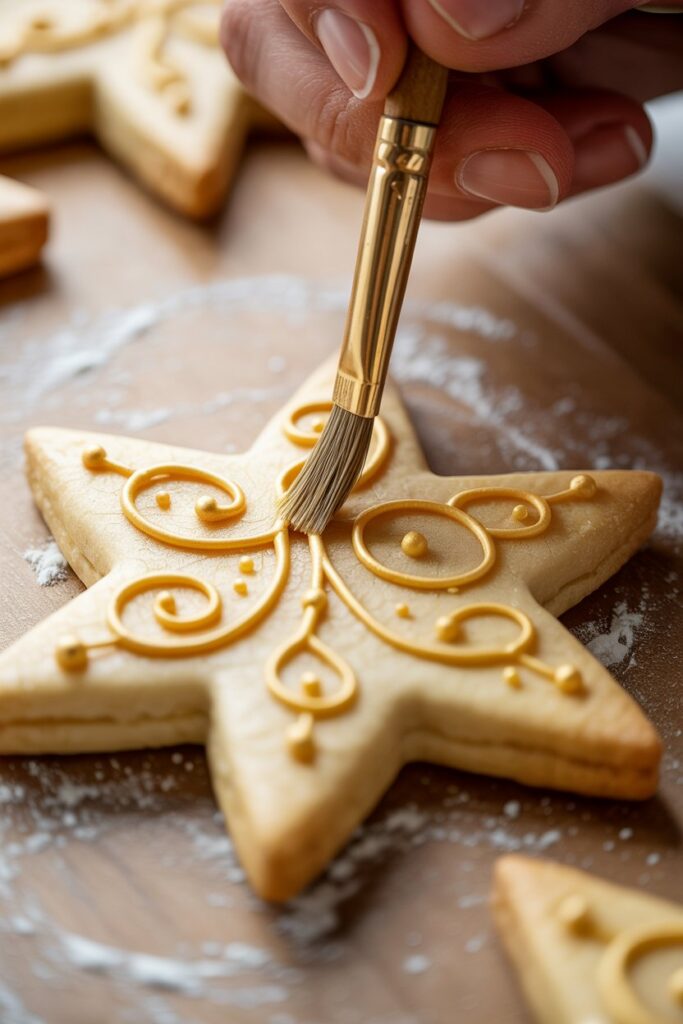
I like to use fine brushes or paint pens for patterns, lettering, or tiny designs. You can write names, draw stars, hearts, stripes, or even festive designs for holidays. This step makes your ornaments truly one-of-a-kind.
Sealing Your Ornaments
Sealing is essential if you want your ornaments to last for years. I use a clear acrylic sealer, either matte or glossy depending on the finish I want.
- Spray lightly and evenly over the entire surface.
- Let it dry completely before handling. This also protects the paint from chipping.
Adding Hanging Ribbon or String

Finally, I thread a ribbon, twine, or string through the hole we made earlier. I tie a small knot to secure it, and now your ornament is ready to hang.
- I often choose colors that match the design or season.
- For a rustic look, natural twine works beautifully; for a festive feel, metallic ribbons add a pop of shine.
Pro Tip:
If you want an extra polished look, you can lightly sand the edges before painting to remove any rough spots. This gives a smooth, professional finish.
Tips for Storing and Preserving Your Salt Dough Ornaments
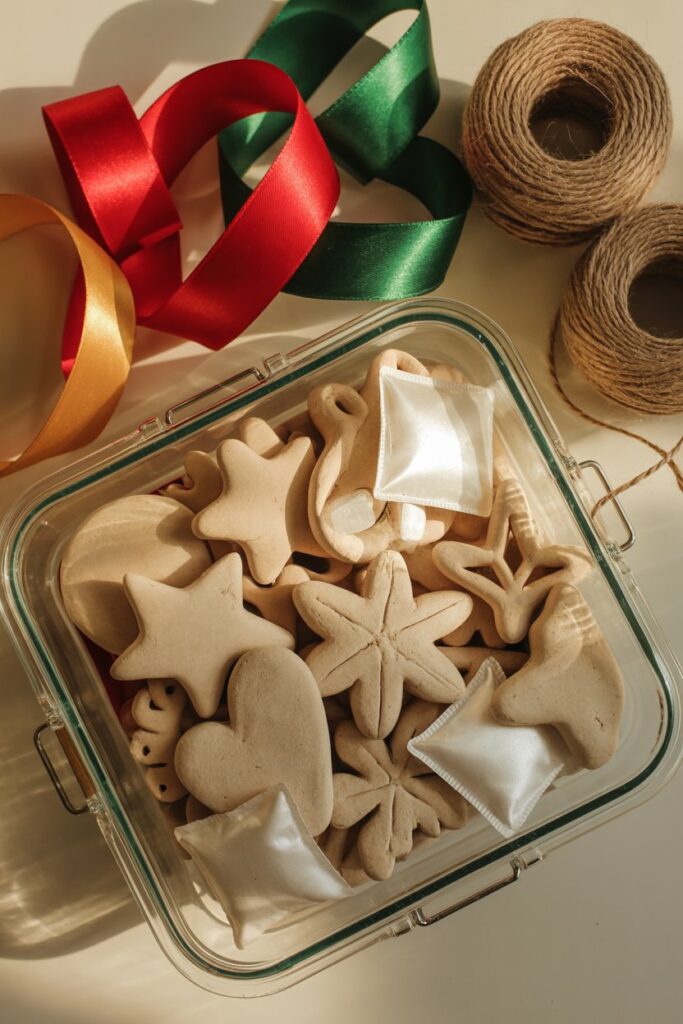
To keep your salt dough ornaments looking their best, it’s important to store them properly. I always keep mine in a cool, dry place to prevent moisture from softening the dough or causing mold.
Using airtight containers with a few silica gel packets or a bit of dry rice helps protect them from humidity.
Handle the ornaments gently, lifting them by the base rather than thin edges or hanging holes to avoid breaking.
I also keep them out of direct sunlight, as prolonged exposure can fade the paint and make the dough brittle.
If needed, a light coat of clear acrylic sealer before storing or displaying can refresh the colors and add extra protection, ensuring your ornaments last for years.
Final Thought
Making salt dough ornaments is such a fun and rewarding craft, whether you’re decorating for the holidays, creating personalized gifts, or just enjoying a creative activity at home.
By prepping your dough, storing ornaments properly, and adding finishing touches like paint and sealer, you’ll have beautiful, durable decorations ready to display or give as thoughtful gifts.
Once you try it, you’ll see just how easy and enjoyable making salt dough ornaments can be.