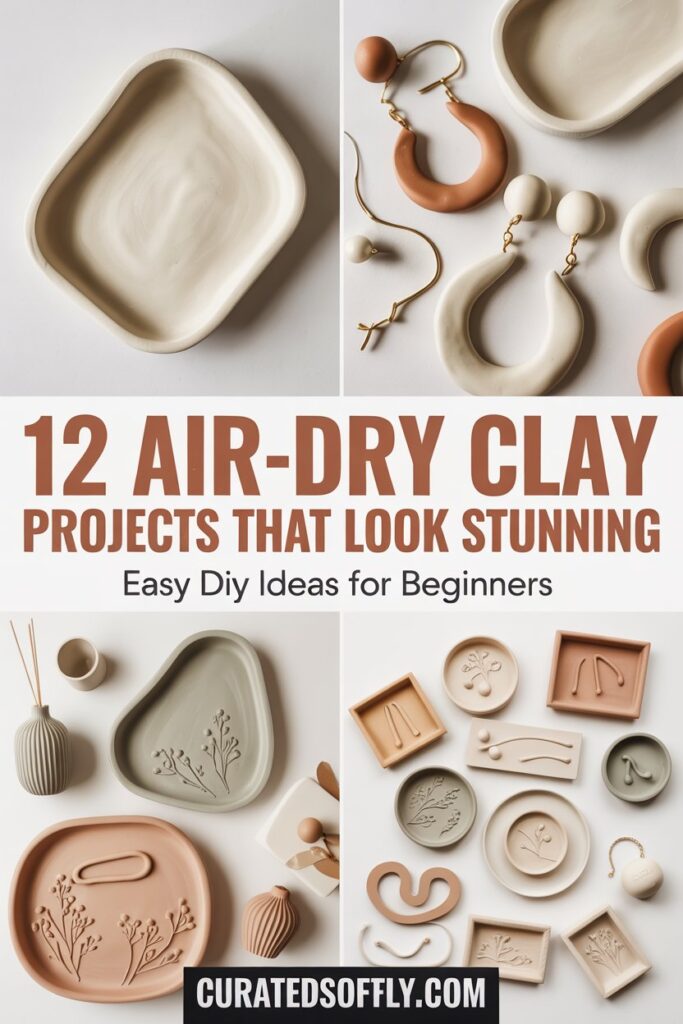
I almost didn’t start using air-dry clay at all.
I bought it, opened it, and then left it sitting there because I kept thinking the same thing you might be thinking right now. What if everything I make looks messy or cheap?
If that sounds familiar, you’re not alone.
You want something creative and relaxing, but you also want the final result to actually look good. Something you can use, display, and feel proud of.
That is exactly why I put this guide together.
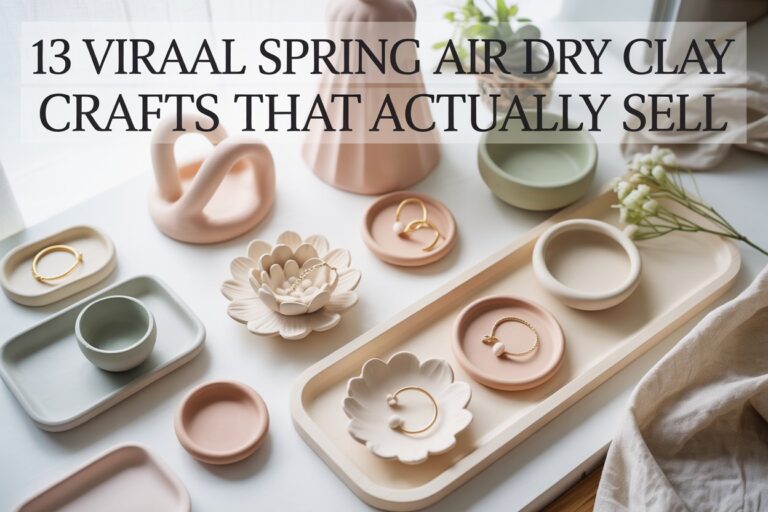
These are the projects I started with when I wanted something simple but still clean, modern, and put together.
And what I realized quickly is this. You do not need to be artistic to make beautiful pieces with air-dry clay. You just need the right kind of projects and a simple approach.
Every idea in this list starts easy, but has the potential to look like something you bought if you focus on the finishing.
That part matters more than anything.
Before we get into the projects, there is one thing I want you to keep in mind because it changed everything for me.
Air-dry clay looks better when you keep it simple.
When I first started, I tried to do too much. Too many details, too many ideas. It made everything look overworked.
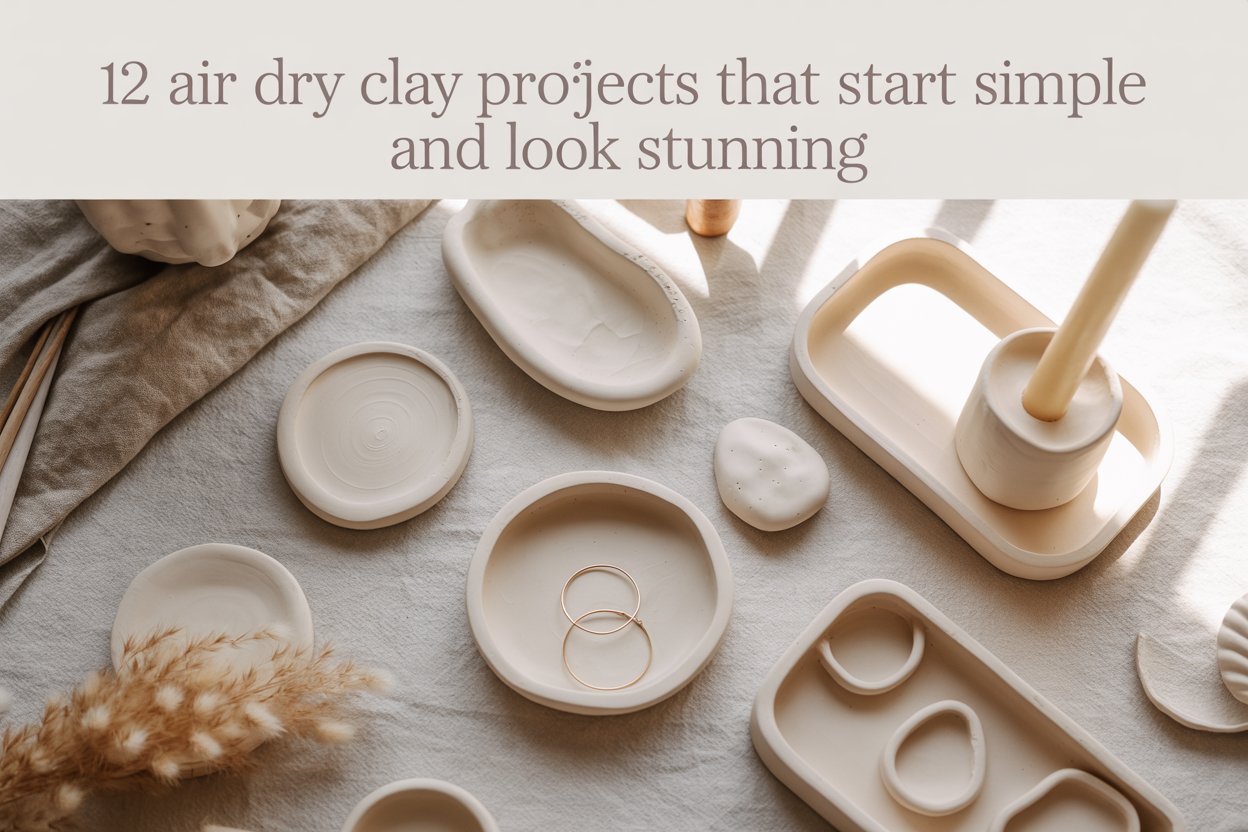
The pieces that turned out best were always the simplest ones. Clean shapes, smooth edges, soft neutral colors.
So as you go through this, do not focus on making something impressive. Focus on making something clean and finished.
That shift alone will completely change how your projects turn out.
Now let’s start with the ones that will build your confidence quickly.
Before You Start: What I Wish I Knew Earlier
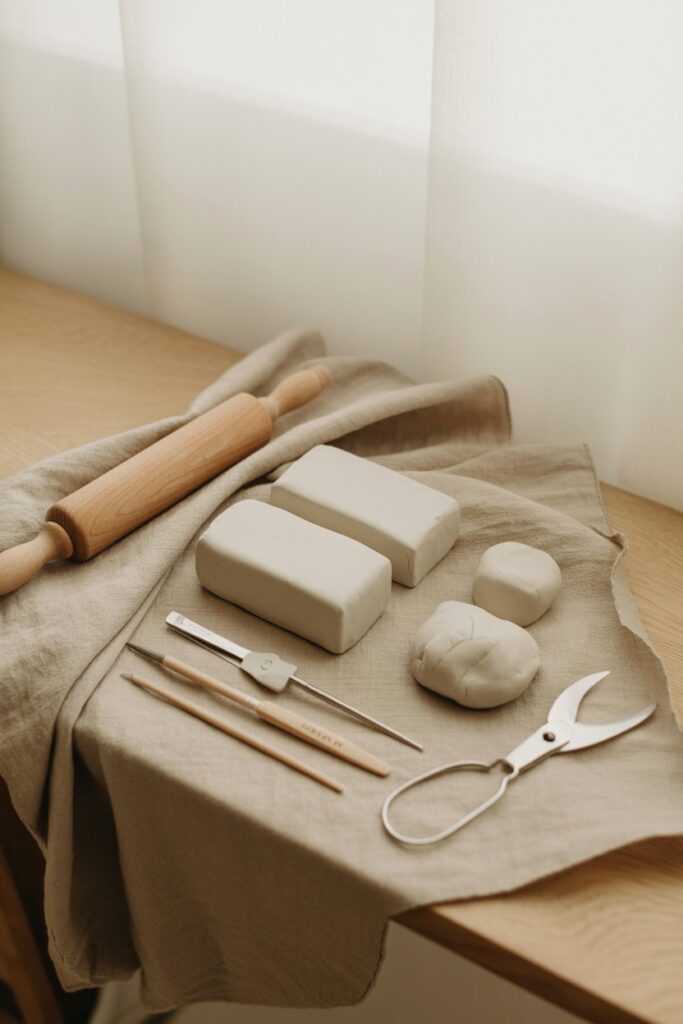
I’m going to save you from the mistakes I made.
When I started, I thought the goal was to make something impressive. So I overworked everything. Too many details, too many ideas, too much pressure.
What I didn’t realize is this:
air-dry clay looks best when you keep it simple.
The pieces that ended up looking the most “expensive” were always the ones where I slowed down, smoothed the edges, and didn’t try to do too much.
So as you go through these projects, keep this in mind:
You’re not trying to impress anyone. You’re trying to create something clean, intentional, and finished.
That shift alone will change your results.
1. Minimalist Clay Coasters (The Project That Hooks You)
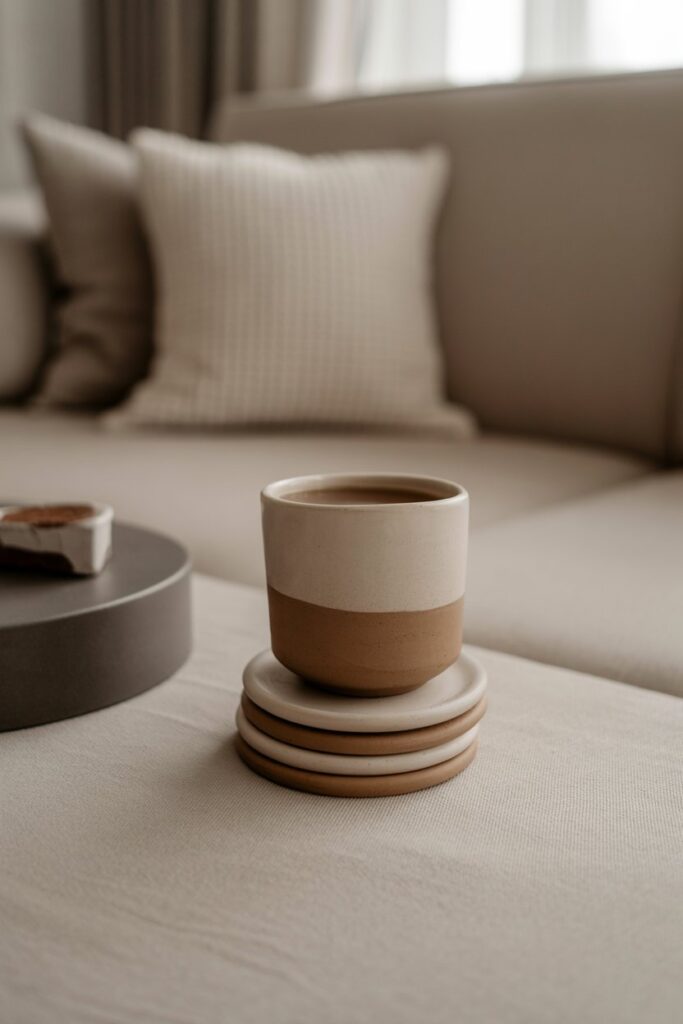
I always tell people to start here, and not just because it’s easy.
It’s because this is the project where something clicks.
The first time I made coasters, I expected them to look flat and boring. But once they dried, once I sanded the edges and added a simple neutral paint… they didn’t look homemade. They looked styled.
That’s when I realized this could actually work.
How I Make Them (And What Makes the Difference)
I roll my clay out evenly, not too thin, not too thick. If it’s too thin, it warps. Too thick, and it looks heavy.
Then I cut simple shapes. Circles are the safest, but honestly, slightly uneven organic shapes look more modern and less “factory-made.”
Here’s the part most people skip:
I spend a few extra minutes smoothing the edges while the clay is still soft. That one step changes everything.
After drying, I lightly sand, then paint in soft tones like beige, off-white, or muted brown. Nothing loud. Nothing complicated.
And finally, I seal it.
That last step is what takes it from “DIY” to something that actually lasts.
How You’ll Actually Use Them
You’ll use these more than you think.
On your desk. On your bedside table. Under your morning coffee. And the best part is, they subtly upgrade your space without trying too hard.
I ended up making a full set because once I had one, the others didn’t match anymore.
2. Ring Dishes (Small, But They Change Your Space)
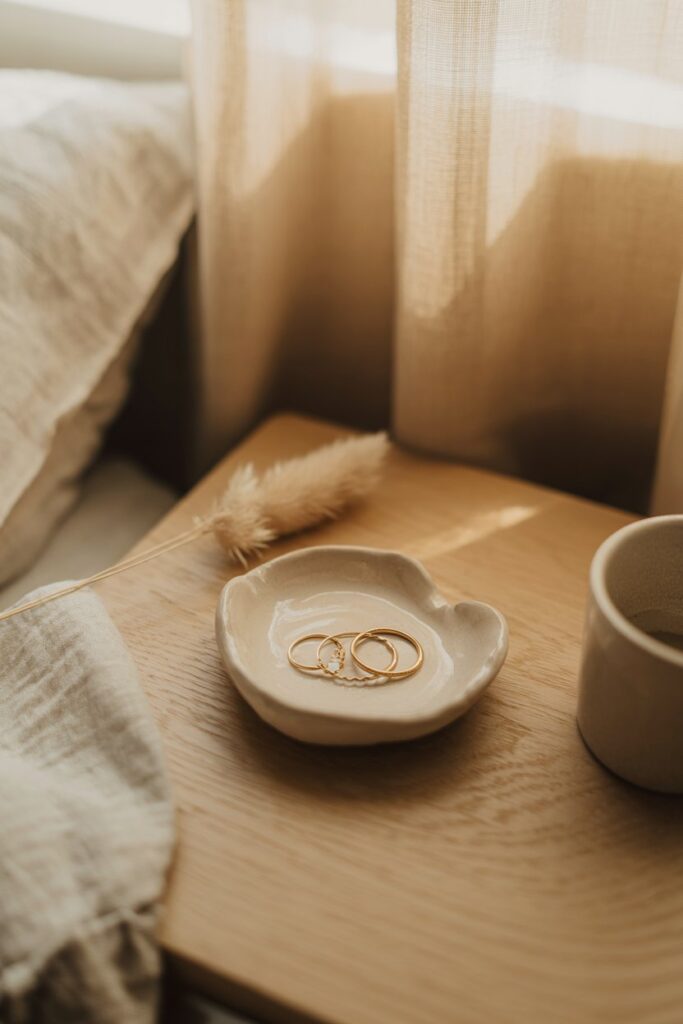
This is one of those projects that feels almost too simple… until you place it somewhere and realize how much it adds.
I keep one next to my bed now, and it holds my rings, my earrings, sometimes even random small things I don’t want to lose.
It’s small, but it makes everything feel more put together.
How I Shape Mine So It Doesn’t Look Flat
I start with a simple circle, nothing perfect.
Then instead of leaving it flat, I gently lift the edges with my fingers. Not too much. Just enough to create a soft curve.
That’s what gives it that “store-bought” look.
If the edges crack a little, I smooth them with a tiny bit of water. You don’t need perfection here, just intention.
After drying, I usually keep it minimal. Sometimes I’ll add a soft wash of color or a tiny gold accent, but honestly, plain neutral always wins.
Where It Works Best
You’ll get the most use out of this in places where you naturally drop things:
- Bedside table
- Bathroom counter
- Desk
And because you made it yourself, it feels a little different every time you use it.
3. Abstract Clay Wall Art (Where Things Start Looking Expensive)
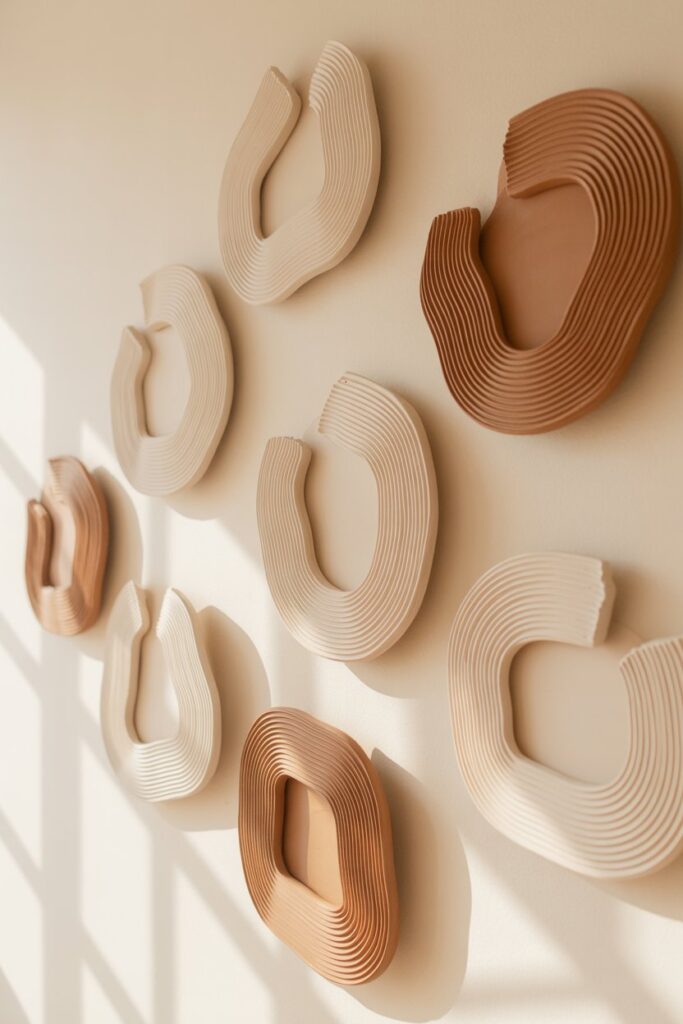
This is where I stopped feeling like a beginner.
Abstract clay art doesn’t rely on skill the way detailed sculpting does. It relies on shape, balance, and restraint.
And that’s good news for you.
How I Approach It Without Overthinking
Instead of trying to “design” something, I let the shapes happen.
I roll out the clay and cut uneven, flowing forms. No symmetry. No perfection.
Sometimes I layer pieces. Sometimes I keep them flat. But I always keep the shapes clean.
After drying, I stick to a very limited color palette. Usually one or two tones at most.
That’s what makes it look intentional instead of messy.
How It Changes a Room
I didn’t expect much the first time I hung these up.
But when I grouped a few pieces together on a blank wall, it completely shifted the space. It felt styled. Finished.
And the best part is, no one assumes it was easy.
4. Clay Labels and Tags (The Most Practical Project)
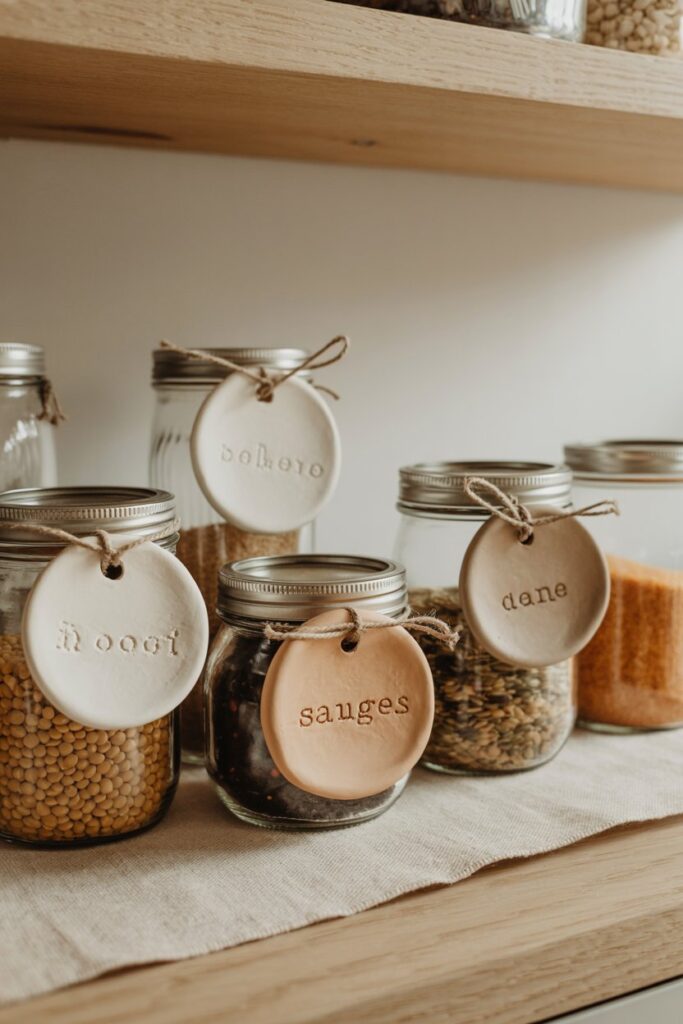
This is the project that made my space feel organized without buying anything new.
You don’t realize how much visual clutter comes from mismatched containers until you start labeling things in a clean, consistent way.
How I Keep Them Clean and Not Messy
I roll the clay thin and cut simple shapes.
Then I either carve letters in or press them in lightly. The key here is not rushing. If the lettering looks messy, the whole piece feels off.
So I slow down here more than anywhere else.
After drying, I usually keep them neutral or lightly painted. Nothing bold.
Where You’ll Actually Use These
Once you start, you’ll find uses everywhere:
- Pantry jars
- Storage boxes
- Gift tags
- Desk organization
It’s one of the simplest projects, but it makes the biggest difference in how your space feels.
5. Simple Candle Holders (Instant Atmosphere)
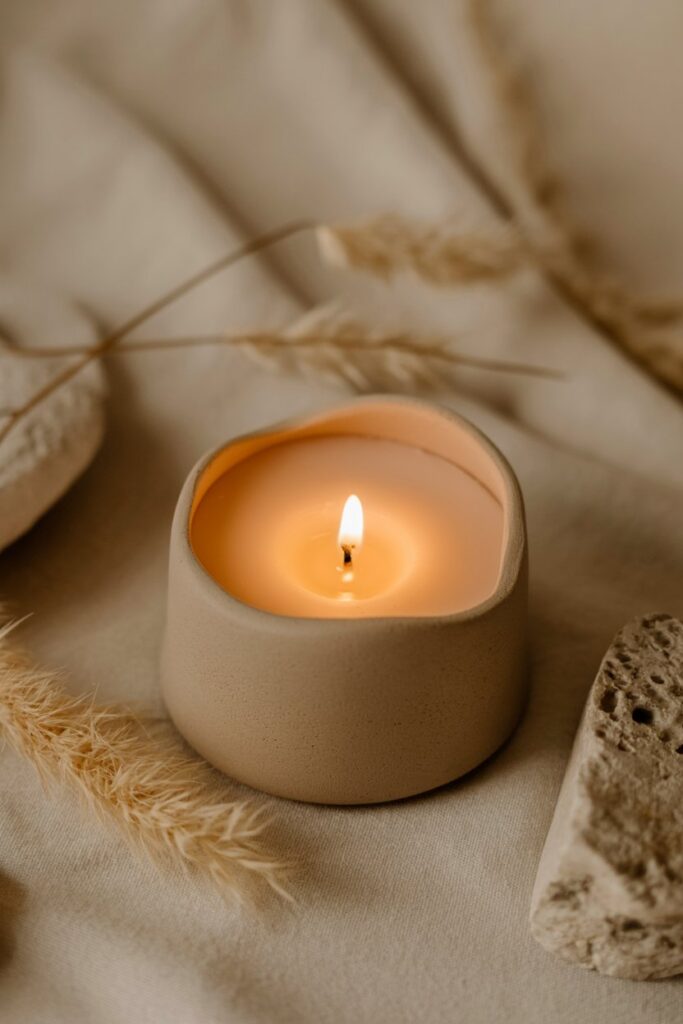
I didn’t expect this one to matter as much as it does.
But the first time I lit a candle in something I made, it completely changed the mood of the room.
It felt warmer. Slower. More intentional.
How I Make Them Without Overcomplicating
I start with a solid base and press the candle gently into the center to create the opening.
Then I refine the shape around it.
Sometimes I leave it smooth. Sometimes I add subtle texture. But I never try to make it too detailed.
That’s where things start looking forced.
Where It Works Best
These look best in spaces where you want calm:
- Bedside tables
- Shelves
- Coffee tables
And even when the candle isn’t lit, it still looks like a decor piece.
6. Decorative Clay Trays (The First “Wow” Piece)
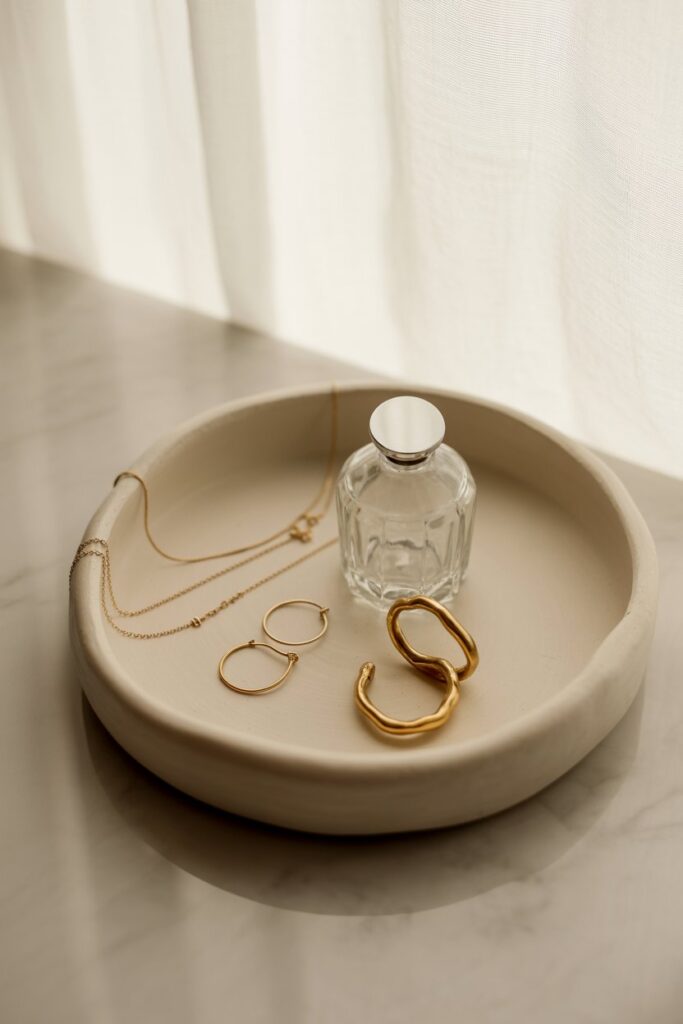
This is usually the first thing I make where I step back and think, okay… this actually looks expensive.
It’s still simple. But it feels elevated.
How I Get That Clean Finish
I roll the clay thicker than usual so it feels sturdy.
Then I shape it slowly. I don’t rush the edges. I lift them gently and keep checking the form as I go.
This is one of those projects where patience shows.
After drying, I sand more than usual. The smoother the surface, the better the final result looks.
Then I keep the design minimal and seal it well.
How You’ll Use It Every Day
You’ll find yourself using this constantly:
- Jewelry holder
- Key tray
- Perfume base
- Desk organizer
It’s one of those pieces that quietly upgrades everything around it.
What Made the Biggest Difference for Me
Before you move on, I want you to understand this part.
Because this is what took my projects from “nice” to something I was genuinely proud of.
I stopped rushing.
I started smoothing edges properly.
I kept my designs simple.
And I always finished with a seal.
That’s it.
Not better tools. Not more skill. Just better attention to the final steps.
Next, Let’s Take It Further
Now that you’ve seen what simple projects can turn into, the next set is where things start getting even more interesting.
Still beginner-friendly. Still doable.
But these are the ones where people start asking if you sell your work.
Let’s get into that next.
7. Textured Clay Ornaments (The Easiest Way to Add Detail)
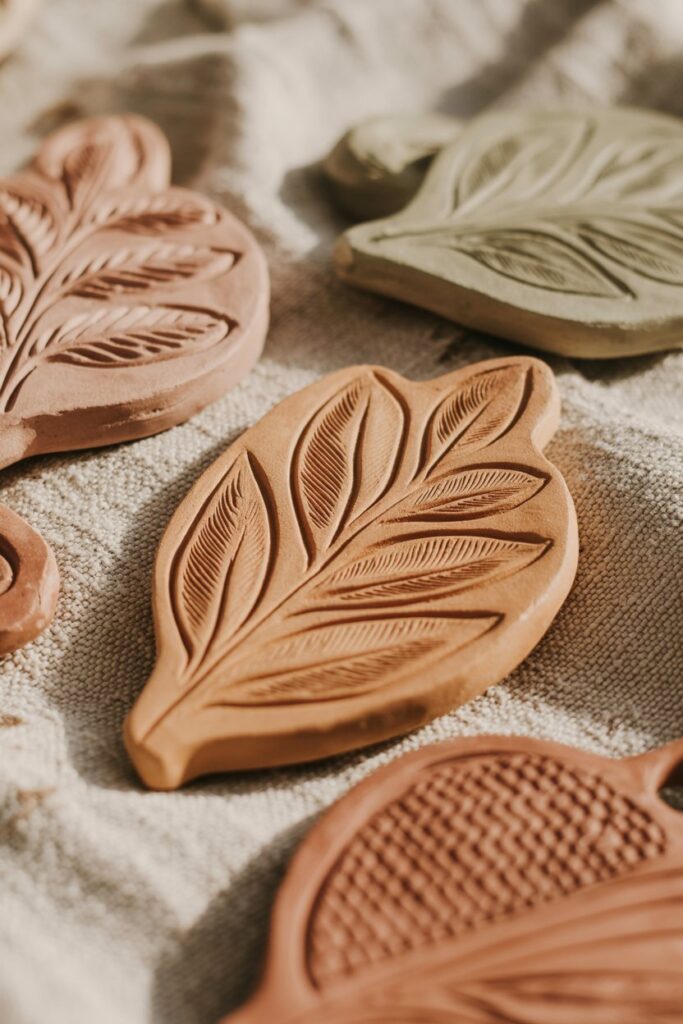
This is where things start getting fun without getting harder.
If you’ve ever felt like your projects look too plain, texture fixes that instantly. It adds depth and detail without requiring any extra skill.
How I Make Them
I roll out the clay evenly and then press different textures into the surface. Leaves are my favorite because they create a natural pattern, but honestly, anything works. Fabric, lace, even simple objects around your home.
Once the texture is in, I cut out shapes. Circles, arches, or soft organic forms all work well.
If I want to hang them, I make a small hole before letting them dry.
After drying, I either leave them natural or lightly paint over the surface to highlight the texture. A soft wash of color usually looks better than anything bold.
How You Can Use Them
These are more versatile than they seem:
- Wall decor
- Seasonal ornaments
- Gift add-ons
- Shelf styling pieces
I usually make a few at once because each one turns out slightly different, and that’s part of the appeal.
8. Clay Plant Markers (Small Detail, Big Impact)
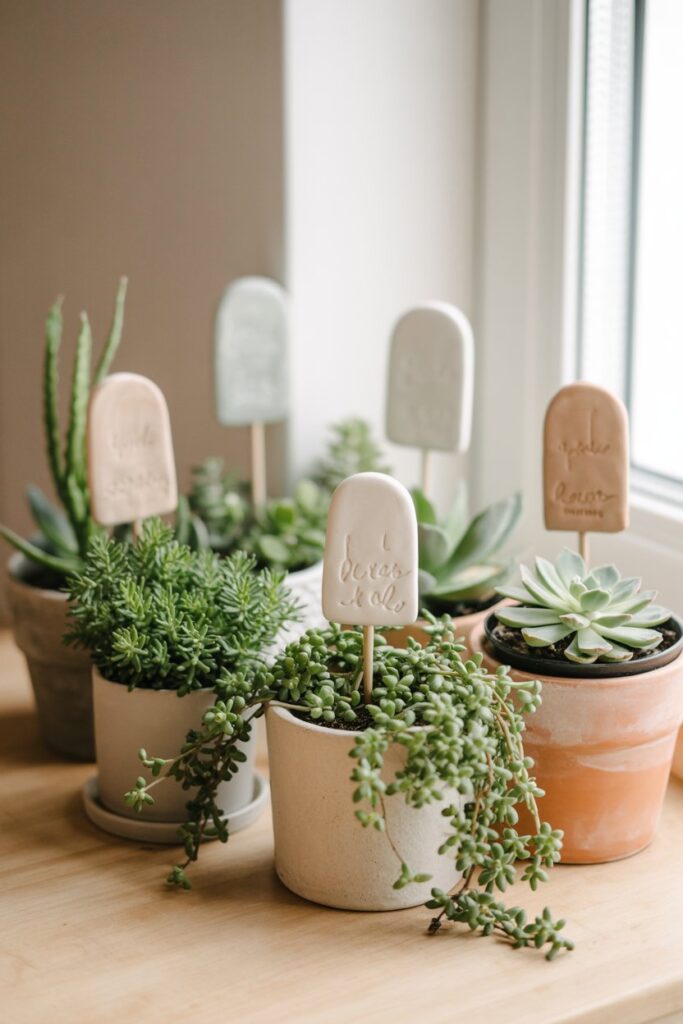
This one surprised me.
I didn’t think plant markers would make much of a difference, but once I added them, my plants instantly looked more styled and intentional.
How I Make Them
I roll the clay thin and cut out small tag shapes. Then I attach a narrow stem at the bottom so it can sit in the soil.
For the lettering, I either carve names in or press them in gently. The key here is to go slow so it stays clean.
After drying, I keep the colors soft and natural. Greens, whites, and neutrals work best.
How You Can Use Them
- Indoor plants
- Herb gardens
- Decorative pots
It’s a small detail, but it pulls everything together in a way you don’t expect.
9. Clay Incense Holders (Simple but Elevated)
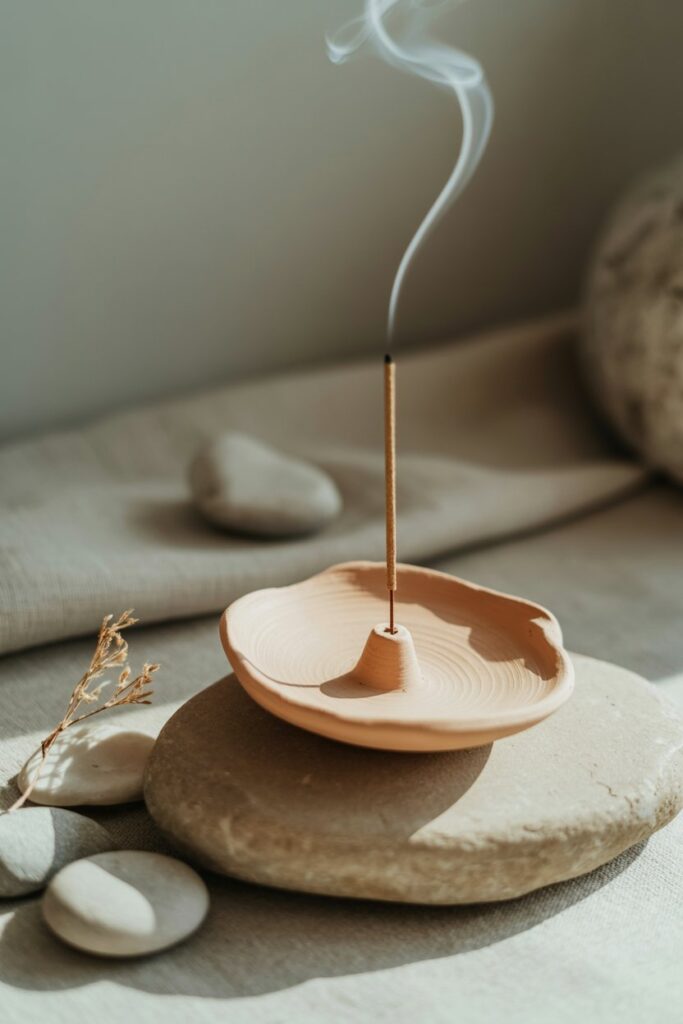
This is one of those pieces that feels calm just by existing.
It is minimal, functional, and adds a quiet, intentional feel to your space.
How I Make Them
I start with a small, flat base. Then I create a tiny angled hole for the incense stick.
That’s it.
Sometimes I shape the base into a soft arch or an organic form, but I never overcomplicate it.
After drying, I sand it well because smoothness really shows on smaller pieces like this.
How You Can Use Them
- Meditation or quiet spaces
- Bedrooms
- Shelf decor
It is one of the simplest projects, but it feels very intentional when placed in the right spot.
10. Sculptural Clay Bowls (Where You Start Experimenting)
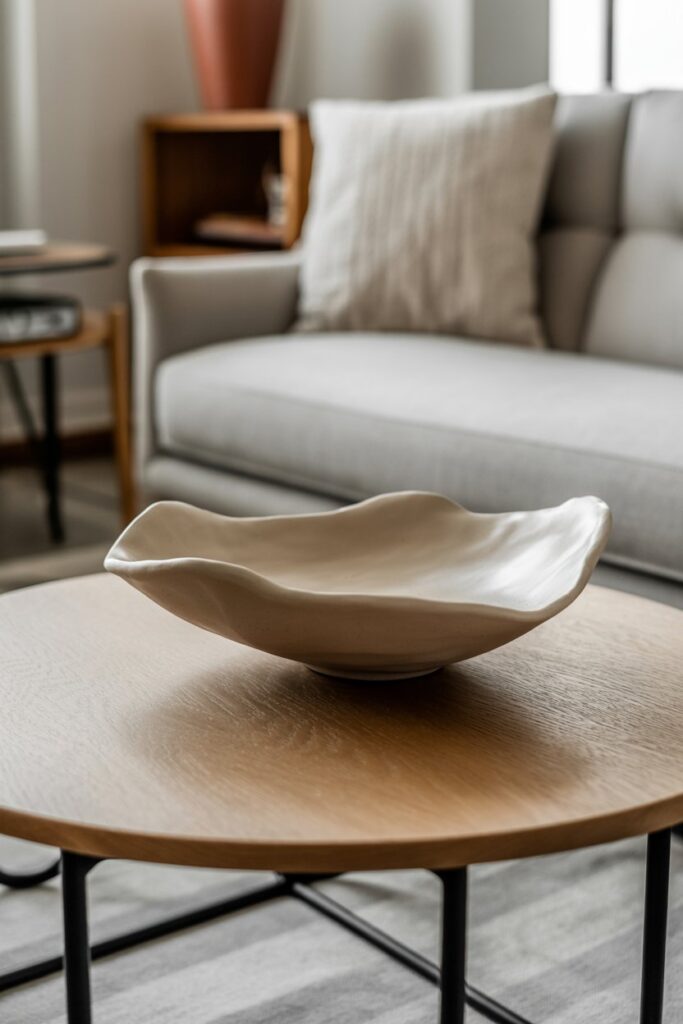
This is where you move from flat projects into something more dimensional.
It might sound harder, but it really is not.
How I Make Them
I roll out a slab and then gently drape it over a bowl to shape it. This helps keep the form even without struggling.
Once it starts to set slightly, I remove it and refine the edges.
I usually leave the edges slightly uneven because it gives that soft, handmade look that feels more high-end than perfect symmetry.
After drying, I sand and keep the finish simple.
How You Can Use Them
- Fruit display
- Coffee table decor
- Catch-all bowls
This is one of the first projects that really feels like a statement piece.
11. Clay Wall Hooks (Functional and Aesthetic)
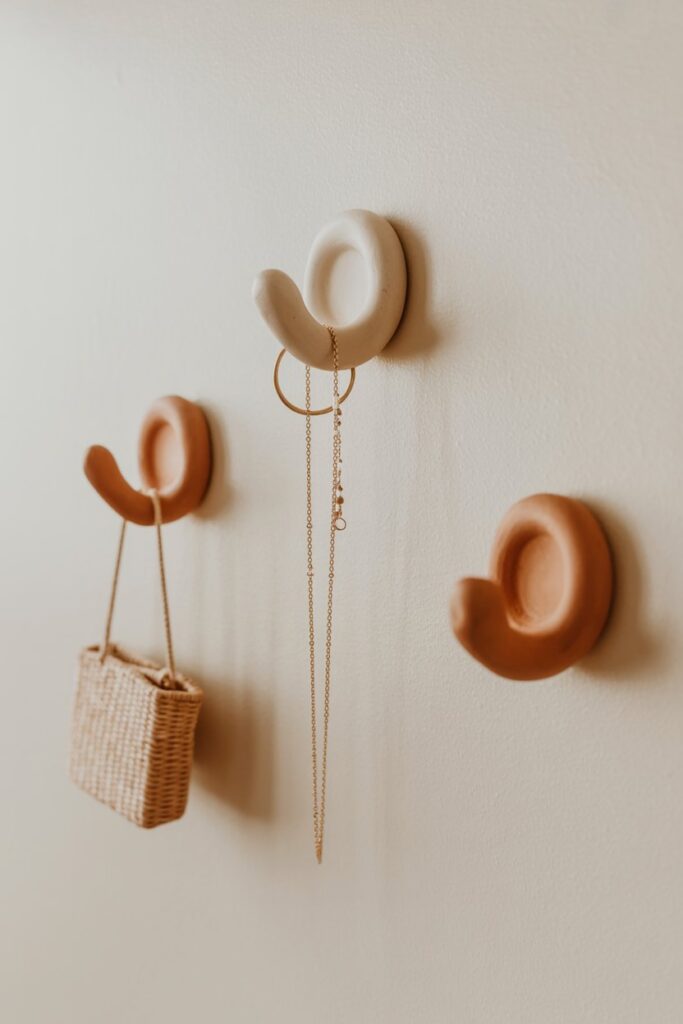
This is where your projects start becoming both decorative and practical.
And honestly, these feel a lot more impressive than they are.
How I Make Them
I shape a small base and then form a hook or knob at the front.
The important part is making sure it feels sturdy, so I keep the base thicker than usual.
Before drying, I create space at the back for mounting or plan to glue it onto a surface later.
After drying, I sand and seal well because this is something that will actually be used.
How You Can Use Them
- Hanging jewelry
- Light bags
- Keys
They add function to your space without losing that clean, minimal look.
12. Statement Clay Pieces (The Ones People Ask About)
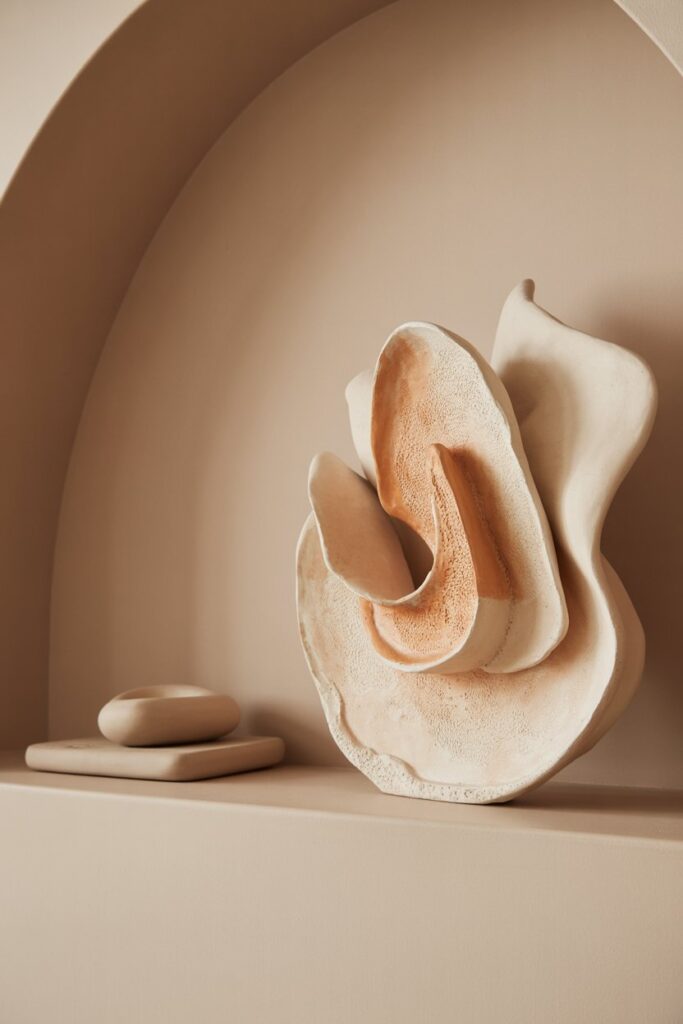
By the time you get here, you will notice something.
You are not just following steps anymore. You are starting to understand how clay behaves and what looks good.
This is where you create something a little more personal.
How I Approach It
I do not start with a strict plan.
I take the techniques I have already used, shaping, layering, keeping things simple, and combine them into one piece.
Sometimes it is a sculptural form. Sometimes it is a mixed piece with texture and shape.
The key is still the same. I do not overdo it.
Why This Matters
These are the pieces people notice.
The ones that make someone ask where you bought it. The ones that make you pause and realize you actually made something worth displaying.
And at that point, it stops feeling like a beginner hobby.
What Actually Makes Your Projects Look High-End
If you take nothing else from this guide, take this.
It is not about the idea. It is about the finish.
What made the biggest difference for me was simple:
I started smoothing edges properly.
I stopped over-designing everything.
I focused on clean shapes and neutral tones.
And I always sealed my pieces.
That is it.
Those small changes are what separate something that looks handmade from something that looks intentional.
Final Thoughts
If you have been hesitating to start, this is your sign to just try one project.
Not all twelve. Just one.
Because once you see how something simple can turn into something beautiful, everything changes.
You stop overthinking. You start experimenting. And before you realize it, you have pieces around your space that you actually made yourself.
And that feeling is what makes this worth it.