Easy Frozen Ice Crystal Pinecones: A Beautiful DIY Winter Craft
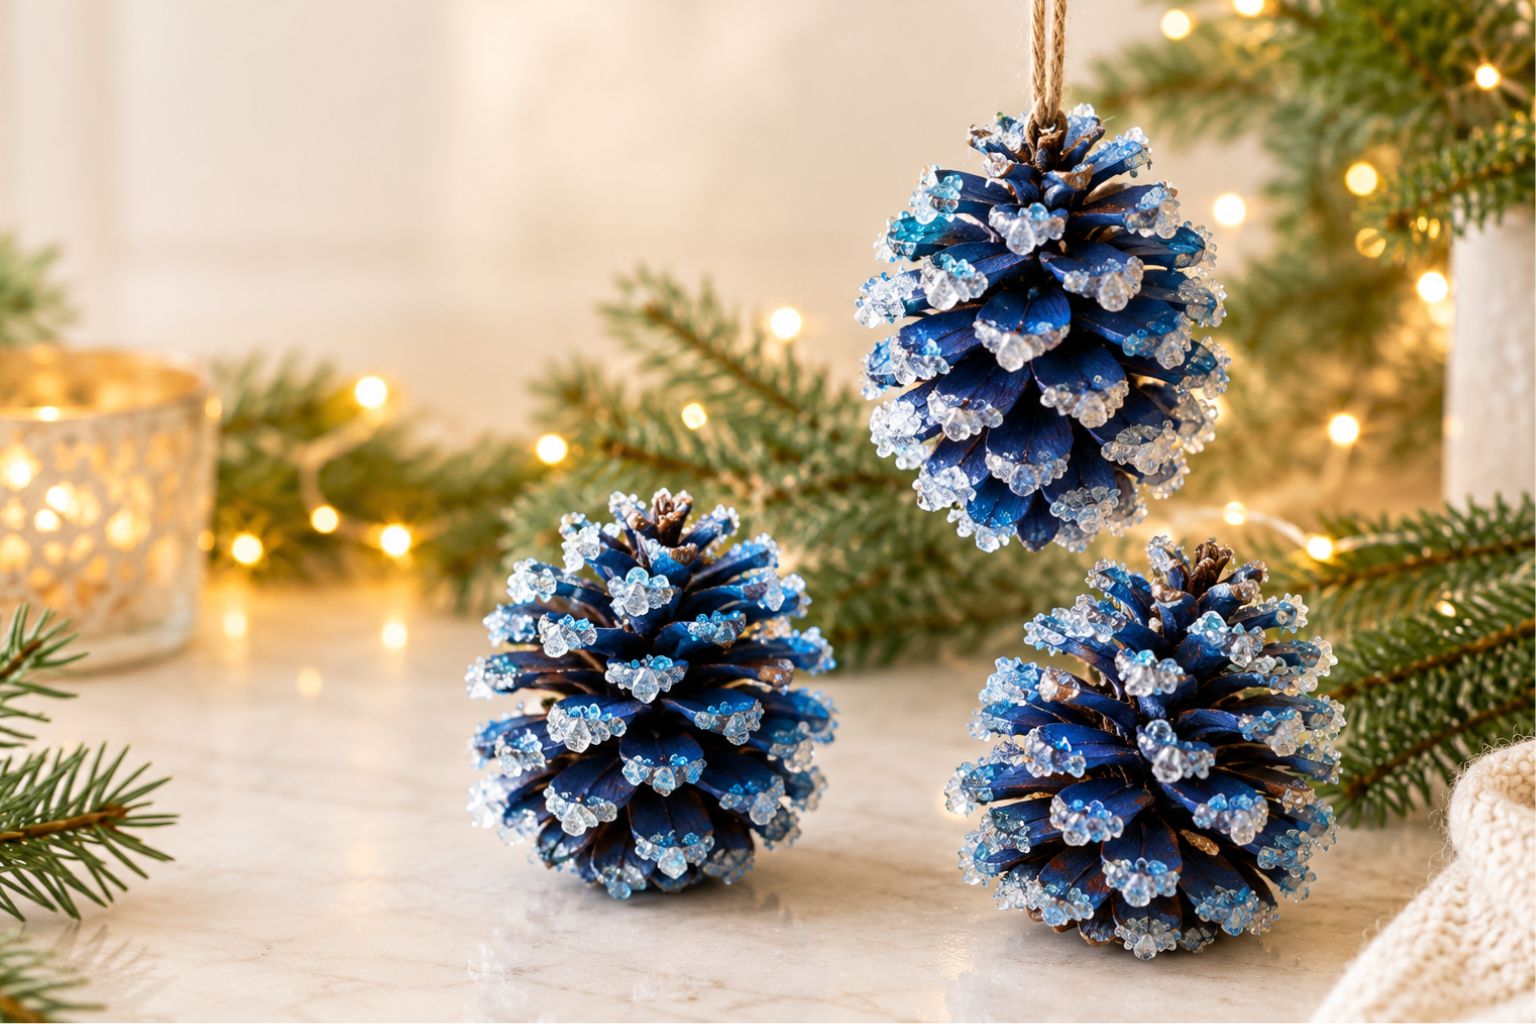
There is something so pretty about pinecones covered in tiny, sparkling crystals. They remind me of frosty winter mornings, icy branches, and the kind of Christmas decorations that make a home feel extra cozy without spending a fortune.
If you love simple winter crafts, these frozen ice crystal pinecones are a fun DIY project to try.
The finished pinecones have a beautiful blue-and-white crystalline appearance, making them perfect for winter displays, Christmas decorating, seasonal centerpieces, or handmade ornaments.
The inspiration for this craft is the look of a natural pinecone covered in sparkling blue ice crystals. You can recreate a similar effect using a few basic craft supplies, clear glue, and decorative crystals. You do not need to find perfectly shaped pinecones or buy expensive decorations to get started.
In this tutorial, I will walk you through the supplies you need, how to prepare your pinecones, and how to create that frosty, crystal-covered finish. I will also share a few ideas for displaying your finished decorations around your home.
What Are Frozen Ice Crystal Pinecones?
Frozen ice crystal pinecones are decorative pinecones designed to look as though they have been coated in frost or sparkling ice. Their natural scales provide the perfect texture for holding glitter, small decorative crystals, or other embellishments.
For the blue version in the inspiration image, the pinecone has a rich cobalt-blue base with pale blue and white crystals concentrated around the tips of its scales. The result is a striking winter decoration that looks lovely against a neutral background, greenery, or warm Christmas lights.
Although the reference image shows pinecones suspended above a jar of blue liquid, you do not need to use a jar of liquid to make a decorative version for your home. The tutorial below uses a craft-based method to create a similar frosty appearance without relying on an unverified crystal-growing process.
Supplies You Will Need
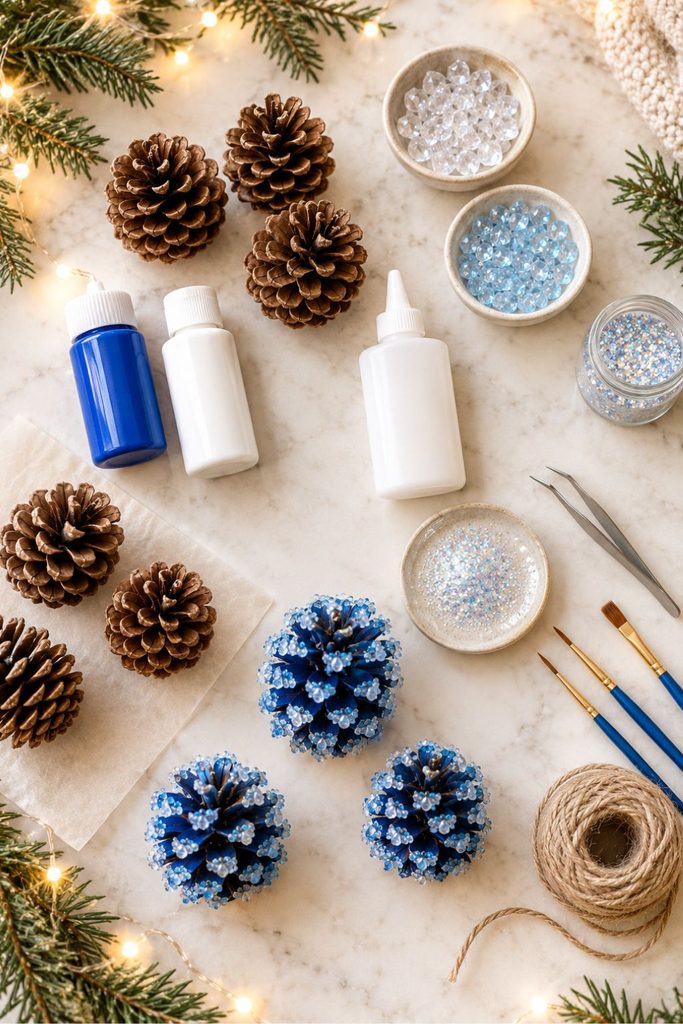
You can find most of these materials at a craft store, a dollar store, or online.
- Natural pinecones: Choose dry pinecones with open scales. Medium-sized pinecones are easy to paint and decorate.
- Blue acrylic paint: A cobalt or royal blue shade creates the rich blue appearance shown in the reference.
- White or pale blue acrylic paint: Use this to add a frosted effect to the tips.
- Craft glue: A clear-drying craft glue helps attach lightweight decorative materials.
- Blue and clear craft crystals: Small flat-backed crystals or lightweight decorative embellishments add sparkle.
- Fine iridescent glitter: Optional, for a delicate icy shimmer.
- Small paintbrushes: Keep one brush for the base color and another for the frosted details.
- Tweezers: Helpful for placing small crystals between the pinecone scales.
- Parchment paper or a disposable work surface: Protects your table while painting and decorating.
- String or ribbon: Optional, if you want to hang the finished pinecones.
If you prefer a softer winter look, use white paint, clear crystals, and a little silver glitter instead of blue. Cream, pale blue, silver, and white work beautifully together for a frosty winter display.
How to Make Frozen Ice Crystal Pinecones
Step 1: Choose and Prepare Your Pinecones
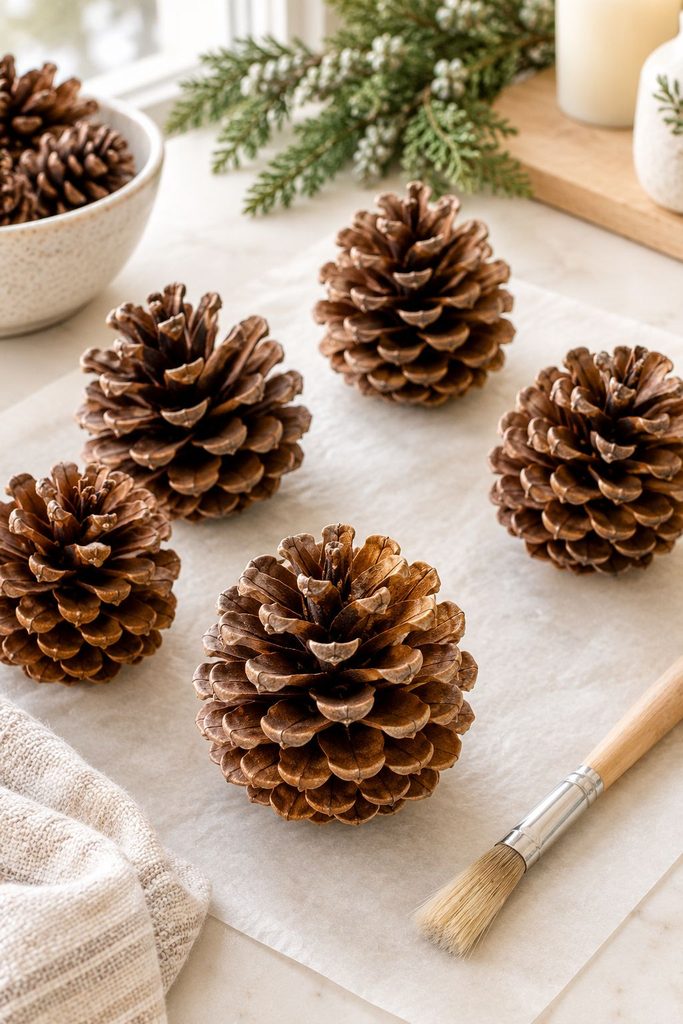
Start with clean, dry pinecones. Look for ones with open scales, because the spaces between the scales make it easier to add paint and decorative crystals.
Remove any loose dirt, needles, or debris with a small brush. If your pinecones are damp, allow them to dry completely before decorating.
You can also gently tap each pinecone to remove loose particles. Avoid soaking it immediately before painting, because moisture can interfere with the paint and glue.
If you collected pinecones outdoors, check them for insects and debris before bringing them into your craft area. Allow them to dry thoroughly, and follow an appropriate cleaning or heat-treatment method if needed.
Place the prepared pinecones on parchment paper and make sure they are stable before moving on to the next step.
Step 2: Paint the Pinecone Blue
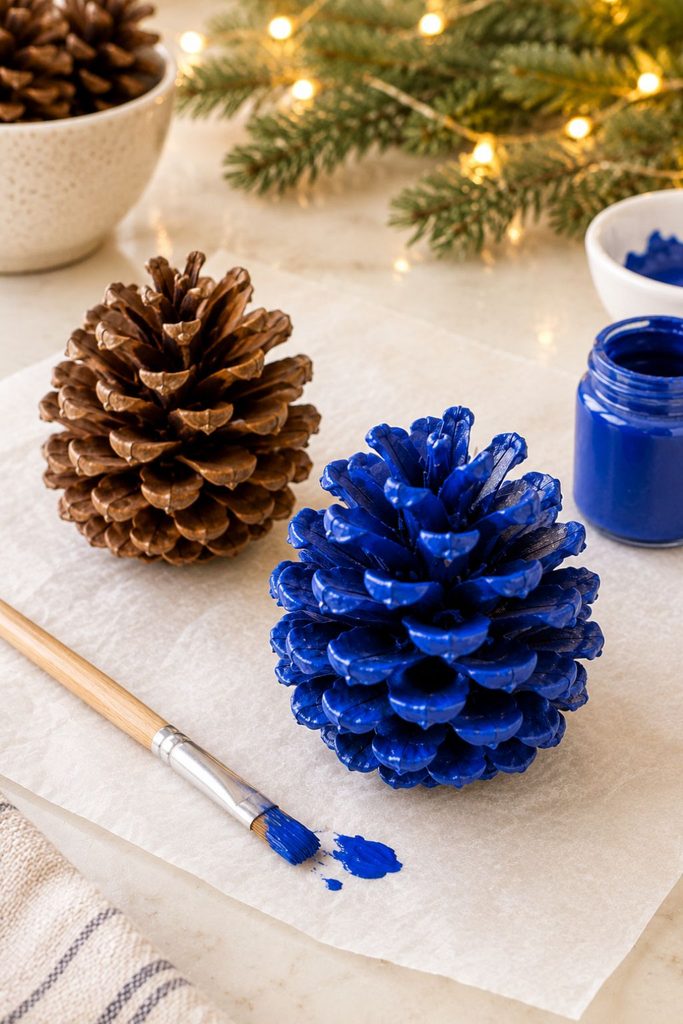
Use a small paintbrush to apply cobalt-blue or royal-blue acrylic paint to the pinecone.
Work the paint into the scales, turning the pinecone as you go. You do not have to cover every tiny surface perfectly. A little variation in the color can make the finished decoration look more natural.
For a deeper blue finish, allow the first coat to dry and apply a second thin coat where needed.
Leave the pinecone to dry completely before adding glue or crystals. If the paint is still wet, the embellishments may slide around or become covered in paint.
My tip: If you want a more natural-looking winter decoration, leave a few small areas of the pinecone brown. The contrast between the natural wood color and icy blue crystals can be especially pretty.
Step 3: Add the Frosted White and Pale Blue Details
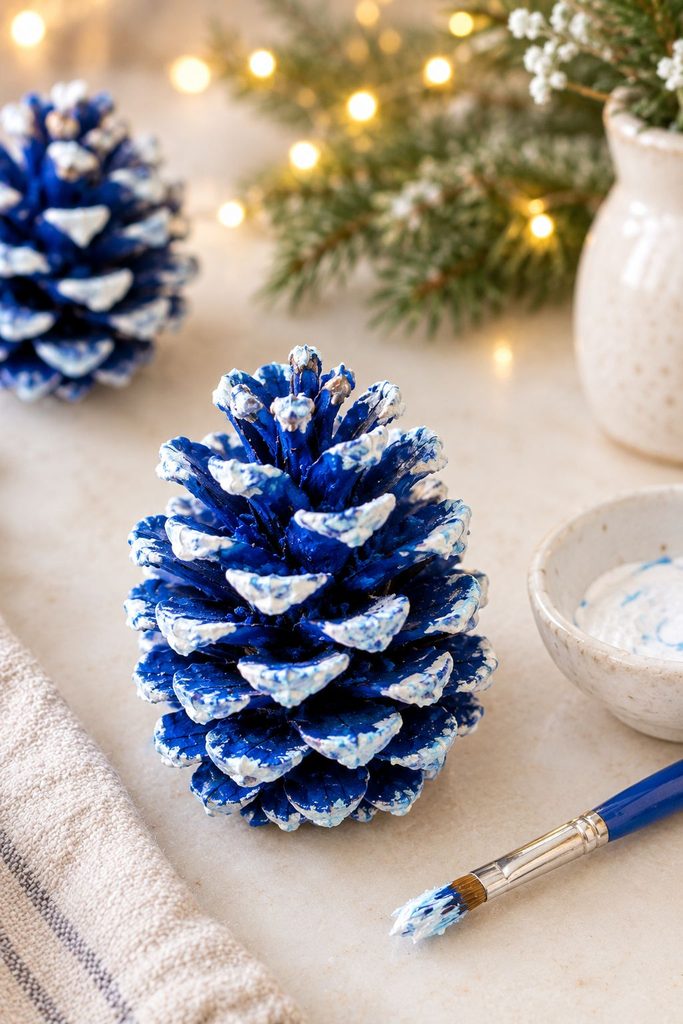
Once the blue paint has dried, use a small brush to dab white or pale blue paint onto the outer tips of the pinecone scales.
Do not brush the entire pinecone with white paint. Instead, concentrate on the raised edges and tips so the blue remains visible underneath.
You can use a nearly dry brush to create a soft, snowy effect. Lightly touch the brush against the scales and build up the frosted appearance gradually.
Allow the paint to dry before continuing.
Step 4: Attach the Decorative Crystals
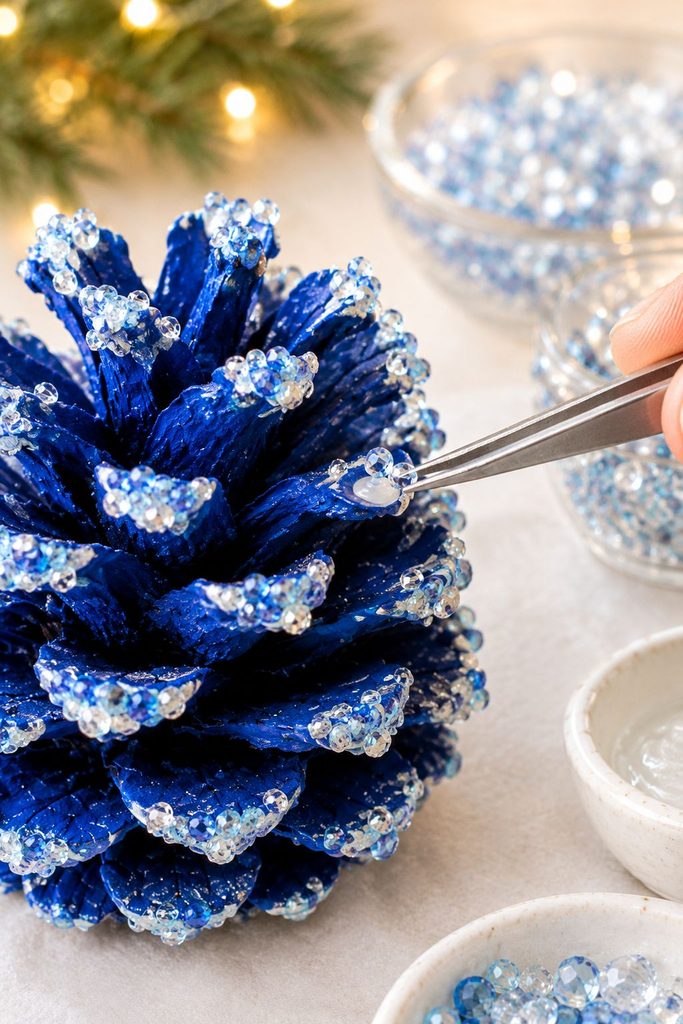
This is the step that gives your pinecones their sparkling ice-crystal appearance.
Apply small dots of clear-drying craft glue to selected scale tips. While the glue is still tacky, use tweezers to place small blue, clear, or pale blue craft crystals onto the glue.
You can concentrate the crystals near the ends of the scales, where natural frost would be most visible. Mix different sizes for a more textured finish, but avoid covering every surface. Leaving some of the blue paint visible creates a more dimensional result.
If you prefer a quicker method, sprinkle a little iridescent glitter onto selected glue-covered areas instead of placing individual crystals.
Work in small sections so the glue does not dry before you add the embellishments. Then leave the pinecone undisturbed until the glue has fully cured according to the product instructions.
Important: Use lightweight decorative crystals intended for craft projects. Do not assume that ordinary glue, glitter, or craft crystals will withstand water or outdoor weather.
Step 5: Create the Icy Sparkle
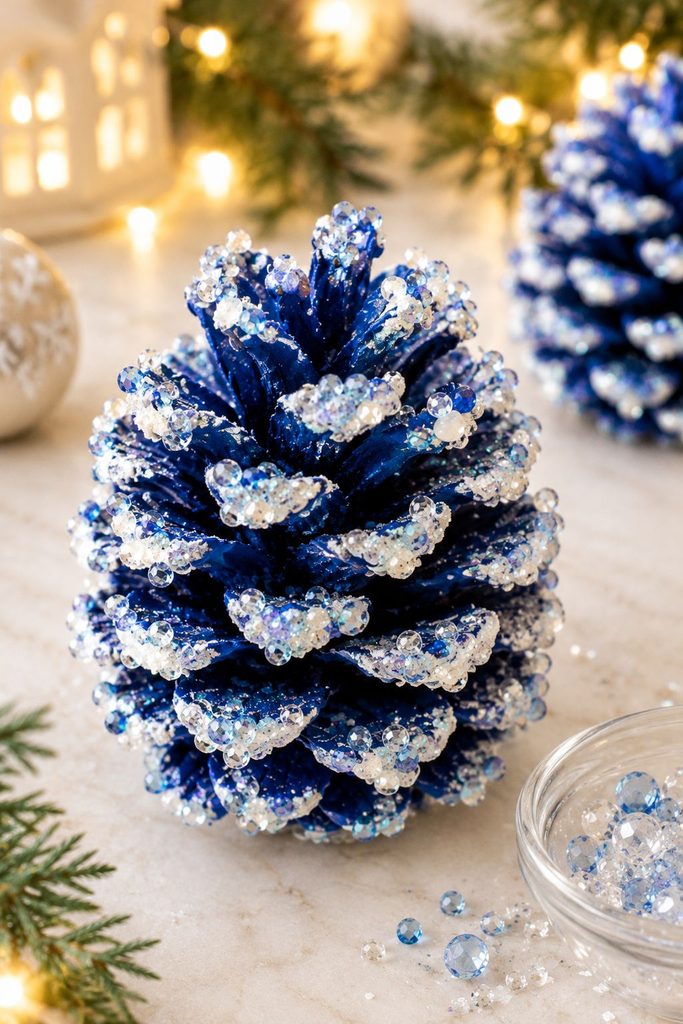
After the crystals have been attached, inspect the pinecone from different angles.
If some areas look too plain, add a few more crystals or tiny touches of white paint. If the decoration looks too busy, leave it as it is rather than adding more embellishments.
For extra sparkle, lightly dab clear craft glue onto a few scale tips and add a small amount of iridescent glitter. Tap off any loose glitter once the glue has set.
The goal is to create a combination of deep blue, pale blue, white, and clear sparkle that resembles a frozen pinecone.
Let the finished piece dry completely before handling it.
Step 6: Add a Hanging Loop if Desired
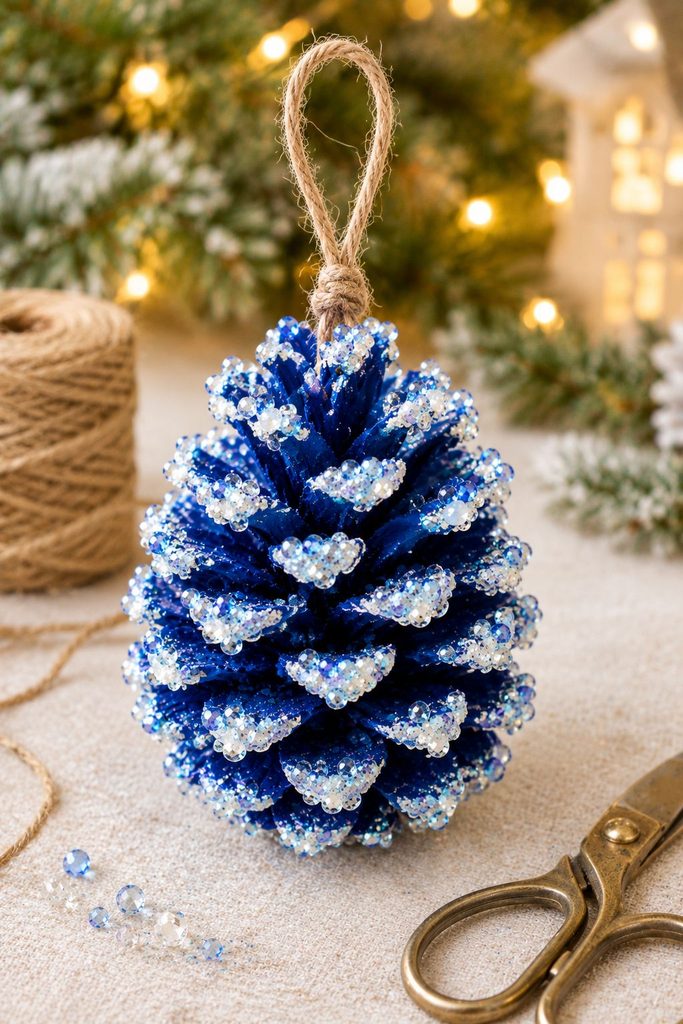
If you want to use your pinecones as Christmas ornaments, attach a loop of ribbon or string.
You can tie the string around a sturdy upper section of the pinecone or attach it with a suitable craft adhesive. Make sure the attachment is secure before hanging the decoration.
For heavier pinecones, avoid relying on a tiny glued area alone. A secure loop will help prevent the ornament from falling.
If you are making table decorations rather than hanging ornaments, you can skip this step entirely.
Step 7: Let Everything Dry and Arrange Your Decorations
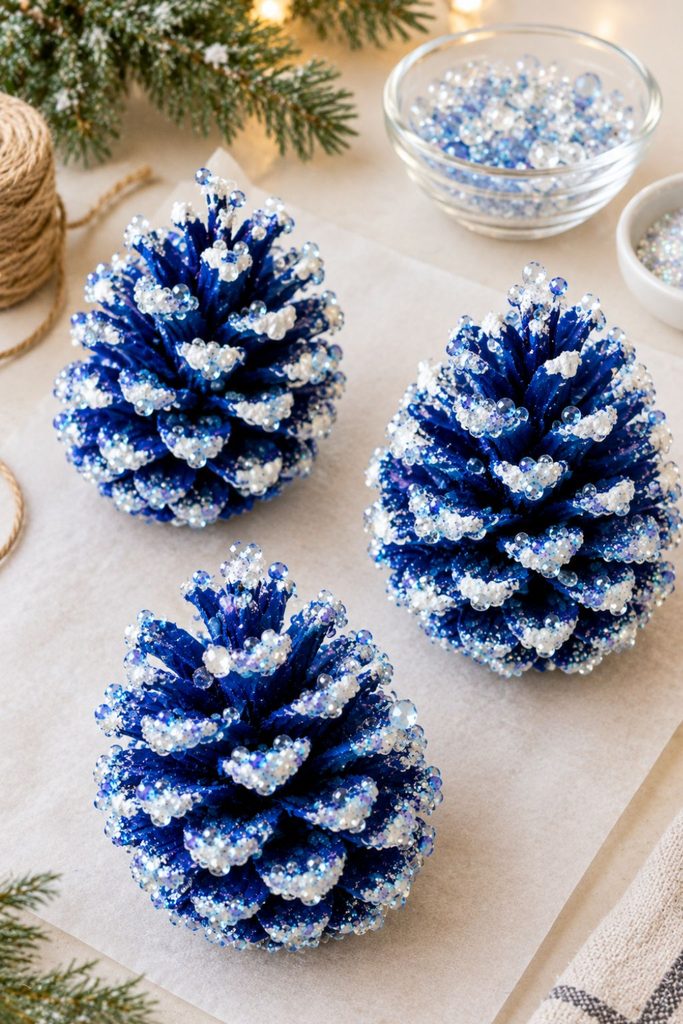
Before displaying your pinecones, check that the paint and glue are fully dry and that no crystals are loose.
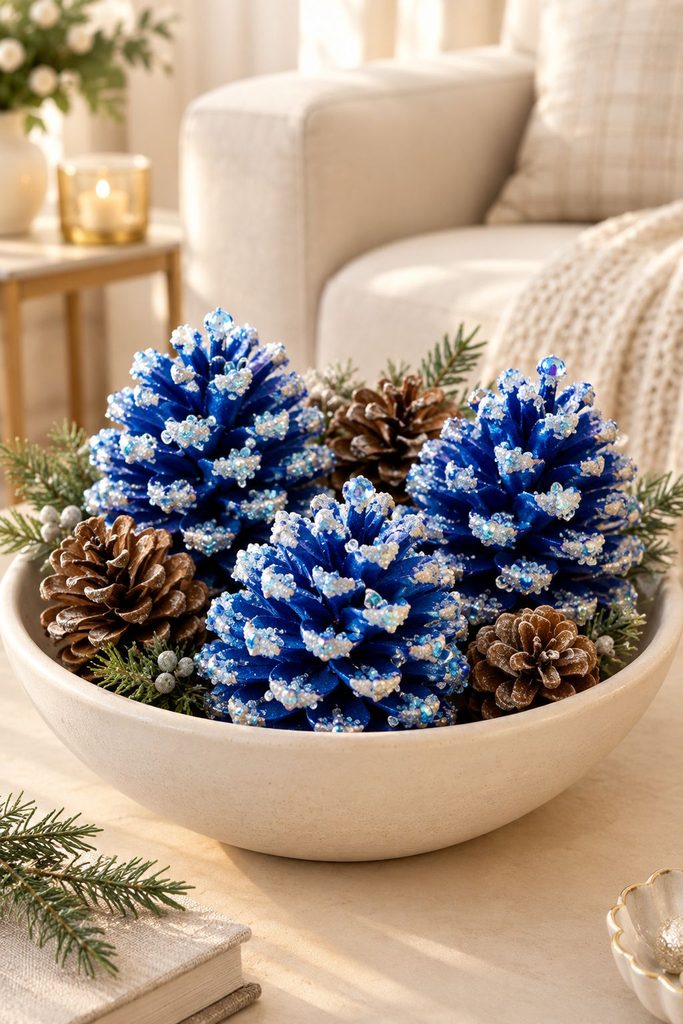
Arrange the finished pinecones in a small decorative bowl, place them on a winter tray, or combine them with faux evergreen branches and warm fairy lights.
You can also use them as part of a Christmas centerpiece or hang them from a seasonal branch arrangement.
The deep blue finish looks particularly striking against white, cream, silver, and natural wood tones.
How to Get the Best Crystal Effect
A few small details can make a big difference to the finished appearance.
Use Different Shades of Blue
A single shade of blue can look flat. Combining cobalt blue with pale blue and white creates more depth and makes the crystals stand out.
Concentrate the Crystals on the Tips
Natural pinecone scales already have interesting texture. Adding most of the crystals to the raised tips helps emphasize that texture instead of hiding it.
Work with Thin Layers
Thick paint and large amounts of glue can fill the gaps between the scales. Thin layers preserve the natural shape of the pinecone and give the decoration a more delicate finish.
Let Each Layer Dry
Patience is important for this project. Allow the paint to dry before adding glue, and allow the glue to cure before moving or displaying the pinecones.
Make a Small Test Piece First
If you are unsure about the combination of paint, glue, and crystals, decorate one small pinecone first. You can adjust the color and amount of sparkle before making a larger batch.
Can You Grow Real Crystals on Pinecones?
Yes, some craft projects use crystal-growing solutions to create crystals on natural objects. However, that is a different process from simply decorating a pinecone with craft crystals.
The reference image shows a pinecone suspended in a jar of blue liquid, but the image alone does not identify the liquid, the crystal-forming material, or the exact method used. It would not be accurate to promise that an ordinary mixture of water, food coloring, or craft supplies will produce the same crystalline result.
If you want to experiment with actual crystal growth, use a clearly documented crystal-growing method and follow its safety instructions. Some crystal-growing chemicals are unsuitable for children to handle, and the finished material may be fragile.
For a simple home decoration, the paint-and-crystal method in this tutorial is a more straightforward way to recreate the blue, frosty appearance.
Beautiful Ways to Decorate with Frozen Ice Crystal Pinecones
Once your pinecones are finished, you can use them in several different ways around your home.
1. Create a Winter Tray Display
Arrange two or three blue crystal pinecones on a wooden or white tray. Add a small candle in a glass holder, a little faux greenery, and a few silver accents for a cozy seasonal display.
For more inspiration, see these cozy winter tray decor ideas.
2. Make Blue and White Christmas Ornaments
Attach ribbon loops and hang the pinecones on a Christmas tree. They look especially pretty on a tree decorated with white lights, silver ornaments, and pale blue accents.
3. Add Them to a Centerpiece
Place the pinecones in the middle of a dining table with greenery, white candles, and a neutral table runner. Keep the arrangement low enough that it does not obstruct conversation.
4. Style a Decorative Bowl
Fill a shallow ceramic bowl with your finished pinecones. Add a few natural pinecones or silver ornaments to create contrast between the frosted blue pieces and the natural materials.
5. Decorate a Mantel
Combine the pinecones with faux evergreen branches, warm fairy lights, and simple white decorations. The blue crystals add a cool winter color that balances the warm glow of the lights.
6. Create a Handmade Gift
A set of decorated pinecones can make a thoughtful seasonal gift for someone who loves handmade Christmas decorations. Arrange them in a small gift box with tissue paper and a ribbon, making sure the crystals are protected from rubbing against each other.
If you enjoy making seasonal decorations, you might also like these DIY Christmas mug candles.
Common Mistakes to Avoid
Using damp pinecones: Moisture can interfere with paint and glue. Start with dry pinecones and allow each layer to dry fully.
Adding too much glue: Heavy glue application can make the pinecone look messy and may cause the crystals to slide. Use small dots and work in sections.
Covering every scale with crystals: Too many embellishments can hide the pinecone’s natural shape. Leave some blue areas exposed for contrast.
Handling the decoration too soon: Moving the pinecone before the glue cures can dislodge the crystals. Follow the drying time on your adhesive.
Assuming the finished piece is waterproof: Craft paint, glue, and decorative crystals are not automatically waterproof. Keep the finished pinecones dry unless you have used products specifically rated for the conditions in which they will be displayed.
Using them near open flames: Pinecones, ribbon, glitter, and many craft materials are flammable. Keep them away from burning candles, fireplaces, and other heat sources. Use battery-operated candles for displays that include pinecones.
Easy Frozen Ice Crystal Pinecones
Materials
- 3 clean completely dry pinecones
- Cobalt-blue acrylic paint
- White or pale-blue acrylic paint
- Clear-drying craft glue
- Small clear and pale-blue decorative crystals
- Iridescent glitter optional
- Small paintbrushes
- Tweezers
- Parchment paper
- Natural twine or ribbon optional
Instructions
- Prepare the pinecones. Remove loose dirt and debris with a small brush. Make sure each pinecone is completely dry before decorating.
- Paint the pinecones. Apply cobalt-blue acrylic paint with a small brush, working between the scales. Allow the paint to dry, adding a second thin coat if needed.
- Add frosted details. Lightly dab white or pale-blue paint onto the tips of the scales to create a snowy appearance. Let the paint dry.
- Attach the crystals. Apply small dots of clear-drying craft glue to selected scale tips. Use tweezers to place the decorative crystals onto the glue.
- Add extra sparkle. If desired, apply a little glue to a few tips and sprinkle with iridescent glitter. Tap away loose glitter once the glue has set.
- Allow the pinecones to dry. Place them on parchment paper and leave them undisturbed until the paint and adhesive have fully cured.
- Add a hanging loop. Attach twine or ribbon securely if you want to use the pinecones as Christmas ornaments.
Notes
- Use thin layers of paint and small amounts of glue to preserve the pinecones’ natural texture.
- Choose blue, white, and clear crystals for a frosty winter look, or substitute silver and champagne-gold accents.
- Keep the finished decorations dry and away from open flames and heat sources.
- Small crystals can be choking hazards. Keep them away from young children and supervise children during crafting.
- Drying times vary by paint and adhesive, so follow the manufacturers’ instructions.
Frequently Asked Questions
How long does it take to make frozen ice crystal pinecones?
The active decorating time is usually around 20 to 40 minutes per pinecone, depending on its size and how many crystals you attach. Drying and curing time is additional, so allow several hours or longer as directed by your paint and glue labels.
What kind of pinecones work best?
Medium-sized pinecones with open, sturdy scales are a good choice. Look for pieces that are not crumbling and have enough space between the scales to hold the decorative details.
Can I make these pinecones without glitter?
Yes. Use blue paint, white frosted tips, and clear or pale blue crystals. This creates a more subtle finish without loose glitter.
Can I use different colors?
Absolutely. Silver and white create a classic frosty look, while champagne and gold give the pinecones a warmer Christmas style. Pale pink and white can also work for a softer winter palette.
Can children make this craft?
Children can help with painting and choosing the colors when supervised by an adult. Small crystals and other embellishments can present a choking hazard, so keep them away from young children. Adults should handle any tools or materials that require special safety precautions.
Will the crystals fall off?
They can if the adhesive is unsuitable, applied too thickly, or not allowed to cure fully. Choose an adhesive suitable for your embellishments, follow its instructions, and handle the finished pinecones gently.
Can I use the pinecones outdoors?
The craft version is best suited to indoor displays unless all materials are rated for outdoor conditions. Rain, humidity, temperature changes, and sunlight may damage the paint, adhesive, or crystals.
How should I store the finished pinecones?
Store them in a dry box with tissue paper between the decorations. Avoid pressing the crystals against hard surfaces, and keep the box somewhere cool and dry until the next winter or Christmas season.
Final Thoughts
These frozen ice crystal pinecones are a lovely way to bring a little winter sparkle into your home. With natural pinecones, blue paint, white frosted details, and a handful of decorative crystals, you can create a seasonal decoration that feels special without requiring complicated crafting techniques.
I love the contrast between the deep blue color and the pale, icy tips. You can make each pinecone slightly different, experiment with silver or white instead of blue, or turn your finished pieces into hanging Christmas ornaments.
Start with one pinecone, see how you like the colors and textures, and make a small collection for your winter tray, mantel, or Christmas tree.
Save this DIY winter craft idea for later, and enjoy creating your own sparkling frozen pinecones!