How to Organize Craft Supplies in a Small Space
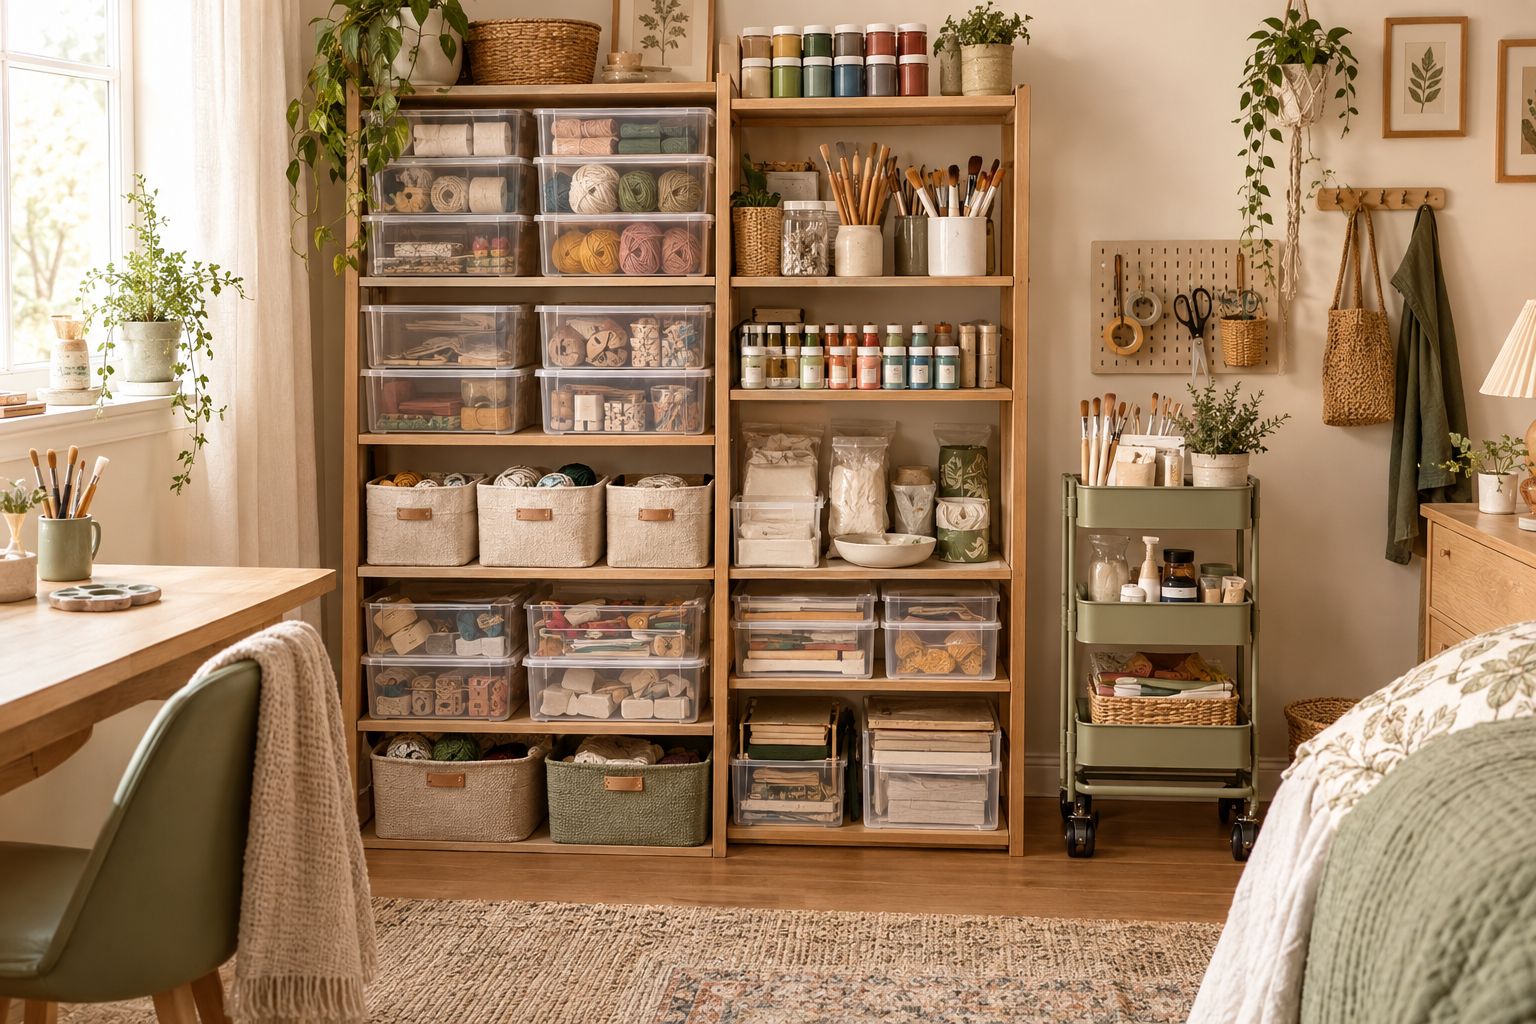
For a long time, my craft supplies lived in four places at once: a bag in the closet, a drawer I couldn’t fully open, a stack of boxes under the bed, and a growing pile on the corner of my desk. Every time I wanted to start a project, I spent the first twenty minutes just finding things, and by the time I’d gathered everything, I’d lost the momentum that made me want to craft in the first place.
What fixed it wasn’t a bigger space. I still don’t have a craft room. It was learning to store supplies by project and by how often I use them, instead of by whatever container happened to be nearby.
Once everything had a home, and the home was easy to reach, getting started took about two minutes, and cleaning up took even less.
This post covers the whole system: how to sort before you buy anything, what’s actually worth buying, twelve ways to store supplies in a tight space, and how to store each type of craft safely, from air dry clay and paint to candle wax and resin.
It works for a closet, a corner of a bedroom, or a kitchen table that has to become dinner again by six.
Before You Start: Why Craft Supplies Are So Hard to Store in a Small Space
Craft supplies are unusually awkward to organize, and it helps to know why before picking a fix.
- There are too many tiny, different things. Beads, brushes, wicks, blades, and buttons all need different containers, and a single big bin turns into a junk pile within a week.
- Some supplies are fussy. Air dry clay dries out, paint can freeze or leak, wax softens in heat, and yarn attracts moisture and moths.
- Some supplies are unsafe around kids and pets. Blades, resin, fragrance oils, and aerosol sealers all need a spot that’s out of reach.
- Projects take up more room than the supplies do. Half-finished work needs somewhere to live while it dries, which is the thing most storage plans forget.
- Small spaces have to do double duty. The same table or corner is often a craft surface, a desk, and a dining table.
Step Zero: Sort Before You Store
The most common mistake is buying storage first. If you organize a pile you don’t need, you’ve just made the clutter neater. Spend an hour sorting before you buy a single bin.
- Pull everything out. Put it all in one place, on the floor or a big table, so you can see how much you really own.
- Sort by craft, not by item. Group clay supplies together, candle supplies together, paint supplies together, and so on. This is how you’ll store them, so sort the way you want to store.
- Make three piles: keep, use up, and let go. Keep what you use regularly. Put aside anything you want to use soon in an “use up” box. Donate or pass along what you haven’t touched in a year and have no plans for. Dried-out paint, cracked tools, and half-used kits you’ll never finish can go.
- Check the safety of what you keep. Throw out anything that’s leaking, expired, or past the manufacturer’s shelf life.
- Take a photo inventory. Snap a quick photo of each category and keep it in a phone album. When you’re standing in a craft store, you can check what you already own before buying a fifth pack of the same thing.
Only after this will you know how much storage you really need.
What to Buy on Amazon
Here’s what to search for if you want to pull together a full system. I’m giving you search terms and what to look for rather than specific listings, since products and prices change constantly.
Hey there! Just so you know, I’m an Amazon affiliate. If you make a purchase through some of the links on this site, I may earn a small commission at no extra cost to you. You can read more on my Amazon affiliate disclaimer page.
- Clear stackable bins with lids: search “clear stackable storage bins with latching lids” and look for shallow and medium sizes, so you can see what’s inside without opening them
- Portable project boxes: search “portable craft storage box with handle” and look for ones with adjustable dividers
- Slim rolling cart: search “slim 3 tier rolling utility cart” and measure the gap where it will live before you buy
- Pegboard kit: search “pegboard wall organizer kit with accessories” and look for one that includes assorted hooks, shelves, and bins
- Over-the-door clear pocket organizer: search “over the door clear pocket organizer” and check the door thickness it supports
- Small clear jars with lids: search “small clear plastic jars with lids” for beads, buttons, and findings
- Adjustable drawer organizers: search “adjustable drawer organizer small” for tools and notions
- Bead and small parts organizer: search “bead storage organizer containers with dividers”
- Floating wall shelves: search “floating wall shelves set” and check the weight rating
- Cube organizer with fabric bins: search “6 cube storage organizer” and “fabric storage bins for cube organizer”
- Under-bed storage with wheels: search “under bed storage bins with wheels and lids” and measure the clearance under your bed
- Magnetic wall strip: search “magnetic tool holder strip wall mount” for scissors and metal tools
- Yarn or cord storage basket: search “yarn storage basket” for crochet and macrame supplies
- Brush and tool holders: search “paint brush holder” or use mugs and jars you already own
- Label maker or waterproof labels: search “label maker” or “waterproof labels”
You may already own half of this. Reusing jars, mugs, boxes, and baskets is always the cheapest start.
1. Give Every Craft Its Own Project Box
This is the single most useful change I’ve made. Instead of storing supplies by type, store each craft or project in its own box. When you want to make candles, you take down the candle box and everything is inside.
What it solves: Hunting for supplies across several rooms, and losing momentum before you even start.
How to set it up:
- Choose one clear or labeled box for each craft you do regularly, such as clay, candles, painting, and crochet.
- Put everything for that craft in its box: tools, supplies, and any instructions you use.
- Label the front and the side so you can read it on a shelf.
- Stack the boxes on a shelf or in a closet, with the ones you use most at the front.
Pro tip: Keep a small “to finish” box for unfinished projects, so half-done work doesn’t take over your table.
2. Use a Rolling Cart as a Mobile Craft Station
A slim rolling cart is the best answer for anyone who crafts at the kitchen table or in a shared room. You wheel it out, work, and wheel it away.
What it solves: Having no permanent craft space, and needing everything within reach while you work.
How to set it up:
- Choose a cart that fits through your doorways and into the gap where you’ll store it, usually 12 to 15 inches wide.
- Assign each tier a job: the top for tools you use every session, the middle for supplies, the bottom for bulky items.
- Keep small things in baskets or bins on the cart, so they don’t roll around when you move it.
Pro tip: If you need to get your cart through a tight space, add a handle or put it on lockable wheels so it doesn’t drift while you work.
3. Mount a Pegboard for Tools and Small Supplies
A pegboard turns a blank piece of wall into storage, and it’s one of the best uses of vertical space in a small area. Hooks hold scissors, rulers, and tools, and small shelves and baskets hold paint bottles and notions.
What it solves: Tools buried in drawers, and the lack of counter space to lay things out.
How to set it up:
- Mount the pegboard above your work surface, where you can reach it from a sitting position.
- Hang your most-used tools at eye level, and heavier or less-used items lower.
- Outline each tool’s spot with a marker, so it’s easy to see where things go back.
Pro tip: Pegboards are great for kids’ craft supplies as well, as I mention in my toy organization ideas.
4. Use an Over-the-Door Organizer
The back of a closet or bedroom door is wasted space in most small homes. A clear-pocket organizer holds paint bottles, brushes, rolls of washi tape, ribbons, and small tools, and you can see everything at a glance.
What it solves: Small items that disappear into drawers, and a lack of floor or shelf space.
How to set it up:
- Check the thickness of your door against the organizer’s hooks before buying.
- Put the supplies you use most in the pockets at eye level.
- Keep heavy items, like full paint bottles, in lower pockets, so the organizer doesn’t pull away from the door.
Pro tip: Keep only light supplies in an over-door organizer, since heavy loads can strain the door and the hooks. This is also a great place to store the kind of small items I cover in my storage solutions for small spaces.
5. Go Vertical With Wall Shelves
When floor space is gone, walls are where you have room. A few floating shelves above a desk or in a corner hold jars, baskets, and project boxes, and keep your work surface clear.
What it solves: A crowded work surface, and bins with nowhere to go.
How to set it up:
- Mount shelves into wall studs or use proper wall anchors, since craft supplies get heavy.
- Put the supplies you use most on the shelf closest to your hands.
- Use matching baskets or jars on the shelves so the wall looks tidy even when it’s full.
Pro tip: A corner is one of the best places to add shelves. My guide to using corner space has more ideas for corners.
6. Turn a Closet Into a Craft Closet
A shallow closet can hold a full craft setup if you use the whole thing: the shelves, the door, and the floor.
What it solves: Having no dedicated room, and needing to hide the mess when guests come.
How to set it up:
- Empty the closet and take out anything that isn’t craft-related, or relocate it.
- Add shelves or a stackable cube organizer for bins, and an over-door organizer on the back of the door.
- Keep your heaviest supplies on the bottom and your most-used ones at waist to eye level.
- Add a small light, such as a battery-powered LED, so you can see inside.
Pro tip: Leave a bit of space for a small folding table or lap desk, so you can pull out the project box and craft right there, then close the door when you’re done.
7. Use Under-Bed Storage for Bulky or Seasonal Supplies
The space under a bed is ideal for supplies you only use a few times a year, like holiday craft kits, spare fabric, or large rolls of paper.
What it solves: Bulky items that take up shelf space, and supplies you don’t need daily.
How to set it up:
- Choose low bins with wheels or handles, so you can pull them out easily.
- Keep supplies inside sealed bags or lidded bins to protect against dust and moisture.
- Label the end of each bin, so you can read it without pulling it out.
Pro tip: Don’t store moisture-sensitive supplies, such as paper or clay, in a damp or cold spot, and avoid storing anything flammable or fragile where it can get crushed.
8. Keep Small Items in Clear Jars and Drawer Organizers
Beads, buttons, wicks, findings, and jump rings get lost in big bins. Small clear jars and drawer organizers give each type of small item its own space.
What it solves: Tiny items scattered everywhere, and the frustration of digging for one small piece.
How to set it up:
- Sort small items by type and size.
- Put each type in its own jar or compartment, and label it.
- Store jars on a shelf at eye level, or in a drawer with dividers so everything is visible when you open it.
Pro tip: Mason jars and recycled food jars work as well as store-bought ones, and they make a handsome display if you line them up on a shelf.
9. Store Paint, Brushes, and Sealers the Right Way
Paint is one of the biggest sources of mess and waste in a craft stash. A few small habits keep it usable for years.
What it solves: Dried-out paint, ruined brushes, and bottles that leak in a bin.
How to set it up:
- Wipe the neck and cap of every bottle clean before closing it, so the cap doesn’t seal itself shut.
- Store brushes bristles-up in a jar or mug, or lay them flat. Never rest them on their bristles.
- Dab a spot of each color on the cap, so you can find the right one without opening it.
- Keep paint in a bin with a lid, in a room that doesn’t freeze or overheat.
Pro tip: Acrylic paint can be damaged by freezing, so avoid unheated garages in winter. My guide to the best paint for air dry clay covers which paints are worth keeping on hand.
10. Use a Cube Organizer With Fabric Bins
A cube organizer with fabric or canvas bins is one of the most flexible storage pieces for a small space. It looks like furniture, and it hides a lot.
What it solves: Open shelves that look messy, and the need for something that looks good in a living area.
How to set it up:
- Choose a cube organizer sized to fit your wall, and anchor it to the wall if it’s tall.
- Use bins in a consistent color, so the whole unit looks tidy.
- Label each bin with a tag on the front.
- Use the top as a small work surface or a display for a finished piece.
Pro tip: A cube organizer is great in a bedroom or living room, where you want craft storage that doesn’t look like craft storage.
11. Create a Craft Corner That Folds Away
If you have no spare room at all, a fold-down desk, a small secretary desk, or a cabinet that opens into a workstation lets you craft and then close it all up.
What it solves: No dedicated craft area, and the need to hide your supplies when you’re done.
How to set it up:
- Choose a wall-mounted fold-down table, a drop-leaf desk, or a console cabinet with doors.
- Store the most-used tools inside, on the door, or in a shallow drawer.
- Set up your project box on the surface when you work, and put it away when you finish.
Pro tip: Pair it with a rolling cart and a wall shelf, and you have a complete craft station that disappears in a minute. For ideas on small workspaces, see my posts on small office ideas and home office aesthetic.
12. Make Your Own Storage With Air Dry Clay
One of the best parts of crafting is making your own storage. A handmade pen holder, a catch-all dish, or a set of small pots makes a craft area feel personal, and they fit exactly the spot you need.
What it solves: Storage that doesn’t fit your space, and a craft area that feels purely functional.
How to set it up:
- Make a pen or brush holder, a cable organizer, or a small dish from my 12 air dry clay projects for your desk.
- Use mini clay pots for beads, buttons, or small tools, and clay bowls or a trinket dish for tiny items.
- Seal each piece, following my sealing guide, so it holds up to daily handling.
Pro tip: If you’re new to clay, start with my 10 essential tips, and keep these pieces for dry items only, since air dry clay isn’t waterproof.
How to Store Each Type of Craft Supply
Different crafts have different needs. This is the section I’d bookmark, and as always, follow the manufacturer’s label on anything you buy.
Air dry clay. Keep it in an airtight container or wrap it tightly in plastic wrap, since opened clay dries out quickly. A slightly damp paper towel, not a wet one, inside the container helps keep it soft. My guide to the supplies I reach for covers the tools to keep with it, and if you make your own, see my homemade air dry clay recipe.
Polymer clay. Keep it cool and away from heat and direct sun. Polymer clay can react with some plastics and soften or mark them, so wrap it in wax paper or keep it in a zip bag, rather than loose in a plastic box. If you bake it, my guides on how long to bake polymer clay and the polymer clay lighter case cover the process.
Paint, glue, and sealers. Keep caps clean, store in a bin with a lid, and keep everything away from freezing and high heat. Aerosol sealers should be kept in a cool, dry place away from heat and flame, as the can says, and not in a hot garage or car.
Candle-making supplies. Wax softens in heat, so keep it in a cool spot. Store wicks flat in a bag so they don’t kink. Many fragrance oils can irritate skin and some are flammable, so keep them tightly capped, upright, and out of reach of children and pets. My beginner candle guide and my tips for stronger-smelling candles cover what you need.
Soap and bath supplies. Keep molds clean and dry, and store essential and fragrance oils like other oils, capped and out of reach. See my soap making for beginners for what to keep on hand.
Resin. Keep resin and hardener sealed, out of direct sunlight, and out of reach of children and pets, and follow the maker’s storage and shelf-life guidance. Store gloves and mixing cups with it so you’re not tempted to improvise. My resin coasters tutorial shows a basic setup.
Yarn and macrame cord. Keep it dry and out of direct sun. If you store wool, a closed container helps protect it from moths. A basket or bag keeps balls from rolling, and a handmade basket is a great use for your own work, as in my macrame basket patterns. My crochet baby hat pattern is a good project to use up a single skein.
Paper and fabric. Keep it flat or rolled, and in a dry place, not a damp basement or garage.
Blades and sharp tools. Keep craft knives in a closed case or with the blade covered, and out of reach of children.
Zone Your Space: A Simple Layout for a Small Area
Even in a tiny space, it helps to divide your craft area into three zones.
The work zone. Your table or desk. Keep only the current project and the tools you’re using on it.
The daily zone. The shelf, cart, or pegboard within arm’s reach, with the tools and supplies you use most.
The storage zone. The closet, under-bed bins, or higher shelves, for supplies you use less often.
When you finish a session, everything returns to its zone. That’s the whole system.
If You Craft at the Kitchen Table
A lot of us don’t have a craft space at all. If that’s you, the goal is to make setup and cleanup as fast as possible.
- Use a project box with a handle that holds everything for the craft.
- Cover the table with a craft mat or a piece of parchment paper so you can wipe it clean in a minute. My mini pots tutorial has a note on workspace prep that works for any craft.
- Keep a small caddy for your most-used tools.
- Have a drying spot for wet projects, such as a high shelf or a tray in a closet, so a project in progress doesn’t take over the table.
- Do a 10-minute reset at the end of each session: tools back in the box, trash out, surfaces wiped.
Renter-Friendly, No-Drill Options
If you can’t drill into walls, you still have options: over-the-door organizers, tension rods, rolling carts, adhesive hooks rated for the weight, cube organizers, and freestanding shelves. For more on getting the most out of a rental, my guide to garage workshop layouts has ideas that work for any shared or flexible space.
Budget Breakdown: What to Buy First
Under $15: Reuse jars, mugs, and boxes you already have, and add a pack of labels and a few zip bags. This alone solves most clutter.
$15 to $40: A pack of clear bins, an over-door organizer, or a set of small drawer organizers.
$40 and up: A rolling cart, a pegboard, a cube organizer, or wall shelves. These make the biggest difference, but they’re the least urgent if you’ve already sorted.
How to Keep It Organized
Do a 10-minute reset after every session. Putting things away while the project is fresh is much easier than doing it later.
Follow one in, one out. When you bring home a new supply, let go of or use up an old one.
Check the photo inventory before you shop. It stops duplicate purchases.
Do a quarterly sort. Every few months, take everything out of one category and re-sort. Throw away what’s dried out or broken.
Finish before you start something new. An unfinished project box is the fastest way to a messy space. My creative 1-hour craft ideas post is full of small projects that actually get finished.
Common Mistakes to Avoid
Buying storage before sorting. You’ll organize things you don’t need.
Storing everything in one giant bin. It becomes a pile within a week.
Hiding supplies where you can’t see them. If you can’t see it, you won’t use it. Choose clear bins or labels.
Storing supplies in a hot garage or damp basement. Heat and moisture ruin paint, wax, clay, paper, and fabric.
Ignoring safety. Blades, resin, fragrance oils, and aerosol sealers all need to be stored out of reach of kids and pets.
Never finishing projects. Unfinished projects take over your space.
Frequently Asked Questions
How do I organize craft supplies with no extra room? Use vertical space and hidden space. A pegboard, an over-door organizer, a rolling cart, and under-bed bins can add a lot of storage without taking floor space.
What’s the best way to store small craft items like beads and buttons? Small clear jars or drawer organizers with dividers. Sort by type, and label each one.
How do I store paint so it doesn’t dry out? Wipe the cap and neck clean before closing, store it in a lidded bin, and keep it away from freezing temperatures and high heat.
How do I keep air dry clay from drying out? Wrap it tightly in plastic wrap, keep it in an airtight container, and add a slightly damp paper towel if you like.
How can I keep my craft stash from taking over my home? Sort first, use project boxes, follow one in, one out, and do a quick reset after every session.
Is it safe to store craft supplies around kids and pets? Store blades, resin, fragrance oils, aerosol sealers, and small parts out of reach, and follow the label on every product.
Final Thoughts
An organized craft space isn’t about having a perfect room, it’s about making it easy to start and easy to stop. When your supplies have a home, you spend your time making things instead of looking for them. Start with the sort, choose one or two of the ideas above, and build from there.
If you only do one thing this weekend, pull everything out and sort it by craft. That single hour will tell you exactly what you need, and what you can finally let go of.
If You Want More Organization Ideas to Try: