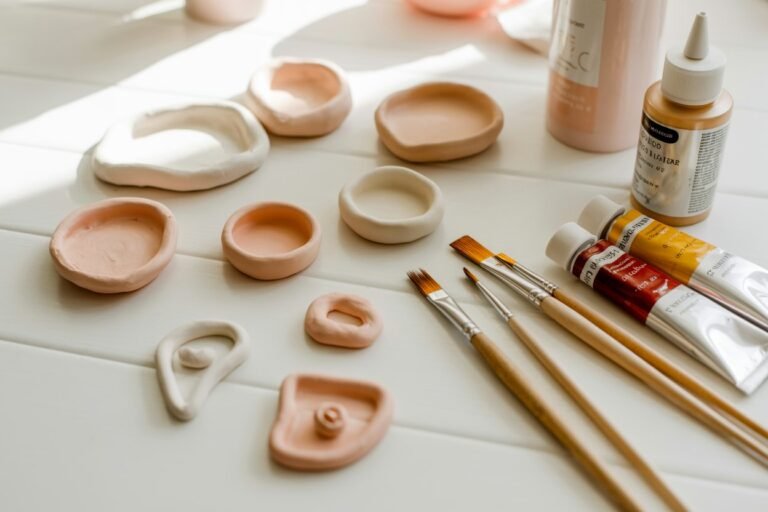
How to Make Polymer Clay Donut Fridge Magnets
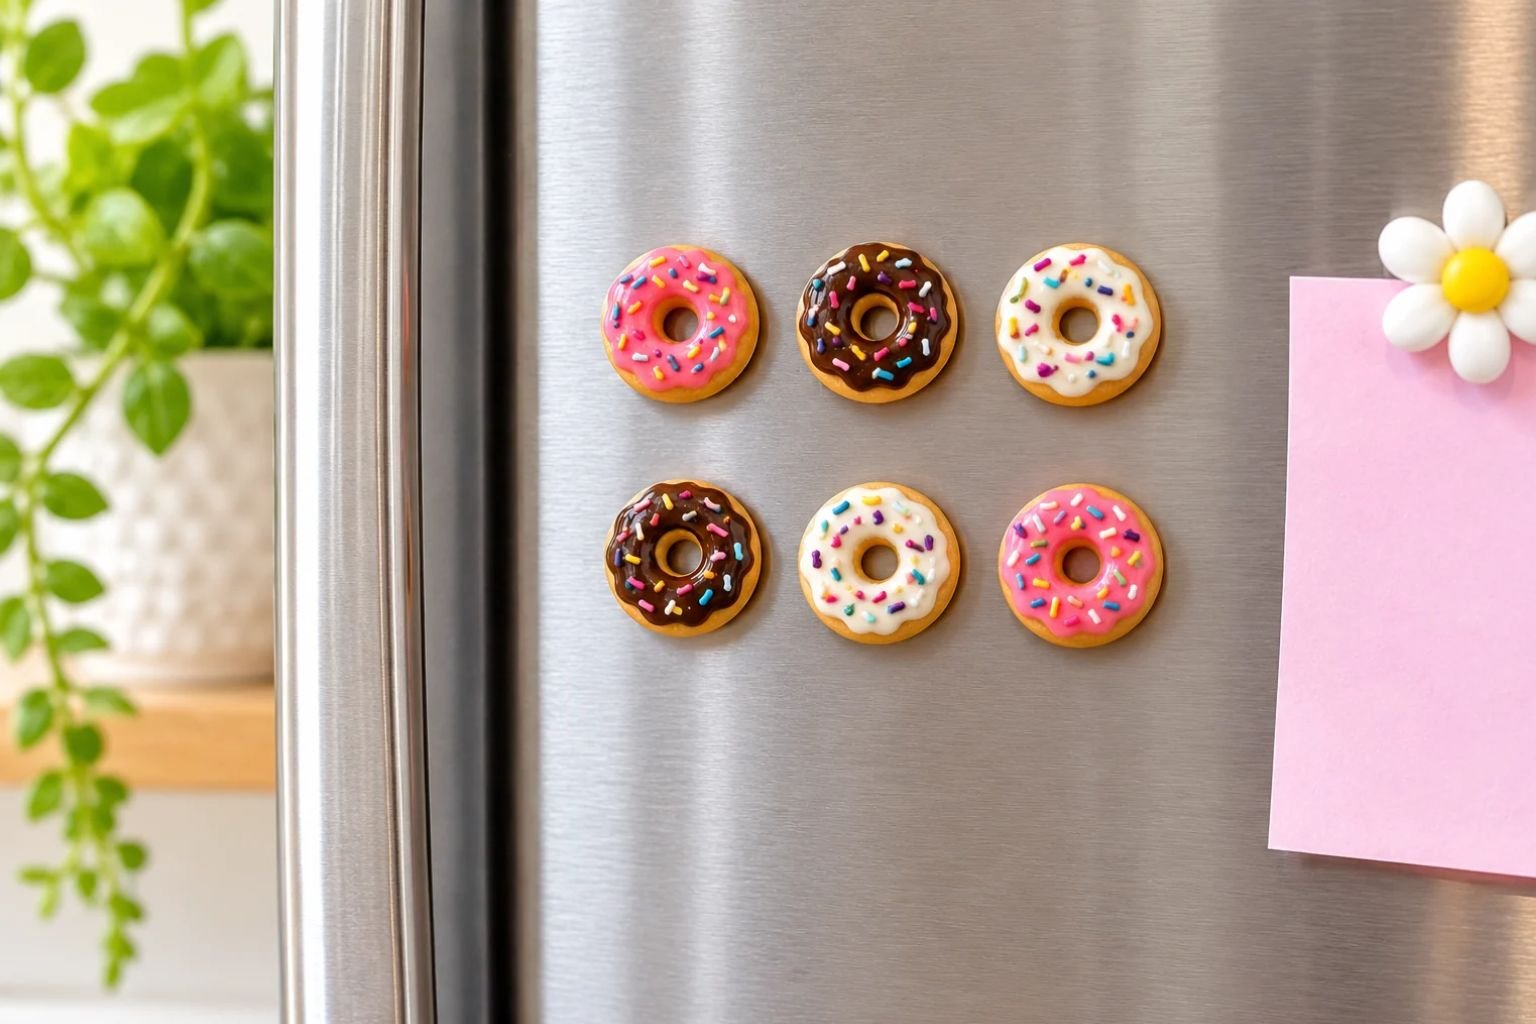
If you love cute little handmade crafts, these polymer clay donut fridge magnets are such a fun project to try. They look like miniature bakery donuts, complete with golden-brown edges, glossy icing, and colorful sprinkles. Even better, you can make them in different flavors and colors to create a whole collection for your refrigerator.
I love projects like this because they turn a simple material into something that looks surprisingly realistic.
You don’t need to be an expert with polymer clay, either. The donut shape is easy to create, and the icing gives you plenty of room to experiment with different designs.

For this tutorial, I’ll show you how to make miniature donuts with pink strawberry icing, chocolate icing, and classic vanilla icing.
I’ll also explain how to add the little sprinkles, give the clay a realistic baked texture, and attach magnets to the back once everything has been baked.
These polymer clay donut magnets are lovely for decorating your fridge, making small handmade gifts, adding to a craft collection, or even creating cute items to sell at craft fairs.
Let’s get started!
Why You’ll Love These Polymer Clay Donut Magnets

There are so many reasons to try this little project, especially if you’re still learning how to work with polymer clay.
- Beginner-friendly: You only need a few basic shaping techniques to create the donut forms.
- Easy to customize: Make chocolate, strawberry, vanilla, caramel, or even colorful birthday-cake donuts.
- Great for small clay leftovers: You can use small amounts of different clay colors for the icing and decorations.
- Useful and decorative: Unlike ordinary clay miniatures, these donuts become functional refrigerator magnets.
- Lovely handmade gifts: You can package a few together in a little bakery-inspired gift box.
- Potential craft-fair product: Their small size makes them a fun item to experiment with if you sell handmade accessories.
If you’re still deciding which clay to use for different projects, my guide to air-dry clay vs. polymer clay explains how the two materials differ and what each one is best suited for.
Supplies You’ll Need to Make Polymer Clay Donut Magnets
You don’t need a huge collection of supplies for this project. Most of the materials are basic polymer clay tools and a few small magnets.
Materials
- Tan or light beige polymer clay: This will be the base of your donuts.
- Dark brown polymer clay: For chocolate icing.
- Pink polymer clay: For strawberry icing.
- White or cream polymer clay: For vanilla icing.
- Small amounts of colored polymer clay: For making the sprinkles.
- Small round magnets: Strong craft magnets that are suitable for the size and weight of your finished donuts.
- Polymer clay-compatible gloss glaze: Optional, for giving the icing a shiny finish.
- Strong adhesive: A suitable adhesive for attaching magnets to baked polymer clay.
Tools
- Clay roller or acrylic rolling pin
- Craft blade
- Round cutter or small circular cutter
- Small round tool for making the donut holes
- Toothpick or needle tool
- Ball tool or rounded sculpting tool
- Soft toothbrush or texture tool
- Baking tile or oven-safe baking surface
- Oven thermometer
- Small paintbrush, if applying glaze
You can use a few everyday clay tools to create most of the details. For example, a toothpick works well for making tiny sprinkle marks, while a soft toothbrush can help create a slightly rough texture on the donut base.
Use tools dedicated to crafting rather than returning them to food preparation.
How to Make Polymer Clay Donut Fridge Magnets
I’ll break the process down into simple steps so you can follow along even if this is your first time making miniature food with polymer clay.
Step 1: Prepare the Donut Base
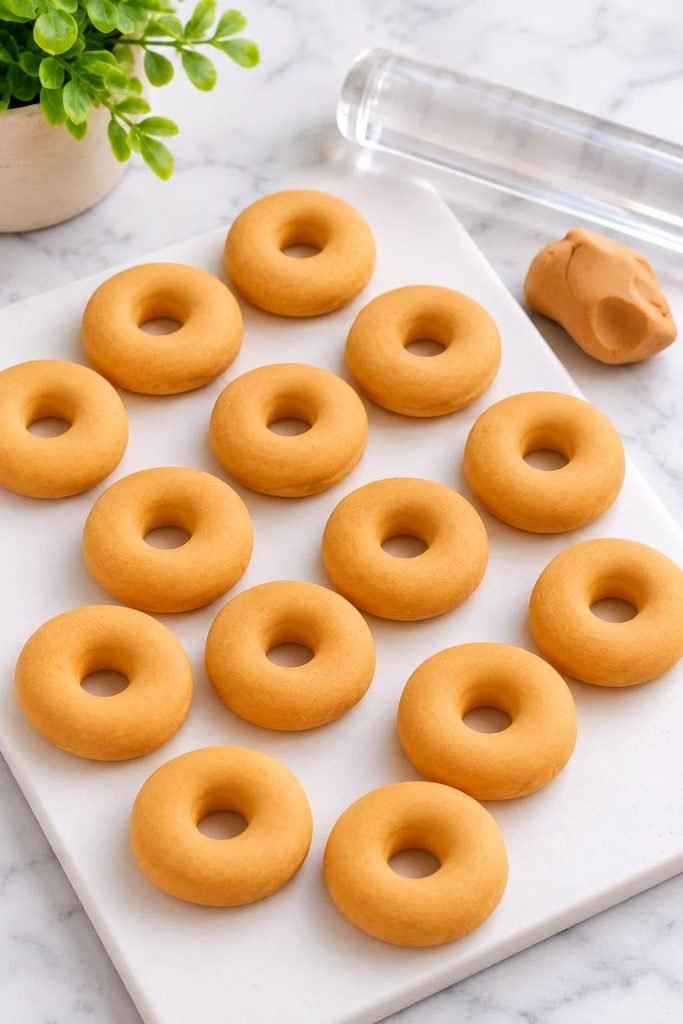
Start by taking a small piece of tan or light beige polymer clay. This will become the baked dough portion of your miniature donut.
Condition the clay by kneading it between your fingers until it becomes soft and flexible. Polymer clay can feel quite firm when you first take it out of the package, so spend a little time working it until it is easy to shape.
Roll the clay into a smooth ball, then gently flatten it into a thick, rounded disc.
You don’t want it to be too thin because the finished donut needs enough thickness to look realistic and hold its shape.
For a traditional donut shape, aim for a rounded disc with a thickness of approximately 5 to 7 mm. You can make yours slightly thicker or thinner depending on the size you prefer.
Step 2: Make the Donut Hole
Now it’s time to create the recognizable donut shape.
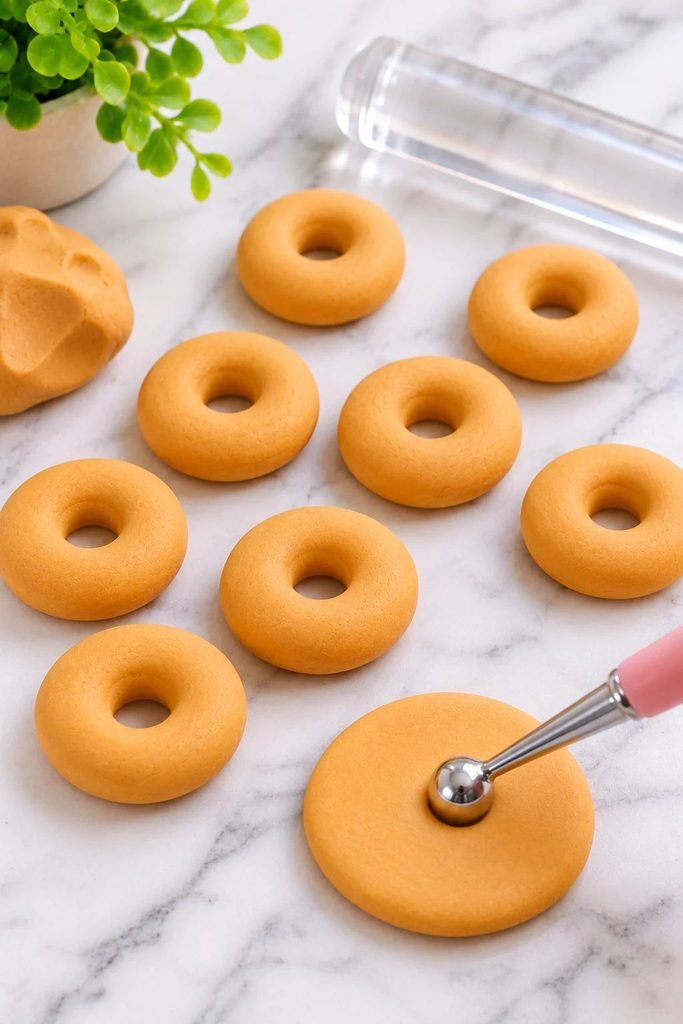
Use a small round cutter, the end of a suitable clay tool, or another rounded tool to make a hole in the center of your flattened clay.
Gently remove the clay from the middle.
Use your fingers to smooth the outside edges of the donut and the inside of the hole. If the opening looks too small, carefully widen it with a rounded sculpting tool.
Don’t worry if your donut isn’t perfectly symmetrical. Real donuts have slightly uneven edges, and that small variation can make your miniature look more natural.
I also like to gently round the top and bottom edges instead of leaving them completely flat.
Step 3: Give the Donut a Baked Texture
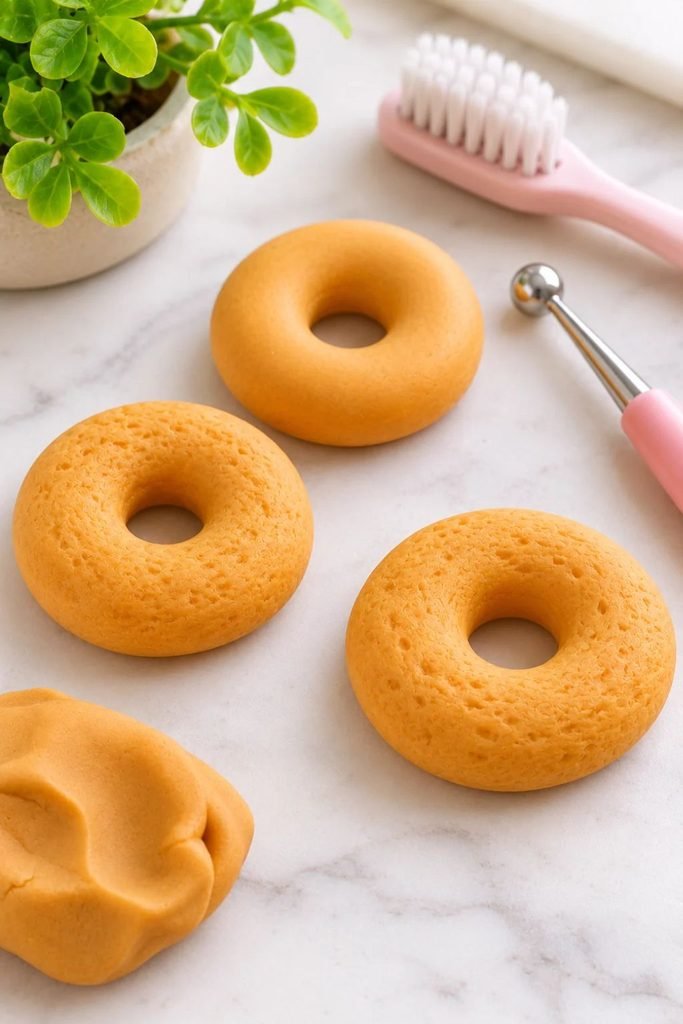
This is one of my favorite details because it helps the finished magnets look more like actual miniature donuts.
A perfectly smooth clay donut can look a little too much like a plastic ring. Adding a subtle texture gives it the appearance of soft, fried dough.
Take a soft toothbrush, a textured sponge, or a small stippling tool and gently press it against the surface of the tan clay.
Work around the top and outer edges, using light pressure. You can also add a little texture around the inside of the donut hole.
Avoid pressing too hard or making deep marks. The goal is to create a fine, slightly uneven surface rather than a rough or damaged-looking donut.
Once you’re happy with the texture, smooth away any unwanted fingerprints around the edges.
Step 4: Prepare the Icing
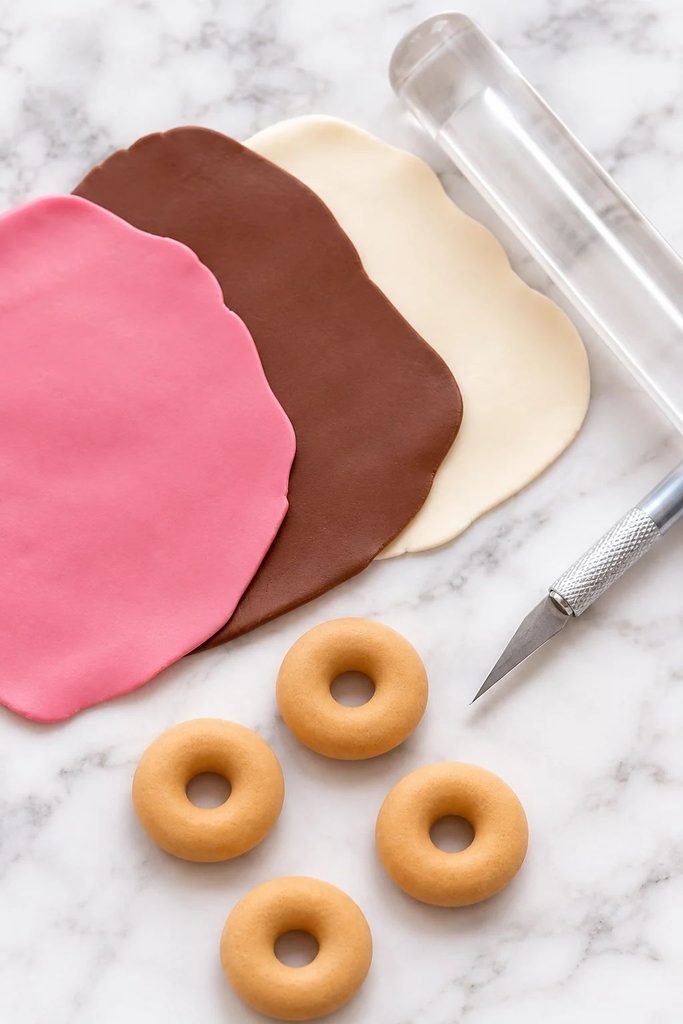
Now comes the fun part!
The icing is what makes these polymer clay donuts so cute. You can make several different colors and decorate each donut to look like a different bakery flavor.
For this tutorial, I’m using three classic options.
Strawberry icing
Take a small piece of pink polymer clay and condition it until soft. Roll it into a thin sheet using your clay roller.
Chocolate icing
Use dark brown polymer clay. Condition it and roll it into a thin sheet, just as you did with the pink clay.
Vanilla icing
Take white or cream polymer clay and roll it into a thin sheet.
Try to keep the icing thin enough to sit naturally on the donut without hiding too much of the baked base.
Step 5: Shape the Icing Around the Donut
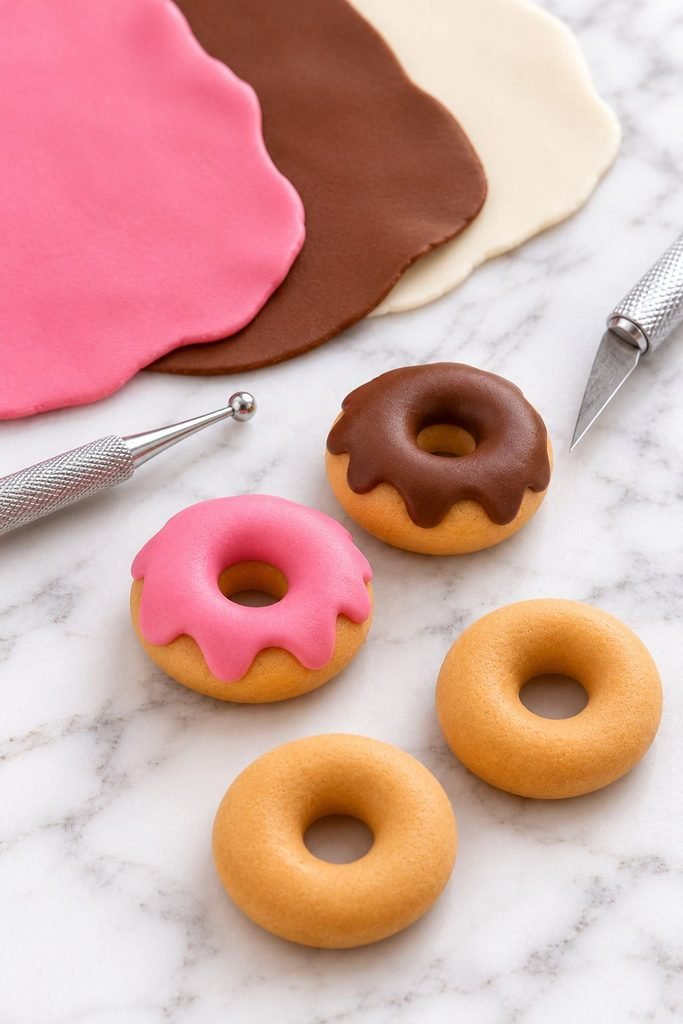
Place your rolled icing sheet over the top of the donut.
Gently press it into place so it follows the rounded shape of the base.
Use a craft blade to trim away the extra clay around the outer edge. You don’t need to make the edge perfectly straight.
In fact, slightly uneven icing looks much more realistic.
To create the drippy icing effect, use a small blade or rounded sculpting tool to shape a few soft curves along the edge. Make some sections hang a little lower than others, as though the icing has naturally settled over the donut.
Next, create the hole in the icing. Use your small round tool to carefully open the center and remove any excess clay.
Smooth the inside edge of the icing around the hole.
Repeat the process with your remaining icing colors.
Step 6: Make the Miniature Sprinkles
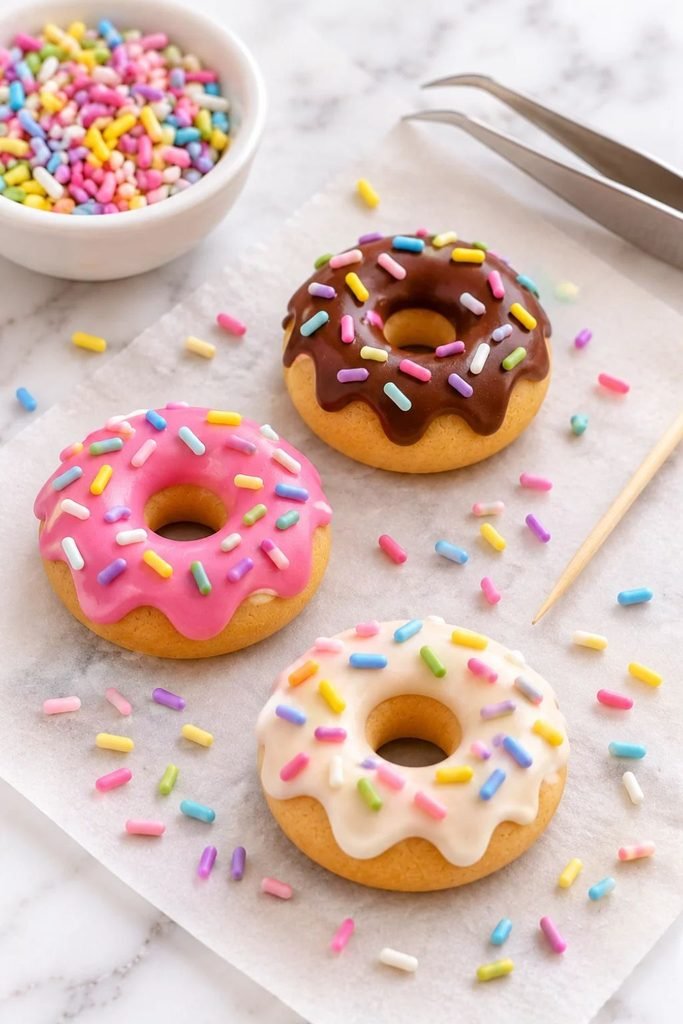
A donut covered in colorful sprinkles is always a cute little detail, and these are surprisingly easy to make with polymer clay.
Take tiny pieces of colored clay and roll each one between your fingers to create very thin strands.
Cut the strands into small, short pieces using your craft blade.
You can make white, pink, red, yellow, blue, purple, and pastel-green sprinkles.
For a more realistic appearance, make the sprinkles slightly different lengths instead of cutting every piece to exactly the same size.
You can also create a few tiny round decorations if you want a different look.
Step 7: Add the Sprinkles to Your Donuts
Once your sprinkles are ready, start placing them onto the icing.
Use tweezers or the tip of a toothpick to position each tiny piece. Gently press them into the icing so they stay in place during baking.
Try not to arrange everything in perfectly straight lines. Scatter the sprinkles naturally across the surface, leaving small spaces between them.
For the chocolate donut, white sprinkles create a lovely contrast.
For the strawberry donut, a combination of white and darker pink sprinkles looks beautiful.
For vanilla icing, use several pastel colors to create a cheerful bakery-style finish.
You can also make a few donuts with only white sprinkles or tiny colored dots for variety.
Step 8: Check the Shape Before Baking
Before baking, take a moment to inspect each donut.
Check that the icing is attached properly, the donut holes are open, and the sprinkles are pressed securely into the surface.
Smooth out any fingerprints or unwanted marks.
If you notice that one side of the donut is much thicker than the other, gently adjust the shape while the clay is still workable.
You can also make small variations between your donuts. One can have more icing drips, another can have extra sprinkles, and another can have a simple, minimal design.
These little differences make a finished set look more handmade and interesting.
Step 9: Bake the Polymer Clay Donuts
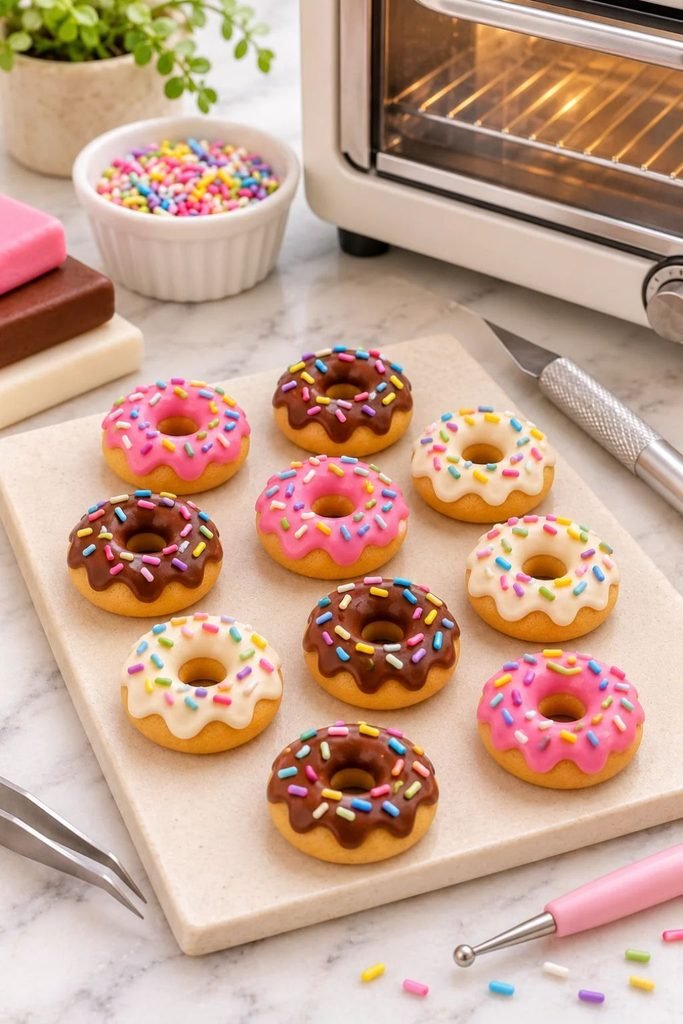
Place your finished donuts on a suitable oven-safe baking surface, following the instructions for your particular polymer clay brand.
Polymer clay brands have different baking recommendations, so always check the packaging for the correct temperature and baking time.
Use an oven thermometer to check that your oven is maintaining the correct temperature. An oven that becomes too hot can scorch or damage polymer clay.
Do not microwave polymer clay, and do not guess the baking temperature.
Once the recommended baking time is complete, carefully remove the baking surface from the oven and allow the donuts to cool completely before handling them.
The clay may feel slightly flexible while warm, so avoid bending or testing the finished pieces until they have cooled.
Step 10: Add a Glossy Finish
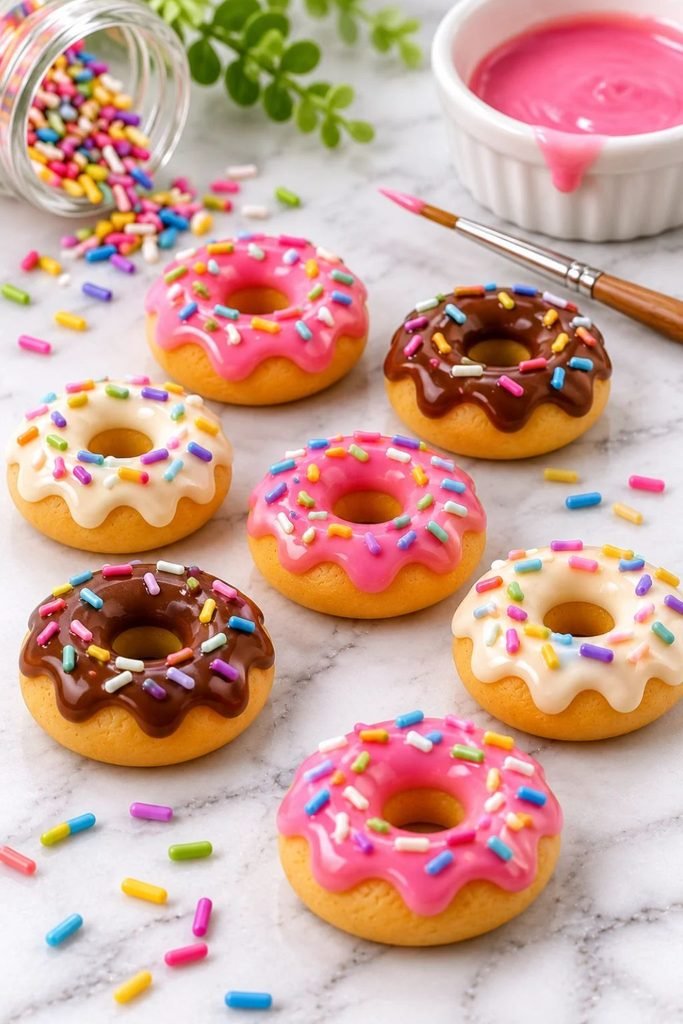
This step is optional, but I think a little shine makes these miniature donuts look even more realistic.
Once the clay has cooled, you can apply a thin layer of polymer clay-compatible gloss glaze to the icing.
Use a small paintbrush and apply the glaze carefully, avoiding thick puddles around the sprinkles and donut holes.
A glossy finish works especially well for chocolate and strawberry icing because it gives the surface the appearance of fresh frosting.
If you want more guidance on choosing and applying a finish, take a look at my tutorial on how to glaze polymer clay.
Always check that your chosen glaze is compatible with your polymer clay. Allow it to dry or cure according to the manufacturer’s instructions before attaching the magnets.
You can also leave the donuts with their natural clay finish if you prefer a softer, more matte appearance.
Step 11: Attach the Magnets to the Back
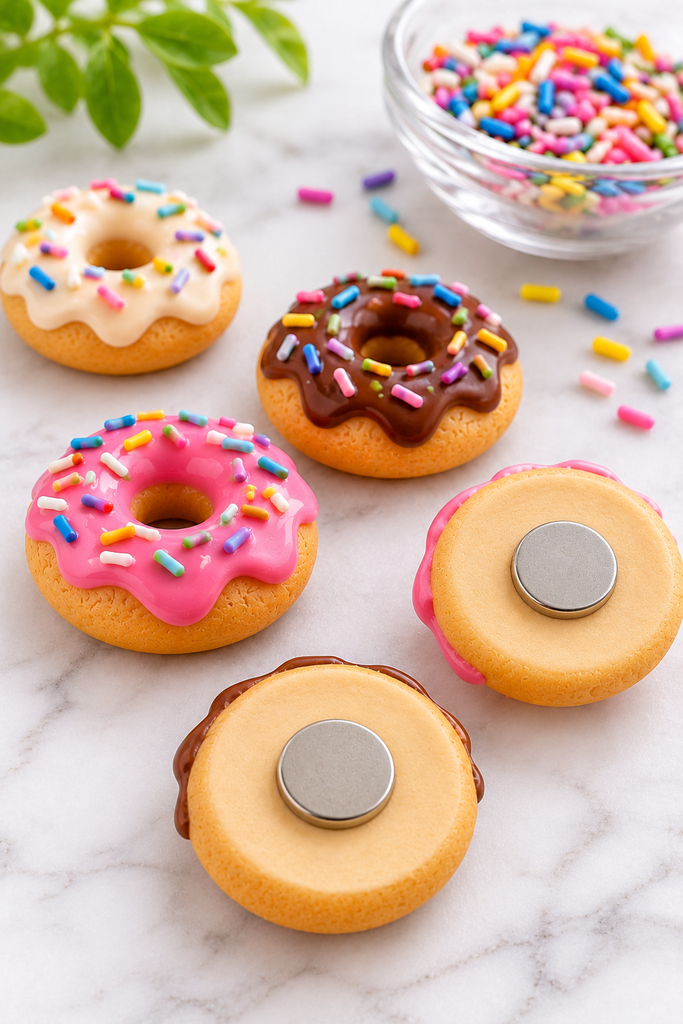
Now it’s time to turn your miniature donuts into functional fridge magnets.
Once the donuts are completely cool and any glaze has fully dried, turn each one over.
Choose a magnet that is appropriately sized for the back of your donut. It should sit flat without extending too far beyond the edges.
Apply a small amount of strong adhesive that is suitable for both the magnet and baked polymer clay.
Position the magnet in the center of the back and press it gently into place.
Follow the adhesive manufacturer’s instructions for curing time. Leave the magnets undisturbed until the adhesive has fully set.
Before using them, test each magnet on a suitable magnetic surface to make sure it holds securely.
If your donut is larger or heavier, you may need a stronger magnet or a different attachment arrangement. Make sure the magnet is firmly secured and cannot easily detach.
Important: Small magnets can be dangerous if swallowed. Keep unfinished magnets and completed projects away from young children and pets, and supervise their use around anyone who might put small objects in their mouth.
More Polymer Clay Donut Designs to Try

Once you’ve made your first set, you can have fun experimenting with different icing colors and decorations.
Here are a few ideas I would love to try.
1. Classic Chocolate Donuts
Use dark brown icing with tiny white sprinkles. You can also add a little lighter brown clay to create a chocolate-drizzle effect.
2. Pink Strawberry Donuts
Use soft pink icing with white and red sprinkles. A slightly darker pink drizzle can make the design even prettier.
3. Vanilla Sprinkle Donuts
Create a cream-colored icing layer and decorate it with pastel sprinkles in yellow, pink, blue, purple, and green.
4. Caramel Donuts
Use a warm caramel-colored icing and add a few thin strips of darker brown clay to resemble caramel drizzle.
5. Birthday Cake Donuts
Use white icing and lots of colorful sprinkles. You can even add tiny pastel dots around the edges for a fun celebration-inspired design.
6. Mini Donut Variety Set
Instead of making every donut the same size, create a collection of smaller and slightly larger donuts with different icing colors. A matching set can look especially cute when displayed together.
Tips for Making Realistic Polymer Clay Donut Magnets
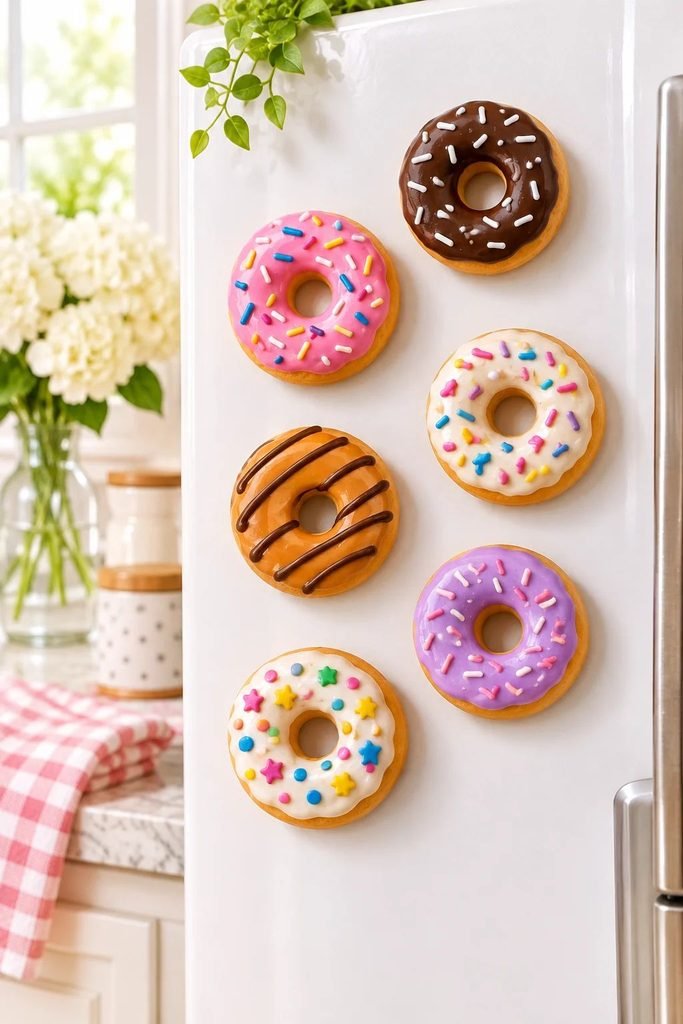
A few small details can make a big difference in how your finished magnets look.
- Keep the icing slightly uneven: Perfectly smooth edges can look artificial. A few gentle drips make the donuts look more realistic.
- Don’t make the icing too thick: A thin layer looks more like frosting and allows the baked dough to remain visible around the edges.
- Use different sprinkle sizes: A mixture of tiny and slightly longer sprinkles creates a more natural appearance.
- Avoid overcrowding the decorations: You want the icing to remain visible rather than covering the entire surface with sprinkles.
- Add subtle texture to the dough: A soft toothbrush or texture tool can help create the appearance of a baked surface.
- Make each donut a little different: Changing the icing, colors, and sprinkle placement gives your collection more personality.
- Choose magnets before finishing: Knowing the size of your magnets beforehand helps you plan the thickness and size of the donut bases.
Common Mistakes to Avoid
Even though this is a beginner-friendly project, there are a few things that can affect the finished result.
Making the Donut Too Thin
If your donut base is too thin, it may be difficult to handle and can look more like a flat decoration than a miniature donut.
Keep the base thick enough to give it a rounded, three-dimensional shape.
Making the Icing Too Thick
Thick icing can hide the donut base and make the finished magnet look bulky.
Roll the icing into a thin sheet and trim away any excess before adding the decorations.
Pressing the Sprinkles Too Deeply
The sprinkles should sit on top of the icing, not disappear into it.
Press them gently into place so they stay attached without losing their shape.
Overworking the Clay
Repeatedly touching and reshaping the clay can leave fingerprints and flatten the details.
Try to finish the donut base first, then add the icing and sprinkles without making unnecessary adjustments.
Baking at the Wrong Temperature
Polymer clay needs to be baked according to the manufacturer’s instructions. Baking at an incorrect temperature can damage the finished pieces.
Always check the packaging and use an oven thermometer.
Attaching the Magnets Before Baking
For this project, it’s best to attach the magnets after baking and cooling.
This allows you to use an adhesive suitable for the magnet and finished clay without exposing the magnet or adhesive to the baking process.
How to Package Polymer Clay Donut Magnets as Gifts
These little donuts are already cute on their own, but packaging them nicely makes them even more special.
If you’re giving them as gifts, you could place three or four different flavors inside a small bakery-style gift box.
Use a little tissue paper underneath to keep them from moving around. You can also add a small card with a message such as “A little sweetness for your fridge.”
For a more colorful presentation, arrange the magnets in a single layer so the different icing designs are visible.
If you’re making them to sell, you could package individual donuts in small gift boxes or create themed sets such as a chocolate collection, pastel collection, or mixed bakery collection.
You can find more inspiration in my guide to 17 small handmade products that make money, especially if you’re exploring small crafts that could become part of a handmade business.
Frequently Asked Questions
Can beginners make polymer clay donut magnets?
Yes! This is a great beginner project because the shapes are simple and you don’t need advanced sculpting skills.
The most important parts are creating a rounded donut base, shaping the icing, and adding the small sprinkles. You can start with just two or three donuts and experiment with more detailed designs as you become comfortable working with polymer clay.
What kind of clay should I use for donut fridge magnets?
Use polymer clay rather than air-dry clay for this tutorial.
Polymer clay is designed to harden when baked according to the manufacturer’s instructions, making it suitable for small decorative pieces like miniature donuts.
Can I use air-dry clay instead?
You can experiment with making donut-shaped decorations from air-dry clay, but the process and finishing requirements will be different.
Air-dry clay hardens by drying rather than baking, and you will need to allow it to dry completely before decorating or sealing it. If you’d like to try a similar magnet project with that material, my DIY fruit air-dry clay magnets tutorial is another fun project to explore.
Do polymer clay fridge magnets need to be sealed?
No, sealing is not always necessary. Polymer clay can be left with its natural finish after baking.
However, if you want the icing to look shiny, you can apply a compatible gloss glaze. Always check the product instructions to make sure it is suitable for polymer clay.
What magnets should I use?
Use small, appropriately sized craft magnets that can support the finished donut without extending beyond its edges.
The right strength depends on the size and weight of your finished piece. Test the magnet before packaging or displaying it, and make sure it is securely attached.
Can I sell handmade polymer clay donut magnets?
Yes, you can make these as small handmade products to sell at craft fairs, online shops, or local markets.
You could offer individual donuts or create matching sets with different icing colors. Good finishing, securely attached magnets, and attractive packaging can help make your products more appealing.
How do I store polymer clay donut magnets?
Store them in a small box or container where they won’t be crushed or scratched by heavier objects.
Avoid leaving them in places exposed to excessive heat, and keep them away from small children and pets because of the magnets.
Final Thoughts
Making polymer clay donut fridge magnets is one of those little craft projects that is simple enough for beginners but still gives you plenty of room to be creative.
I love how much personality you can give each tiny donut just by changing the icing color, adding different sprinkles, or making the frosting drip in a slightly different way.
You can stick with classic chocolate, strawberry, and vanilla, or experiment with your own bakery-inspired designs. Once you get comfortable with the basic shape, making a whole collection becomes even more enjoyable.
If you have some polymer clay left over from another project, this is also a lovely way to use those smaller pieces instead of letting them go to waste.
I hope you have fun making your own miniature donut magnets. They make such sweet little decorations, and I think a set of them would look adorable on any refrigerator!