Mini Yarn Hat Ornaments Made With Cardboard Rings: Easy DIY Christmas Decorations
If you love making handmade Christmas decorations but don’t want to spend a lot of money on supplies, these mini yarn hat ornaments are such a lovely little project to try.
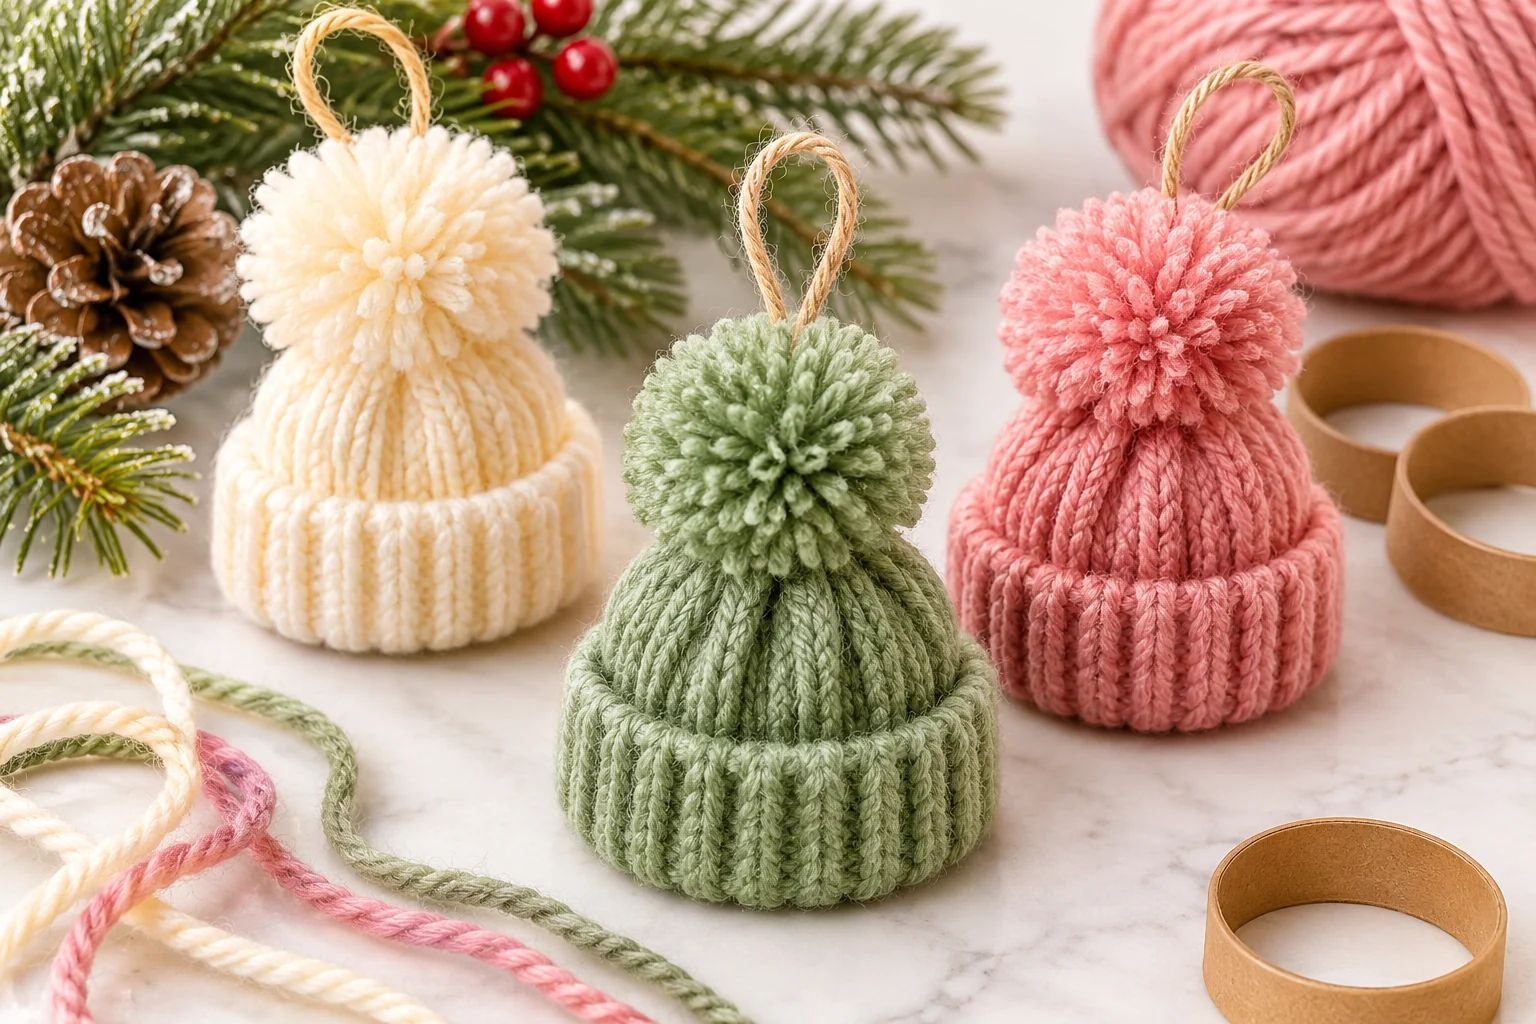
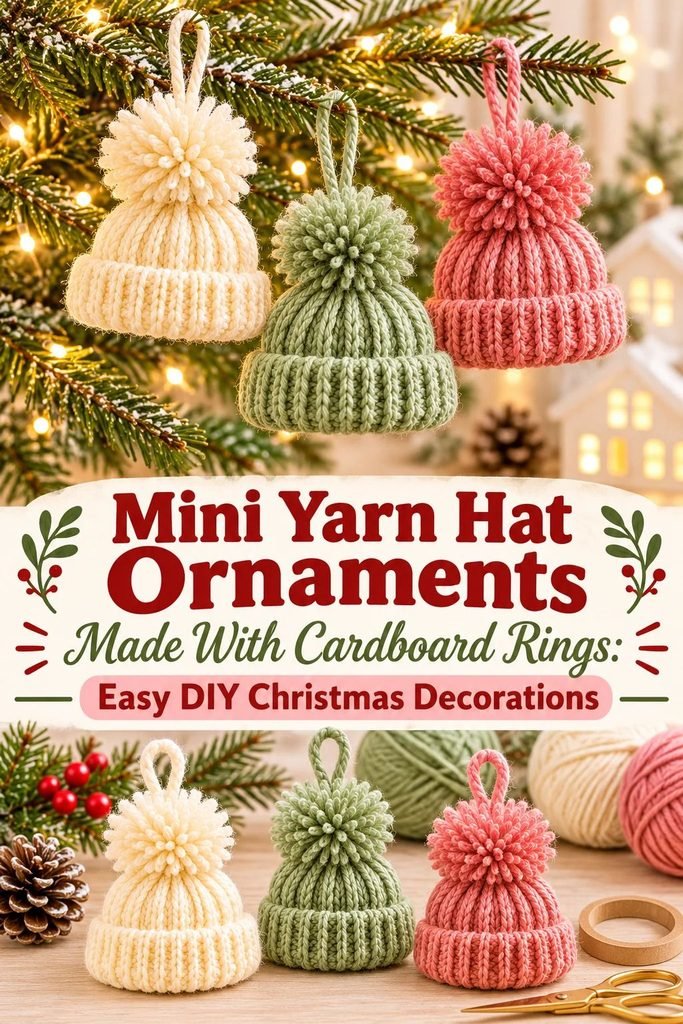
They look like tiny knitted winter hats, complete with a fluffy pom-pom on top, and they’re surprisingly easy to make using something you probably already have at home: an empty cardboard toilet paper tube.
I love crafts like this because they turn simple materials into decorations that look much more special than you’d expect.
All you need is a little yarn, a cardboard tube, scissors, and a few minutes to learn the looping technique. There is no sewing, knitting, or crochet involved.
The finished hats have a cute folded brim and a little hanging loop, making them perfect for decorating your Christmas tree.
You can make them in traditional Christmas colors, or choose softer shades like cream, dusty rose, and sage green for a cozy, neutral holiday look.
I especially love making three or more in coordinating colors. They look beautiful hanging together on an evergreen branch, but you can also attach them to gift bags, use them as handmade gift toppers, or add them to your seasonal decorations.
If you’re putting together a collection of handmade Christmas projects this year, you might also enjoy my air dry clay gift ideas that actually feel thoughtful. They’re another lovely way to make personal gifts without needing expensive supplies.
Why You’ll Love These Mini Yarn Hat Ornaments

- They are inexpensive to make. The cardboard rings come from an empty toilet paper tube, and you only need a small amount of yarn for each hat.
- No knitting or crochet skills are needed. You create the hat by looping yarn around a cardboard ring.
- They are beginner-friendly. Once you understand the first loop, the rest of the project is mostly repeating the same movement.
- You can customize the colors. Make classic red and white hats, soft neutral ornaments, or colorful hats to match your Christmas tree.
- They make thoughtful handmade gifts. You can attach one to a wrapped present or make a small set for friends and family.
- They are great for using leftover yarn. Small amounts of yarn from previous knitting or crochet projects can work beautifully.
If you enjoy making little handmade items, you may also like these small gift basket ideas that look expensive but aren’t. A few mini yarn hats would make such a cute addition to a cozy winter-themed gift basket.
Materials You’ll Need
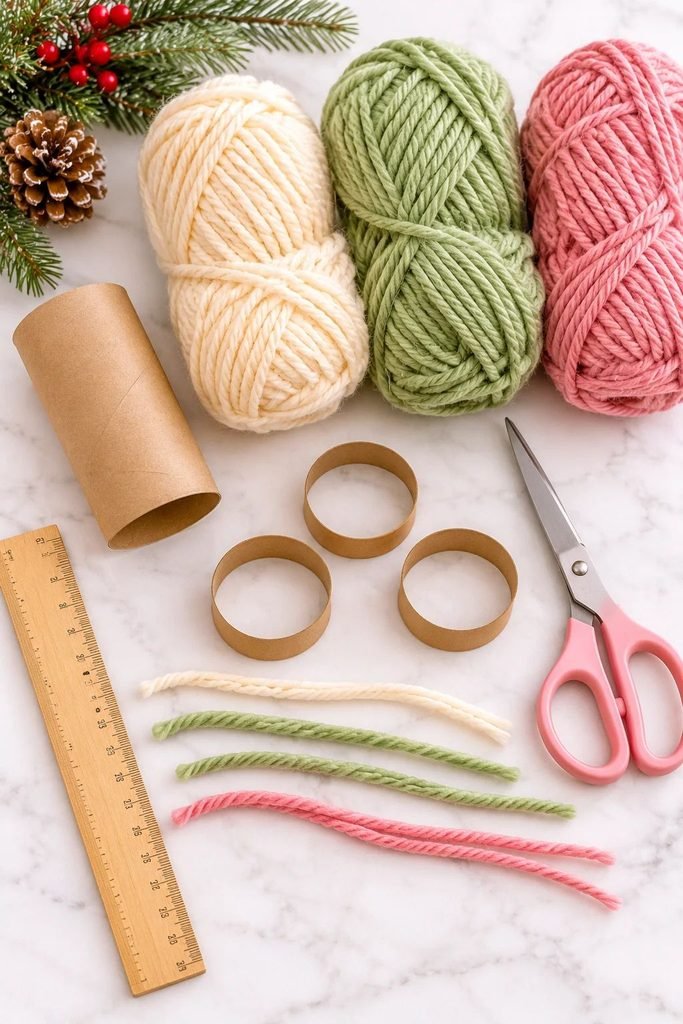
One of the best things about this project is how short the supply list is. You don’t need a special craft kit or expensive equipment.
Supplies
- Empty cardboard toilet paper tube: This is used to make the rings that form the hat brims.
- Medium-weight yarn: Choose three coordinating colors. Cream, muted sage green, and dusty rose create a soft, cozy Christmas look.
- Scissors: For cutting the cardboard, yarn strands, and trimming the pom-poms.
- Ruler: To measure the cardboard rings and yarn.
- Pencil: For marking the cardboard before cutting.
You can use other yarn colors depending on your Christmas decorations. White, red, forest green, burgundy, beige, and brown are all lovely choices.
For the tutorial below, I’ll make three mini hats in cream, sage green, and dusty rose.
How Much Yarn Do You Need?
For three ornaments, prepare approximately 15 yards of each color, or about 45 yards altogether.
For each individual hat, you’ll need approximately:
- 45 yarn strands measuring 10 inches each
- One additional 8-inch strand to tie the top
- One additional 8-inch strand for the hanging loop
These measurements are a starting point. You may need slightly more or fewer strands depending on the thickness of your yarn and how closely you arrange the loops around the cardboard ring.
How to Make Mini Yarn Hat Ornaments With Cardboard Rings
Project time: Approximately 1–2 hours for three ornaments
Difficulty: Beginner-friendly
Finished result: Three miniature yarn hats with folded-looking brims, fluffy pom-poms, and hanging loops.
Step 1: Cut the Cardboard Rings

Start with an empty toilet paper tube. Remove any loose paper and place the tube on a flat surface.
Using your ruler and pencil, measure three sections that are each approximately ½ inch wide. Mark the measurements around the tube so that the lines are as straight as possible.
Carefully cut along each marked line to create three separate cardboard rings.
These rings will become the brims of your mini hats, so try to keep them round instead of flattening them while cutting.
Check that each ring is approximately the same width. If any edges are uneven, trim them carefully.
You should now have three small cardboard rings, one for each ornament.
Step 2: Cut the Yarn Strands
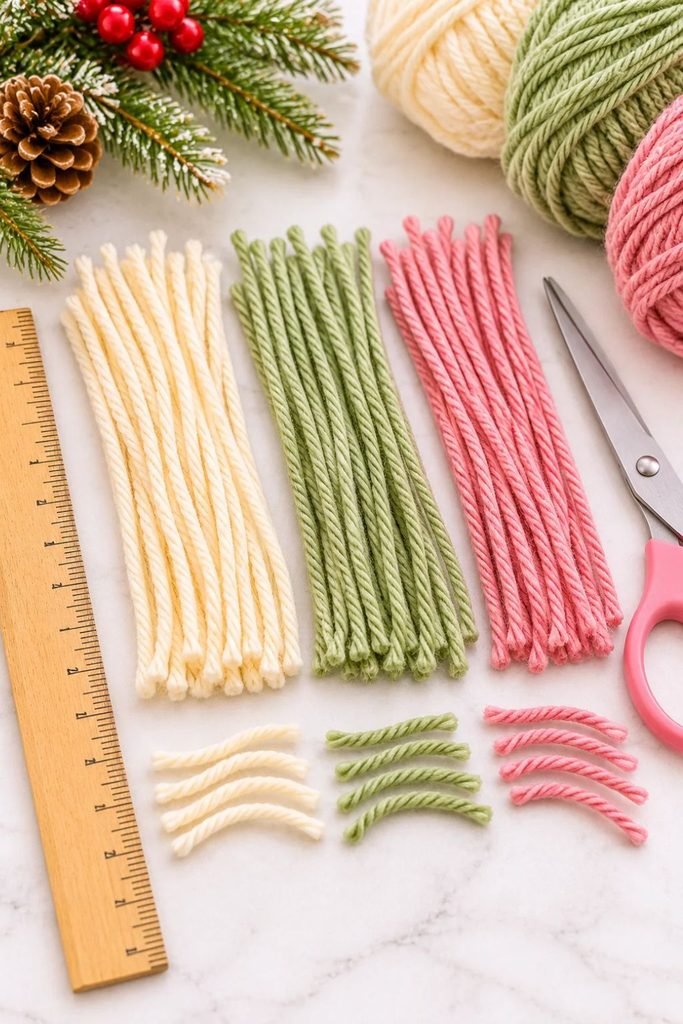
Choose your first yarn color and measure one strand that is approximately 10 inches long.
Use this first strand as your guide to cut around 45 strands of the same length. Keeping the strands similar in size will help your finished hat look even.
Repeat this process for your other two colors.
You should have three separate piles of yarn, with approximately 45 strands in each color.
Next, cut two additional 8-inch pieces for each hat. One will be used to tie the top of the hat, and the other will become the hanging loop.
Keep these shorter strands separate from the longer pieces so you don’t accidentally mix them up.
My tip: Don’t worry about making every strand absolutely perfect. The important thing is to keep them close to the same length. You can trim the finished hat later to create a neat shape.
Step 3: Attach the Yarn to the Cardboard Ring
Now comes the fun part!
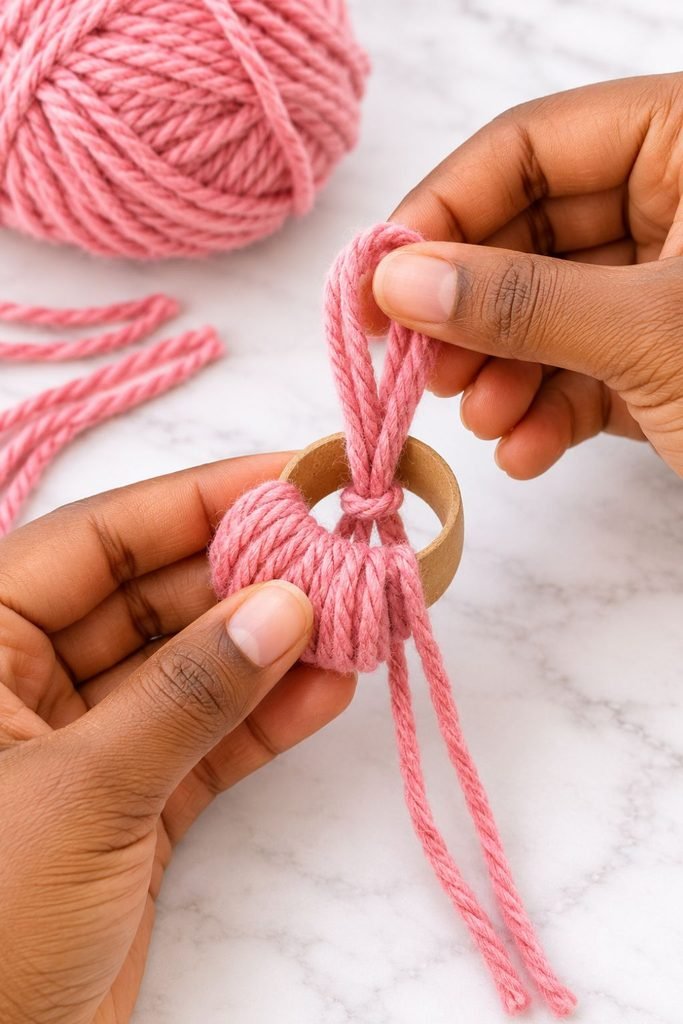
Take one of your 10-inch yarn strands and fold it in half so that both cut ends meet.
Hold one cardboard ring and push the folded end of the yarn through the center of the ring. Pull the two loose ends through the folded loop, then gently tighten the yarn around the cardboard.
This creates a simple loop knot that holds the yarn in place.
Continue adding yarn strands around the entire ring using exactly the same technique. Place each new loop close to the previous one so the cardboard becomes covered.
Try to keep the loose ends pointing in the same direction as you work. This will make the next step much easier.
Keep adding strands until you can no longer see the cardboard between the loops.
Repeat the process with your remaining two rings and yarn colors.
Important: Pull each loop snugly, but don’t tug too hard. If you pull too tightly, the cardboard can bend or lose its round shape.
Step 4: Push the Loose Yarn Ends Through the Ring
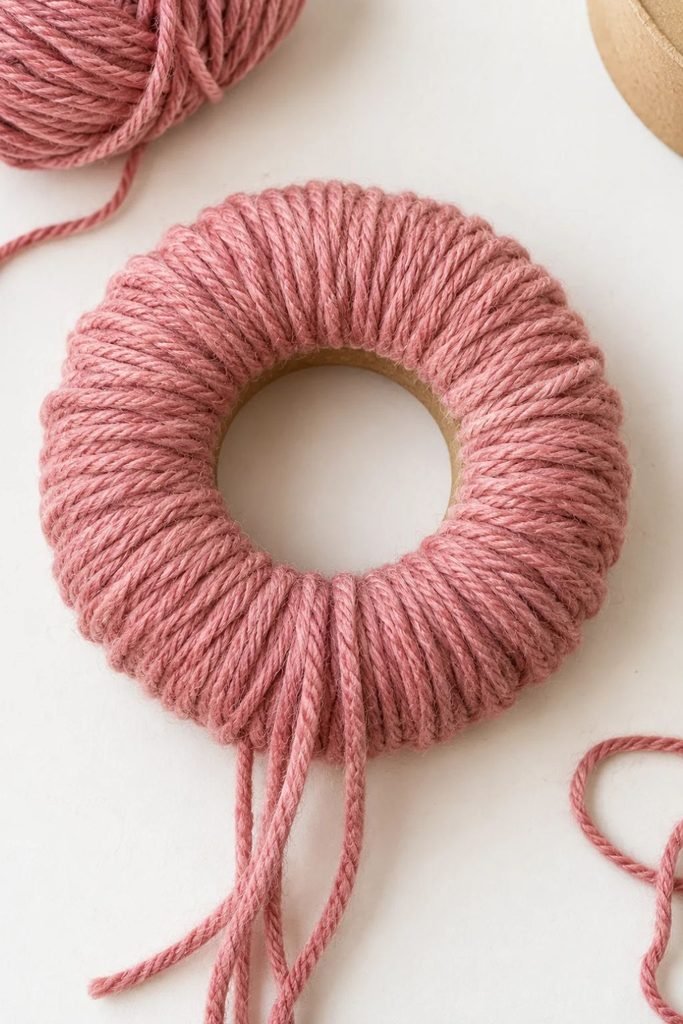
Once the cardboard ring is completely covered, hold it with all the loose yarn ends pointing downward.
Gather the loose ends together and push them through the center of the cardboard ring. Pull them through to the opposite side.
This step is what gives the ornament its little winter hat shape.
As you pull the yarn through, the strands fold over the lower edge of the cardboard ring. The covered cardboard becomes the folded-looking brim, while the loose yarn ends form the body of the hat.
Gently arrange the yarn so that it sits evenly around the ring.
If you notice any cardboard showing through, adjust the nearby strands to cover it.
Repeat this step for your other two ornaments.
Step 5: Tie the Top and Create the Pom-Pom
Your little hats should now have a rounded brim and a bunch of loose yarn strands sticking upward.

Take one of the extra 8-inch yarn pieces in the matching color.
Gather all the loose strands together and measure approximately 1¼ inches above the brim. Wrap the shorter yarn piece firmly around the gathered strands at this point.
Tie a secure knot to hold everything together.
The yarn below the knot becomes the crown of the hat, while the strands above it will form the pom-pom.
Once the top is secured, use your scissors to trim the yarn above the knot into a small rounded pom-pom.
Turn the hat as you trim so you can remove any longer strands and create an even shape. Work slowly rather than cutting too much at once.
You want a soft, fluffy pom-pom that sits neatly at the top of the hat.
Repeat this process for the other two ornaments.
Step 6: Add the Hanging Loops

The final step is adding a small loop so you can hang your finished hats on your Christmas tree.
Take the remaining 8-inch yarn strand for one ornament.
Slip it underneath the yarn tied at the top of the hat, just below the pom-pom. Bring the two ends together and tie them securely to create a small hanging loop.
Give the loop a gentle pull to make sure the knot stays in place.
Repeat with the other two hats, using yarn that matches each ornament.
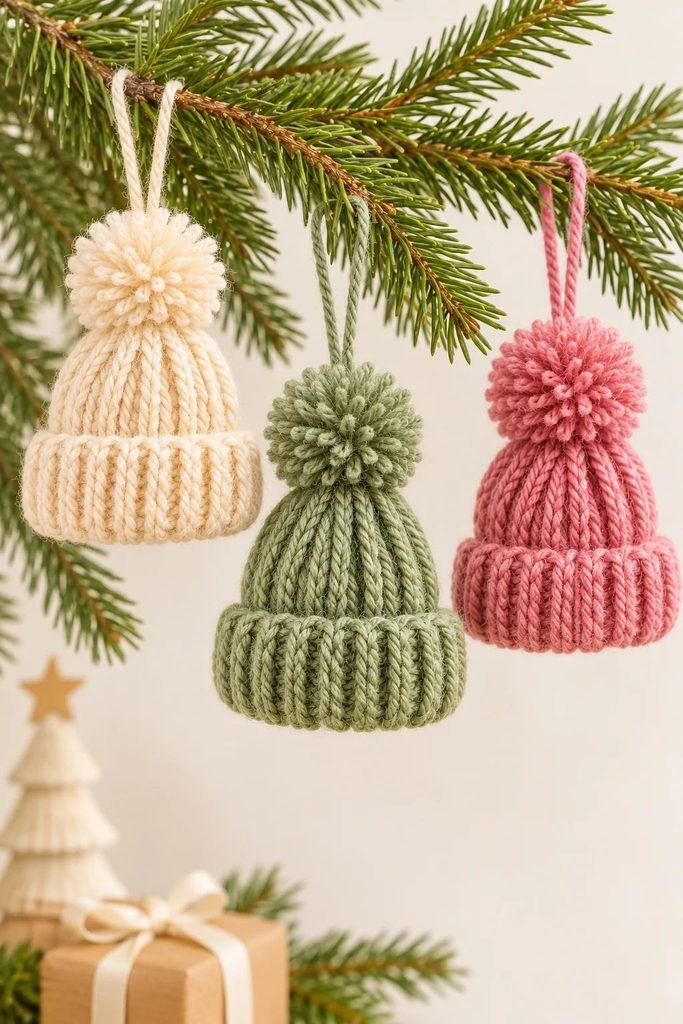
Before hanging them, check that the loops are secure and that the hats hang upright. If one leans to the side, gently adjust the position of the hanging strand around the tied top until it balances.
Trim any loose yarn ends without cutting the hanging loop or the knot holding the hat together.
And that’s it! Your mini yarn hat ornaments are ready to display.
Tips for Making Your Mini Yarn Hats Look Neat
The technique is simple, but a few small details can make a big difference to how your finished ornaments look.
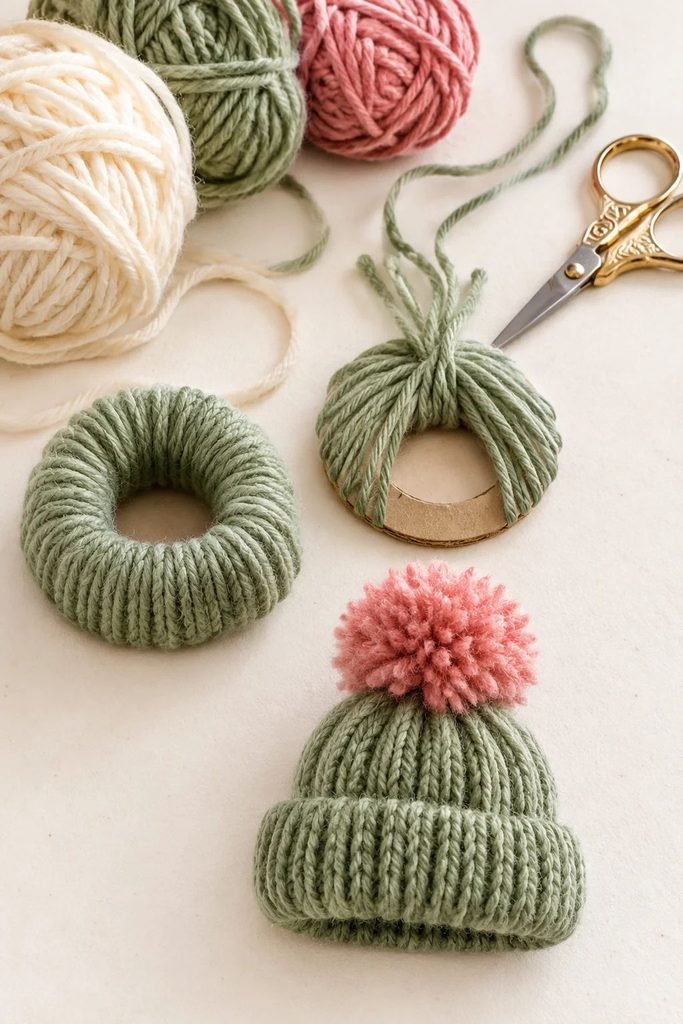
1. Use yarn that isn’t too thin. Medium-weight yarn is a good choice because it covers the cardboard ring without requiring an excessive number of strands.
2. Cut your yarn strands to similar lengths. This makes it easier to create an even hat and reduces the amount of trimming needed later.
3. Cover the cardboard completely. Place the loops close together so you don’t have visible gaps around the ring.
4. Avoid pulling too tightly. The yarn should be secure, but the cardboard needs to keep its round shape.
5. Tie the top firmly. A secure knot helps keep the crown in place and prevents the yarn from loosening.
6. Trim the pom-pom gradually. It’s much easier to remove a little more yarn than to fix a pom-pom that has been cut too short.
7. Make the hats in coordinating colors. Cream, sage, dusty rose, and beige look especially pretty together if you prefer a softer Christmas decorating style.
Common Mistakes to Avoid
Even though these ornaments are easy to make, there are a few things that can affect the finished result.
Leaving Gaps Between the Yarn Loops
If you space the yarn too far apart, the cardboard ring may show through.
To avoid this, slide the loops closer together as you work. If you notice a gap before pushing the strands through the ring, add another yarn strand.
Using Uneven Yarn Strands
Strands that are very different in length can make the hat look uneven.
Try using one measured strand as a guide when cutting the rest. You can still trim the finished ornament to tidy up the shape.
Pulling the Yarn Too Tightly
Pulling too hard can bend the cardboard ring and make the brim look uneven.
Tighten each loop gently and keep checking that the ring stays round.
Cutting the Pom-Pom Too Short
The pom-pom is one of the cutest details of this project, so don’t rush this part.
Trim a little at a time and rotate the hat as you work. This helps you create a fuller, rounder shape.
Making the Hanging Loop Too Small
A tiny loop can make it difficult to hang the ornament on a Christmas tree branch.
Leave enough space for the loop to fit comfortably over a branch or ornament hook.
Creative Ways to Customize Your Yarn Hat Ornaments
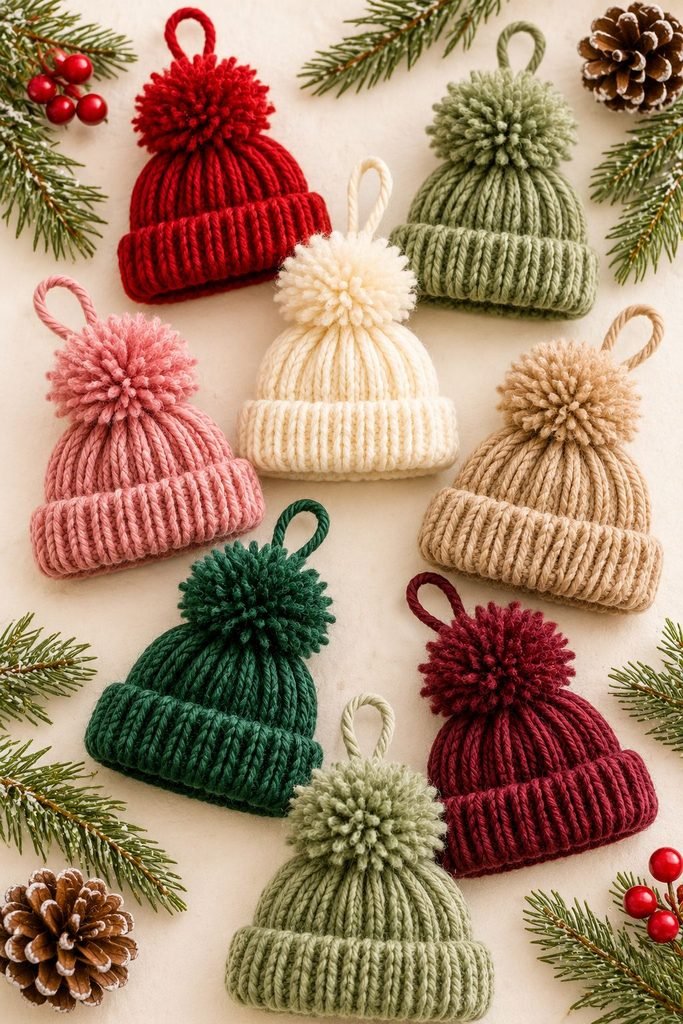
Once you’ve made your first few hats, you can experiment with different colors and little details.
1. Make Traditional Christmas Colors
Use red, white, and forest green yarn for a classic Christmas tree decoration. You could also make a matching set in burgundy, cream, and dark green.
2. Try a Neutral Christmas Color Palette
If you prefer a softer holiday look, choose cream, beige, taupe, dusty rose, and sage green.
I love how these shades look against natural greenery and warm white Christmas lights.
3. Make Mini Hat Gift Toppers
Instead of using the hats only as Christmas tree ornaments, attach one to a wrapped gift with a little ribbon.
They make a sweet handmade finishing touch, especially for gifts that are already wrapped in kraft paper or neutral-colored paper.
4. Make a Matching Ornament Set
Create several hats in the same three or four colors and hang them together on one section of your Christmas tree.
You could also package three matching ornaments in a small gift box for someone who loves handmade Christmas decorations.
If you enjoy putting together thoughtful handmade presents, take a look at my guide on how to start a gift box business. Small handmade decorations like these can be lovely additions to seasonal gift boxes.
5. Use Leftover Yarn From Other Projects
This is one of my favorite ways to make the project even more budget-friendly.
If you have leftover yarn from crochet, knitting, or other crafts, sort your scraps by color and use them to create a collection of different mini hats.
You can even make each ornament a different color.
How to Display Your Mini Yarn Hat Ornaments
These little hats are small enough to fit into lots of different Christmas decorating arrangements.

- On your Christmas tree: Hang them from evergreen branches using their yarn loops.
- On a decorative branch: Place a few branches in a vase and hang the hats from them for a simple seasonal display.
- On wrapped gifts: Use one as a handmade gift topper.
- In a Christmas centerpiece: Arrange a few ornaments around greenery and other small decorations.
- As handmade stocking stuffers: Package one or two in a small gift bag for someone who loves crafting.
- In a holiday gift basket: Combine them with cozy winter treats and other small gifts.
For more inspiration when putting together seasonal presents, you can browse my collection of small gift basket ideas that look expensive but aren’t.
Frequently Asked Questions
Can I make yarn hat ornaments without knitting or crocheting?
Yes! You don’t need knitting needles or a crochet hook for this project. The yarn is attached to the cardboard ring using simple loops, and the loose ends are gathered to create the hat shape.
What kind of yarn works best?
Medium-weight yarn works well because it gives the hats a full appearance and covers the cardboard ring nicely. You can experiment with different yarn textures, but very thin yarn may require more strands.
Can I use a paper towel tube instead of a toilet paper tube?
Yes. A cardboard paper towel tube can work just as well. Simply cut it into rings that are approximately ½ inch wide.
How many yarn strands do I need for one mini hat?
Around 45 strands measuring 10 inches each is a useful starting point for medium-weight yarn. The exact number can vary depending on the yarn thickness and how closely you place the loops.
Why can I still see the cardboard ring?
This usually happens when the yarn loops are spaced too far apart. Slide the loops closer together or add a few more strands before pulling the loose ends through the ring.
Can I make the hats in different sizes?
Yes. You can experiment with wider or narrower cardboard rings to create different proportions. Keep in mind that changing the ring size may also mean adjusting the amount of yarn you need.
How do I make the pom-pom look round?
Tie the top securely, then trim the yarn above the knot gradually. Rotate the hat as you cut so you can shape the pom-pom evenly from every side.
Can I make these ornaments with children?
This is a fun supervised craft activity. An adult should handle cutting the cardboard and yarn, especially with younger children. Children can help choose colors and loop the yarn around the rings with supervision.
Can I sell handmade yarn hat ornaments?
You can make these ornaments as handmade products to sell, especially around the Christmas season. Try offering them individually or in small matching sets. Remember to account for your materials, time, packaging, and selling fees when setting your price.
Final Thoughts
I love how something as simple as an empty cardboard tube and a few leftover yarn strands can turn into such cute little Christmas decorations.
These mini yarn hat ornaments are easy to customize, inexpensive to make, and a lovely project even if you’re not particularly experienced with crafts. Once you’ve made the first one, the others become much quicker because you’re simply repeating the same steps.
I’d start with three coordinating colors, like cream, sage green, and dusty rose, and make a small matching set for your Christmas tree. You can always experiment with brighter colors or leftover yarn once you get comfortable with the technique.
And don’t forget that these little hats make lovely handmade gift toppers, too. Sometimes it’s the small handmade details that make a Christmas present feel extra special.
Happy crafting!