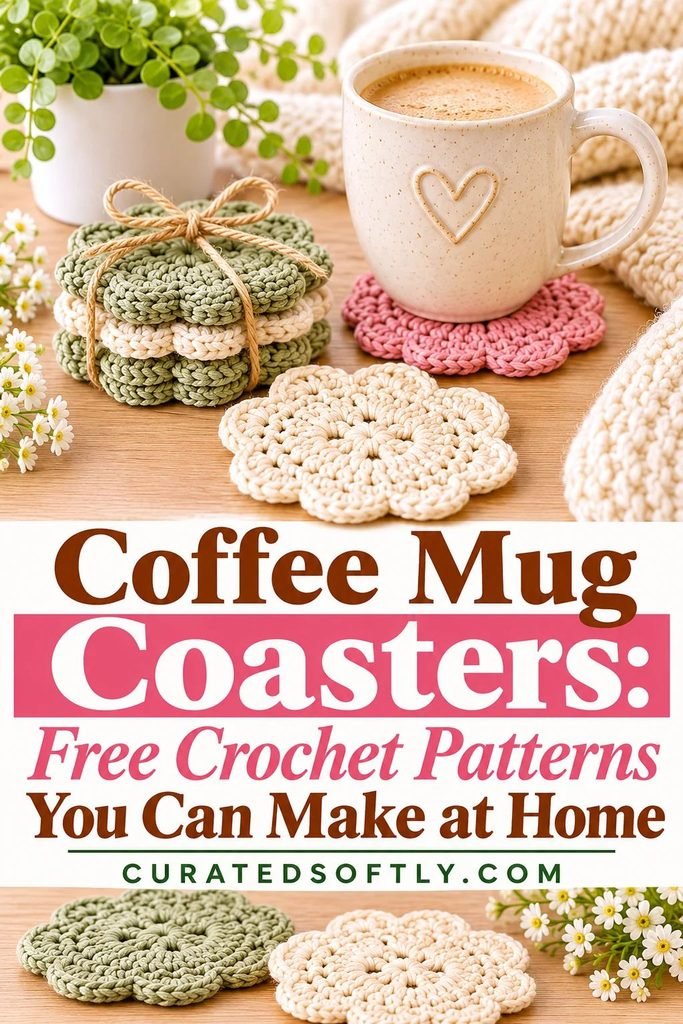
Coffee Mug Coasters: Free Crochet Patterns You Can Make at Home
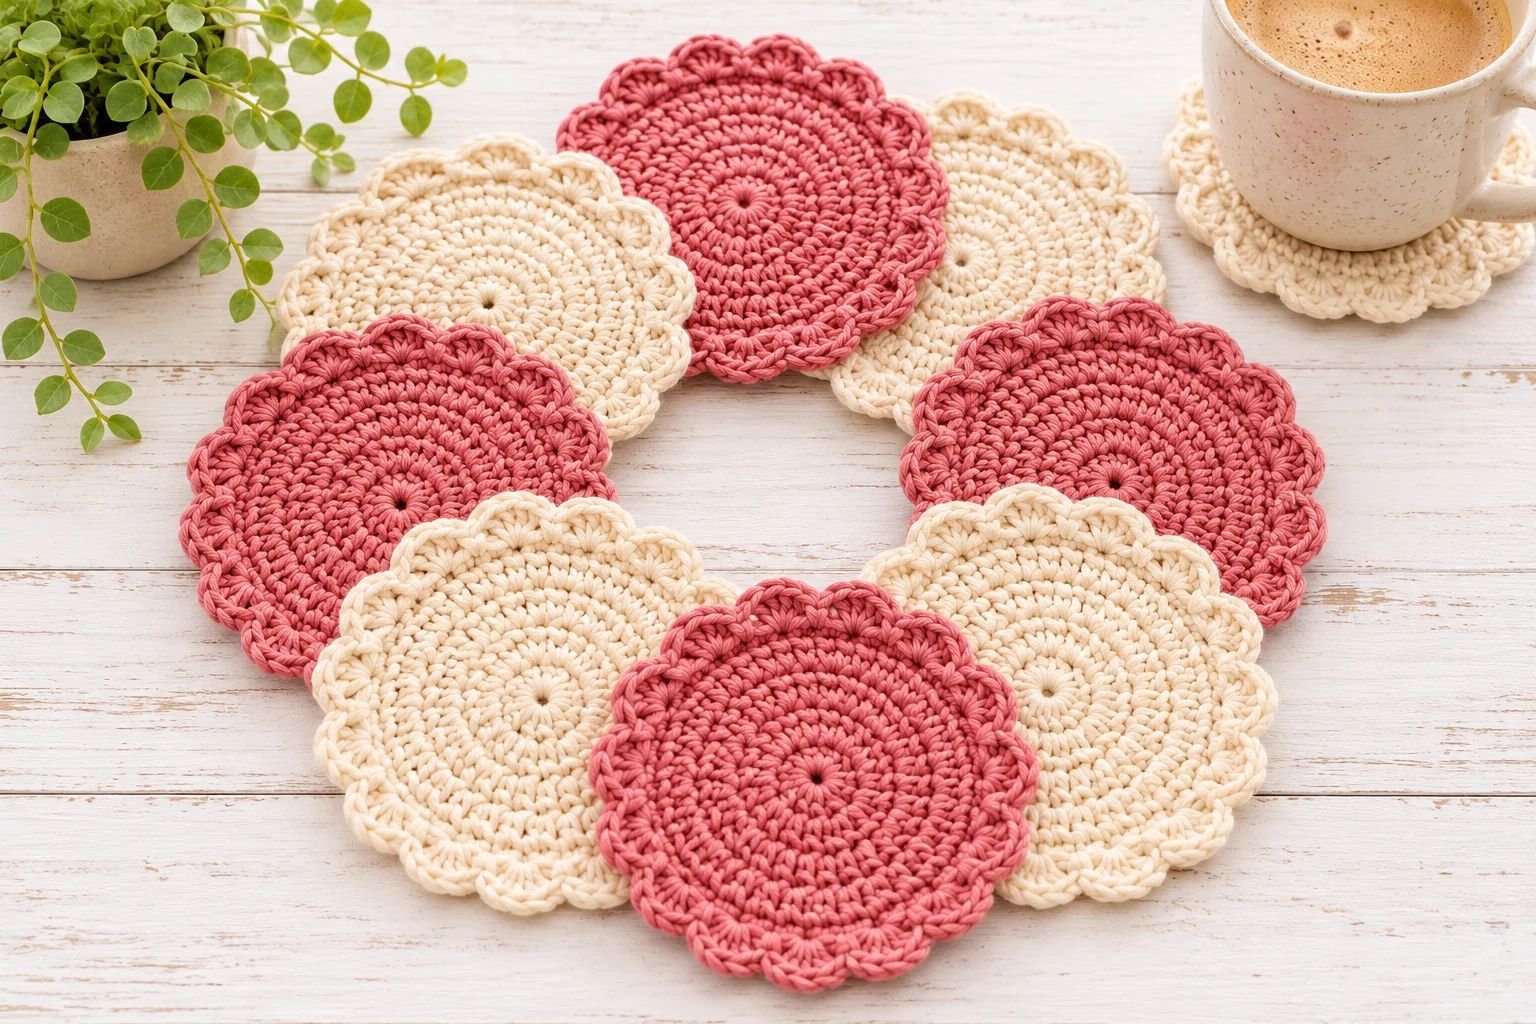
If you love making little handmade projects that are both pretty and useful, crochet coffee mug coasters are such a lovely place to start. They are small enough to finish in an afternoon, use relatively little yarn, and give you the chance to experiment with different colours, textures, and decorative edges.
I especially love the look of round crochet coasters with scalloped borders. They have that soft, vintage-inspired finish that makes an ordinary coffee table feel a little more thoughtful.
Dusty rose, cream, beige, and muted pink are particularly pretty together, but you can easily choose colours that match your own home.
In this tutorial, I’m sharing an original round crochet coaster pattern with a decorative scalloped edge.
I’ll walk you through the materials, stitches, rounds, finishing techniques, and a few ways to customise your coasters.
You can make a matching set for your home, create a handmade gift, or even experiment with different colour combinations for a small craft project.
If you enjoy making useful handmade pieces, you might also like my DIY air-dry clay mini pots tutorial, which is another simple project for adding handmade details to your home.
What You’ll Love About These Crochet Coffee Coasters
There are plenty of reasons to try this pattern, especially if you’re still building your crochet skills.
- Beginner-friendly construction: The coaster is worked in joined rounds, so you don’t need to sew separate pieces together.
- A pretty scalloped border: The shell edging gives each coaster a decorative finish without complicated shaping.
- Small yarn requirement: You can make several coasters from leftover cotton yarn.
- Easy to customise: Change the yarn colour, add stripes, or make a two-colour set.
- Useful and giftable: A matching stack of handmade coasters makes a thoughtful present for coffee lovers, housewarmings, birthdays, and holidays.
The best part is that once you’ve made the first coaster, the remaining ones become much quicker because you’ll already understand the stitch pattern.
Materials You’ll Need
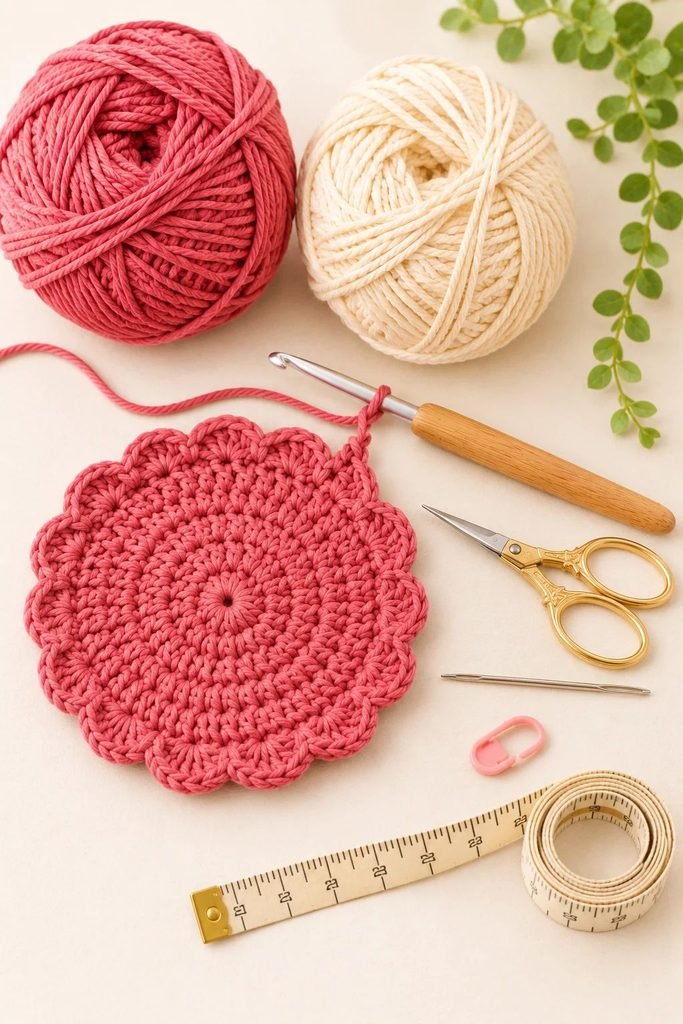
Before starting, gather your supplies. I recommend cotton yarn because it has a nice structure, absorbs small drips, and is generally more suitable for everyday coasters than fluffy or stretchy yarn.
- Medium-weight cotton yarn (worsted weight), approximately 15–20 grams per coaster.
- 4 mm crochet hook, or the size needed to achieve a firm fabric.
- Scissors.
- Yarn needle for weaving in ends.
- Stitch marker, especially if you’re still learning to crochet in rounds.
- Measuring tape or ruler.
My yarn recommendation: Choose a smooth, tightly spun cotton yarn. It makes your stitches easier to see and gives the finished coaster enough structure to sit flat. For a set inspired by the photograph, try dusty rose and warm ivory.
Avoid very fluffy yarn for this project. It can make the stitches difficult to see and may not provide the firm surface you want beneath a mug.
Crochet Abbreviations
This pattern uses US crochet terminology.
| Abbreviation | Meaning |
|---|---|
| ch | Chain |
| sl st | Slip stitch |
| sc | Single crochet |
| dc | Double crochet |
| st | Stitch |
| sts | Stitches |
| inc | Increase: 2 stitches in the same stitch |
| rep | Repeat |
Skill level: Beginner to easy intermediate
Construction: Worked in joined rounds from the centre outward.
Finished size: Approximately 4.5–5 inches across, depending on your yarn, hook, and tension.
Gauge: Exact gauge is not essential, but your stitches should be firm enough that a mug will sit securely on the coaster.
Free Crochet Pattern: Round Scalloped Coffee Mug Coaster
This is the main pattern for the round, flower-like coasters shown in the reference. You’ll crochet a flat circular centre first, then finish with a row of small shells to create the scalloped edge.
Step 1: Make the Centre Ring
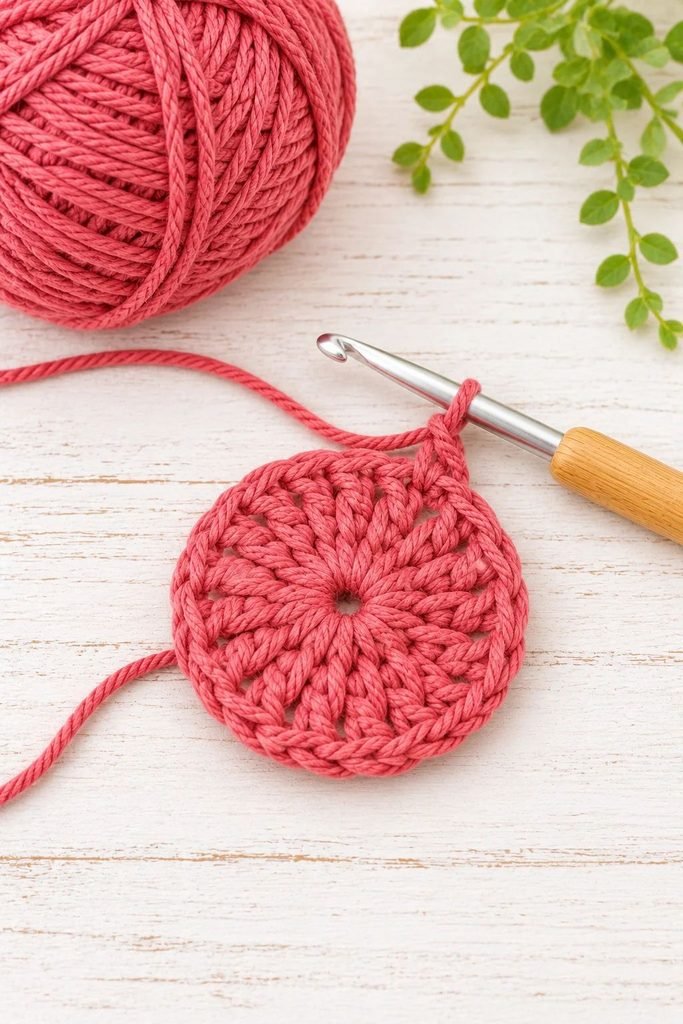
Start with a magic ring.
If you prefer not to use a magic ring, you can chain 4 and join with a slip stitch to form a small ring.
Round 1: Ch 2 (does not count as a stitch). Work 12 dc into the magic ring. Pull the ring closed and join with a sl st to the first dc.
You should have 12 stitches.
Take a moment to check that the centre is tightly closed. A small hole is normal with some yarns, but you don’t want a large opening where the mug could catch.
Step 2: Increase the Circle
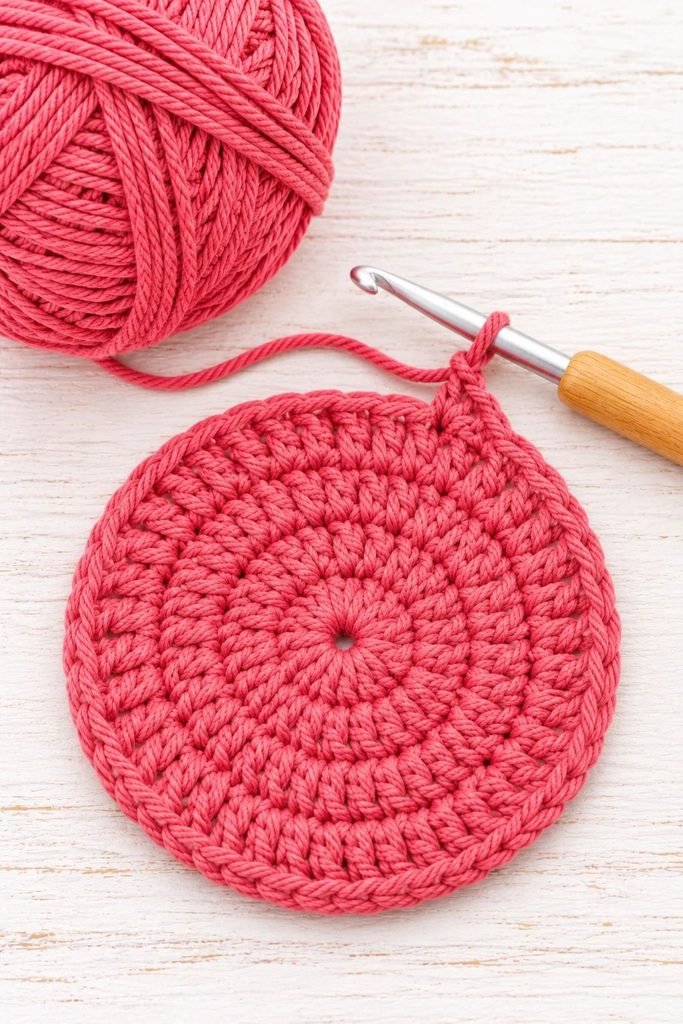
Round 2: Ch 2. Work 2 dc in every stitch around. Join with a sl st to the first dc.
You should have 24 stitches.
The circle should begin to spread outward. If the centre starts to curl into a bowl, your tension may be too tight. If it becomes wavy, you may be working too many increases or using a hook that is too large.
Step 3: Continue Increasing
Round 3: Ch 2. Work 1 dc in the next stitch, then 2 dc in the following stitch. Repeat around. Join with a sl st.
You should have 36 stitches.
Round 4: Ch 2. Work 1 dc in each of the next 2 stitches, then 2 dc in the following stitch. Repeat around. Join with a sl st.
You should have 48 stitches.
Round 5: Ch 2. Work 1 dc in each of the next 3 stitches, then 2 dc in the following stitch. Repeat around. Join with a sl st.
You should have 60 stitches.
At this stage, your coaster should look like a neat, flat circle. Measure across it before adding the edging. If you prefer a smaller coaster, you can stop after Round 4 and use a 48-stitch shell border, provided you have enough stitches to repeat the edging evenly.
Step 4: Crochet the Scalloped Border
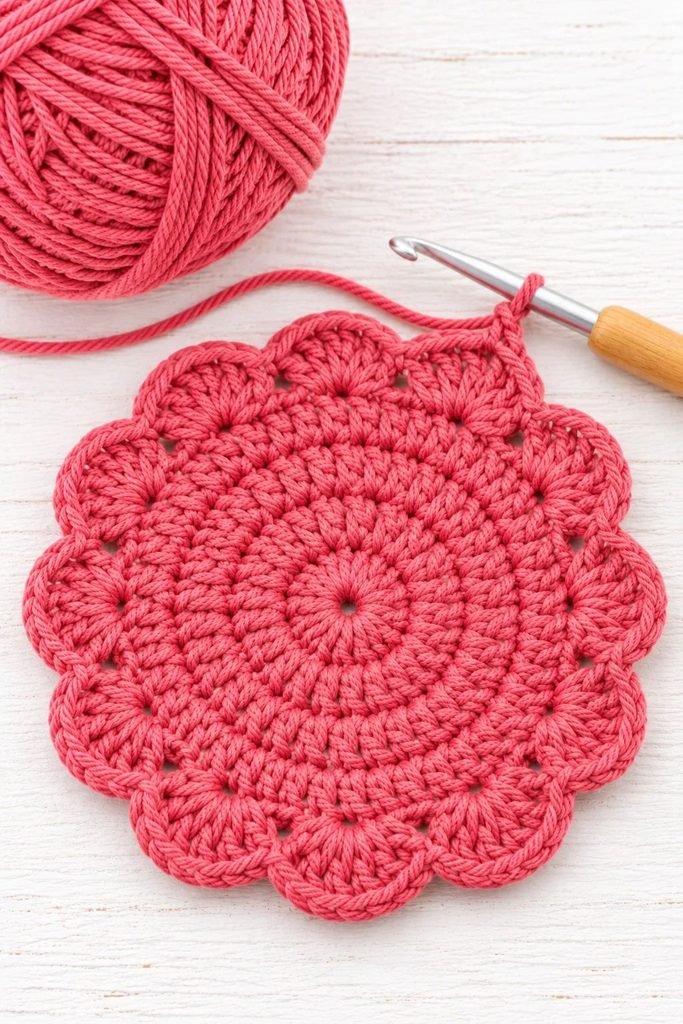
The scalloped edge is what gives this coaster its pretty finished appearance.
For the 60-stitch version, work the following around the entire circle:
Border round: Ch 1. Sl st in the next stitch, skip the next stitch, work 5 dc in the following stitch, skip the next stitch. Repeat from * around. Join with a sl st to the first slip stitch.
You should have 15 scallops around the edge.
Each group of 5 double crochet stitches creates one rounded shell. The slip stitches separate the shells and help form the dips between them.
Don’t pull your slip stitches too tightly. If the border is too tight, the coaster may curl upward. Keep your tension relaxed and consistent so the scallops sit evenly.
Fasten off and leave a short yarn tail.
Step 5: Finish the Coaster
Thread the yarn tail through your yarn needle and weave it into the back of the stitches. Change direction once or twice so the end stays secure.
Trim the excess yarn carefully without cutting into the fabric.
Lay the coaster on a flat surface and gently shape the scallops with your fingers. If necessary, lightly dampen the coaster and allow it to dry flat. Avoid stretching the edge too far, as this can make the scallops look uneven.
Your first round scalloped coaster is finished!
How to Make a Two-Colour Crochet Coaster
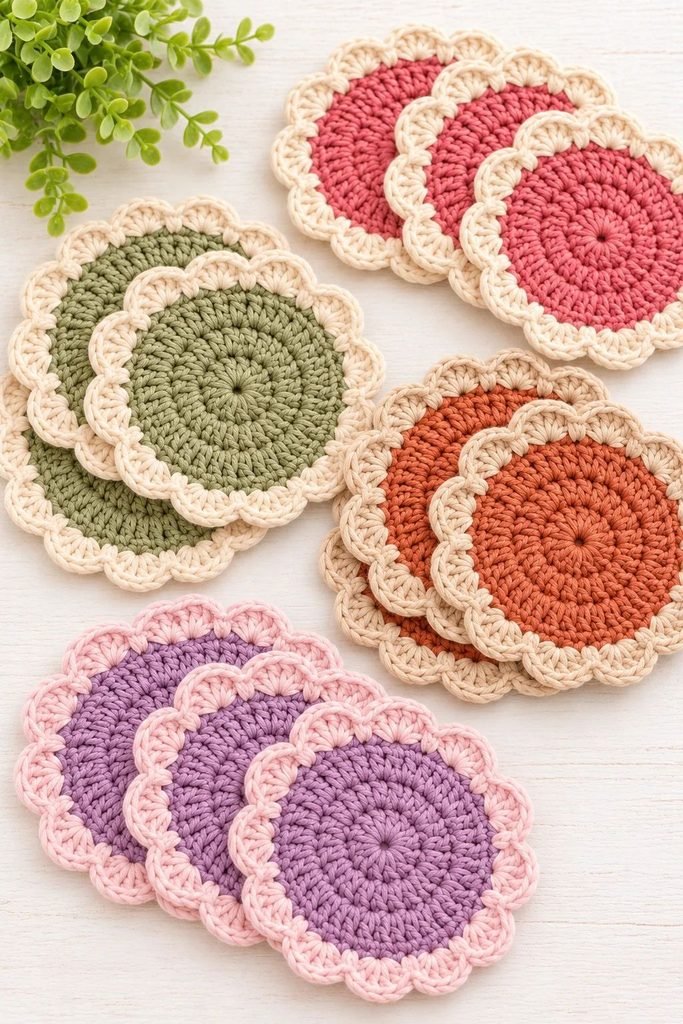
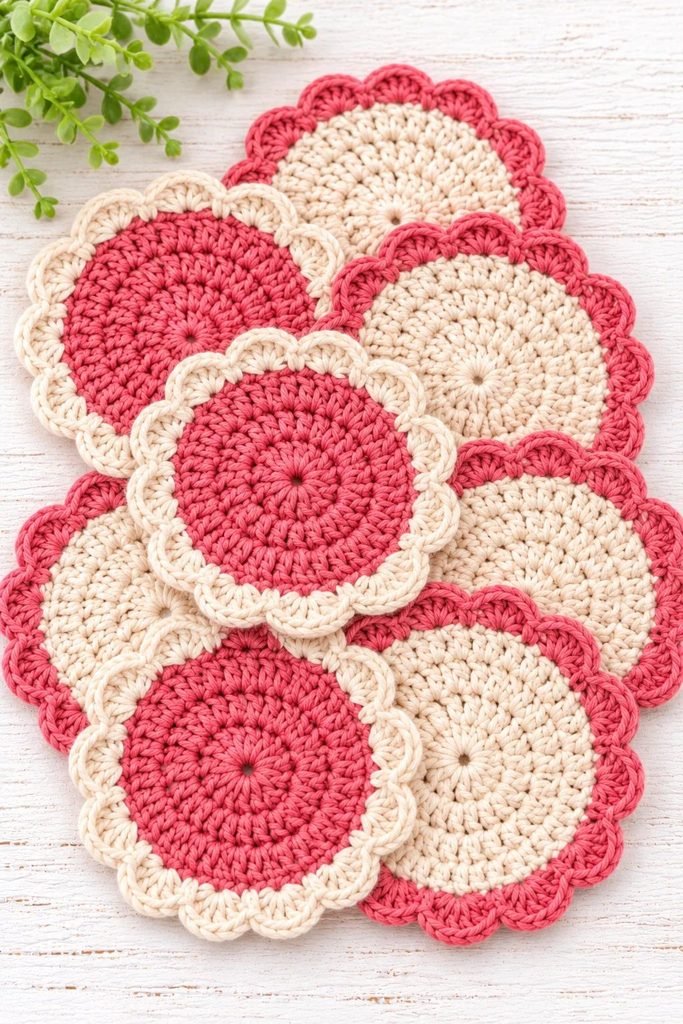
One of my favourite ways to customise this pattern is to use two colours. The dusty rose and cream combination in the reference image looks especially pretty because the contrast is soft rather than too strong.
You can make the main circle in one colour and the scalloped border in another.
Here’s how:
- Crochet Rounds 1–5 using your main colour.
- Join the second colour with a slip stitch in the first stitch where you want the border to begin.
- Work the scalloped border using the second colour.
- Fasten off and weave in both yarn tails neatly.
For a more subtle look, use cream for the centre and dusty rose for the border. You can also reverse the colours for the next coaster to create a coordinated set.
Another option is to alternate the colours between rounds. For example, crochet the centre in rose, Round 2 in cream, and the remaining rounds in rose before adding a cream border. This gives you a striped effect without changing the actual pattern.
More Ways to Customise Your Crochet Coasters
Once you’ve made the basic coaster, there are several ways to make the design your own without having to learn an entirely new pattern.
1. Make a Simple Solid-Coloured Set
A set of matching coasters looks clean and coordinated. Try cream, beige, dusty rose, terracotta, or soft grey.
If you want a more neutral home decor look, make all your coasters in warm ivory cotton. For something a little more colourful, alternate two shades throughout the set.
2. Create a Mixed Colour Set
You don’t have to make every coaster identical. Choose three colours that complement one another and alternate them throughout the set.
Some combinations I would try include:
- Dusty rose, ivory, and warm beige.
- Sage green, cream, and muted olive.
- Terracotta, oatmeal, and soft brown.
- Lavender, cream, and pale pink.
- Mustard, ivory, and warm grey.
3. Make Them Slightly Larger
If you use larger mugs or want more surface coverage, add another increase round before the border.
For a larger version, continue increasing evenly:
Round 6: Ch 2. Work 1 dc in each of the next 4 stitches, then 2 dc in the following stitch. Repeat around. Join with a sl st.
You should have 72 stitches.
For the scalloped border, use 18 repeats of the same edging sequence: sl st in the next stitch, skip the next stitch, 5 dc in the following stitch, skip the next stitch. This uses four stitches per repeat.
Keep in mind that a larger coaster will need more yarn and may be better suited to larger cups or mugs.
4. Make a Matching Set With Different Edges
You can also keep the same circular centre but experiment with the final round. A simple slip-stitch border gives a clean finish, while the shell border creates the decorative flower-like look.
This is an easy way to make a set feel varied while keeping all the coasters the same size.
Tips for Making Crochet Coasters That Lie Flat
A crochet coaster should look attractive, but it also needs to sit flat on a table. Here are a few things I pay attention to when working circular crochet projects.
Keep your increases evenly spaced. The increases are what allow the circle to grow. If you accidentally add too many or too few stitches, the coaster may become wavy or start curling.
Check your work after every round. Counting stitches might feel tedious at first, but it is much easier to correct a mistake immediately than to unravel several rounds later.
Use a firm but comfortable tension. Loose stitches can create a floppy coaster, while very tight stitches can make the circle curl. Aim for a fabric that feels stable without being stiff.
Choose cotton yarn. Cotton gives the coaster a practical texture and helps it absorb small amounts of moisture. It also holds its shape better than many very stretchy yarns.
Don’t pull the border too tightly. The scalloped edge needs a little room to spread out. If you tighten every slip stitch, the outer edge may draw inward.
Block the finished coaster if needed. A little moisture and gentle shaping can help even out the circle and make the scallops look neater.
Common Crochet Coaster Mistakes and How to Fix Them
If your first coaster doesn’t look exactly like the photograph, don’t worry. Circular crochet takes a little practice, and most problems are easy to correct.
Why Is My Crochet Coaster Curling Up?
This usually happens when there aren’t enough increases in the circular rounds, or your stitches are too tight.
Check your stitch counts first. Each round in the main pattern should finish with 12 more stitches than the previous round. If your counts are correct, try a slightly larger hook or relax your tension.
Why Does My Coaster Have Wavy Edges?
Wavy edges usually mean the circle has too many stitches for the amount of fabric being worked. Check that you haven’t accidentally placed extra increases in a round.
Also make sure you’re not crocheting into the joining slip stitch or counting the starting chain as a double crochet.
Why Do My Scallops Look Uneven?
Uneven scallops can happen when the shell groups contain different numbers of stitches or when the skipped stitches are inconsistent.
Count five double crochet stitches in every shell and follow the same sequence around the coaster. Keeping your tension consistent will also help.
Why Does the Centre Have a Hole?
If you used a magic ring, pull the yarn tail firmly to close it. If the opening remains, weave the tail around the centre stitches again and secure it on the back.
Why Is My Coaster Too Small?
Your yarn weight, hook size, and tension all affect the finished measurements. If you want a larger coaster, use the additional increase round in this pattern or try a slightly thicker cotton yarn.
How Many Crochet Coasters Should You Make in a Set?
For everyday use, I would make at least four coasters. That gives you enough for a small coffee table or a couple of people enjoying drinks together.
A set of six is also a lovely option, particularly if you’re planning to give them as a present. You can make three in dusty rose and three in cream, or alternate the colours to create a more varied collection.
If you’re making them for a gift, consider pairing the coasters with a favourite mug, coffee sachets, tea bags, or a small treat. My 15 small gift basket ideas that look expensive but aren’t can give you more inspiration for putting together a thoughtful gift.
For a larger handmade gift, you could also use the coasters as one item in a themed gift box. I’ve shared more ideas in my guide on how to start a gift box business.
How to Care for Handmade Cotton Crochet Coasters
Cotton crochet coasters are fairly easy to care for, but a little attention will help them keep their shape.
- Check the yarn label for washing instructions before cleaning.
- Wash gently when needed, preferably with similar colours.
- Avoid harsh scrubbing that could distort the stitches.
- Reshape the coaster while damp.
- Allow it to dry completely on a flat surface.
- Don’t put a damp coaster away in a closed container.
If you’re making coasters to sell or give as gifts, include a small care note so the recipient knows how to look after them.
Remember that crochet cotton coasters are absorbent, but they are not waterproof. They are best for ordinary mugs and cups rather than very hot cookware or dishes taken directly from the oven.
Can You Sell Handmade Crochet Coffee Coasters?
Yes! Crochet coasters are a nice small handmade product to experiment with because they don’t require a large amount of yarn, and customers can buy them individually or in matching sets.
If you are thinking about selling them, focus on the presentation as much as the crochet itself. A neatly finished set in complementary colours can look much more appealing than several unrelated pieces.
Here are a few ways you could package and sell them:
- Four-piece coaster sets: Offer four matching coasters in a simple paper belly band or gift box.
- Six-piece mixed sets: Combine two or three coordinating colours.
- Personalised gift sets: Pair the coasters with a mug or a small coffee-themed gift.
- Seasonal collections: Create colours for Christmas, Valentine’s Day, Mother’s Day, or autumn.
- Housewarming gifts: Package neutral-coloured coasters as practical handmade home accessories.
You can also explore other small handmade products before deciding what to sell. My guide to air-dry clay business ideas and what you can actually sell shares ideas for thinking about handmade products, pricing, and choosing items customers may want to buy.
If you enjoy creating handmade gifts, you might also like these 10 air-dry clay gift ideas that actually feel thoughtful. They can help you think about building a coordinated collection of small gifts.
Frequently Asked Questions About Crochet Coffee Mug Coasters
What is the best yarn for crochet coasters?
Cotton yarn is generally the best choice because it is absorbent, durable, and holds its shape well. Medium-weight cotton is a good option for this pattern.
What size should a crochet coffee coaster be?
A typical crochet coaster is around 4–5 inches across. This pattern makes a coaster approximately 4.5–5 inches wide, depending on your yarn and tension.
How much yarn do I need to make one crochet coaster?
You will usually need approximately 15–20 grams of medium-weight cotton yarn for one coaster, although the exact amount depends on your stitch tension and finished size.
Are crochet coasters beginner-friendly?
Yes. This pattern uses basic crochet stitches, including chains, slip stitches, and double crochet. If you can crochet in rounds and make a double crochet stitch, you can work through the instructions.
Can I use acrylic yarn for crochet coasters?
You can, but cotton is usually a better option. Acrylic yarn is less absorbent and may not be as practical for catching condensation or small spills.
Why do crochet coasters need a scalloped edge?
They don’t have to have one. The scalloped border is decorative and gives the coaster a pretty finished look. You can leave the circle plain or use a simple slip-stitch border instead.
Can I make these crochet coasters in different colours?
Absolutely. You can make each coaster a different colour, alternate colours between rounds, or use one shade for the centre and another for the scalloped border.
How do I stop crochet coasters from curling?
Check your increase rounds, make sure your stitch count is correct, and avoid crocheting too tightly. If the coaster still curls, try a larger hook or gently block the finished piece.
Final Thoughts
These round scalloped crochet coffee coasters are one of those little projects that are worth making more than once. The pattern is simple enough to enjoy without spending days on a single piece, but the decorative edge and colour combinations make the finished set feel special.
I particularly love the dusty rose and cream combination because it has a soft, vintage-inspired look that works beautifully in a cosy home. You can follow the pattern exactly, experiment with your own colours, or make a few different sets for gifts.
Once you’ve finished your first coaster, try making three or five more to create a matching collection. A handmade set is a lovely way to add a personal touch to your coffee table, and it’s even better when you can say you made every piece yourself.