Air Dry Clay Strawberry Vase
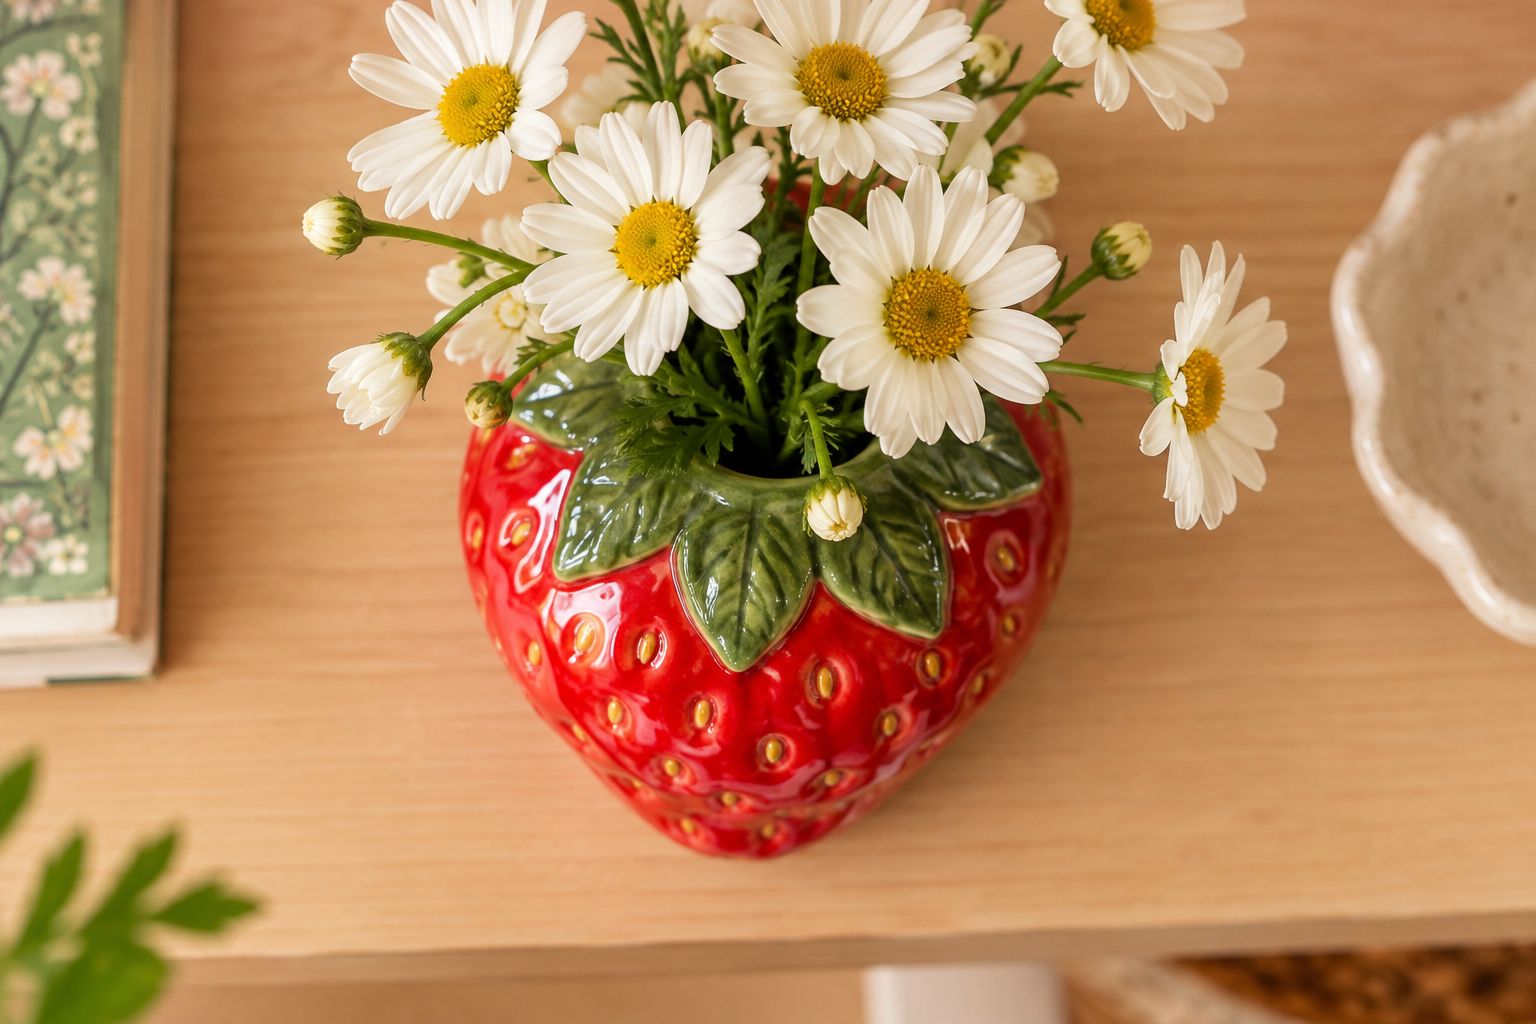
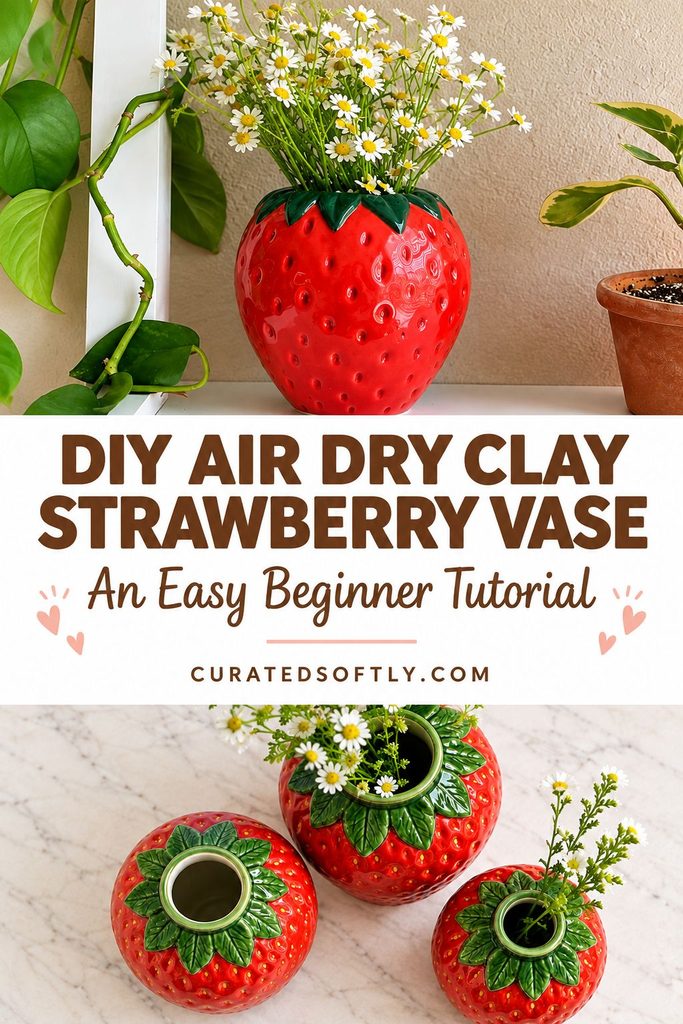
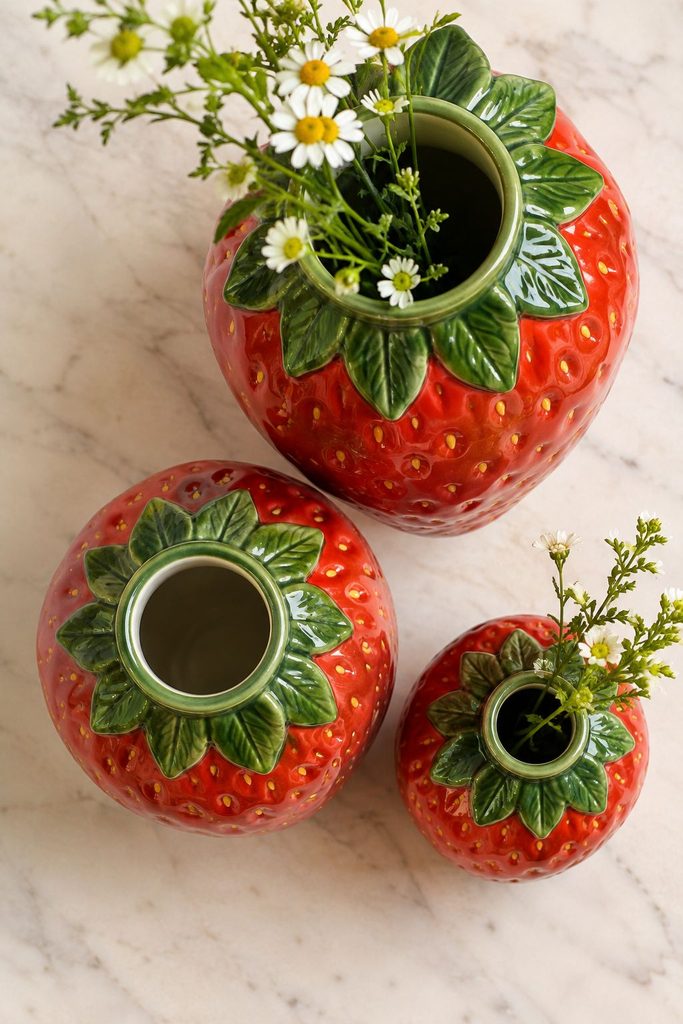
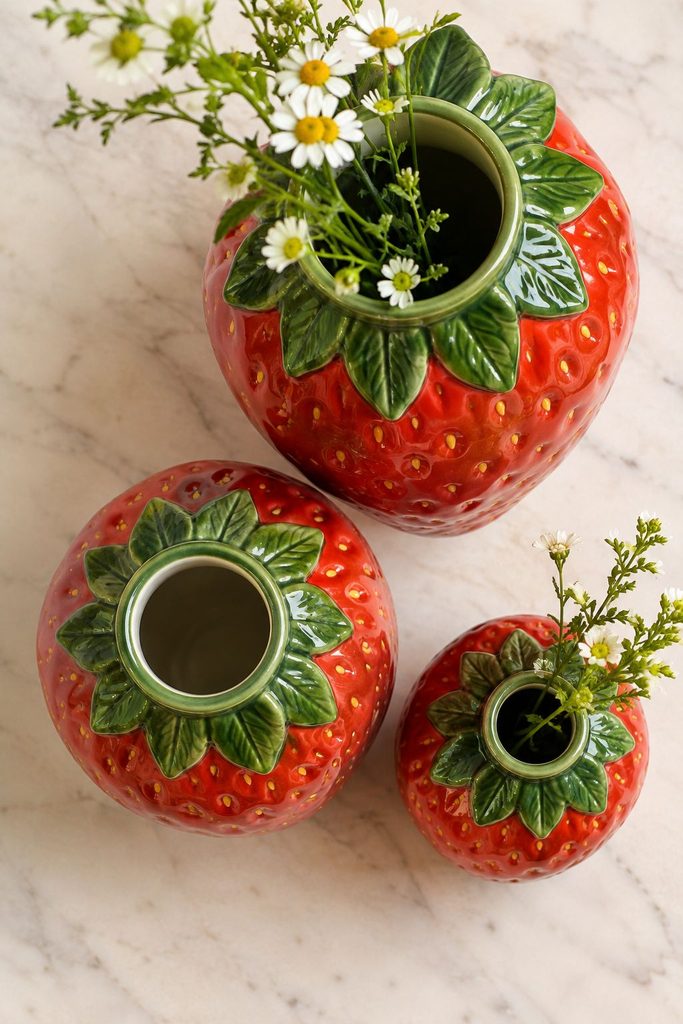
A strawberry vase is a rounded, coil-built air dry clay vessel sculpted and painted to look like an oversized strawberry, complete with pressed seed indentations and a leafy green calyx around the opening, built to actually hold fresh flowers and water like a real vase.
It’s one of the more ambitious projects on this site, both because of the shaping involved and because, unlike a purely decorative piece, this one needs to hold standing water without falling apart.
I’d seen versions of these floating around online for a while before I finally sat down and built my own, and I remember assuming it would be a simple shape to pull off since it’s just a rounded body with some texture on top.
It took me two attempts to get something I was actually happy with, and both of those attempts taught me more about working with volume and water resistance than almost anything else I’ve made for this site.
I want to be upfront that this project has two real technical hurdles most tutorials skip past: building a rounded form that doesn’t collapse under its own weight while drying, and sealing it thoroughly enough to actually hold water long-term rather than just looking finished.
Get those two things right and the rest, the seed texture, the glossy red finish, is honestly the fun part.
If you haven’t read my guide to making air dry clay waterproof yet, I’d genuinely read it before starting this project, since this vase needs that level of sealing, not the lighter finish most decorative pieces get away with.
Why This Project Is Trickier Than It Looks
Most air dry clay projects on this site are flat or shallow, dishes, coasters, trinket trays. A rounded, hollow vase form is structurally different.
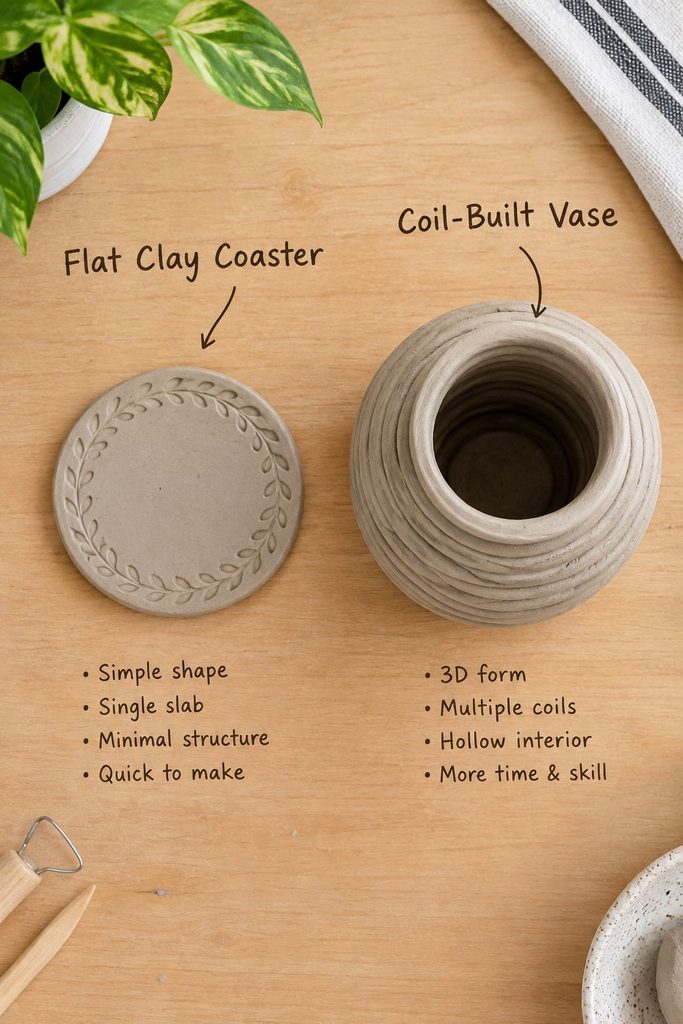
The walls need to be thick enough to hold their curved shape as they dry, but not so thick that the piece takes days to fully cure or cracks from uneven drying between the thick base and thinner upper walls.
Water exposure is the other real difference. A trinket dish gets touched occasionally. This vase will sit with standing water inside it for days at a time if you’re using it the way it’s designed to be used, which means an under-sealed piece won’t just look worn over time, it’ll actually start absorbing moisture, soften, and eventually fail.
I say all this not to talk you out of the project, but because I think it’s genuinely more satisfying to attempt something with real technical stakes and understand what you’re up against, rather than being surprised partway through by a problem a simpler tutorial didn’t warn you about.
Every mistake I made building my own version, and there were several, taught me something specific about coil construction or sealing that I now apply to every rounded piece I build, not just this one.
There’s also a gravity problem unique to this shape that flatter pieces never run into. As the coils stack upward, each new layer is physically resting its full weight on the layer below it, which is still soft and workable while you’re building.
Build too fast without letting the lower coils firm up slightly, and the whole form can start to slump or bulge outward before it ever makes it to the drying stage.
This is really the main reason a strawberry vase takes noticeably longer to build than it looks like it should, you’re working in stages, not one continuous session, and rushing that pacing is where a lot of the shape problems actually come from.
What You’ll Need
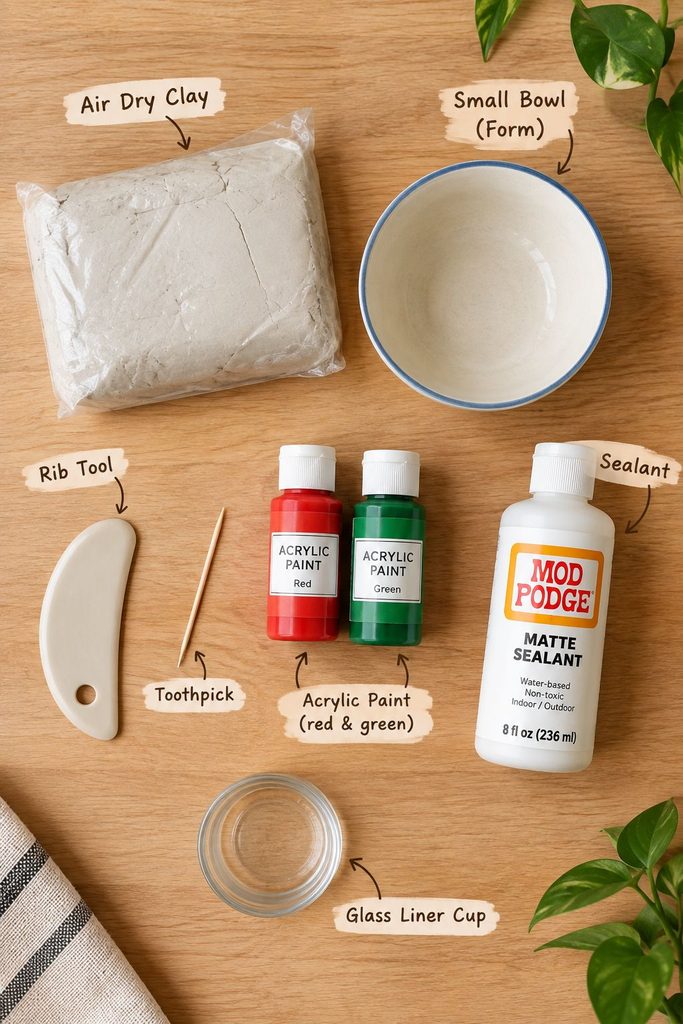
- Air dry clay, enough for a solid, coil-built vessel roughly 5 to 6 inches tall, this uses noticeably more clay than a flat project.
- A pinch pot base or a small bowl to use as a form, to help support the rounded shape while you build up the walls.
- Coil-rolling surface, a flat table or mat for rolling even clay ropes.
- A rib tool or the back of a spoon, for smoothing seams between coils.
- A toothpick or ball-tip clay tool, for pressing the strawberry’s seed indentations.
- Acrylic paint, true red, a darker red or brown for shading, and green for the calyx.
- A genuine water-resistant sealant, applied in multiple coats, not a single light coat of craft varnish.
- A glass or plastic liner cup, sized to fit inside the vase opening, as an optional but genuinely smart extra layer of water protection.
If You Need to Substitute
No specific rib tool? The back of a spoon or a smooth, rounded popsicle stick both work fine for smoothing coil seams.
Nervous about the sealing step holding up long-term? Use a glass votive or a small plastic cup as a hidden liner inside the vase, filling that with water and flowers rather than the clay itself. This gives you the exact look with a fraction of the waterproofing risk, and it’s honestly what I’d recommend for a first attempt.
No specific ball-tip tool for the seeds? A toothpick, used at a slight angle rather than straight in, creates a very similar teardrop-shaped seed indent.
How to Make an Air Dry Clay Strawberry Vase
Step 1: Build the Base
Form a thick, flat disc of clay, about half an inch thick, for the vase’s bottom. Set it into or on top of a small bowl to help it hold a slightly rounded shape as you build upward.
Step 2: Roll and Stack Coils
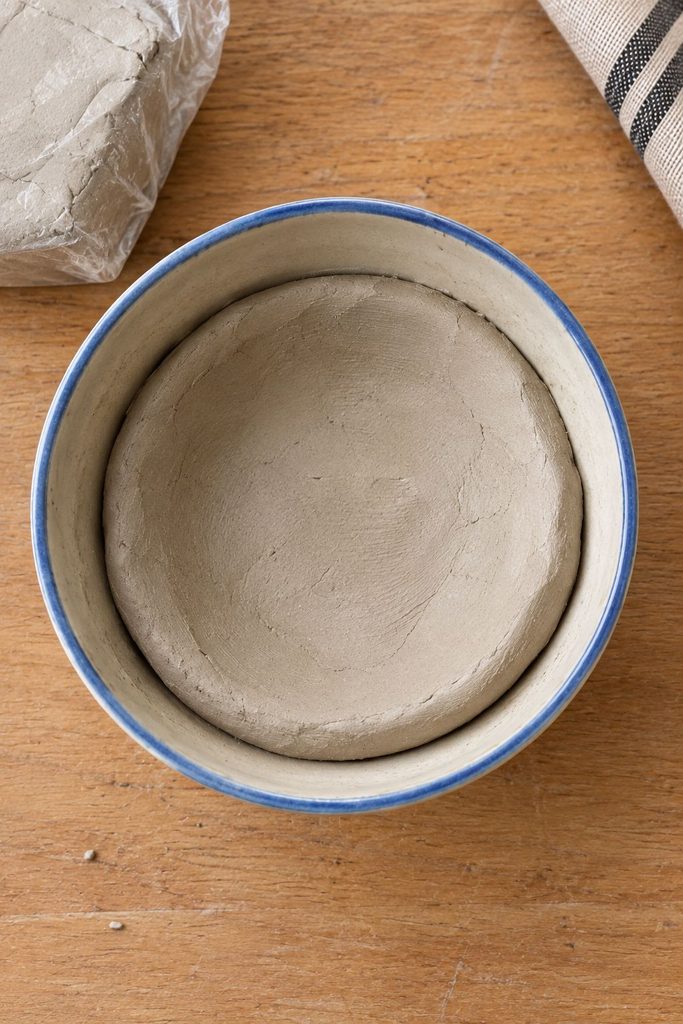
Roll long, even ropes of clay, about the thickness of your finger, and begin coiling them around the base’s edge, stacking upward and curving each layer slightly inward as you build toward the strawberry’s characteristic tapered top.
Press and smooth each new coil into the one below it as you go, don’t wait until the end to blend seams, a coil left unblended is a weak point once the piece dries.
Step 3: Smooth the Walls
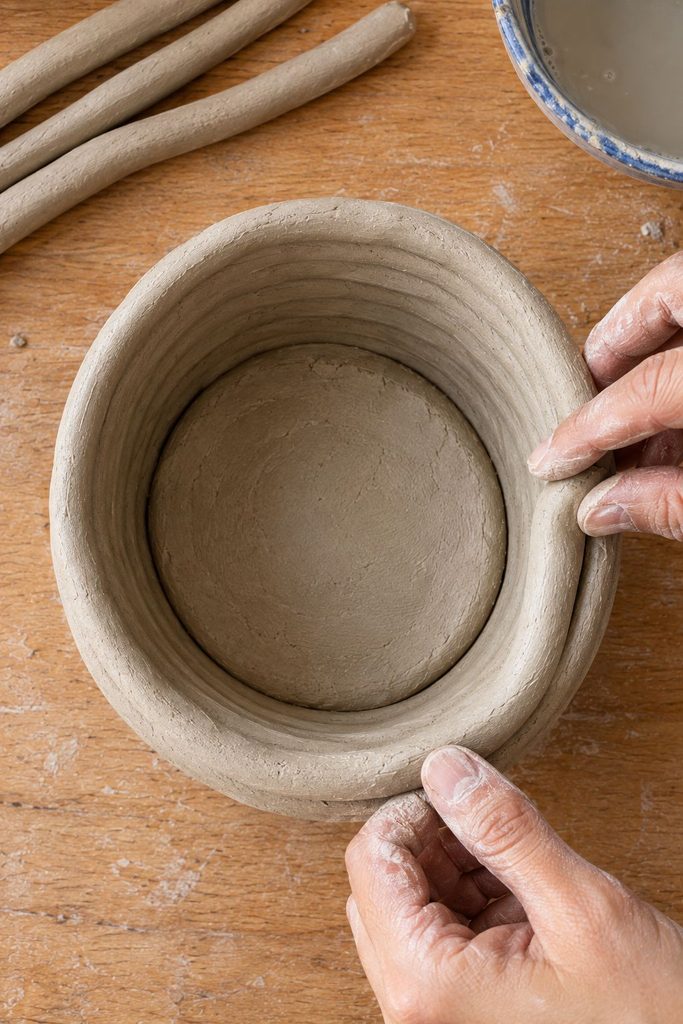
Once you’ve built up the full height, use a rib tool or the back of a spoon to smooth the coil ridges into one continuous, even wall, both inside and outside.
Work in one direction consistently rather than going back and forth, it gives a cleaner, more even surface.
Step 4: Shape the Opening
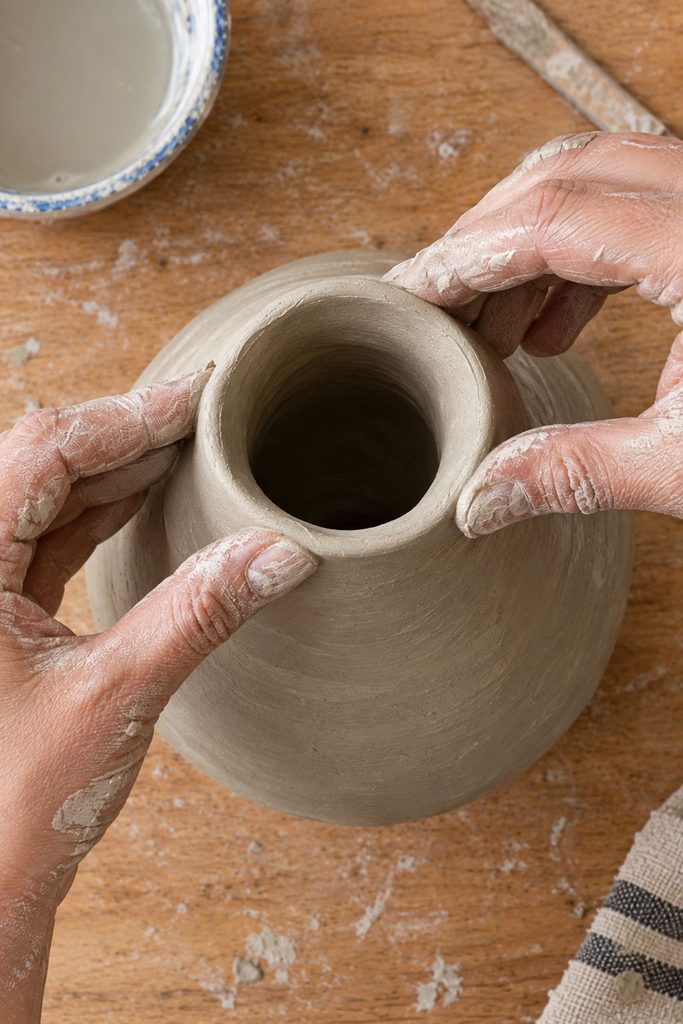
Narrow the top slightly to create the strawberry’s characteristic neck, then flare it back out just enough to form a usable opening for stems to sit in.
Keep the opening wide enough to actually fit flower stems comfortably, it’s easy to narrow this too much while chasing the strawberry shape.
Step 5: Press the Seed Indentations
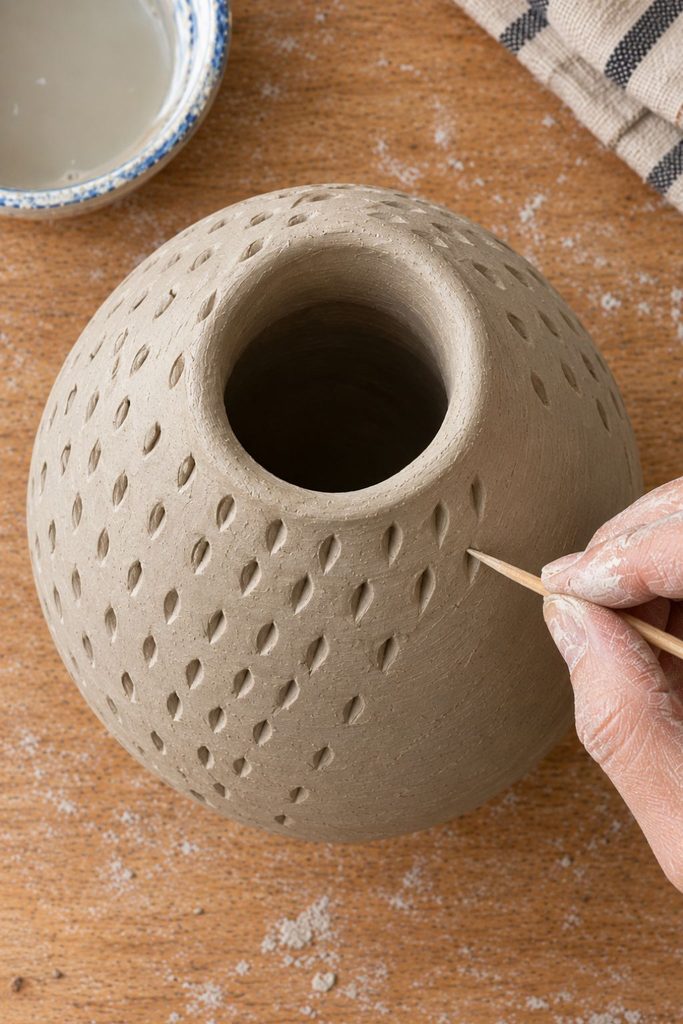
Once the walls are smooth and the piece is firm but not yet fully dry, use a toothpick or ball tool to press rows of small, evenly spaced teardrop-shaped indentations across the entire surface, angling each one slightly rather than pressing straight down, this is what gives real strawberries their texture.
Work in loose spiraling rows rather than a strict grid, it reads as more natural.
Step 6: Add the Calyx
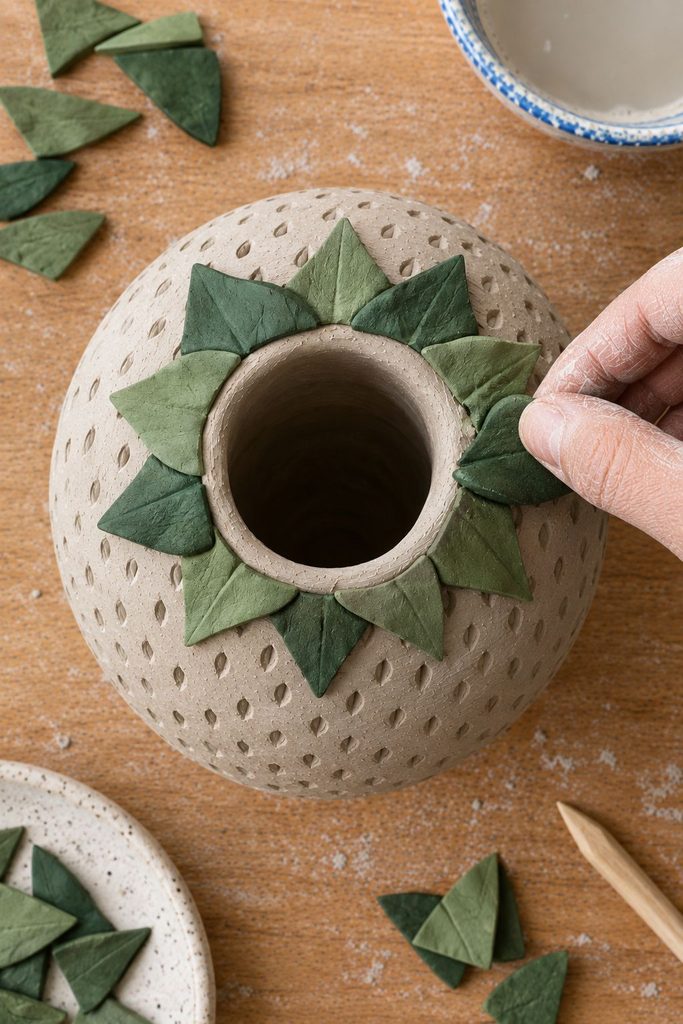
Roll and flatten several small triangular leaf shapes and press them around the top opening in an overlapping star pattern, blending the base of each leaf into the vase’s neck so they read as one continuous piece rather than separate add-ons stuck on top.
Step 7: Let It Dry Fully
This is a thick, substantial piece, budget at least 4 to 5 days of drying time, longer in humid conditions.
Check that the base and thickest lower walls feel completely firm, not just the thinner upper areas, before moving on.
A rounded form like this is also more prone to uneven drying than a flat piece, so rotate it occasionally and keep it out of direct sun or heat, which can cause the outer surface to dry and shrink faster than the interior.
Step 8: Paint the Base Red
Apply a solid, even base coat of true red across the entire body, leaving the calyx unpainted for now. Two coats usually gives you full, even coverage without the clay’s natural color showing through.
Step 9: Add Shading for Depth
Once the base red is dry, mix a small amount of darker red or brown into your red paint and lightly dry-brush it into the recesses around each seed indentation.
This single step is what pushes the finish from flat to genuinely dimensional, real strawberries have exactly this kind of subtle shadowing around each seed.
Step 10: Paint the Calyx
Paint the leafy top in a rich green, adding a slightly darker green toward the base of each leaf for the same dimensional effect.
Step 11: Seal Thoroughly
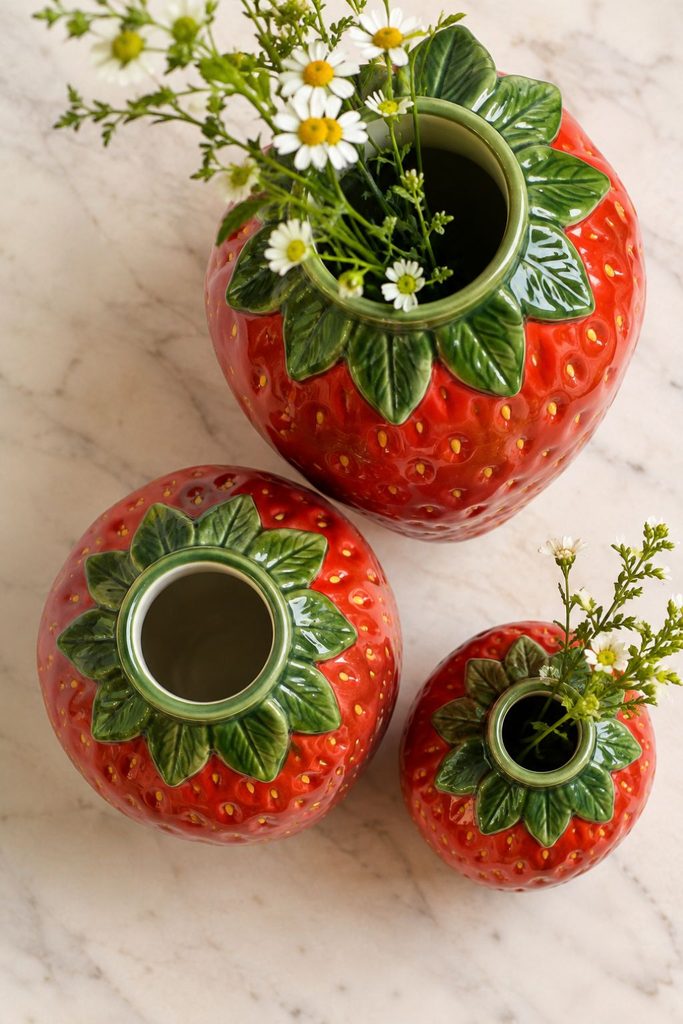
Apply your water-resistant sealant in at least 3 to 4 thin coats, letting each coat cure fully before the next, following the same approach covered in my waterproofing guide.
Pay particular attention to the interior, it needs just as much coverage as the outside, arguably more, since it’s what actually contacts standing water.
Tips From Making These
- Build the walls thicker at the base and gradually thinner toward the top, roughly double the thickness at the bottom compared to near the opening. A base that’s too thin is the most common structural failure point on a rounded form like this, since it’s carrying the weight of everything built on top of it while also being the section most exposed to standing water.
- Don’t rush the drying time, and resist the urge to check by pressing on the piece too often, each press can leave a small dent in still-soft clay. A rounded vessel is more prone to warping or cracking from uneven drying than a flat piece, and this is not the project to test your patience on.
- Consider the liner cup approach for your first attempt, genuinely, not as a lesser option. It’s a smart way to get the exact look and function without betting the whole piece on a perfect seal, and plenty of experienced clay artists use hidden liners in decorative vessels for exactly this reason.
- Dry-brush the seed shading lightly, using a nearly dry brush and wiping off most of the paint on a paper towel before it ever touches the piece. A heavy hand here can look muddy rather than dimensional, less paint on the brush and a light touch works better than it seems like it should.
- Test the seal with plain water for a day or two, in a spot where a leak won’t cause damage, before trusting it with actual flowers. This gives you a low-stakes way to catch any weak spots in the sealant before committing a finished floral arrangement to it.
Mistakes I’ve Made So You Don’t Have To
Building the walls too thin trying to keep the piece lightweight. It developed a hairline crack near the base within the first day of drying, right where the weight of the upper walls was concentrated.
Rushing the drying time on my first attempt, moving to painting after only two days. The interior was still slightly cool and soft, and sanding tore up the surface instead of smoothing it.
Skipping the liner cup and trusting the seal completely on an early piece. It held for about two weeks before I noticed a faint soft spot developing near the base, exactly the kind of failure a liner cup would have prevented entirely.
Pressing the seed indentations too deep and too close together. It weakened the wall in that section, and a few of the deeper seed presses actually cracked through as the clay continued to dry and shrink.
Troubleshooting
The vase is leaking or the wall feels soft after use. This points to an incomplete seal. Empty it immediately, let it fully dry out over several days, and consider switching to the liner cup approach rather than repeating a direct water fill.
Cracks appeared near the base after drying. This is almost always a wall-thickness issue, the base and lower walls need to be noticeably thicker than the upper sections to support the piece’s own weight.
The seed texture looks flat once painted. This usually means the dry-brush shading step was skipped or applied too lightly. Go back in with a small amount of darker paint on a mostly dry brush and work it specifically into the recesses.
The piece warped slightly while drying. Uneven drying, often from one side facing a heat source or direct sun, is the usual cause. Rotate pieces regularly during drying, especially anything with real height and volume like this one.
Variations and Uses
Liner Cup Version. As mentioned above, a hidden glass or plastic liner holding the actual water is a genuinely smart way to build this piece with far less risk, especially for a first attempt.
Mini Strawberry Vase Set. A cluster of smaller versions, 2 to 3 inches tall, makes a charming grouped centerpiece rather than one single large piece.
Other Fruit Shapes. The same coil-and-shape technique adapts to other rounded fruits, a lemon or an orange shape follows the same basic build with different surface texture and color.
If you enjoyed the sculptural, food-inspired shaping in this project, my air dry clay coaster ideas and gift guide both have more approachable next projects if you want to build confidence before attempting a second sculptural piece like this one.
Related Posts
- How to Make Air Dry Clay Waterproof
- 10 Beautiful & Easy Air Dry Clay Coaster Ideas
- 10 Air Dry Clay Gift Ideas That Actually Feel Thoughtful
- Start Your Air Dry Clay Journey: 10 Essential Tips
Storage and Care
Empty and dry the vase out between uses rather than leaving water standing in it indefinitely, even a well-sealed piece benefits from not being asked to hold water constantly.
I let mine air dry fully, upside down on a towel, for at least a few hours after every use before refilling it, which gives any moisture that did work its way into the sealant a real chance to evaporate back out rather than compounding over repeated fills.
Wipe the exterior with a soft, dry cloth when not in use rather than a wet one, since repeated damp wiping is its own small source of moisture exposure over time.
If you’re storing the vase empty for an extended period, somewhere between uses or out of season, keep it somewhere dry and out of direct sunlight, prolonged UV exposure can fade the red paint noticeably faster than you’d expect, especially compared to how well it holds up with normal, moderate use.
If you notice any softening, discoloration, or a musty smell developing, treat that as an immediate signal, stop using it with water right away.
At that point you have two real options: let it fully dry out over several days in a well-ventilated spot and then reseal thoroughly with fresh coats, or retire it from active water duty and switch to the liner cup approach going forward so the piece can still be displayed and used without further risk.
Frequently Asked Questions
Can this actually hold real water safely? With thorough sealing, multiple coats, full cure time, yes, but I’d genuinely recommend the liner cup approach for anyone who isn’t fully confident in their sealing technique, since a failed seal means a ruined piece and a wet mess on whatever surface it’s sitting on.
Even experienced clay crafters tend to lean toward liners for pieces meant for daily water use, it’s less about skill and more about not wanting to babysit a seal indefinitely.
How long does this project actually take start to finish? Between building, drying, painting, and sealing, I’d budget a full week to ten days from start to a piece that’s actually safe to use with water.
The hands-on building time is really only an hour or two, but the drying and multi-coat sealing steps each need real, uninterrupted time that can’t be rushed without compromising the final piece.
Can I skip the seed texture and keep it simple? Yes, a smooth, unpressed red vase still reads clearly as strawberry-inspired thanks to the shape and calyx alone, the seed texture just adds an extra layer of realism.
This is actually a good option if you’re newer to clay work, since skipping the seed-pressing step removes one more opportunity for small cracks to form in a piece that’s already got a lot going on structurally.
Is this a good project for a beginner? I’d call this an intermediate project. If you’re brand new to clay, I’d build a few flatter, simpler pieces first, my beginner tips guide is a good starting point before attempting something with this much structural complexity.
The coiling technique itself isn’t hard to learn, but combining it with a functional, water-holding end use raises the stakes on getting the fundamentals right the first time.
What if my finished vase feels too heavy? This usually means the walls were built thicker than necessary throughout, rather than tapering thinner toward the top.
It’s not a functional problem, just a weight consideration, and it won’t affect how well the piece holds up.
If weight is a real concern for where you plan to display it, that’s actually a good argument for the liner cup version, since you can build slightly thinner walls when the clay itself isn’t the thing holding water pressure.
Final Thoughts
This is genuinely one of the most satisfying pieces I’ve made on this site, not because it’s the easiest, but because getting the shape, texture, and finish all working together feels like a real accomplishment once it’s done.
It’s also one of the few projects here that keeps teaching you something new each time you make it, a slightly different coil pace, a different seed pattern, a different call on liner versus direct seal, so don’t be discouraged if your first one isn’t exactly what you pictured. Mine certainly wasn’t.
If you make one, I’d love to see whether you went with real water or the liner cup approach, and how your seed texture turned out.