Witchy Air Dry Clay Crafts You Can Actually Make at Home
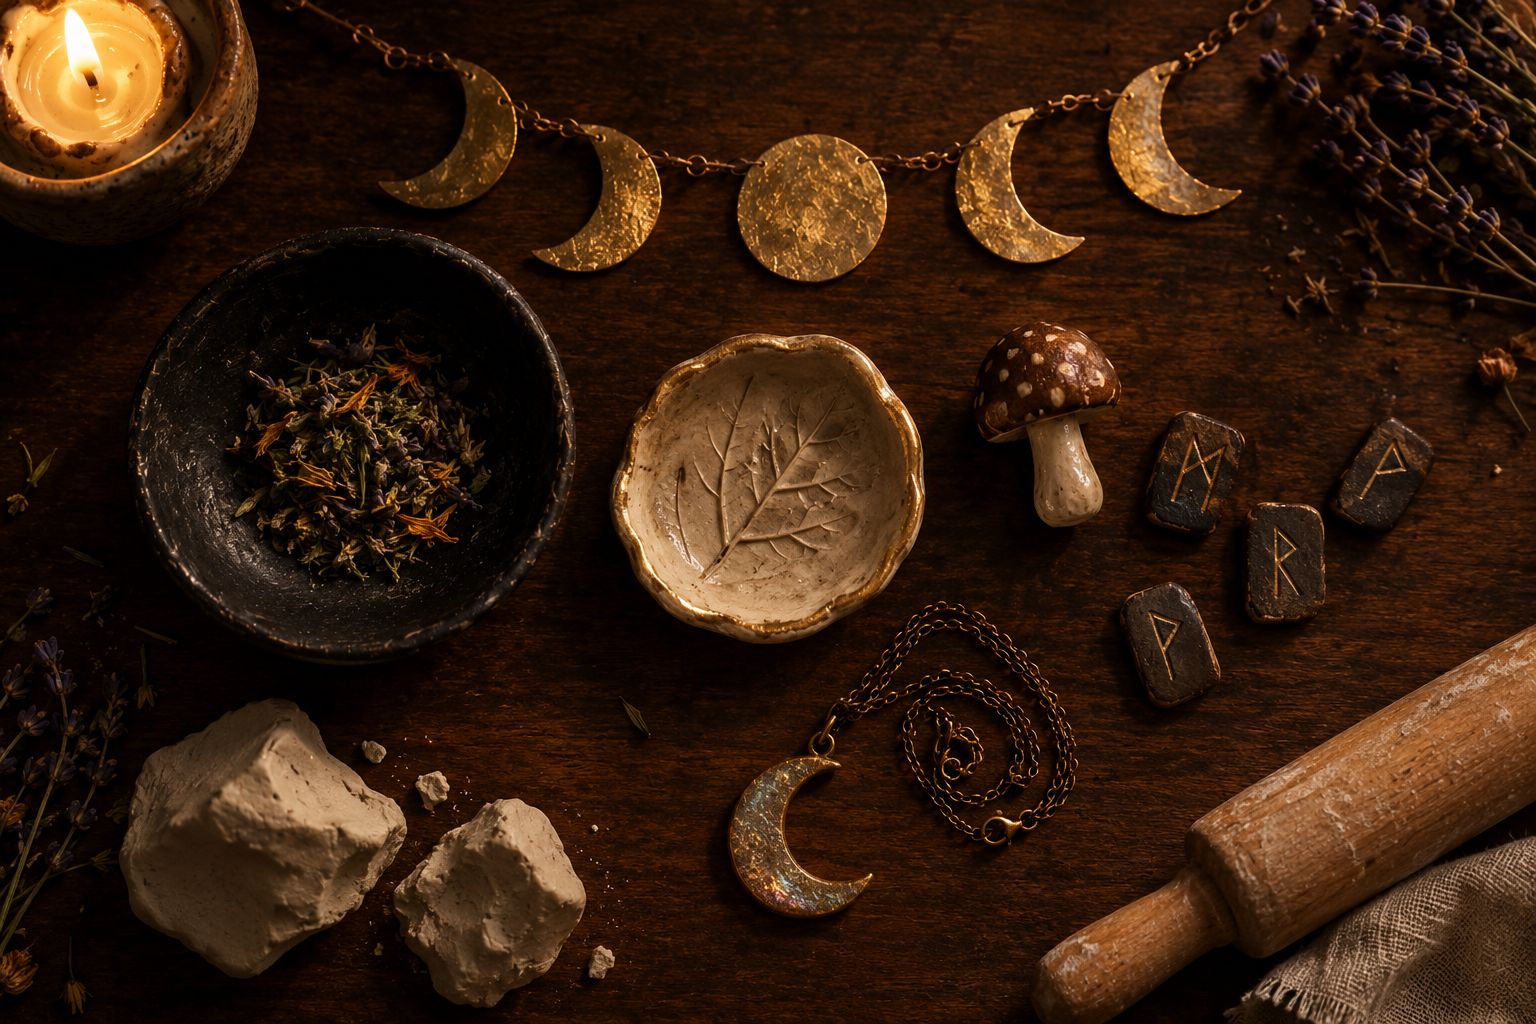
There’s something about air dry clay that lends itself naturally to witchy, moody decor, the raw, earthy texture, the way it takes paint and mica powder so beautifully, the fact that it doesn’t need a kiln to feel handmade and a little ceremonial.
I started making pieces like this for my own altar space, mostly because I couldn’t find exactly what I wanted in stores, and it turned into one of my favorite categories of project to share here.
There’s also something genuinely calming about the process itself, shaping something slowly with your hands tends to fit the same reflective mood that draws people to this aesthetic in the first place.

This isn’t a strict numbered list, more of a tour through the different directions you can take this aesthetic, organized by the kind of piece you’re after, whether that’s something for a ritual space, a bit of celestial decor, a divination tool, or jewelry you can actually wear.
Each project below includes what you’ll need and the actual steps, not just an idea to riff on, so pick whichever one speaks to you and treat it as a real starting point.
If you’ve read my How to Make Air Dry Clay at Home or my How to Paint Air Dry Clay guide, you already have the core skills needed for everything below, this post is really about applying that same technique to a specific aesthetic rather than teaching anything brand new from scratch.
Getting Started: The Core Supplies You’ll Reuse Across Every Project
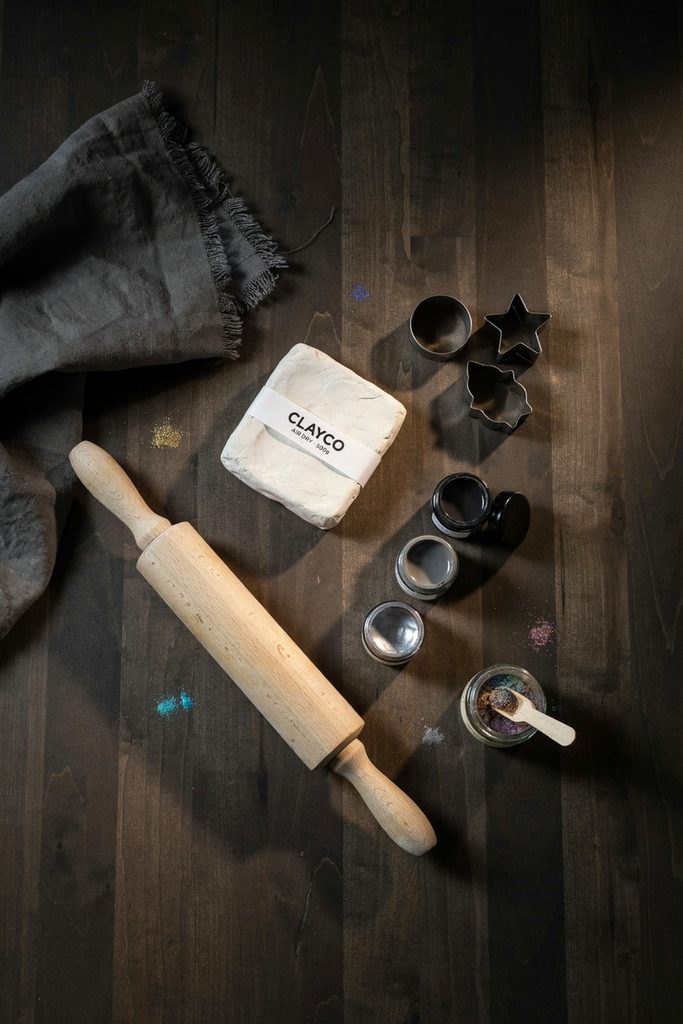
Before jumping into individual projects, it’s worth stocking a small set of shared supplies. Most of what’s listed project by project below pulls from the same short list, so you won’t need to buy something new for each individual idea.
A basic white or gray air dry clay is the foundation for everything here, since it’s painted afterward, you don’t need a specialty pre-colored clay.
A rolling pin and a simple smoothing tool or damp sponge cover shaping for almost every piece. A few basic cutters, round, square, and a crescent shape if you can find one, get you through most of the specific projects below without needing anything custom.
For finishing, keep black, charcoal, and white or silver acrylic paint on hand along with a small jar of mica powder. That combination alone covers the vast majority of the color palette this whole aesthetic leans on.
A sealant made for air dry clay rounds out the list, especially for anything you plan to wear or handle regularly.
Once you have that core kit assembled, moving between the projects below becomes mostly a matter of shape and detail work rather than gathering new materials each time.
Altar and Ritual Pieces
An altar tends to be where this aesthetic really comes together, and clay is a natural fit for it since so many altar tools benefit from a handmade, slightly imperfect look rather than something mass-produced.
A Shallow Offering Dish
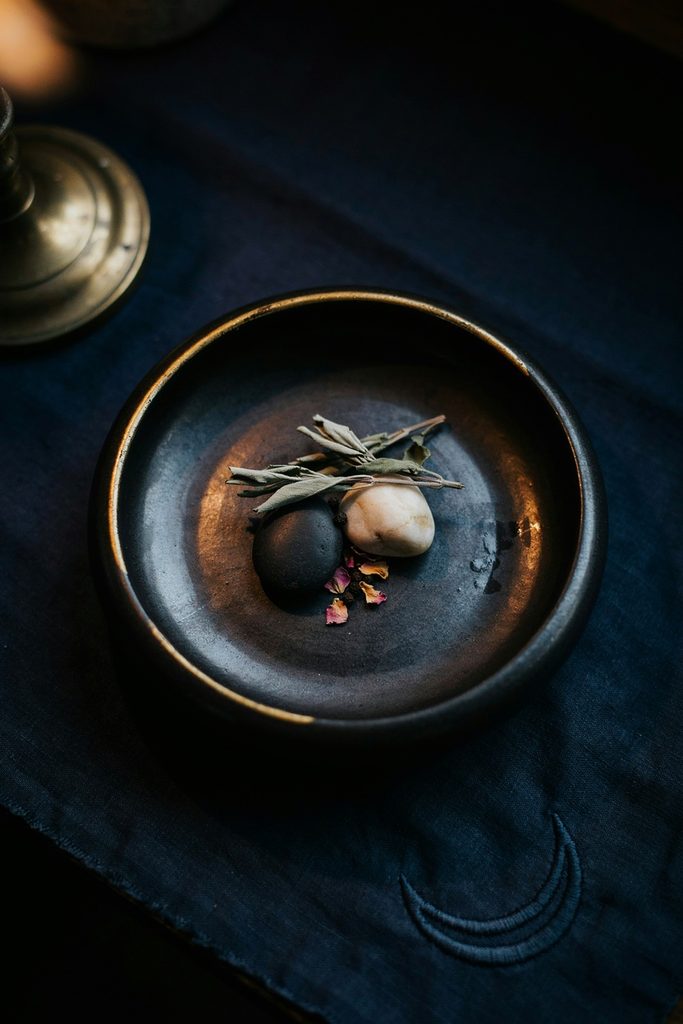
This is one of the simplest pieces on this whole list, and a good place to start if you’re newer to working with clay. It’s meant to hold small offerings, salt, herbs, a few stones, right on your altar space, and the soft curved shape comes together with almost no special tools.
What You’ll Need
Here’s what to gather before you start:
- Air dry clay
- A small bowl to use as a mold
- A rolling pin
- A smoothing tool or damp fingertip
- Black or charcoal acrylic paint
- A small amount of gold paint for dry-brushing
How to Make It
Once everything’s ready, here’s how it comes together:
- Roll the clay to about a quarter inch thick on a flat surface.
- Drape it gently over the outside of a small bowl, or press it into the inside if you prefer a deeper dish, and smooth the edges with a damp finger so there are no cracks or rough spots.
- Let it dry fully on the mold for the first few hours before carefully removing it to finish drying flat, this helps it hold its curved shape.
- Once completely dry, paint the entire piece black or charcoal and let it dry.
- Load a dry brush with a small amount of gold paint and lightly drag it across the raised edges and any texture, wiping most of the paint off the brush first so it only catches the highest points.
Tip: Don’t skip the dry-brush step, a flat black dish looks fine, but the gold catching the edges is what gives it that aged, ceremonial look rather than reading as a plain painted bowl.
Taper Candle Holders
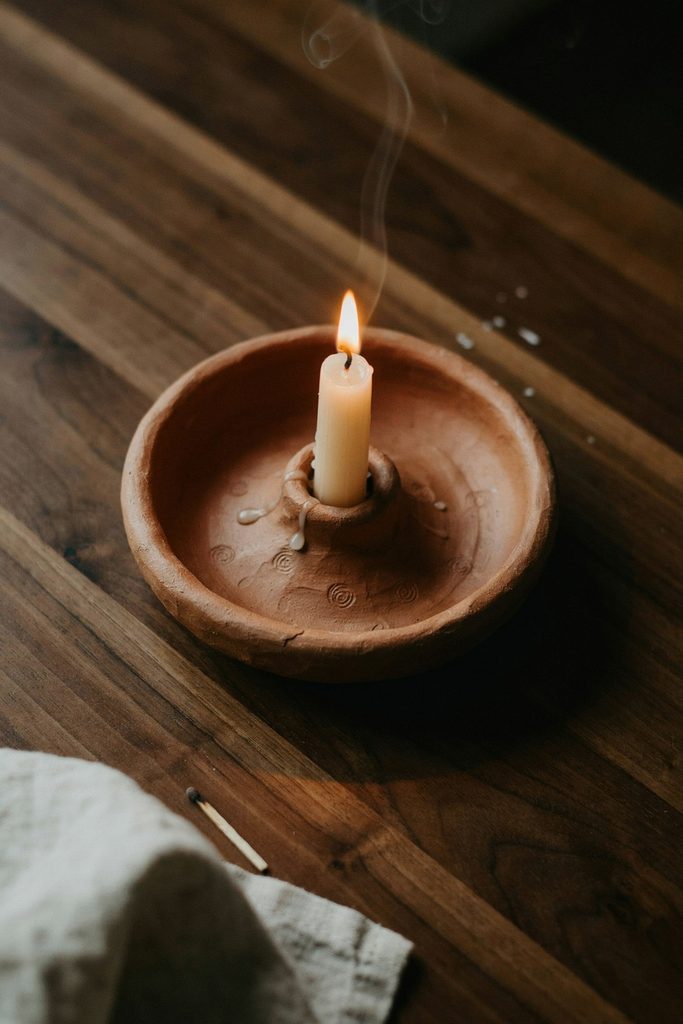
A hand-formed candle holder feels much more at home on an altar than a store-bought one, and this is a good project for practicing basic coil and pinch techniques if you’re still building confidence with clay.
What You’ll Need
Here’s what to gather before you start:
- Air dry clay
- A taper candle to use as a sizing guide
- A small knife or clay tool
- Paint of your choice
How to Make It
Once everything’s ready, here’s how it comes together:
- Form a ball of clay and use your thumb to press a hole into the center, working it into a rough cup shape, or build up the sides with coils of clay if you prefer that method.
- Press your taper candle gently into the opening to check the fit, aiming for snug but not tight enough to crack the clay as it dries.
- Remove the candle before it dries completely stuck in place.
- Smooth the base so it sits flat and stable, and smooth the rim where the candle will sit.
- Let it dry fully, which can take a couple of days for a thicker piece like this, then paint as desired.
Tip: Leave a little extra room around the candle’s base diameter, clay shrinks slightly as it dries, and a hole that fit perfectly when wet can end up too snug once fully cured.
Moon and Celestial Decor
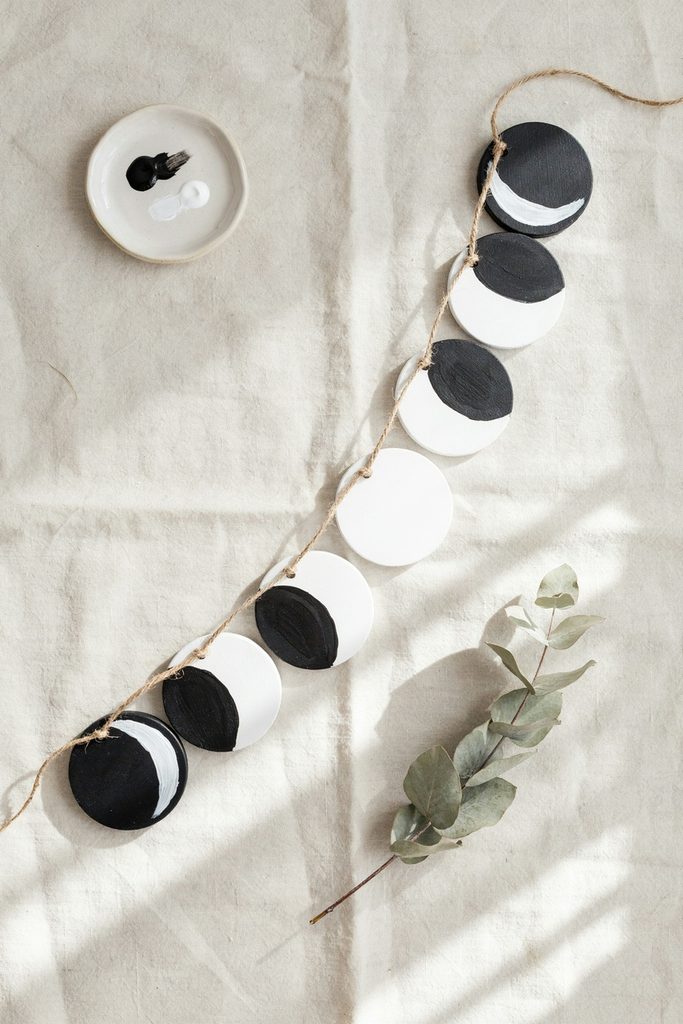
Moon phases are probably the most recognizable motif in this whole aesthetic, and they translate beautifully into clay because the shapes are simple enough for a beginner but still visually striking once finished.
A Moon Phase Garland
This is a lovely project for a wall that feels a little bare, and it’s easy to make in one sitting since each piece is small and quick to cut.
What You’ll Need
Here’s what to gather before you start:
- Air dry clay
- A round cutter or a small glass to trace circles
- A butter knife
- A small tool or toothpick for the crescent shapes
- Twine or ribbon
- Black or navy paint, plus white or silver for detail
How to Make It
Once everything’s ready, here’s how it comes together:
- Roll the clay to an even quarter-inch thickness.
- Cut out a full moon circle, then cut several crescent shapes by removing an offset circle from one edge of a full circle, along with one small new moon disc.
- While the clay is still soft, poke a small hole near the top edge of each piece with a toothpick, this is much easier now than trying to drill through dried clay later.
- Let all the pieces dry completely, this usually takes a full day or two depending on thickness.
- Paint each phase, leaving the full moon light and the new moon dark, or however you’d like the gradient to read.
- Once the paint is dry, thread twine through each hole in the order you want the phases to appear and hang.
Tip: Lay out your full set of phases on the table before painting anything, it’s much easier to catch a sizing or spacing mistake while everything is still flat and rearrangeable than after they’re strung together.
An Oversized Crescent Moon Wall Hanging
If a garland feels like too many small pieces, a single larger crescent makes a strong, simple statement piece instead.
What You’ll Need
Here’s what to gather before you start:
- Air dry clay
- A large crescent-shaped template, cut from cardboard or paper
- A rolling pin
- A knife
- A hanging hook or picture wire
- Mica powder in white or silver
How to Make It
Once everything’s ready, here’s how it comes together:
- Roll the clay to about a half inch thick, thick enough to stay sturdy at this larger size.
- Lay your crescent template on top and cut around it carefully with a knife.
- Insert a hanging hook into the back near the top before the clay dries, or press a loop of wire in deep enough that it will stay anchored once cured.
- Let it dry fully, a piece this size can take several days, flipping occasionally so it dries evenly on both sides.
- Paint a deep navy or black base coat.
- Dust a small amount of mica powder over the surface with a soft brush while the paint is still slightly tacky, so it catches and holds onto the surface.
Tip: Because of its size and weight once dry, make sure your hanging hardware is embedded deeply and centered, an off-balance piece will hang crooked no matter how good the shape looks.
Divination Tools
Clay lends itself surprisingly well to a few divination-adjacent tools, and these tend to make some of the more distinctive, conversation-starting pieces in this whole category.
A Set of Rune-Style Tiles
This is a satisfying project to batch, since you’re making a full set of small, similar pieces rather than one larger item, and it’s a great way to practice carving detail into soft clay.
What You’ll Need
Here’s what to gather before you start:
- Air dry clay
- A rolling pin
- A small square or circle cutter
- A toothpick or fine carving tool
- Dark paint for the wash
How to Make It
Once everything’s ready, here’s how it comes together:
- Roll the clay to about a quarter inch thick and cut out evenly sized tiles, aiming for consistency so the full set feels cohesive.
- While the clay is still soft, carve your chosen symbols into the center of each tile with a toothpick, pressing firmly enough to leave a clear groove.
- Let the full set dry completely, this can take a day or two depending on thickness.
- Paint a dark wash over the entire tile.
- Before it dries, wipe the raised surface clean with a damp cloth or your finger, leaving the color settled only in the carved grooves.
Tip: Carve your symbols a little deeper than feels necessary, shallow carving tends to fill back in with the wash and lose definition, while a deeper groove holds the contrast much more clearly.
A Clay Pendulum
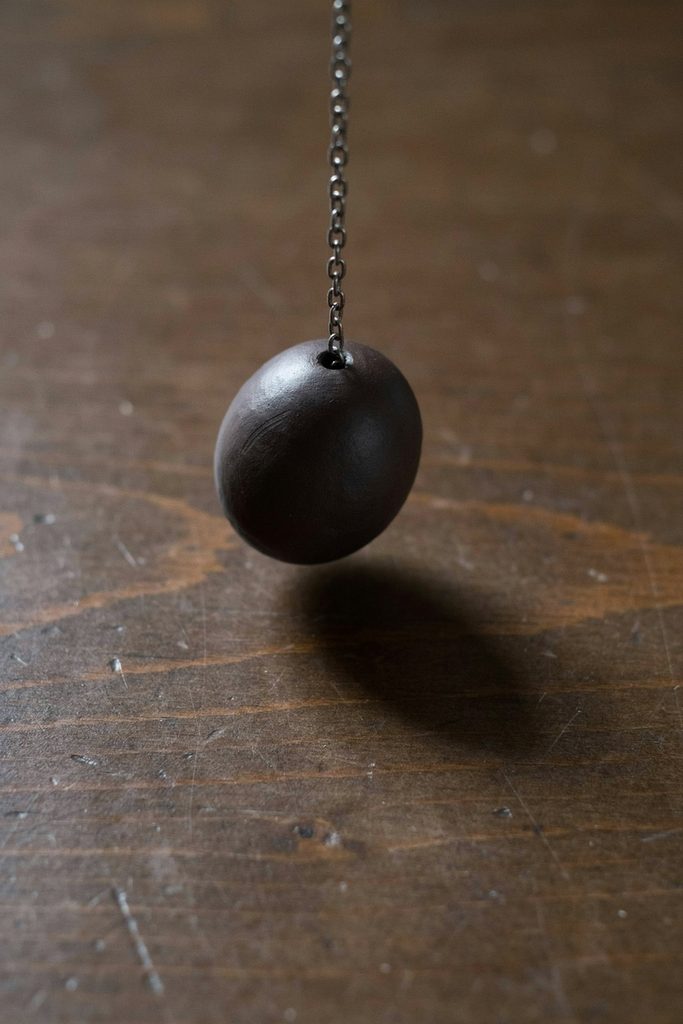
A pendulum is a small project, but the placement of the hanging loop matters more than almost any other detail on this list, since it affects how the finished piece actually swings.
What You’ll Need
Here’s what to gather before you start:
- Air dry clay
- A small jump ring or piece of wire
- A chain
- Paint or sealant of your choice
How to Make It
Once everything’s ready, here’s how it comes together:
- Shape a small ball of clay into a teardrop or point, tapering it to a rounded tip at the bottom.
- Before it dries, press a jump ring or a small loop of wire into the wide top end, centered as precisely as you can manage, an off-center loop will cause the finished pendulum to hang and swing crookedly.
- Let it dry fully, checking that the embedded loop hasn’t shifted.
- Paint if desired, then seal thoroughly once cured, since this is a piece that will be handled often.
- Attach a chain through the loop once everything is fully cured.
Tip: Test the balance before attaching a permanent chain, hang the dried piece from a temporary string first and see if it hangs straight, adjusting isn’t possible after the fact, so this check matters before you consider it finished.
Nature and Herb-Inspired Pieces
A lot of this aesthetic borrows heavily from nature, dried botanicals, herbs, mushrooms, and this is where clay’s natural, earthy texture really gets to shine without needing much embellishment at all.
A Pressed Herb or Leaf-Imprint Dish
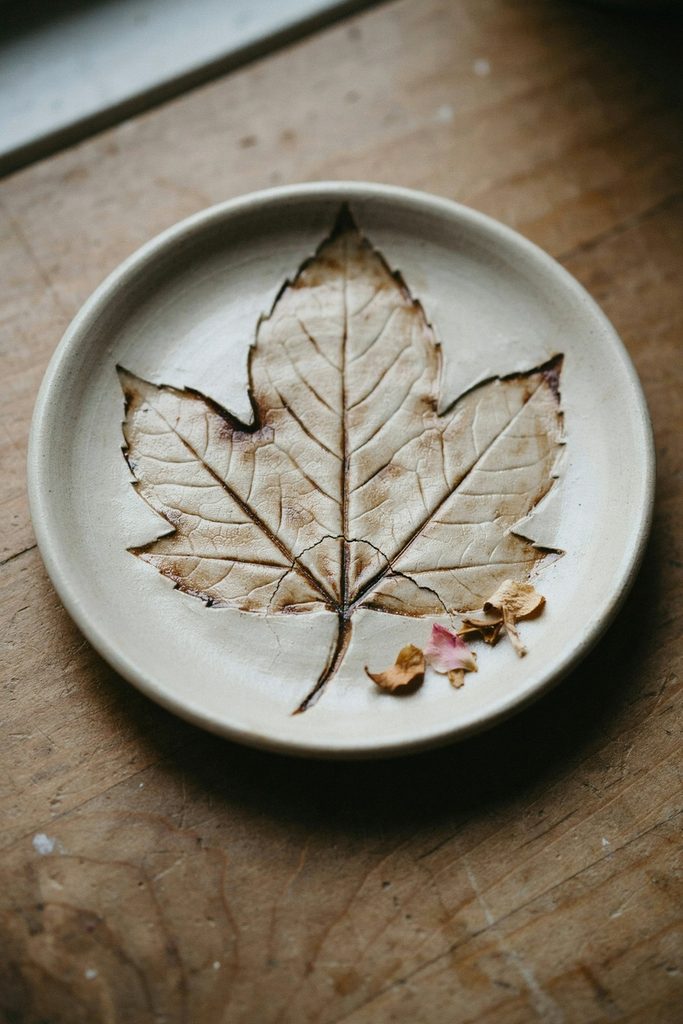
This is one of the most satisfying projects on this entire list, because the level of detail comes almost entirely from the plant itself rather than your own carving skill.
What You’ll Need
Here’s what to gather before you start:
- Air dry clay
- A real dried leaf or sprig of herb
- A rolling pin
- A small bowl for shaping
- Dark paint for the wash
How to Make It
Once everything’s ready, here’s how it comes together:
- Roll the clay to about a quarter inch thick.
- Press your chosen leaf or herb firmly and evenly into the surface, using a rolling pin over the top to make sure every part of the impression comes through clearly.
- Carefully peel the plant back away from the clay.
- Drape or press the imprinted clay into a small bowl to give it a shallow dish shape, and let it dry fully.
- Rub a dark paint wash into the impressed lines with your finger or a small brush, then wipe the raised surrounding surface clean, leaving the detail visible in the grooves.
Tip: Ferns and other leaves with a lot of fine detail give you the most impressive result, but they can also be delicate to peel away cleanly, work slowly from one edge rather than lifting straight up all at once.
Tiny Mushroom Figures
These are quick, whimsical, and a great way to use up small leftover scraps of clay from a bigger project.
What You’ll Need
Here’s what to gather before you start:
- Air dry clay
- A small tool for smoothing and shaping
- Paint in earthy reds, browns, or whites depending on the style you’re going for
How to Make It
Once everything’s ready, here’s how it comes together:
- Form a small ball for the cap and roll a short, slightly tapered cylinder for the stem.
- Press the cap gently onto the top of the stem, smoothing the seam where they meet so it looks like one continuous piece.
- Use a small tool to add texture, gills underneath the cap, a slight dimple on top, or small dots for a toadstool look.
- Let dry fully.
- Paint in whatever color scheme fits your space.
Tip: Make several at once in slightly different sizes, a cluster of mushrooms in varying heights looks far more natural scattered on a shelf than a single uniform one on its own.
Jewelry and Wearables
If you want to actually wear this aesthetic rather than just display it, a few smaller clay pieces translate nicely into jewelry with the addition of some basic findings.
Crescent Moon Pendants
A scaled-down version of the larger wall hanging above, sized for a necklace rather than a wall.
What You’ll Need
Here’s what to gather before you start:
- Air dry clay
- A small crescent cutter or template
- A toothpick
- A jump ring
- A chain
- Paint or mica powder
How to Make It
Once everything’s ready, here’s how it comes together:
- Roll clay thin, about an eighth of an inch, since jewelry needs to stay lightweight.
- Cut a small crescent shape and poke a hole near one tip with a toothpick while the clay is still soft.
- Let it dry fully.
- Paint or dust with mica powder as desired.
- Once cured, attach a jump ring through the hole and thread onto a chain.
Tip: Seal jewelry pieces more thoroughly than display pieces, anything worn against skin or clothing regularly needs more protection from wear than something sitting on a shelf.
Mushroom or Herb-Imprint Stud Earrings
A sweet, subtle way to bring this aesthetic into everyday jewelry rather than just statement pieces.
What You’ll Need
Here’s what to gather before you start:
- Air dry clay
- A small round or teardrop cutter
- Earring posts and backs
- Jewelry glue
- Paint
How to Make It
Once everything’s ready, here’s how it comes together:
- Roll clay thin and cut two small, matching shapes for a pair.
- If you want a botanical imprint, press a tiny leaf or herb sprig into each piece before cutting it to shape.
- Let dry fully, then paint if desired.
- Once completely cured, glue earring posts to the back of each piece with a strong jewelry adhesive.
- Let the glue cure fully before wearing.
Tip: Make a couple of extra pairs at once, small flat pieces like this are one of the easiest and most giftable projects on this whole list, and it’s much more efficient to batch them than make one pair at a time.
A Few General Tips for This Whole Aesthetic
Lean into imperfection rather than fighting it. A slightly uneven edge or an asymmetrical shape tends to read as more handmade and intentional in this style than something overly polished and symmetrical.
Dark washes are your best friend for detail work. Any carved or pressed detail, runes, leaf veins, symbols, benefits enormously from a dark paint wash that settles into the grooves and wipes back off the raised surface, this single technique does more visual work than almost anything else on this list.
Seal anything that will be handled often. Jewelry, altar tools you’ll pick up regularly, and anything living outside of pure display all benefit from a proper sealant, my How to Glaze Air Dry Clay guide covers the options in more depth.
Small scraps add up fast. Almost every idea in this post can be made from leftover clay from a bigger project, this is a genuinely good use for the odds and ends you’d otherwise throw away.
Frequently Asked Questions
Do I need special black clay, or can I paint white clay black? Painting is far easier and more reliable, pre-colored black air dry clay exists but can be trickier to source and doesn’t hide seams or fingerprints as well as a painted finish does.
How do I get that aged, weathered look on altar pieces? A dark base coat with a dry-brushed lighter color, gold, silver, or white, lightly applied only to raised edges and details, is the easiest way to fake an aged, well-loved look on a brand new piece.
Can these pieces get wet, like near a bath or sink? Not without a proper sealant, and even sealed pieces shouldn’t be regularly submerged. Air dry clay isn’t waterproof on its own, so keep unsealed pieces away from consistent moisture.
What’s the best way to make jewelry-sized pieces durable enough to wear? Keep them on the thicker side rather than paper-thin, let them cure fully before handling, and seal them well, thin, rushed pieces are the most likely to crack or chip with regular wear.
Related Posts
If this was helpful, here are a few more from the site worth reading next:
- How to Make Air Dry Clay at Home (Easy Recipe) — the base recipe every project above starts from.
- How to Paint Air Dry Clay: A Step-by-Step Guide — covers the dry-brush and wash techniques used throughout this post in more detail.
- How to Glaze Air Dry Clay: A Beginner’s Guide for Moms — the sealing step for anything you’ll wear or handle regularly.
- How to Avoid Cracks in Air Dry Clay — especially useful for the larger pieces like the crescent moon wall hanging.
- Air Dry Clay Jewellery Ideas — more inspiration if the pendant and earring projects were your favorites.
- Air Dry Clay Beginner Tips — a good starting point if any of this felt new to you.
Final Thoughts
What I like about this aesthetic is how much room it leaves for personal interpretation, there’s no single “right” way to make a witchy altar piece or a moon phase garland, and the slightly imperfect, handmade quality that air dry clay naturally has only adds to that.
Start with whichever category feels most like you, whether that’s altar tools, celestial decor, or something wearable, and let the rest come together over time as you figure out what you actually reach for.
My name is Amelia Hart, and I’m passionate about home decor, DIY projects, and creating beautiful spaces on any budget.
I love sharing boho-inspired styling tips, creative decor ideas, and practical ways to make your home feel warm and inviting. Join me for inspiration and easy-to-follow decorating advice!