DIY Air Dry Clay Keychains: An Easy Beginner Tutorial
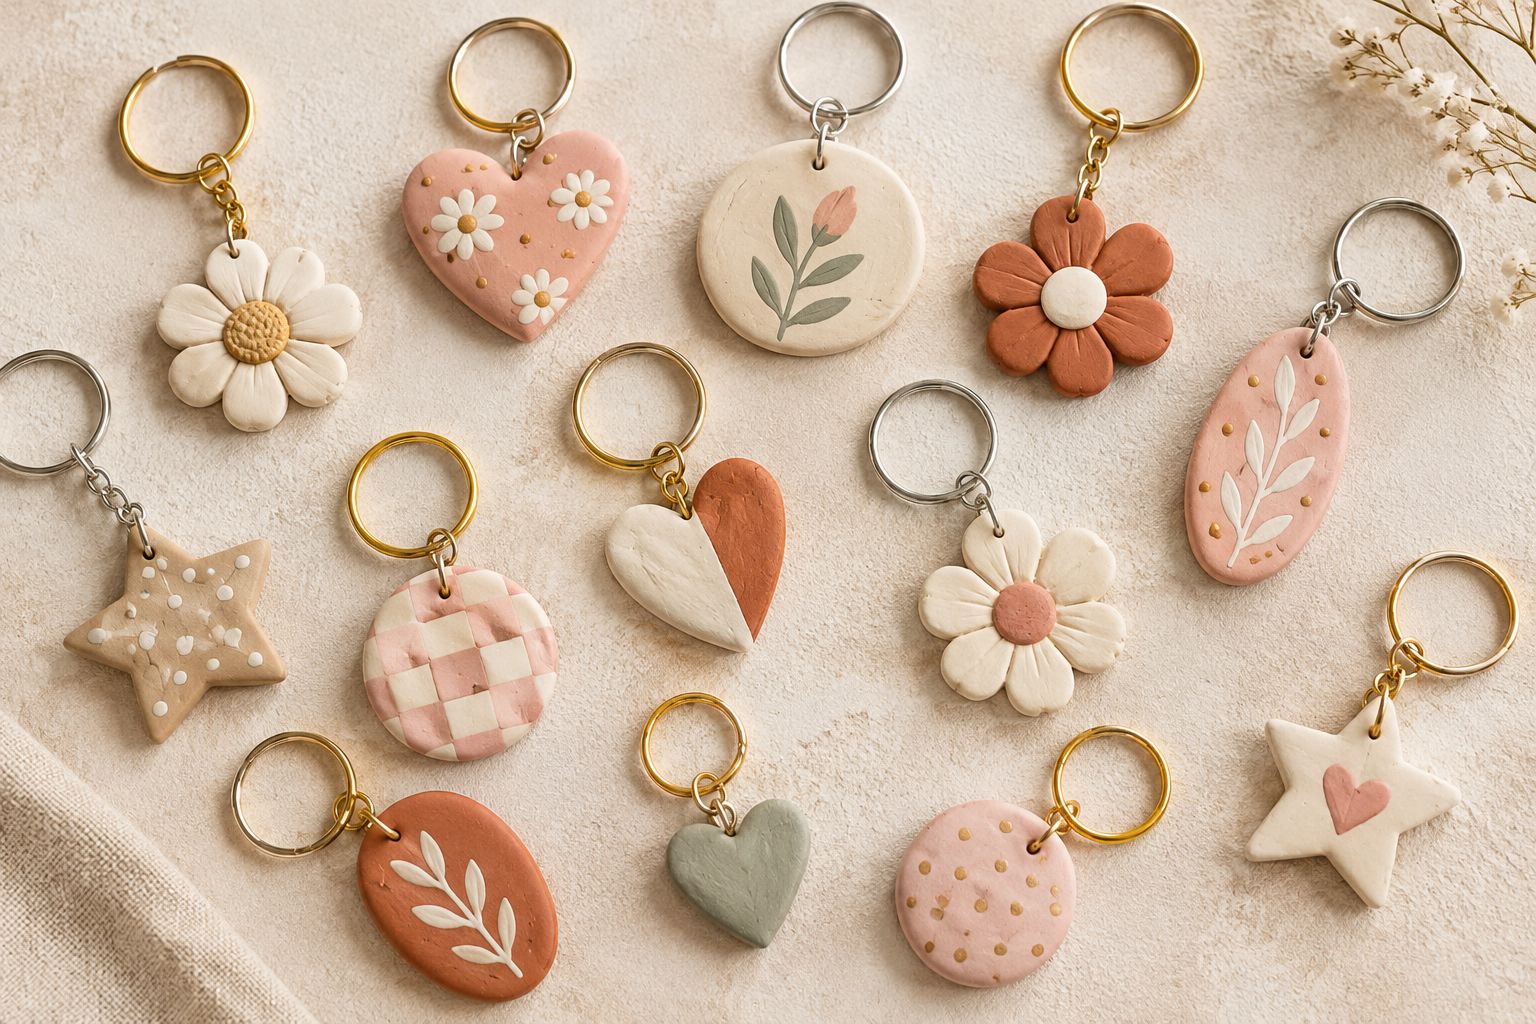
There’s something about a little handmade keychain that makes even your everyday house keys feel a bit more personal. I’ve made plenty of small clay projects over the years, but keychains are the ones I keep coming back to, they’re small enough to finish in an afternoon, and there’s no shortage of ways to customize them once you’ve got the basic shape down.
The idea is wonderfully simple: you roll out air dry clay, cut it into a shape, poke a hole for the ring before it dries, and once it’s hardened, you paint and seal it however you like.
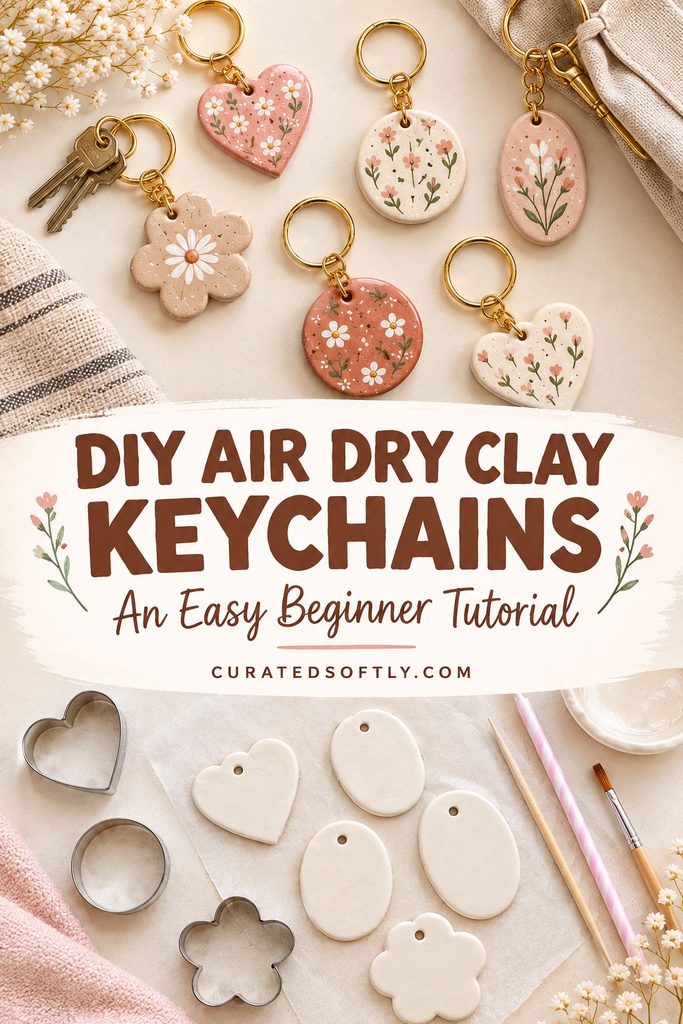
I especially like this project for using up small leftover bits of clay from bigger projects, since a keychain doesn’t need much material at all.
A single golf-ball-sized piece of clay is usually enough for two or three of these, which makes it a great way to avoid wasting the little scraps that are otherwise too small to use for much else.
If you like the idea of small clay accessories generally, my air dry clay jewelry ideas post has a few more directions to take this in.
Why I Love This Air Dry Clay Keychain Project
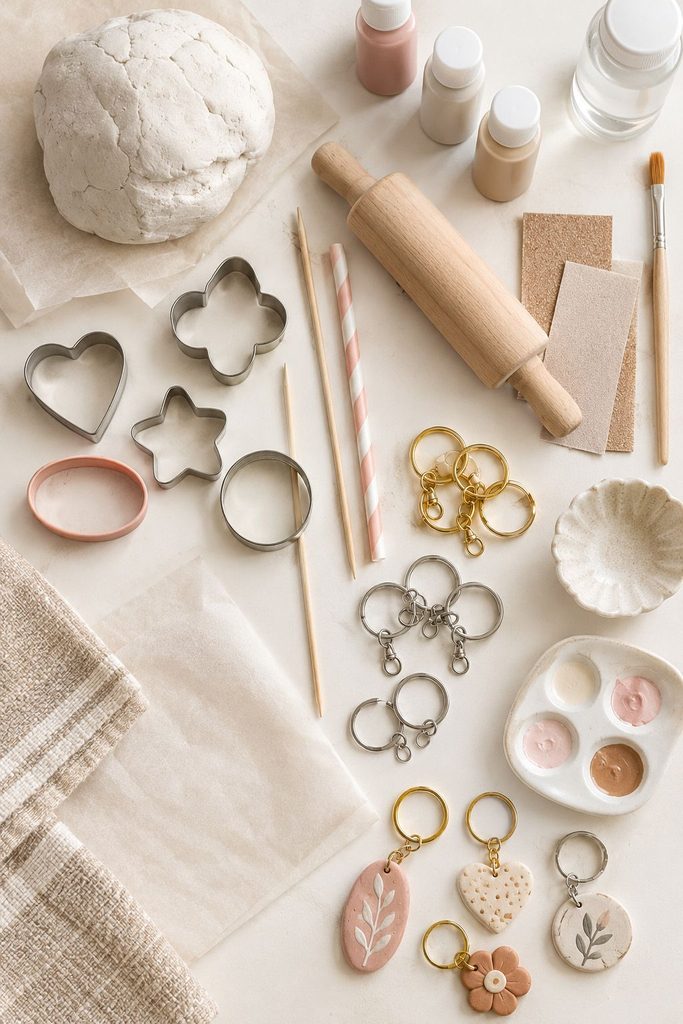
The first reason I keep making these is that they’re genuinely one of the fastest air dry clay projects to finish, hands-on time is well under half an hour, and they use almost no material compared to bowls, dishes, or planters.
It also looks much more polished than the effort actually involved. A simple cut-out shape, a bit of paint, and a coat of sealer is enough to make something that looks intentional and well made, not like a beginner’s first attempt.
I also love that these make genuinely good small gifts. A keychain doesn’t ask much of the giver in terms of cost or time, but it still feels handmade and thoughtful in a way that a store-bought one never quite does.
Unlike a lot of clay projects that need days of drying before you can even tell if they turned out well, a keychain is small enough that you’re not out much time or material if your first attempt doesn’t go the way you pictured it.
You Don’t Need Many Supplies
This is one of those projects where I can pull almost everything together from my regular craft supplies.
You need:
- Air dry clay
- Rolling pin
- Cookie cutters or a small craft knife for cutting shapes
- A straw or skewer for poking the ring hole
- Fine sandpaper
- Acrylic paint
- A small paintbrush
- Clear sealer
- Key rings or keychain clasps
- Parchment paper or a smooth work surface
You don’t need any specialty clay tools to make these. A straw from your kitchen drawer works just as well as a purpose-made hole punch, and a butter knife handles most of the cutting a craft knife would otherwise do.
What Kind of Clay Works Best?
Not every air dry clay behaves the same way, and for a small, detailed piece like a keychain, that difference matters more than it would for a larger project.
I prefer a smooth, fine-textured white clay for keychains, since it holds crisp edges when cut and gives you a clean surface to paint on.
Chunkier or more fibrous craft clays can work, but they tend to leave a slightly rougher texture that’s harder to hide once the piece is painted, and small details like carved initials or stamped patterns don’t come through nearly as cleanly.
If you’re newer to air dry clay generally, my beginner tips guide covers a lot of the basics, choosing a clay brand, workspace setup, and drying technique, that make small detailed projects like this one go a lot more smoothly.
Choosing the Right Key Ring or Clasp
The hardware you attach matters more than it might seem, since it’s the part that gets the most repeated stress from daily use.
Standard split key rings are the most common choice and work well for most keychains, but they can be a little fiddly to thread through a small clay hole. Lobster clasps or lanyard-style clips are a nice alternative if you want something easier to snap on and off a bag or belt loop.
Whatever you choose, make sure the wire gauge isn’t too thick for the hole you’ve planned. A hole that’s too small for the hardware means forcing it through, which is one of the more common ways a dried keychain cracks right at the point where it needs to be strongest.
How to Make Air Dry Clay Keychains
Step 1: Prepare Your Work Surface
Before touching the clay, cover your work surface with parchment paper or another smooth, clean surface.
This matters more than it sounds for a piece this small. Any dust, fibers, or bits of dried clay stuck underneath can show up as texture on the surface once your keychain is finished, and it’s much harder to sand out of a small, detailed shape than a larger one where a bit of texture blends into the piece.
Step 2: Condition the Clay
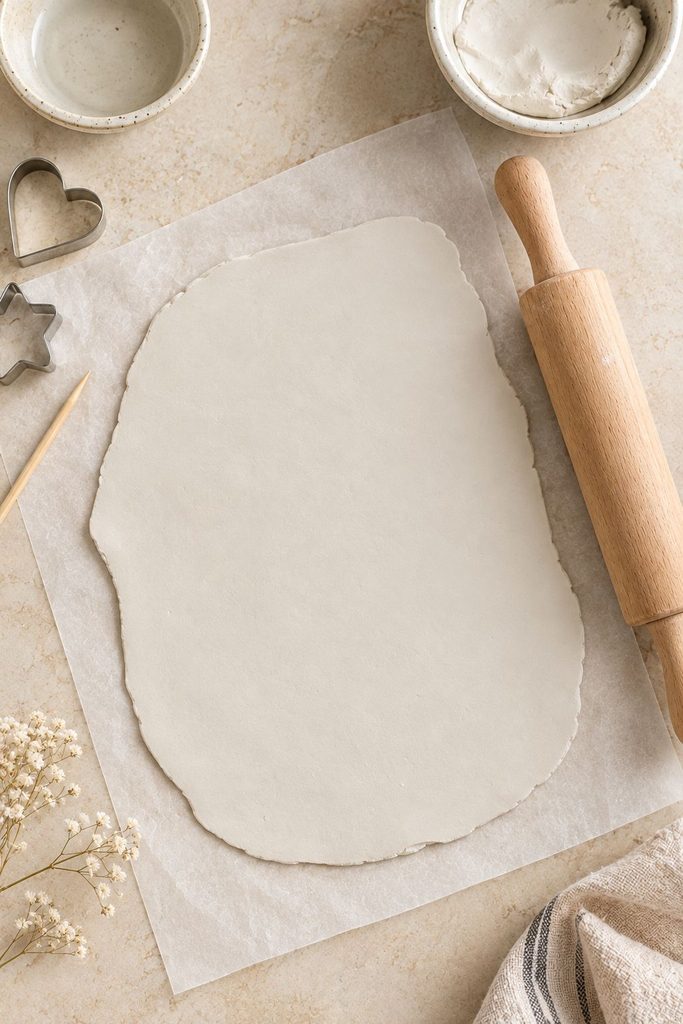
Take a small piece of air dry clay and knead it gently between your hands until it feels smooth and pliable, without any dry, crumbly patches or visible air pockets.
You don’t need much clay at all for a single keychain, a piece roughly the size of a golf ball is plenty and will usually stretch to cover two or three keychains depending on the shape.
If the clay feels slightly firm from sitting in storage, spend a little extra time working it before rolling, since it’s much easier to condition clay properly now than to fix cracks in a finished piece later. Kneading also helps push out small air bubbles that can otherwise expand and crack the surface as the clay dries.
Step 3: Roll the Clay Evenly
Roll the clay out into a flat sheet, aiming for roughly 1/4 inch thick.
Thinner than this and the finished keychain can feel flimsy or crack easily once it’s handled regularly, especially right around the ring hole where most of the daily stress ends up.
Thicker than this and it starts to feel bulky and heavy for something meant to hang off a set of keys.
Try to keep the thickness consistent across the whole sheet, since uneven spots dry at different rates and are more prone to warping, and roll from the center outward rather than in one direction to help keep the thickness even.
Step 4: Cut Your Shape
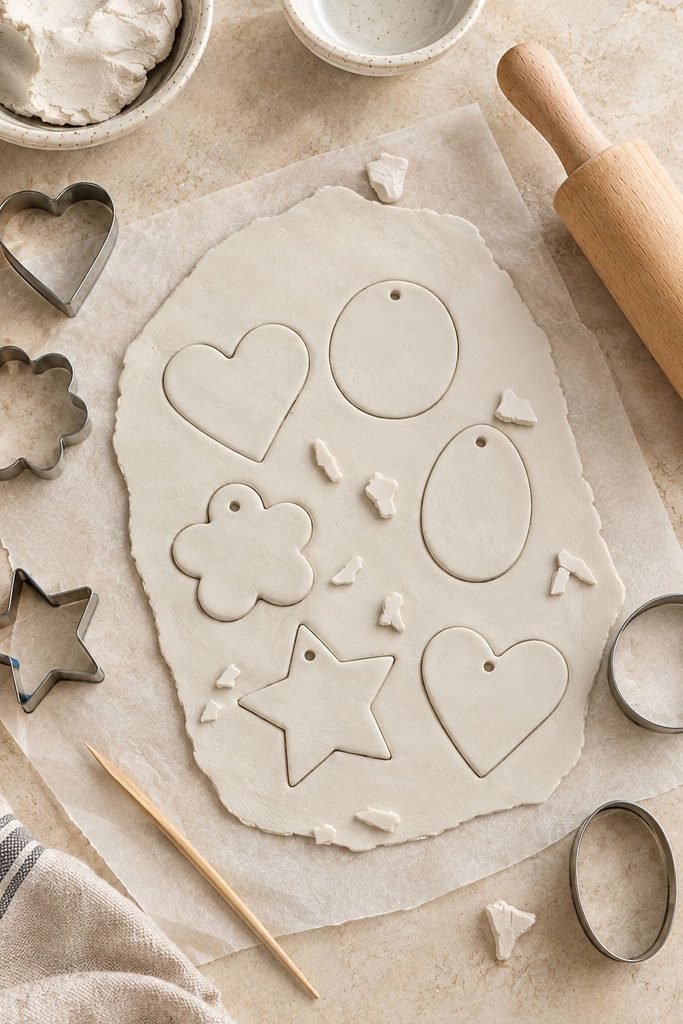
Use a cookie cutter, a small stencil, or a craft knife to cut your keychain into the shape you want.
Simple shapes like circles, hearts, or ovals tend to be the most forgiving for a first attempt, since there’s less detailed edge work to clean up.
If you’re freehanding a shape with a knife, cut slowly and smooth any rough edges with a slightly damp fingertip as you go.
Avoid shapes with very thin or narrow points, like a long, skinny star point, since those thin sections are more prone to snapping off both while handling the wet clay and later during everyday use.
Step 5: Poke the Ring Hole
Before the clay dries at all, use a straw or a skewer to poke a clean hole near the top edge of your shape.
Leave enough space between the hole and the edge of the clay, at least a quarter inch, so the clay around it doesn’t crack or tear once it’s dry and handling regular wear from a key ring.
Rotate the straw gently as you remove it to keep the hole’s edges clean rather than dragging or distorting the surrounding clay. If you want extra reinforcement here, see the section below on strengthening the ring hole before it’s a required fix rather than an afterthought.
Step 6: Smooth the Edges
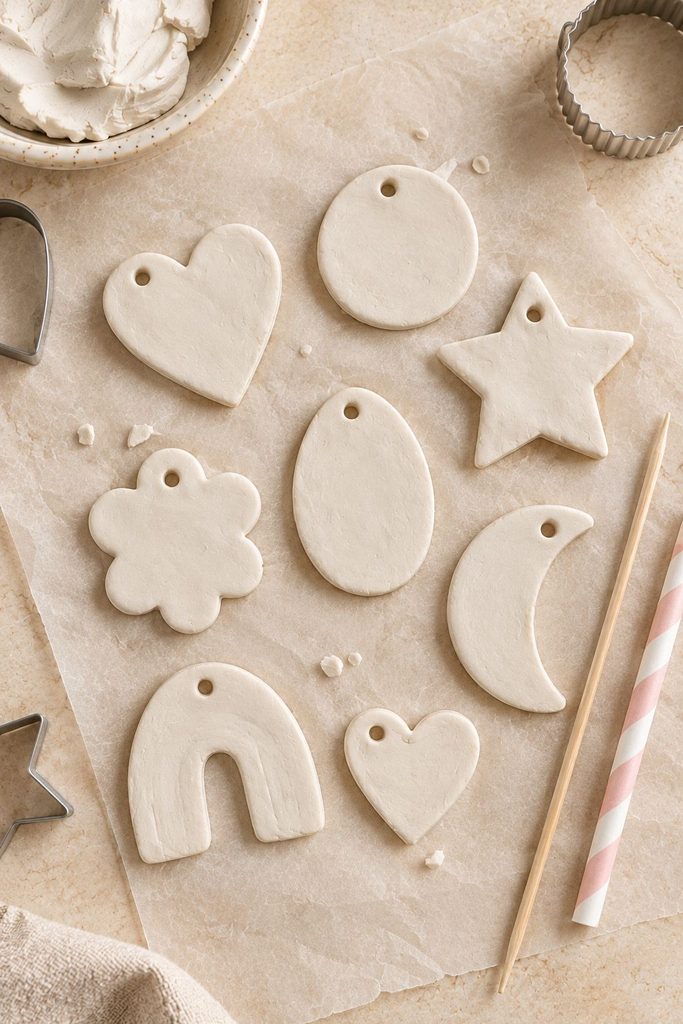
Run a slightly damp fingertip around the edges of your shape to smooth out any rough spots left over from cutting.
This step is easy to rush, but it makes a real difference in how finished the piece looks once it’s painted, rough edges tend to catch and hold extra paint unevenly, while smoothed edges take color cleanly.
Take a moment to check the edge of the ring hole too, since that spot gets missed often and can leave a slightly sharp rim that’s uncomfortable against a keyring or pocket lining.
Step 7: Let It Dry Completely
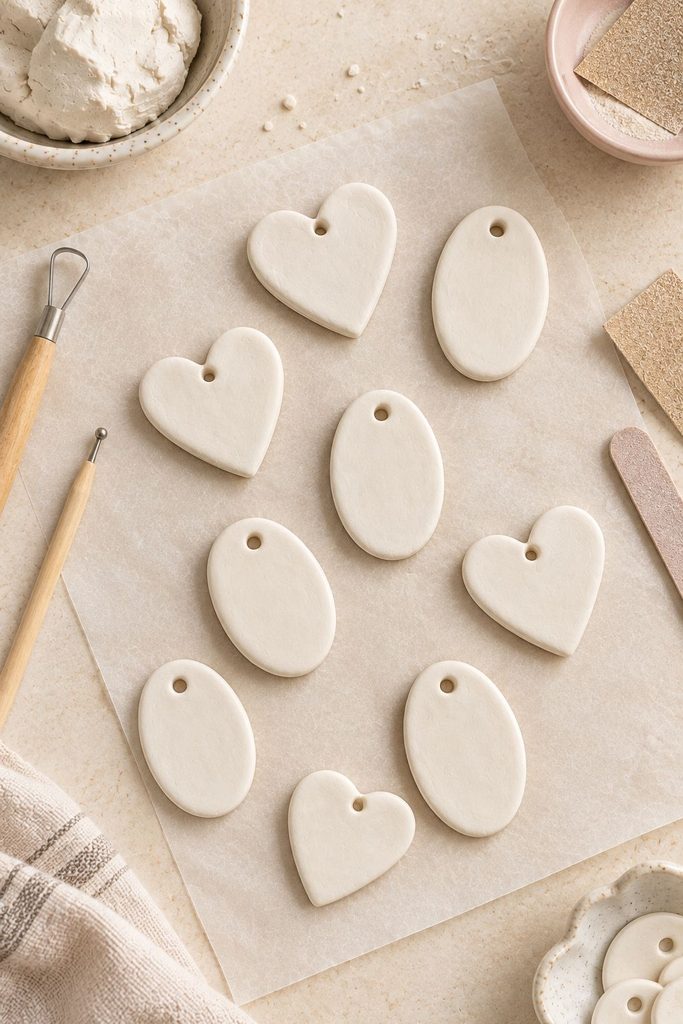
Set your keychain shape on a flat surface to dry, flipping it occasionally so both sides dry evenly and it doesn’t warp.
Drying time depends on the thickness of your piece, the clay brand, and the humidity in your space, so I’d avoid relying on a fixed number of hours.
A keychain this size usually takes a full day or two to dry all the way through, and it’s worth being patient here, since a piece that feels dry on the outside can still be soft in the center.
Pressing a fingertip gently into the thickest part is a decent way to check, if it gives at all, it needs more time.
Step 8: Sand and Paint
Once completely dry, lightly sand any remaining rough spots with fine-grit sandpaper, then wipe away the dust with a dry cloth.
Paint your keychain however you like, a single solid color, a pattern, or even a marbled look if you mixed colors into the clay earlier.
Let each coat dry fully before adding another, since thin layers give a much cleaner finish than one thick coat, and thick, wet paint is more likely to pool oddly around the edges of a small piece like this.
Step 9: Seal and Attach the Ring
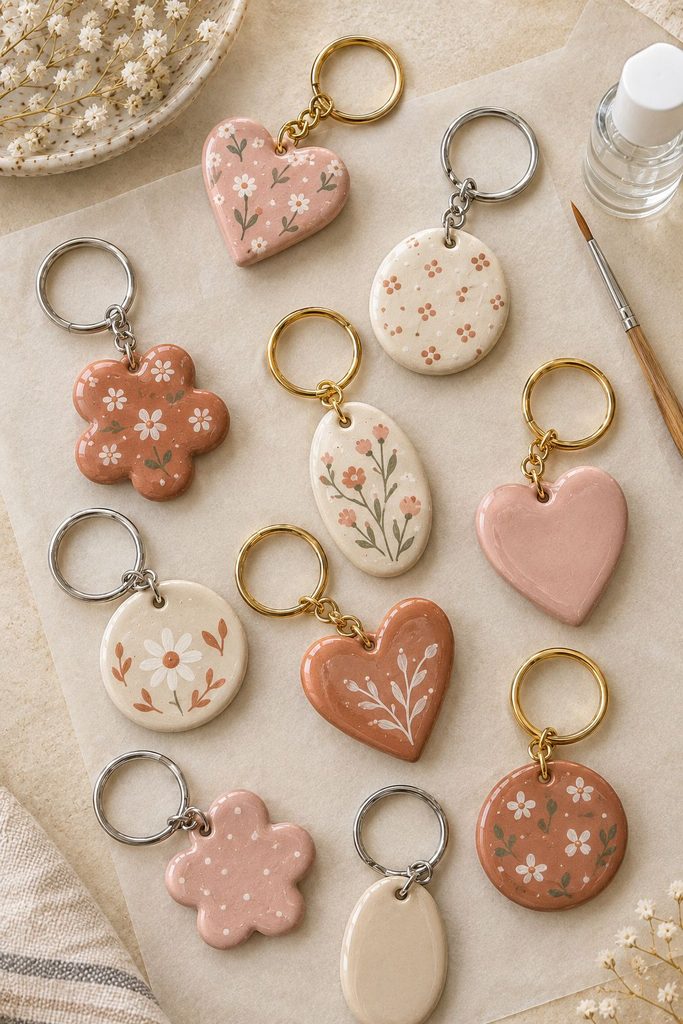
Once the paint is fully dry, seal your keychain thoroughly (more on exactly how in the sealing section below), then thread a key ring or clasp through the hole once the sealer has cured completely.
Reinforcing the Ring Hole for Extra Durability
Since the ring hole is the single spot on a keychain that takes the most repeated stress, it’s worth giving it a little extra attention beyond just poking a clean hole.
One simple trick is to slightly thicken the clay right around where the hole will go before poking it, either by pressing a small extra bit of clay into that spot and smoothing it in, or by not rolling that section quite as thin as the rest of the piece.
A slightly thicker ring area gives you more material to work with and makes the whole thing noticeably more resistant to cracking under regular use.
If you’re making a keychain for a child or for someone who tends to be rough on their keys, I’d lean toward a slightly larger hole with more surrounding clay rather than a small, delicate one, even if it means the finished piece looks a touch less dainty.
What If the Ring Hole Cracks?
If a small crack appears near the hole while the clay is still slightly damp, smooth it gently with a touch of water and blend the surrounding clay together.
If the piece has already fully dried, you can patch it with a small amount of fresh clay pressed into the crack, smoothed carefully, and left to dry again before sanding.
For a crack that’s already happened on a finished, sealed piece, a dot of strong craft glue can sometimes hold it together well enough for continued light use, though it won’t be quite as strong as the original clay.
The best prevention is giving the hole enough distance from the edge in the first place, reinforcing that area as described above, and avoiding excessive force when threading the ring through once it’s dry.
What If My Keychain Warps While Drying?
Warping usually comes down to uneven thickness or drying too quickly on one side.
Make sure your clay is rolled evenly before cutting, and flip your keychain every few hours during the first day of drying so both sides dry at a similar rate.
Keeping it out of direct sunlight also helps, since fast, uneven drying is one of the most common causes of warping. If you notice a piece starting to curl slightly as it dries, laying something flat and lightweight on top, without pressing down hard, can sometimes help correct it before it fully hardens.
What If My Paint Looks Patchy or Uneven?
This usually means the paint went on too thick in one layer, or the surface wasn’t fully sanded and cleaned of dust beforehand.
Apply paint in thin, even coats rather than trying to get full coverage in one pass, and let each layer dry completely before adding the next. A quick wipe with a dry cloth after sanding also helps the paint go on smoothly, since leftover clay dust can cause the paint to grab unevenly in spots.
What If My Clay Feels Sticky or Won’t Hold Its Shape?
This usually means the clay is either too fresh out of the package and needs a bit more air exposure while you work, or it’s picked up moisture from your hands during a long kneading session.
Let it rest uncovered for a few minutes before continuing, and dust your work surface and hands very lightly with cornstarch if it continues to stick. Avoid adding water to try to fix stickiness, since that tends to make the problem worse rather than better.
How I Like to Finish Mine
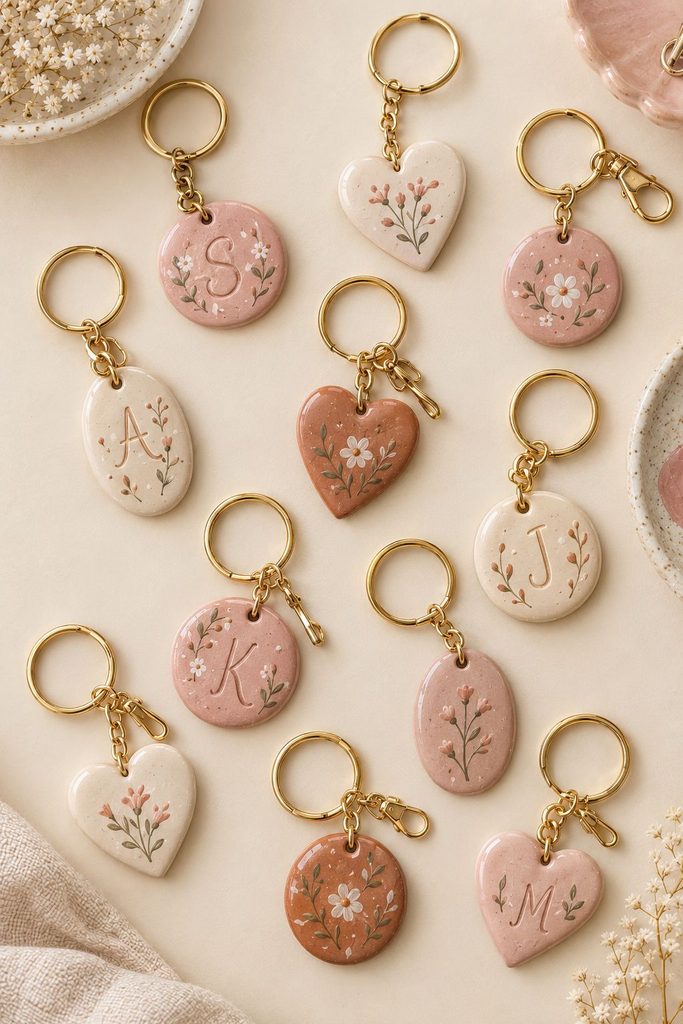
Once the keychain is completely dry, there are a few directions I like to take the finishing touches.
Natural Clay Finish
Leave the clay its original color and apply a clear sealer for a soft, minimalist look. This works especially well for simple, organic shapes.
Solid Color With a Painted Detail
Paint the whole shape one solid color, then add a small painted detail, an initial, a tiny flower, or a thin outline, once the base coat is dry.
Marbled Finish
Knead two or three colors of clay together before rolling, stopping before they fully blend, for a soft marbled effect that needs no painting at all.
Metallic Accent
Paint the shape a neutral color, then add a thin line of gold or silver paint around the edge for a subtle, elevated look.
Can I Add Names or Initials?
Yes, and it’s one of the easiest ways to make a plain keychain feel much more personal without much extra effort.
While the clay is still soft, you can carve letters directly into the surface with a toothpick or a small letter stamp, then let it dry as usual before painting.
If you’d rather add text after the piece is dry, a fine-tip paint pen or a very small brush works well for writing directly onto the sealed or unsealed surface, just make sure to seal over it afterward if you paint before sealing.
Keep lettering simple and a bit larger than you think you need, since fine detail can get lost once the piece is sealed, and small, cramped letters are much harder to read at a glance than a clean initial or short name.
How to Seal an Air Dry Clay Keychain
I recommend sealing every keychain you make, especially since these get handled constantly and often end up in pockets, bags, or clipped to a belt loop where they pick up dirt and moisture regularly.
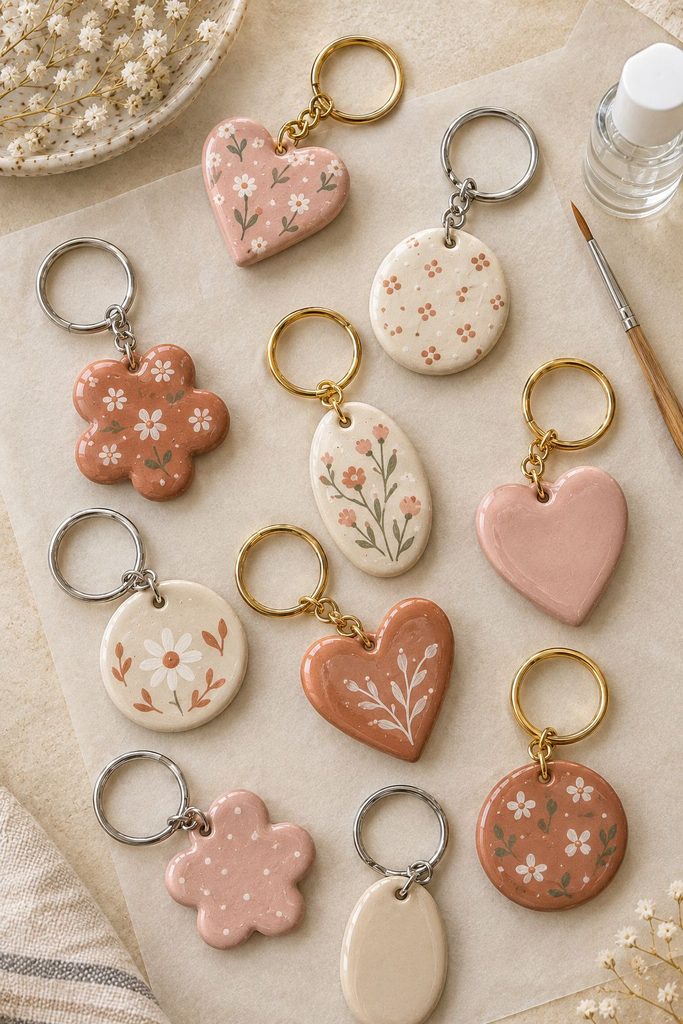
Once the paint is completely dry, apply a clear acrylic sealer in thin, even coats, covering the front, back, and edges, including the inside of the ring hole itself, which is easy to miss but gets just as much wear as the rest of the piece.
Let one coat dry fully before deciding whether it needs another, two coats is usually enough for something that gets this much daily handling, though I’ll sometimes add a third on a piece I know is going to see rough use.
I’ve written a full breakdown of this process, including which sealants hold up best for different finishes and how to avoid a cloudy or streaky coat, in my how to seal air dry clay guide, it’s worth a look if you want more detail than I’ve got room for here, especially if you’re planning to make a batch of these at once.
One Important Thing About Water
Even sealed, I wouldn’t treat an air dry clay keychain as fully waterproof. It can handle everyday use just fine, brief contact with rain or a damp pocket won’t ruin it, but I wouldn’t leave it submerged, run it through the wash, or leave it sitting in a wet gym bag.
If you’re gifting one, it’s worth mentioning to the recipient so they know to keep it reasonably dry and to avoid tossing it in with laundry.
How to Make Your Keychain Look More Polished
A few small details tend to make the biggest difference between a keychain that looks handmade in a rough way and one that looks handmade in an intentional, well-finished way.
Keep the Color Palette Simple
One or two colors, rather than several competing tones, almost always looks more considered and less busy on a piece this small.
Sand More Than You Think You Need To
A slightly softened, rounded edge reads as more finished and comfortable to hold than a sharp, straight-cut one. It’s a small step that’s easy to underdo.
Match the Hardware to the Piece
A plain gold or silver key ring tends to look more cohesive than a busy, decorative one, which can pull attention away from the clay shape itself.
What Can You Attach a Keychain To?
Keychains aren’t limited to house keys, and it’s worth thinking about the end use before deciding on a size and hole placement.
I’ve made these for:
- House and car keys
- Backpacks and tote bags
- Lanyards for badges or ID cards
- Luggage tags
- Zipper pulls on jackets or pouches
If you know a piece is headed for something like a backpack zipper rather than a keyring, you can afford to size it a bit larger and more decorative, since it won’t be jostling around with a full set of keys the same way.
Gift Ideas for Air Dry Clay Keychains
Keychains are one of those handmade gifts that feel personal without being a huge undertaking to make.
I’ve found they feel even more thoughtful when the shape or color has some connection to the person, an initial, a favorite color, or a shape tied to something they love.
Make a Matching Set
If you’re making these for a few people, batch them together using the same clay and color palette, but let each person’s shape or detail be a little different. It keeps the set cohesive while still feeling individually chosen.
A Few Keychain Variations to Try
Once you’ve made the basic version, there are plenty of ways to change up the look.
Initial Keychains
Cut a simple shape, then use a small letter stamp or a toothpick to carve an initial into the surface before it dries.
Two-Tone Keychains
Cut two thin layers in different colors and press them together before cutting your final shape, so the edge shows both colors.
Textured Keychains
Press a piece of lace, a leaf, or a textured fabric into the clay before cutting, similar to the technique in my leaf imprint jewelry dish tutorial, for a bit of natural texture.
Mini Charm Keychains
Cut several small shapes instead of one larger one, and thread them all onto a single ring for a fuller, charm-bracelet-style look.
How Long Does an Air Dry Clay Keychain Take to Make?
The actual hands-on portion is quick, usually 15 to 20 minutes for shaping, cutting, and poking the hole.
The drying is the part that takes patience. Depending on the clay, thickness, and humidity, expect a full day or two before it’s dry enough to sand and paint, plus additional drying time for the paint and each coat of sealer.
I wouldn’t plan on shaping, painting, sealing, and gifting one in the same day it was made, start it a few days ahead if it’s for a specific occasion.
More Air Dry Clay Projects to Try
- Air Dry Clay Jewelry Ideas
- Leaf Imprint Jewelry Dish: An Easy Air Dry Clay Tutorial
- Start Your Air Dry Clay Journey with These 10 Essential Tips
- How to Seal Air Dry Clay
Final Thoughts
This air dry clay keychain project is one of those small crafts that reminds me why I like working with clay in the first place. You don’t need much material, much time, or much skill to make something that looks genuinely intentional once it’s painted and sealed.
I’ve made these with different shapes, colors, and finishes, and the simplest versions, a plain shape in one solid color, are still the ones I reach for most.