12+ Halloween Outdoor Decoration Ideas (With Full How-To for Each One)
The first year I decorated my porch for Halloween, I bought a big inflatable, plugged it in, and called it done. It looked fine, I guess, but it also looked like everyone else’s porch on the block, and when it deflated into a sad nylon puddle three days later, I realized I’d spent real money on something I didn’t even particularly like.
What I’ve learned since is that the displays I actually love, the ones neighbors slow down for, are almost never the most expensive ones.
They’re the ones with a little repetition, a little height variation, and one or two handmade pieces that clearly took someone an afternoon.
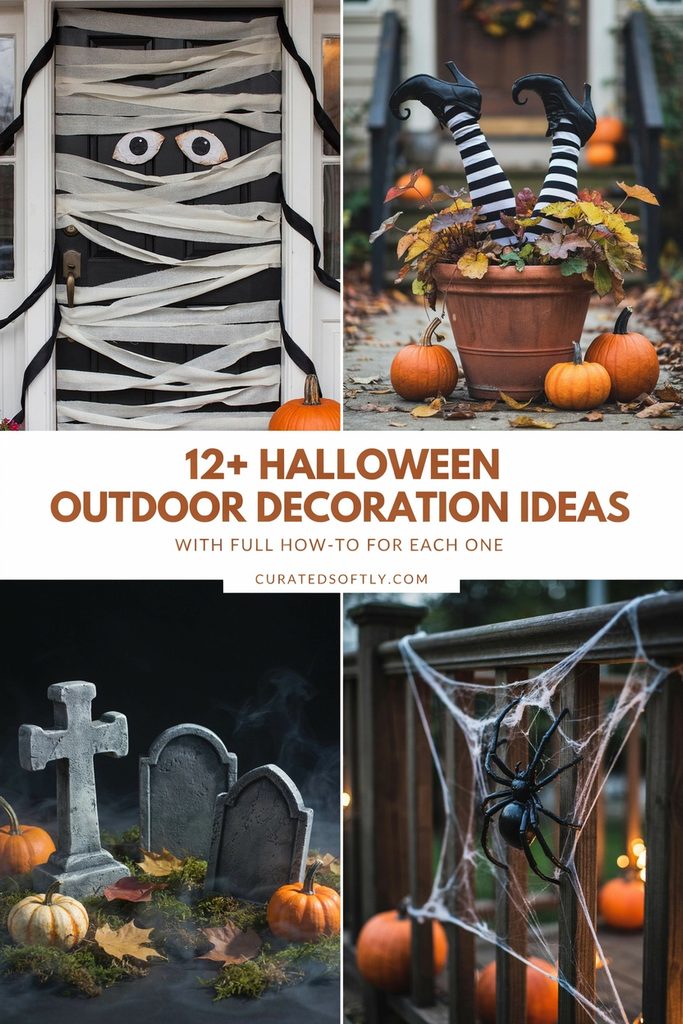
So this list is built differently from most Halloween roundups. Instead of fifty ideas with a photo and a sentence each, I’ve picked the ones that are genuinely popular and genuinely doable, and written out how to actually make each one, materials, steps, and the specific mistakes that sink each project.
Everything here is realistic for a normal weekend and a normal budget, and almost all of it stores flat and comes back out next October.
If you’re starting more or less from scratch this year, my Halloween painted flower pots tutorial is probably the best single entry point on this list, it’s cheap, fast, and it anchors a porch display better than almost anything else here.
What Makes an Outdoor Display Actually Work
Before the list itself, three principles matter more than any individual decoration you choose. Everything below is built around them.
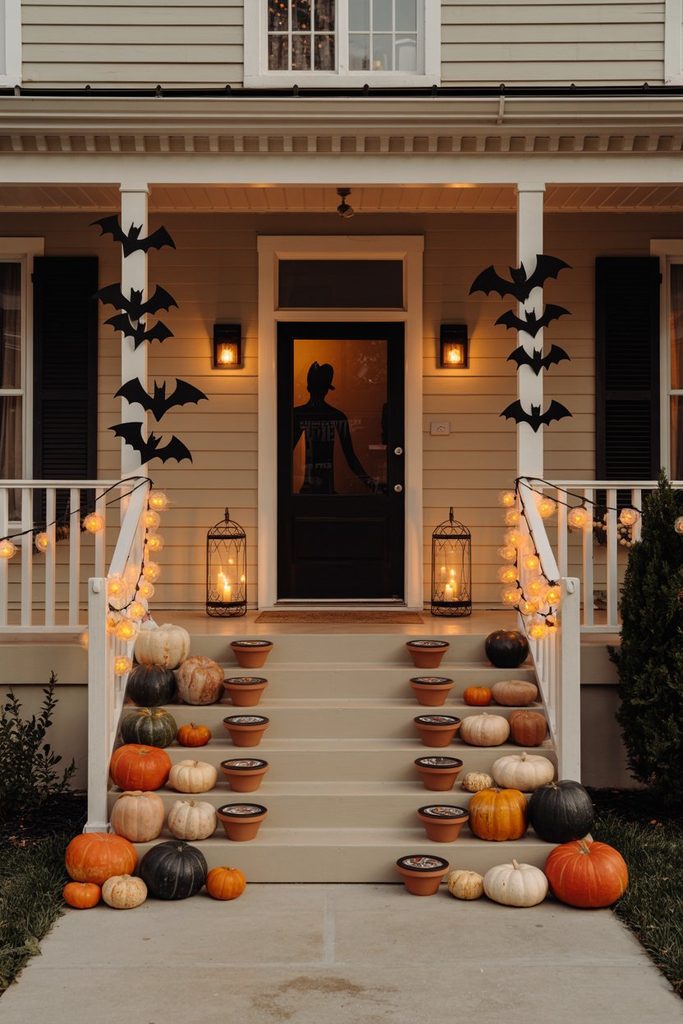
Repetition reads from a distance. One pumpkin on a step looks like a pumpkin. Five pumpkins in a descending row looks like a display. Anything you can repeat, pots, lanterns, gourds, silhouettes, does more visual work than the same money spread across five unrelated items.
Height variation keeps it from going flat. A porch where everything sits at ground level looks unfinished no matter how much is on it. Mix something hanging, something at railing height, and something on the ground, and the whole thing suddenly reads as intentional.
Lighting is what makes it work after 6pm. Halloween is mostly experienced in the dark, and a display with no lighting plan disappears at exactly the moment people are looking at it. Even cheap battery string lights change everything.
Easy Ideas (Under an Hour Each)
1. Painted Terracotta Pot Faces
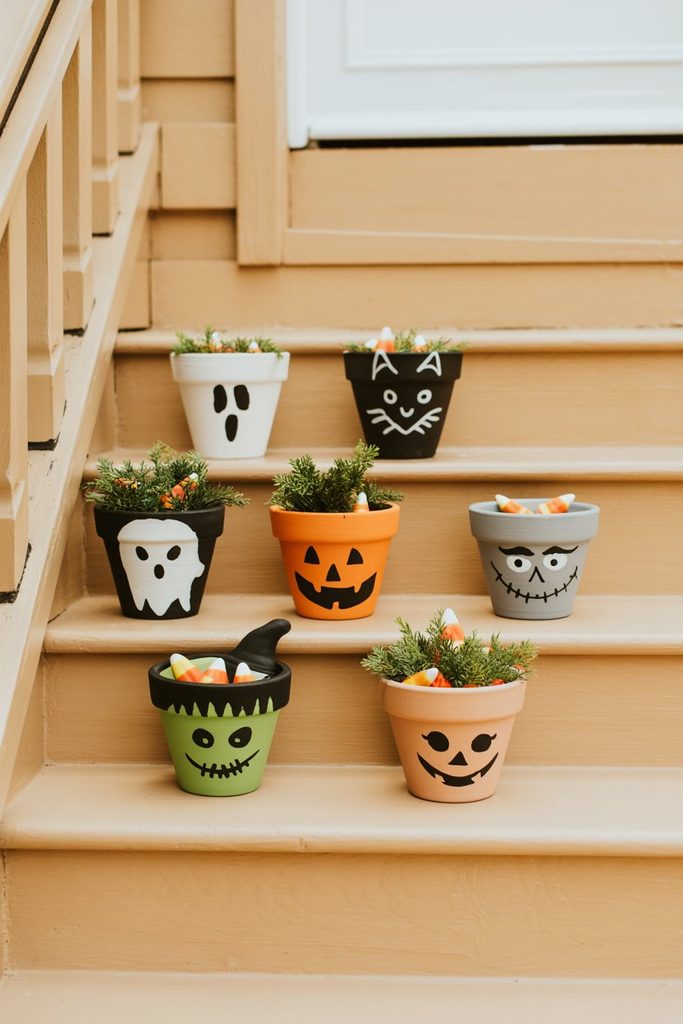
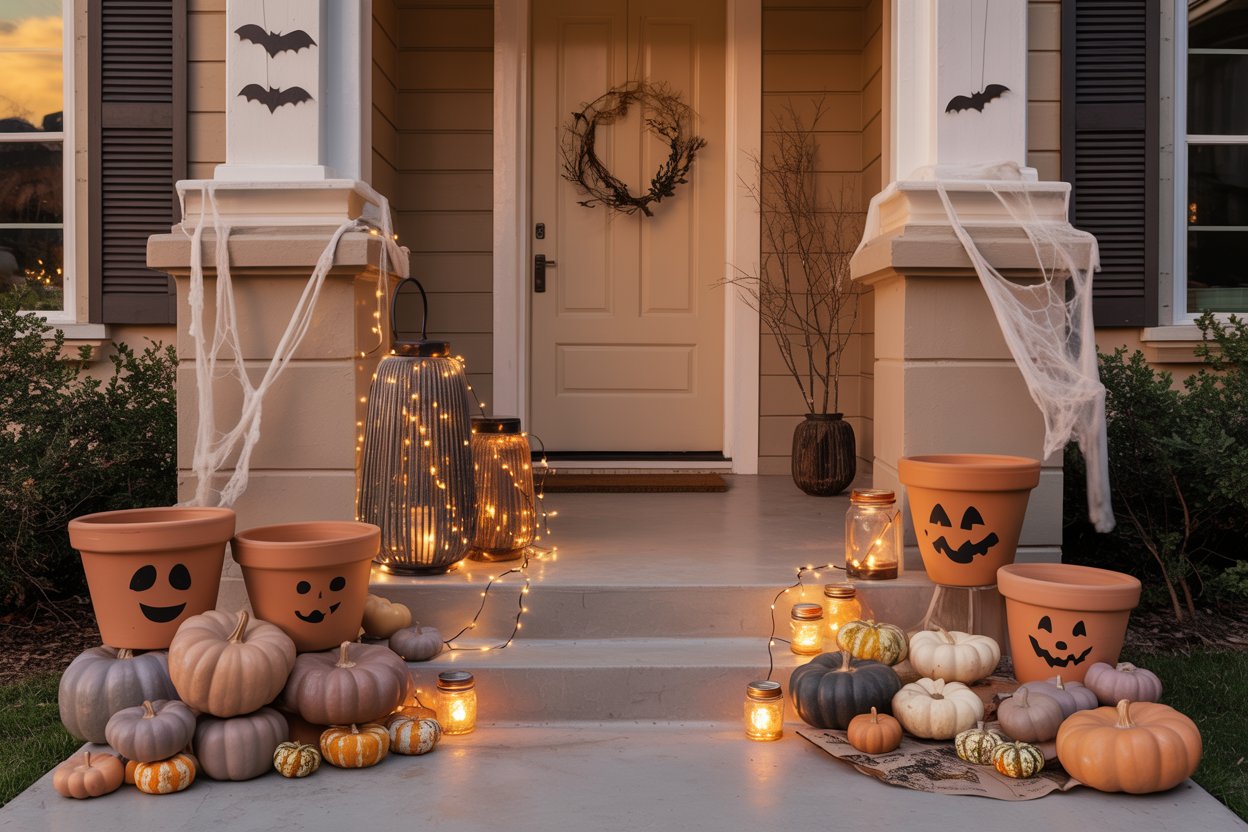
A row of small terracotta pots painted as a ghost, black cat, jack-o’-lantern, Frankenstein, and witch, lined along a porch step, is the highest-impact-per-dollar decoration on this list. They store flat, survive the season with sealant, and come back out every year.
What you’ll need: 4-6 small terracotta pots, acrylic craft paint in black, white, orange, green, and purple, a wide flat brush, a fine detail brush or paint pen, clear spray sealant.
How to make it:
- Wipe each pot clean with a damp cloth and let dry fully, terracotta is porous and paint won’t sit evenly over dust.
- Paint each pot in its base color using two thin coats rather than one thick one, letting the first dry 20-30 minutes in between. Thin coats dry more evenly and won’t drip at the bottom rim.
- Add secondary details once the base is dry, a jagged black hairline for Frankenstein, subtle vertical shading lines for the pumpkin.
- Paint the faces last with a paint pen or detail brush. Keep shapes simple and slightly oversized, fine detail disappears from more than a few feet away.
- Seal with two light coats of clear spray sealant, holding the can about 12 inches away, and let cure at least an hour before handling.
- Fill with candy corn, mini succulents, or faux greenery and line them along a step.
Where people go wrong: Painting faces before the base coat is fully dry, which drags the black into the background and leaves a muddy smear. My full step-by-step version covers all five designs in more detail.
2. Mason Jar Luminaries
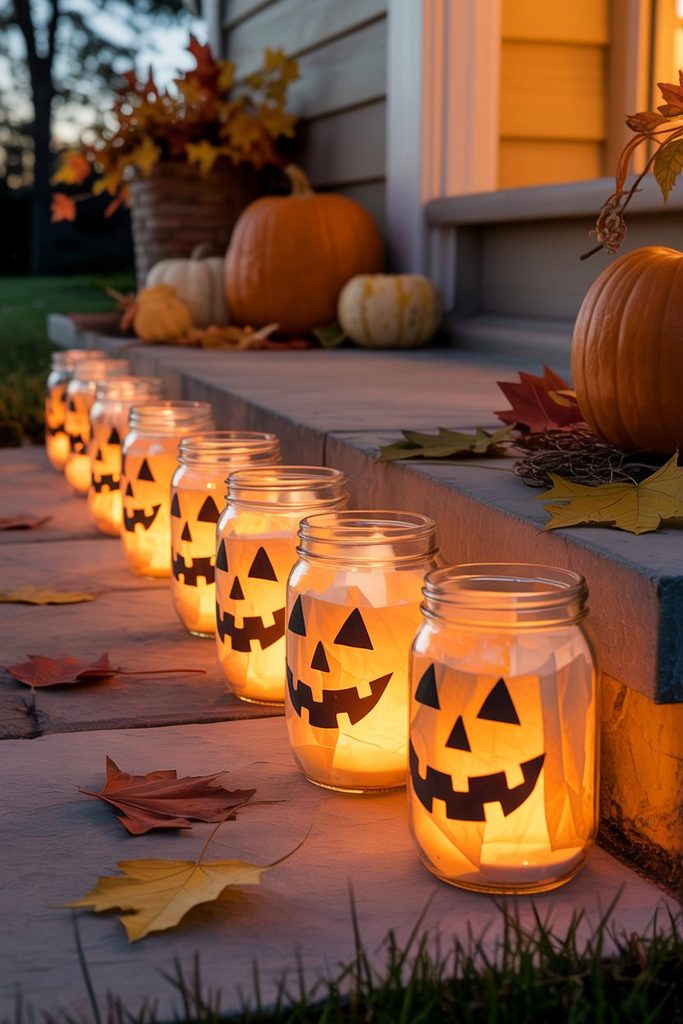
Cheap, fast, and they solve the lighting problem at the same time. A row of these along a walkway edge does more after dark than almost anything else you can make in an hour.
What you’ll need: Mason jars or any clean glass jars, orange and black tissue paper, Mod Podge or watered-down white glue, a foam brush, battery tea lights, sand or gravel.
How to make it:
- Tear (don’t cut) tissue paper into rough 2-inch pieces, torn edges blend together invisibly, cut edges show as hard lines.
- Brush a thin layer of Mod Podge onto a section of the jar’s outside, press tissue pieces on, then brush another thin layer over the top to seal them down.
- Overlap pieces as you work around the jar until it’s fully covered, then let dry completely, about an hour.
- For jack-o’-lantern faces, cut simple black cardstock shapes and glue them on over the orange once dry, or paint them directly on.
- Add an inch of sand or gravel to the bottom of each jar for wind stability, then drop in a battery tea light.
Where people go wrong: Using real candles outdoors near tissue paper. Use battery LEDs only, this isn’t a place to improvise.
3. Window Silhouettes
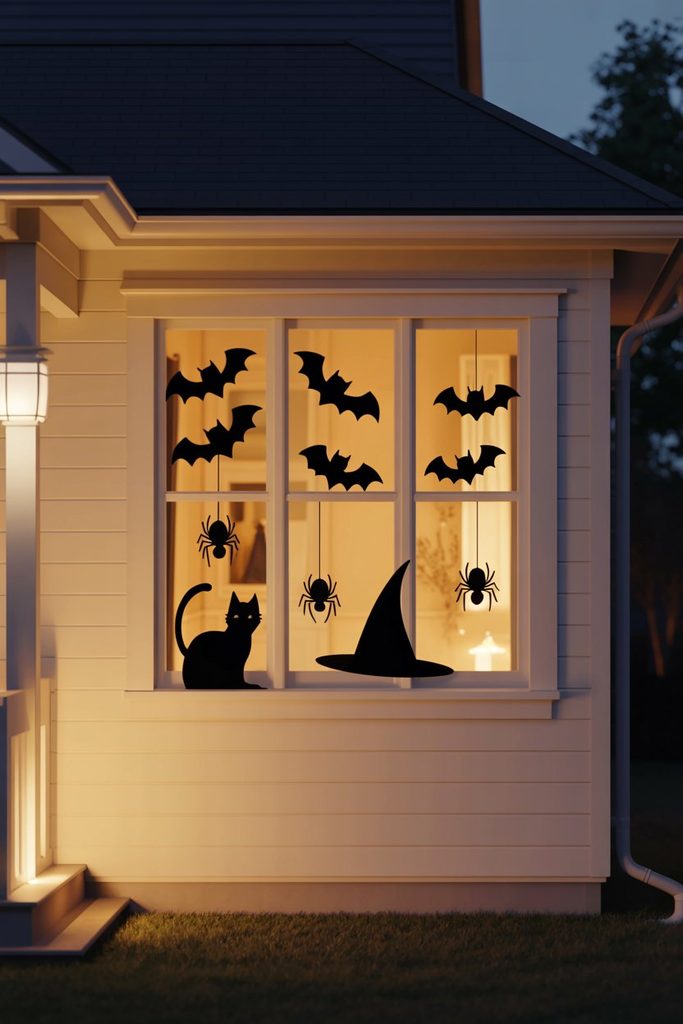
One of the most striking ideas here relative to effort, and it costs almost nothing. The trick is that they’re lit from inside, so they read as crisp black shapes from the street.
What you’ll need: Black cardstock or thin craft foam, a pencil, scissors or a craft knife, painter’s tape.
How to make it:
- Sketch simple bold shapes on the back of the cardstock, bats, a cat arching its back, a witch hat, a cluster of spiders, or a row of crows.
- Cut them out, keeping edges clean, jagged cuts show clearly when backlit.
- Tape them to the inside of the window glass with painter’s tape so they’re protected from weather and the tape doesn’t damage the frame.
- Leave the room light on in the evening, that backlighting is the entire effect.
Where people go wrong: Making the shapes too detailed. Intricate designs turn into visual mush from the sidewalk, bold silhouettes are what actually read.
4. A Cluster of Pumpkins and Gourds
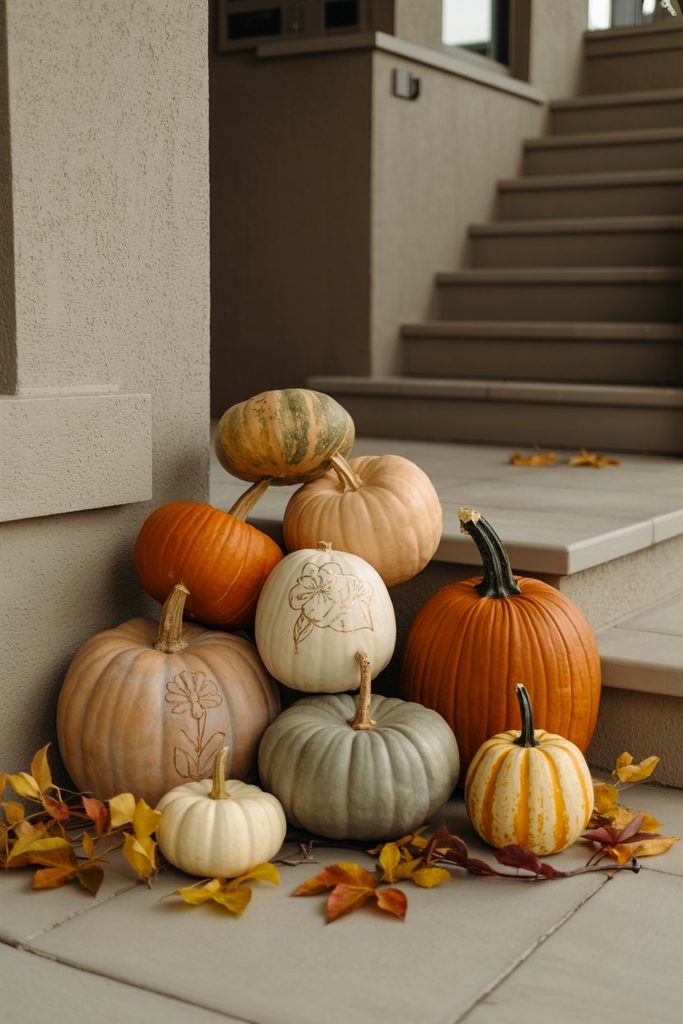
The simplest idea here and still one of the most effective. What separates a good pumpkin display from a random pile is entirely arrangement.
What you’ll need: 5-7 pumpkins and gourds in mixed sizes, optional paint or carving tools.
How to make it:
- Buy in odd numbers and deliberately mixed sizes, three large, two medium, two small is a good starting ratio.
- Group them at the base of your steps or flanking the door rather than spacing them evenly across the porch, clustering reads as designed, spacing reads as scattered.
- Set the largest at the back and let smaller ones spill forward, creating a natural triangular shape.
- Leave most plain and carve or paint only one or two, a display where everything is carved loses its focal point.
- If carving, rub petroleum jelly on the cut edges to slow shriveling and extend the display by several days.
Where people go wrong: Carving too early. A carved pumpkin realistically lasts 5-10 days, so carve within the last week of October, not the first.
5. Faux Spiderweb, Used Sparingly
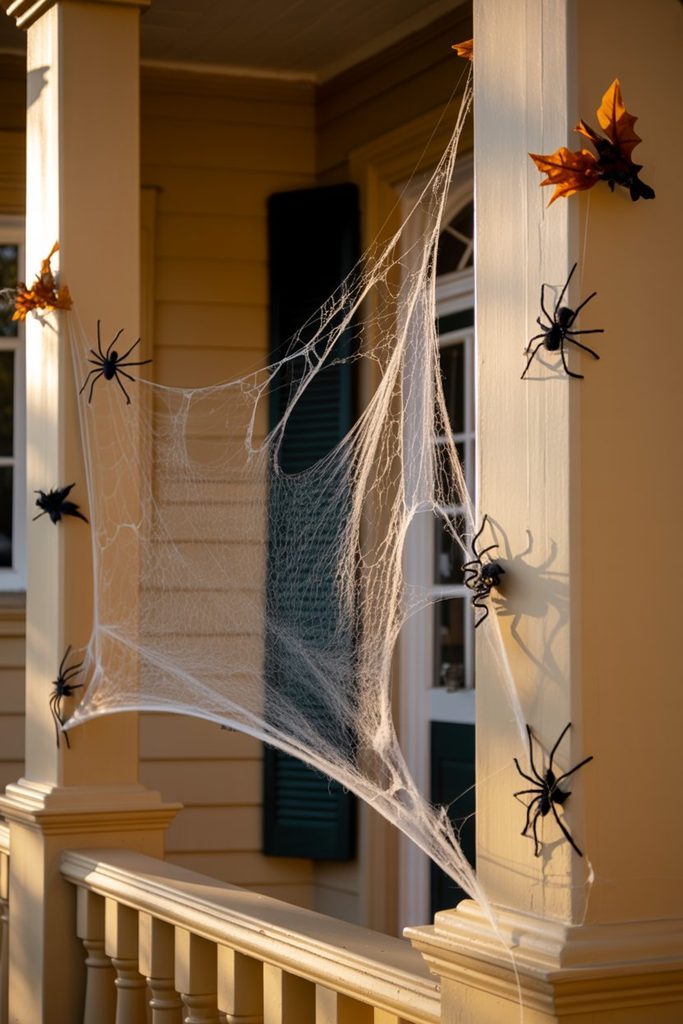
Instant atmosphere for a couple of dollars, and almost everyone uses too much of it.
What you’ll need: A bag of polyester faux spiderweb, plastic spiders.
How to make it:
- Pull a small handful off the bundle and stretch it out much further than feels natural, you want it nearly transparent, not clumpy.
- Anchor it at three or four points, a railing corner, a porch column, the edge of a shrub, so it spans a gap rather than lying flat against a surface.
- Add a few plastic spiders at different points along it for scale.
- Focus it in one or two corners rather than covering the whole porch, concentrated webbing reads as intentional, spread-out webbing reads as packing material.
Where people go wrong: Using it on plants and shrubs you can’t easily clean. It’s genuinely difficult to fully remove from foliage, and it’s a hazard for birds and small wildlife, so keep it to hard surfaces where you can pull it off cleanly.
6. Front Door Wreath Swap
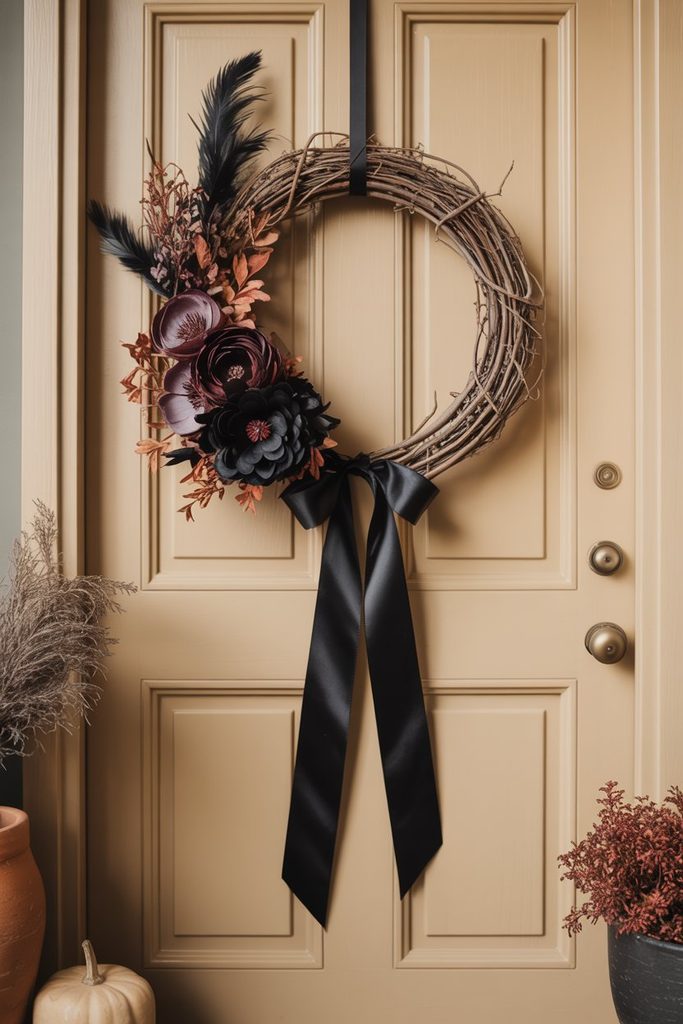
A door is the natural focal point of any porch, so this is high-visibility for very little effort.
What you’ll need: A plain grapevine or twig wreath base, black or orange ribbon, faux florals or feathers, hot glue, floral wire.
How to make it:
- Start with a plain grapevine base, they’re inexpensive and give you a textured foundation that already looks good half-finished.
- Wire or hot-glue your florals and feathers in a loose cluster on one side rather than distributing them evenly, asymmetry looks more designed than a perfectly balanced ring.
- Add one focal element, a small hanging bat, a black bow, or a single oversized faux bloom.
- Hang with a wide ribbon rather than a plastic hook if your door allows, it frames the wreath and adds height.
Where people go wrong: Overloading the wreath so the base disappears. The visible grapevine texture is part of what makes it look good.
Medium Effort (An Afternoon Each)
7. Painted Ghost Rocks
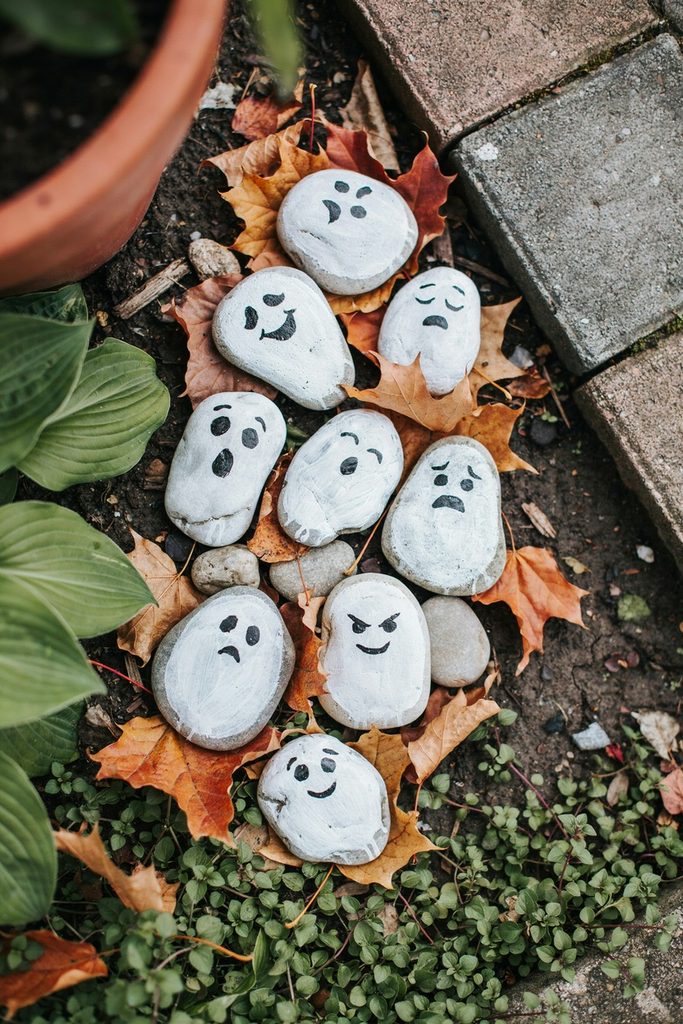
Weatherproof by nature, essentially free, and a great project to hand off to kids while you work on something bigger.
What you’ll need: Smooth, flat-ish stones, white outdoor acrylic paint, a black paint pen, clear sealant, a brush.
How to make it:
- Scrub the stones and let them dry completely, any remaining dirt will cause the paint to flake later.
- Paint each with two coats of white acrylic, letting the first dry fully. Stones are porous, so the first coat will soak in and look patchy, that’s expected.
- Add simple black eyes and an oval mouth with a paint pen once dry. Vary the expressions between rocks, it makes a group look far more charming than identical faces.
- Seal with clear outdoor sealant, including the bottom edges where moisture wicks up from soil.
- Tuck them among plants, line them along a walkway, or cluster them at the base of a tree.
Where people go wrong: Skipping sealant because “they’re rocks.” The stone is weatherproof, the paint isn’t.
8. Lit Porch Lanterns
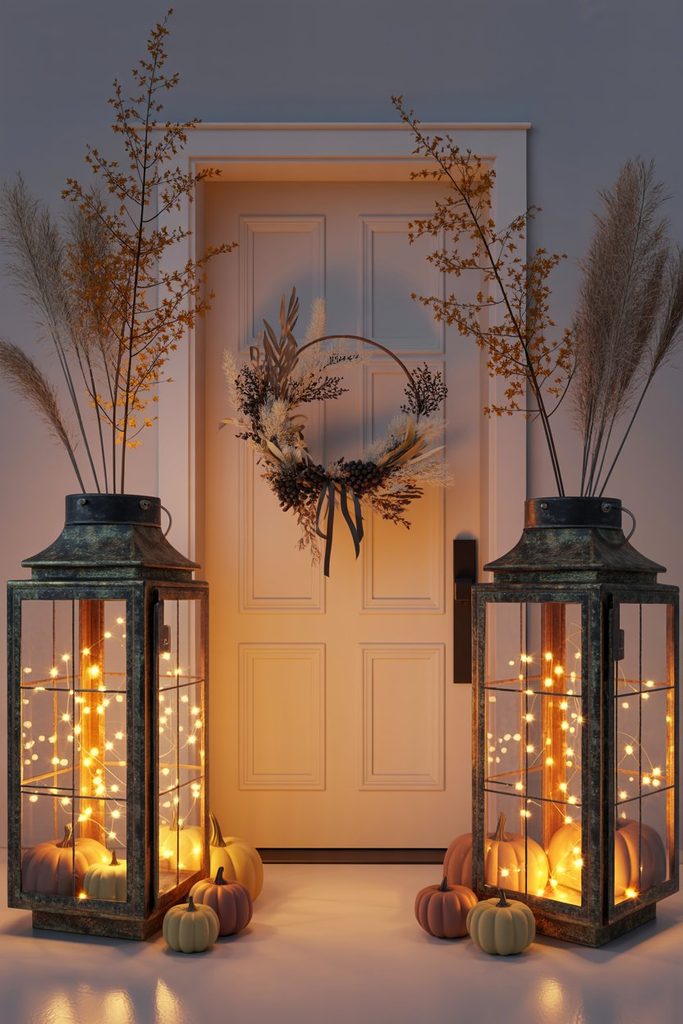
This hits both repetition and lighting at once, and lanterns stay useful all year if you swap the fillers seasonally.
What you’ll need: Two lanterns (thrifted or inexpensive), battery fairy lights with a timer, small faux pumpkins, dried florals or faux fall stems.
How to make it:
- Coil the fairy lights loosely inside each lantern, letting them pool at the bottom rather than wrapping them tightly, the loose pile creates a warmer, fuller glow.
- Nestle two or three small faux pumpkins in among the lights.
- Tuck in a few dried or faux stems so they extend slightly above the lantern’s top edge, breaking the rigid silhouette.
- Use lights with a built-in timer so they come on at dusk without you thinking about it, this is the single best upgrade on this whole list.
- Place one on each side of the door, matched but not identical.
Where people go wrong: Using lanterns that are too small. A lantern under about 12 inches reads as clutter next to a full-size door, go larger than feels right.
9. A Hanging Bat Cluster
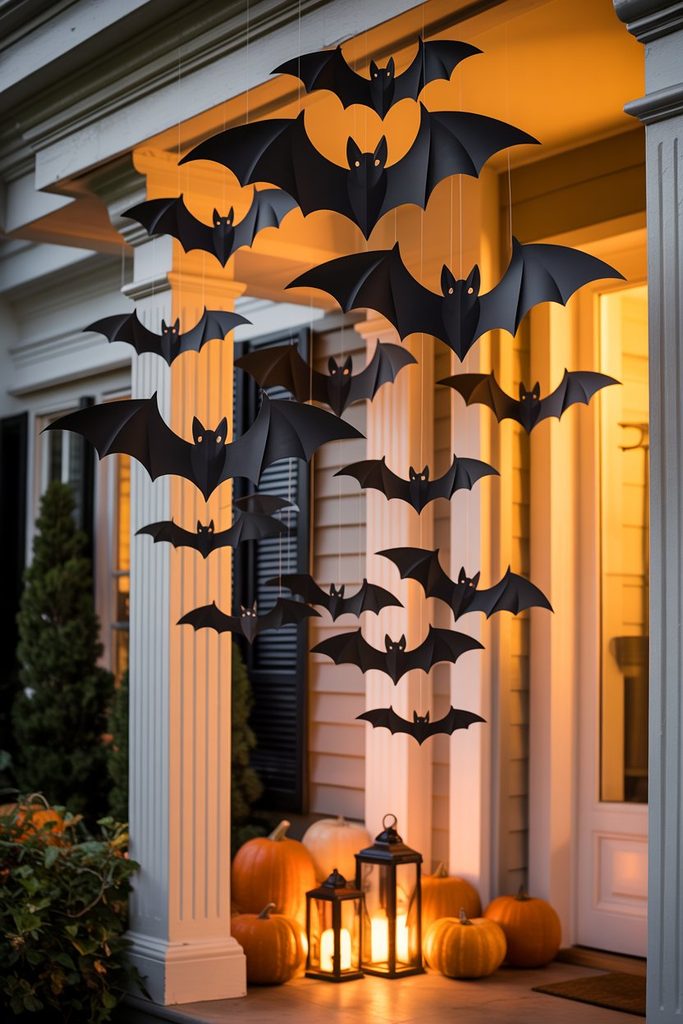
Movement in the breeze does most of the work here, and the staggered heights solve the flatness problem.
What you’ll need: Black cardstock or thin craft foam, scissors, clear fishing line, small adhesive hooks or push pins, a bat template.
How to make it:
- Cut bats in three distinct sizes, roughly 4, 6, and 8 inches across. Varied sizes create depth, matching sizes look like a decal sheet.
- For dimension, lightly fold each bat down its center line so the wings angle forward instead of sitting flat.
- Punch a small hole near the top center and thread with clear fishing line at varying lengths, anywhere from 6 to 24 inches.
- Hang from a porch ceiling, overhang, or tree branch using clear adhesive hooks, staggering both height and spacing.
- If using outdoors in damp weather, use craft foam rather than cardstock, cardstock wilts fast in humidity.
Where people go wrong: Hanging them all at the same height, which kills the sense of a swarm in motion.
10. Potted Plant Ghosts
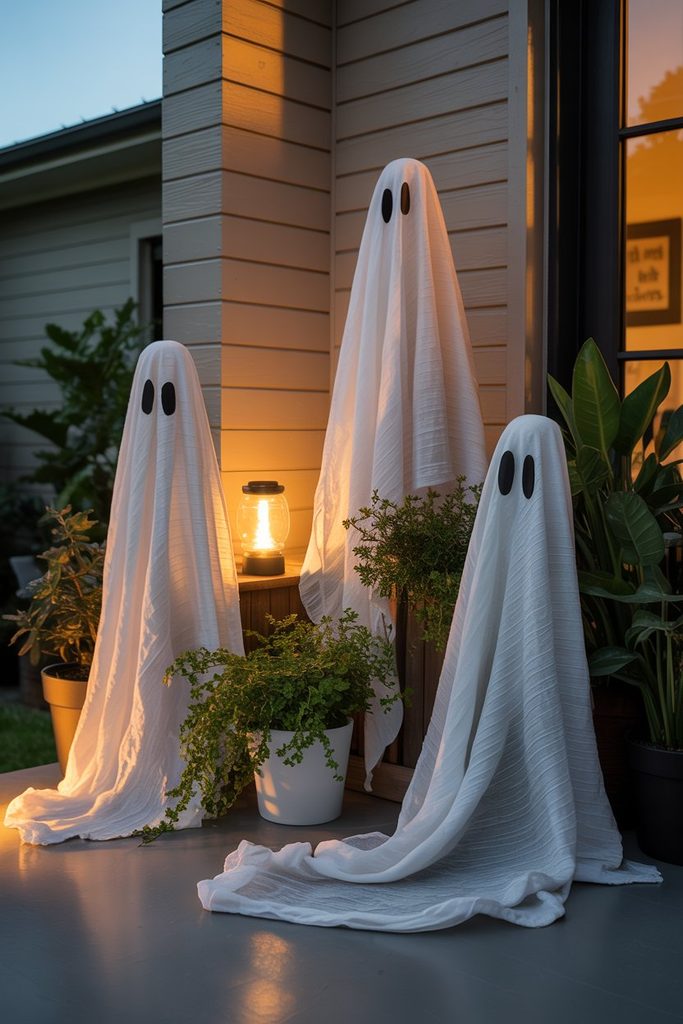
Five minutes per ghost, using things you probably already own, and a cluster of them lit from behind is genuinely striking after dark.
What you’ll need: White fabric, cheesecloth, or old white sheets, twine, black felt or cardstock, existing potted plants or garden stakes.
How to make it:
- Drape the fabric over a potted plant, shrub, or a stake with a foam ball on top, letting it fall naturally.
- Cinch loosely with twine a few inches down to form a “neck,” loose is important, a tight cinch makes it look like a bagged plant rather than a floating figure.
- Cut two black felt ovals for eyes and attach with a dab of fabric glue or a straight pin.
- Vary the heights across a group of three or four so they don’t look like a matched set.
- Place a small uplight or battery lantern behind the cluster for an after-dark glow through the fabric.
Where people go wrong: Using fabric that’s too heavy. Thin cheesecloth or an old sheet drapes and moves; canvas just sits there.
11. Jar or Bottle Potion Shelf
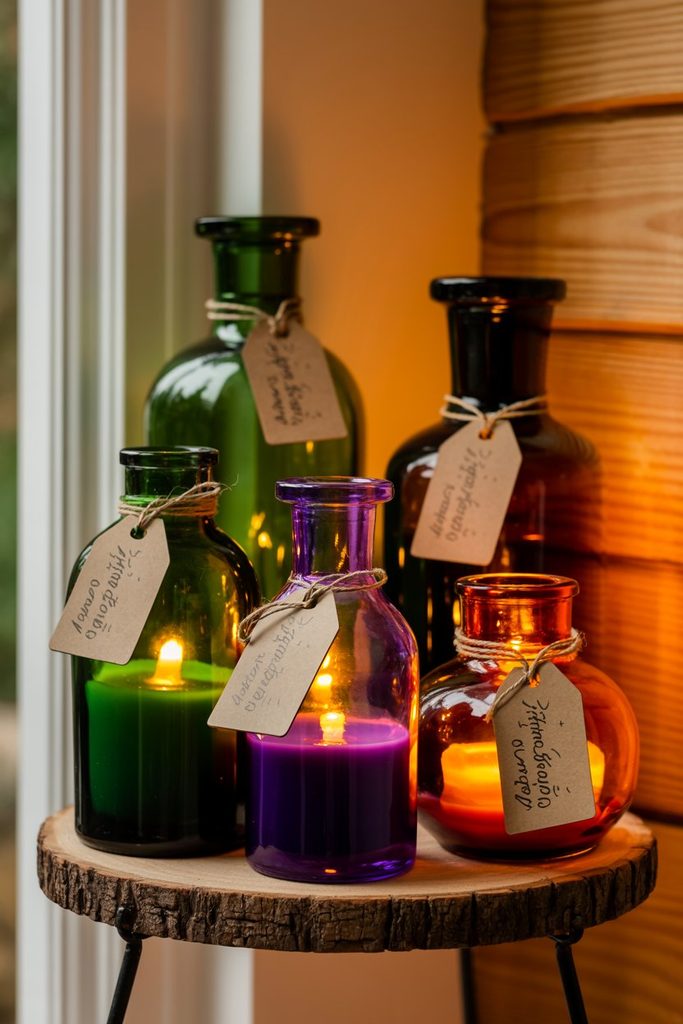
The glow through colored liquid is what sells this, so lean into that rather than the labels.
What you’ll need: Glass jars and bottles in varied shapes, food coloring, water, battery LED tea lights or submersible LEDs, kraft paper or aged cardstock, a black pen.
How to make it:
- Collect bottles in genuinely different shapes and heights, uniformity is the enemy here, mismatched is the point.
- Fill each with water tinted with a few drops of food coloring, going for deep saturated greens, purples, and ambers.
- Add a submersible LED to each, or set the bottles in front of battery tea lights so the light passes through the liquid.
- Write labels on kraft paper in a loose hand, tea-stain them for age if you want, and attach with twine around the neck rather than glue.
- Arrange on a small side table, plant stand, or repurposed shelf at varied heights.
Where people go wrong: Using clear or very pale liquid, which reads as water rather than potion. Go darker than you think.
12. A Hay Bale and Cornstalk Base
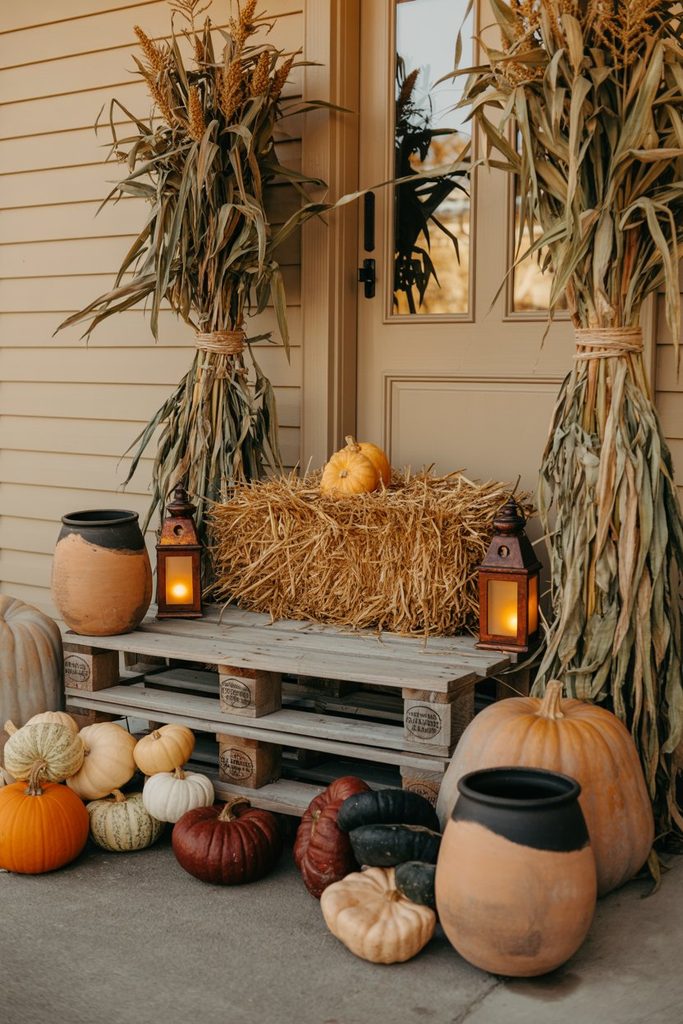
The classic fall foundation everything else builds on, and it carries you straight through Thanksgiving.
What you’ll need: One or two small straw bales, 2-3 cornstalk bundles, twine, pumpkins, a plastic sheet or pallet.
How to make it:
- Set the bale on a pallet, brick, or plastic sheet rather than directly on soil, this keeps it from wicking moisture and rotting from the bottom.
- Tie cornstalk bundles to a porch post or railing with twine, positioning the tie point high so the stalks fan out naturally at the base.
- Arrange pumpkins at the foot of the bale in an odd-numbered cluster.
- Layer other elements on top, painted pots, lanterns, a couple of mums.
- In November, pull the Halloween-specific pieces off and the base carries straight into Thanksgiving unchanged.
Where people go wrong: Buying a full-size bale for a small porch. A mini or half bale is almost always the right scale.
Bigger Projects (A Weekend)
13. A Tombstone Yard Display
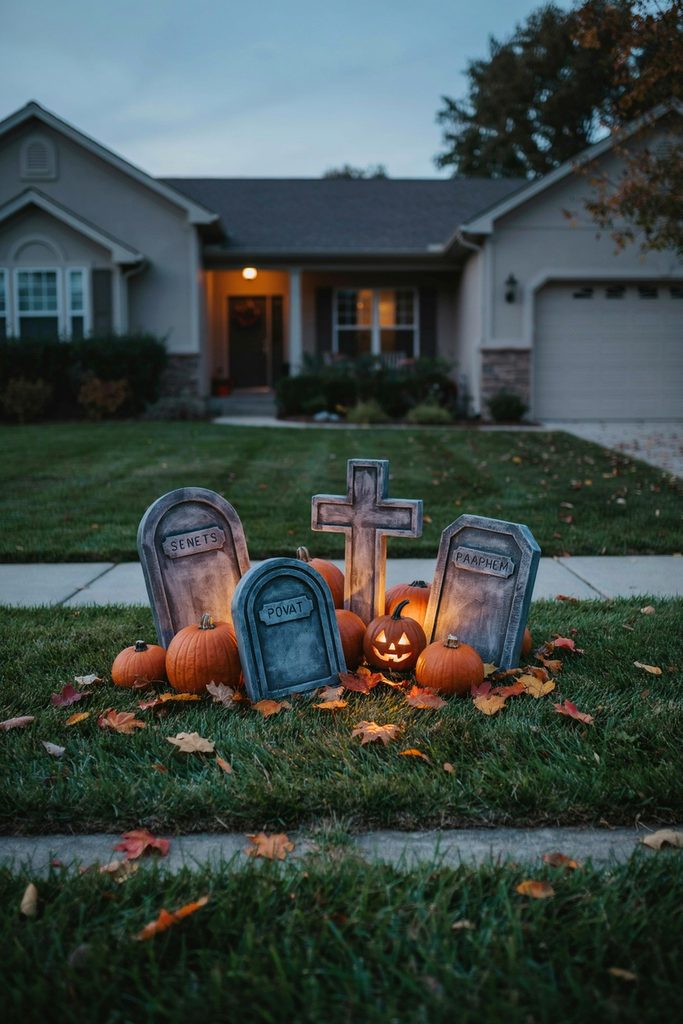
Uneven spacing and tilt is what makes these look real rather than propped up, so resist the urge to line them up neatly.
What you’ll need: 1-inch thick foam insulation board or thin plywood, a craft knife or jigsaw, gray and black acrylic paint, a stiff brush, wooden stakes, construction adhesive, clear sealant.
How to make it:
- Cut headstone shapes in three or four different silhouettes, rounded top, cross top, flat top, and vary the heights between 18 and 36 inches.
- For foam, round the cut edges by sanding lightly or dragging a craft knife along them, sharp factory edges are the number-one thing that makes these read as fake.
- Base-coat in flat gray, then dry-brush with black in the recesses and white on the raised edges. Dry-brushing means nearly wiping the brush dry before touching the surface, it’s what creates the weathered stone look.
- Add lettering with a stencil or by carving shallow letters into foam before painting.
- Attach wooden stakes to the back with construction adhesive, running the full height for stability.
- Seal thoroughly, then stake into the lawn at slightly uneven angles and irregular spacing.
Where people go wrong: Painting foam with spray paint, which dissolves it. Use brush-on acrylics on foam board, always.
14. A Silhouette Yard Cutout Set
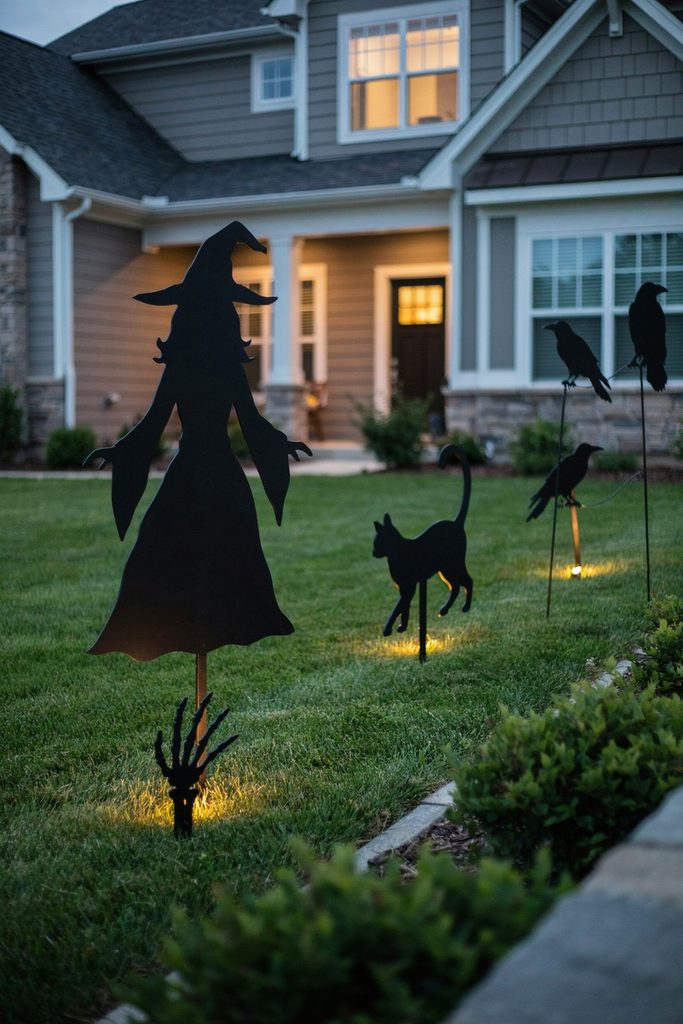
Probably the most dramatic thing here from the street, and it packs away flat for next year.
What you’ll need: Thin plywood or heavy foam board, a jigsaw or craft knife, black exterior paint, wooden stakes, screws or adhesive, a cheap stake spotlight.
How to make it:
- Choose bold, instantly recognizable silhouettes, a witch with a pointed hat, an arching cat, a row of crows on a wire, a reaching hand.
- Sketch the shape directly on the board, scaling it large, 2 to 4 feet is a good range for yard pieces.
- Cut carefully, then sand any rough edges. Clean outlines are everything with silhouettes, since there’s no interior detail to distract from a bad edge.
- Paint both sides flat black, matte rather than gloss, so they don’t reflect and flatten out under light.
- Attach stakes to the back, then set a stake spotlight on the ground in front, angled up, so the cutout throws a long shadow.
Where people go wrong: Lighting from above or head-on, which flattens the shape. Uplighting from the ground is what creates the drama.
15. A Full Porch Archway
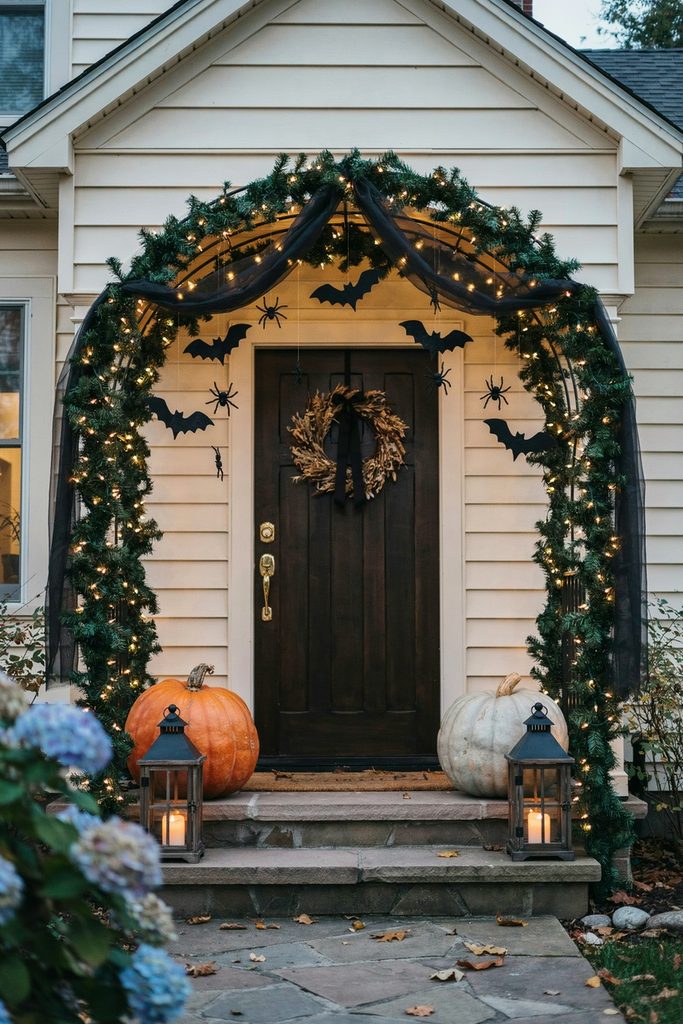
The most involved idea here, but it turns the front door into an actual moment rather than a door with a wreath on it.
What you’ll need: Faux garland or black fabric, string lights, zip ties or floral wire, hanging bats or spiders, adhesive hooks, an optional pool noodle or flexible tubing for an arch frame.
How to make it:
- Map out the frame first, either use the doorway itself or build a loose arch shape with flexible tubing anchored on both sides.
- Run string lights along the frame first, before adding any greenery or fabric, this way the lights sit underneath and glow through rather than on top.
- Wire faux garland or drape black fabric over the frame, working from both sides toward the center so the seam meets in the middle.
- Add hanging elements at staggered depths, some near the front edge, some further back, so it has dimension when you walk through it.
- Secure everything with zip ties rather than tape, tape fails in the first cold damp night.
Where people go wrong: Adding lights last, over the top of the greenery, which looks tacked on instead of integrated.
Lighting Ideas That Tie It All Together
Whatever you pick from the list above, these three moves make it look twice as finished:
- Warm white string lights along the railing or roofline give the whole display a base glow without reading as Christmas. Warm white specifically, cool white looks clinical.
- Orange or purple bulbs swapped into your existing porch light fixture, a genuinely one-minute change with outsized effect.
- Uplighting from cheap stake spotlights aimed at a wall, a tree trunk, or your yard cutouts creates shadows and drama that flat overhead lighting never will.
- Timers on everything battery-powered, so the display turns itself on at dusk without you remembering.
Newer to DIY?
If most of this list feels like a lot, start with just one thing: a set of painted pots or a row of mason jar luminaries. Both are cheap, quick, forgiving of imperfection, and they teach you the basic painting and sealing skills the bigger projects build on. My Halloween flower pots tutorial is where I’d send a total beginner first, and my guide to painting air dry clay covers the layering and clean-line techniques that carry over to nearly every painted project here.
Weatherproofing What You Make
This is the part most Halloween decor roundups skip, and it’s the reason so many handmade pieces only last one season.
Seal anything painted. A clear spray sealant, matte or gloss, is what stands between your paint job and the first heavy dew. Two light coats beat one heavy one, and don’t forget bottom edges where moisture wicks up.
Elevate anything porous. Cardboard, foam board, and untreated wood absorb moisture from the ground up. Stake them, mount them, or set them on something rather than resting them directly on soil or concrete.
Weight down anything light. Sand or gravel in the base of pots, jars, and lanterns keeps a windy night from redistributing your display across the yard.
Choose materials by exposure. Covered porch: cardstock and paper are fine. Open yard: foam board, plastic, wood, or sealed stone only.
Have a bring-in plan. Know which pieces come inside if a storm is forecast. Much easier to decide that in advance than at 9pm in the rain.
Prep-Ahead Checklist
- Decide your color palette before buying anything, classic orange/black, purple/green, or all-neutral
- Count your outdoor outlets and confirm which ones actually work
- Buy battery LEDs early and test the batteries before you need them
- Test sealant on a scrap piece first, some formulas react badly with foam
- Set aside a dry storage bin for the pieces you’ll reuse next year
- Sketch a rough layout so you know what goes where before you start staking things into the lawn
Mistakes I’ve Made So You Don’t Have To
Buying five unrelated decorations instead of five of the same thing. The porch looked cluttered rather than decorated, and none of it read from the street.
Skipping sealant on painted pieces because the forecast looked clear. One heavy overnight dew left water spots I never fully fixed.
Putting everything at ground level. The display looked flat and low, and I didn’t understand why until I added one hanging element and the whole thing came together.
Spray painting foam board tombstones. The propellant ate straight through the surface and left pitted craters in every single one.
Forgetting about lighting until the week of Halloween. By then the good string lights were sold out locally, and the display essentially disappeared after dark.
Running an extension cord across the walkway. A genuine tripping hazard for trick-or-treaters, and I’ve routed everything along the edges ever since.
Frequently Asked Questions
How early should I put Halloween decorations up? Early to mid-October is the sweet spot for most people, late enough that it doesn’t feel premature, early enough to enjoy for a few weeks. Save real carved pumpkins for the final week.
What’s the cheapest way to make a porch look decorated? Repetition of one inexpensive thing, painted pots, mason jar luminaries, or a pumpkin cluster, plus any lighting at all. That combination beats one expensive statement piece almost every time.
How do I keep decorations from blowing away? Weight bases with sand or gravel, stake lawn pieces deeper than feels necessary, and use fishing line rather than tape for anything hanging.
Are these ideas kid-friendly? Most of them. Painted rocks, pot faces, and window silhouettes are great to do together. Save spray sealant, craft knives, and jigsaws for adults.
Can I reuse these next year? That’s the goal with most of this list. Anything sealed, stored dry, and packed with a little padding comes back out in good shape year after year.
What if I only have a small apartment balcony? Scale down to the pot faces, mason jar luminaries, and a wreath. Skip anything staked, and use battery lighting throughout since balcony outlets are rarely convenient.
Final Thought
The best Halloween porches aren’t the ones with the most stuff on them, they’re the ones where a few things clearly got made by hand and everything else supports them.
Pick two or three ideas from this list, repeat them, light them, and you’ll have a display that looks considered rather than crowded.
And the pieces you make this year are the ones you’ll pull out of a bin next October without starting over, which is honestly the best part of making things yourself instead of buying another inflatable.
If You Want More DIY Crafts to Try
- How to Make Halloween Flower Pots: Easy Tutorial
- How to Paint Air Dry Clay: A Step-by-Step Guide
- Best Paint for Air Dry Clay
- DIY Air Dry Clay Mini Pots Tutorial
Which of these are you trying this year? Let me know in the comments what’s going on your porch!