Air Dry Clay Flower Projects That Actually Make Good Decor
I went through a phase last spring where I couldn’t keep a single real flower alive in my house, not for lack of trying, just bad luck and a lot of travel. So I started sculpting them out of clay instead, and it turned into one of the most satisfying crafting phases I’ve had in a while.
There’s something genuinely calming about shaping tiny petals one at a time, and unlike the real thing, these never wilt, never need water, and look just as good a year later as they did the day I made them. A small clay rose on my nightstand has outlasted every bouquet I bought that same month.
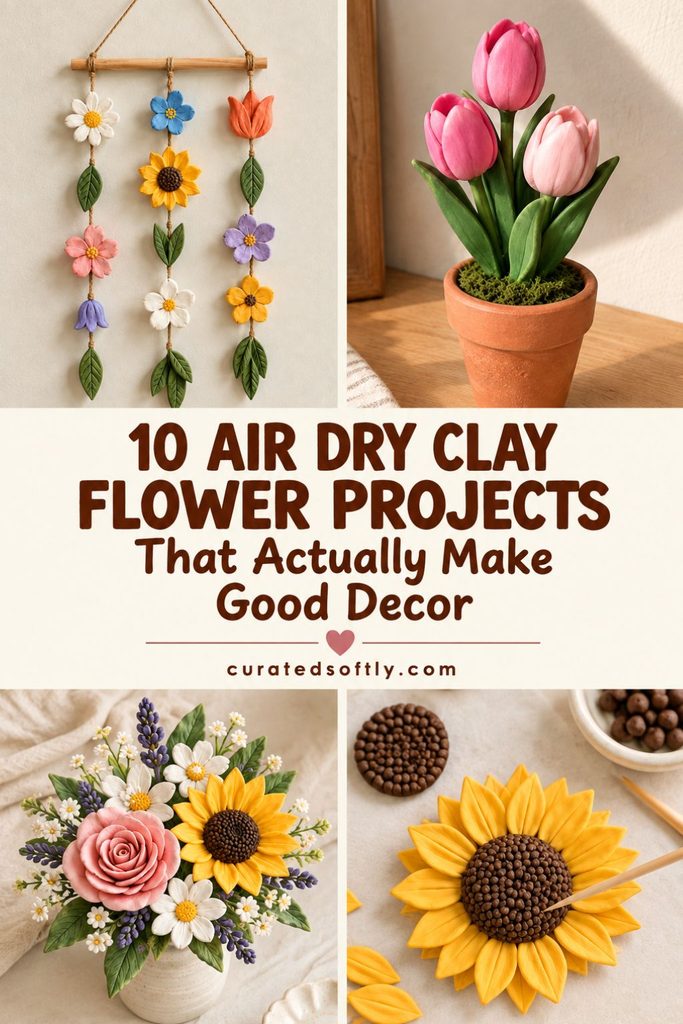
This isn’t a strict numbered list, more of a tour through the different ways you can bring sculpted flowers into your clay projects, organized by the kind of piece you’re after, whether that’s a single standalone bloom, a wall-hung plaque, a flower-shaped dish, or a full potted arrangement.
Each project below includes what you’ll need and the actual steps, not just an idea to riff on.
If you’ve read my How to Make Air Dry Clay at Home or my How to Paint Air Dry Clay guide, you already have the core skills needed for everything below, this post is really about applying that same technique to flowers specifically rather than teaching anything brand new from scratch.
Getting Started: The Core Supplies You’ll Reuse Across Every Project
Before jumping into individual projects, it’s worth stocking a small set of shared supplies.
A basic white air dry clay is the foundation for everything here, since nearly every project below gets painted afterward, you don’t need a specialty pre-colored clay.
A small rolling pin, a ball tool or the rounded end of a paintbrush for shaping petal curves, and a toothpick for fine detail work cover shaping for almost every flower on this list.
For finishing, keep acrylic paint in a soft range of pinks, yellows, whites, and greens on hand, along with a fine detail brush. A sealant made for air dry clay rounds out the list, especially for anything that will be handled or displayed outdoors.
Once you have that core kit assembled, moving between the projects below becomes mostly a matter of shape and detail work rather than gathering new materials each time.
Single Sculpted Blooms
A single standalone flower is the best place to start if you’re newer to sculpting, since you’re only shaping one component rather than assembling a full scene.
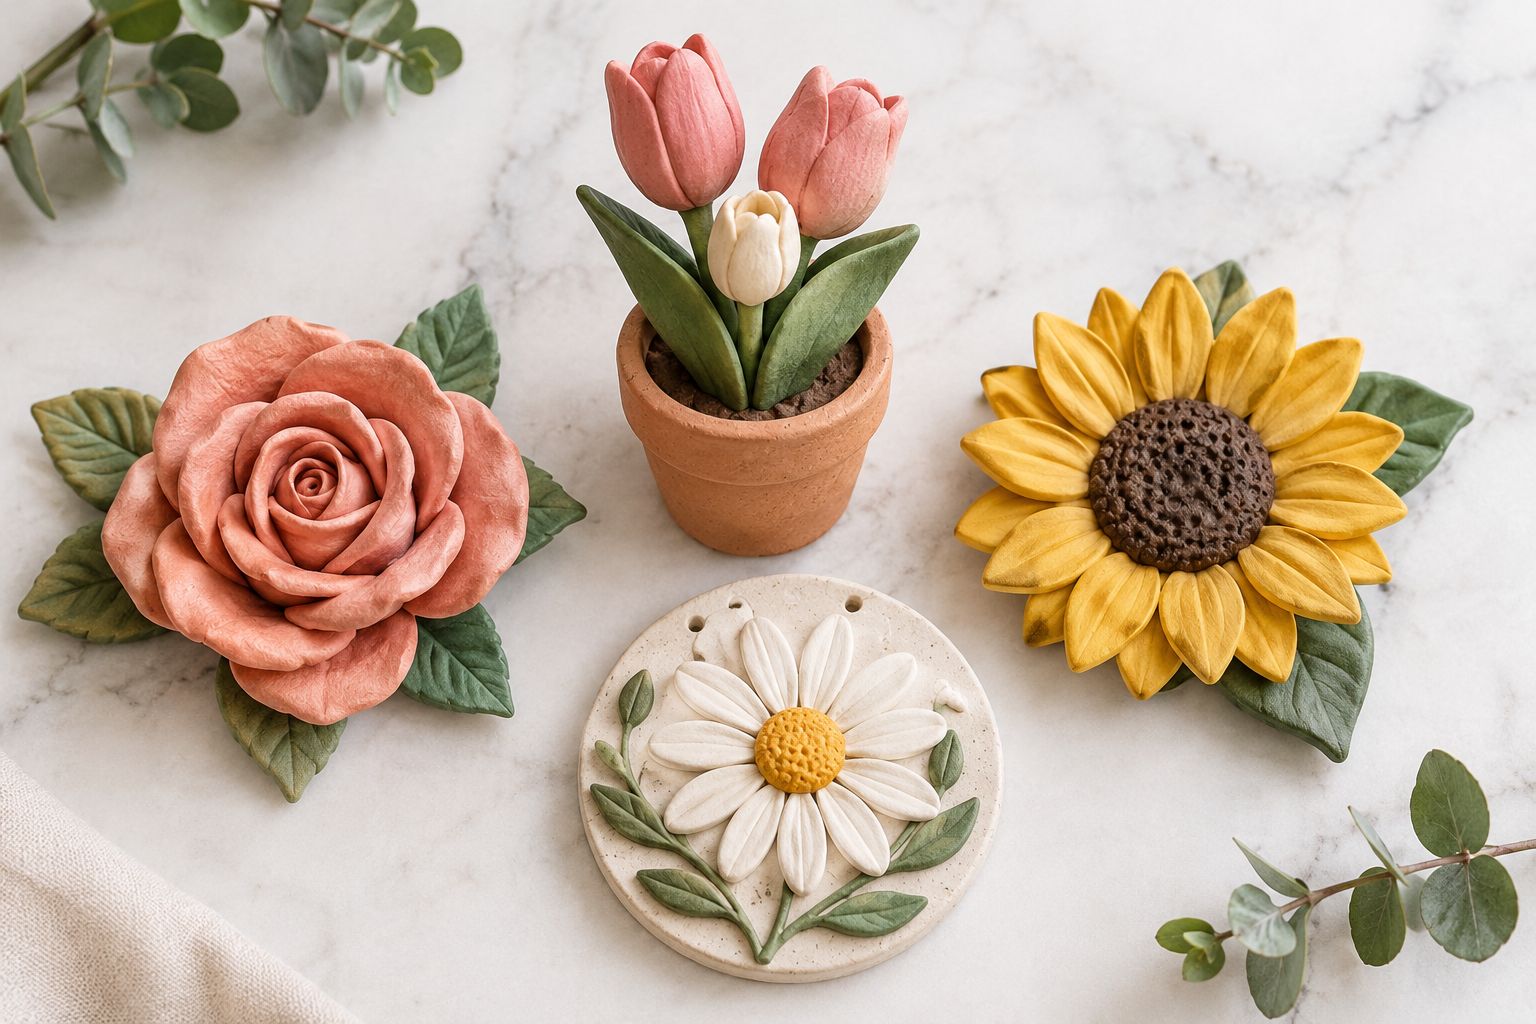
A Clay Rose
A sculpted rose looks far more advanced than it actually is once you understand the petal-building technique, it’s really just layering small clay ovals around a central cone, one at a time, the same way you’d build a real rose from the inside out.
What makes this project satisfying is watching the shape emerge gradually rather than all at once, the first few petals barely look like anything, and it’s really only once you’ve added six or seven that it suddenly reads as a rose.
I find it’s one of the more meditative projects on this whole list precisely because of that slow build, there’s no rushing a good rose, and the repetition of shaping petal after petal ends up being part of the appeal rather than a chore.
What You’ll Need
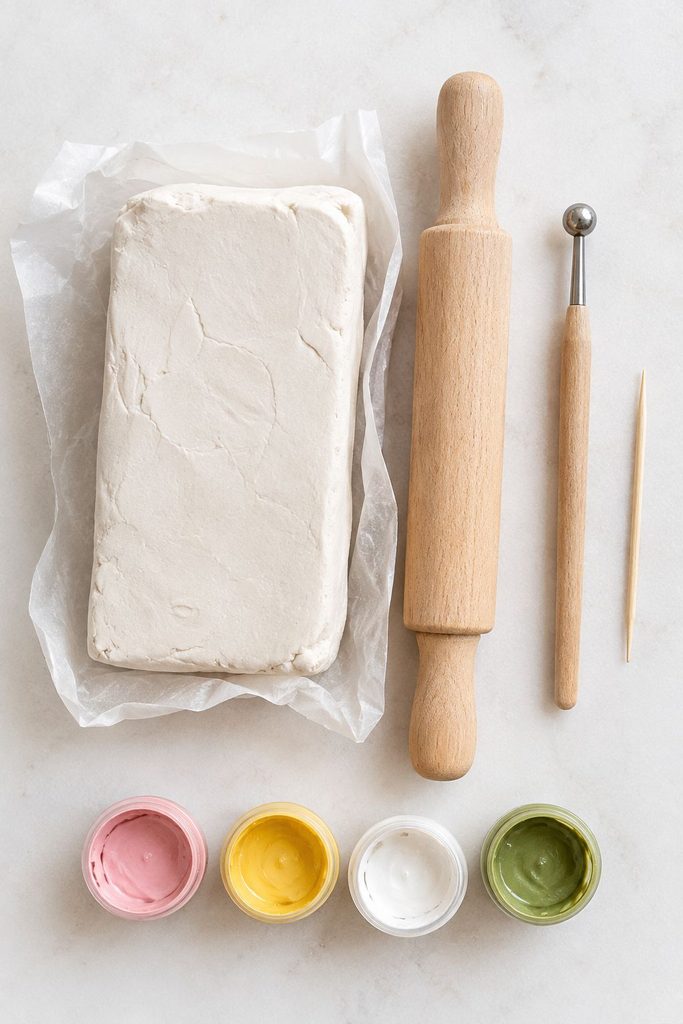
Here’s what to gather before you start:
- Air dry clay
- A rolling pin
- A small ball tool or the back of a spoon
- Green paint for the leaves
- Pink, red, or white paint for the petals
How to Make It
Once everything’s ready, here’s how it comes together:
- Roll a small cone of clay to act as the rose’s center bud.
- Flatten several small ovals of clay between your fingers, thinning the edges so they curve naturally.
- Wrap the first petal tightly around the cone, then continue adding petals, overlapping each one slightly and angling them outward as you work toward the outside of the rose.
- Curl the outer edges of the last few petals outward with your fingertip for a more open, blooming look.
- Add a few leaf shapes at the base and let the whole piece dry fully, this can take a day or two depending on size.
- Paint once completely dry.
Tip: Build the rose in one sitting if you can, the base cone needs to stay slightly soft while you’re attaching petals, working over multiple days with a fully dried center makes the petals harder to adhere securely.
A Clay Tulip in a Mini Pot
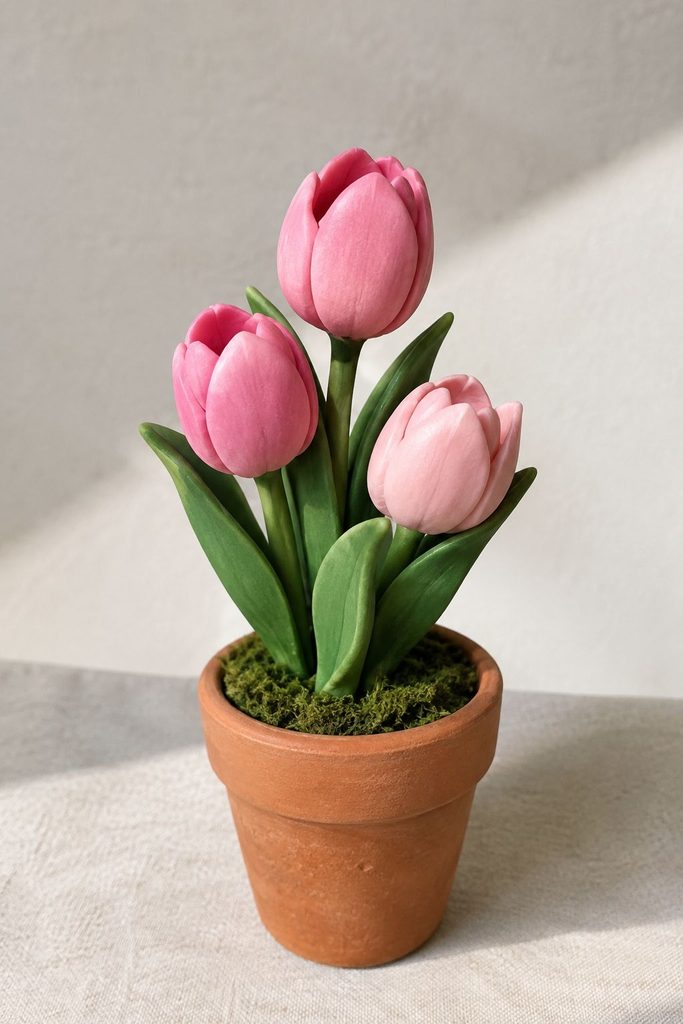
Tulips are one of the simplest flowers to sculpt because the petal shape is just a rounded teardrop, no fine detail work required, no veining, no complicated layering.
That simplicity is exactly why I recommend this project to anyone who tried the rose above and found it a little fussy.
A tulip’s charm comes from its clean, closed shape rather than intricate detail, which means you can go from a lump of clay to a recognizable, pretty little flower in a fraction of the time.
Displayed in a small pot, a cluster of these also happens to be one of the easiest ways to bring real color into a room that doesn’t get enough natural light for actual plants.
What You’ll Need
Here’s what to gather before you start:
- Air dry clay
- A toothpick or thin wire for the stem
- A small terracotta or clay pot
- Paint in your chosen tulip color, plus green for the stem and leaves
How to Make It
Once everything’s ready, here’s how it comes together:
- Shape five or six small teardrop petals and pinch the bottom of each into a slight point.
- Overlap the petals around a central point, cupping them slightly inward the way a real tulip bud curves.
- Insert a toothpick or thin wire into the base of the flower while the clay is still soft, this becomes the stem.
- Roll one or two thin, tapered leaf shapes and let everything dry fully.
- Paint the bloom and leaves once dry.
- Insert the finished stem into a small pot of dried floral foam or a bit of leftover clay pressed into the pot’s base.
Tip: Make at least two or three tulips per pot, a single stem tends to look sparse, while a small cluster reads as a much fuller, more finished arrangement.
A Clay Sunflower
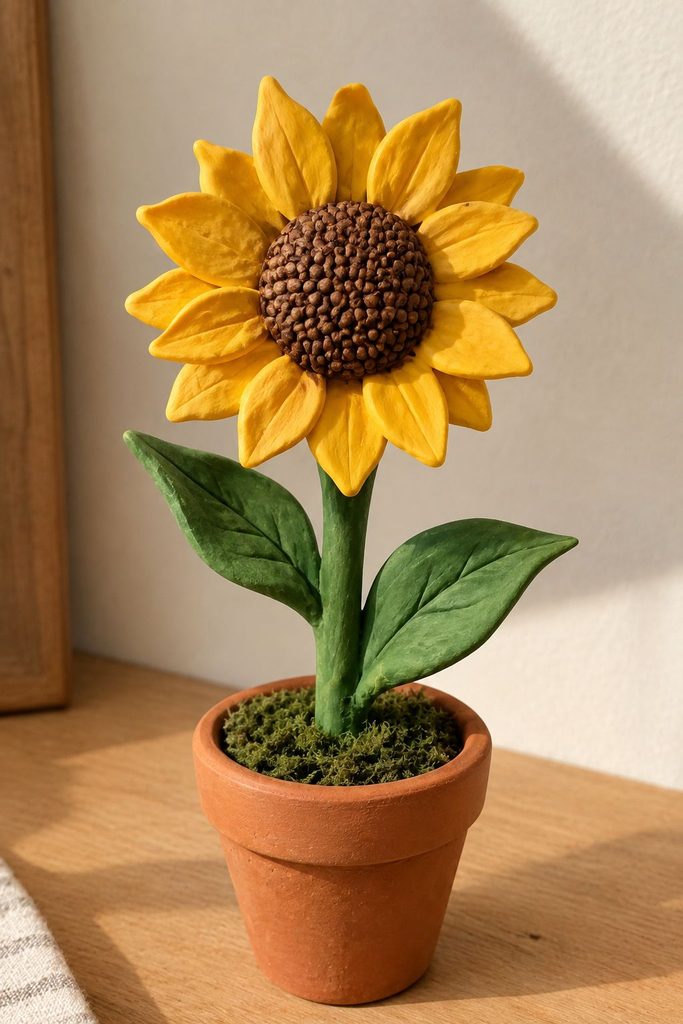
The sunflower’s center is what makes this one feel special, a textured, dimensional core surrounded by simple pointed petals, rather than relying on the petals alone to carry the whole design.
I actually think the center is the more interesting part of this project than the petals, which is a little unusual for a flower.
Most sculpted blooms put all their visual interest into the petal shapes, but here, the repetitive texturing of the seed pattern is genuinely satisfying to do and gives the finished piece a level of realism that flat, smooth petals alone couldn’t manage.
It’s also a great project if you want something that reads as cheerful and bright without needing a complicated color palette, just yellow, brown, and green.
What You’ll Need
Here’s what to gather before you start:
- Air dry clay
- A toothpick for texturing the center
- Yellow, brown, and green paint
How to Make It
Once everything’s ready, here’s how it comes together:
- Flatten a small disc of clay for the flower’s center.
- Poke the surface repeatedly and evenly with a toothpick to create the textured seed pattern sunflowers are known for.
- Shape ten to twelve narrow, pointed petals and arrange them around the edge of the disc, pressing gently to secure each one.
- Add a stem and a couple of leaf shapes if displaying it as a standalone piece.
- Let dry fully, then paint the center brown, the petals yellow, and the stem and leaves green.
Tip: Keep the petals slightly uneven in length and angle rather than perfectly symmetrical, real sunflower petals are never perfectly uniform, and a little variation makes the finished piece look far more natural.
Flower Wall Art and Plaques
Flat, wall-hung pieces let you showcase several flowers at once without needing to sculpt each one fully in the round.
A Daisy Plaque
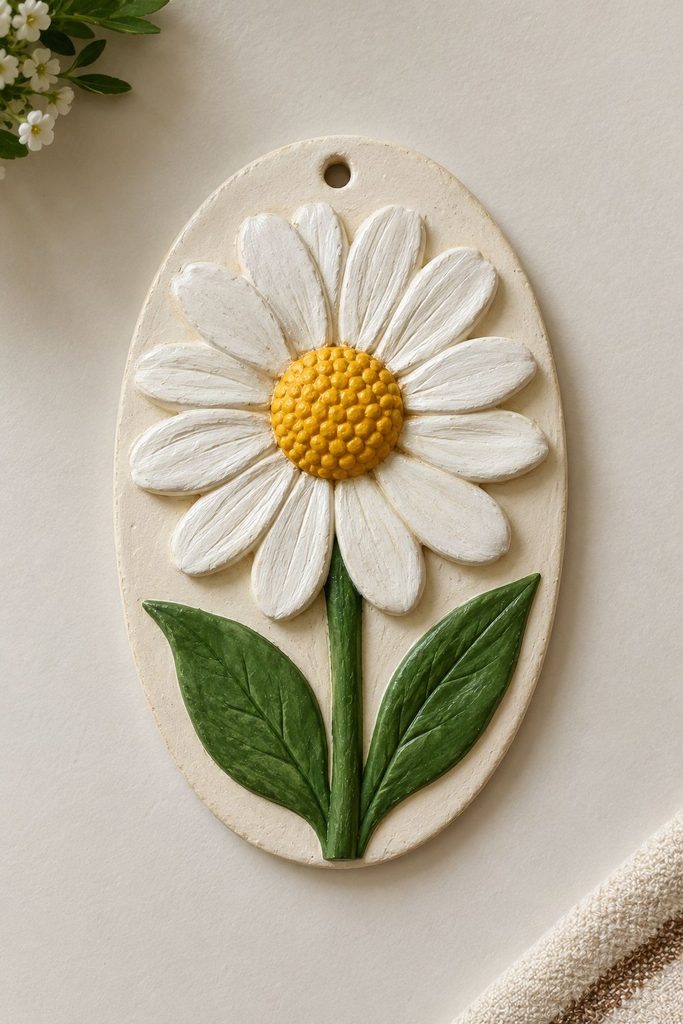
This project uses simplified, flat daisy shapes rather than fully dimensional petals, which makes it a faster project than the sculpted blooms above.
Because the flowers are built directly onto a flat base rather than shaped in the round, this is a genuinely good project if you’ve enjoyed the sculpting so far but want something
you can finish in one sitting rather than across a couple of days. It also solves the display question that standalone flowers sometimes run into, a plaque is ready to hang the moment it’s dry and painted, no vase, no pot, no additional styling decisions required.
What You’ll Need
Here’s what to gather before you start:
- Air dry clay
- A rolling pin
- A small round cutter for the plaque base
- A toothpick for the hanging hole
- White, yellow, and green paint
How to Make It
Once everything’s ready, here’s how it comes together:
- Roll clay to about a quarter inch thick and cut a circular or oval plaque base.
- Shape several small teardrop petals per daisy and arrange them in a circle directly onto the plaque’s surface, pressing gently so they adhere.
- Add a small flattened ball at the center of each daisy.
- Add simple leaf and stem details connecting the flowers.
- Poke a hole near the top of the plaque with a toothpick while the clay is still soft.
- Let dry fully, then paint the petals white, the centers yellow, and the stems and leaves green.
Tip: Press your petals firmly into the base plaque while both pieces are still soft, this fuses them together as one piece rather than risking them popping off once fully dried.
A Mixed Flower Wall Hanging
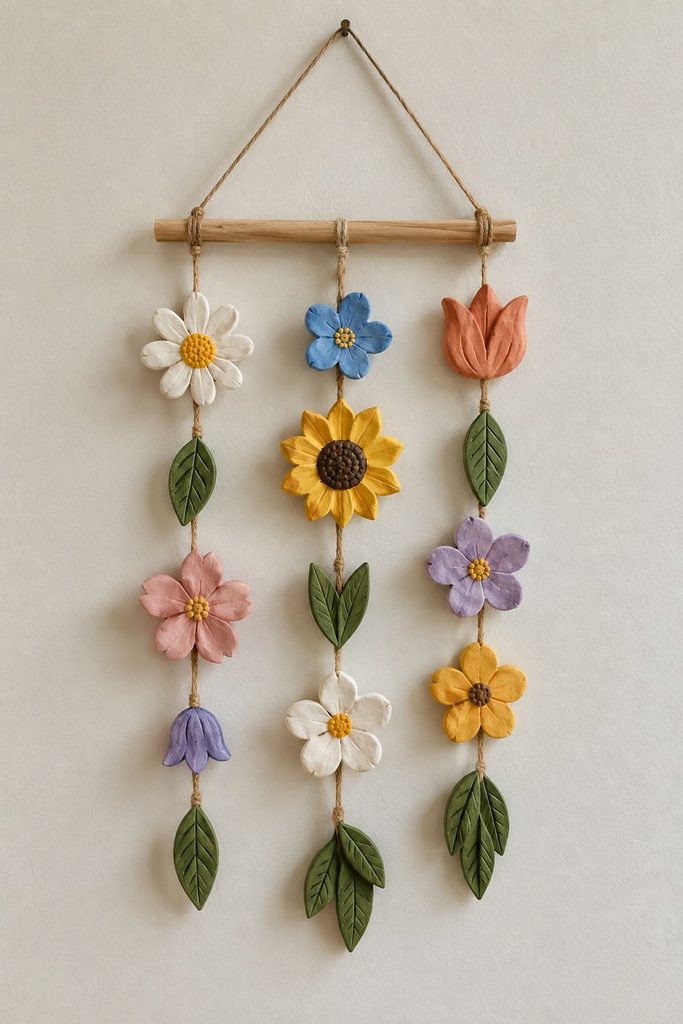
This is a slightly more advanced version of the daisy plaque, combining a few different flower shapes on a single elongated piece.
Where the daisy plaque works well as a first project, this one is a nice next step once you’re comfortable with the basic technique and want to practice composition rather than just repetition. Mixing flower types on one piece also gives you more room to play with color, instead of a single repeated bloom, you get to think about how pink, yellow, and purple flowers balance against each other, which starts to feel more like arranging a bouquet than just sculpting shapes.
What You’ll Need
Here’s what to gather before you start:
- Air dry clay
- A rolling pin
- A knife for cutting the plaque shape
- Twine for hanging
- A varied paint palette, pinks, yellows, whites, purples, and green
How to Make It
Once everything’s ready, here’s how it comes together:
- Roll and cut a longer, arched plaque shape as your base.
- Build two or three different simplified flower shapes directly onto the base, mixing daisy shapes, small rounded blooms, and clustered bud shapes for variety.
- Add stems connecting each flower down toward the bottom of the plaque, along with a few simple grass-blade details.
- Poke two holes near the top for hanging twine.
- Let dry fully, then paint each flower a different color for visual variety.
- Thread twine through the two holes once the paint has dried.
Tip: Sketch your flower arrangement on paper first if you’re combining several different blooms, it’s much easier to plan the composition before committing to wet clay than to rearrange pieces once they’re pressed into place.
Flower-Shaped Dishes and Trinket Trays
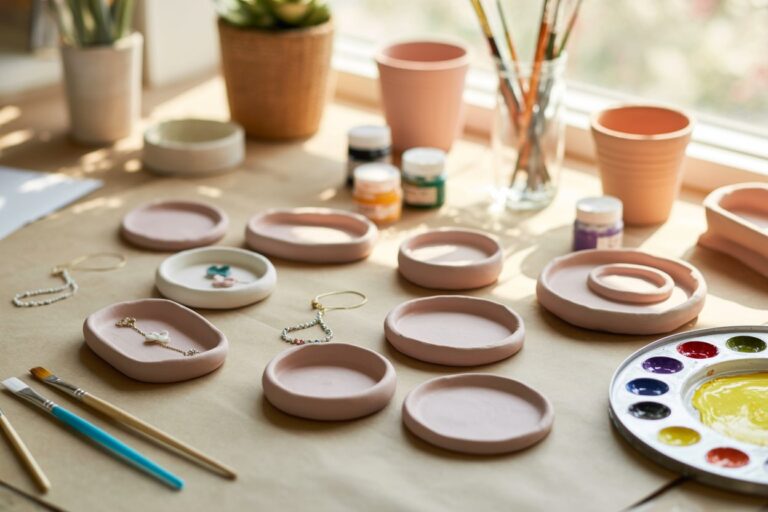
A flower shape works beautifully as the outline for a small functional dish, giving you something both decorative and useful.
A Flower-Shaped Trinket Dish
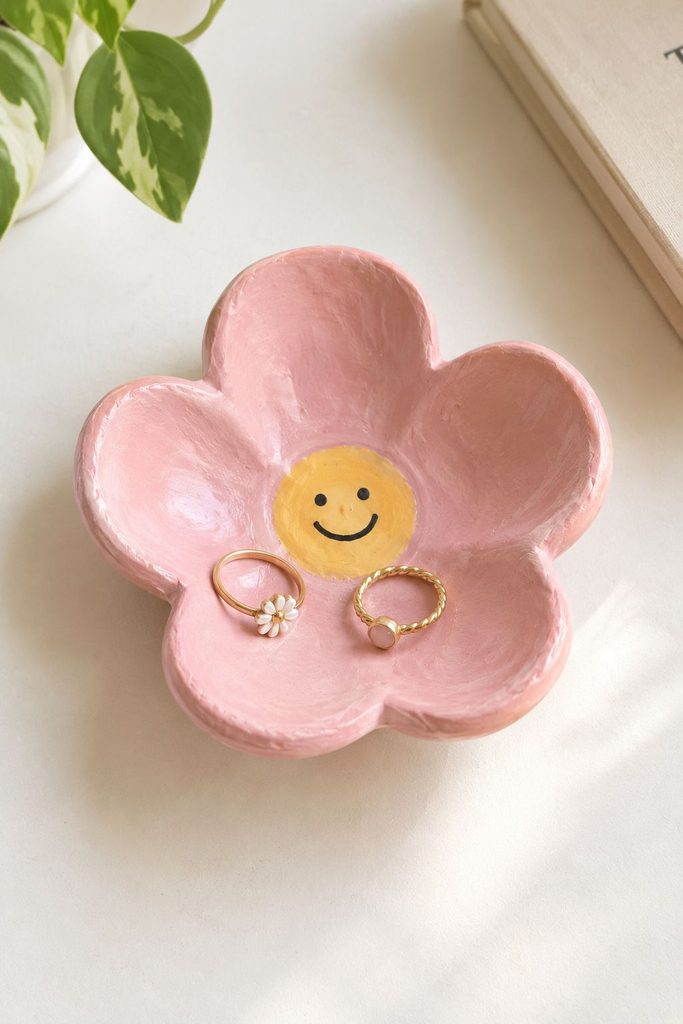
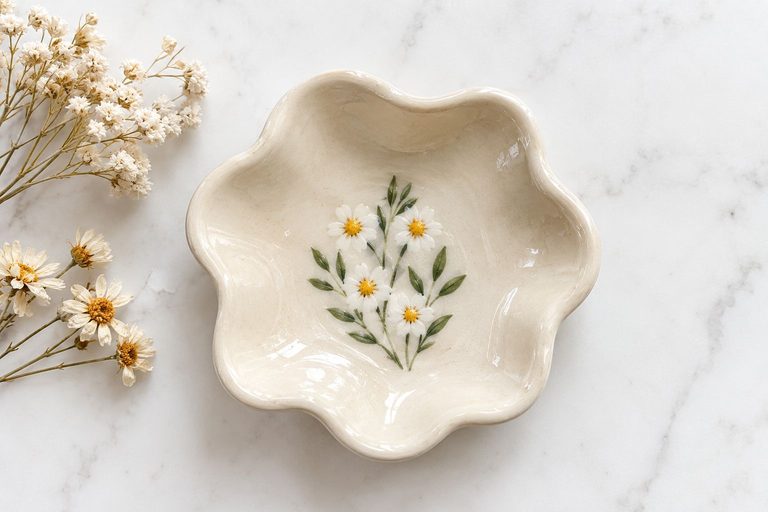
A flower-shaped dish takes the same flat-cutting technique as the daisy plaque, but instead of building small individual blooms, you’re cutting one large flower outline and turning it into something genuinely useful.
This is one of the more practical projects on this list, a small dish for rings, earrings, or hair ties that also happens to look like a piece of decor rather than plain storage. Between the low effort required and how often you’ll actually reach for it once it’s sitting on a dresser or by the sink, it tends to be one of the first things people ask me how to make once they see it in person.
What You’ll Need
Here’s what to gather before you start:
- Air dry clay
- A rolling pin
- A flower-shaped cutter, or a simple template cut from cardboard
- A small bowl to shape the dish’s curve
- Pink or your color of choice, plus white for the center
How to Make It
Once everything’s ready, here’s how it comes together:
- Roll clay to about a quarter inch thick and cut out a simple flower shape using a cutter or template.
- Drape the flower shape gently over the outside of a small bowl to give it a slight upward curve at the petal edges.
- Smooth any rough edges with a damp finger.
- Let dry fully on the mold before removing to finish drying flat.
- Paint the petals your chosen color and add a contrasting circle at the center.
Tip: A face painted onto the center circle, two dots and a small smile, turns this from a plain flower dish into something with a lot more personality, it’s a small detail that consistently gets the most compliments.
A Painted Floral Coaster Set
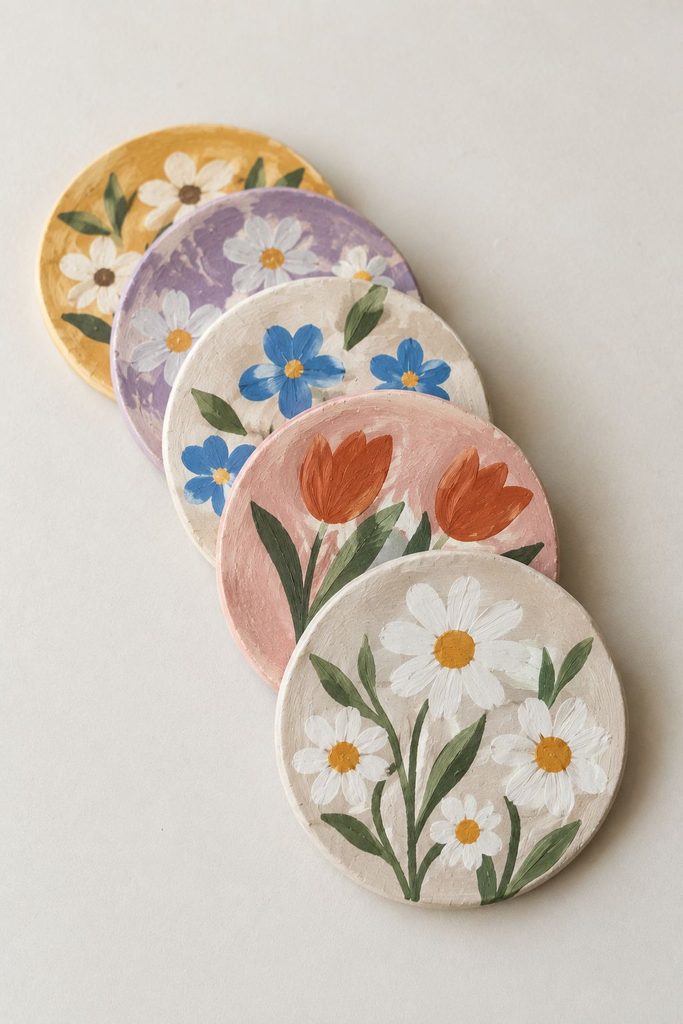
Unlike the sculpted flowers elsewhere on this list, the floral detail here comes entirely from paint rather than dimensional clay work, which makes this a good project if you enjoy the painting side of clay crafts more than the sculpting side.
A matching set also just feels more finished than a single piece, coasters in particular read as intentional home decor once you have four or six of them together rather than one odd piece sitting on a shelf.
It’s also a genuinely useful gift, most people can always use a fresh coaster set, and a hand-painted one carries a lot more weight than something bought off a shelf.
What You’ll Need
Here’s what to gather before you start:
- Air dry clay
- A rolling pin
- A round cutter
- A fine detail paintbrush
- A mixed floral paint palette
How to Make It
Once everything’s ready, here’s how it comes together:
- Roll clay to a quarter inch thick and cut even circles for each coaster in the set.
- Smooth the edges of each circle with a damp finger or sponge so they dry without cracking or warping.
- Once fully dry, paint a small floral bouquet, stems, leaves, and a few simple blooms, onto the center of each coaster.
- Seal thoroughly once the paint has dried, since coasters get handled and set down often.
Tip: Keep the floral design centered and a bit smaller than the coaster itself, a design that runs too close to the edge tends to look cramped and can chip more easily with regular use.
A Potted Flower Bouquet
This is the most ambitious project on the list, but it’s really just several of the techniques above combined into one finished arrangement.
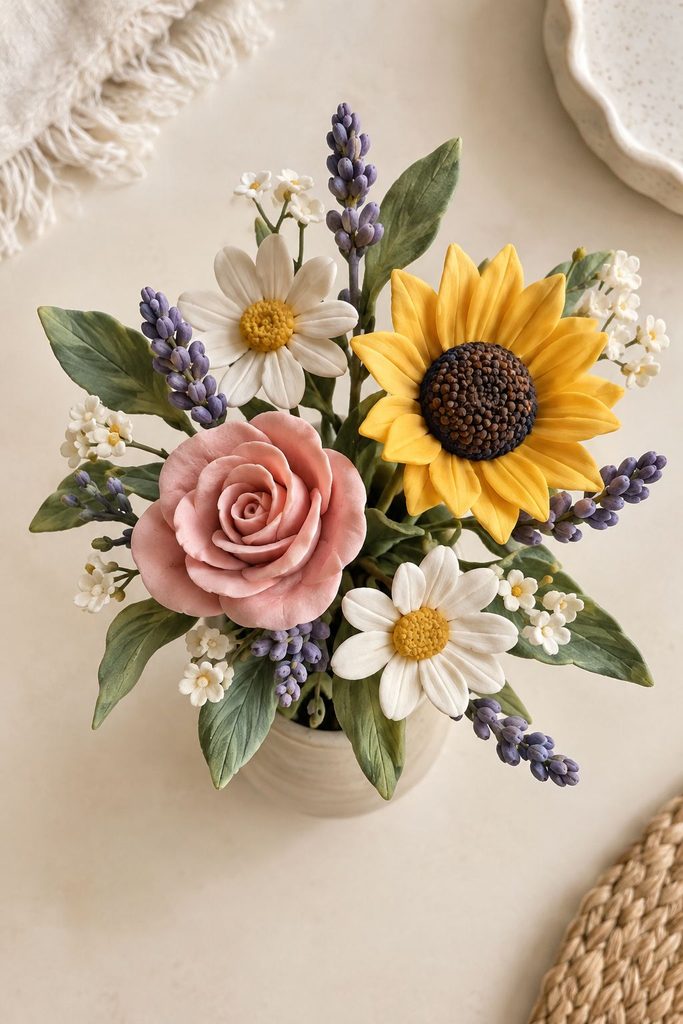
A Mixed Bouquet in a Small Vase
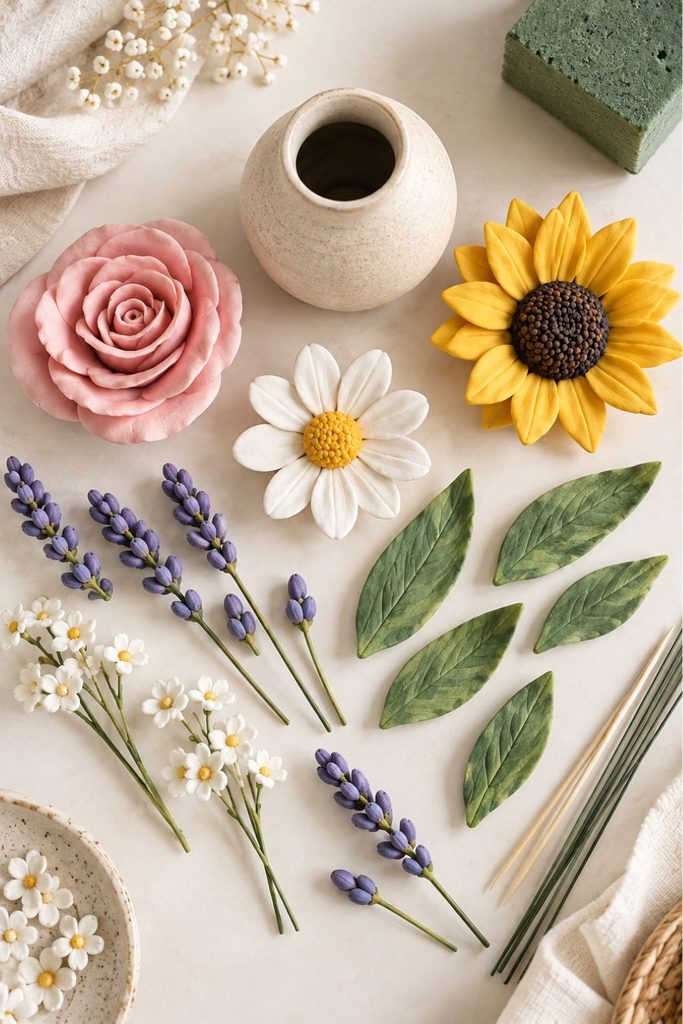
If you’ve made your way through even two or three of the projects above, this is where all of that practice comes together into a single finished piece, and it’s genuinely the most rewarding project on this whole list to display once it’s done.
Unlike a single standalone flower, a full bouquet lets you play with height, color balance, and composition all at once, the same way a florist would think about a real arrangement.
It also solves the styling question a lot of people run into with sculpted flowers, rather than deciding where one small piece goes, you end up with a single cohesive centerpiece that works on a dining table, an entryway console, or a nightstand without needing to think much further about it.
What You’ll Need
Here’s what to gather before you start:
- Air dry clay
- Toothpicks or thin floral wire for stems
- A small vase or painted clay pot
- Floral foam or extra clay to anchor the stems
- A full mixed paint palette
How to Make It
Once everything’s ready, here’s how it comes together:
- Sculpt three or four different flower types using the techniques above, a few daisies, a rose, and a couple of smaller bud shapes work well together.
- Insert a toothpick or wire stem into the base of each flower while the clay is still soft.
- Let everything dry fully, then paint each flower.
- Press a small piece of floral foam or soft clay into the bottom of your vase to anchor the stems.
- Arrange the finished flowers at varying heights, placing the tallest stems toward the back or center and shorter ones toward the front.
Tip: Odd numbers of flowers, five or seven rather than four or six, tend to look more natural in a small arrangement like this, it’s a basic floral design principle that applies just as well to clay flowers as real ones.
A Few General Tips for Clay Flowers
Work with clay that’s still soft when assembling multi-part pieces. Petals, stems, and centers all bond best while the clay retains some moisture, once it starts to firm up, pieces are far more likely to crack apart rather than fuse together.
Thin edges make more convincing petals. Pinch or roll the edges of each petal thinner than the center, real flower petals taper at the edges, and this small detail makes a sculpted flower read as far more realistic.
Let larger pieces dry slowly and evenly. Flip bigger plaques or dishes occasionally while drying so one side doesn’t dry and warp faster than the other.
Seal anything that will live outdoors or get handled often. My How to Glaze Air Dry Clay guide covers the sealing options in more depth if you want a piece to hold up to regular touching or weather.
Frequently Asked Questions
How long do these clay flowers take to fully dry? It depends heavily on thickness, small petals can dry within a day, while a thicker piece like a full rose or a dish can take two to three days, always let a piece feel completely hard before painting.
Can I make these flowers waterproof for outdoor use? With a proper sealant, yes, though even sealed pieces should avoid constant direct rain exposure, a covered porch or a spot under an overhang holds up much better than fully open weather.
Do I need special tools to sculpt petals? Not really, a rolling pin, a toothpick, and your fingers cover almost everything on this list, a dedicated clay tool set is nice to have but not required to get started.
Why did my petals crack or fall off after drying? This usually means they were attached after the clay had already started to firm up. Build multi-part flowers in one sitting while everything is still soft enough to fuse together properly.
Related Posts
If this was helpful, here are a few more from the site worth reading next:
- How to Make Air Dry Clay at Home (Easy Recipe) — the base recipe every project above starts from.
- How to Paint Air Dry Clay: A Step-by-Step Guide — covers the painting techniques used throughout this post in more depth.
- How to Glaze Air Dry Clay: A Beginner’s Guide for Moms — the sealing step for anything you’ll display outdoors or handle often.
- How to Make Flower Frogs with Air Dry Clay — a nice companion piece if you want to display real stems alongside your clay flowers.
- 10 Beautiful & Easy Air-Dry Clay Coaster Ideas — more on working with pressed and painted florals in a flatter format.
- Air Dry Clay Beginner Tips — a good starting point if any of this felt new to you.
Final Thoughts
What I like most about this whole category of project is how forgiving it is, a slightly uneven petal or an imperfectly symmetrical bloom still reads as a flower, real flowers aren’t perfectly symmetrical either, and that natural variation is part of what makes a sculpted piece feel handmade rather than manufactured.
If you’re picking just one project to start with, I’d choose the rose or the sunflower over the more assembled pieces like the plaques or the full bouquet.
Getting comfortable with basic petal shaping on a single bloom first makes every other project on this list come together faster once you’re ready for it.
My name is Amelia Hart, and I’m passionate about home decor, DIY projects, and creating beautiful spaces on any budget.
I love sharing boho-inspired styling tips, creative decor ideas, and practical ways to make your home feel warm and inviting. Join me for inspiration and easy-to-follow decorating advice!