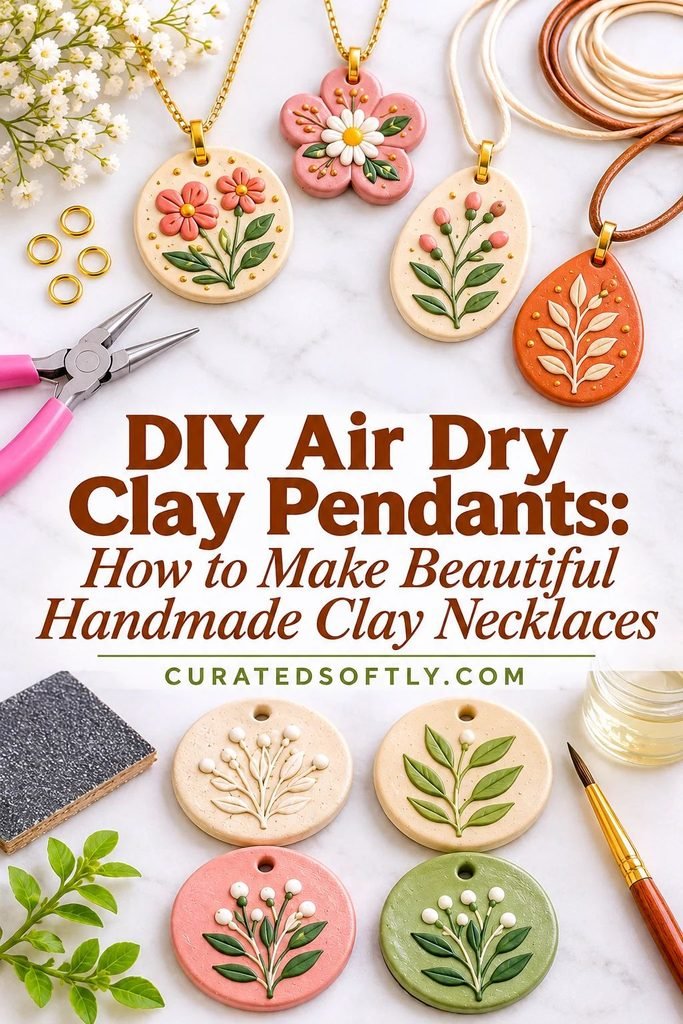
DIY Air Dry Clay Pendants: How to Make Beautiful Handmade Clay Necklaces
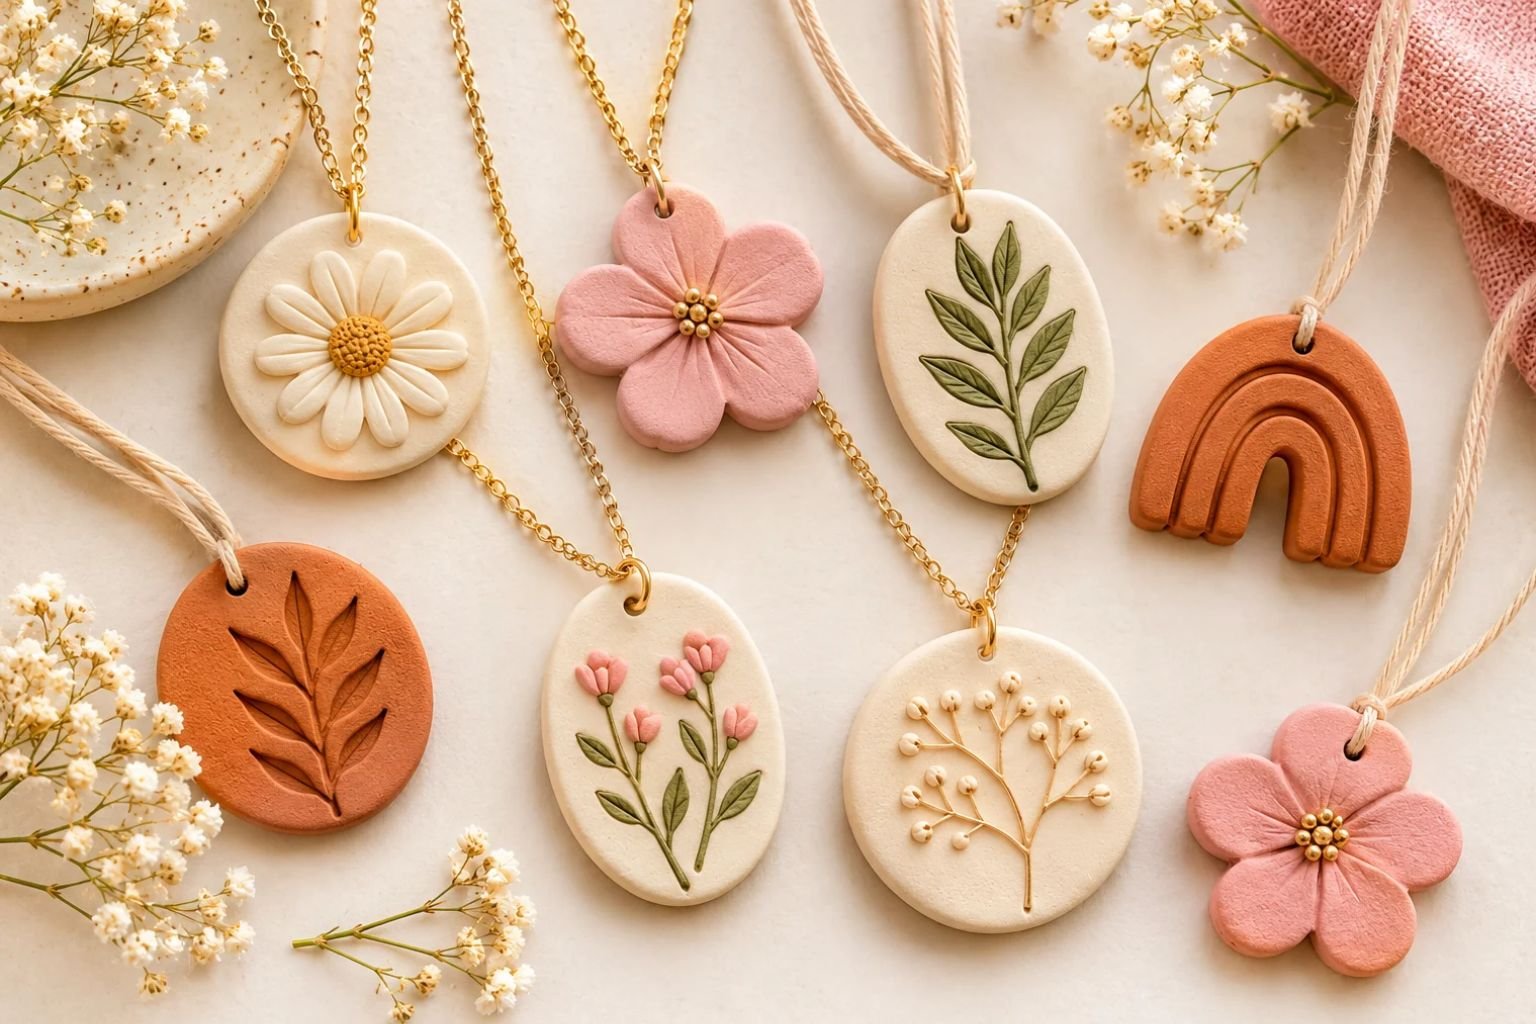
If you love making handmade jewelry, air-dry clay pendants are such a fun project to try. You don’t need a pottery kiln, expensive equipment, or a whole collection of specialized tools. With a little clay, a rolling pin, a few simple cutters, and some acrylic paint, you can create beautiful necklaces that look thoughtful, unique, and completely personal.
What I especially like about this project is how many different designs you can make from one small piece of clay.
You can keep things simple with minimalist circles and organic shapes, add pressed flowers and textured patterns, or paint little botanical designs for a more decorative finish.
Air-dry clay pendants also make lovely handmade gifts. You can create matching necklaces for friends, personalized pieces for birthdays, or several different designs to give as a small jewelry gift set.
In this tutorial, I’ll walk you through how to make your own air-dry clay pendants, from shaping and decorating the clay to drying, painting, sealing, and turning your finished pieces into necklaces.
Why Make Pendants With Air Dry Clay?
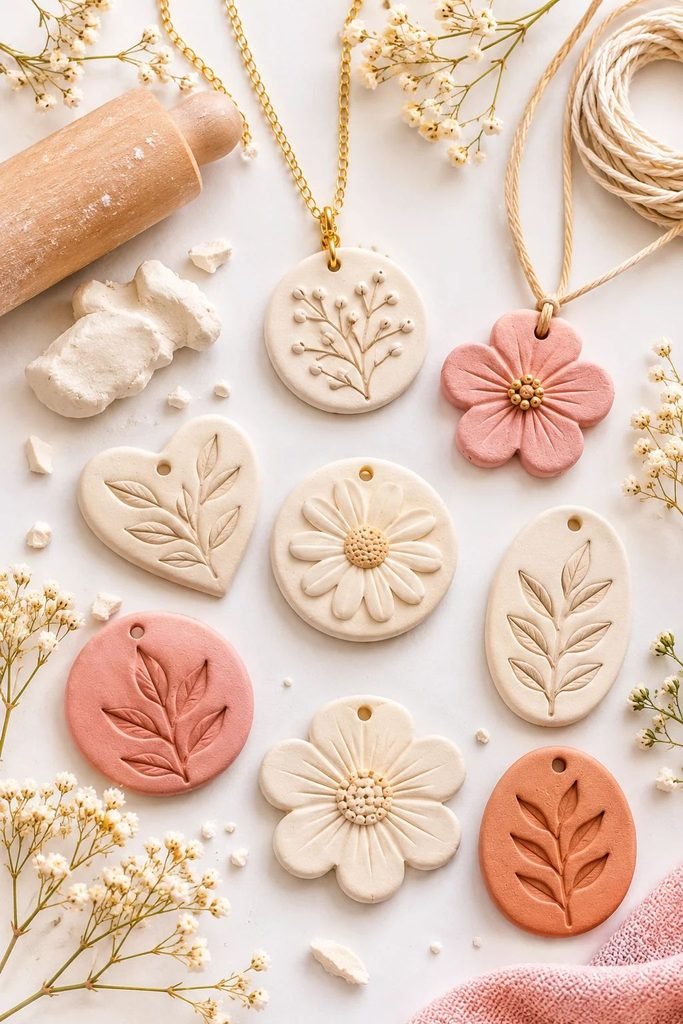
Air-dry clay is a convenient material for beginner jewelry projects because it hardens naturally without needing to be fired in a kiln.
You can cut it into almost any shape, press patterns into the surface, paint it in your favorite colors, and finish it with a protective sealer.
Here are a few reasons to try making your own clay pendants:
- Beginner-friendly: You only need a few basic supplies to get started.
- Easy to customize: Choose your own shapes, colors, patterns, and finishes.
- Affordable: A small amount of clay can make several pendants.
- Great for handmade gifts: Each necklace can be designed around someone’s favorite colors or style.
- Perfect for experimenting: You can try botanical prints, abstract patterns, minimal designs, and colorful painted details.
If you’re building a collection of handmade clay accessories, you might also enjoy my tutorial on DIY air-dry clay keychains. The same basic shaping and decorating techniques work beautifully for both projects.
Materials You’ll Need to Make Air Dry Clay Pendants
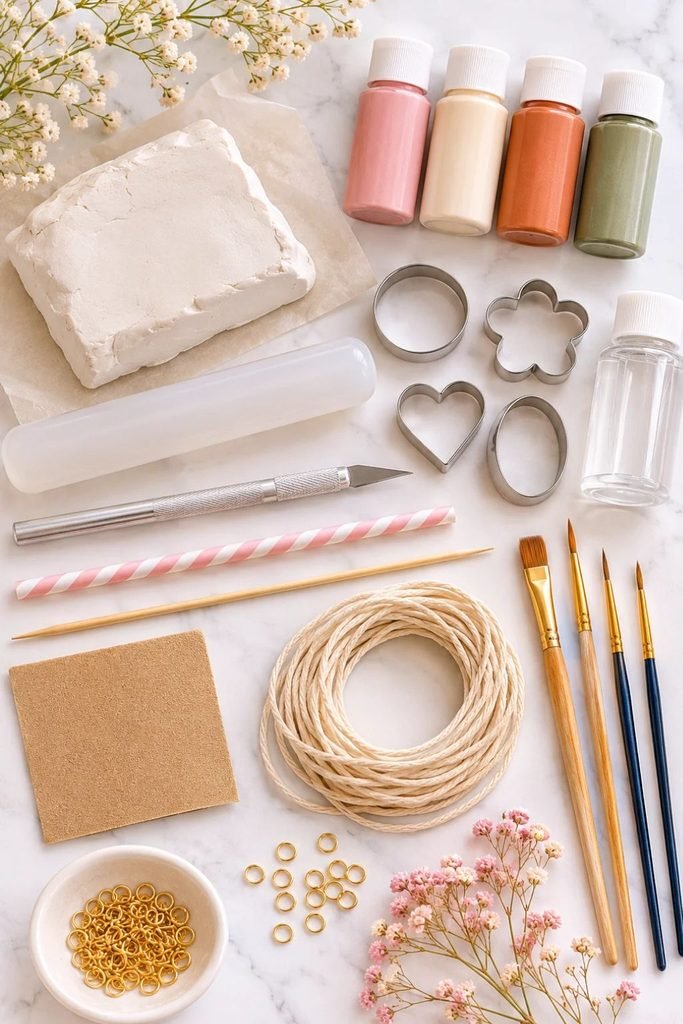
You don’t need a complicated jewelry-making setup. Most of these supplies are easy to find at craft stores or may already be in your craft drawer.
Essential supplies
- Air-dry clay: White air-dry clay is a good starting point because it’s easy to paint and decorate.
- Acrylic rolling pin: Use a smooth acrylic roller or small rolling pin to flatten your clay evenly.
- Parchment paper: This protects your work surface and gives you a clean area for shaping.
- Small cookie cutters: Round, oval, heart, flower, and geometric cutters are all useful.
- Craft knife: Helpful for cutting custom shapes and trimming uneven edges.
- Drinking straw: A small straw makes a neat hole for attaching your pendant to a necklace.
- Skewer or needle tool: Useful for adjusting holes and adding tiny decorative details.
- Fine-grit sandpaper: Use this to smooth rough edges after the clay has completely dried.
- Acrylic paints: Choose colors that suit your designs.
- Small paintbrushes: Fine brushes are useful for painting details and patterns.
- Clay sealer or acrylic varnish: Helps protect the finished surface from moisture and everyday handling.
- Cotton cord or jewelry chain: This turns your finished clay shape into a wearable necklace.
Optional decorating supplies
You can make beautiful pendants with plain clay, but a few extra supplies can help you create more detailed designs.
- Pressed leaves and small flowers
- Texture stamps
- Lace or textured fabric
- Alphabet stamps
- Gold or metallic acrylic paint
- Small paint sponges
- Fine paint markers
- Mica powder suitable for your chosen clay and sealer
How to Make Air Dry Clay Pendants Step by Step
This tutorial makes simple, lightweight pendants with a hole at the top for threading a cord or attaching a jewelry finding.
Step 1: Prepare Your Clay
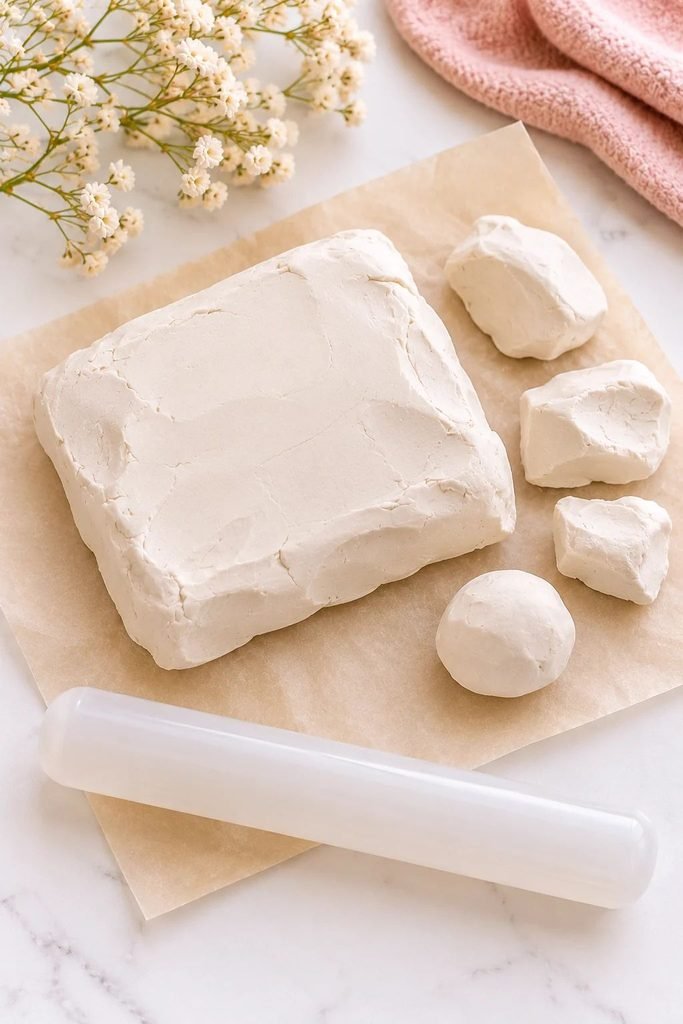
Start by taking a small amount of air-dry clay from the package. Keep the remaining clay tightly sealed so it doesn’t begin drying while you’re working.
Knead the piece gently between your hands until it becomes smooth and workable. If the clay feels a little stiff, follow the manufacturer’s instructions for conditioning it. Avoid adding too much water because overly wet clay can become sticky and may take longer to dry.
Place a sheet of parchment paper on your work surface. This helps prevent the clay from sticking and makes it easier to lift your finished shapes.
Step 2: Roll the Clay Evenly

Place your clay on the parchment paper and use an acrylic roller to flatten it.
Aim for an even thickness of approximately 1/8 inch (3 mm). This gives you a pendant that is substantial enough to handle but not unnecessarily heavy.
Try to keep the thickness consistent across the entire piece. If some areas are much thicker than others, they may dry at different rates.
If the clay sticks to your roller, gently lift it and reposition it on the parchment. Avoid pulling or stretching the clay because this can distort your shapes.
Step 3: Cut Out Your Pendant Shapes
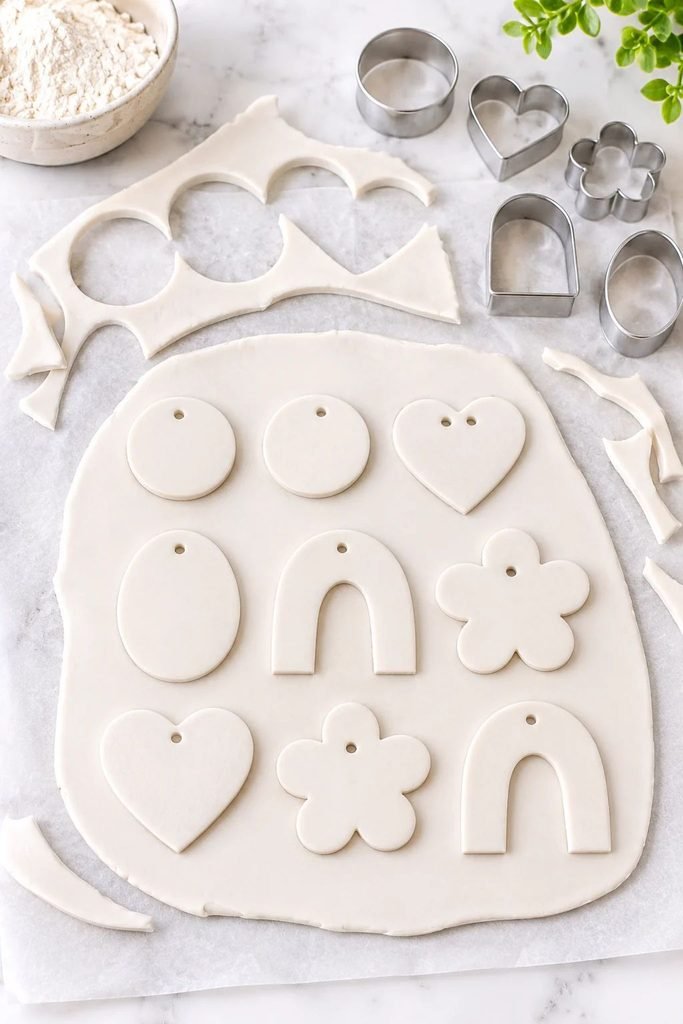
Now comes the fun part: choosing the shapes for your necklaces.
Use small cookie cutters to create circles, hearts, ovals, flowers, arches, or other designs. You can also cut your own shapes with a craft knife and a simple paper template.
Some ideas to try include:
- Small round pendants for a minimalist necklace
- Oval pendants with botanical impressions
- Heart-shaped pendants for handmade gifts
- Organic wavy shapes for a modern look
- Flower-shaped pendants for a feminine design
- Arch-shaped pendants with painted details
After cutting each shape, carefully remove the excess clay around it.
Smooth the edges gently with your fingertips. If necessary, use a tiny amount of water on a fingertip to smooth small imperfections, but don’t soak the clay.
Step 4: Add Texture and Decorative Details
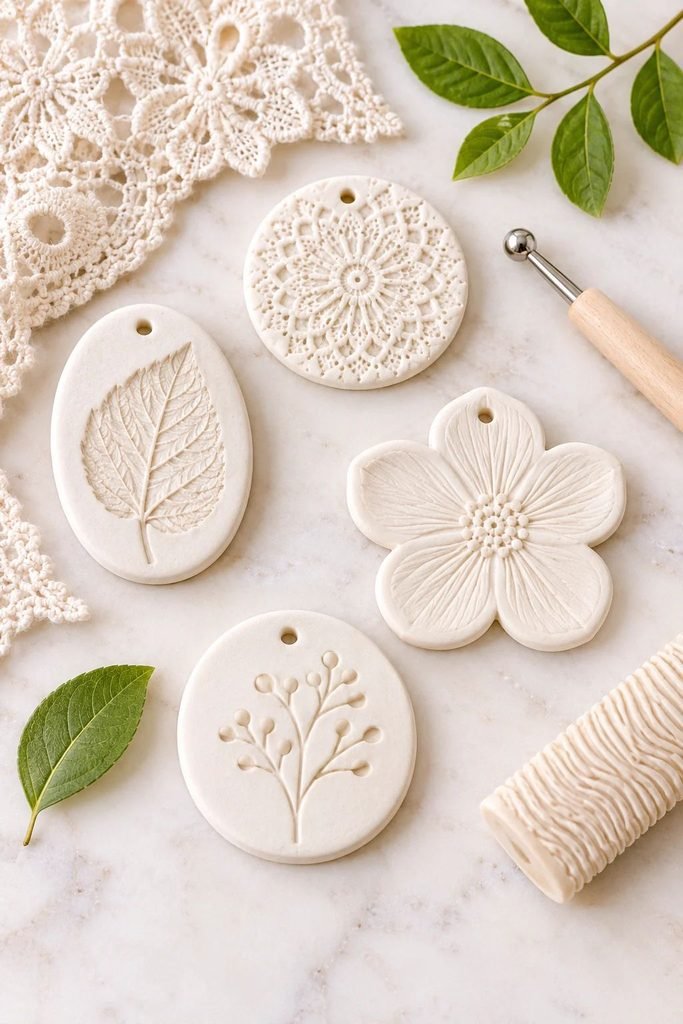
You can leave your pendants smooth and simple, or decorate them before they dry.
This is where you can make each piece look different without needing complicated techniques.
For botanical pendants: Press a small leaf or flower gently into the clay to create an impression. Lift it carefully so the pattern remains visible.
For textured pendants: Use a texture stamp, lace, or patterned fabric to create an interesting surface.
For minimalist pendants: Keep the surface smooth and add a small border or simple line detail.
For personalized pendants: Use small alphabet stamps to add an initial or short letter.
Press your designs gently. You want the pattern to show without making the pendant too thin or distorting its shape.
Step 5: Make a Hole for the Necklace

This is an important step, and it’s much easier to do while the clay is still soft.
Take a drinking straw, skewer, or needle tool and carefully create a hole near the top of each pendant.
If you’re using a straw, press it straight through the clay and gently remove the small piece of clay inside it.
Make sure the hole is large enough for your chosen cord or jump ring. Leave enough clay around the hole so the top of the pendant doesn’t become too fragile.
Before moving on, check that the hole is centered and that the pendant will hang straight when worn.
Don’t wait until the clay is completely dry to make this hole. Drilling into dry air-dry clay can cause cracks or breakage.
Step 6: Let the Pendants Dry Completely
Place your pendants flat on a clean piece of parchment paper or another smooth, nonporous surface.
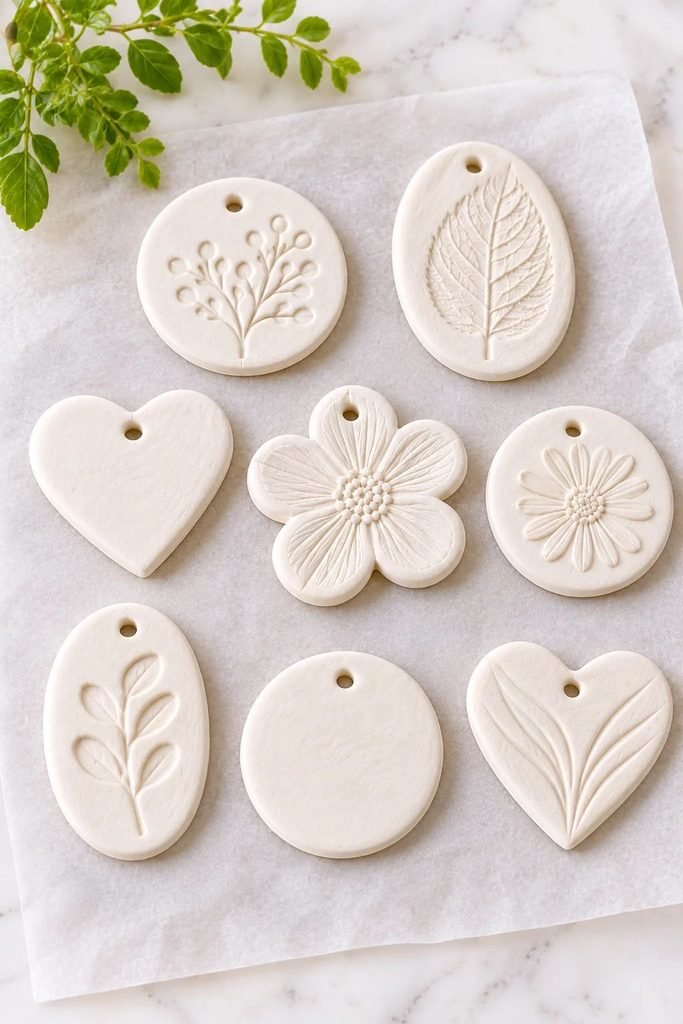
Leave them in a dry, well-ventilated room away from direct sunlight, radiators, or strong heat sources.
Drying time depends on the clay brand, thickness, humidity, and room temperature. Thin pendants may take a day or two, while thicker pieces can take longer.
Turn the pendants carefully during drying so the underside can dry too. Don’t rush this stage with direct heat because uneven drying can cause warping or cracks.
Before painting, make sure each pendant is completely dry throughout. The surface should feel hard, and the thickest part should not feel cool or damp.
Step 7: Smooth the Edges
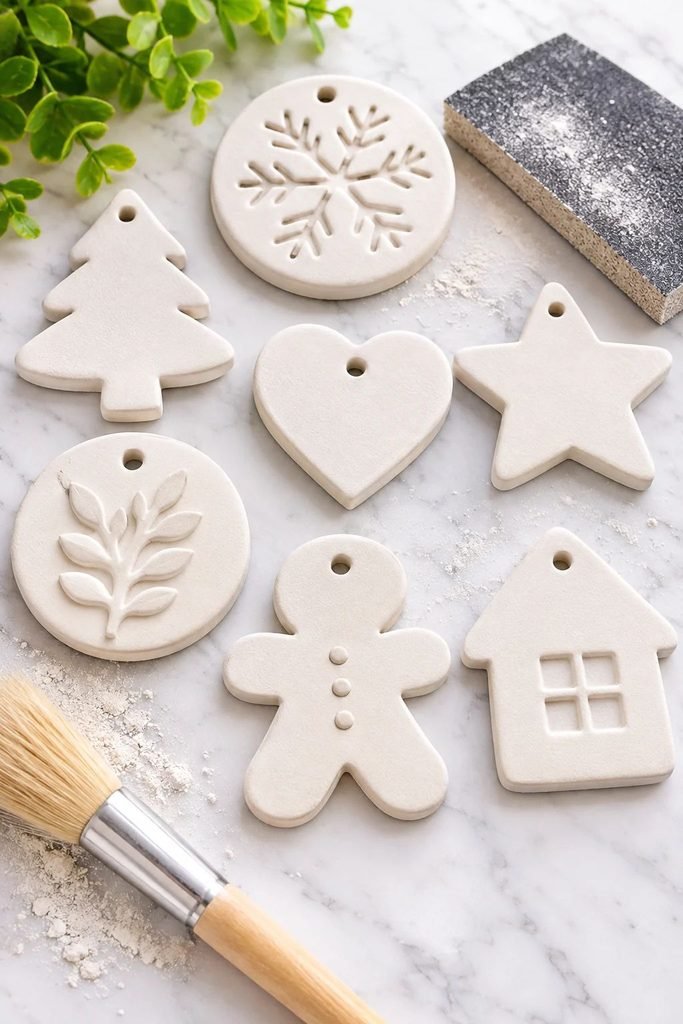
Once your pendants are completely dry, inspect them for rough edges, small bumps, or uneven areas.
Use fine-grit sandpaper to smooth these imperfections. Work gently and avoid applying too much pressure, especially around the hole.
Wipe away the dust with a dry, soft cloth before painting.
Avoid wet sanding air-dry clay because water can soften the material and damage the surface.
Step 8: Paint Your Clay Pendants
Now you can bring your designs to life.
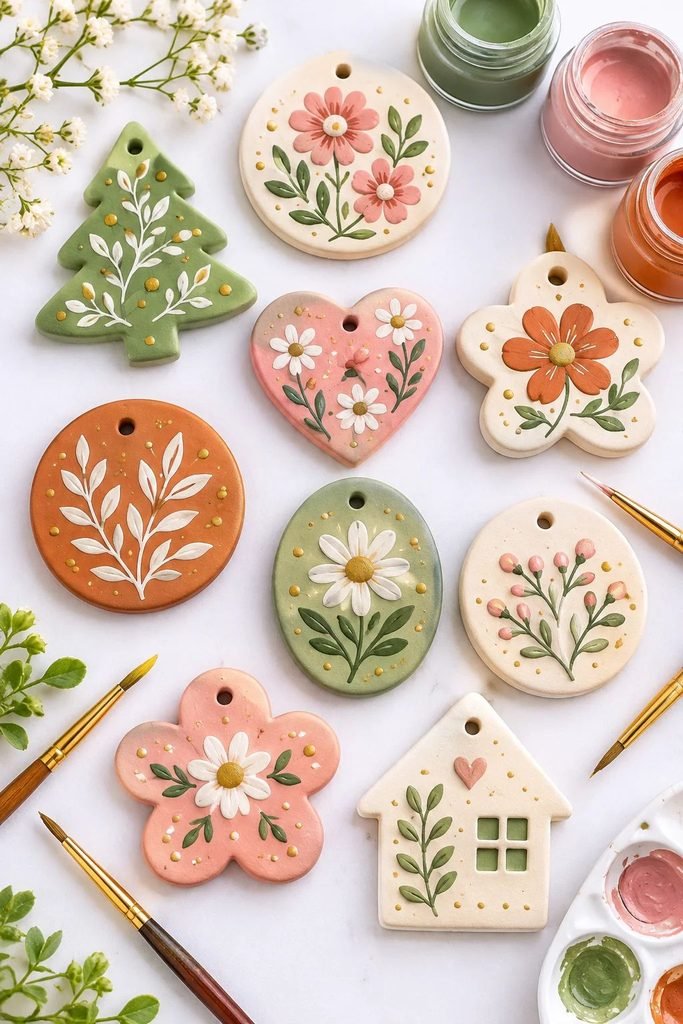
Acrylic paint is a simple choice for decorating air-dry clay. You can use one solid color, create little patterns, or combine several shades for a more detailed look.
Here are a few combinations worth trying:
- Neutral and natural: Cream, beige, warm brown, and soft white.
- Soft and feminine: Blush pink, dusty rose, ivory, and muted peach.
- Earthy botanical: Sage green, terracotta, olive, and warm cream.
- Minimalist: White, black, charcoal, and soft gray.
- Metallic accents: White or beige with small gold details.
Apply thin coats rather than one thick layer. Allow each coat to dry before adding another.
For small details, use a fine paintbrush or paint marker. You can add tiny flowers, dots, stripes, leaf patterns, or simple abstract shapes.
If you want a more natural ceramic-inspired look, keep the colors muted and avoid adding too many decorative details.
Step 9: Seal Your Finished Pendants
Once the paint is completely dry, apply a suitable clear sealer or acrylic varnish.
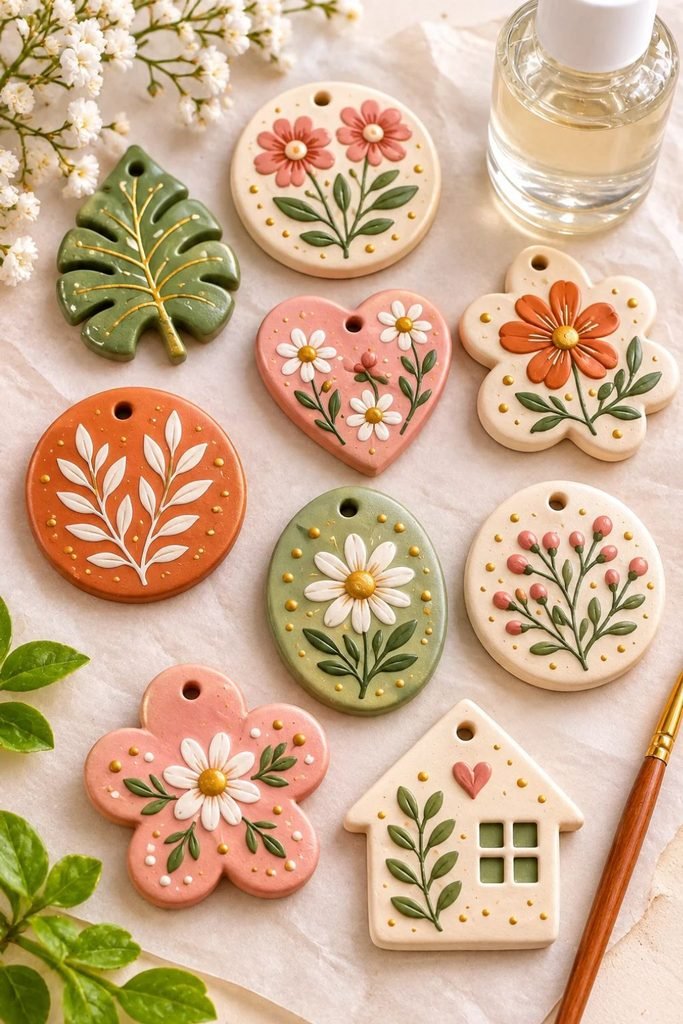
Sealing is especially important for jewelry because the pendants will be handled and exposed to moisture from the environment and skin.
Choose a product that is compatible with your clay and paint. You can use a matte, satin, or gloss finish depending on the appearance you want.
Apply two thin coats, allowing each coat to dry according to the product instructions. Cover the front, back, edges, and the area around the hole.
A thin, even finish is much better than applying one thick coat, which can leave brush marks or an uneven surface.
Remember that sealing makes air-dry clay more resistant to moisture, but it does not make it waterproof. Avoid wearing your clay necklace in the shower, swimming pool, or while exercising heavily.
For more information about choosing a finish, read my guide on how to seal air-dry clay.
Step 10: Turn Your Pendant Into a Necklace
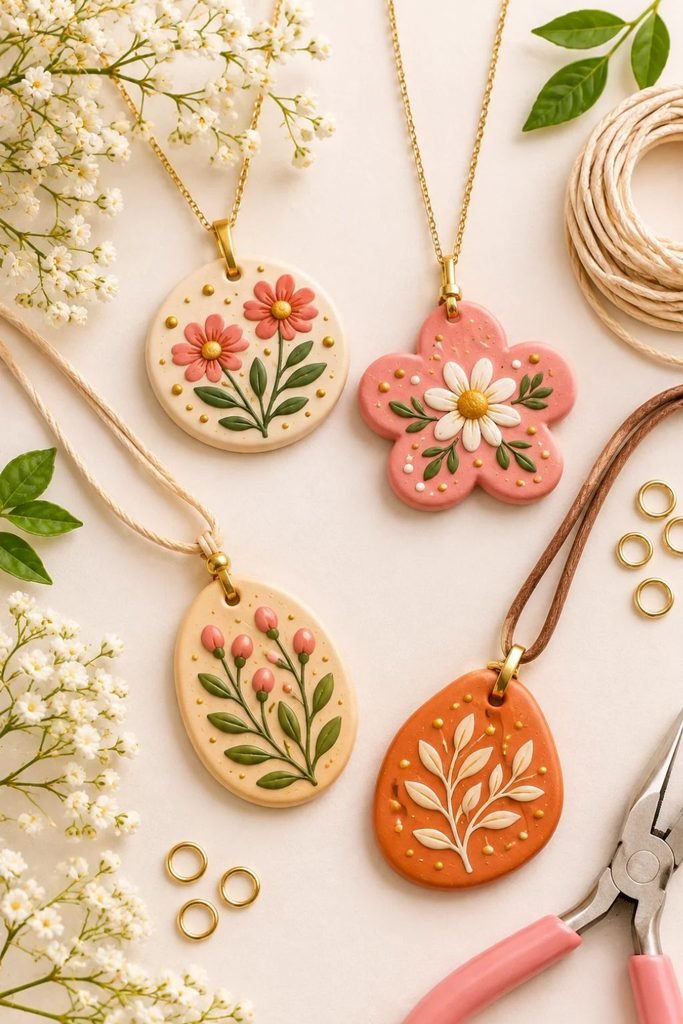
Once the sealer has fully cured, you can attach your pendant to a cord or chain.
For a simple necklace, cut a length of cotton cord or waxed cord to your preferred size. Thread it through the hole and tie the ends securely.
For a more polished jewelry finish, use a jump ring and a jewelry chain. Open the jump ring by twisting the two ends sideways with jewelry pliers, rather than pulling them apart. Thread it through the pendant hole, attach the chain, and close the ring securely.
You can also add small spacer beads, a tassel, or a decorative knot to give your necklace a little extra character.
Before wearing it, check that the cord, jump ring, and pendant are all secure.
10 Air Dry Clay Pendant Design Ideas to Try
Once you’ve made your first pendant, you can experiment with different shapes and finishes. Here are ten designs that would make a lovely handmade jewelry collection.
1. Botanical Leaf Pendants
Press small leaves into the surface of your clay before cutting out your shapes. The natural veins create a beautiful pattern without needing much additional decoration.
Paint them in soft sage green, cream, or terracotta, or leave them in a natural clay color with a matte finish.
2. Minimalist Round Pendants
Simple round pendants are perfect if you prefer understated jewelry. Cut small circles, smooth the edges, and paint them in neutral colors.
You can leave them plain or add a tiny gold dot or line for a little detail.
3. Floral Clay Pendants
Create flower-shaped pendants using a small flower cutter. Add a contrasting center with acrylic paint and use a fine brush to create tiny petal details.
These are especially pretty in blush, ivory, and muted pink.
4. Textured Arch Pendants
Cut an arch shape and press a textured stamp or piece of lace into the surface. A soft beige or cream finish gives these pendants a simple, modern look.
5. Marbled Clay Pendants
Take two small pieces of clay in different colors and gently twist them together. Roll them lightly until you see a marbled pattern.
Avoid overmixing, or the colors will blend into one shade.
6. Heart-Shaped Pendants
Heart pendants are lovely for birthdays, Valentine’s Day, or small handmade gifts. Try painting them in dusty pink, red, cream, or soft brown.
You can also personalize them with an initial.
7. Sun and Moon Pendants
Cut small circular shapes and add simple sun rays, crescent moons, or tiny stars. Metallic gold paint can make these designs look especially pretty.
8. Speckled Neutral Pendants
Paint your pendants in a warm cream or beige shade. Once dry, use a small brush to flick tiny brown or black paint speckles across the surface.
This creates a subtle handmade stone-like appearance.
9. Abstract Organic Pendants
Instead of using a cutter, shape your pendants by hand. Slightly irregular edges give each piece a unique appearance.
Try muted colors and a matte finish for a contemporary handmade look.
10. Personalized Initial Pendants
Cut out a simple round or oval shape and stamp an initial into the front before drying.
Once dry, paint the pendant in a favorite color and lightly highlight the letter with a contrasting shade.
These make thoughtful gifts and are easy to customize for different people.
Tips for Making Stronger, Better-Looking Clay Pendants
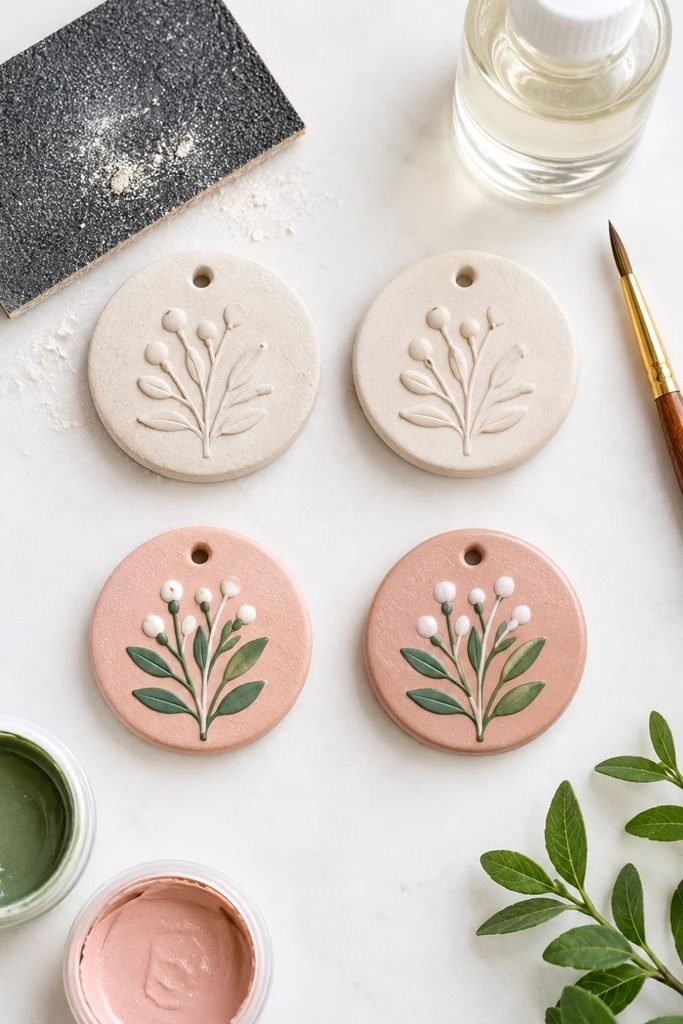
A few small details can make a big difference in how your finished jewelry looks and holds up.
Keep the thickness even. Uneven clay can dry inconsistently and may become more likely to warp or crack.
Don’t make your pendants too thin. Very thin pieces can chip easily, especially around the hole where the necklace attaches.
Make the hole before drying. This gives you a cleaner opening and helps prevent unnecessary breakage.
Smooth the edges while the clay is soft. It’s much easier to fix rough edges before the pendant dries.
Allow enough drying time. A pendant that feels dry on the outside may still contain moisture inside.
Use thin paint and sealer coats. Thick layers can hide your texture and leave an uneven finish.
Keep your unused clay covered. Air-dry clay begins hardening when exposed to air, so seal the remaining clay between uses.
Make a few extra pieces. If you’re making several necklaces, it’s helpful to have spare pendants in case one cracks or breaks during drying.
Common Mistakes to Avoid
Even a simple clay jewelry project can be frustrating if you rush a few important steps.
Here are some mistakes to watch out for:
- Making the pendant too thin: This can leave it fragile and more likely to break.
- Making the hole too close to the edge: There may not be enough clay to support the jump ring or cord.
- Drying the clay too quickly: Direct sunlight and strong heat can cause uneven drying and cracking.
- Painting before the clay is completely dry: Trapped moisture can affect the finish.
- Applying too much water: Excess water can make the clay sticky and difficult to work with.
- Using too much sealer: Thick coats may create an uneven or cloudy finish.
- Assuming sealed clay is waterproof: Air-dry clay jewelry still needs to be kept away from water.
Can You Make Air Dry Clay Pendants to Sell?
Yes! Handmade clay pendants can be a lovely addition to a small craft business, especially when you create designs that feel coordinated and giftable.
Rather than making every necklace look the same, consider creating small collections around a particular theme.
For example, you could make a botanical collection with leaf impressions, a neutral collection with simple geometric shapes, or a floral collection with painted flowers.
You can also offer different cord colors and simple gift packaging to make each necklace feel more finished.
When pricing your work, remember to include the cost of clay, paint, sealer, jewelry findings, packaging, and the time you spend making each piece. Don’t price your work based only on the amount of clay used.
If you enjoy making small accessories, you can also explore my air-dry clay keychain tutorial for another project that uses similar supplies and techniques.
One important thing to remember is that air-dry clay is more fragile than kiln-fired ceramic or properly cured polymer clay. Be honest about the material and care instructions when selling your jewelry, and test your finished designs before offering them to customers.
Frequently Asked Questions
Do air-dry clay pendants break easily?
They can break if they are too thin, have weak areas around the hole, or are dropped onto a hard surface. Make your pendants an even thickness, leave enough clay around the hole, and handle them carefully while drying and assembling.
How thick should air-dry clay pendants be?
Around 1/8 inch (3 mm) is a useful starting thickness for small, lightweight pendants. Larger designs may need to be slightly thicker, but avoid making them unnecessarily heavy.
How long do air-dry clay pendants take to dry?
Drying time depends on the clay brand, thickness, and humidity. Thin pendants may dry within 24 to 48 hours, but thicker pieces can take longer. Always check that the clay is completely dry before painting or sealing.
Can I paint air-dry clay pendants?
Yes. Acrylic paint is a popular option for decorating dry air-dry clay. Apply thin coats and allow the paint to dry fully before sealing.
Do I need to seal air-dry clay jewelry?
I recommend sealing finished pendants with a compatible clay sealer or acrylic varnish. This helps protect the surface from everyday handling and moisture, although it does not make the jewelry waterproof.
Can I use Mod Podge on air-dry clay pendants?
Mod Podge can be used as a decorative coating on some air-dry clay projects, but the finish and durability depend on the product and how the jewelry will be used. For wearable pendants, choose a clear sealer specifically suitable for your clay and paint, and test it on a spare piece first.
Can I make holes in air-dry clay after it dries?
You can, but dry air-dry clay is more brittle and may crack when drilled. It’s much easier and safer to make the hole while the clay is still soft.
Can I wear air-dry clay necklaces every day?
You can wear them carefully, but they are not as durable as kiln-fired ceramic or polymer clay jewelry. Keep them dry, avoid dropping them, and check the cord and findings regularly.
Final Thoughts
Making your own air-dry clay pendants is a simple way to turn a small amount of clay into something beautiful and personal. You can experiment with different shapes, pressed textures, painted patterns, and finishes until you find a style you love.
I would start with a few simple round or oval pendants before trying more detailed botanical or floral designs. Once you get comfortable rolling, cutting, drying, and sealing the clay, you can create an entire collection of handmade necklaces.
And the best part? You don’t need to make every pendant perfect. The little variations in handmade pieces are often what make them special.