
Air Dry Clay Christmas Ornaments: Easy DIY Decorations You Can Make at Home
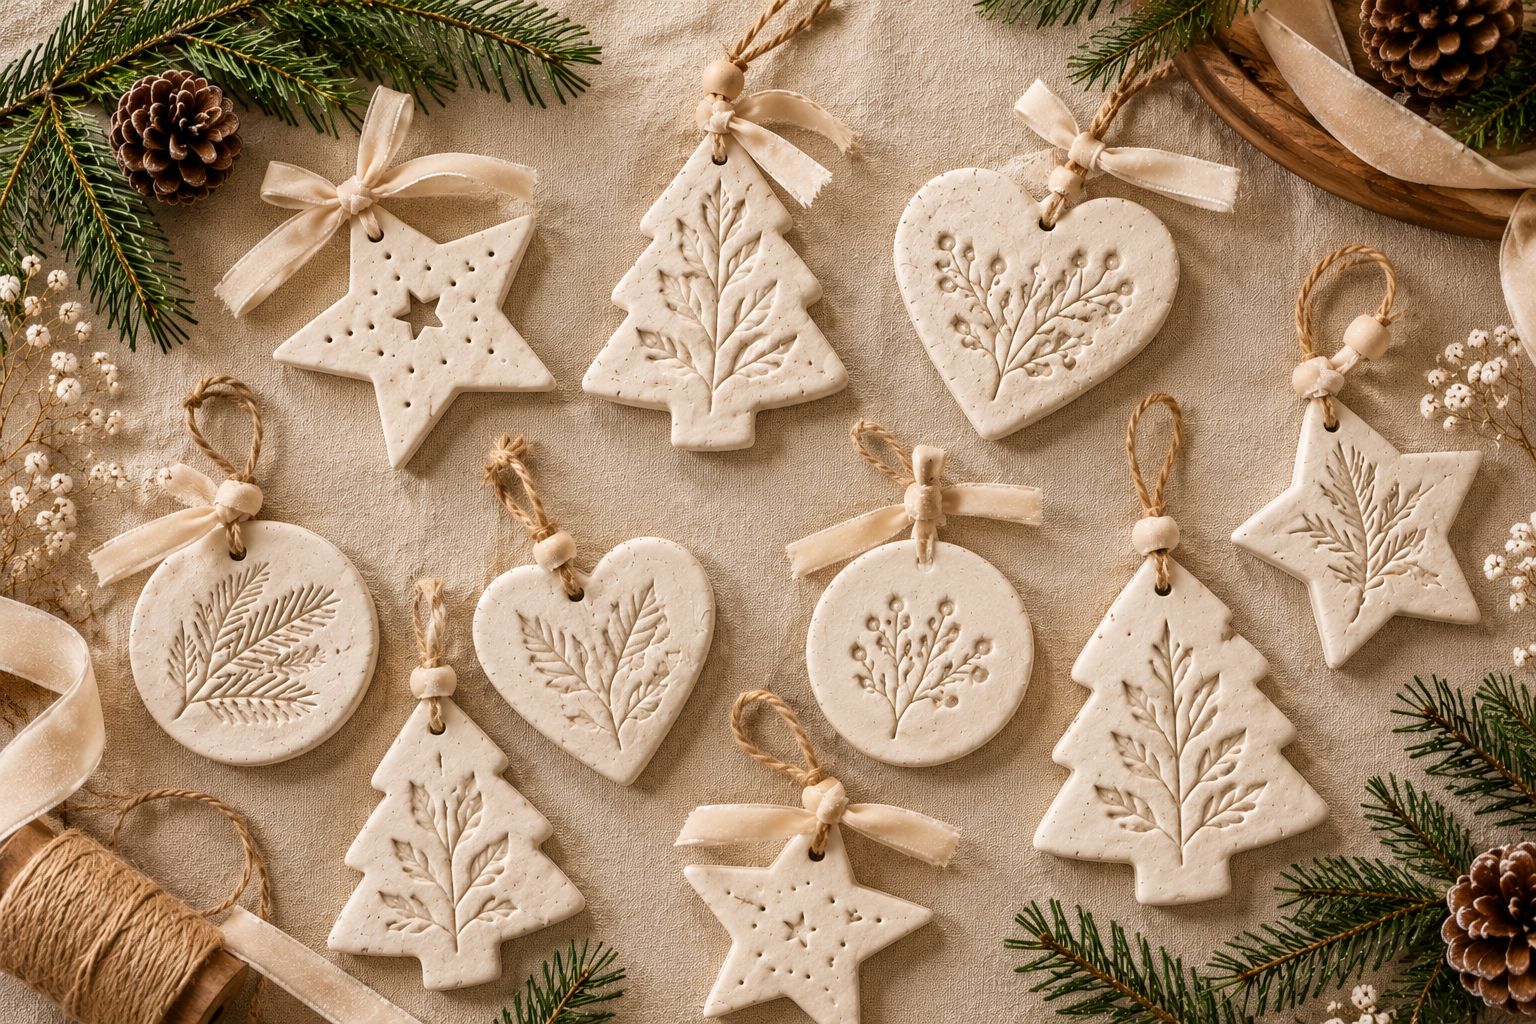
There is something special about decorating your Christmas tree with ornaments you have made yourself. They feel more personal than store-bought decorations, and you can customize every detail to match your home, your Christmas colors, and your decorating style.
Air dry clay Christmas ornaments are one of my favorite DIY Christmas craft ideas because you don’t need a kiln, expensive equipment, or advanced crafting skills to make them.
With a little clay, a few basic supplies, and some patience while the pieces dry, you can create beautiful handmade decorations right at home.
You can make classic stars, tiny houses, personalized name ornaments, delicate botanical designs, and simple minimalist shapes. These ornaments also make thoughtful handmade gifts for family and friends, especially when you package them with ribbon or add a name or special date.

Whether you prefer simple Scandinavian-inspired decorations, rustic farmhouse Christmas decor, or personalized keepsakes, there are so many ways to make these ornaments suit your style. You can even turn them into thoughtful handmade gifts or create matching sets for your family, making this an easy Christmas craft you’ll want to revisit every year.
Why Make Christmas Ornaments With Air Dry Clay?
Air dry clay is a lovely material for Christmas crafts because it is easy to work with and doesn’t require baking in an oven or firing in a kiln. It hardens as moisture evaporates, making it accessible for beginners who want to try making their own decorations.
Here are a few reasons to give this project a try:
- Beginner-friendly: You can make simple shapes with cookie cutters, even if you have never worked with clay before.
- Easy to customize: Paint the ornaments, stamp patterns into them, add names, or leave them in their natural clay color.
- Affordable: You can make several ornaments from one package of clay, depending on their size and thickness.
- Great for handmade gifts: A set of personalized ornaments makes a thoughtful Christmas present.
- Suitable for different decorating styles: Choose neutral colors for a minimalist tree, white and gold for an elegant look, or traditional red and green for a classic Christmas theme.
- Potentially sellable: If you enjoy making them, you could create small ornament sets for craft fairs or an online handmade shop.
If you are completely new to this craft, start with a few simple shapes before moving on to detailed designs. You can also read my guide to air dry clay beginner tips for more help getting comfortable with the material.
Supplies You’ll Need to Make Air Dry Clay Christmas Ornaments
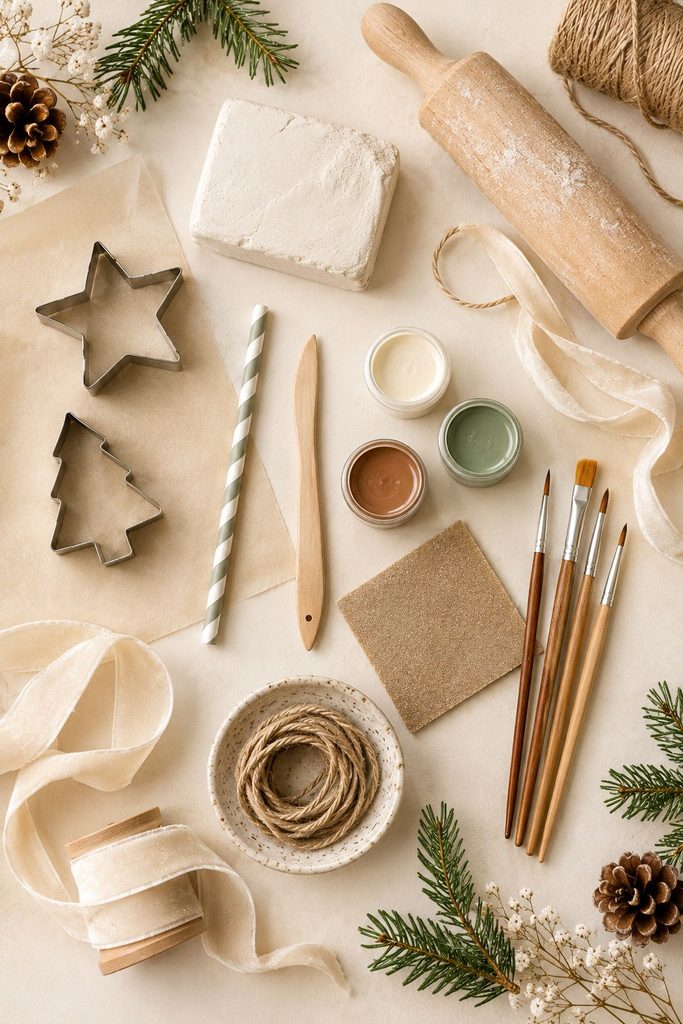
You don’t need a large collection of supplies for this project. Most of the items are inexpensive and easy to find at craft stores or online.
Essential supplies
- Air dry clay: Choose a clay that is suitable for small decorative projects. White clay is especially useful if you want a clean, bright finish.
- Rolling pin: A small craft rolling pin works well, but a smooth, clean kitchen rolling pin can also do the job.
- Cookie cutters: Stars, hearts, trees, circles, bells, and gingerbread-house shapes are all good options.
- Parchment paper or a smooth work surface: This helps prevent the clay from sticking to your table.
- Drinking straw or small round tool: Use this to make a hole for hanging the ornament.
- Craft knife or clay tool: Useful for trimming uneven edges and adding details.
- Fine-grit sandpaper: Helps smooth rough edges after the clay has dried completely.
- Acrylic paints and small paintbrushes: Optional, but useful for adding color and decorative details.
- Ribbon, twine, or ornament string: Choose something that suits the style of your finished ornaments.
- Clay sealer: Optional for decorative pieces that you want to protect from dust and light handling.
You can also use stamps, lace, leaves, textured fabric, or other objects to press patterns into the clay.
How to Make Air Dry Clay Christmas Ornaments
These ornaments are straightforward to make, but the drying stage requires patience. The clay needs to dry thoroughly before you paint, seal, or hang the finished pieces.
Step 1: Prepare Your Work Surface
Cover your work surface with parchment paper or use a clean, smooth craft mat. Make sure your hands and tools are clean so you don’t transfer dirt, fibers, or unwanted marks into the clay.
If the clay is stiff, knead a small portion gently according to the manufacturer’s instructions. Avoid adding water unless the clay packaging recommends it, because too much moisture can make the clay sticky and increase drying time.
Step 2: Roll Out the Clay
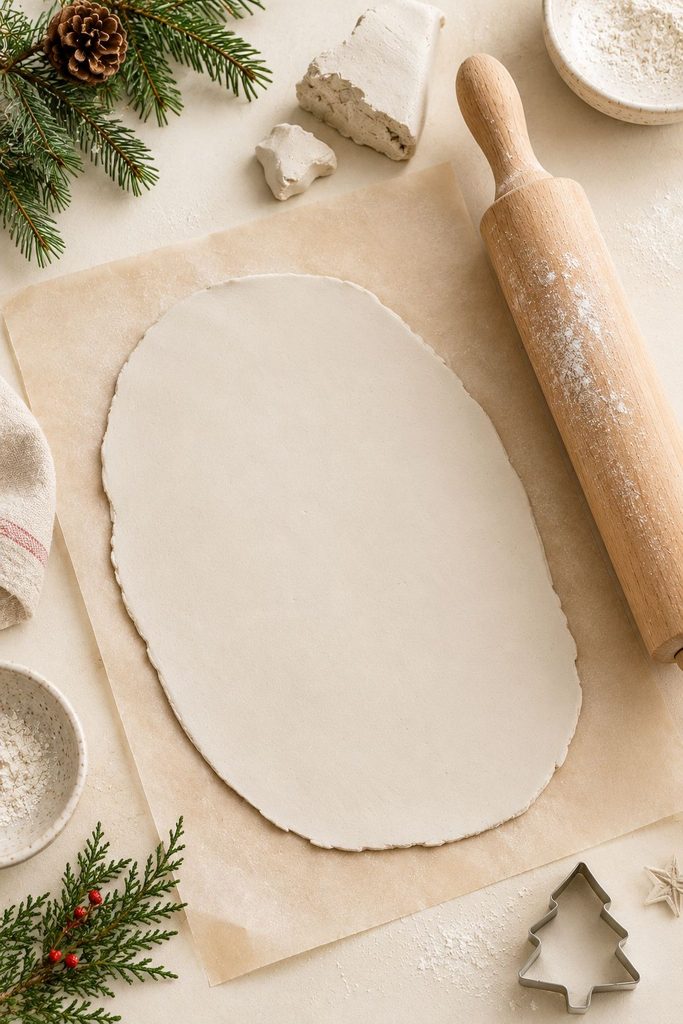
Take a portion of clay and roll it out into an even sheet.
Aim for a thickness of approximately 1/8 to 1/4 inch (about 3 to 6 mm). Very thin ornaments can be fragile, while very thick pieces take longer to dry and may be more likely to develop problems as moisture escapes.
Try to keep the thickness consistent across the sheet. If one side is much thicker than the other, the ornament may dry unevenly.
My tip: Roll the clay between two guides of equal thickness if you have them. This makes it easier to create ornaments that look consistent when displayed together.
Step 3: Cut Out Your Christmas Shapes
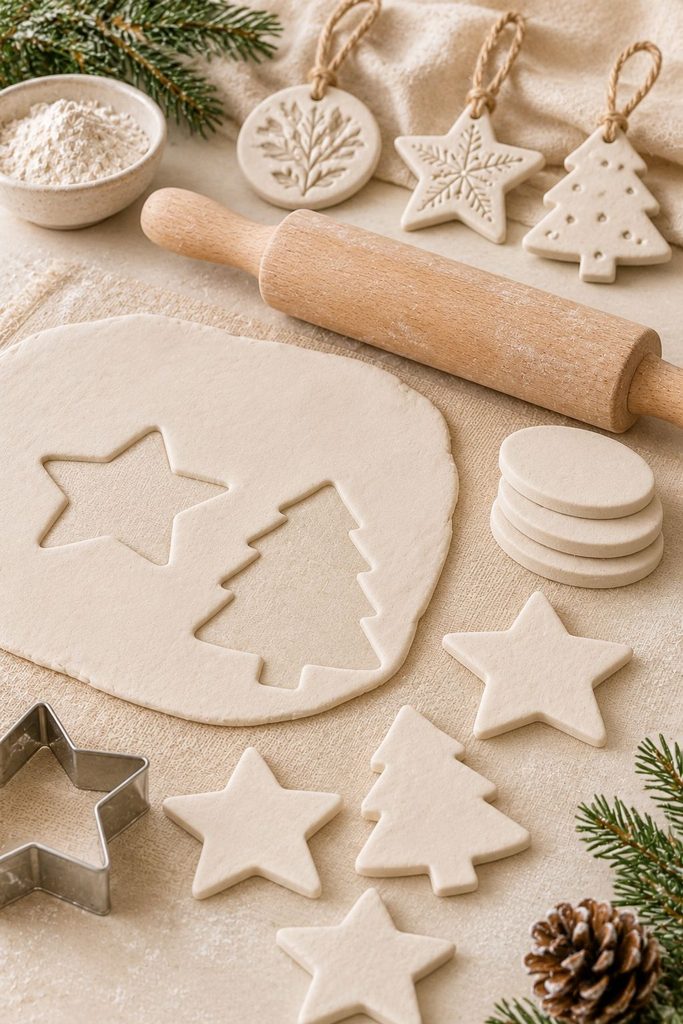
Press your cookie cutters firmly into the rolled clay and remove the excess around each shape.
Some easy shapes to begin with include:
- Stars
- Christmas trees
- Snowflakes
- Hearts
- Circles
- Bells
- Little houses
- Gingerbread-person shapes
Carefully lift away the leftover clay without pulling on the cutouts. If a shape becomes distorted, gently reshape it with your fingers or a clay tool.
Gather the scraps and reroll them if the clay is still workable. Try not to knead the clay excessively, especially if it has started to dry.
Step 4: Smooth the Edges
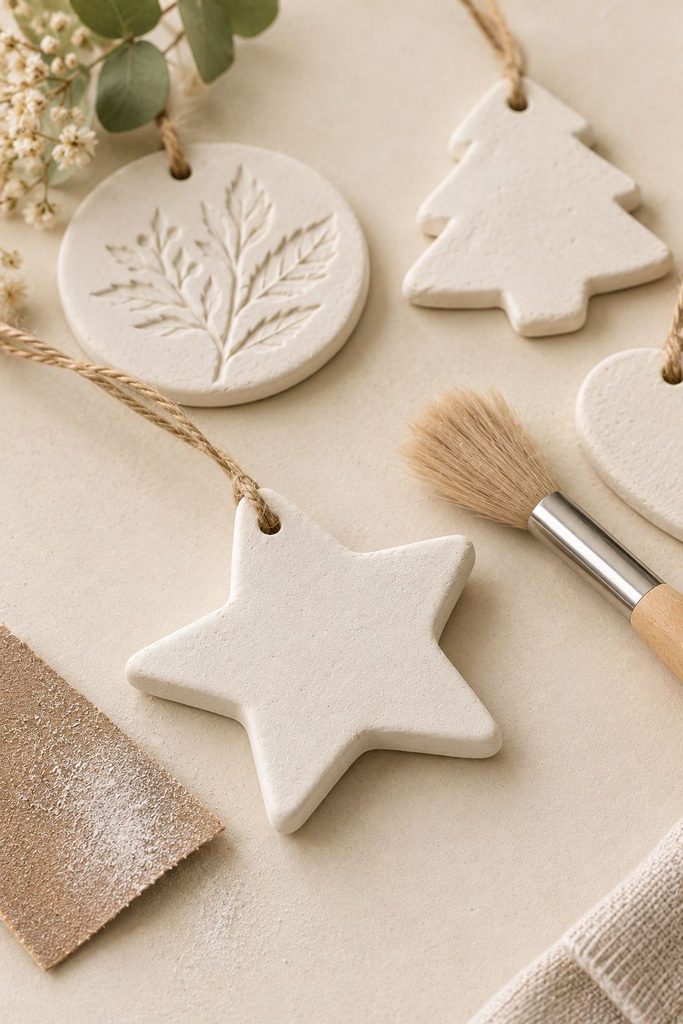
Freshly cut clay ornaments can have rough or slightly jagged edges. Smooth them gently with a fingertip or a small tool.
A lightly damp fingertip may help with some types of clay, but use very little water and follow the manufacturer’s instructions. Too much water can soften the edges and make the surface harder to control.
Take your time with this step because smooth edges make the finished ornaments look much more polished.
Step 5: Add Texture and Decorative Details
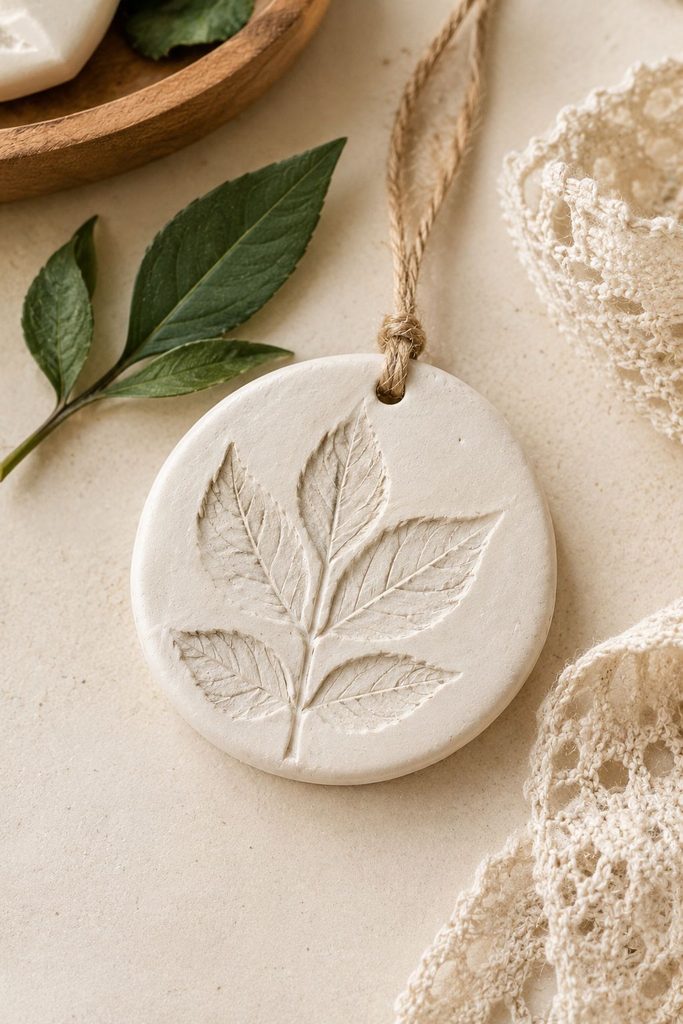
This is where you can make each ornament your own.
Try pressing a small leaf, piece of lace, textured fabric, or rubber stamp into the clay. You can also use the end of a paintbrush to create dots or a blunt tool to draw simple lines.
For a minimalist Christmas look, leave the ornaments plain and focus on their shapes. For a rustic style, try subtle botanical imprints or textured edges.
If you want to make personalized ornaments, use letter stamps to add names, initials, or a year. Press gently and test your stamps on a scrap piece of clay first.
Avoid pressing so deeply that you weaken narrow parts of the ornament.
Step 6: Make a Hole for Hanging
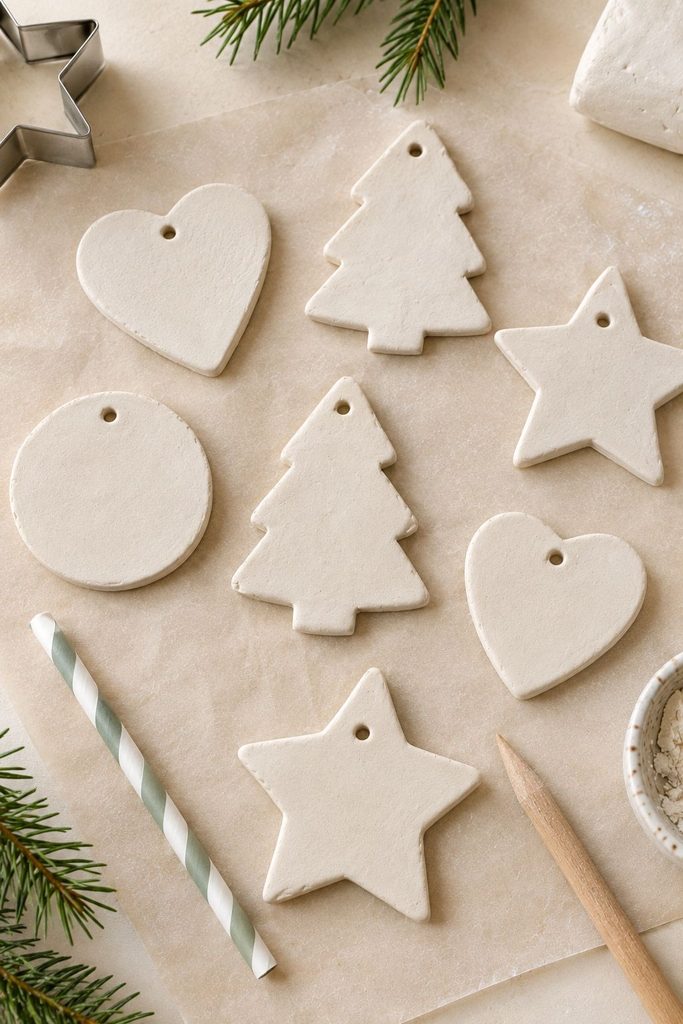
Before the clay dries, create a hole near the top of each ornament using a drinking straw or a small round tool.
Make sure the hole is large enough for your chosen ribbon or string to pass through easily. Leave enough clay around it so the top doesn’t become fragile.
Remove any little pieces of clay left inside the hole and smooth the surrounding area.
This step is important because drilling or forcing a hole into dry air dry clay can cause it to crack or break.
Step 7: Let the Ornaments Dry Completely
Place the ornaments flat on a clean, nonstick surface in a dry, well-ventilated area.
Drying time depends on the clay brand, thickness, humidity, and size of each ornament. Many pieces need at least 24 to 72 hours, and thicker ornaments may take longer.
Turn the ornaments carefully when the surface is firm enough to handle, following the clay manufacturer’s instructions. This can help the underside dry more evenly.
Don’t rush the process by placing the ornaments directly on a radiator or using intense heat. Rapid or uneven drying can contribute to cracking or warping.
The ornaments should be completely dry before you begin painting or sealing them.
Step 8: Sand Any Rough Areas
Once the ornaments are fully dry, check their edges and surfaces.
Use fine-grit sandpaper to smooth small imperfections. Work gently and avoid sanding away details or making narrow sections too thin.
Wipe away the dust with a soft, dry brush or cloth before painting.
If you notice cracks, don’t assume sanding or sealing will fix them. For help understanding why cracks happen and how to prevent them, see my guide to how to avoid cracks in air dry clay.
Step 9: Paint Your Ornaments
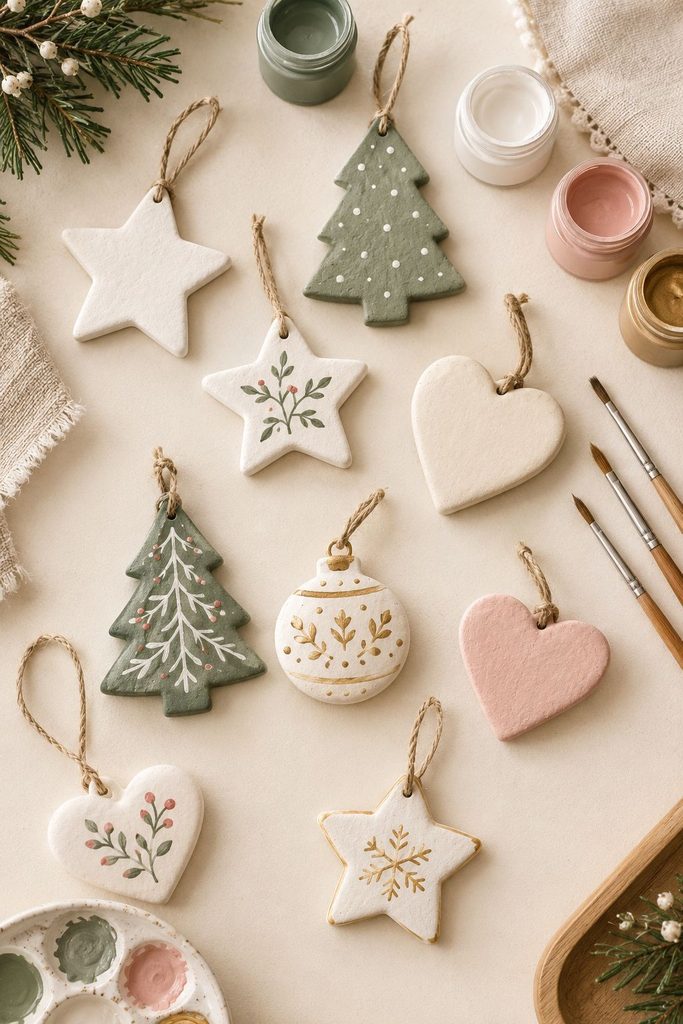
You can leave your ornaments unpainted for a natural, understated look or decorate them with acrylic paint.
Here are a few color combinations worth trying:
- Classic Christmas: Red, green, white, and touches of gold.
- Neutral Christmas: Cream, beige, warm white, and soft brown.
- Elegant Christmas: White, champagne, muted gold, and silver.
- Scandinavian-inspired: White, natural clay tones, and simple black details.
- Soft and feminine: Blush pink, ivory, dusty rose, and pale gold.
Apply thin coats of paint and allow each coat to dry before adding another. Several thin layers usually give you more control than one thick coat.
You can paint the entire ornament one color or add tiny stars, dots, stripes, botanical details, or initials.
For more detailed instructions, read my tutorial on how to paint air dry clay.
Step 10: Seal the Ornaments if Needed
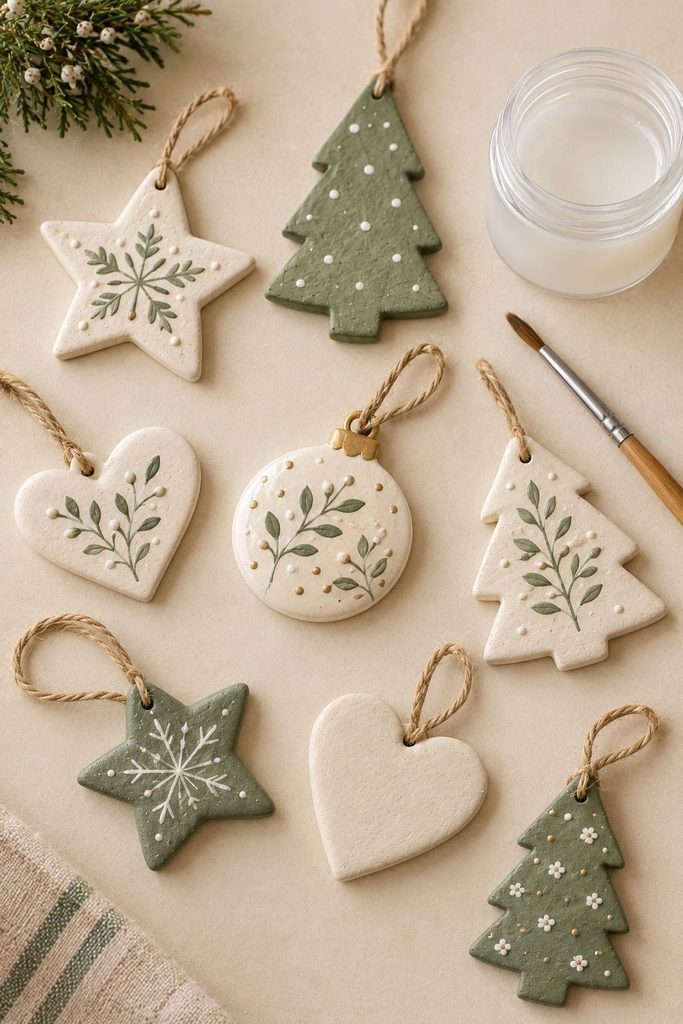
A sealer is optional, but you may want to use one if your ornaments will be handled often or you want to protect the painted surface.
Choose a product compatible with your clay and paint, and follow its instructions for application and drying. Apply thin, even coats rather than one heavy layer.
Depending on the finish you want, you might choose a matte, satin, or glossy sealer. Always test the product on a spare piece first because sealers can change the appearance of the clay or paint.
Remember that sealing does not make ordinary air dry clay waterproof or unbreakable. These ornaments are decorative items, so keep them away from moisture and handle them carefully.
For more details, see my guide to how to seal air dry clay.
Step 11: Add Ribbon or String
Once the paint and sealer are completely dry, thread ribbon, twine, or ornament string through the hole.
Tie a secure loop that is long enough to fit over a Christmas tree branch. Velvet ribbon gives the ornaments a softer, elegant look, while natural twine works well with rustic or farmhouse decorations.
Before hanging each ornament, check that the hole and surrounding clay are strong enough to support it. Avoid pulling hard on the ribbon, especially if the ornament has a narrow top.
Your handmade air dry clay Christmas ornaments are now ready to display.
10 Air Dry Clay Christmas Ornament Ideas
Once you have mastered the basic technique, you can experiment with different shapes, textures, and finishes. Here are ten ideas to inspire your next Christmas craft session.
1. Classic Star Ornaments
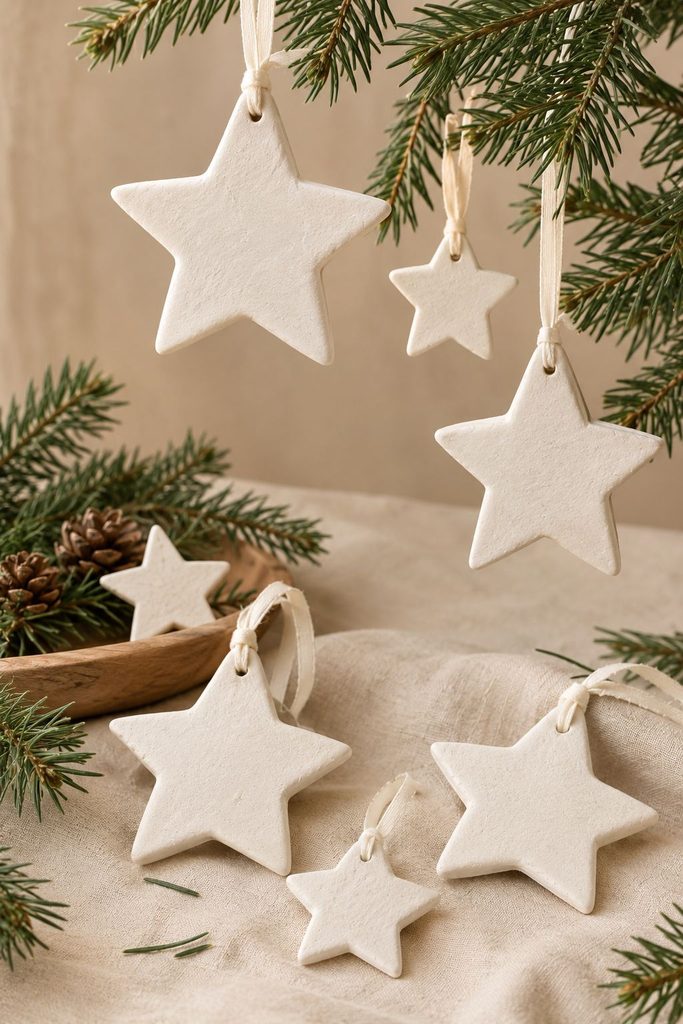
Star ornaments are one of the easiest designs to make, and they suit almost any Christmas decorating style.
Cut out stars using a cookie cutter, smooth the edges, and make a hanging hole near the top. You can leave them white, paint them gold, or add a subtle textured pattern.
How to style them: Make a matching set in two or three sizes and hang them throughout the tree for a coordinated look.
Pro tip: Avoid making the points too thin, as they can be more likely to chip or break.
2. Minimalist Christmas Tree Ornaments
Small Christmas tree shapes look beautiful in neutral colors or classic green.
Use a tree-shaped cutter, then add tiny dots, shallow lines, or simple geometric details. You can also leave the surface plain and let the silhouette do the work.
How to style them: Paint a few ornaments in muted green and leave the rest cream or white for a natural, understated tree.
Pro tip: Keep the branches relatively thick so they are less likely to break during handling.
3. Personalized Name Ornaments
Personalized ornaments are lovely for family trees, children’s gifts, or commemorating a special Christmas.
Cut out circles, stars, or simple tags, then press a name or initials into the clay before it dries. Add a year if you want to remember a particular holiday.
How to style them: Use one consistent shape and color for the whole family, then add a different ribbon color for each person.
Pro tip: Test the letter stamps on scrap clay first so you can check the spacing before working on the finished ornament.
4. Botanical Leaf Ornaments
If you enjoy natural textures, leaf-imprint ornaments are a beautiful option.
Press a small leaf gently into the rolled clay to transfer its veins and shape. Remove the leaf carefully, then trim the clay into a circle, oval, or organic shape.
How to style them: Keep the clay natural or use white paint with a light wash of muted green or brown.
Pro tip: Choose leaves with visible veins and a relatively flat shape to make a clearer imprint.
5. Rustic Farmhouse Ornaments
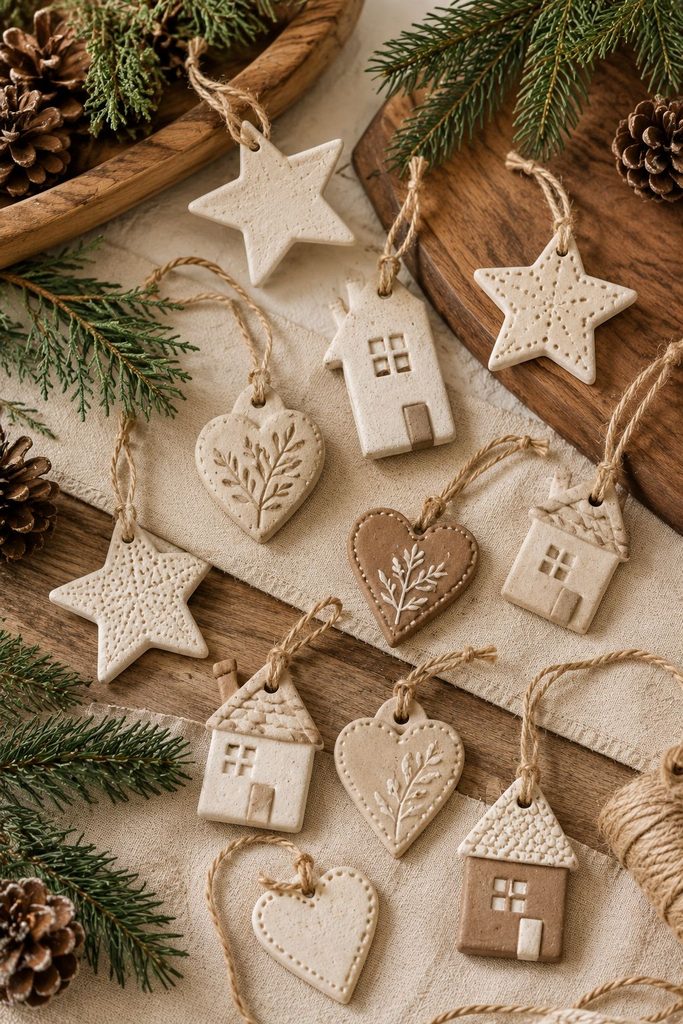
Rustic ornaments work especially well with simple shapes, neutral paint, and natural ribbon.
Try circles, stars, hearts, and little houses. Add subtle lines or fabric impressions, then finish with cream, beige, or warm white paint.
How to style them: Pair them with wooden decorations, natural greenery, and twine.
Pro tip: A slightly imperfect handmade look can be part of the charm, so you don’t need to make every ornament identical.
6. Snowflake Ornaments
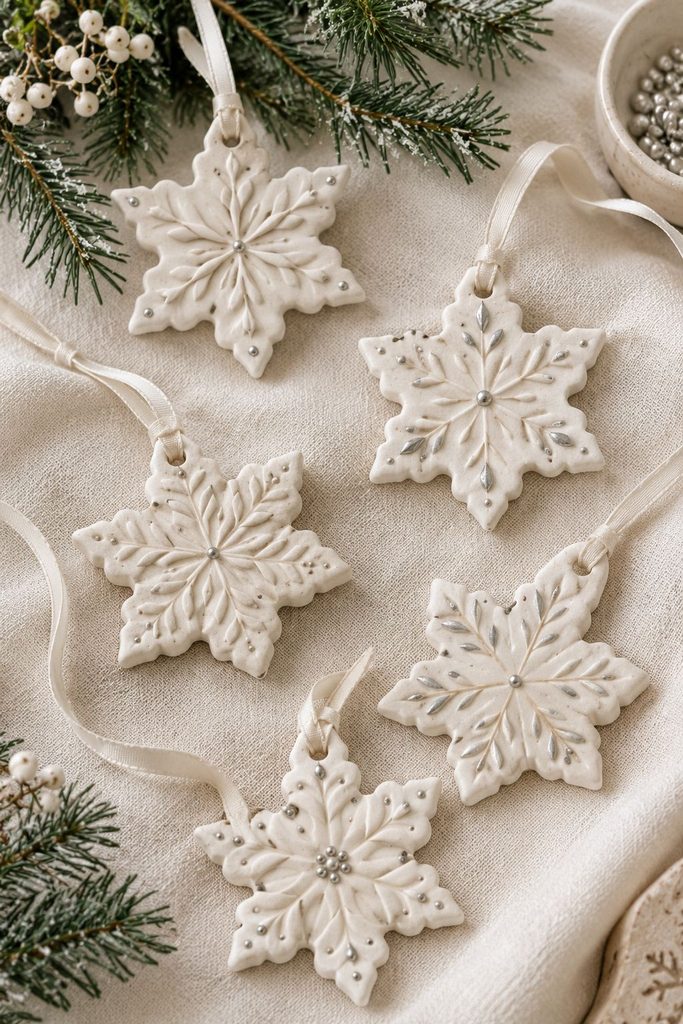
Snowflake designs create a delicate winter look, especially when painted white or silver.
You can use a snowflake-shaped cutter or draw simple lines and dots into a circular ornament. If you’re making intricate shapes, leave enough clay between the narrow sections to help prevent breakage.
How to style them: Combine white snowflakes with clear or silver decorations for a frosty Christmas tree.
Pro tip: Start with a simple snowflake pattern if you’re new to clay. Intricate cutouts are more fragile.
7. Mini House Ornaments
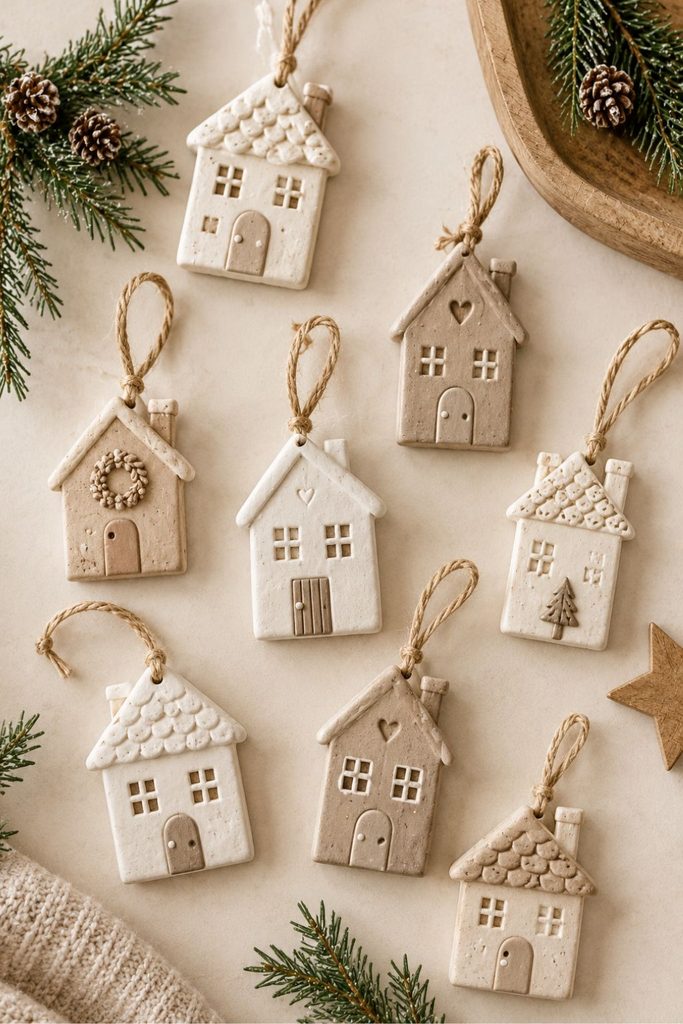
Little house ornaments look charming on a Christmas tree or as part of a seasonal garland.
Cut out a simple house shape and use a small tool to add a door, windows, or roof lines. Keep the details shallow so they don’t weaken the clay.
How to style them: Paint the houses white with muted brown roofs, or use soft colors for a little village effect.
Pro tip: Keep the roof and walls reasonably thick and even to reduce the risk of fragile edges.
8. Heart-Shaped Christmas Ornaments
Heart ornaments are easy to personalize and make thoughtful keepsakes.
Use a heart-shaped cutter, smooth the edges, and add initials, a date, or a simple pressed pattern. A small heart can be left plain, while a larger one gives you more room for lettering.
How to style them: Use blush, ivory, or dusty rose paint with a velvet ribbon for a soft, romantic Christmas look.
Pro tip: Make the hanging hole before the clay dries, and don’t place it too close to the top edge.
9. Textured Lace Ornaments
Lace and textured fabric can create beautiful impressions without requiring complicated tools.
Place a clean piece of lace over the rolled clay and press gently with a rolling pin. Remove the fabric slowly, then cut out your chosen shapes.
How to style them: Leave the ornaments white or add a thin coat of paint that highlights the texture.
Pro tip: Test the fabric on a scrap piece first. Some patterns transfer more clearly than others, and very deep impressions may weaken the ornament.
10. Gold-Detailed Ornaments
For a more elegant finish, try simple clay ornaments with gold accents.
Start with stars, circles, or tree shapes. Paint them white, cream, or beige, then add small gold dots, thin lines, or painted edges once the base color is dry.
How to style them: Pair them with white lights, gold ribbon, and a few larger statement decorations.
Pro tip: Use a small brush and a light touch. A few details often look more refined than covering the entire ornament in metallic paint.
How to Prevent Air Dry Clay Christmas Ornaments From Cracking
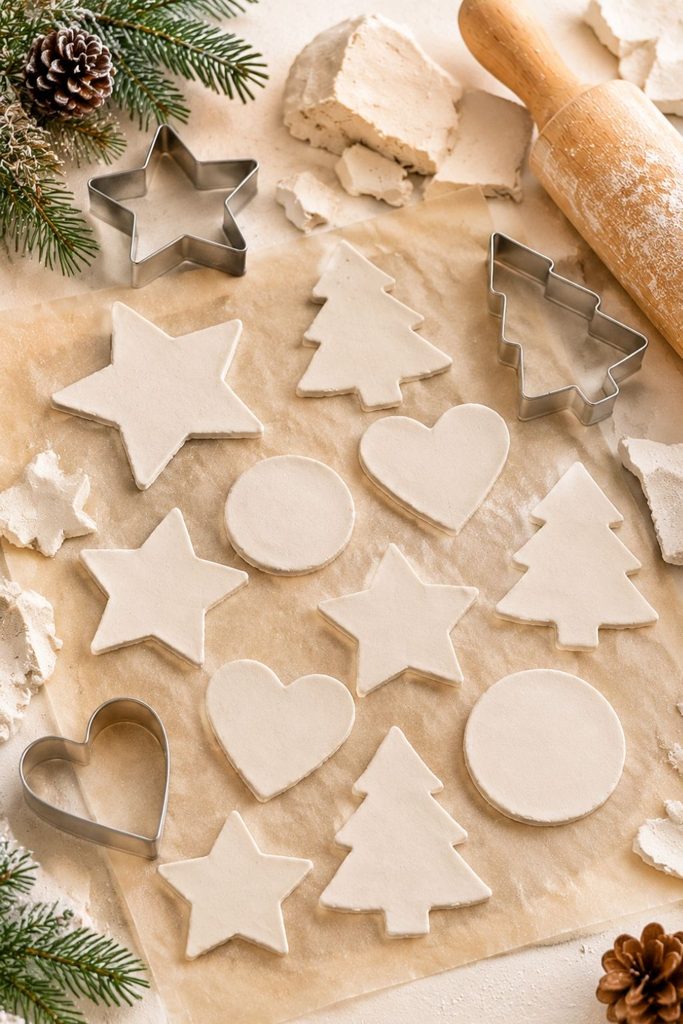
Cracking is one of the most frustrating problems when you’re working with air dry clay, especially after spending time shaping and decorating each piece.
Although some cracking can occur because of the clay itself, a few habits can help reduce the risk.
Keep the clay an even thickness
Uneven sections dry at different rates. Roll the clay to a consistent thickness and avoid creating thick centers with very thin edges.
Avoid making the ornaments too thin
Very thin ornaments may be fragile and can break during sanding, painting, or hanging. A thickness of about 1/8 to 1/4 inch is a useful starting point for many small ornaments, although the ideal thickness depends on the clay and design.
Let the ornaments dry gradually
Place them in a dry, well-ventilated area away from direct heat. Very rapid or uneven drying can contribute to warping and cracking.
Be careful with added water
Adding too much water can make the clay difficult to handle and may increase drying time. Follow the instructions for your particular clay rather than assuming every type responds the same way.
Don’t rush the decorating stage
Painting or sealing an ornament before it has dried completely can trap moisture or affect the finish. Give the pieces enough time to dry all the way through.
If you want to learn more about this issue, read my guides on preventing cracks in air dry clay and fixing cracked air dry clay.
How to Decorate With Handmade Clay Ornaments
Once your ornaments are finished, you can use them in more ways than simply hanging them on a Christmas tree.
Create a coordinated Christmas tree
Choose two or three colors and repeat them throughout your ornament collection. For example, cream, beige, and muted gold create a soft neutral look, while red, white, and green feel more traditional.
Mix handmade clay pieces with other decorations so the tree has a variety of textures and sizes.
Use them for gift wrapping
Tie a small clay star or heart onto a wrapped present instead of using a standard gift tag. You can stamp the recipient’s initial into the clay or attach a paper tag to the ribbon.
This works especially well with kraft paper, plain white wrapping paper, or fabric gift wrap.
Make a handmade ornament garland
Thread several lightweight ornaments onto a sturdy ribbon or string to create a seasonal garland.
Leave enough space between each ornament so they don’t knock against one another too much. Check that every piece is fully dry and strong enough before stringing it.
Add them to holiday place settings
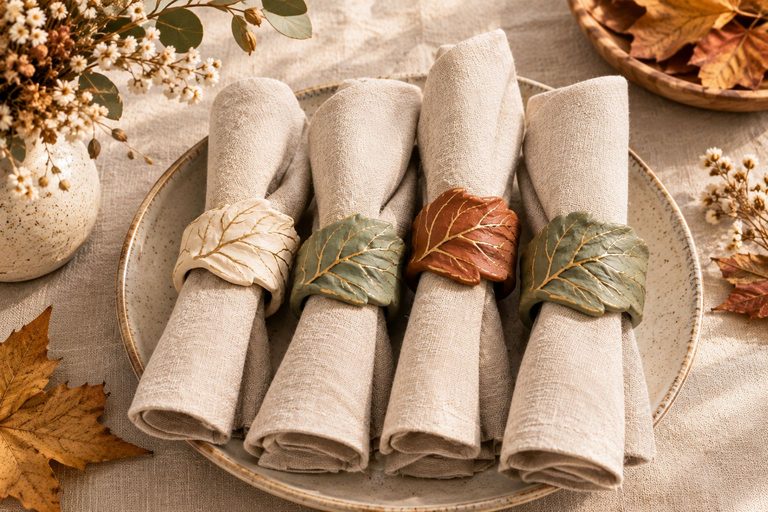
A small clay ornament can double as a decorative place-setting accent. Tie it around a napkin or place it beside a name card.
Keep the ornaments separate from food and drink, and don’t use ordinary air dry clay pieces as food-contact items.
Give them as handmade Christmas gifts
Package a set of ornaments in a small gift box with tissue paper, or wrap each piece individually to reduce the chance of chips during transport.
If you’re giving personalized ornaments, double-check spelling and dates before the clay dries.
Can You Sell Air Dry Clay Christmas Ornaments?
Yes, handmade clay ornaments can be a seasonal product to explore if you enjoy crafting and want to sell your work. Personalized ornaments, matching sets, and neutral Christmas decorations may appeal to people looking for something more individual than mass-produced decor.
Before selling, consider the time required to make each piece, the cost of clay and other supplies, packaging, platform fees, and shipping materials. Don’t price your work based only on the cost of the clay. Your time and the care that goes into finishing each ornament matter too.
Tips for selling your ornaments
- Offer sets: Create matching groups of three, four, or six ornaments.
- Provide personalization: Names, initials, and dates can make the pieces more meaningful.
- Photograph them clearly: Use natural light and a simple background so buyers can see the texture and finish.
- Package carefully: Air dry clay can break, so protect each ornament with suitable cushioning.
- Start with a small collection: Make a few designs and see which ones people respond to before buying large quantities of supplies.
- Be clear about care: Tell customers that the ornaments are decorative and should be kept dry and handled gently.
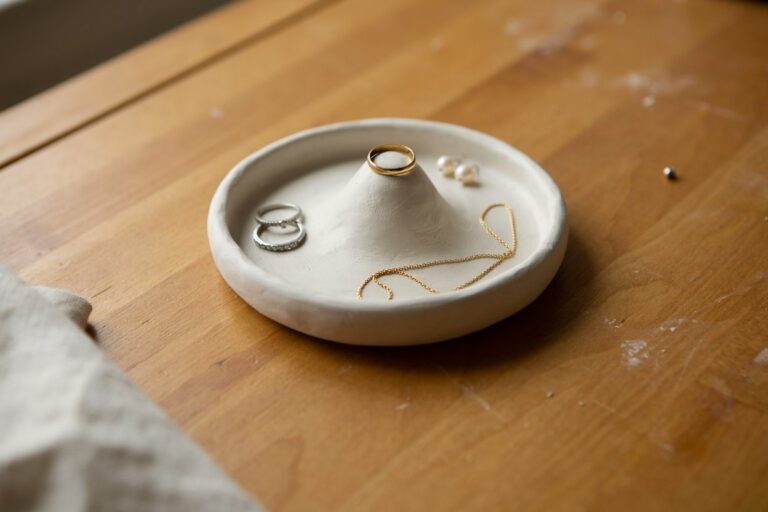
If you are interested in building a wider handmade clay collection, you could also explore projects such as air dry clay coasters.
Common Mistakes to Avoid
Even a simple project can become frustrating if you rush the process. Keep these common mistakes in mind as you work.
Making the clay too thin: Thin pieces and narrow details can break more easily. Keep the thickness consistent and avoid delicate projections.
Forgetting the hanging hole: Make the hole while the clay is still workable. Trying to force a hole into a fully dried ornament can cause damage.
Painting before the clay is dry: Give the ornaments enough time to dry thoroughly before applying paint or sealer.
Using too much water: Excess moisture can make the clay sticky and harder to control. Use only what the product instructions recommend.
Applying thick coats of paint or sealer: Heavy coats can obscure texture and may take longer to dry. Use thin coats and allow adequate drying time.
Hanging ornaments before checking them: Inspect each piece around the hole and along narrow edges. If an ornament looks weak or cracked, don’t hang it where it could fall and break.
Expecting the sealer to make the clay waterproof: Most ordinary air dry clay projects remain vulnerable to moisture even when sealed. Store and display the ornaments in dry conditions.
Frequently Asked Questions
How long do air dry clay Christmas ornaments take to dry?
Many small ornaments take around 24 to 72 hours to dry, but the exact time depends on thickness, clay type, humidity, and room conditions. Thicker pieces may need longer. Follow the manufacturer’s instructions and make sure the ornaments are dry throughout before painting or sealing.
Do I need to bake air dry clay Christmas ornaments?
No. Air dry clay hardens as it dries, so it does not normally need to be baked or fired. Always check the packaging for the instructions for your particular product.
Can I paint air dry clay ornaments?
Yes. Acrylic paint is a common choice for decorative air dry clay ornaments. Apply it after the clay has dried completely, using thin coats and allowing each coat to dry before adding details.
Do I need to seal air dry clay ornaments?
Not necessarily. A sealer is optional for many decorative ornaments. You may choose one to help protect the surface from dust and light handling, especially if the pieces are painted. Use a compatible product and follow its instructions.
Are air dry clay Christmas ornaments waterproof?
No. Ordinary air dry clay is generally not waterproof, and a coat of sealer does not automatically make it waterproof. Keep the ornaments away from water, damp areas, and outdoor conditions unless the clay and finishing products are specifically designed and tested for that use.
Why did my clay ornaments crack while drying?
Cracks can occur for several reasons, including uneven thickness, rapid or uneven drying, excess water, or characteristics of the clay itself. Keep the clay evenly rolled and allow the ornaments to dry gradually in a well-ventilated space.
Can I use cookie cutters for air dry clay ornaments?
Absolutely. Cookie cutters are one of the easiest ways to create neat, consistent shapes. Use cutters reserved for crafts rather than food preparation, or clean and separate your tools carefully according to the materials used.
Can children make air dry clay Christmas ornaments?
This can be a fun supervised craft for children. Choose simple shapes, help with any cutting tools, and follow the age and safety guidance on the clay packaging. Young children should not put clay, paint, or finishing products in their mouths.
What should I use to hang my clay ornaments?
Ribbon, twine, and suitable ornament string all work well. Make the hole before the clay dries and leave enough space around it to prevent the top from breaking. Choose lightweight hanging materials and handle the finished ornaments gently.
Can I make air dry clay Christmas ornaments in advance?
Yes. Making them ahead of Christmas is a good idea because the clay needs time to dry and the paint or sealer may need additional drying time. Store the finished ornaments in a dry place where they won’t be crushed or exposed to moisture.
Final Thoughts
Making air dry clay Christmas ornaments is a simple way to add something personal to your holiday decorations. You can keep the designs clean and minimal, experiment with botanical textures, paint them in your favorite Christmas colors, or create personalized keepsakes for people you love.
Start with a few easy shapes, allow the clay to dry completely, and take your time with the finishing details. Once you get comfortable with the process, you can experiment with more designs and build a collection that suits your home.
And if you end up loving the process, you may find that handmade ornaments become a Christmas tradition you look forward to every year.





One Comment