DIY Fabric Cord Keeper: Easy Sewing Tutorial for Beginners
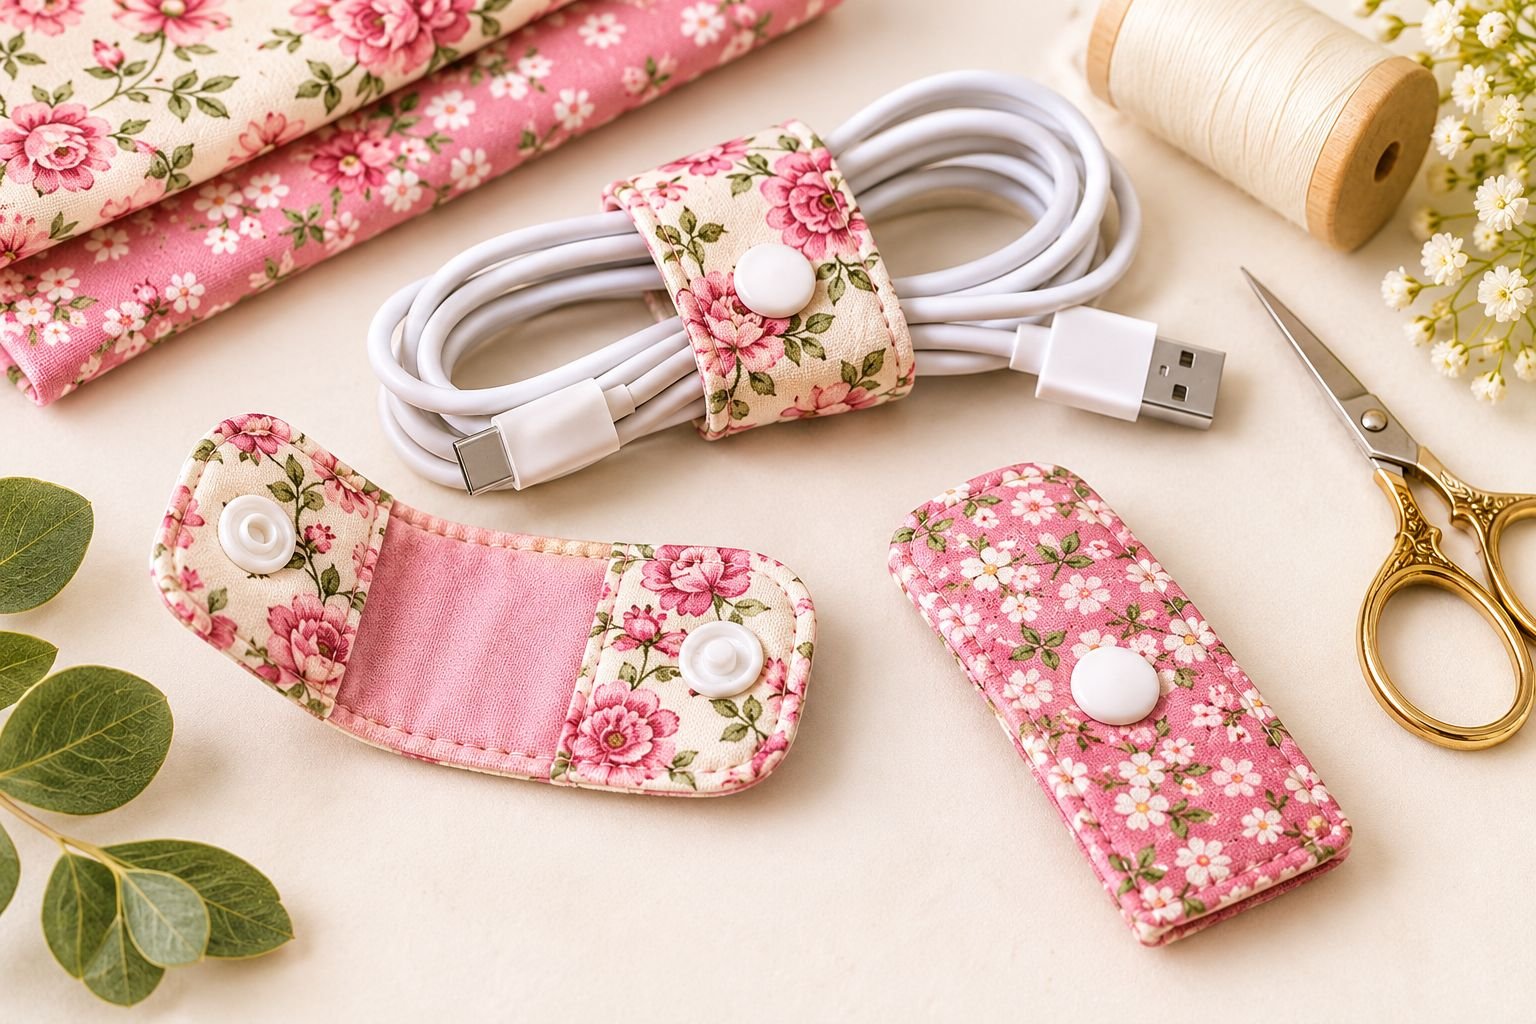
If you have ever opened a drawer and found your phone charger tangled with your headphones, USB cables, and other little cords, you know how quickly they can become a mess. I used to throw my cables into a drawer or tuck them into my bag, only to spend time untangling everything when I needed something.
That is why I love the idea of making a DIY fabric cord keeper. It is a small sewing project, but it solves a genuinely annoying everyday problem.
Instead of buying plastic cable organizers, you can make your own using pretty cotton fabric, a little interfacing, and a couple of snap fasteners.
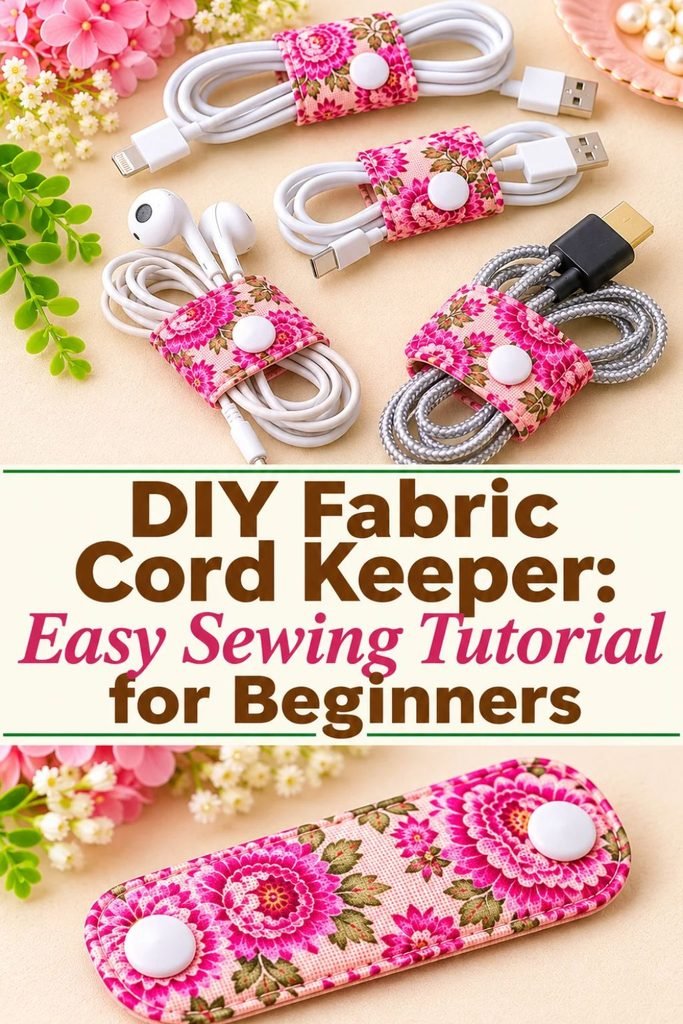
These handmade fabric cord wraps are also a lovely way to use up fabric scraps. You can make several in different patterns, personalize them with your favorite colors, or sew a few as inexpensive handmade gifts.
The best part is that you do not need advanced sewing skills. If you can cut fabric, sew a simple seam, and attach a snap fastener, you can make this project.
In this tutorial, I will walk you through the materials, cutting measurements, sewing process, and finishing details so you can make a neat fabric cord keeper even if you are still learning to sew.
What Is a Fabric Cord Keeper?
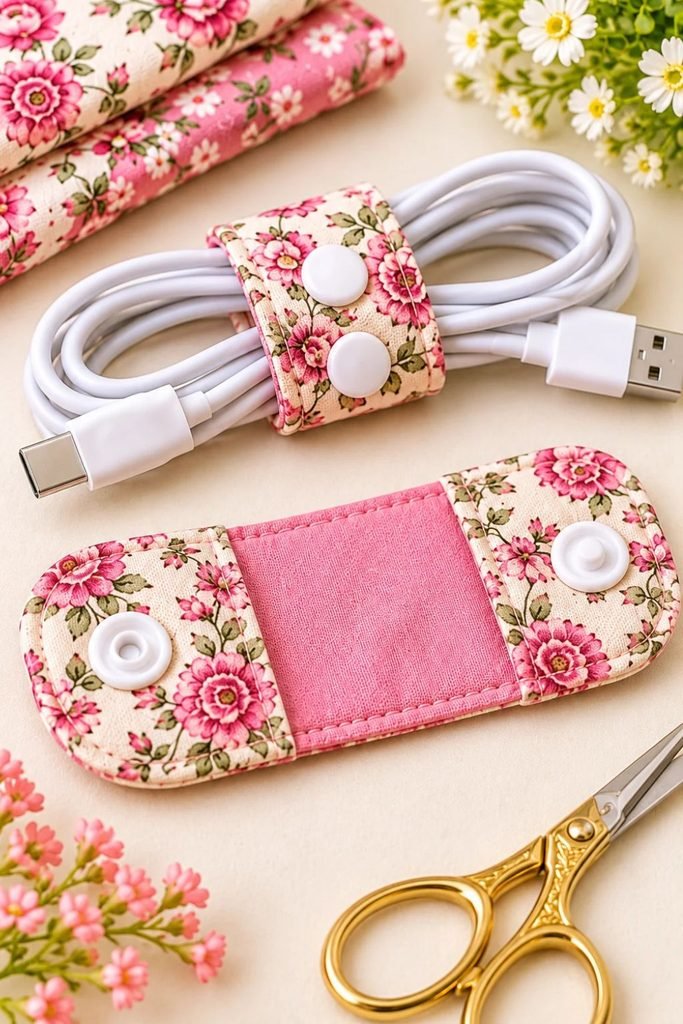
A fabric cord keeper is a small fabric accessory designed to wrap around folded cables and keep them neatly together. It usually has a simple padded or interfaced body with rounded ends and snap fasteners that close around the cord.
You can use one to organize phone charging cables, USB cords, earbuds, computer cables, and other small electronics accessories.
Unlike a loose elastic band, a fabric cord keeper gives you a little more structure and looks much prettier. You can choose the fabric yourself, which means it can match your personal style or the person you are making it for.
For this tutorial, we are making a simple rectangular cord keeper with softly rounded ends and snap closures.
Why You’ll Love This DIY Fabric Cord Keeper
There are plenty of reasons to make these little fabric organizers, especially if you enjoy simple sewing projects.
They are beginner-friendly. The construction is straightforward, and you do not need complicated sewing techniques.
They use small fabric scraps. This is one of my favorite things about the project. You can use leftover cotton fabric from previous sewing projects instead of purchasing a large amount of material.
They are practical. A cord keeper makes it easier to store chargers and cables without having them become tangled.
They are easy to customize. Floral cotton, gingham, polka dots, stripes, or neutral linen-look fabric can all work beautifully.
They make thoughtful handmade gifts. You can sew a matching set for someone who loves keeping their desk, handbag, or travel accessories organized.
Materials You’ll Need
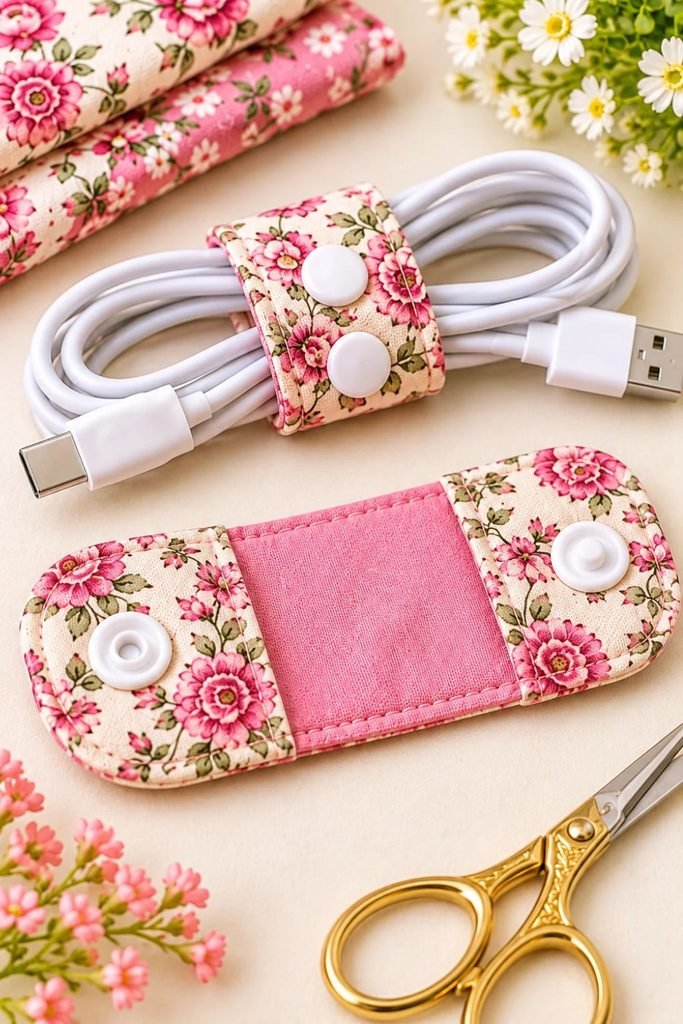
You only need a few basic sewing supplies for this project.
- Two small pieces of cotton fabric
- Lightweight fusible interfacing
- KAM snap fasteners or suitable sew-on snaps
- Matching sewing thread
- Sewing machine
- Fabric scissors or rotary cutter
- Ruler
- Fabric marking pen or tailor’s chalk
- Iron and ironing board
- Snap fastener pliers, if using KAM snaps
- Turning tool or blunt pencil
Choosing your fabric: I recommend using quilting cotton or another medium-weight woven cotton. It is easy to sew, comes in many beautiful prints, and is sturdy enough for a small accessory like this.
Avoid very thick fabrics because they can make the rounded ends bulky and difficult to turn neatly.
Fabric Cord Keeper Measurements
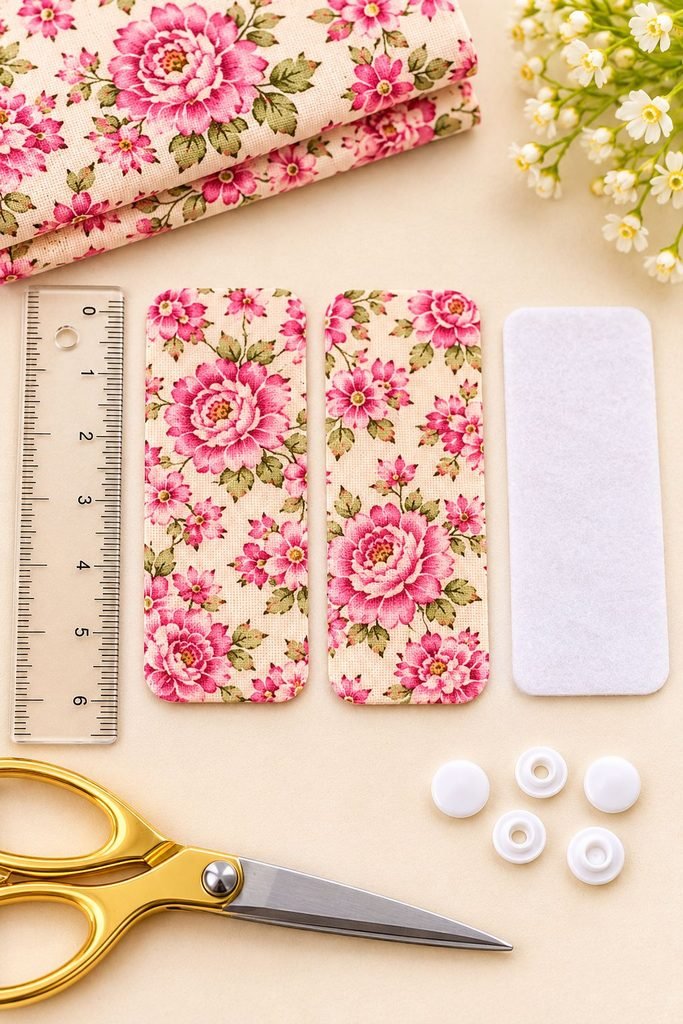
For a simple small cord keeper, you can start with these measurements:
- Two fabric pieces measuring approximately 2.5 x 5 inches each
- One piece of lightweight interfacing measuring approximately 2 x 4.5 inches
These are suggested starting measurements rather than a fixed commercial pattern. You can adjust the size depending on the cables you want to organize.
The finished cord keeper will be approximately 2 x 4.5 inches, depending on your seam allowance and finishing.
If you want to make a larger version for thicker charging cables, increase the length and width slightly. For small earphone cords, a smaller version may be enough.
How to Make a DIY Fabric Cord Keeper
Now let’s make the fabric cord keeper. Take your time with the cutting and pressing because those little details make a difference to how neat the finished accessory looks.
Step 1: Cut Your Fabric Pieces
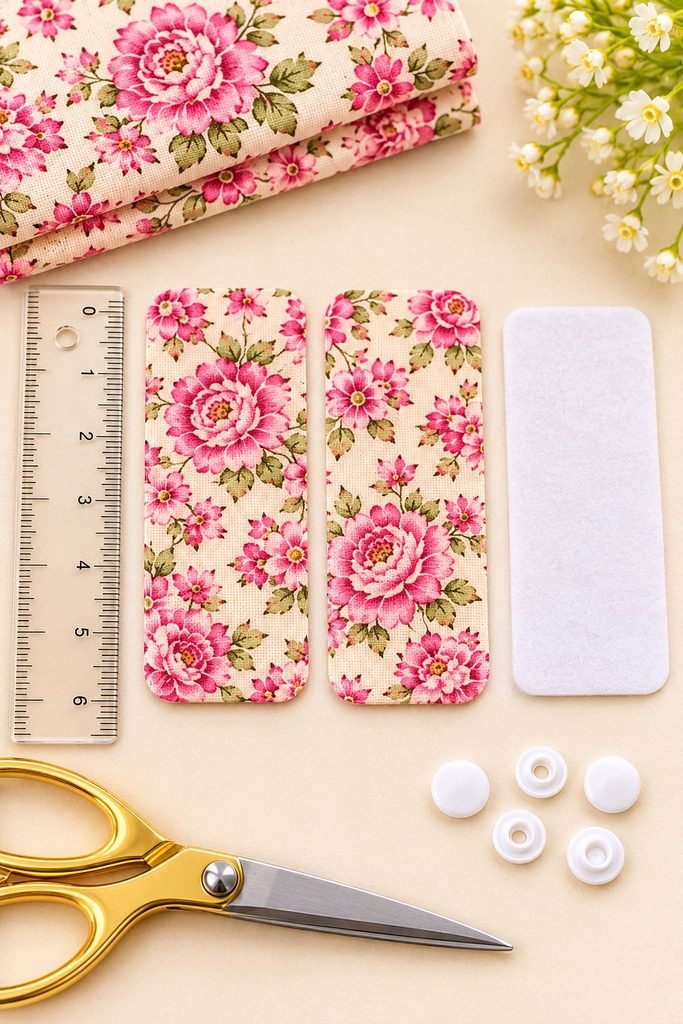
Start by washing and pressing your cotton fabric if necessary. This helps remove wrinkles and makes it easier to cut accurately.
Cut two matching fabric pieces measuring approximately 2.5 x 5 inches.
You can use the same fabric for both sides or choose two coordinating prints. I think using two different but complementary fabrics makes the finished cord keeper look especially cute.
Once your pieces are cut, gently round the corners at both ends. You can use a small round object as a guide or carefully trim the corners freehand.
Try to keep the curves similar on all four corners. They do not need to be perfect, but matching curves will make the finished piece look more professional.
Step 2: Add the Fusible Interfacing
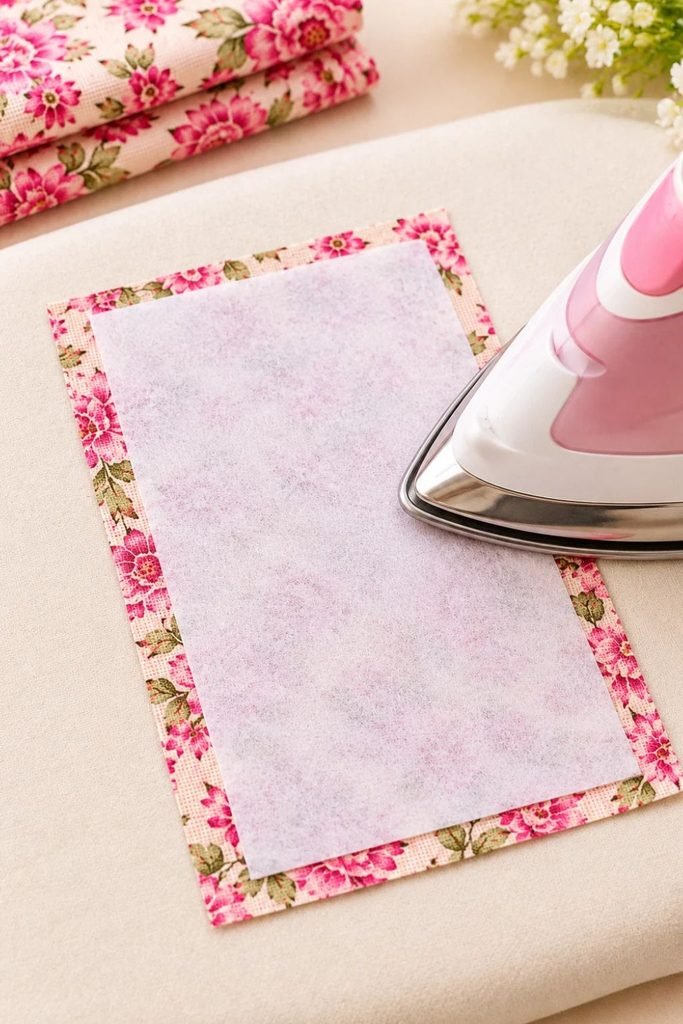
Take your lightweight fusible interfacing and cut it slightly smaller than the fabric pieces.
Position it on the wrong side of one fabric piece, leaving a small margin around the edges.
Follow the manufacturer’s instructions to fuse it in place using your iron. Avoid sliding the iron back and forth if the interfacing instructions recommend pressing instead.
The interfacing gives the cord keeper a little structure and helps it hold its shape. You do not want it to become too stiff, so lightweight interfacing is a good choice.
Allow the fabric to cool before moving on.
Step 3: Place the Fabric Pieces Together
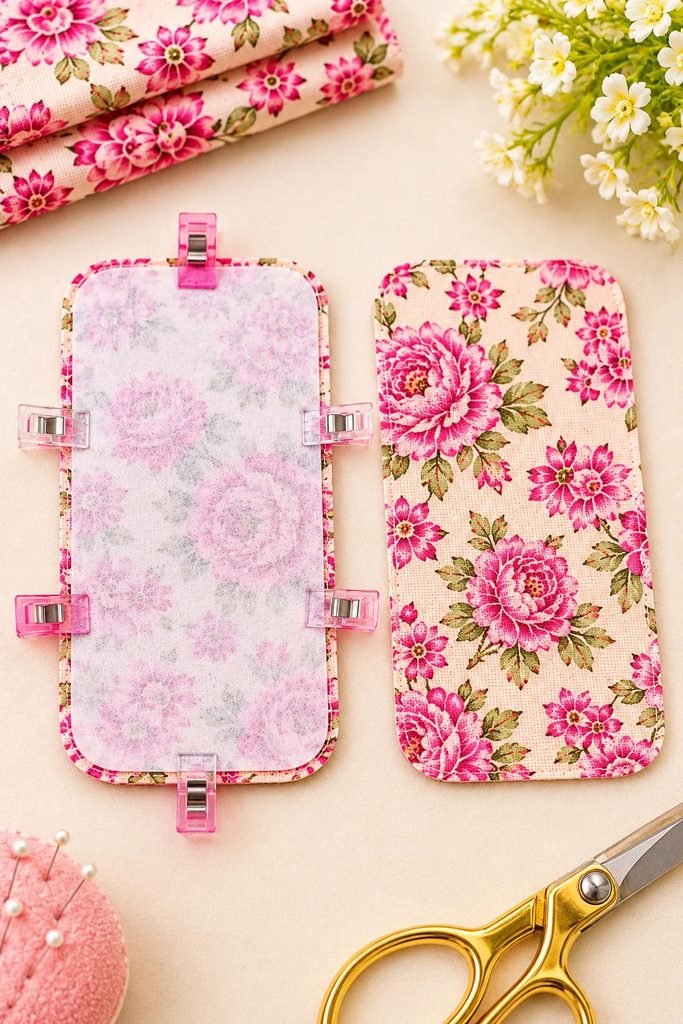
Lay the two fabric pieces on top of each other with their right sides facing inward.
This means the printed or pretty sides should be touching, while the wrong sides face outward.
Make sure the rounded corners line up as closely as possible.
Pin or clip around the edges to keep the layers from shifting while you sew.
Step 4: Sew Around the Edges
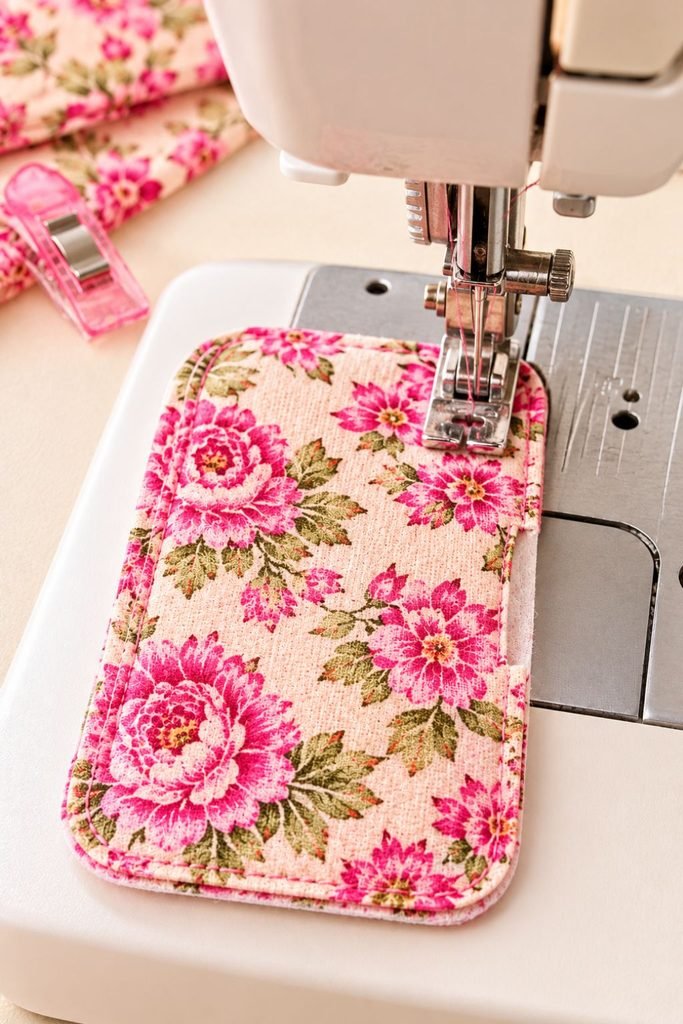
Take your fabric to the sewing machine and sew around the perimeter using a consistent seam allowance of approximately 1/4 inch.
Leave a small opening along one straight edge. This opening will allow you to turn the fabric right side out.
When you reach each rounded corner, slow down and carefully guide the fabric around the curve. Stop with your needle down if you need to reposition the fabric.
Backstitch at the beginning and end of your seam to secure the stitching.
Do not sew the turning gap closed just yet.
Step 5: Trim, Turn, and Press
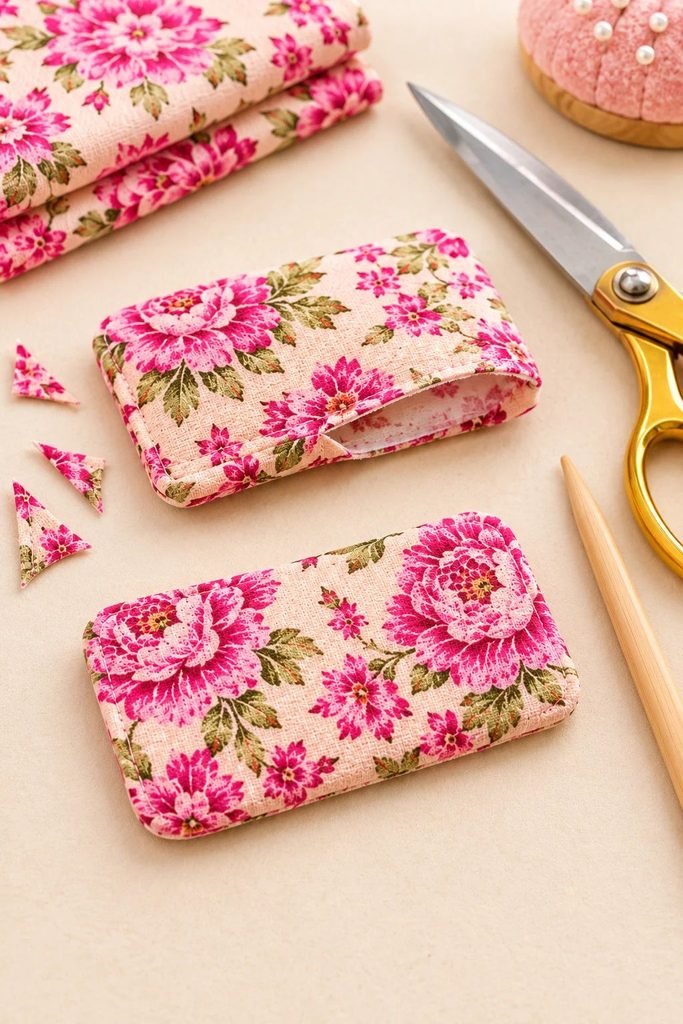
Before turning the cord keeper right side out, trim away excess fabric at the corners. Be careful not to cut through your stitching.
You can also trim the seam allowance slightly around the rounded corners to reduce bulk.
Turn the fabric through the opening, gently pushing out the rounded ends with a turning tool or the blunt end of a pencil.
Avoid using anything sharp that could poke through the fabric.
Once the piece is fully turned, gently shape the edges and press it flat with your iron.
Fold the raw edges of the turning gap inward so they sit neatly in line with the rest of the seam.
Step 6: Topstitch Around the Cord Keeper
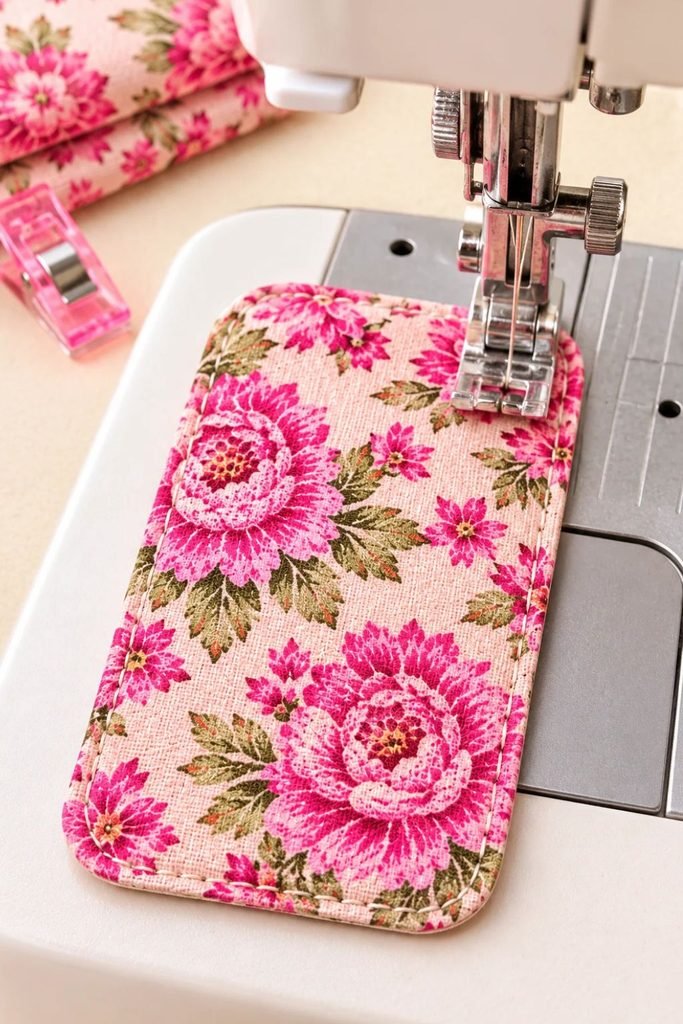
Topstitch around the entire outer edge, sewing close to the edge of the fabric.
This step helps the cord keeper lie flat, gives it a cleaner finish, and closes the small opening you left for turning.
Use a matching thread for a subtle finish or a contrasting thread if you want the stitching to become part of the design.
Take your time around the rounded ends so the stitching stays smooth.
Step 7: Attach the Snap Fasteners
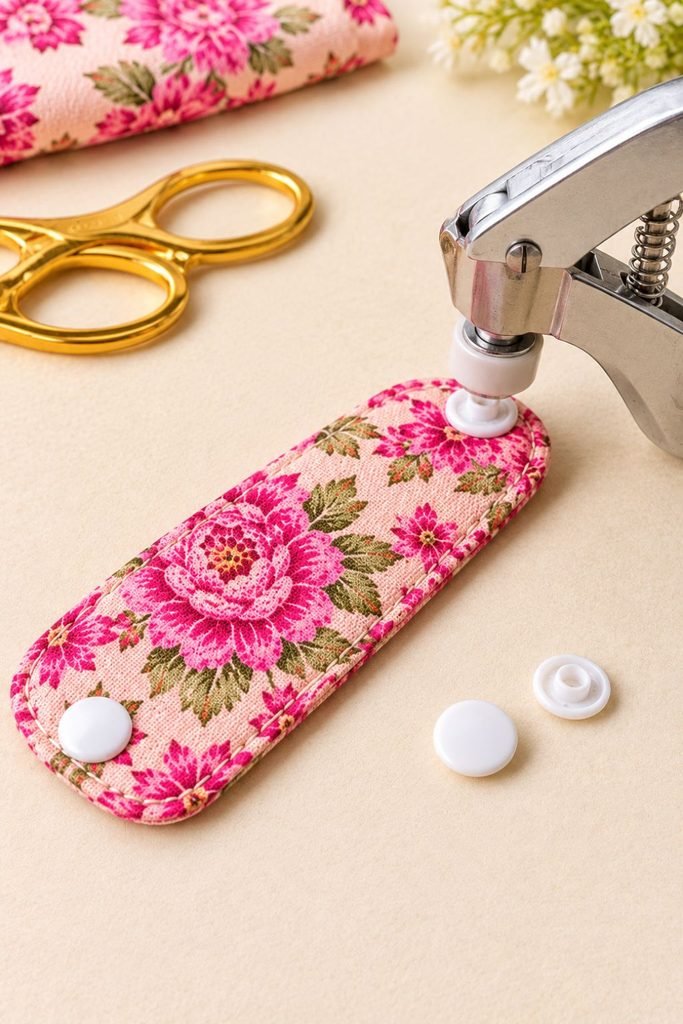
Now it is time to add the snaps.
Position the snap fasteners near the ends of the cord keeper. Before attaching them permanently, fold the fabric around a cable to check that the two ends will meet comfortably.
Follow the instructions supplied with your snap fasteners. If you are using KAM snaps, use the correct snap pliers and make sure the cap, socket, and stud are positioned properly.
Attach the corresponding snap components to opposite ends so the cord keeper can close securely around a folded cable.
Do not position the snaps too close to the edge. Leave enough fabric around each fastener so it does not pull against the seam.
Once both snaps are attached, open and close them a few times to check that they fasten properly.
Step 8: Test Your Finished Fabric Cord Keeper
Your little fabric cord organizer is ready!
Fold a cable neatly, wrap the cord keeper around it, and fasten the snaps.
The cord should stay together without the fabric being stretched too tightly.
If you are making these for different types of cables, test each size before sewing a whole batch. A small adjustment to the measurements can make a big difference in how comfortably the cord keeper fits.
Tips for Making Your Fabric Cord Keepers Look Neat
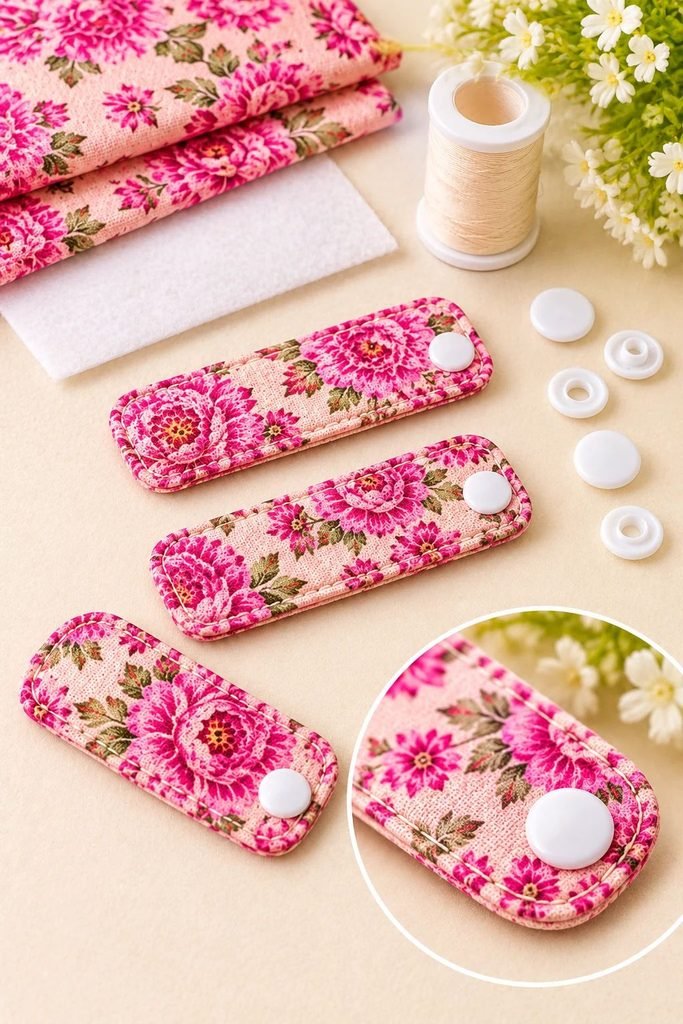
A simple sewing project can look surprisingly polished when you pay attention to a few details.
Use lightweight interfacing. Thick interfacing can make the ends bulky, especially when you turn the fabric through the opening.
Keep the seam allowance consistent. This helps the cord keeper maintain an even shape.
Trim the rounded corners. Removing excess fabric before turning makes it easier to achieve smooth curves.
Press between steps. Pressing the fabric after fusing the interfacing and again after turning helps everything sit flat.
Test your snap placement. Fold the cord keeper around a cable before attaching the snaps permanently.
Choose coordinating fabrics. Two fabrics that complement each other can make even a simple design look special.
Common Mistakes to Avoid
There are a few small mistakes that can affect the finished result, but they are easy to avoid.
Using fabric that is too thick: Thick fabric can make the cord keeper bulky and difficult to turn. Lightweight cotton is easier to work with.
Making the turning opening too small: If the opening is tiny, turning the fabric can become frustrating. Leave enough room to pull the fabric through without stretching the seam.
Forgetting to trim the corners: Untrimmed corners can create bulky edges and make the finished shape look uneven.
Attaching the snaps before checking the fit: Always test the placement around a folded cable first. This helps prevent the finished cord keeper from being too tight or too loose.
Pulling the cable too tightly: The purpose is to keep the cable organized, not compress it. Leave enough room for the cord to sit comfortably.
Different Ways to Use a Fabric Cord Keeper
Once you make your first one, you will probably find plenty of uses for it around your home.

- Phone chargers: Keep charging cables neatly folded in a drawer or handbag.
- Earphones: Stop small earphone cords from becoming tangled with other accessories.
- USB cables: Organize the smaller cables you use for electronics.
- Travel accessories: Keep your cables together when packing for a trip.
- Desk organization: Store frequently used cables neatly instead of leaving them loose on your desk.
- Gift sets: Make several matching cord keepers and package them together as a small handmade gift.
Just remember to choose a suitable size for the cable. These small fabric wraps are best for folded cords and should not be used to force thick cables into a tight shape.
How to Customize Your DIY Fabric Cord Keepers
One of the nicest things about sewing your own accessories is that you can change the design to suit your taste.
For a soft feminine look, try tiny floral prints, blush pink, cream, or muted beige cotton.
If you prefer something more minimal, neutral fabrics, gingham, and simple stripes look lovely.
You can also use contrasting fabric on the front and back, add decorative topstitching, or make a set using different prints from the same fabric collection.
For gifts, consider choosing fabrics that match the recipient’s personality. A bright print can be fun for someone who loves color, while a simple neutral design may suit someone who prefers understated accessories.
How to Care for Fabric Cord Keepers
Because these are small fabric accessories, caring for them is quite simple.
If they become dusty or lightly soiled, gently spot-clean the fabric with a damp cloth and mild detergent.
If your fabric and snap fasteners are suitable for machine washing, you can place the cord keeper in a small laundry bag and wash it on a gentle cycle. Always check the care instructions for your fabric and fasteners first.
Allow it to dry completely before using it again.
Are Fabric Cord Keepers Good Handmade Gifts?
Absolutely! I think this is one of those little projects that makes a lovely gift because it is both pretty and useful.
You can make a set of three or four using coordinating cotton prints, stack them together, and tie them with a simple ribbon.
They are suitable as small gifts for friends, students, coworkers, travelers, or anyone who carries chargers and electronic accessories.
You could also include one in a larger handmade gift package. If you enjoy putting together thoughtful gift collections, you may also like my guide on how to start a gift box business.
A small handmade accessory like this can add a personal touch to a gift without requiring expensive materials.
Frequently Asked Questions
Can beginners sew a fabric cord keeper?
Yes! This is a beginner-friendly sewing project. You mainly need to cut two fabric pieces, sew around the edges, turn the fabric, topstitch, and attach snap fasteners.
What fabric is best for a DIY cord keeper?
Quilting cotton is a great choice because it is lightweight, easy to sew, and available in many prints. You can also use other medium-weight woven cotton fabrics.
Do I need interfacing?
Interfacing is recommended because it gives the cord keeper structure and helps it keep its shape. Lightweight fusible interfacing is usually sufficient.
Can I make a fabric cord keeper without a sewing machine?
Yes, you can hand-sew the project using small, neat stitches. It may take a little longer, but the basic construction is still possible.
Can I use Velcro instead of snap fasteners?
Yes. Small pieces of sew-on hook-and-loop tape can be used instead of snaps. Make sure the pieces are securely attached and positioned so the cord keeper closes comfortably.
What size should a fabric cord keeper be?
The suggested finished size for this tutorial is approximately 2 x 4.5 inches. You can adjust the measurements for smaller earphone cords or larger charging cables.
How many fabric cord keepers can I make from leftover fabric?
That depends on the size of your scraps. Since each cord keeper uses only two small fabric pieces, you can often make several from leftover quilting cotton.
Can I sell handmade fabric cord keepers?
Yes, you can sell them as small handmade accessories, especially in sets or as part of gift bundles. Choose attractive fabric combinations, make sure your stitching is neat, and calculate your material and labor costs before setting a price.
Final Thoughts
I love simple sewing projects that turn small pieces of fabric into something useful, and this DIY fabric cord keeper is a perfect example.
It is quick to make, beginner-friendly, and practical enough to use every day. You can make one for your own charging cables, sew a matching set for your travel bag, or create several as thoughtful handmade gifts.
You also do not need to buy a lot of supplies. A few fabric scraps, some lightweight interfacing, and snap fasteners are enough to get started.
Once you have made your first one, experiment with different prints, sizes, and color combinations. You might be surprised by how many useful little accessories you can create from leftover fabric.
Happy sewing!