Easy DIY Lighted Ghost Wreath for Halloween (Pottery Barn Look for Under $25)
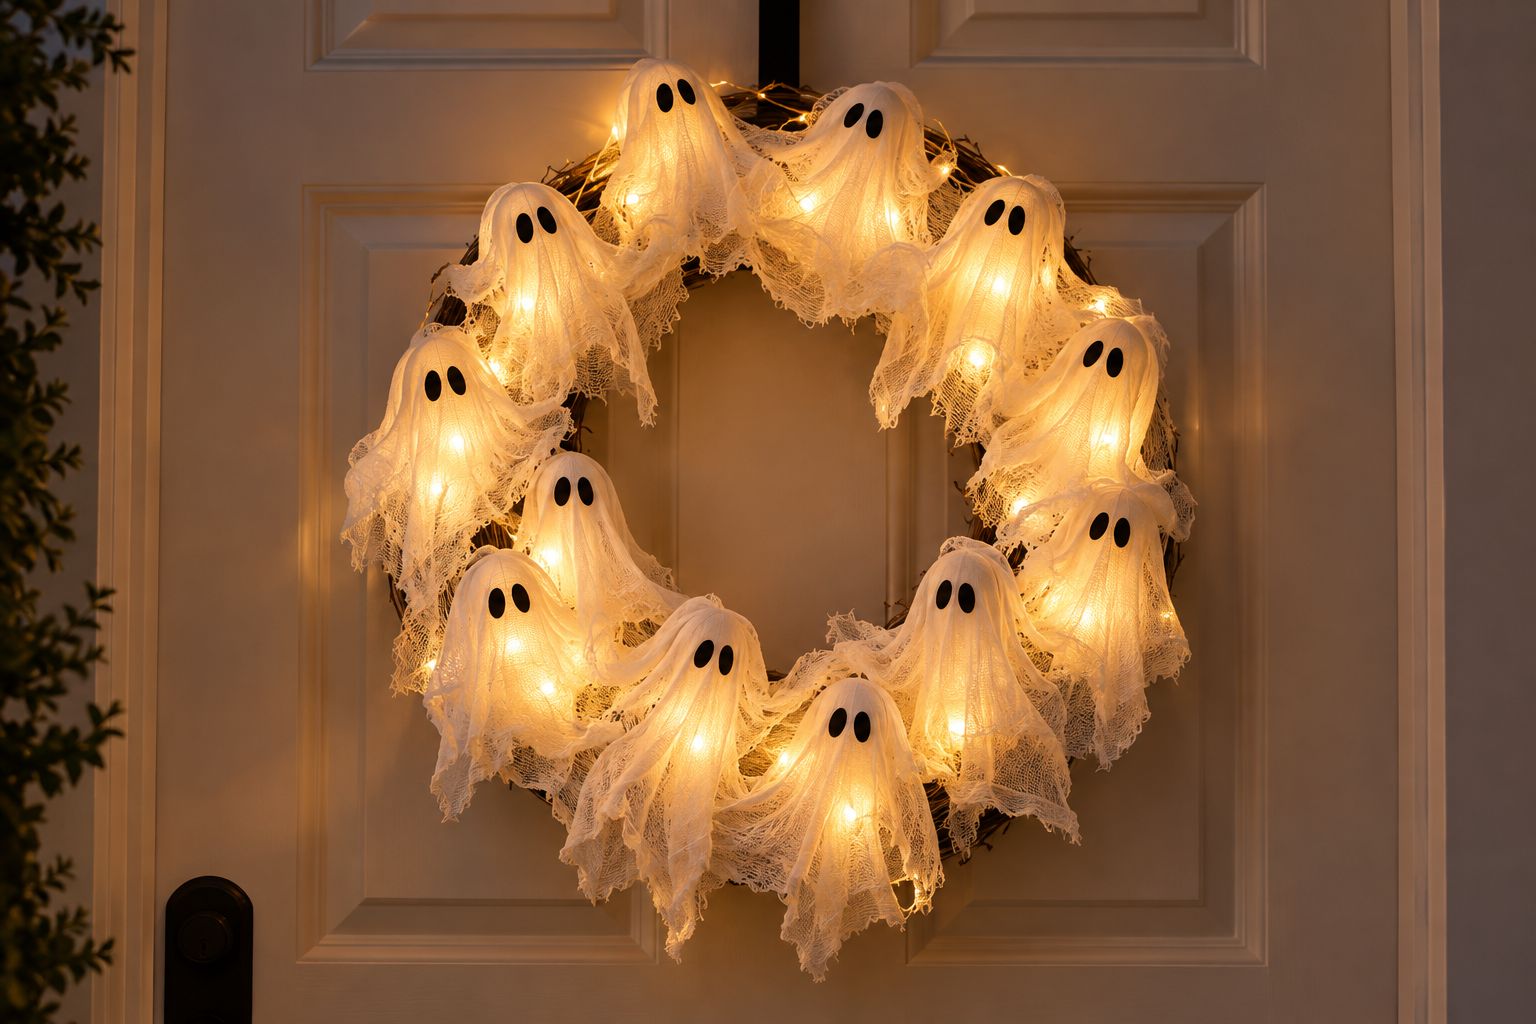
I fell hard for one of those glowing ghost wreaths in a home decor catalog a couple of years ago, right up until I saw the price tag. It was well over a hundred dollars for what was, when I really looked at it, a foam wreath form, some fairy lights, and a few yards of cheesecloth.
So I made my own version for a fraction of that, and honestly, I like mine better. The cheesecloth drapes a little more loosely, the ghosts have more personality because I drew the faces myself, and the whole thing took an afternoon while I was half-watching a movie.
The first year I hung it, I had three separate neighbors ask where I’d bought it, which felt like a small victory considering the entire thing cost me less than a takeout dinner. My daughter drew half the faces that year, and I genuinely can’t tell which ones were hers anymore, which tells you something about how forgiving this project is.
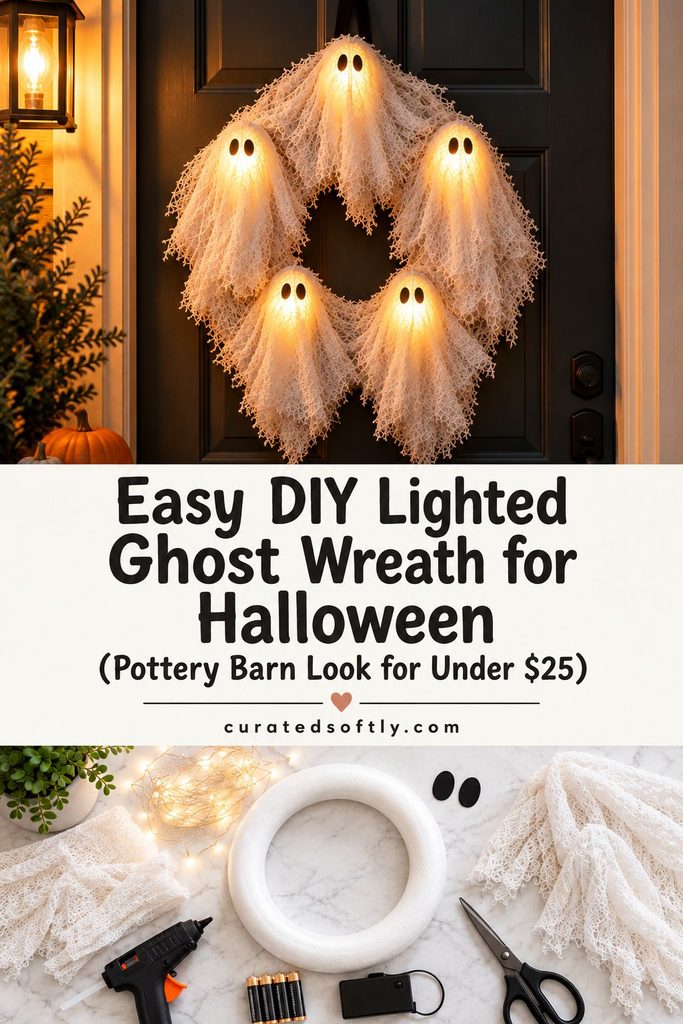
This is one of those projects that looks genuinely impressive hanging on a door but requires almost no actual skill, if you can wrap a string of lights around a foam ring and drape fabric over a ball, you can make this.
It’s also the kind of decor that earns its storage space, unlike a lot of seasonal pieces that get used once and then feel dated by the following year.
If you’ve read my Fall Home Decor Ideas or my 15 Pumpkin Painting Ideas, this fits right into that same seasonal, high-impact-low-effort category.
Why You’ll Love This Project
It costs a fraction of the store-bought version. Most of the materials come from a craft store or dollar store, and the whole thing lands well under what you’d pay for a comparable catalog wreath.
It glows beautifully at night. Battery-operated fairy lights tucked inside the cheesecloth give each ghost a soft interior glow rather than a harsh spotlight effect.
No special skills required. There’s no sewing, no power tools, and no painting technique to master, just hot glue, fabric, and a little patience.
It’s genuinely reusable. Stored properly, this wreath holds up year after year, unlike a lot of cheaper seasonal decor.
Kids can help with parts of it. Drawing the ghost faces is a genuinely fun step to hand off to a child who wants to be involved.
Getting the Look Right
The difference between a ghost wreath that looks charmingly handmade and one that looks a little cheap usually comes down to two things: the fabric and the light temperature.
Cheesecloth is the right choice here specifically because it’s semi-sheer, it lets the light glow through rather than blocking it, and it drapes with those soft, irregular folds that read as ghostly rather than stiff. Plain white fabric or felt won’t give you that effect at all.
For the lights, always reach for warm white rather than cool white or bright white. Cool white reads as clinical and harsh, while warm white gives you that soft, candle-like glow that makes the whole thing feel atmospheric instead of like a work light behind a sheet.
What You’ll Need
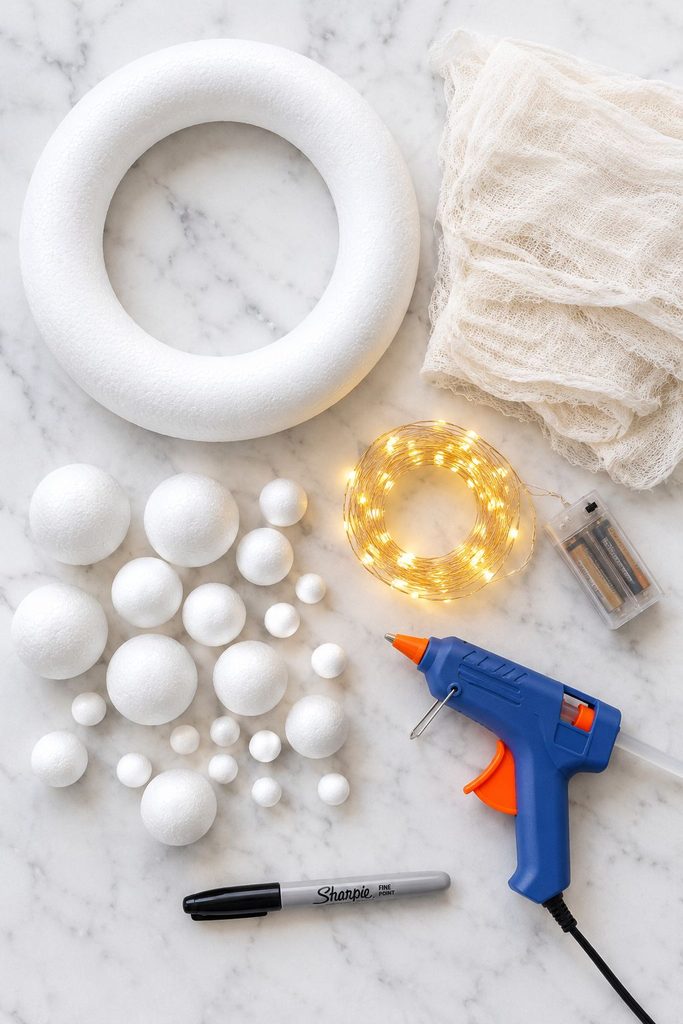
Here’s what to gather before you start:
- 1 foam wreath form (12 to 16 inches works well)
- 10 to 12 foam balls in varying sizes (2 to 3 inches)
- 2 to 3 yards of cheesecloth
- 1 to 2 strands of battery-operated warm white fairy lights
- Hot glue gun and glue sticks
- Black permanent marker or black felt for the faces
- Scissors
- Ribbon or twine for hanging
How to Make It
Once everything’s ready, here’s how it comes together:
Step 1: Wrap the Wreath Form in Lights
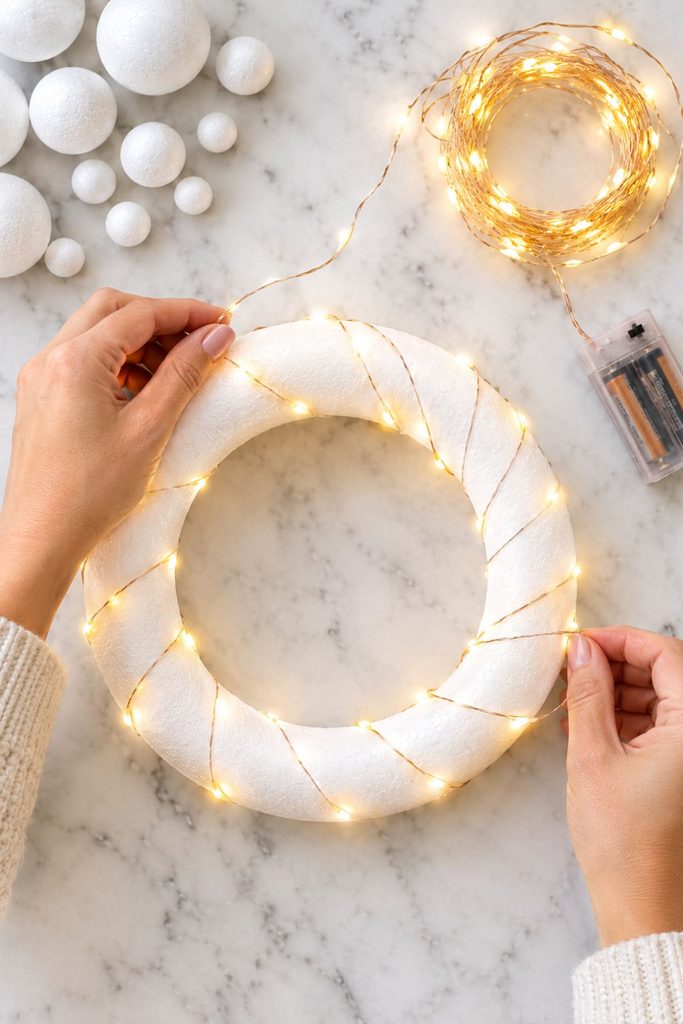
Wind your fairy lights around the foam wreath form, spacing them fairly evenly so the glow is consistent all the way around rather than clustered in one spot.
Tuck the battery pack toward the back of the wreath where it won’t be visible from the front, and make sure you can still reach the switch to turn it on and off.
Step 2: Position the Foam Balls
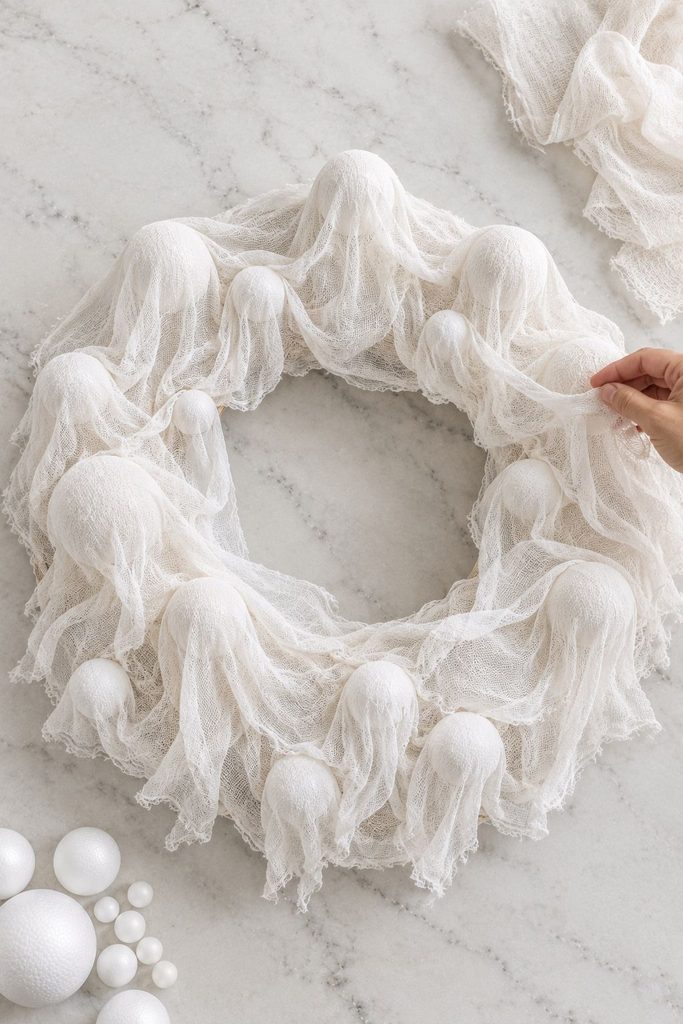
Arrange your foam balls around the wreath form, mixing sizes rather than using all the same size, this variation is what makes the finished wreath look like a cluster of ghosts rather than a uniform row of circles.
Once you’re happy with the placement, hot glue each ball securely to the form.
Step 3: Cut and Drape the Cheesecloth
Cut the cheesecloth into squares roughly 8 to 10 inches across, one for each ghost. Drape a square over each foam ball, letting it fall naturally with uneven folds rather than smoothing it flat, then secure it underneath with a small dab of hot glue where it won’t be seen.
Step 4: Layer for Depth
Add a second, looser layer of cheesecloth over the whole wreath, letting it drape between and around the ghosts and hang down slightly at the bottom edge.
This layering is what gives the finished piece that soft, flowing, slightly eerie look rather than a collection of individually wrapped balls.
Step 5: Add the Faces
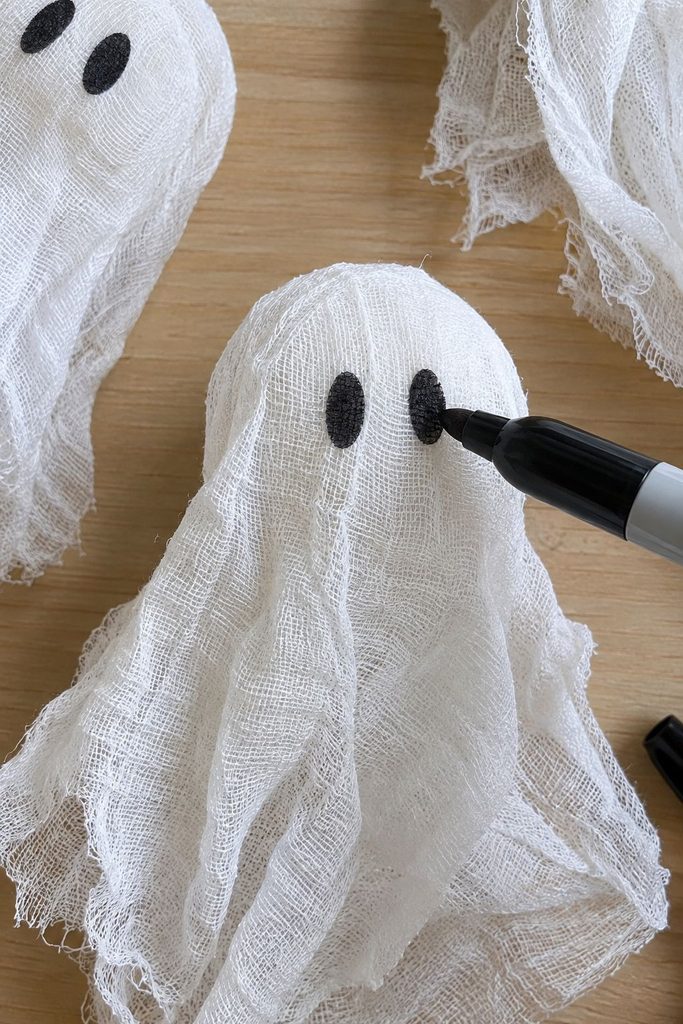
Draw two simple oval eyes on each ghost with a black permanent marker, or cut small ovals from black felt and glue them on if you’d prefer something you can reposition.
Keep the faces simple, two eyes is genuinely enough, adding mouths tends to tip the look from charming into cartoonish.
Step 6: Attach a Hanger
Loop a length of ribbon or twine through the top of the wreath form and tie securely, testing that it hangs evenly before you consider it finished. Turn the lights on and adjust any cheesecloth that’s shifted during assembly.
What This Actually Costs to Make
One of the main reasons to make this yourself is the price difference, so it’s worth breaking down where the money actually goes.
The foam wreath form is usually the single largest line item, running somewhere in the range of six to ten dollars depending on size and where you buy it.
Foam balls typically come in multipacks and cost a few dollars for enough to cover a wreath, and cheesecloth is genuinely inexpensive, a few yards runs around four or five dollars in most craft stores or grocery stores.
Battery-operated fairy lights are the other real cost, generally five to eight dollars per strand, and you may want two depending on your wreath size.
Everything else, the hot glue, the marker, the ribbon, is likely already in a drawer somewhere in your house if you craft at all regularly.
All in, most people land somewhere in the twenty to twenty-five dollar range for a wreath that reads as a much more expensive piece, and if you catch a craft store coupon or shop the dollar store for the foam balls, you can bring that down further.
Choosing the Right Wreath Size
The size of your wreath form determines almost everything else about this project, so it’s worth thinking through before you buy.
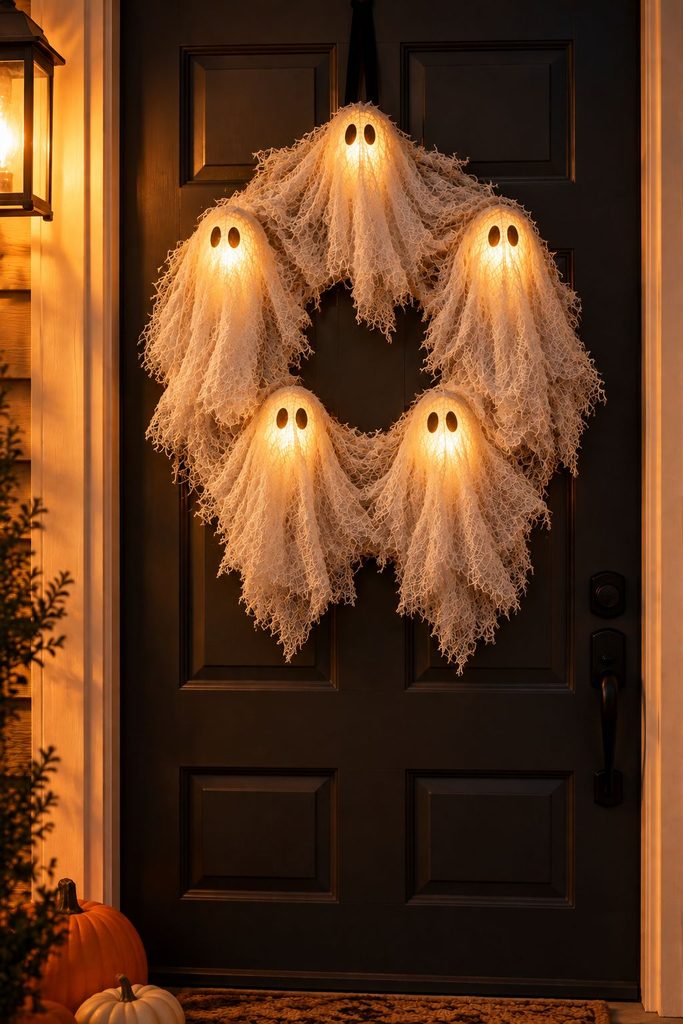
A 12-inch form is a good choice for an interior wall, a narrow door, or a smaller window, it takes fewer foam balls, less cheesecloth, and usually only one strand of lights, making it the cheapest and fastest version to build.
A 16-inch form makes a much stronger statement on a standard front door and is closer in scale to the store-bought versions you’ve probably seen. It’ll need more foam balls, likely two strands of lights, and noticeably more cheesecloth to cover properly.
Anything larger than 16 inches starts getting genuinely heavy once everything is attached, which matters if you’re hanging it on a door that gets opened and closed frequently. If you want something bigger, consider a wall placement rather than a door.
How Long This Actually Takes
Plan for roughly two hours from start to finish if you’re working at a relaxed pace, though very little of that is demanding work.
Wrapping the lights takes about fifteen minutes and is genuinely the fiddliest part of the whole project, mostly because keeping the spacing even requires a bit of attention.
Positioning and gluing the foam balls takes another twenty minutes or so, with a little extra time if you’re rearranging them to get the composition right.
Cutting and draping the cheesecloth is the longest single step, closer to forty-five minutes across all the ghosts, and it’s also the most enjoyable part if you’re watching something in the background while you work.
Drawing the faces and attaching the hanger takes maybe fifteen minutes combined, which means you can genuinely start this after dinner and have it hanging by bedtime.
Tips for the Best Results
Vary your ball sizes. A mix of 2-inch and 3-inch foam balls looks far more natural and visually interesting than a uniform set, and it’s what sells the “cluster of ghosts” effect.
Let the cheesecloth stay wrinkled. Resist the urge to smooth everything flat, the irregular folds are exactly what makes these read as ghosts rather than wrapped balls.
Tuck lights between the ghosts, not just under them. A few lights peeking through the gaps between ghosts adds depth and keeps the glow from looking flat.
Test your battery pack placement before gluing. Make sure you can actually reach the on/off switch once everything is assembled, this is an easy thing to overlook until it’s too late.
Common Mistakes to Avoid
Using cool white lights instead of warm white. This single choice changes the entire mood of the piece, cool white makes it look harsh and clinical rather than soft and atmospheric.
Choosing fabric that’s too opaque. Regular cotton or felt blocks the light entirely, defeating the whole purpose of the lighted design. Cheesecloth’s sheerness is essential here.
Drawing faces that are too detailed. Simple oval eyes look far more elegant than full faces with mouths and expressions, restraint genuinely works better with this aesthetic.
Gluing the cheesecloth too tightly. A few small dabs of glue to hold things in place is all you need, over-gluing flattens the drape and makes everything look stiff.
Variations Worth Trying
Once you’ve made the basic version, there are a few directions worth taking it if you want something a little different.
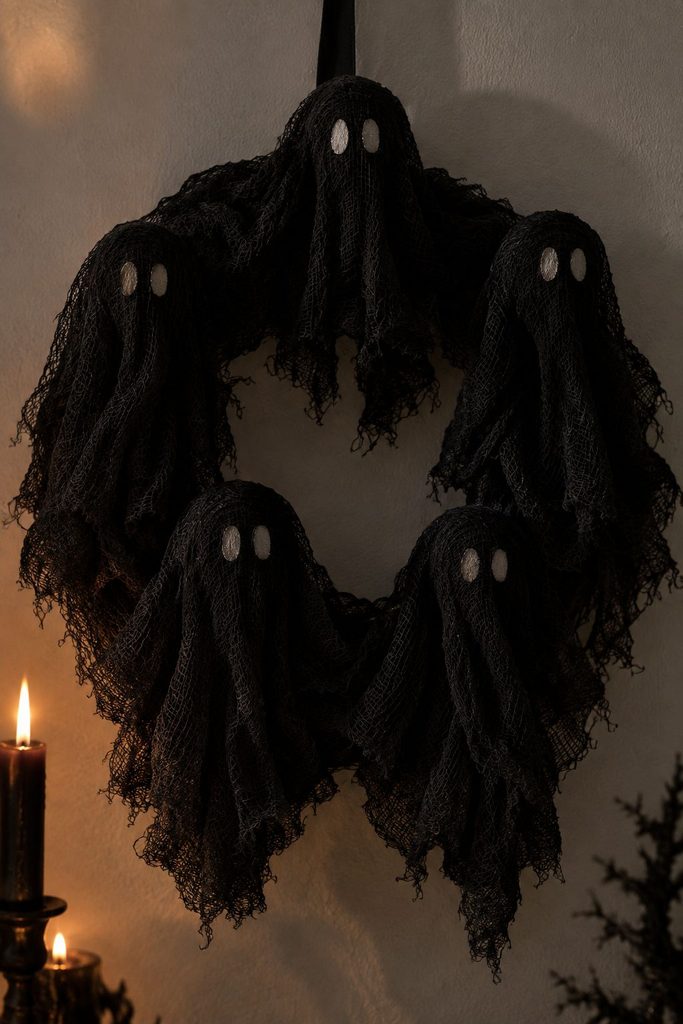
A moodier black version. Swap white cheesecloth for black and use fewer, dimmer lights for something closer to a gothic or haunted aesthetic rather than a cute one. This version pairs well with the moodier end of Halloween decor.
A single oversized ghost. Instead of a cluster of small ghosts around a ring, build one large ghost using a bigger foam ball and a generous length of cheesecloth, then hang it as a standalone door piece rather than a wreath.
A ghost garland instead of a wreath. Use the same technique on individual foam balls and string them along a length of twine to drape across a mantel or doorway, this works especially well if a wreath doesn’t fit your space.
A neutral post-Halloween version. Skip the faces entirely and you’re left with a soft, glowing cheesecloth wreath that honestly looks lovely straight through the winter months without reading as Halloween decor at all.
Making This With Kids
This is a genuinely good project to do alongside children, with a couple of caveats worth planning around.
The hot glue is the obvious thing to keep in adult hands, especially the ball-attaching step where you’re working with a lot of glue in quick succession. A low-temp glue gun helps if an older child wants to participate in that part with supervision.
Drawing the faces is the perfect step to hand off entirely. Each ghost only needs two simple ovals, mistakes are barely noticeable once the wreath is assembled and glowing, and giving a child ownership of that step tends to make them genuinely proud of the finished piece.
Draping the cheesecloth also works well for smaller hands, since there’s no precision involved and the irregular results are actually what you want.
How to Store It for Next Year
Store the wreath flat rather than hanging, ideally in a large box or bin where nothing will press down on the cheesecloth and crush the drape out of it.
Remove the batteries from the battery pack before storing, leaving them in over a long stretch risks corrosion that can ruin the light strand entirely.
If the cheesecloth looks a little flat when you pull it out next season, a gentle shake and some hand-fluffing usually restores the shape without needing any replacement fabric.
Where to Hang It
Front door. The classic choice, and the glow is especially effective once porch lights are on in the evening.
Above a mantel. Hung on the wall above a fireplace, it becomes more of a statement piece and the lights read beautifully in a dim room.
In a window facing the street. This is my favorite placement, since the glow is visible from outside without the wreath being exposed to weather.
On an interior wall or hallway. A lower-commitment spot if you’d rather keep your front door decor more neutral.
Frequently Asked Questions
Can I use plug-in lights instead of battery-operated? Battery-operated is strongly recommended here, a plug-in strand means a visible cord running down from your wreath, which undercuts the look considerably.
Will this hold up outdoors? It’s best suited to a covered porch or indoor use, cheesecloth and foam don’t handle rain or heavy moisture well, so an exposed door in a rainy climate isn’t ideal.
How long do the batteries last? Most battery-operated fairy light strands run for a couple of weeks with a few hours of use each evening, many also have a built-in timer function that helps considerably.
Can I make this in a different color? Absolutely, the same technique works with black cheesecloth for a moodier look or cream for something softer, though white gives you the most classic ghost effect.
Related Posts
If this was helpful, here are a few more seasonal projects from the site:
- Fall Home Decor Ideas: Cozy, Budget-Friendly Ways to Transform Every Room — more ideas for the season beyond Halloween.
- 15 Pumpkin Painting Ideas That Are Cute, Easy, and So Fun — a natural companion project for the same weekend.
- 15 Front Porch Ideas to Make a Welcoming and Stylish Entryway — for styling the space where this wreath will hang.
- Creative 1-Hour Craft Ideas for Adults — more quick projects if you enjoyed this one.
- 10 Beautiful Boho Crafts Perfect for Selling — if you’re thinking about making a few of these to sell.
Final Thoughts
What I love about this project is how much visual impact it delivers relative to the actual effort involved. There’s no technique to master, no expensive materials, and no real way to mess it up badly, the slightly imperfect, hand-draped quality is genuinely part of the charm rather than something to correct.
If you make one change from this whole tutorial, make it the warm white lights. Everything else here has room for personal interpretation, but that single detail is what separates a wreath that looks like a catalog piece from one that looks like a craft project, and it costs exactly the same either way.
My name is Amelia Hart, and I’m passionate about home decor, DIY projects, and creating beautiful spaces on any budget. I love sharing boho-inspired styling tips, creative decor ideas, and practical ways to make your home feel warm and inviting. Join me for inspiration and easy-to-follow decorating advice!