How to Make Cute Crochet Mittens: A Cozy Winter Crochet Pattern
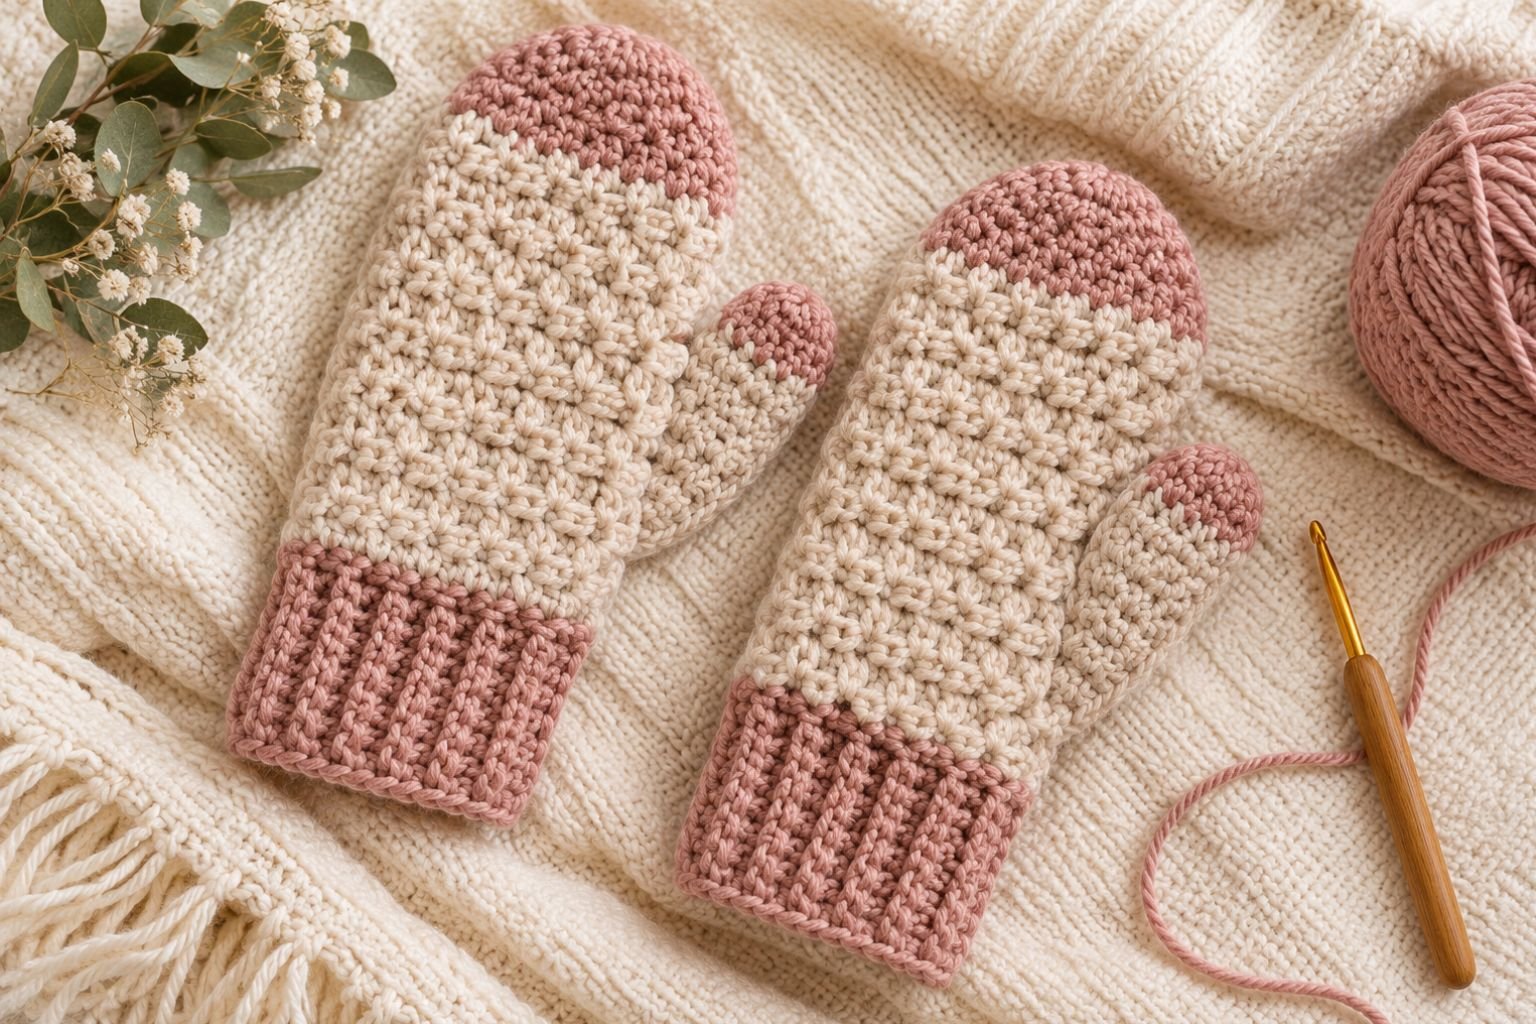
When the weather gets cold, there’s nothing quite like pulling on a warm pair of handmade mittens. I love crochet winter accessories because they’re practical, make lovely gifts, and give you a chance to create something you can actually use throughout the season.
Crochet mittens are also a great project if you’ve been wanting to make something a little different from the usual scarves, hats, and blankets. Unlike gloves, mittens don’t require you to crochet individual fingers, which makes their construction easier to manage.
You work the cuff, build the hand section in rounds, leave an opening for the thumb, and shape the top to finish.
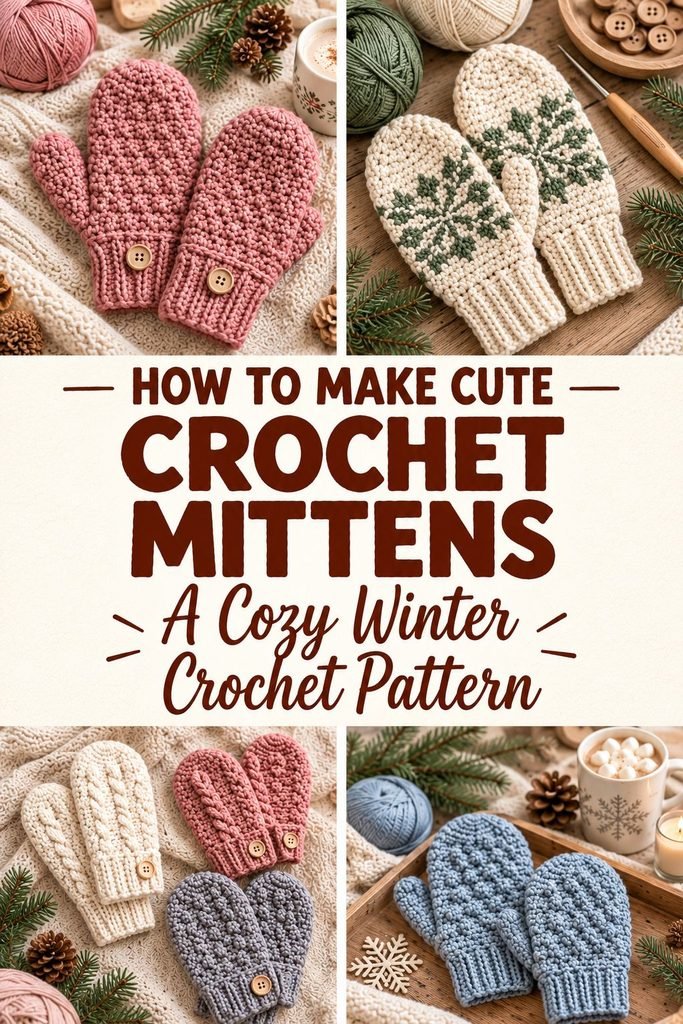
In this tutorial, I’ll walk you through making a cozy pair of crochet mittens using worsted-weight yarn. The design features a stretchy ribbed cuff, a simple single crochet body, and a separate thumb worked into an opening.
You can keep them plain for an everyday winter accessory or decorate them with little flowers, buttons, stripes, or other details.
If you enjoy making handmade crochet accessories, you might also like my Free Crochet Bandana Pattern: Easy Crochet Bandana Tutorial. It’s another beginner-friendly wearable project that you can customize with your favorite yarn colors.
Whether you’re making your first pair or adding another handmade accessory to your winter wardrobe, this is a lovely pattern to try.
Why You’ll Love This Crochet Mitten Pattern
There are so many reasons to make your own crochet mittens instead of buying another pair from the store.
- Beginner-friendly construction: The mitten uses basic crochet stitches and simple shaping.
- No individual fingers: Unlike crochet gloves, mittens have one main hand section, making them quicker to complete.
- Stretchy ribbed cuffs: The back-loop-only cuff helps the mittens sit comfortably around your wrists.
- Easy to personalize: You can change the yarn color, add stripes, or decorate the finished mittens.
- A thoughtful handmade gift: A pair of cozy mittens makes a lovely Christmas, birthday, or winter gift.
- Great for using different yarn colors: Make a matching pair or use leftover yarn for a playful color combination.
Materials You’ll Need
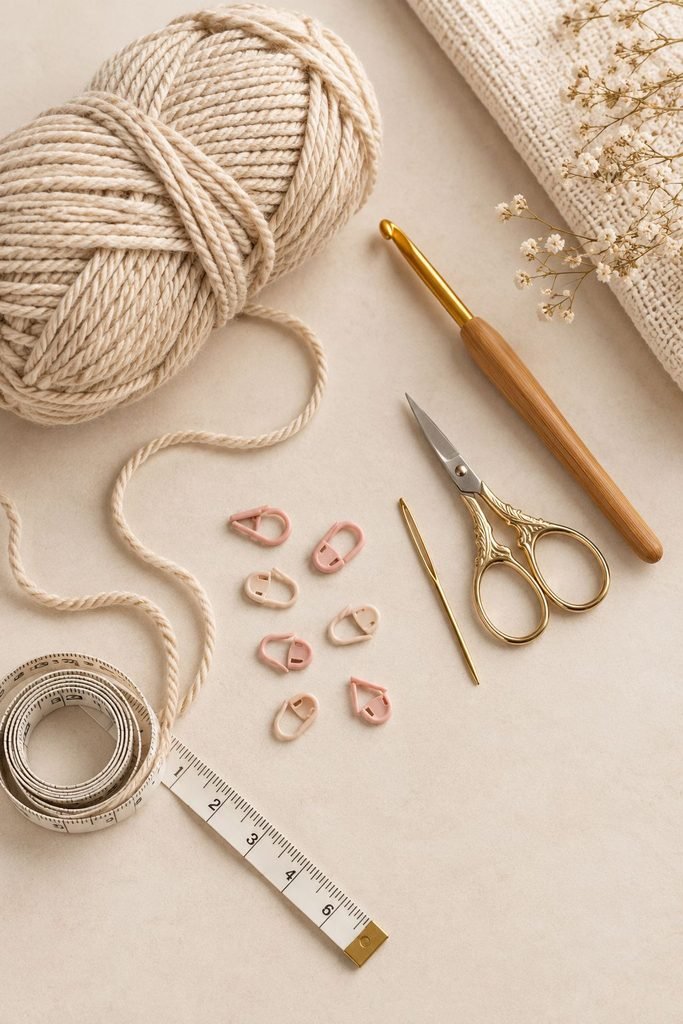
Before you begin, gather everything you’ll need. I recommend choosing a soft wool or wool-blend yarn because warmth and comfort are especially important for winter mittens.
- Approximately 100 to 150 yards of worsted-weight wool or wool-blend yarn for a pair, depending on hand size and crochet tension.
- 5 mm or 5.5 mm crochet hook.
- Stitch markers.
- Yarn needle.
- Scissors.
- Measuring tape.
Choosing your yarn: Wool is a lovely choice for winter accessories because it provides warmth and has natural elasticity.
A wool blend can also be a good option if you prefer something easier to care for. If you have sensitive skin, choose a soft yarn that won’t feel scratchy around your fingers and wrists.
A smooth, medium-weight yarn is easiest to work with because you can see your stitches clearly. Very fuzzy yarn can make it harder to count stitches, especially when you’re shaping the thumb opening.
Crochet Abbreviations
This pattern uses standard US crochet terminology.
- ch: Chain
- sl st: Slip stitch
- sc: Single crochet
- hdc: Half double crochet
- inc: Increase, or work two single crochets into the same stitch
- dec: Decrease, or single crochet two stitches together
- BLO: Back loop only
- st: Stitch
- sts: Stitches
- rnd: Round
- MR: Magic ring
- pm: Place marker
Understanding the Pattern Before You Start
This pattern is worked in sections. You’ll begin with a flat ribbed cuff, join the short ends to make a tube, and then crochet the hand section upward in rounds.
The thumb opening is created by chaining stitches and skipping stitches in one round. After finishing the main hand section, you’ll return to that opening and crochet the thumb separately.
You’ll make two mittens to complete the pair. Because the thumb openings sit on opposite sides of the hands, remember to mirror their placement when making the second mitten.
A note about sizing: The instructions below provide a starting point for an average adult hand. Your crochet tension and yarn can change the finished measurements, so try the mitten on as you work whenever possible.
How to Make Cute Crochet Mittens
Skill level: Beginner to intermediate
Construction: Ribbed cuff, hand worked in rounds, separate thumb
Yarn: Worsted-weight wool or wool blend
Hook: 5 mm or 5.5 mm
Finished size: Approximately 7.5 to 8 inches in hand circumference, depending on tension
The instructions below make one mitten. Repeat them for the second mitten, reversing the thumb placement.
Step 1: Crochet the Ribbed Cuff
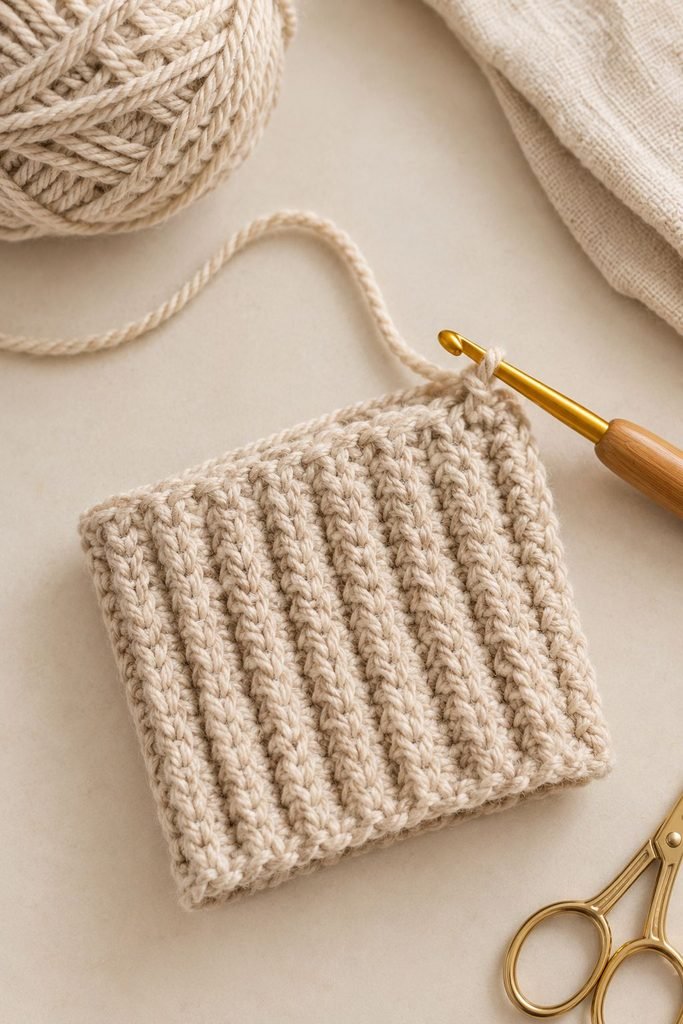
The cuff is the first part of the mitten. It creates a snug opening around your wrist and helps keep cold air from getting inside.
Start by chaining 10.
Work 1 single crochet into the second chain from your hook and continue with 1 single crochet in each chain across. You should have 9 stitches.
Chain 1 and turn.
For rows 2 through 36, work 1 single crochet into the back loop only of each stitch across. Chain 1 and turn after every row.
Continue until your strip measures approximately 7 inches long. You can make it shorter for a small hand or longer if you prefer a cuff that folds over.
Working into the back loops creates the ribbed texture that gives the cuff its stretch.
Tip: Keep your turning chains consistent, and avoid accidentally working into them unless your pattern instructions call for it. Count your stitches regularly so the cuff doesn’t become wider or narrower as you go.
Step 2: Join the Cuff
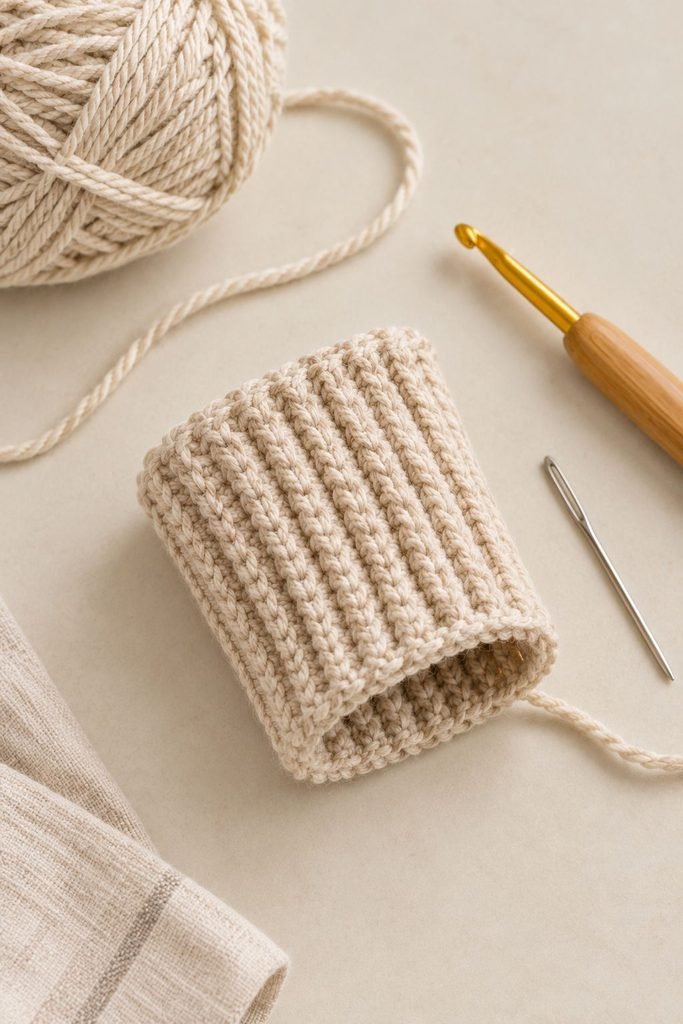
Once the cuff reaches your desired length, fold it so the two short ends meet.
Use slip stitches to join the ends together, forming a tube.
Make sure the ribbed rows run neatly around the cuff. Don’t pull the joining stitches too tightly, because you want the opening to remain comfortable and stretchy.
You now have the wrist section of your mitten.
Step 3: Start the Hand Section
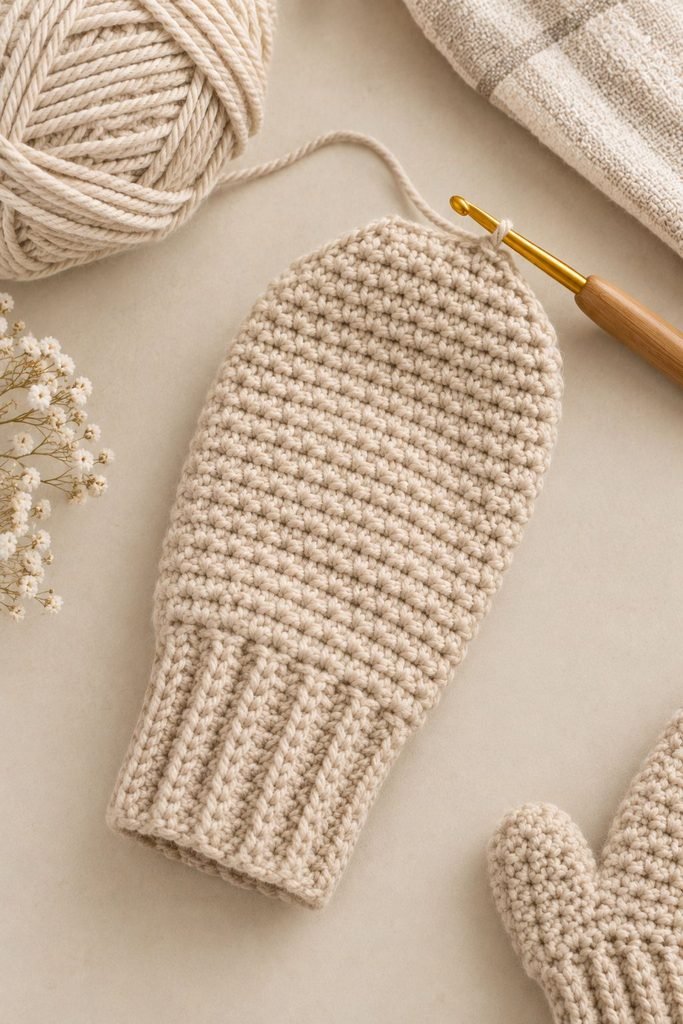
Turn the cuff so the right side is facing you.
Join your yarn along the long upper edge of the cuff. Work 32 single crochet stitches evenly around the edge.
Place a stitch marker at the beginning of the round so you can keep track of where each round starts.
For rounds 2 through 4, work 1 single crochet into every stitch around, maintaining 32 stitches per round.
These rounds build the wrist area above the cuff. The fabric should feel snug enough to stay in place but not so tight that it restricts movement.
Beginner tip: When working into the edge of the cuff, distribute your stitches evenly. If you place too many stitches in one area, the fabric may flare. Too few stitches can make the mitten pull or bunch.
Step 4: Create the Thumb Opening
The thumb opening is made by skipping a section of stitches and replacing it with a short chain.
For round 5, work as follows:
- Single crochet into the first 6 stitches.
- Chain 6.
- Skip the next 6 stitches.
- Single crochet into the remaining 20 stitches.
The chain creates the space where the thumb will eventually sit.
In the next round, work single crochet stitches across the chain stitches just as you would across regular stitches.
For rounds 6 through 16, continue working single crochet around. Maintain the same stitch count and work over the chain section to build the hand.
Continue until the mitten measures approximately 3.5 inches above the thumb opening, or until the fabric reaches the base of your pinky finger when you try it on.
Important: The thumb opening should sit on the side of the mitten, not directly in the center of the palm. Check its position before continuing.
Step 5: Shape the Top of the Mitten
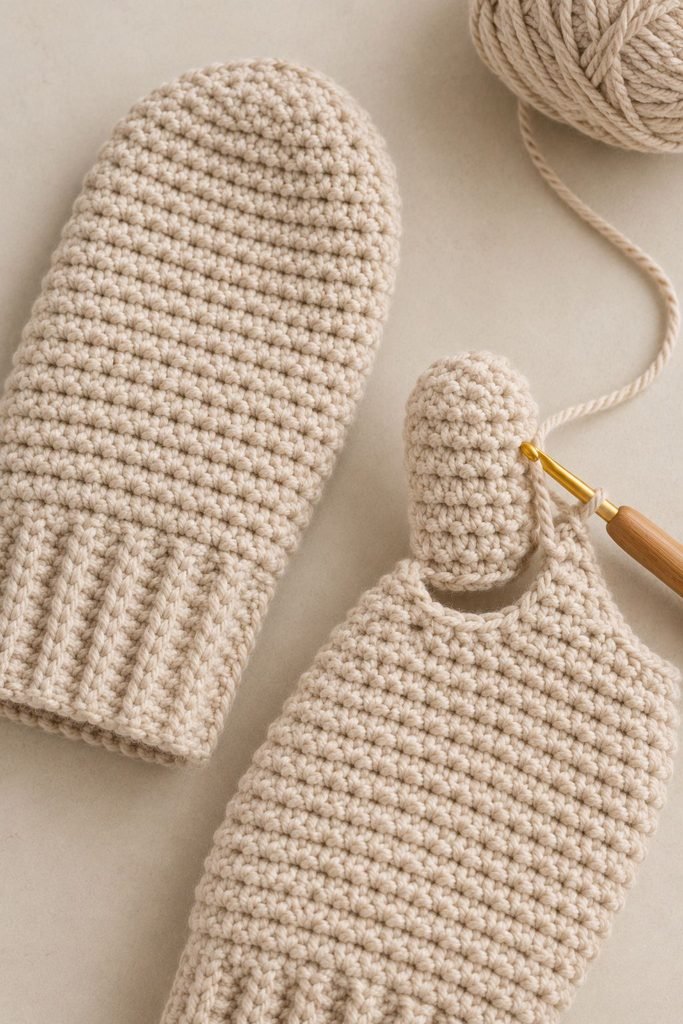
Now you’ll gradually decrease the stitches to close the top of the mitten.
Work the following rounds:
Round 17: Single crochet 2 together, single crochet in the next 12 stitches, single crochet 2 together, then single crochet in the last 14 stitches. You should have 30 stitches.
Round 18: Single crochet in each stitch around.
Round 19: Single crochet 2 together, single crochet in the next 11 stitches, single crochet 2 together, then single crochet in the last 13 stitches. You should have 28 stitches.
Round 20: Single crochet in each stitch around.
Round 21: Repeat the following four times: single crochet 2 together, then single crochet in the next 5 stitches. You should have 24 stitches.
Round 22: Repeat the following four times: single crochet 2 together, then single crochet in the next 4 stitches. You should have 20 stitches.
Round 23: Repeat the following four times: single crochet 2 together, then single crochet in the next 3 stitches. You should have 16 stitches.
Round 24: Repeat the following four times: single crochet 2 together, then single crochet in the next 2 stitches. You should have 12 stitches.
Round 25: Single crochet 2 together around. You should have 6 stitches.
Cut the yarn, leaving a tail approximately 8 inches long.
Thread the tail through your yarn needle and pass it through the remaining stitches. Pull gently to close the top, then weave the end securely into the inside of the mitten.
Step 6: Crochet the Thumb
Now return to the opening you created earlier.
Join your yarn at one corner of the opening. Work 6 single crochet stitches across the chain stitches. Then work 6 single crochet stitches across the opposite side of the opening, picking up stitches from the skipped section.
Pick up 1 or 2 additional stitches at the corners if needed to help close any gaps.
You should have approximately 14 to 16 stitches around the thumb opening. Place a stitch marker at the beginning of the round.
For rounds 1 through 6, work 1 single crochet into each stitch around.
Try the mitten on as you go. The thumb should reach comfortably toward the base of your thumbnail without feeling too tight.
For round 7, work single crochet decreases around until you have approximately 6 to 8 stitches remaining.
Cut the yarn, leaving a tail. Thread it through the remaining stitches, pull closed, and weave in the end.
Your first mitten is complete!
Step 7: Make the Second Mitten
Repeat the same instructions to make the second mitten.
The important difference is the thumb placement. Position the thumb opening on the opposite side so the two mittens fit the left and right hands correctly.
Before finishing the second mitten, compare it with the first one. Check that the cuffs, hand lengths, and thumb sizes are similar.
Finishing and Blocking Your Mittens
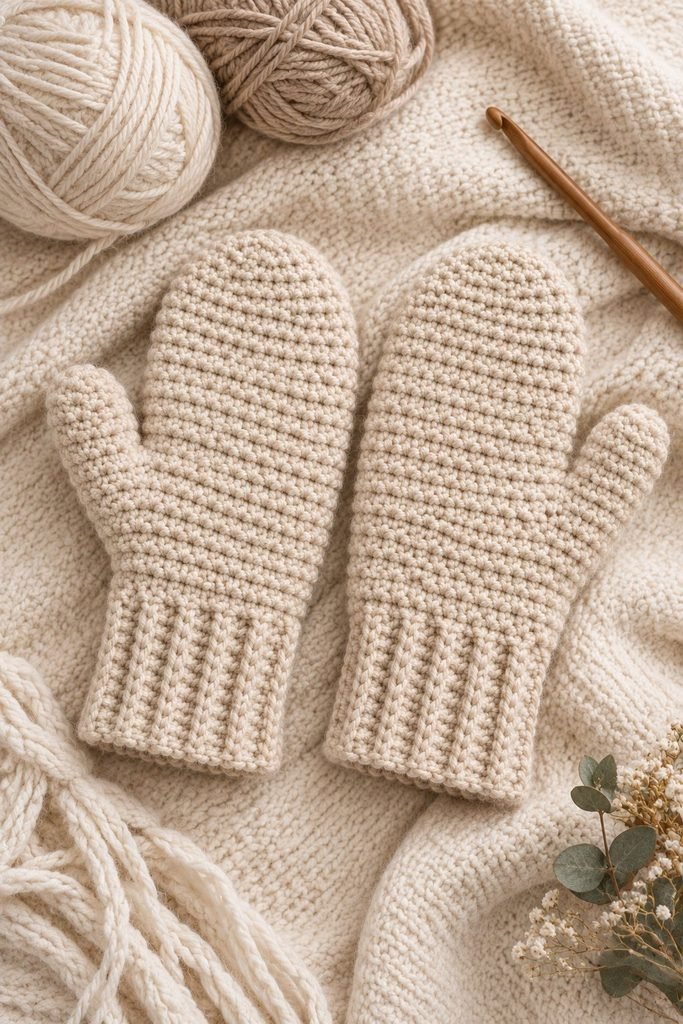
Once both mittens are finished, take a little time to tidy up the loose ends and shape the fabric.
Use your yarn needle to weave each yarn tail through several stitches in different directions. This helps keep the ends from working loose when the mittens are worn or washed.
If you’re using wool, gentle blocking can help even out the stitches and improve the overall shape.
Fill a basin with cool or lukewarm water and add a small amount of wool-friendly wash. Submerge the mittens and allow the yarn to become fully wet. Gently press out the excess water without twisting or wringing the fabric.
Place the mittens on a clean towel, roll the towel gently to remove additional moisture, and then lay the mittens flat to dry.
Reshape the cuffs, thumbs, and mitten tops while the fabric is damp. Allow them to dry completely before wearing.
Always check the yarn label first, especially if you’re using a wool blend or a yarn that requires special care.
How to Make Your Crochet Mittens Even Cuter
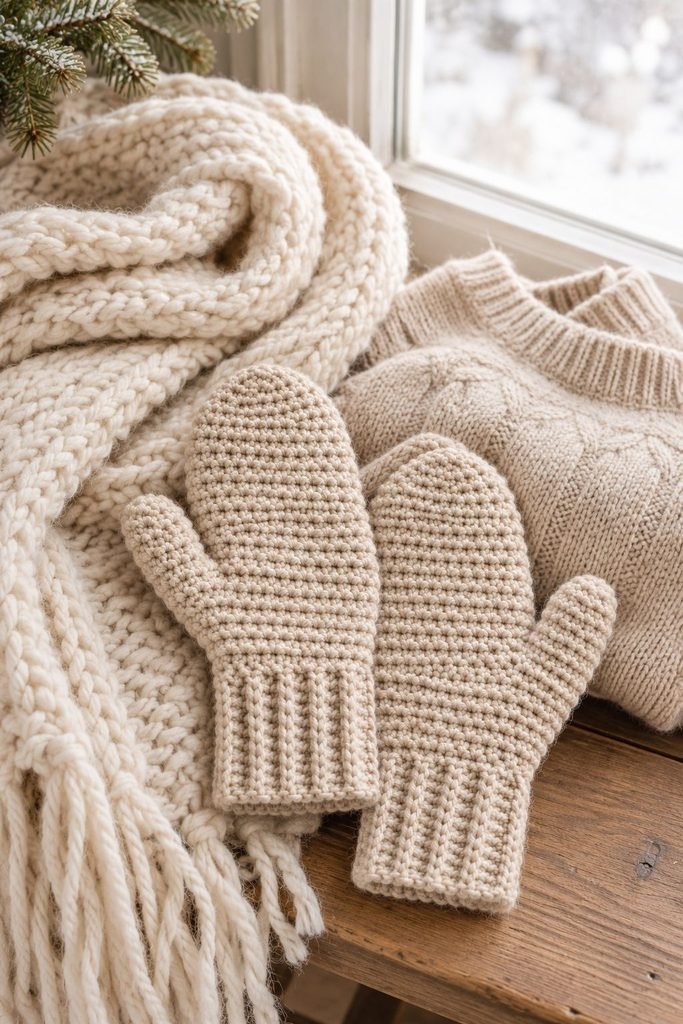
One of my favorite things about handmade accessories is how easy they are to personalize. Once your basic mittens are finished, you can add small details to make them look completely different.
Add Small Crocheted Flowers
A little crochet flower can make a simple pair of mittens look much more decorative.
Choose a contrasting yarn color and make a small flower using your preferred flower pattern. Sew it securely onto the back of each mitten, making sure the stitches are firm enough to withstand regular wear.
Cream flowers look beautiful on olive or brown mittens, while rust or mustard flowers add a lovely autumn touch.
Decorate the Cuffs With Buttons
Small wooden or decorative buttons can give your mittens a vintage-inspired finish.
Arrange two or three buttons along the cuff and sew them on securely. If you’re making mittens for young children, avoid small detachable buttons because they can present a choking hazard.
Add Colorful Stripes
Stripes are a simple way to make your mittens more playful.
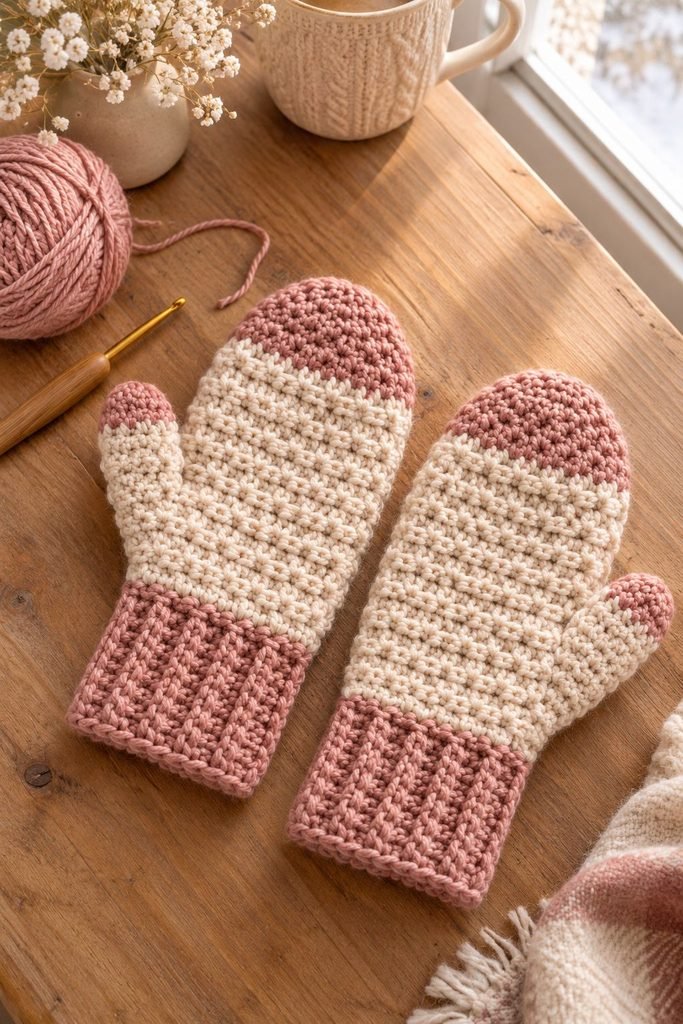
You can work the cuff in one color and the hand section in another, or add two or three contrasting stripes around the wrist.
Choose colors that complement each other rather than using too many shades at once. Cream and brown, olive and oatmeal, or rust and beige are lovely combinations.
Attach Small Pompoms
A small yarn pompom can give your mittens a cute, playful finish.
Wrap yarn around a pompom maker or your fingers, tie it securely in the middle, cut the loops, and trim the shape.
Attach the pompom firmly to the mitten. Keep the decoration small enough that it doesn’t get in the way when you’re using your hands.
Add Simple Embroidery
If you enjoy embroidery, try adding little hearts, stars, initials, or simple floral details to the back of each mitten.
Use a contrasting yarn and keep the embroidery stitches secure. This is an easy way to make a pair of mittens feel more personal, especially if you’re making them as a gift.
How to Adjust the Mitten Size
The pattern is written as a starting point for an average adult hand. You can adjust the measurements to make smaller or larger mittens.
For children’s mittens: Use a shorter cuff and reduce the number of stitches worked around the hand. Make the thumb opening smaller, and shorten the hand section before beginning the decreases. Always measure the child’s hand rather than relying on age alone.
For larger adult hands: Add stitches around the hand section and adjust the thumb opening to provide enough room. You may also need extra rounds before shaping the top.
For longer cuffs: Work additional rows on the ribbed cuff before joining the ends. A longer cuff can be folded back for a cozy gauntlet-style finish.
For wider hands: Add stitches evenly around the hand section. Remember to adjust the decrease rounds so the top closes evenly.
The best way to get a comfortable fit is to measure the hand around its widest part, excluding the thumb, and compare that measurement with your crochet fabric as you work.
Tips for Making Warm and Comfortable Crochet Mittens
A good pair of mittens should feel comfortable as well as look beautiful. These small details can make a big difference.
Choose a warm yarn. Wool and wool blends are excellent choices for winter accessories. If you prefer acrylic, choose a soft, thick yarn with enough structure to create a warm fabric.
Keep your stitches even. Loose gaps can let cold air through. Try to maintain consistent tension, especially around the hand and thumb.
Check the thumb placement. A thumb that sits too high, too low, or too tightly can make the mittens uncomfortable. Try the mitten on before finishing the thumb.
Make both mittens the same size. Compare the pieces as you work so one mitten doesn’t end up noticeably longer or wider than the other.
Don’t make the cuff too tight. The ribbing should fit comfortably around your wrist without leaving deep marks or making it difficult to put the mitten on.
Secure your finishing stitches. Mittens get plenty of use, so weave in the yarn ends carefully and secure any decorations firmly.
Caring for Your Wool Crochet Mittens
Wool mittens can last for many winters if you care for them properly.
Hand washing is usually the safest option for wool. Use cool water and a small amount of wool-friendly detergent. Gently move the mittens through the water without rubbing or stretching the fabric.
Rinse carefully with water at a similar temperature. Press out excess water using a towel, then reshape the mittens and lay them flat to dry.
Avoid hanging wet wool mittens because the weight of the water can stretch the fabric. Keep them away from direct high heat, which can damage or shrink some wool fibers.
If your mittens develop small pills with regular wear, carefully remove them with a sweater comb or fabric shaver suitable for the yarn.
When winter is over, store the clean, completely dry mittens in a cool, dry place.
Troubleshooting Common Crochet Mitten Problems
Even a straightforward pattern can have a few tricky moments. Here are some problems you might come across and how to handle them.
My Mittens Are Too Small
This often happens when your crochet tension is tighter than the pattern’s recommended gauge.
Try using a larger hook or adding stitches to the hand section. It’s also important to check the cuff length because a cuff that’s too short can make the whole mitten feel uncomfortable.
There Are Gaps Around the Thumb
Small gaps can appear where the thumb opening meets the hand section.
When picking up stitches for the thumb, add one or two extra stitches at the corners if necessary. You can also use a yarn needle to close any remaining small gaps after finishing.
The Top of My Mitten Looks Uneven
Uneven decreases can make the top look lumpy or slightly crooked.
Check that you’re spacing your decreases evenly and following the stitch counts carefully. Gentle blocking may help smooth minor differences in the finished fabric.
The Cuff Is Too Tight
If the cuff doesn’t stretch comfortably over your hand, try using a larger hook for the ribbed section or loosening your tension slightly.
You can also add a few more rows to make the cuff wider, depending on how your strip is worked.
My Two Mittens Are Different Sizes
This can happen when your tension changes between projects.
Compare the measurements of the first mitten with the second one as you work. Use the same yarn, hook, and stitch count, and measure both pieces before weaving in the ends.
Frequently Asked Questions
Are crochet mittens suitable for beginners?
Yes. This pattern uses basic stitches, including single crochet and slip stitch. Beginners who are comfortable working in rows and learning simple rounds can follow the instructions. The thumb opening and shaping may take a little extra practice.
How much yarn do I need to crochet a pair of mittens?
The pattern uses approximately 100 to 150 yards of worsted-weight yarn for an adult pair. The exact amount depends on the size of the hands, the length of the cuffs, your crochet tension, and the yarn you choose.
What is the best yarn for warm crochet mittens?
Wool and wool blends are excellent options because they provide warmth and natural elasticity. Soft acrylic yarn can also work well, particularly if you want an affordable and easy-care option.
How long does it take to crochet mittens?
The time depends on your experience and how quickly you crochet. An experienced crocheter may finish a pair in a few hours, while a beginner may need longer to work through the cuff, thumb opening, and finishing steps.
Can I make these mittens without a thumb opening?
You can make a simpler mitten without a separate thumb, but it won’t fit or function in quite the same way. The thumb opening gives your thumb its own space and makes the finished mittens more comfortable to wear.
Can I sell handmade crochet mittens?
You can sell your finished handmade items, but check the terms of the pattern you’re following and any restrictions attached to it. Make sure your finished mittens are consistent in size and securely finished before offering them for sale.
Final Thoughts
Crochet mittens are such a lovely winter project because they combine something practical with the pleasure of making something by hand. The ribbed cuffs, simple single crochet body, and separate thumb create a classic design that you can wear throughout the colder months.
I especially love how easy it is to change the look with different yarn colors and small decorative details. You can keep your mittens simple in cream or brown, make a colorful striped pair, or add little flowers for a more playful finish.
Once you’ve completed your first mitten, the second one usually feels much easier because you’ll already understand the construction. Before long, you could have a whole collection of cozy handmade mittens ready for winter or to give as thoughtful gifts.
If you enjoy making simple crochet accessories, you can also try my Free Crochet Bandana Pattern: Easy Crochet Bandana Tutorial. It’s another fun project to make in a favorite yarn color.
So gather your favorite yarn, pick up your crochet hook, and give this winter mitten pattern a try. A warm handmade pair is always worth the effort!