How to Decoupage Pumpkins with Napkins: An Easy DIY Fall Craft
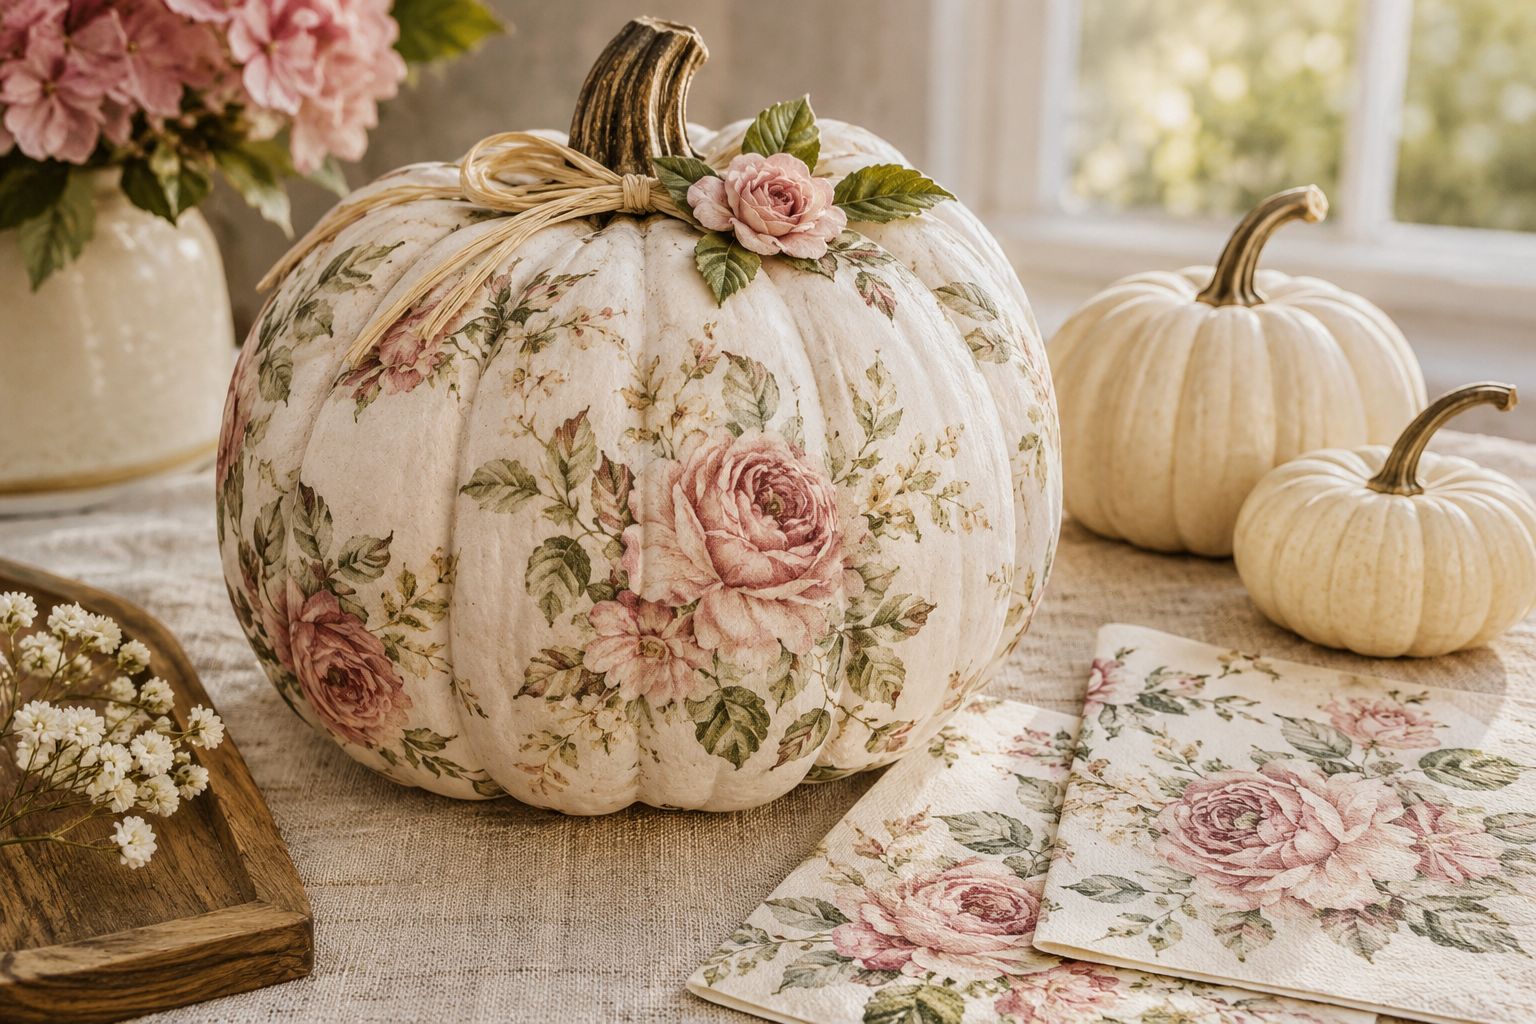
I love fall decorations that look beautiful without requiring a long list of supplies or hours of complicated work. One of my favorite ways to transform a simple craft-store pumpkin is to cover it with decorative paper napkins. Delicate roses, little autumn leaves, and vintage botanical prints can turn an ordinary white pumpkin into something that looks like a custom piece of home decor.
What makes this project especially appealing is that you do not need to be good at painting. The pattern is already printed on the napkin, so your main job is to apply it carefully and let the design become part of the pumpkin’s surface.
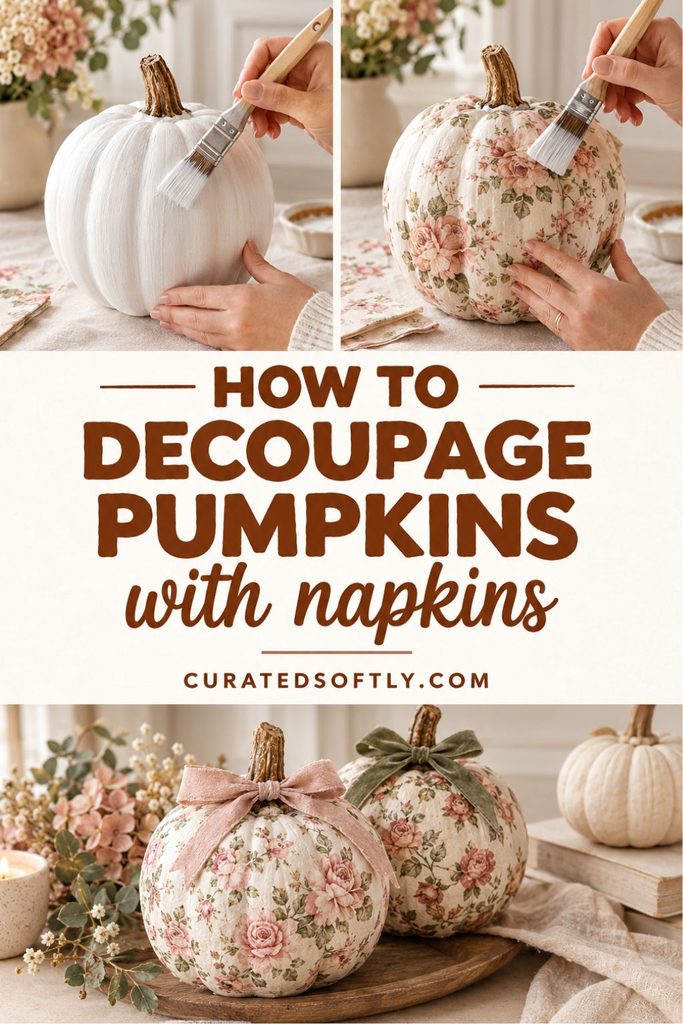
You can create a soft farmhouse look, a romantic floral display, or something more colorful for traditional fall decorating.
In this tutorial, I’ll walk you through how to decoupage pumpkins with napkins, including how to choose the right materials, apply the paper around the pumpkin’s curves, and finish the decoration neatly.
I’ll also share design ideas and styling tips so you can create a pumpkin that fits your home rather than simply copying a look you have seen online.
If you enjoy giving plain pumpkins a creative makeover, take a look at these 15 pumpkin painting ideas that are cute, easy, and so fun for another way to customize your fall decorations.
Why You’ll Love These DIY Decoupage Pumpkins
Decoupage is a simple paper-crafting technique that can produce a surprisingly detailed finish. Instead of painting flowers or leaves individually, you use a printed design to decorate the pumpkin.
Here are a few reasons to try it:
- Beginner-friendly: You do not need drawing or advanced painting skills.
- Affordable: A basic faux pumpkin and decorative napkins are enough to get started.
- Customizable: Choose floral, botanical, plaid, vintage, or autumn-inspired designs.
- No carving required: This is an easy no-carve pumpkin decorating project.
- Reusable: Faux pumpkins can be stored and displayed again in future seasons.
- Versatile: Finished pumpkins work well on mantels, coffee tables, shelves, entryway tables, and tiered trays.
You can decorate a single pumpkin as a focal point or make several in coordinating patterns for a fuller fall display.
Supplies You’ll Need
Gather these materials before starting:
- Faux pumpkin: A white or cream pumpkin is ideal for floral and botanical designs. An orange pumpkin works too, especially if you prefer traditional fall colors.
- Decorative paper napkins: Choose a pattern you love, such as vintage roses, autumn leaves, small flowers, or botanical illustrations.
- Mod Podge or another suitable decoupage medium: Choose a product compatible with your pumpkin’s material.
- Soft paintbrush: A small, soft-bristled brush helps you position the paper without damaging it.
- Scissors: Useful for cutting out individual motifs or dividing the napkin into smaller pieces.
- White acrylic or chalk paint (optional): Use this if you want to change the pumpkin’s background color.
- Protective covering: Cover your work surface to make cleanup easier.
- Paper towels: Keep these nearby for small spills.
Choosing the Right Pumpkin
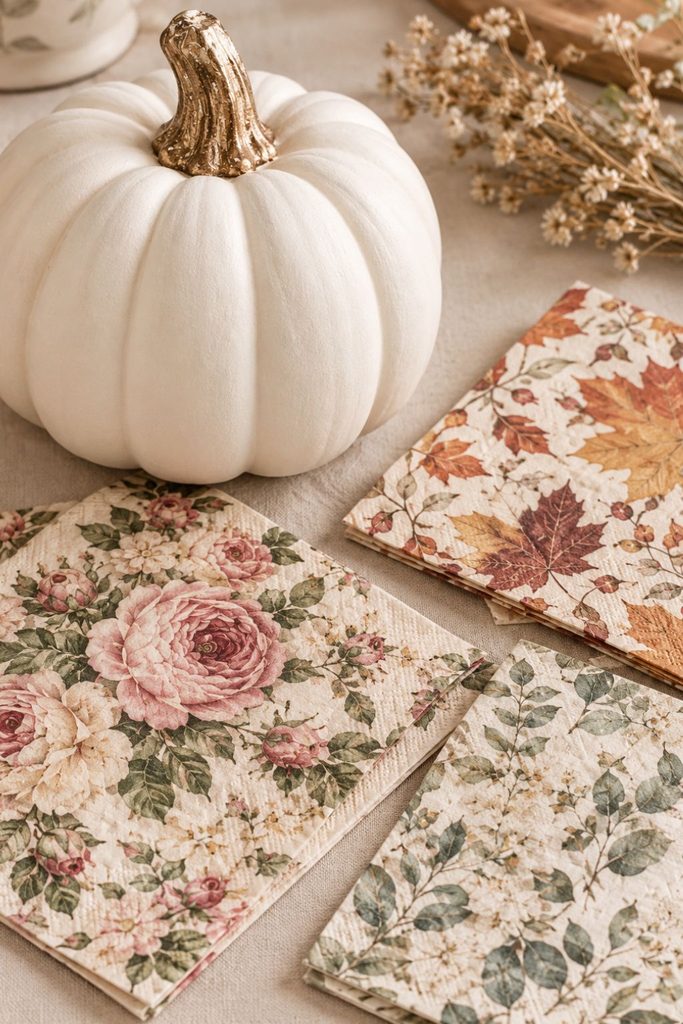
A faux pumpkin with a relatively smooth surface is a good starting point for beginners. White pumpkins are particularly useful because their light background helps the napkin’s colors remain visible.
If you have an orange or dark-colored pumpkin, you can paint it a lighter shade before decorating. Allow the paint to dry completely and check that your chosen adhesive is suitable for the painted surface.
Deep pumpkin ridges are not a problem, but they require smaller pieces of paper and a little more patience. If this is your first attempt, a smaller pumpkin with gently curved sides may be easier to manage.
Real pumpkins can also be decorated, but their natural moisture and eventual deterioration make them less suitable for long-term displays. For a decoration you want to keep, choose a faux pumpkin.
Choosing Decorative Napkins
Look for napkins with patterns that will work well on a curved surface. Small flowers, scattered leaves, and delicate botanical prints are often easy to arrange.
A napkin with a cream or white background generally works well on a white pumpkin. If you want a more colorful design, try rust, burgundy, mustard, sage, or dusty pink.
You can also use individual motifs rather than covering the entire pumpkin. Cutting out a few flowers or leaves gives you more control over the placement and creates a slightly different look from an all-over pattern.
How to Decoupage Pumpkins with Napkins
The process is straightforward, but thin napkin paper needs gentle handling once adhesive is applied. Set aside enough time to work without rushing, especially around the pumpkin’s ridges.
Step 1: Prepare the Pumpkin
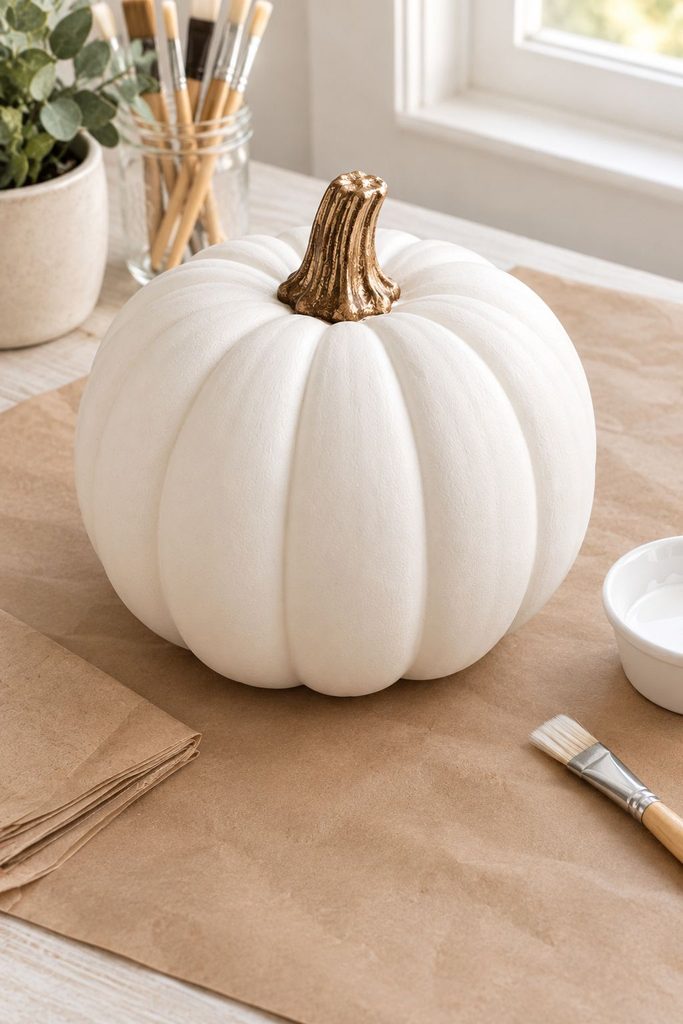
Make sure your pumpkin is clean and dry. Remove stickers, dust, and loose debris so the adhesive can attach properly.
If you want to change the background color, paint the pumpkin with a suitable craft paint and let it dry fully. You can skip this step if the pumpkin already has the color you want.
Step 2: Separate the Napkin Layers
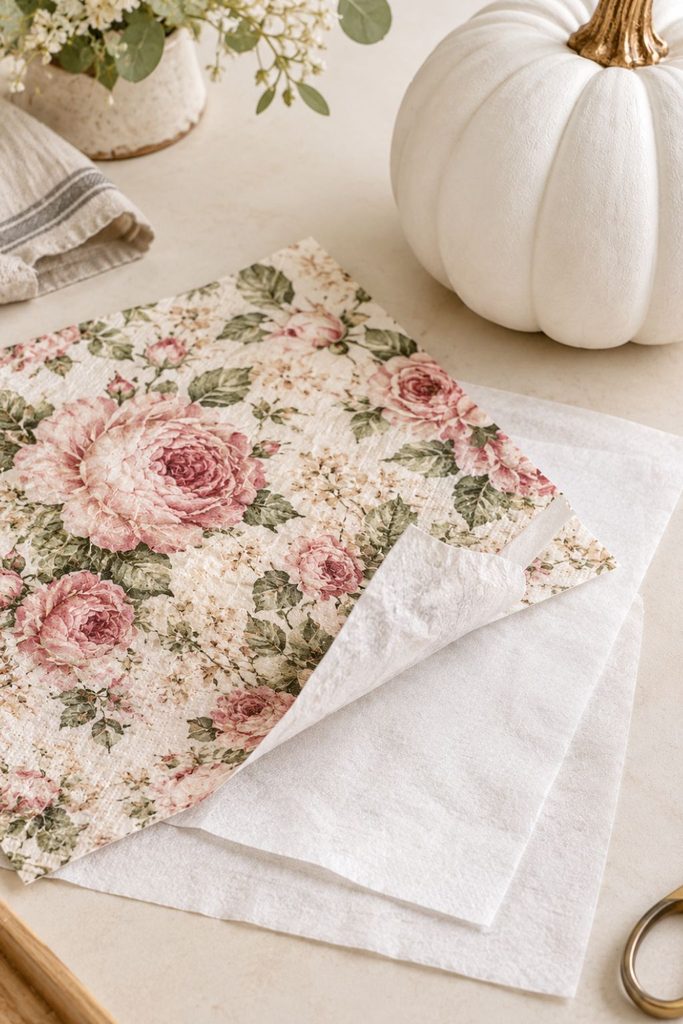
Most decorative paper napkins have two or three layers. Carefully separate them until you have only the printed top layer.
Start at one corner and gently tease the layers apart with your fingernail. Take your time, as the printed layer is thin and can tear easily.
Using only the printed layer helps the design sit closer to the pumpkin’s surface instead of looking thick and bulky.
Step 3: Cut or Tear the Paper
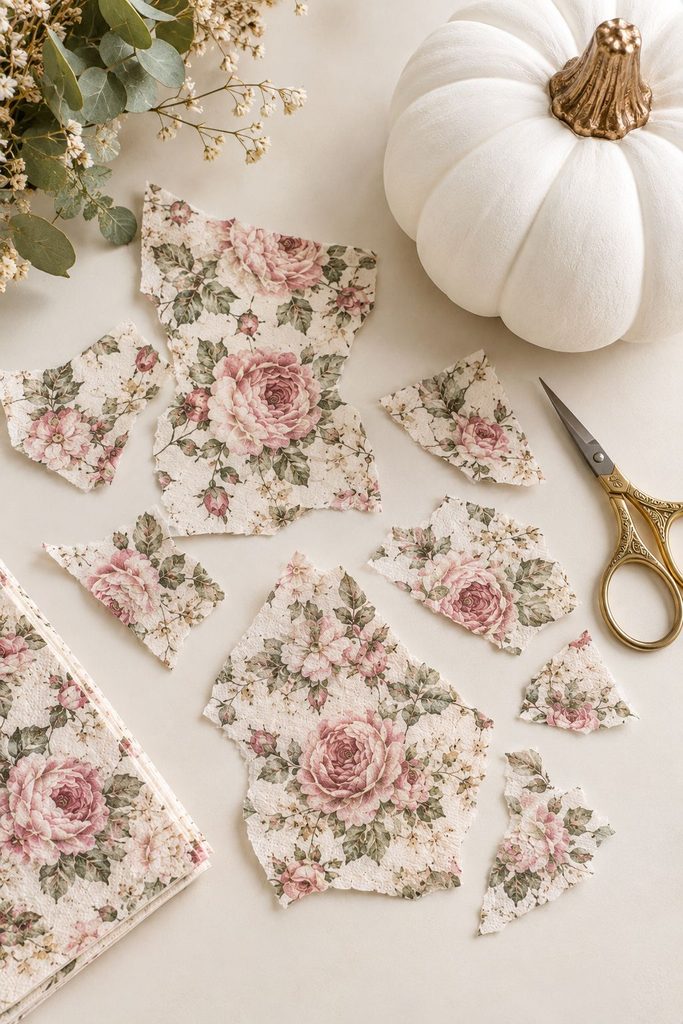
Divide the napkin into manageable pieces. Smaller sections are easier to position around a curved pumpkin than one large sheet.
For an all-over floral design, use strips or irregular pieces that can overlap slightly. If your napkin features individual flowers, leaves, or other illustrations, cut around those motifs and arrange them separately.
Before applying adhesive, place a few pieces against the pumpkin to see how the pattern will look. This lets you plan the arrangement without having to reposition wet paper later.
Step 4: Apply the Decoupage Medium
Brush a thin, even layer of decoupage medium onto one small section of the pumpkin.
Avoid covering the entire surface at once. Working in sections gives you more control and prevents the adhesive from drying before the paper is in place.
Use the amount recommended by the product instructions. Excess adhesive can make the napkin slippery and more difficult to position.
Step 5: Position the Napkin
Place one piece of printed napkin onto the glued area, with the design facing outward.
Begin near the top and work gradually around the pumpkin. Let the paper follow the natural shape of the surface rather than pulling it tightly across the curves.
For deep grooves, use smaller pieces. You can make a small cut along the edge of a piece if that helps it sit more naturally around a curve.
Slight overlaps are fine, especially if you want the pumpkin to have complete pattern coverage. The design does not need to match perfectly at every join.
Step 6: Smooth the Paper
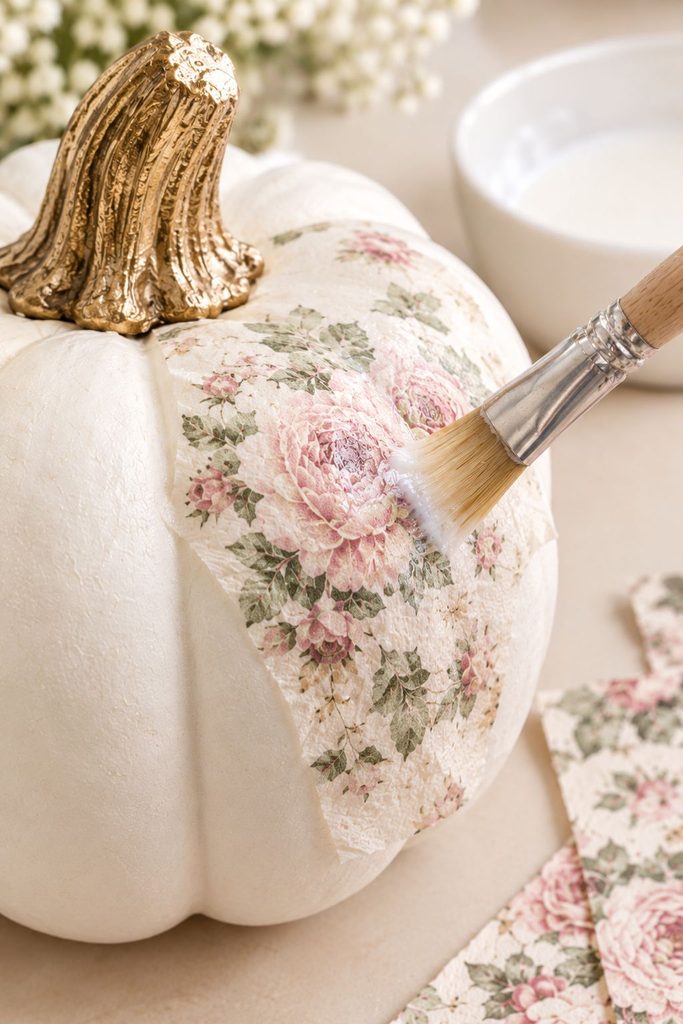
Using a soft brush, gently guide the napkin from the center toward its edges. Light dabbing motions can help position the paper without stretching it.
If the paper begins to bunch up, pause and adjust the loose edge rather than brushing harder. Wet napkin paper can tear if it is handled repeatedly.
Some small wrinkles may remain around the pumpkin’s ridges. This is normal for a handmade project, and trying to remove every tiny imperfection can cause more damage than leaving it alone.
Continue working section by section until you have covered the areas you want to decorate.
Step 7: Let the Design Dry
Leave the pumpkin undisturbed until the adhesive has dried according to the manufacturer’s instructions. Drying time depends on the product, the amount applied, and the conditions in your room.
Once dry, check for any loose edges. If a small section has lifted, carefully apply a little compatible adhesive underneath it and press it into place.
Allow any repairs to dry before moving on to the final coat.
Step 8: Seal the Finished Pumpkin
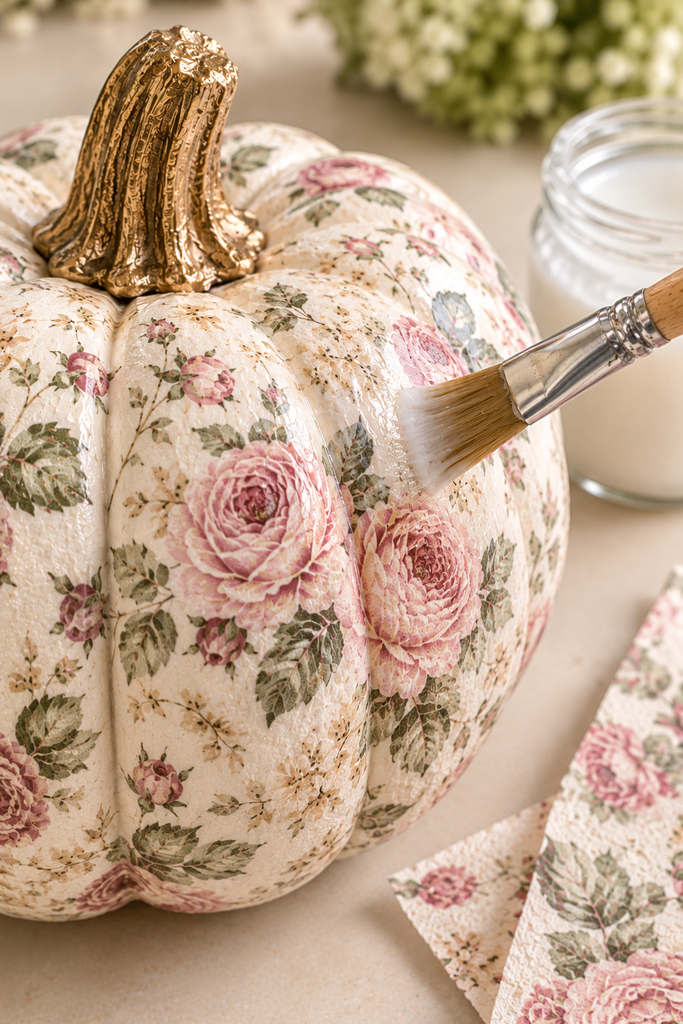
Apply a thin finishing coat of decoupage medium if the product instructions recommend it for your project. This helps protect the paper and gives the surface a more finished appearance.
A matte finish works beautifully with vintage floral and farmhouse styles. A gloss finish gives the decoration more shine.
Allow the pumpkin to dry completely before handling or displaying it. Remember that a craft sealer does not automatically make a paper-covered pumpkin waterproof or suitable for outdoor exposure.
Step 9: Finish the Stem
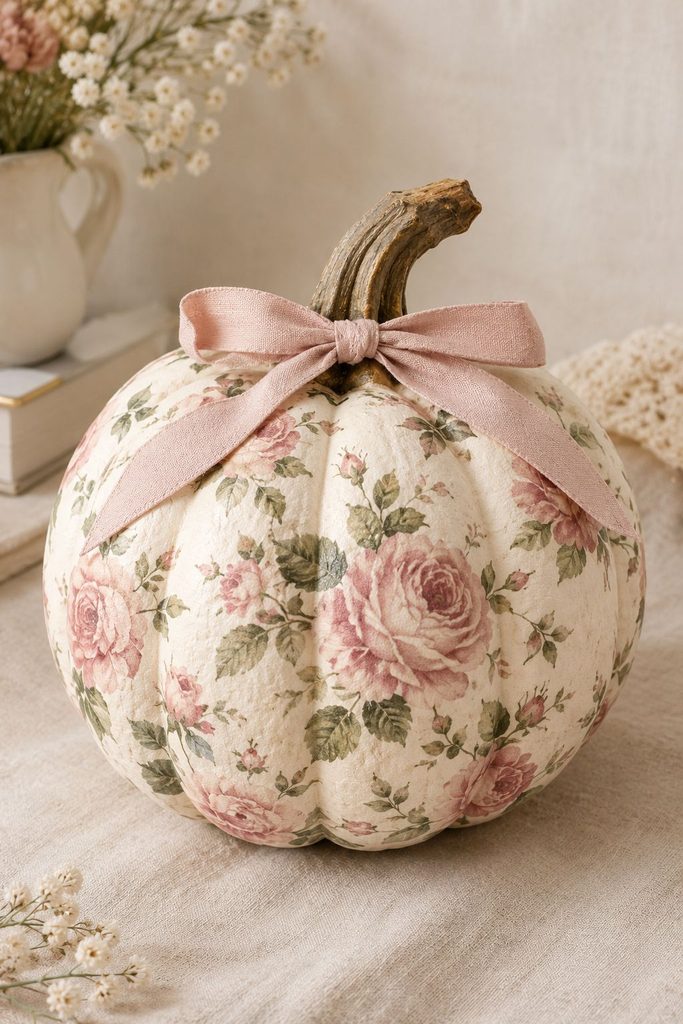
The stem is a small detail, but changing its color can make the entire design feel more coordinated.
Try painting it brown for a natural look, cream for a softer neutral finish, or muted gold for a subtle decorative accent. You can also tie a small ribbon around the stem once all paint and adhesive have dried.
Keep the finishing touches simple if your napkin already has a busy pattern. If the design is more minimal, a little ribbon or a contrasting stem color can make the pumpkin stand out.
How to Get a Better Finish Around Pumpkin Ridges
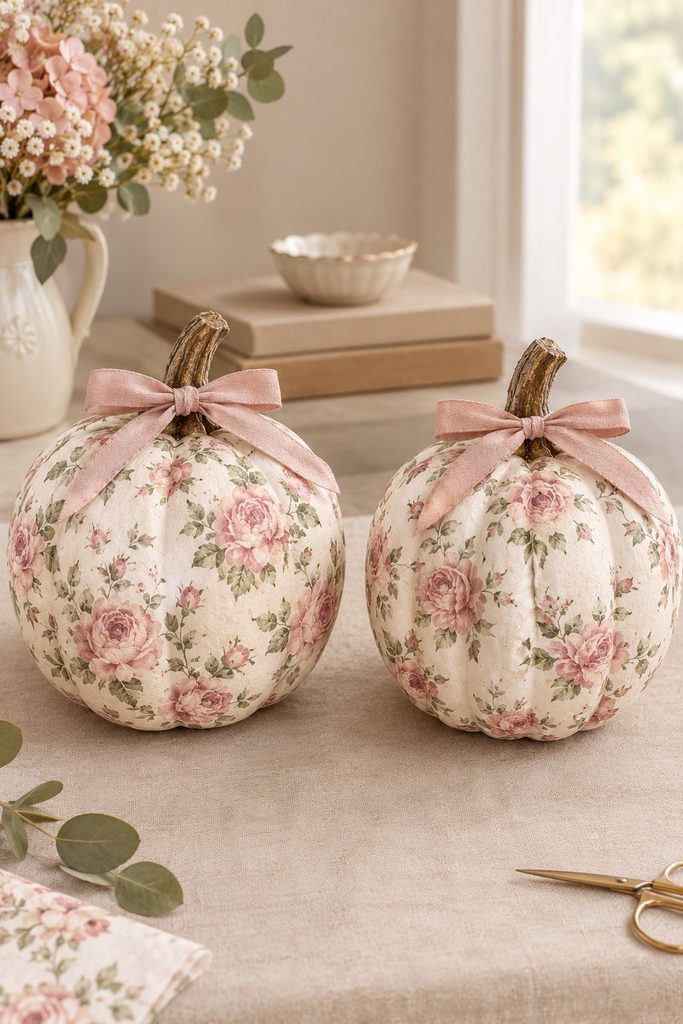
The ridges are often the trickiest part of this project because the paper needs to follow a surface that curves inward and outward.
The easiest approach is to use smaller pieces of napkin around deep grooves instead of forcing one large piece to fit. Position the paper gradually, allowing it to settle into the indentation without pulling it tight.
If the edge of a piece bunches up, a small cut along the edge may help it lie more naturally. Avoid cutting too far into the main design, particularly if you are using a large flower or illustration.
If you are decorating several pumpkins, consider using a different arrangement for each one. A pumpkin covered in small overlapping pieces will have a different appearance from one decorated with individual floral motifs, even if you use the same napkin.
Common Problems and How to Fix Them
The Napkin Tears While You’re Applying It
This usually happens when the paper is handled too much while wet. Stop brushing the damaged area. If necessary, use a small spare piece of the same pattern to cover the tear, then allow it to dry.
The Paper Looks Too Transparent
The printed layer may become more transparent when wet. A white or light-colored pumpkin often helps the pattern show more clearly. If you are unsure, test a small piece on a hidden section before covering the whole pumpkin.
The Pattern Looks Uneven
Step back and look at the entire pumpkin before making further adjustments. Small overlaps and slight variations are part of the handmade appearance. Adding too many patches can make the surface look unnecessarily busy.
An Edge Lifts After Drying
Apply a small amount of compatible decoupage medium beneath the loose edge and press it down gently. Let it dry before applying any recommended finishing coat.
The Finish Looks Lumpy
Thick adhesive or overlapping paper can create raised areas. Use smaller pieces, apply adhesive in a thin layer, and avoid building up too many layers in one spot.
Decoupage Pumpkin Design Ideas
Once you understand the technique, you can use different napkin patterns to create pumpkins for almost any fall decorating style.
Vintage Floral Pumpkins
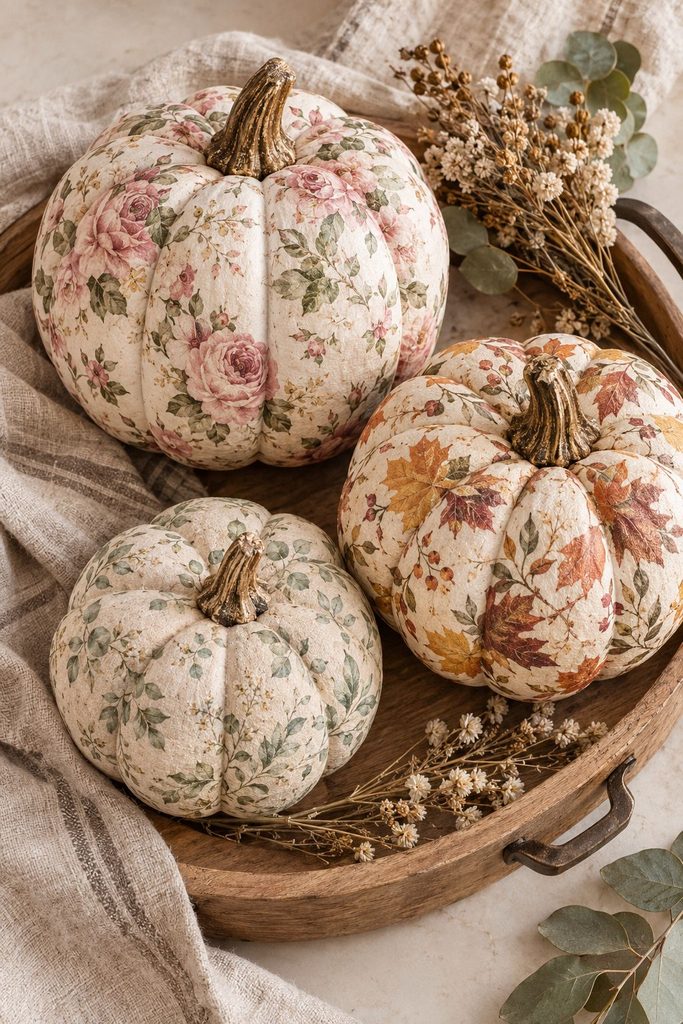
Choose napkins with faded roses, delicate greenery, and muted peach or rust flowers. Pair them with cream pumpkins and natural wooden accents for a romantic, vintage-inspired display.
Autumn Leaf Pumpkins
Use napkins printed with maple leaves, acorns, branches, or other fall foliage. Orange, brown, burgundy, and gold tones create a traditional autumn look.
Neutral Farmhouse Pumpkins
Try cream, beige, taupe, and soft sage patterns. These shades work especially well with woven baskets, wooden trays, and simple seasonal decorations.
Botanical Pumpkins
Napkins featuring ferns, herbs, wildflowers, or delicate plant illustrations create a natural look. Display them alongside dried stems and small terracotta accessories.
Halloween Decoupage Pumpkins
Black-and-white patterns, bats, stars, dark botanical prints, and vintage Halloween illustrations can give your pumpkins a more playful seasonal appearance.
For another seasonal decorating project, try these DIY Halloween flower pots. They can complement patterned pumpkins without requiring every item in your display to have the same design.
Mixed-Pattern Pumpkin Displays
Make several pumpkins using complementary napkins rather than repeating the exact same pattern. Display them in different sizes to create a collection that feels coordinated without looking identical.
How to Style Your Finished Pumpkins
After your pumpkins have dried completely, think about where you want to display them. A little styling can help your handmade decorations feel like part of a cohesive seasonal arrangement.
- On a mantel: Combine floral pumpkins with autumn leaves and dried stems.
- On a coffee table: Place a patterned pumpkin on a wooden tray with pinecones and a small vase.
- On an entryway table: Pair a pumpkin with a framed print or a vase of dried flowers.
- On a tiered tray: Use smaller pumpkins with complementary patterns and vary their sizes.
- As a centerpiece: Mix one or two decoupage pumpkins with plain white or orange pumpkins so the patterns have room to stand out.
You can also mix your handmade pumpkins with other DIY decorations. Browse these creative one-hour craft ideas for adults if you want more projects to make for your home throughout the season.
Keep paper-covered decorations away from moisture and open flames. If you display them near candles, maintain a safe distance and never leave burning candles unattended.
How to Store Decoupage Pumpkins After Fall
Faux pumpkins can often be reused for several seasons if you store them carefully.
Make sure the pumpkin is completely dry before packing it away. Wrap it loosely in tissue paper or a soft cloth to prevent the decorated surface from rubbing against other items.
Place it in a sturdy box where it will not be crushed, and store it somewhere dry. Avoid stacking heavy decorations on top of it.
Before bringing the pumpkin out next fall, check the surface for lifted edges or scratches. Small areas can often be repaired with a compatible craft medium.
Frequently Asked Questions
Can you decoupage pumpkins with regular paper napkins?
Yes. Decorative paper napkins are commonly used for decoupage. Separate the printed layer from the backing layers before applying it, and handle it gently once it becomes wet.
Do you have to paint the pumpkin white first?
No. Painting is optional. A white or cream background is useful when you want the printed colors to appear bright and clear, especially on a dark or orange pumpkin.
Can you use any kind of Mod Podge?
Choose a decoupage medium suitable for your pumpkin’s material and intended finish. Matte and gloss products can both work. Follow the manufacturer’s instructions and test unfamiliar combinations of paint, adhesive, and sealer first.
Can you decoupage a real pumpkin?
Yes, but real pumpkins are temporary decorations. Their natural moisture and eventual deterioration can affect the paper and adhesive. For a decoration you want to store and reuse, a faux pumpkin is a better choice.
How long does it take to make a decoupage pumpkin?
The active crafting time depends on the pumpkin’s size and the complexity of the design. You will also need to allow time for any paint, adhesive, and finishing coats to dry. Follow the instructions on your products rather than relying on one fixed drying time.
Can you use tissue paper instead of napkins?
Tissue paper can be used for some decoupage projects, although it may behave differently depending on its thickness and color. Test a small piece first to see how it looks when wet and how well it adheres to your pumpkin.
Do decoupage pumpkins need a sealer?
A compatible finishing coat can help protect the paper and create a more finished surface. Follow the product directions, and remember that a craft sealer does not automatically make the pumpkin waterproof.
Can you reuse decoupage pumpkins next year?
Faux pumpkins can generally be stored and reused if they are kept dry and protected from crushing or peeling. Inspect the finish before displaying them again and repair any loose edges if necessary.
More DIY Projects to Try Next
If you enjoy turning simple materials into personalized home decor, here are a few more CuratedSoftly projects to explore:
- 15 Pumpkin Painting Ideas That Are Cute, Easy, and So Fun for more seasonal pumpkin designs.
- How to Make Halloween Flower Pots for another way to customize simple decor.
- 10 Beautiful and Easy Air-Dry Clay Coaster Ideas for handmade pieces you can use around the home.
- Creative 1-Hour Craft Ideas for Adults for more approachable DIY inspiration.
Final Thoughts
Decoupage pumpkins are a lovely way to turn a plain craft pumpkin into something personal and decorative. With a pretty napkin, a suitable decoupage medium, and a little patience, you can create floral, botanical, or autumn-inspired pumpkins that fit your home perfectly.
If you are new to this craft, start with a white faux pumpkin and a small floral pattern. Once you get comfortable positioning the paper around the curves, you can experiment with different prints and create a collection of pumpkins for your fall decor.
Which design would you try first: vintage florals, autumn leaves, or neutral botanical prints?