17 Small Handmade Products That Make Money
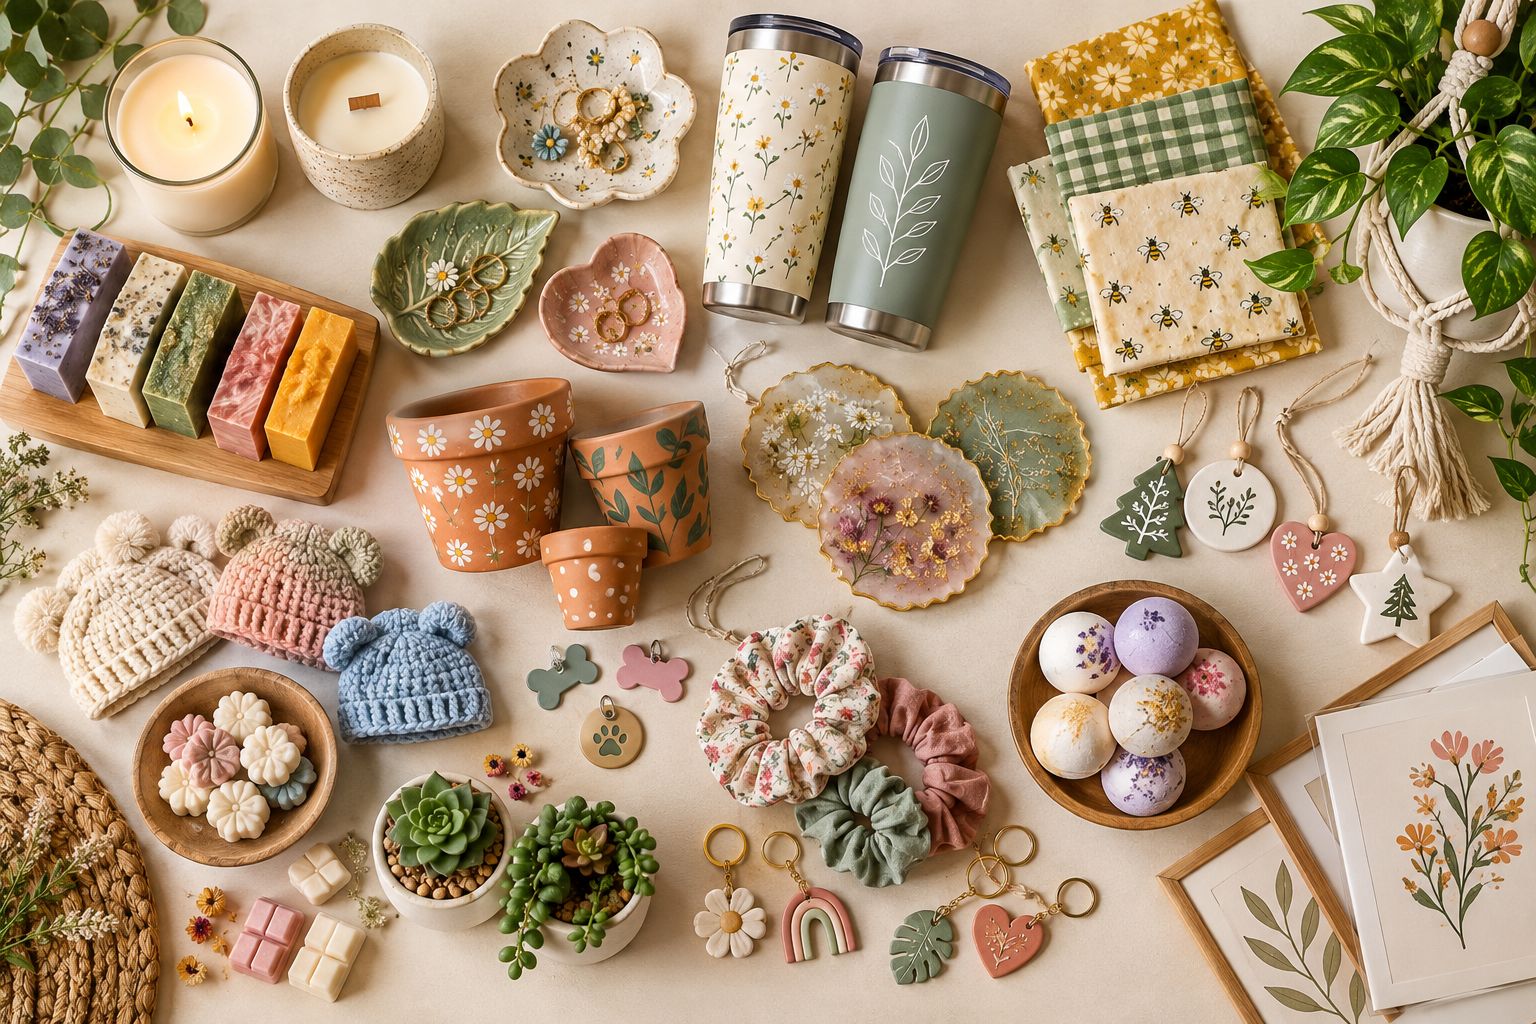
I get asked some version of the same question a lot: “What should I actually make if I want to start selling?” It’s a fair question, because not every craft that’s fun to make is actually easy to sell.
Some things take hours of work and barely cover the cost of materials once you actually sit down and do the math. Others take twenty minutes, cost almost nothing to produce, and people happily pay real money for them without a second thought.
I learned this the hard way early on. My first attempts at selling were things I personally loved making, elaborate, multi-step pieces that felt impressive to finish but took so long that my effective hourly rate was embarrassingly low once I actually tracked it.
It took a while to realize that the products that actually build income aren’t necessarily the most impressive ones on a shelf, they’re the ones you can produce efficiently, price fairly, and that still feel special enough to a buyer that they don’t hesitate to say yes.
This isn’t a list of vague ideas to get you thinking. Every item below has real quantities, an actual step-by-step process, and the specific thing that tends to go wrong the first time you try it, so you can genuinely make one this week instead of just adding another idea to a list.
Why Small Handmade Products Sell So Well
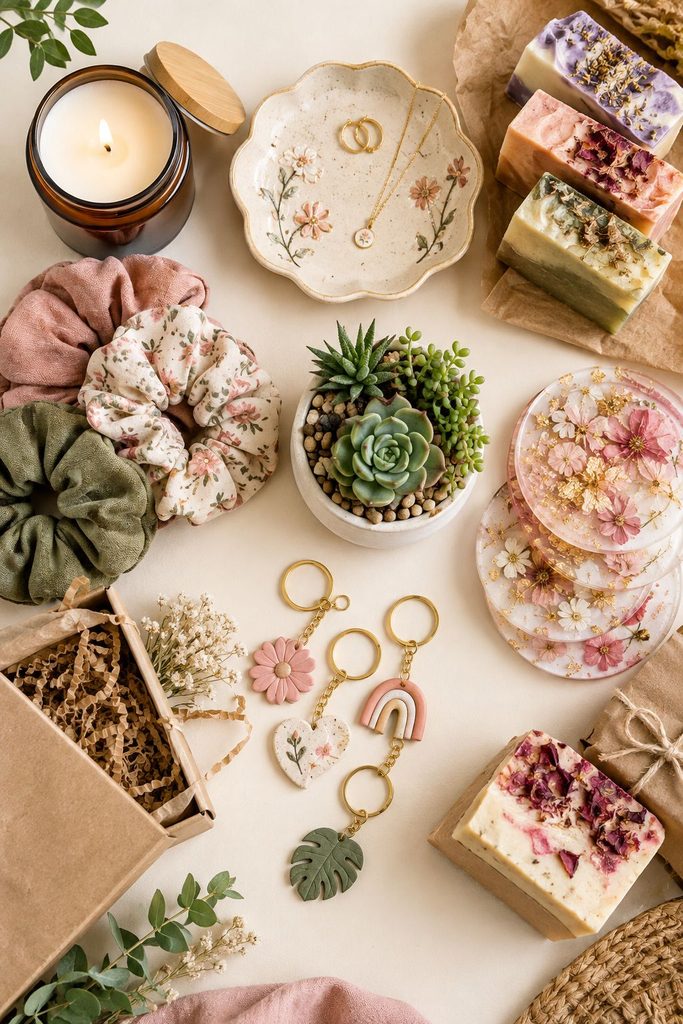
Low material cost, high perceived value. The best products on this list cost a few dollars in materials but feel like they’re worth much more, because handmade already carries a sense of care that mass production doesn’t.
Fast to produce in batches. The products that actually generate income are the ones you can prep, assemble, and finish efficiently once you’ve built a repeatable process.
Gift-ready by default. A huge share of handmade sales happen because someone’s shopping for another person. Products that already feel like a finished gift sell faster.
Easy to photograph well. Products with texture, color, and a clear focal point photograph better and convert better.
1. Personalized Soy Candles
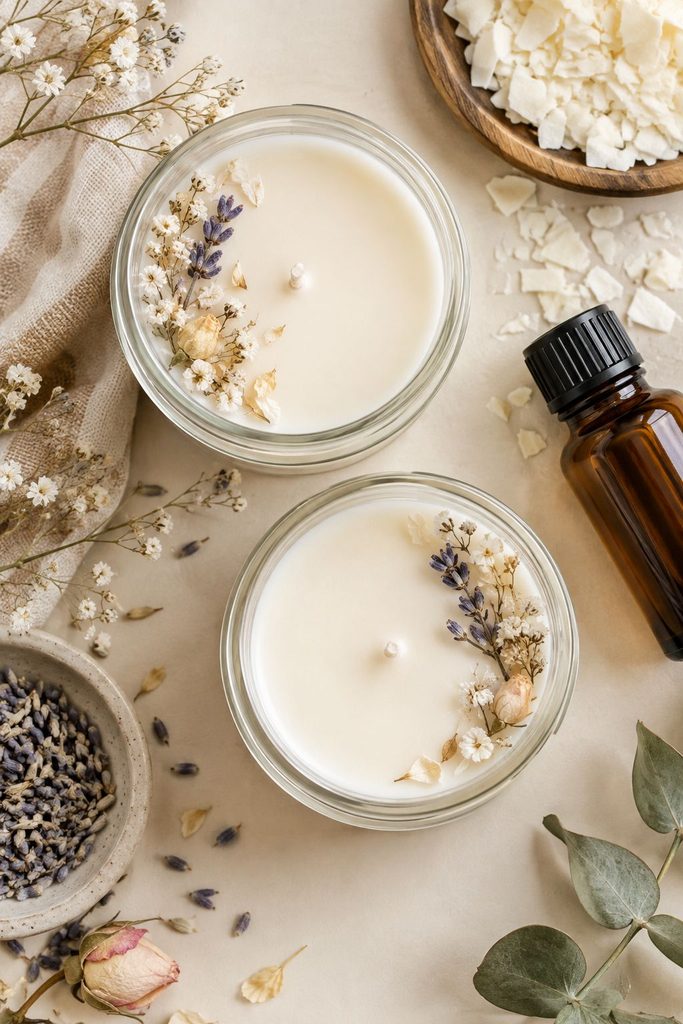
Candles remain one of the most consistently profitable handmade products because the base cost is low and personalization, a name, a date, a custom scent blend, lets you charge a real premium over a plain, unlabeled candle.
They’re also genuinely simple once you’ve made your first batch, most of the skill is in getting your fragrance load and pour temperature right.
What You’ll Need
- 1 lb soy wax flakes (makes roughly two 8 oz candles)
- 2 cotton wicks with metal tabs, sized for a 2.5 to 3 inch diameter container
- 0.5 oz fragrance oil per 8 oz of wax (a 5% fragrance load)
- 2 glass jars or tins, 8 oz each
- A pouring pitcher, a kitchen scale, a thermometer, and wick stickers or hot glue
How to Make It
- Weigh out 16 oz of wax flakes and melt it in a pouring pitcher set inside a pot of simmering water, stirring occasionally, until it reaches 185°F.
- While the wax melts, stick a wick sticker to the bottom of each wick tab and press it firmly into the center of each jar.
- Remove the wax from heat and let it cool to 135°F, then stir in your fragrance oil (0.8 oz total for two candles) for a full 2 minutes to make sure it’s evenly distributed.
- Pour the wax slowly into both jars, leaving about half an inch of space at the top. Use a pencil or wick holder laid across the top of the jar to keep the wick centered and straight while it sets.
- Let the candles cure undisturbed for at least 24 hours, ideally 48, before trimming the wick to a quarter inch and lighting.
- Once fully cured, add a personalized sticker or printed label with the buyer’s name, initials, or date.
What Goes Wrong
If you see a sunken, cratered top once the candle cools, your wax was poured too hot or cooled too fast. Pouring at 135°F instead of straight off the heat, and letting the candle cure somewhere free of drafts, mostly fixes this.
If the scent throw is weak once burned, your fragrance load was likely too low, stick to the 5-8% range for soy wax specifically.
Ways to Sell It
Offer an “add a name” field directly on your listing. Etsy and local markets both do well here, especially in the run-up to holidays when personalized gifts spike.
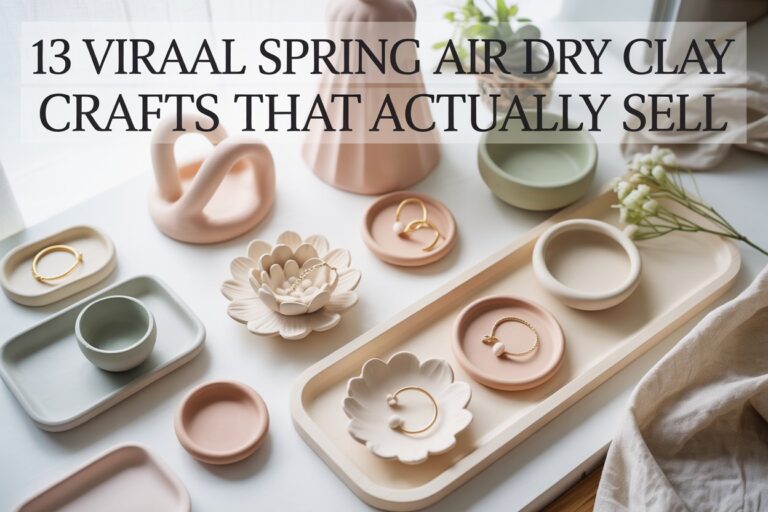
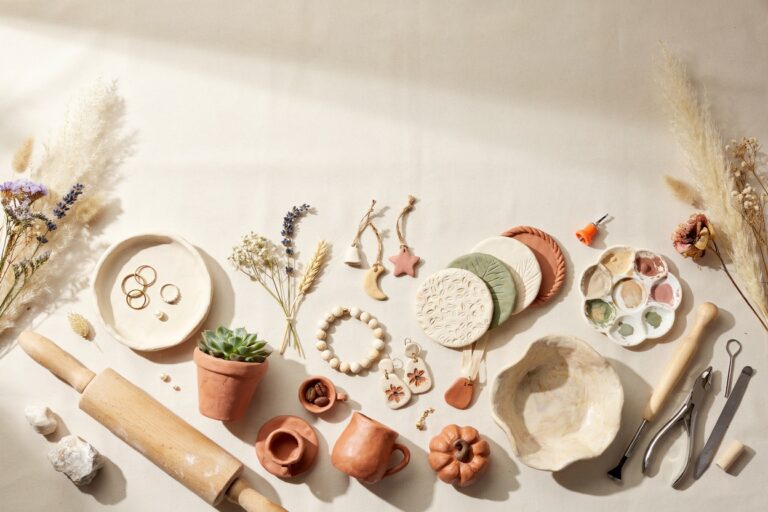
2. Air Dry Clay Trinket Dishes
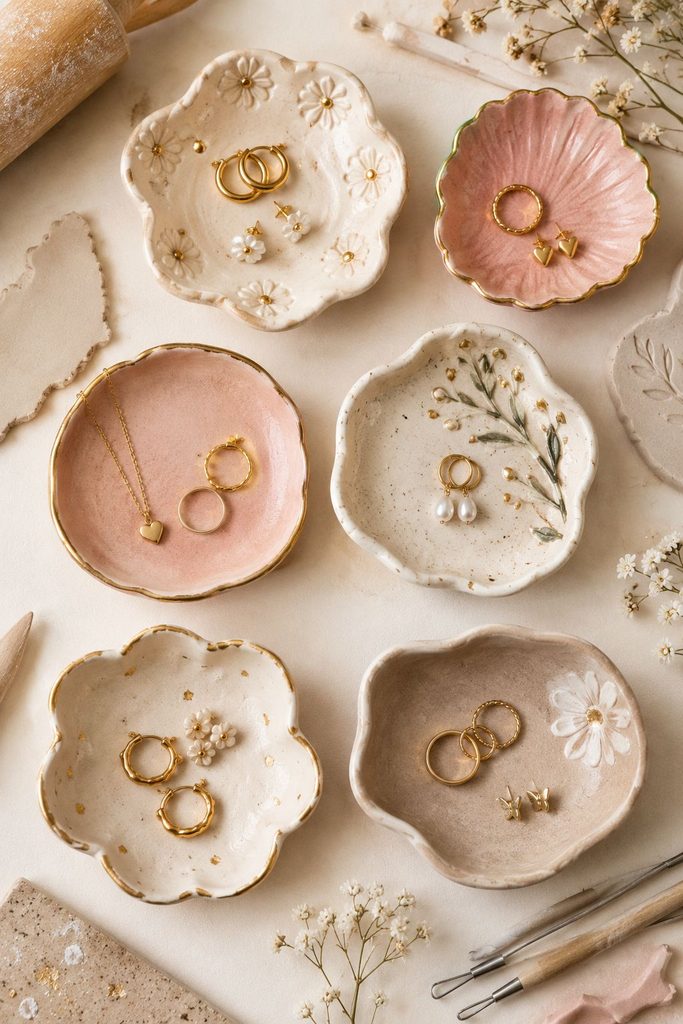
Small clay dishes for rings, keys, or jewelry are inexpensive to make and genuinely useful, which is a rare combination in the handmade space.
My Anthropologie-Inspired Trinket Dish Tutorial walks through a closely related version of this same draping technique.
What You’ll Need
- 1 lb block of air dry clay (makes 3 to 4 small dishes)
- A rolling pin and two ¼-inch wooden guide sticks (to roll an even thickness)
- A small bowl, 4 to 5 inches wide, lined with plastic wrap, to shape the dish over
- Acrylic paint, a fine brush, and a matte or glossy sealant spray
How to Make It
- Knead the clay for about a minute to remove air bubbles, then place it between your two guide sticks and roll it flat to an even ¼-inch thickness.
- Cut a rough circle or freeform shape about 5 to 6 inches across using a butter knife or clay cutter.
- Drape the shape over your plastic-wrap-lined bowl, gently pressing the center down and letting the edges fall naturally into soft waves.
- Smooth any cracks at the edges with a wet fingertip, then let it air dry in the bowl for 24 hours before carefully removing it to dry fully for another 24 hours.
- Once completely dry (it should feel light and cool, not cold or damp), paint your design and let it dry fully between colors.
- Seal with two light coats of sealant spray, letting each coat dry for about 20 minutes.
What Goes Wrong
Edges that crack while drying usually mean the clay was rolled too thin at the edges or dried too fast in direct sun or near a heater.
Roll evenly and dry it somewhere at room temperature out of direct sunlight. If paint looks patchy, it’s almost always because the clay wasn’t fully dry underneath, wait the full 48 hours before painting.
Ways to Sell It
These photograph well in a styled flat-lay next to jewelry or a candle. List them individually and as a bundled “vanity set” with a candle for a higher-value listing.
3. Custom Vinyl Tumblers
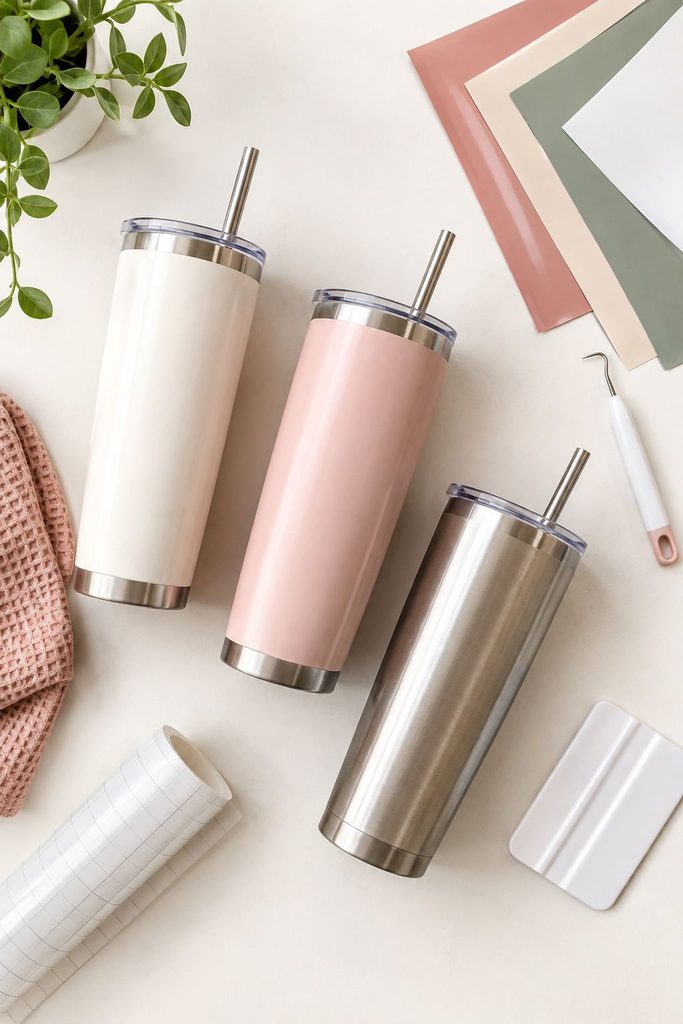
A blank tumbler and a sheet of adhesive vinyl turns into a personalized product in under 30 minutes, and buyers consistently pay a significant markup for a name, monogram, or custom design over a plain one.
The whole process comes down to patience during application, rushing is where nearly every mistake happens.
What You’ll Need
- Blank stainless steel tumblers (20 oz is the most popular size)
- Adhesive vinyl and transfer tape, cut with a cutting machine
- A weeding tool, a scraper or credit card, isopropyl alcohol, and a lint-free cloth
How to Make It
- Wipe the tumbler down with isopropyl alcohol and let it dry completely, any oil or residue will stop the vinyl from sticking properly.
- Design and cut your decal, then weed out the excess vinyl, leaving only your design on the backing sheet.
- Apply transfer tape over the design and burnish it firmly with a scraper before peeling the backing sheet away.
- Position the design on the tumbler, starting from one edge, and slowly press it down while smoothing outward with the scraper to avoid trapping air bubbles.
- Peel back the transfer tape at a low angle, checking that all the vinyl has released cleanly onto the tumbler.
- Optional: seal with a clear epoxy coat for extra durability if the tumbler will go through a dishwasher (check that your epoxy is rated for that use).
What Goes Wrong
Bubbles under the vinyl almost always come from applying it too quickly. Go slow, working from the center outward, and use a pin to pop any stubborn bubbles before smoothing them flat.
If the vinyl peels up at the edges after a day, the tumbler likely wasn’t cleaned well enough beforehand.
Ways to Sell It
Bulk orders (bridesmaid sets, team gifts) are where the real money is here. List a “set of 6” option with a small per-unit discount to encourage bigger orders.
4. Beeswax Food Wraps
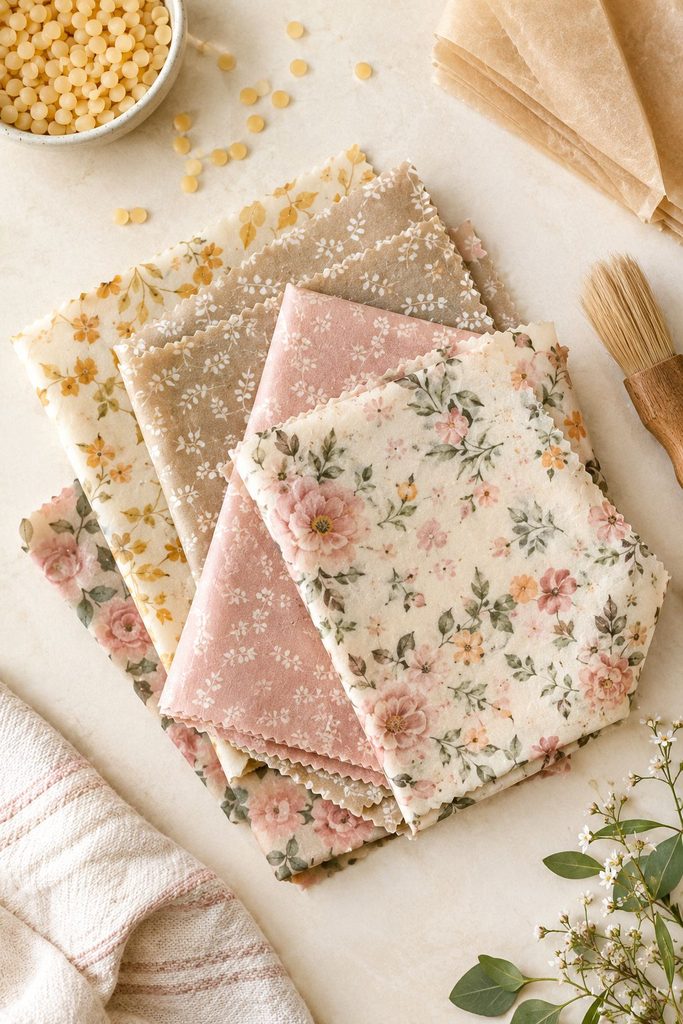
Reusable food wraps appeal to buyers looking for an eco-friendly kitchen swap, and the materials, beeswax, cotton fabric, and a bit of jojoba oil, cost very little per finished piece relative to what they sell for.
An iron and some parchment paper are really all the “equipment” this one needs.
What You’ll Need
- ½ yard 100% cotton fabric (makes about 4 wraps: 2 small, 2 medium)
- 3 oz beeswax pellets
- 1 tablespoon jojoba oil
- 1 teaspoon pine resin (optional, adds extra tack)
- Parchment paper, a paintbrush (for spreading), and an iron
How to Make It
- Cut your fabric into rectangles: two at 7×8 inches and two at 10×11 inches.
- Lay a sheet of parchment paper on your ironing surface, place one fabric piece on top, and sprinkle beeswax pellets evenly over the surface, more heavily near the edges where wax tends to run thin.
- Drizzle a few drops of jojoba oil over the wax, then cover with a second sheet of parchment paper.
- Set your iron to low-medium heat (no steam) and iron over the parchment in slow, even passes until you see the wax fully melted and absorbed through the fabric.
- Peel back the top parchment while the wax is still warm to check for dry spots, add a bit more wax to any thin patches and re-iron.
- Lift the wrap by the corners and wave it gently in the air for about 30 seconds to cool and set before it’s ready to use.
What Goes Wrong
Stiff, brittle wraps usually mean too much wax and not enough oil, the jojoba oil is what keeps the final wrap flexible.
Patchy spots that never got tacky mean that section didn’t get enough wax during ironing, more wax and another pass usually fixes it.
Ways to Sell It
Sell as a 3-pack (small, medium, large) rather than individually. Lean into the eco-friendly, zero-waste kitchen angle in your listing title and photos.
5. Macrame Plant Hangers
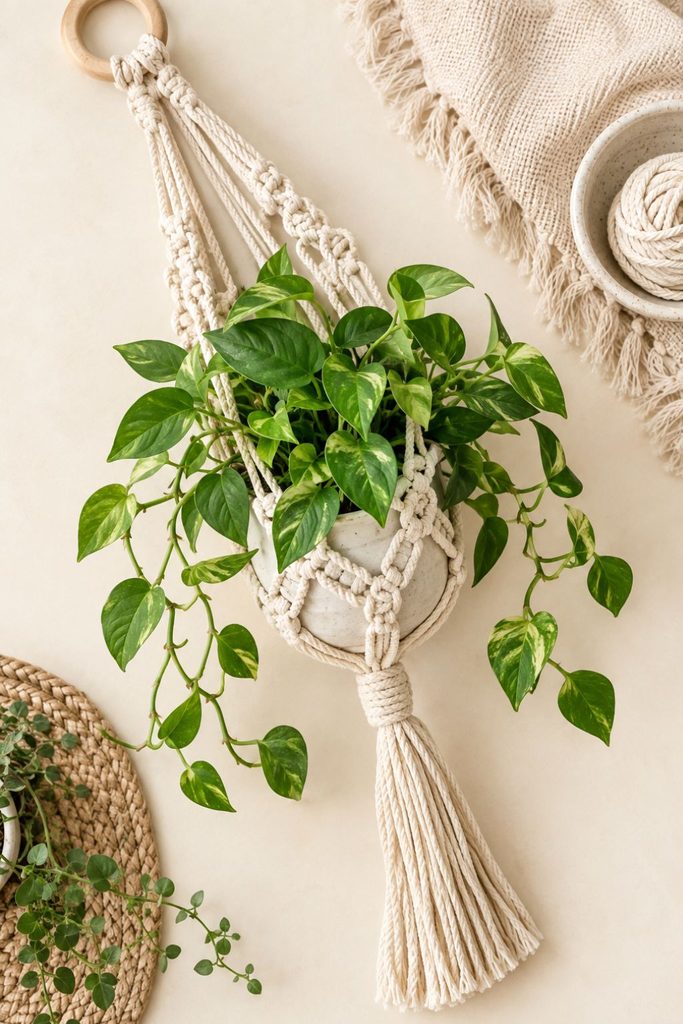
A single skein of cord makes multiple hangers, and macrame has stayed consistently popular for home decor.
The technique is entirely about knot spacing consistency, once that clicks, the actual knotting itself is fairly repetitive and easy to batch.
What You’ll Need
- 8 lengths of 4mm cotton macrame cord, each cut to 8 feet (for a medium hanger)
- A 2-inch wooden or metal ring
- Scissors and a clipboard or dowel to anchor your work while knotting
How to Make It
- Fold all 8 cords in half over the ring, so you have 16 strands hanging down, and secure the ring to your clipboard or dowel to hold it steady.
- Divide the strands into 4 groups of 4 and tie a square knot about 4 inches down from the ring on each group to start the first row.
- Skip down another 3 inches, then take 2 strands from one group and 2 from the neighboring group and tie a new square knot, repeating around to connect all 4 groups into a second row. This is what creates the diamond lattice pattern.
- Repeat one more connecting row 3 inches below that for a fuller look, or skip straight to gathering all strands together.
- Gather all 16 strands about 4 inches below your last row and tie a final tight wrapping knot to close the base.
- Trim the ends evenly to your desired tassel length, anywhere from 4 to 8 inches depending on the look you want.
What Goes Wrong
Uneven knot spacing is the most common issue for beginners, measure each gap with your fingers or a small ruler rather than eyeballing it, since even small inconsistencies are obvious once the piece is hanging.
If the hanger twists to one side, your square knots were likely tied in the same direction throughout, alternate left-over-right and right-over-left every other knot to keep it balanced.
Ways to Sell It
Photograph the finished hanger with a small potted plant in it, even if the plant isn’t included in the sale, listings with a styled photo convert noticeably better than a plain product shot.
6. Hand-Poured Melt-and-Pour Soap Bars
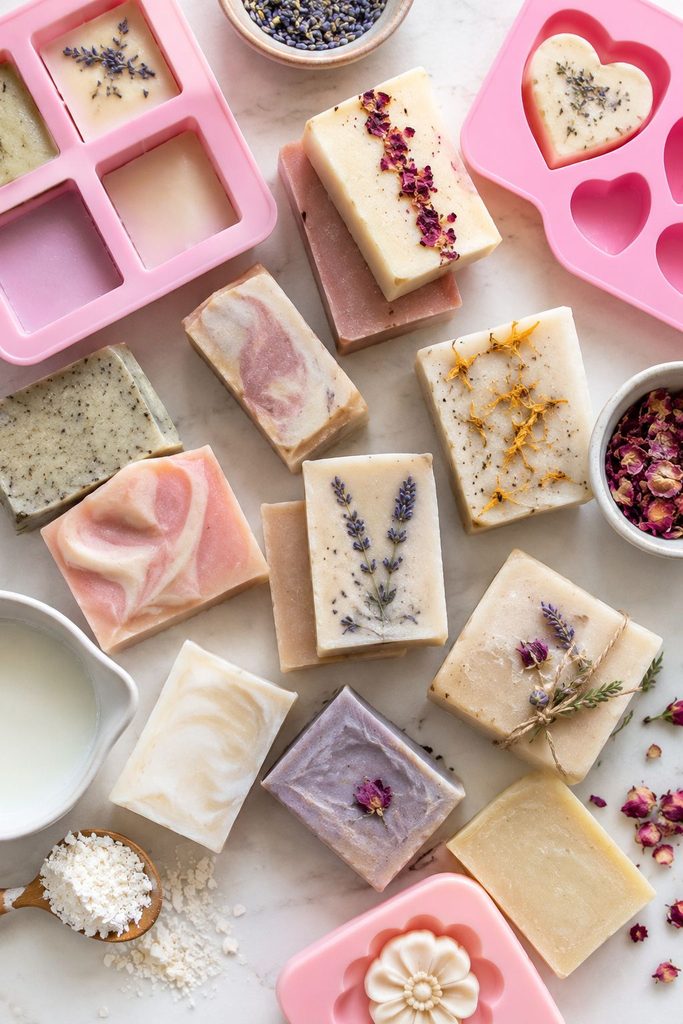
Soap has a loyal repeat-customer base, since people run out and need more on a predictable cycle.
Melt-and-pour base skips the lye handling of cold-process soap entirely, which makes this the far more approachable starting point if you’ve never made soap before.
What You’ll Need
- 2 lbs melt-and-pour soap base (makes about 8 bars)
- 0.5 oz fragrance oil per pound of base
- Liquid or mica soap colorant
- A silicone bar mold (6 to 8 cavities) and a heat-safe pouring container
How to Make It
- Cut the soap base into roughly 1-inch cubes for even, faster melting.
- Melt in the microwave in 30-second bursts, stirring between each, or in a double boiler over low heat, until fully liquid with no lumps.
- Remove from heat and stir in your fragrance oil (1 oz total for a 2 lb batch) and a few drops of colorant, mixing until evenly distributed.
- Pour into your mold cavities, tapping the mold firmly on the counter a few times to release any trapped air bubbles.
- Lightly spritz the top of each bar with rubbing alcohol to pop any remaining surface bubbles.
- Let the bars cool and fully harden for 2 to 4 hours at room temperature before unmolding.
What Goes Wrong
A layer of small bumps on the surface after unmolding, often called “sweating,” usually means the soap cooled somewhere too humid.
Let bars set in a dry, room-temperature spot. If bars crack while unmolding, they likely weren’t fully cooled and hardened yet, give them another hour before trying again.
Ways to Sell It
Bundle 3 to 4 different scents together rather than selling single bars. Local markets outperform online listings here since buyers like to smell the scents before committing.
7. Painted Terracotta Pots
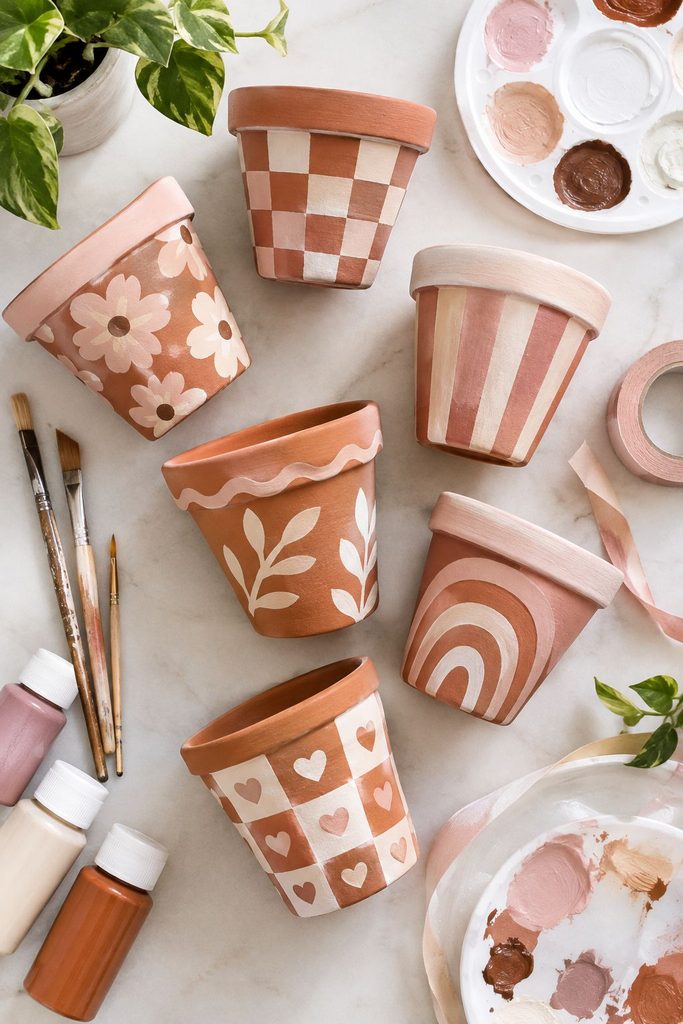
A plain pot and a few colors of acrylic paint turn into something that looks intentional and boutique-bought.
My Creative 1-Hour Craft Ideas post covers a similar quick-turnaround painting approach if you want another reference for technique.
What You’ll Need
- Plain terracotta pots (4 to 6 inch sizes sell best)
- Acrylic paint in 3 to 4 colors
- Painter’s tape, a small round brush, and a clear matte sealant spray
How to Make It
- Wipe the pot down with a damp cloth to remove dust and let it dry fully, terracotta is porous, so a clean, dry surface matters more here than with most materials.
- Apply a base coat of your main color, using two thin layers rather than one thick one, letting each dry for about 20 minutes.
- Use painter’s tape to mask off any stripes, triangles, or geometric shapes, pressing the edges down firmly so paint doesn’t bleed underneath.
- Paint your second color inside the taped sections, then carefully peel the tape away while the paint is still slightly tacky, not fully dry, for the cleanest edge.
- Add any fine detail work (dots, thin lines) freehand once the base layers are fully dry.
- Seal with two light coats of clear sealant spray, waiting about 20 minutes between coats.
What Goes Wrong
Paint bleeding under tape almost always means the tape wasn’t pressed down firmly enough at the edges, or the base coat underneath wasn’t fully dry before taping. Peeling the tape too late, after the paint has fully dried, is the most common cause of a jagged rather than crisp edge.
Ways to Sell It
Sell as a matching set of 2 or 3 sizes rather than a single pot. Seasonal color palettes (pastels for spring, deep reds for fall) sell in predictable spikes if you list them a few weeks ahead of the season.
8. Resin Coasters
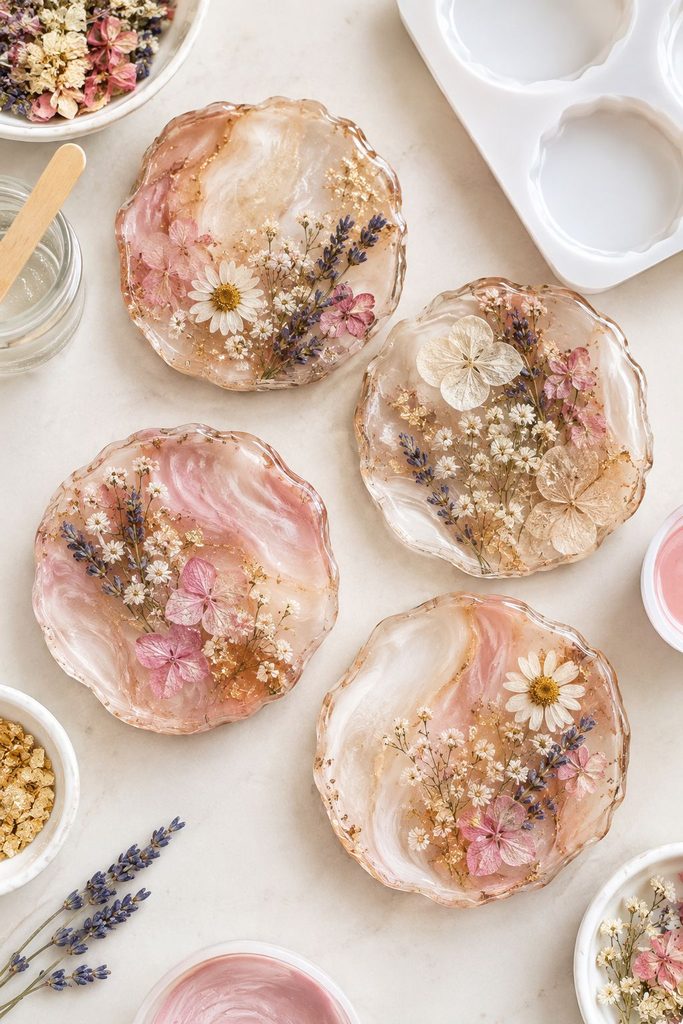
Resin coasters have a high perceived value because of how polished and glossy the finished product looks, even though the actual pour process is fairly quick once you’ve got your molds and workflow set.
Getting the measuring and mixing right matters more here than in almost any other craft on this list.
What You’ll Need
- Clear casting resin and hardener (a 1:1 ratio is standard, check your specific brand)
- A 4-cavity silicone coaster mold
- Mixing cups, a stir stick, a small kitchen scale, and a heat gun or butane torch
- Optional: dried flowers, mica powder, or alcohol ink for color and inclusions
How to Make It
- Weigh equal parts resin and hardener into a mixing cup (most coaster molds need about 1.5 oz total per coaster).
- Stir slowly and thoroughly for a full 3 minutes, scraping the sides and bottom of the cup, to avoid a soft or tacky final cure.
- If adding color, split the mixed resin into smaller cups and stir in a few drops of alcohol ink or a pinch of mica powder per color.
- Pour a thin base layer into the mold first, torch out any bubbles, then add any dried flowers or inclusions face-down against the mold for a clean top surface once flipped.
- Pour the remaining resin to fill the mold, then pass a heat gun or torch quickly over the surface to pop any remaining bubbles.
- Let cure undisturbed for 24 to 72 hours depending on your resin’s specific cure time, then demold and lightly sand any rough edges with fine-grit sandpaper.
What Goes Wrong
Soft, tacky coasters that never fully harden almost always mean the ratio was measured incorrectly, always measure by weight, not volume, for accuracy.
Cloudy or foggy resin usually means it wasn’t stirred long enough, under-mixing is the single most common resin mistake.
Ways to Sell It
Sell in sets of 4, and bundle with a matching resin tray for a higher-value listing. Clear, well-lit photos matter enormously here since the glossy finish is the main selling point.
9. Personalized Salt Dough Ornaments
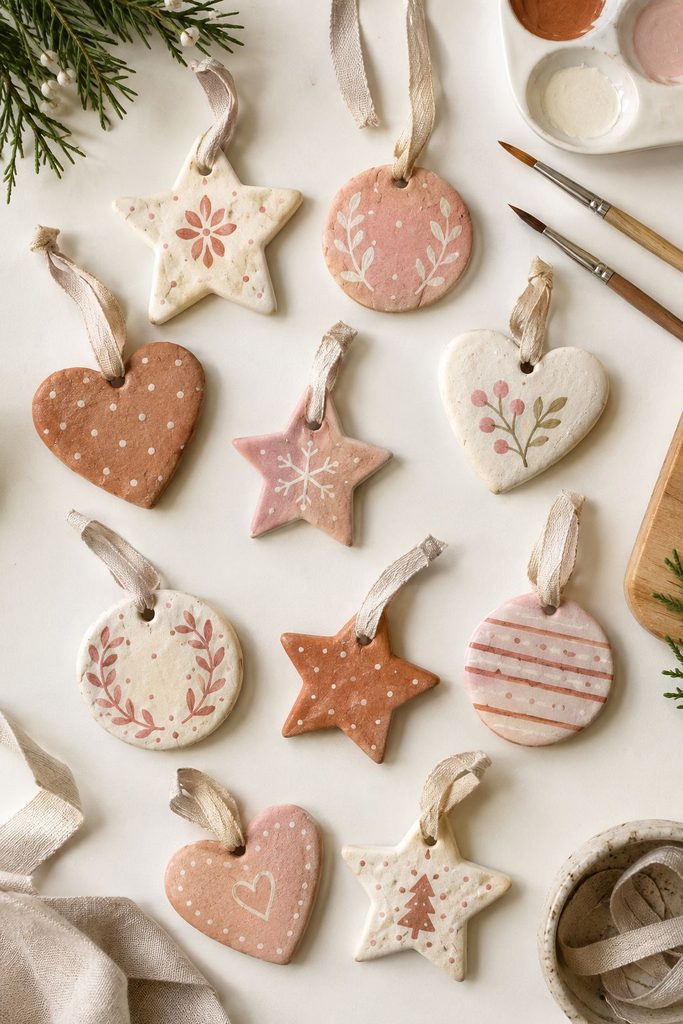
Ornaments sell heavily in a tight seasonal window, but the margin is excellent since flour, salt, and water cost next to nothing.
This is one of the cheapest products on the entire list to make, the only real investment is the low, slow oven time.
What You’ll Need
- 2 cups flour, 1 cup salt, 1 cup water (makes about 8 to 10 small ornaments)
- A rolling pin, cookie cutters, and a straw for the hanging hole
- Acrylic paint, a fine brush, and ribbon or twine
How to Make It
- Mix the flour and salt in a bowl, then slowly add water, mixing until it forms a smooth, non-sticky dough. Knead for about 5 minutes.
- Roll the dough to about ¼-inch thickness and cut shapes using cookie cutters.
- Use a straw to punch a small hole near the top of each shape for hanging, this needs to happen before baking.
- Bake at 200°F for 2 to 3 hours, flipping halfway through, until fully hardened and dry with no soft spots. Larger or thicker pieces will need more time.
- Let the ornaments cool completely before painting, then add a base coat and let dry fully before adding personalized details like a name or date.
- Seal with a matte or glossy sealant spray, then thread ribbon through the hole for hanging.
What Goes Wrong
Ornaments that puff up or crack while baking usually mean the oven was too hot, or they weren’t rolled to an even thickness. Keep the temperature low and slow rather than rushing with higher heat.
If they feel soft in the center after baking, they need more time, underbaked salt dough will eventually mold if not fully dried.
Ways to Sell It
List these 6 to 8 weeks before the relevant holiday, this category has a hard seasonal cutoff and sales fall off fast once the season passes. Sell as a set of 3 to 5 rather than individually.
10. Crochet Baby Hats
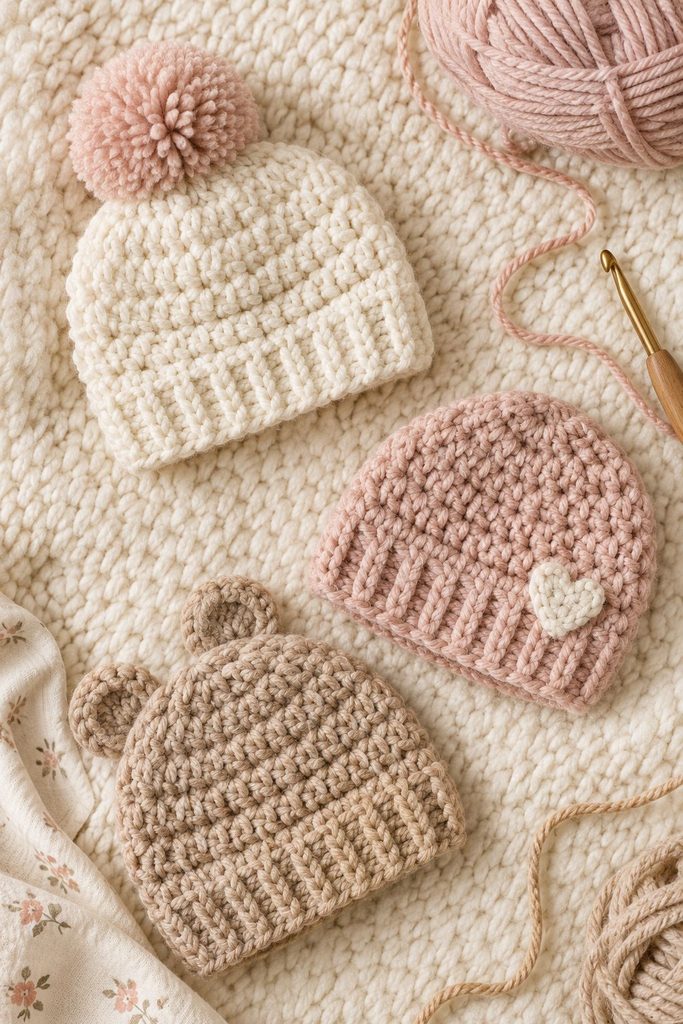
Small crochet pieces take relatively little yarn and time compared to a full blanket or sweater, but new parents and gift-givers consistently pay well for handmade baby items.
My Free Crochet Baby Hat Pattern covers this same basic construction with a few extra size variations.
What You’ll Need
- 1 skein worsted weight cotton yarn (makes 2 to 3 hats)
- A 5.0mm (H) crochet hook
- A yarn needle for weaving in ends and stitch markers
How to Make It
- Chain 4 and join with a slip stitch to form a ring.
- Round 1: work 8 single crochet stitches into the ring, join with a slip stitch.
- Round 2: work 2 single crochet in each stitch around (16 stitches total).
- Round 3: alternate 1 single crochet, then 2 single crochet in the next stitch, repeating around (24 stitches).
- Continue increasing every round in this stepped pattern until the flat circle measures about 4.5 inches across for a newborn size, or 5.5 inches for 6-12 months.
- Once you’ve reached the right width, stop increasing and crochet straight rounds (no more increases) until the hat measures about 4 to 5 inches tall from the center.
- Finish with a single crochet or ribbing round for a clean edge, then weave in all loose ends with a yarn needle.
What Goes Wrong
A hat that comes out cone-shaped instead of flat and round usually means the increases weren’t spaced evenly around each round, use stitch markers every 8 stitches to keep your increases lined up.
If the finished hat feels too loose, size down your hook by half a millimeter for a tighter, more secure fit.
Ways to Sell It
Sell as a matched set with booties rather than a single hat, matched sets consistently outsell single pieces in the baby category. Market directly toward baby shower gifts in your listing title.
11. Wax Melts
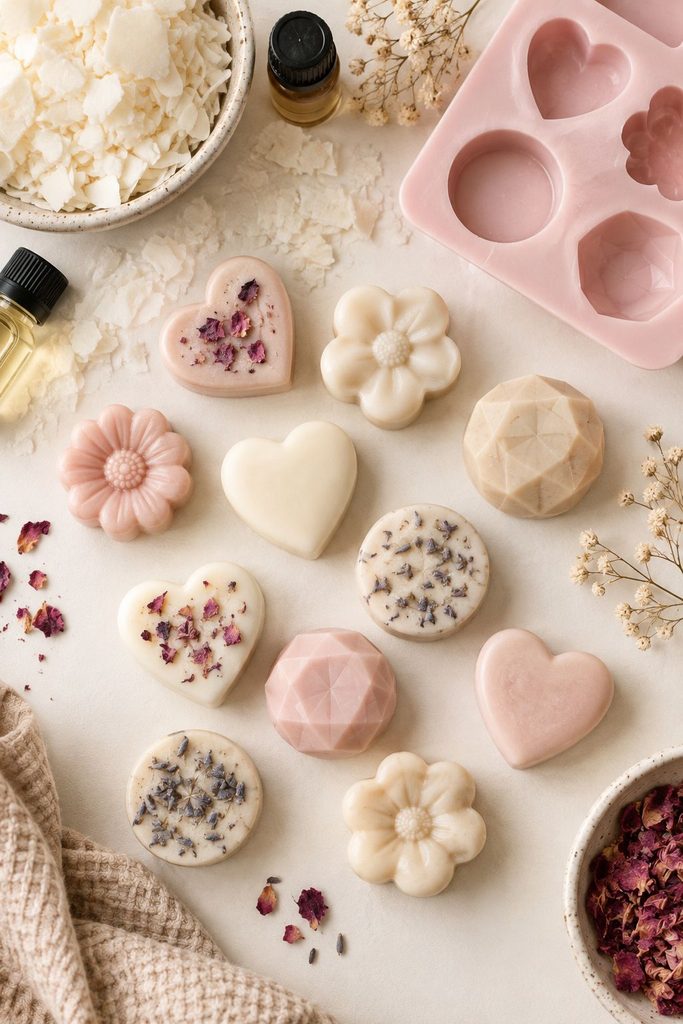
Wax melts use less wax than a full candle, which keeps material costs down, and they appeal to buyers who want a scented home product without an open flame. If you already make candles, this is essentially the same process with a different mold and no wick.
What You’ll Need
- 8 oz soy wax flakes (makes about 6 melts in a standard clamshell)
- 0.6 oz fragrance oil
- A silicone clamshell mold or melt-specific silicone tray
How to Make It
- Melt the wax in a pouring pitcher over a double boiler, stirring until fully liquid, around 185°F.
- Remove from heat and let cool to about 150°F (wax melts don’t need as precise a fragrance-binding temperature as candles do).
- Stir in the fragrance oil for a full 2 minutes to distribute evenly.
- Pour into the clamshell cavities, filling each about ¾ full to leave room for the lid to close.
- Let cool and fully harden for about 2 hours at room temperature before popping out of silicone molds or sealing clamshells.
What Goes Wrong
A grainy or crumbly texture usually means the wax was poured too cool, work quickly once you hit 150°F rather than letting it sit and continue cooling in the pitcher.
Weak scent once melted usually means an underpowered fragrance load, soy wax melts can typically handle a slightly higher fragrance percentage than candles, closer to 7-8%.
Ways to Sell It
Sell as a variety 6-pack of different scents. This is a strong upsell alongside a matching candle in the same scent line.
12. Custom Pet Tags
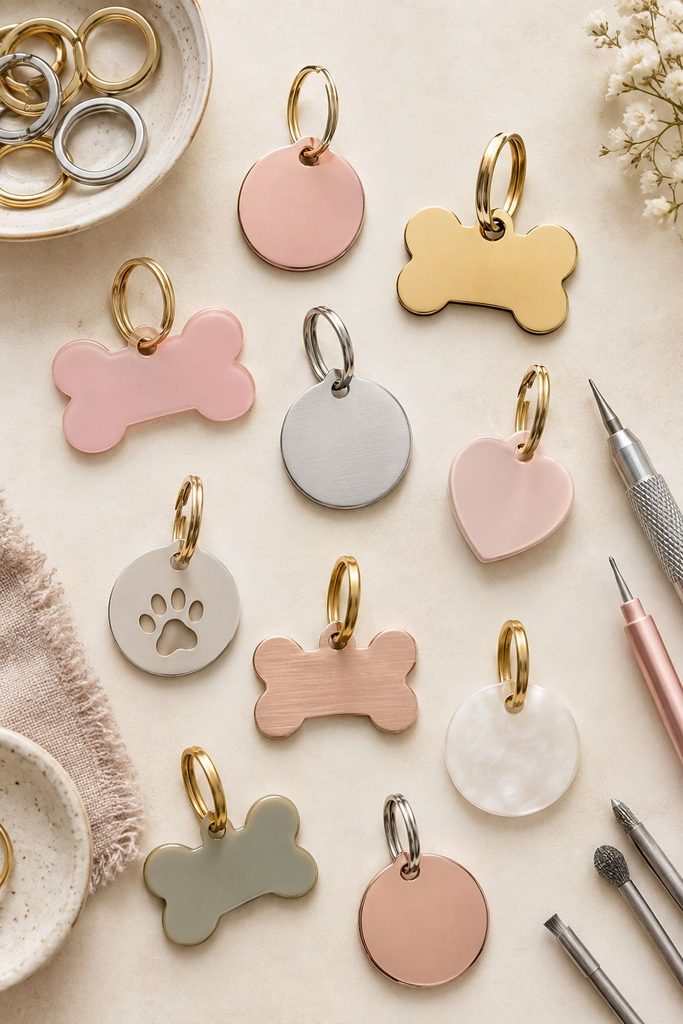
Pet-themed products tap into an audience that’s famously willing to spend on their pets, and a personalized tag is a fast, low-material-cost product with genuinely useful function behind it, it’s not just decorative.
What You’ll Need
- Blank aluminum or acrylic pet tag blanks
- A rotary engraving tool (or paint pens for a hand-lettered look)
- A keyring or small clasp
How to Make It
- Clean the blank tag with rubbing alcohol to remove any oils that could affect engraving or paint adhesion.
- If engraving, secure the tag in a small vise or clamp and slowly trace your design or lettering with the rotary tool, using light, even pressure rather than pressing hard.
- If hand-painting instead, sketch your design lightly in pencil first, then go over it with a fine paint pen, letting each color dry before adding the next.
- Once finished, seal painted tags with a light clear coat spray for durability, engraved tags typically don’t need sealing.
- Attach the keyring or clasp hardware to the tag’s hole.
What Goes Wrong
Shaky, uneven engraved lines almost always come from moving too fast or not securing the tag firmly enough, clamp it down and let the tool do the work rather than forcing it through the metal.
Paint that chips quickly usually means it wasn’t sealed, always finish painted tags with a clear protective coat.
Ways to Sell It
Require the pet’s name and a phone number as required fields at checkout so you’re not chasing buyers for order details. These also sell well as a small add-on to a bigger pet-themed order.
13. Hand-Lettered Prints
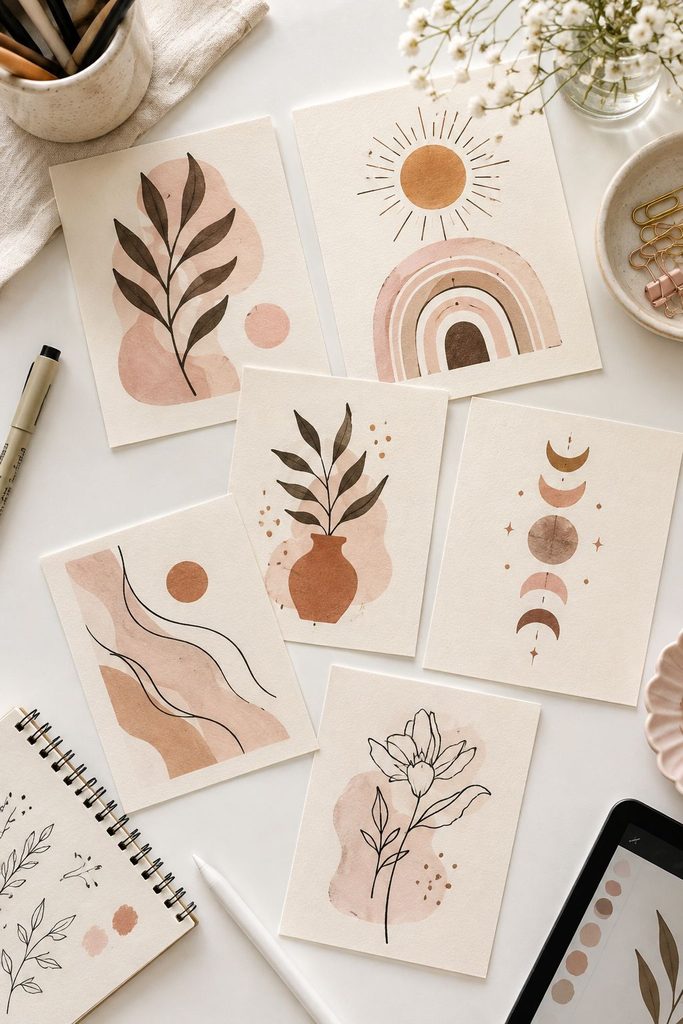
A single design can be printed and sold repeatedly with essentially no additional material cost per sale, which makes this one of the highest-margin categories on this list once the initial design work is done.
What You’ll Need
- A tablet and stylus (or paper, a fine-liner pen, and a scanner for a traditional approach)
- Design software (Procreate is the most common for tablet lettering)
- Quality cardstock or matte photo paper and a home printer, or a print-on-demand account
How to Make It
- Sketch a rough layout first in pencil or a light digital layer, working out spacing and composition before committing to final linework.
- Letter your final design in a new layer, working slowly and building up thicker strokes on downstrokes for a classic hand-lettered look.
- Clean up any inconsistent lines and export your file at a high resolution, at least 300 DPI, sized to your intended print dimensions.
- Print a test copy first to check color accuracy and spacing before printing your full batch, or upload to a print-on-demand service for order-based fulfillment.
- Package finished prints in a flat mailer with a stiff cardboard backing to prevent bending in shipping.
What Goes Wrong
Blurry or pixelated prints almost always trace back to a low-resolution export, always design and export at 300 DPI minimum at your final print size, not a smaller size scaled up later.
Colors that look different once printed than they did on screen usually mean your file wasn’t converted to CMYK before sending to print.
Ways to Sell It
Offer multiple size options (5×7, 8×10, 11×14) on a single listing rather than separate listings per size.
Test a few different designs early and lean into whichever ones get the most engagement before committing to a bigger print run.
14. Fabric Scrunchies
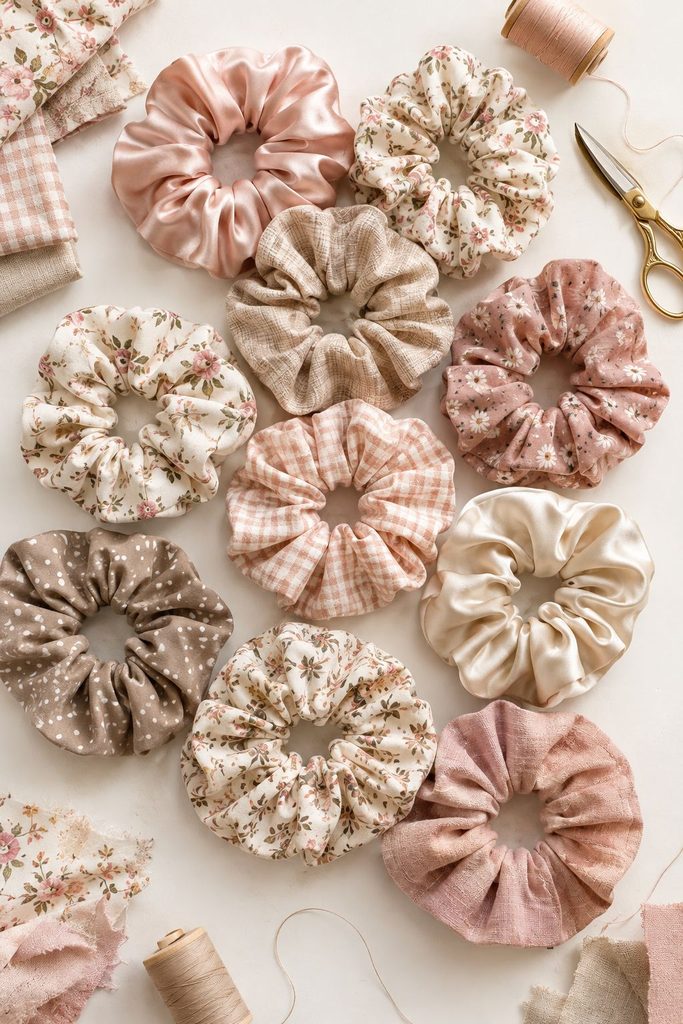
Fabric scraps go a long way here, and scrunchies have stayed popular enough that a single half-yard of fabric can produce a dozen sellable pieces in one sitting.
This is one of the fastest products on the list to batch once you’ve sewn a few.
What You’ll Need
- ½ yard cotton or satin fabric (makes about 10 to 12 scrunchies)
- ⅛-inch elastic, cut into 7-inch lengths
- A sewing machine (or needle and thread), scissors, and a safety pin or turning tool
How to Make It
- Cut fabric strips 4 inches wide by 20 inches long, one strip per scrunchie.
- Fold each strip in half lengthwise, right sides together, and sew along the long edge with a ¼-inch seam allowance, leaving both short ends open.
- Turn the tube right-side out using a safety pin or turning tool threaded through one end.
- Attach a safety pin to one end of your elastic and thread it all the way through the fabric tube.
- Overlap the two ends of elastic by about half an inch and stitch them together securely to form a loop.
- Tuck the joined elastic inside the tube, then fold the raw fabric edges inward and hand-stitch the opening closed.
What Goes Wrong
A scrunchie that looks flat rather than full usually means the fabric strip was cut too narrow, a 4-inch width is the sweet spot for that classic gathered look.
If the elastic bunches unevenly around the loop, distribute the fabric gathers by hand around the elastic before stitching the opening closed.
Ways to Sell It
Sell in sets of 3 to 5 in a coordinated color palette rather than single scrunchies. Seasonal fabric prints (florals for spring, plaids for fall) sell in predictable waves tied to the season.
15. Mini Faux Succulent Arrangements
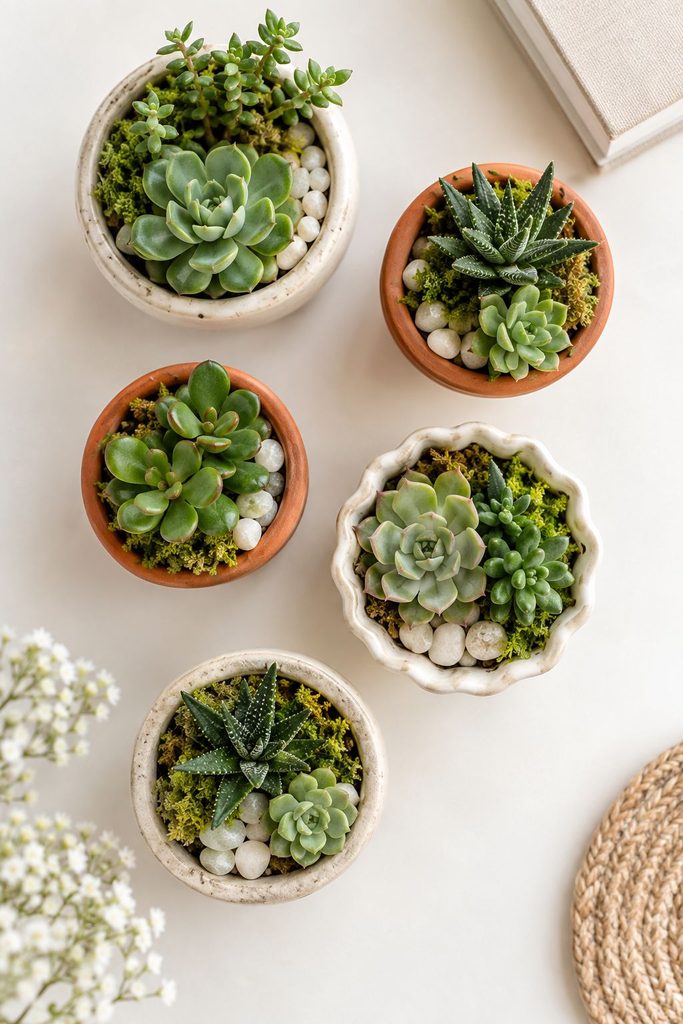
Small arranged pots sell well as desk and shelf decor, and because they’re faux, there’s no risk of a buyer receiving something wilted or damaged in shipping, which matters more for online sales than people expect.
What You’ll Need
- Small pots, 2.5 to 3 inches wide
- Floral foam, cut to fit the pot
- 3 to 4 small faux succulent stems
- Decorative moss or small stones for the top layer, and floral wire for shaping stems if needed
How to Make It
- Cut floral foam to snugly fit the pot, pressing it down firmly so it sits about a quarter inch below the rim.
- Trim your faux succulent stems to varying heights using wire cutters, so the finished arrangement has visual depth rather than everything sitting at one level.
- Insert the tallest stem slightly off-center first, then build outward with shorter stems, angling a few slightly outward for a fuller, more natural look.
- Once you’re happy with the arrangement, cover any visible foam with a layer of decorative moss, tucking it snugly around the base of each stem.
- Finish with a few small decorative stones around the very top edge of the pot for a clean, finished look.
What Goes Wrong
An arrangement that looks flat or one-note usually means all the stems were cut to the same height, vary your stem lengths deliberately for a more natural, layered look.
If the foam is visible after adding moss, use more moss than feels necessary at first, it compresses down once handled.
Ways to Sell It
Market these directly to remote workers and gift-givers as a “no water needed” desk plant. Photograph on a styled desk or shelf setup rather than a plain background, context sells this category more than the product alone.
16. Personalized Clay Keychains
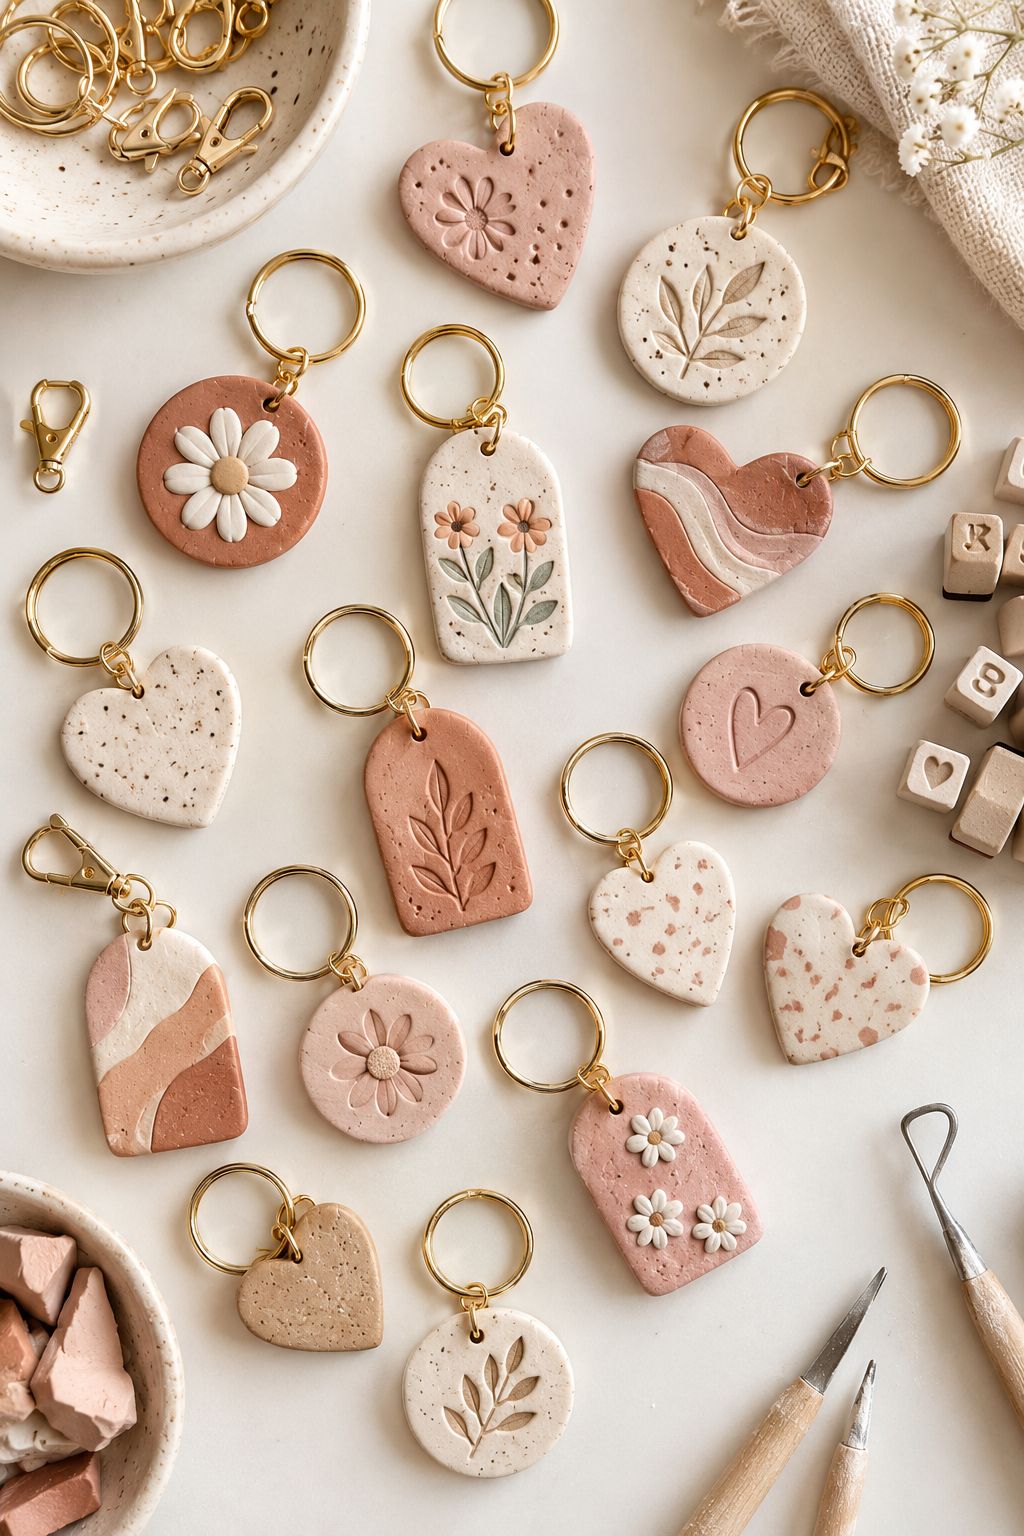
Keychains are cheap to produce in batches, and personalization is what pushes the price up.
They’re also a popular small add-on item that boosts average order value when paired with a bigger purchase from your shop.
What You’ll Need
- Air dry clay or polymer clay (polymer needs baking, air dry doesn’t)
- A small rolling pin, letter stamps or a fine tool for freehand lettering
- Acrylic paint (for air dry clay) and keyring hardware with a jump ring
How to Make It
- Roll clay to about ⅛-inch thickness and cut a simple shape (circle, heart, or tag shape) using a cutter or the rim of a small glass.
- Use letter stamps to press a name or word into the clay while it’s still soft, or carve freehand with a fine tool.
- Use a straw to punch a small hole near the top edge for the jump ring, this must happen before drying or baking.
- For air dry clay, let it dry fully for 24 to 48 hours. For polymer clay, bake according to the package instructions, typically 230°F for 15 to 30 minutes depending on thickness.
- Once cooled and fully hardened, paint any raised or stamped lettering if desired, and seal air dry clay pieces with a light sealant spray.
- Attach a jump ring through the hole, then attach your keyring hardware to the jump ring.
What Goes Wrong
Letters that look shallow or hard to read once dry usually mean the stamp wasn’t pressed firmly or evenly into the clay, apply steady, even pressure straight down rather than at an angle.
Cracks appearing near the hole are common if the hole was punched too close to the edge, keep it at least a quarter inch from the border.
Ways to Sell It
Offer these as a cheap add-on option on your other listings, not just standalone. A simple name or initial keychain is a common impulse add at checkout.
How to Price Handmade Products for Profit
A lot of new sellers underprice out of nervousness, and it’s one of the fastest ways to burn out on a craft you actually enjoy.
A simple starting formula: add up your material cost per item, multiply your total making time by a reasonable hourly rate, add a bit for packaging and platform fees, then round up.
If that number feels uncomfortably high, it usually means the product needs a faster process, not a lower price.
Batching is what actually makes small handmade products profitable. Making one candle at a time barely covers materials once you account for your time.
Making twelve in one sitting, with your workspace and tools already set up, is where the real hourly rate improves.
Mistakes I’ve Made Pricing and Selling Crafts
I priced my first batch of trinket dishes based purely on material cost, a couple of dollars each, and completely left my time out of the equation.
Once I recalculated including my actual time, the same product at a fair price still sold just as well, which told me the original pricing was never the problem.
I also used to make items one at a time as orders came in, constantly stopping and restarting my whole setup. Switching to batch production, painting six pots in one sitting instead of one at a time, cut my per-item time by more than half almost immediately.
Frequently Asked Questions
What’s the easiest handmade product to start with as a beginner? Painted terracotta pots or air dry clay trinket dishes are both low-cost, low-skill entry points that still sell well and don’t require specialized equipment to start.
How do I know if a handmade product will actually sell? Look for products that are gift-ready, photograph well, and solve a small problem or feel personal. If you can personalize it in some way, that’s usually a strong signal it’ll sell better than a generic version.
Where should I sell handmade products? Etsy, local markets, and Instagram are the three most common starting points. My How to Start a Gift Box Business post covers more on turning a handmade hobby into an actual income stream.
How many of each product should I make before listing it for sale? Start with a small batch, 6 to 12 pieces, so you can test pricing and demand without overcommitting materials and time to something that hasn’t sold yet.
Final Thoughts
The products that actually make money aren’t necessarily the fanciest or most complicated ones, they’re the ones you can make efficiently, price fairly, and that genuinely feel worth buying to the person on the other end.
Pick one from this list, actually make it this week using the steps above, and expand from there once you know what works for you.
If You Want More Craft-to-Sell Ideas: