DIY Clay Bookmark Tutorial: How to Make Air Dry Clay Bookmarks
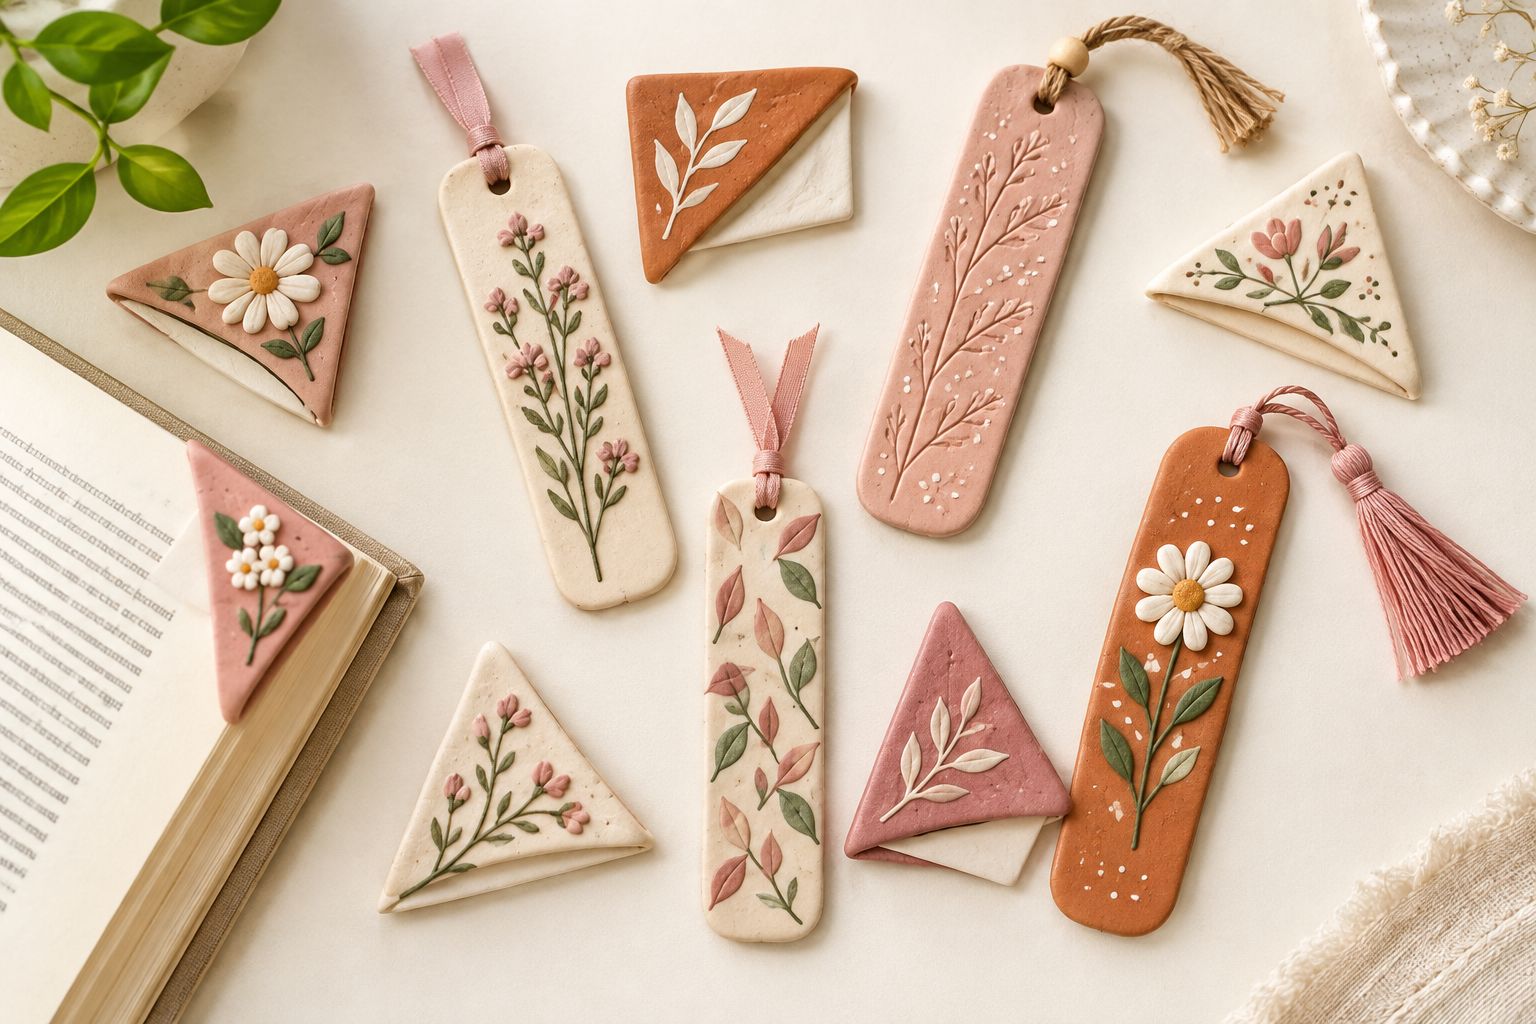
I made my first clay bookmark almost by accident.
I had a small ball of air dry clay left over from a coaster project. It wasn’t enough to make another coaster, but I didn’t want to throw it away either. So I rolled it flat, cut it into a simple corner shape, and let it dry.
What I ended up with was one of those little projects I kept reaching for afterward.
It was small, useful, inexpensive, and surprisingly satisfying to make. Unlike some air dry clay projects that spend days sitting on a shelf waiting to be admired, a bookmark actually gets used. Mine ended up tucked into whatever book I was reading at the time, and that was when I realized how good this project would be for using up leftover clay.
The corner version is also incredibly beginner-friendly because it doesn’t require ribbon, wire, jump rings, or any extra hardware. You simply make the clay shape, let it dry completely, paint it if you want to, and seal it.
If you prefer a traditional bookmark, I’ll show you how to make that version too. You can create a simple rectangle, scalloped shape, flower, heart, or even a little character and add a ribbon or tassel through a hole at the top.
The nice thing about this project is that you don’t need much clay or many supplies. If you’ve been experimenting with air dry clay and have small pieces left over from other projects, this is one of my favorite ways to use them.
Why You’ll Love This Clay Bookmark Project
It’s beginner-friendly. You don’t need advanced clay skills or special equipment. If you can roll clay flat and cut a simple shape, you can make these.
It uses very little clay. This makes bookmarks particularly useful for leftover pieces from larger air dry clay projects.
There are two different styles to choose from. The corner bookmark slips directly over a page corner, while the hanging version works more like a traditional bookmark.
You can personalize them endlessly. Paint them, stamp them, add initials, press flowers or leaves into the surface, or keep the clay natural for a minimalist look.
They’re inexpensive handmade gifts. A personalized clay bookmark paired with a favorite book, journal, or reading gift makes a thoughtful handmade present.
They’re a great afternoon project. The actual hands-on work is short. Most of the time is spent allowing the clay to dry properly.
What You’ll Need

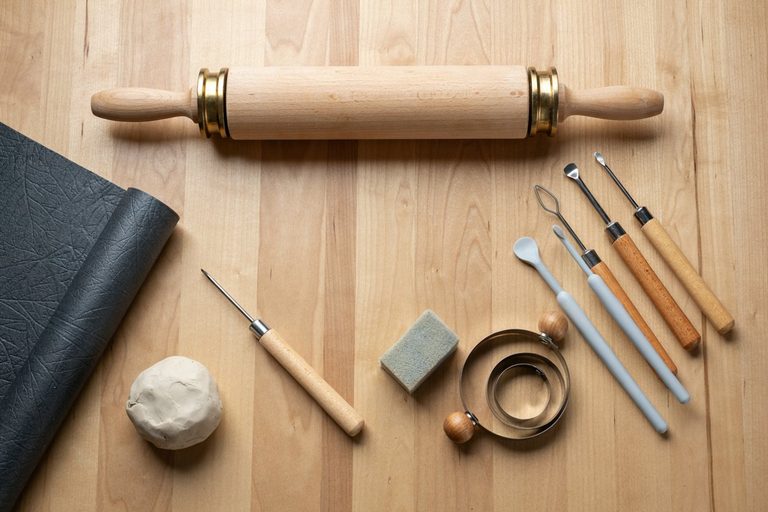
You don’t need a huge collection of clay tools for this project.
Basic Supplies
- Air dry clay
- Rolling pin or smooth glass bottle
- Two ¼-inch wooden guide sticks or spacers
- Butter knife or clay cutting tool
- Small ruler
- Bottle cap or other small round object
- Straw or skewer for the hanging version
- Acrylic paint
- Fine detail paintbrush
- Matte or glossy clay-safe sealant
- Wax paper or parchment paper for drying
Optional Supplies
- Texture stamps
- Lace
- Small leaves or flowers for impressions
- Pencil
- Fine-tip paint marker
- Ribbon
- Twine
- Small tassel
- Sandpaper or fine sanding sponge
You really don’t need to buy a dedicated clay tool set for your first bookmark. A smooth bottle can substitute for a rolling pin, and a butter knife works perfectly well for making straight cuts.
Before You Start: Which Bookmark Should You Make?
There are two basic styles I recommend for air dry clay.
Corner Bookmark
The corner version is my favorite for beginners.
It’s essentially a small clay pocket that slips over the corner of a page. There is no ribbon to attach and no hole to make, so the finished piece is very simple.
It’s also a good option if you’re making bookmarks with kids because there are fewer small components to deal with.
Hanging Bookmark
The hanging version looks more like a traditional bookmark.
You roll the clay into a thin rectangle or decorative shape, make a hole near the top, and add ribbon or twine after the clay has completely dried.
This style gives you more room for personalization because you can experiment with different shapes and tassels.
How to Make an Air Dry Clay Corner Bookmark
Step 1: Condition the Clay

Take a small piece of air dry clay and knead it gently for about a minute.
You’re looking for clay that feels soft and workable without being sticky.
If the clay has been sitting open for a while and feels slightly firm, work it between your hands before rolling. Don’t add a lot of water to soften it because excess moisture can make the drying process take much longer and can contribute to cracking or warping.
If you notice visible air pockets while kneading, gently press them out before continuing.
Step 2: Roll the Clay Evenly

Place the clay between two ¼-inch guide sticks.
Roll the clay until the rolling pin rests against the guides and the clay reaches an even thickness.
This is one of the little tricks that makes a surprisingly big difference.
It’s very easy to look at a rolled piece and think it is even when one side is actually considerably thicker than the other. As air dry clay loses moisture, uneven areas can dry at different rates, which can contribute to warping.
Try to keep the entire bookmark approximately the same thickness.
Step 3: Cut the Corner Shape

For a corner bookmark, cut a right-angle triangle with the two straight sides approximately 2 to 2½ inches long.
You don’t have to make the measurements exact. The important thing is that the finished shape is large enough to sit securely over a page corner without being so large that it becomes awkward.
Once you’ve cut the triangle, inspect the edges.
If there are little pieces of clay sticking out or rough sections left from the cutting tool, smooth them now.
A Small Tip for the Point
I prefer slightly rounding the outer point instead of leaving it extremely sharp.
A sharp clay point can catch on paper when you’re sliding the bookmark onto a page. A softly rounded edge feels smoother and gives the finished bookmark a more polished look.
A small bottle cap or similarly rounded object can help you create the curve.
Step 4: Smooth the Edges

This is one of the steps I wouldn’t skip.
Dip your fingertip in a tiny amount of water and gently smooth the edges.
You don’t want to soak the clay. Just enough moisture to soften the surface is plenty.
Pay particular attention to:
- The outside edges
- The corners
- Any areas where the cutting tool left marks
- The rounded point
If you see cracks beginning to appear, smooth them gently with your fingertip while the clay is still workable.
Don’t overwork the surface, though. Too much water can turn the outside of the clay into a paste-like texture.
Step 5: Add Texture While the Clay Is Soft
If you want a textured bookmark, do it before the clay dries.
There are so many things you can use for this.
Try pressing:
- Lace
- Small leaves
- Dried flowers
- Fabric
- Textured stamps
- A small doily
- A textured rolling pin
- A clean rubber stamp
Place the texture over the clay and press evenly.
The key is not to press too deeply.
You want the pattern to be visible without making the clay extremely thin in certain areas.
For a more minimalist bookmark, you can skip texture completely and let the paint provide the decoration later.
Step 6: Let the Bookmark Dry Completely
Place the finished bookmark on wax paper or parchment paper.
Let it dry according to the instructions for your particular clay, generally around 24 to 48 hours, depending on thickness, humidity, and the clay you’re using.
I recommend checking the piece rather than relying only on the clock.
A bookmark that feels dry on the outside may still contain moisture underneath.
How I Check Mine
The piece should feel:
- Firm
- Lightweight
- Completely dry
- No longer cool or damp-feeling
- Solid rather than slightly soft
If you’re unsure, give it another day.
There is very little downside to allowing air dry clay additional drying time, while painting or sealing too early can trap moisture inside.
Turn It While Drying
I also like to carefully turn the bookmark partway through drying.
This allows both sides to be exposed to the air and can help the piece dry more evenly.
If your clay tends to warp, placing it somewhere with good air circulation and away from extreme heat is preferable to trying to speed-dry it with a hair dryer.
Step 7: Smooth or Sand the Fully Dry Bookmark
Once the clay is completely dry, inspect the surface.
If there are rough areas that you couldn’t smooth while the clay was wet, you can gently sand them with fine-grit sandpaper.
Use a light touch.
You’re not trying to reshape the entire bookmark. You’re simply smoothing little imperfections so the finished piece feels comfortable against your fingers and pages.
Wipe away the dust before painting.
Step 8: Paint Your Clay Bookmark

Now comes the fun part.
Acrylic paint works beautifully for this type of project.
You can keep the design incredibly simple or get much more creative.
Easy Beginner Designs
Try:
- Cream with a blush border
- Terracotta with tiny white dots
- Soft pink with a floral design
- Beige with a brown scalloped edge
- White with a simple black initial
- Sage green with pressed-leaf texture
- Natural clay with one painted corner
I usually prefer several thin coats rather than one thick coat.
Thick paint can obscure texture and may take considerably longer to dry.
Let each layer dry before adding another.
How to Add Names or Initials
Clay bookmarks are especially cute when personalized.
Once your base color is completely dry, use a very fine brush or paint marker to add:
- A first initial
- A name
- A short word
- A tiny flower
- A heart
- A simple star
- A meaningful date
If you’re making these as gifts, personalization makes a very simple clay project feel much more intentional.
For small lettering, practice on a scrap piece of clay or paper first. It’s much easier to adjust your design before putting paint onto the finished bookmark.
Step 9: Seal the Bookmark

Because bookmarks are handled frequently, I recommend sealing the finished clay.
Once your paint is completely dry, apply your chosen sealant according to its instructions.
A matte finish gives the bookmark a soft, understated appearance, while a glossy finish makes painted colors look brighter and gives the surface a more polished appearance.
Apply light, even coats rather than trying to cover everything with one heavy coat.
Allow the recommended drying time between coats.
And don’t forget the back.
A bookmark is handled from both sides, so sealing only the decorated surface leaves the other side more vulnerable to scuffs and moisture.
For a more detailed explanation of sealing different types of air dry clay projects, see my How to Seal Air Dry Clay guide.
How to Make a Hanging Air Dry Clay Bookmark

If you prefer a traditional bookmark, the process is almost the same.
Step 1: Roll the Clay
Roll the clay between your guide sticks until it’s approximately ¼ inch thick.
Step 2: Cut Your Shape
You can make the bookmark:
- Rectangular
- Rounded
- Scalloped
- Wavy
- Floral
- Heart-shaped
- Animal-shaped
For a first attempt, I’d keep the shape fairly simple.
Long, narrow shapes can be more fragile than a compact design, especially if the clay is rolled too thin.
Step 3: Make the Ribbon Hole
While the clay is still soft, use a straw or skewer to make a hole near the top.
Leave enough clay around the hole so it doesn’t become a weak point.
I recommend placing the hole approximately ¼ inch from the edge rather than cutting it extremely close to the border.
Don’t make the hole too small if you’re planning to thread thick ribbon through it.
Step 4: Smooth Around the Hole
Gently smooth the clay around the opening.
This removes rough edges and gives you a cleaner finished hole once the bookmark dries.
Step 5: Dry Completely
Allow the bookmark to dry fully before painting.
Step 6: Paint and Seal
Paint your design, allow it to dry, and then apply your sealant.
Step 7: Add the Ribbon or Tassel

Once everything is completely dry and cured according to your sealant’s instructions, thread your ribbon, twine, or tassel through the opening.
How to Keep Air Dry Clay Bookmarks From Cracking
Cracking is one of the most frustrating parts of working with air dry clay, especially when you’re new to it.
There are a few things you can do to reduce the chances.
Keep the Thickness Consistent
Don’t make one side ¼ inch thick and another side paper-thin.
Uneven thickness can cause different parts of the clay to dry at different rates.
Don’t Use Too Much Water
Water can help smooth clay, but you only need a tiny amount.
Too much water can make the surface overly wet and extend drying time.
Don’t Force the Drying Process
Avoid putting the bookmark directly beside a heater or using intense heat to dry it quickly.
Slow, even drying is generally much kinder to air dry clay.
Smooth Cracks While They’re Small
If you notice a tiny crack while the clay is still workable, gently smooth it rather than leaving it to grow.
What If Your Bookmark Warps?
A little movement during drying can happen with air dry clay.
If your bookmark is noticeably curling, check whether:
- One side is considerably thicker than the other
- It was drying on a surface that wasn’t flat
- The room is very humid
- The clay dried too quickly
- The piece was handled before it was fully dry
For future bookmarks, focus on consistent thickness and slow, even drying.
I also like to make sure the drying surface itself is completely flat.
Design Ideas for Clay Bookmarks

Once you’ve made the basic version, there are so many directions you can take the design.
Minimalist Neutral Bookmark
Use natural cream or beige clay with a thin brown border.
This would look beautiful tucked into a coffee-table book or neutral journal.
Pressed Botanical Bookmark
Press a small leaf into the clay before drying.
Afterward, leave the clay natural or paint only the recessed design.
Personalized Name Bookmark
Paint the reader’s name or initial across the center.
This is particularly nice for birthdays, teacher gifts, Mother’s Day, or book-loving friends.
Floral Bookmark
Paint tiny flowers around the border while leaving the center a neutral color.
Terrazzo-Inspired Bookmark
Use tiny pieces of different colored clay pressed into the surface before rolling them gently together.
Scalloped Bookmark
Instead of straight edges, cut a series of soft curves around the outside.
Tassel Bookmark
Make a simple rectangle with a hole at the top and finish it with a contrasting tassel.
How to Make These With Kids
This is a particularly nice clay project for older kids because the basic corner bookmark doesn’t require complicated construction.
Kids can:
- Roll the clay
- Cut the basic shape with supervision
- Add texture
- Paint their designs
- Choose colors
- Add initials
For younger children, I would handle the sharper cutting tools and sealant myself.
The corner version is especially convenient because there are no ribbons or small hardware pieces involved.
Can You Make Clay Bookmarks From Leftover Clay?
Absolutely, and this is actually one of my favorite reasons to make them.
Air dry clay projects often leave behind small amounts of clay that aren’t quite enough for another large project.
Instead of throwing those scraps away, keep them in an airtight container or sealed bag according to your clay manufacturer’s storage recommendations.
When you have enough, turn them into small projects such as:
- Bookmarks
- Gift tags
- Mini ornaments
- Jewelry dishes
- Plant markers
- Magnets
- Small decorative charms
The bookmark shape doesn’t require much material, so it’s a particularly good project for using up scraps.
How Long Do Air Dry Clay Bookmarks Last?
A properly dried, painted, and sealed bookmark can last a long time with normal use.
The important thing is remembering that air dry clay isn’t the same thing as fired ceramic.
It’s still a relatively fragile material.
A bookmark can survive being tucked into a book repeatedly, but it shouldn’t be bent, soaked, or treated like a piece of flexible plastic.
The corner style has an advantage here because it isn’t designed to flex back and forth.
For the longest-lasting result, make sure the clay is completely dry before painting and seal both sides after decorating.
Are Air Dry Clay Bookmarks Waterproof?
I wouldn’t consider a sealed air dry clay bookmark completely waterproof.
A sealant can provide protection against normal handling and small amounts of moisture, but prolonged exposure to water can still damage air dry clay depending on the clay and sealer used.
This is another reason I prefer using these as indoor bookmarks rather than treating them like waterproof accessories.
If the bookmark gets a little damp, dry it gently rather than leaving it wet.
My Best Tips for Making Clay Bookmarks
Keep the bookmark relatively small. Especially with the corner style, a compact shape feels much more natural inside a book.
Use guide sticks when rolling. This is one of the easiest ways to get consistent thickness.
Round sharp corners. It makes the bookmark more comfortable to use and less likely to catch on paper.
Don’t rush drying. This is probably the most important tip after getting the thickness right.
Paint in thin layers. You’ll get cleaner details and a smoother finish.
Seal both sides. The back gets just as much handling as the front.
Don’t make the ribbon hole too close to the edge. Leaving enough clay around it reduces the chance of the area breaking.
Keep a few plain ones aside. A simple unpainted clay bookmark can look beautiful with just a pressed botanical texture.
Common Mistakes to Avoid
Making the Clay Too Thin
A bookmark doesn’t need to be paper-thin.
Very thin air dry clay can become fragile and may warp more easily.
Making the Bookmark Too Large
Especially for the corner style, an oversized bookmark can become awkward when you’re turning pages.
Skipping Edge Smoothing
Rough clay edges can catch on paper and make an otherwise beautiful bookmark feel unfinished.
Painting Before the Clay Is Fully Dry
Paint can make the surface look finished while moisture remains inside the clay.
Give the clay plenty of time to dry first.
Using Heavy Layers of Paint
Thick paint can hide texture and make the finished bookmark look bulky.
Sealing Only One Side
Both sides need protection because both sides are handled.
Making the Ribbon Hole Too Close to the Edge
There needs to be enough clay surrounding the opening to maintain its strength.
Handling the Bookmark Too Soon
Even when the paint feels dry, give the sealant enough time to cure according to the product instructions before putting the bookmark into a book.
How to Store Handmade Clay Bookmarks
If you’re making several bookmarks at once, keep finished pieces somewhere dry and away from direct moisture.
Don’t stack freshly painted or sealed bookmarks together until they’re completely dry.
If you are making these as gifts, I also like the idea of wrapping each one in tissue paper or placing it inside a small paper sleeve before adding it to a book or gift box.
Are Clay Bookmarks Good Handmade Gifts?
Yes, especially when they’re personalized.
They’re inexpensive to make but don’t feel like a generic store-bought item.
A few combinations I love are:
For a book lover:
Personalized clay bookmark + favorite novel + small note.
For a teacher:
Floral clay bookmark + pretty notebook.
For Mother’s Day:
Initial bookmark + journal.
For a friend:
Minimalist neutral bookmark + favorite book.
For a child’s gift:
Brightly painted corner bookmark + children’s book.
You could also make a small collection using different colors and designs rather than giving just one.
Frequently Asked Questions
Can I make a clay bookmark without a rolling pin?
Yes. A clean, smooth glass bottle can work as a substitute. The important thing is getting the clay to an even thickness.
How thick should an air dry clay bookmark be?
For this tutorial, approximately ¼ inch works well. The most important thing is keeping the thickness consistent throughout the piece.
Can I use polymer clay?
Yes. Polymer clay can be used for this type of project, but it must be baked according to the manufacturer’s instructions rather than air dried.
Can I use a clay bookmark in a paperback book?
Yes. The corner style is particularly suited to paperbacks because it sits over the page corner rather than requiring a thick piece of clay to sit between pages.
Can I write on an air dry clay bookmark?
Yes. Once the surface is completely dry, you can personalize it with acrylic paint, a fine paint marker, or another suitable medium. Seal it afterward to protect the design.
Can I make these bookmarks ahead of time?
Yes. They’re actually a great batch project. You can make several clay shapes at once, allow them all to dry, and then paint them together.
Why did my clay bookmark crack?
Common causes include uneven thickness, drying too quickly, excessive water, or handling the clay before it was properly dry. Small cracks are much easier to address while the clay is still workable.
Can I sell handmade clay bookmarks?
You can make them as handmade products, but your exact materials, finishing process, pricing, packaging, and durability should be considered before selling them. If you’re selling them, make sure your product description accurately explains that they’re made from air dry clay and aren’t waterproof or flexible.
Final Thoughts
I still think it’s funny that one of my favorite little clay projects came from not wanting to waste a leftover piece of clay.
The bookmark itself is simple, but that’s part of why I like it.
You don’t need a huge collection of supplies, an afternoon of complicated sculpting, or much clay to make something genuinely useful. And once you know how to make the basic shape, you can change the colors, texture, size, shape, and finish to make each one completely different.
If you’re just getting started with air dry clay, I’d begin with the simple corner version. It’s forgiving, doesn’t require any extra hardware, and gives you a chance to practice the basics of rolling, cutting, smoothing, drying, painting, and sealing.
And if you have a little leftover clay sitting around from another project, this is a pretty good excuse to turn it into something useful instead of letting it dry out.