
How to Make Coffee Clay Recipe Without Glue
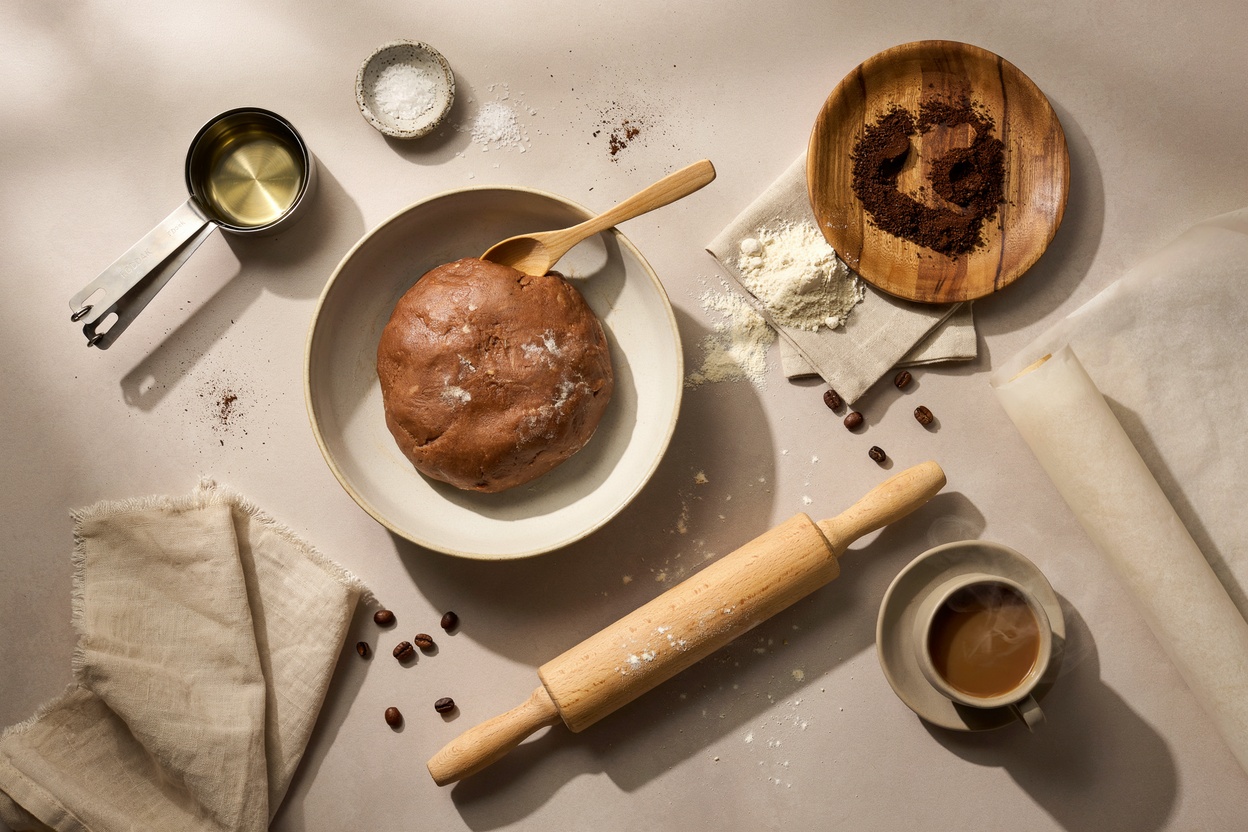
If you have a jar of leftover coffee grounds sitting in your kitchen, don’t throw them away just yet. I started experimenting with coffee clay because I wanted a simple way to turn something I would normally toss into a small handmade project, without needing glue, complicated ingredients, or a kiln.
The finished clay has a naturally warm, earthy color and a subtle coffee texture that makes it especially nice for rustic ornaments, little decorative dishes, tags, and other small craft projects.

The biggest thing I learned while making it is that coffee clay behaves differently from regular air dry clay. It isn’t meant to replace commercial modeling clay for every project, and getting the consistency right matters much more than I expected.
Too much liquid leaves it sticky and difficult to shape. Too little makes it crack when you try to roll or flatten it. Once you get the mixture to a soft dough-like consistency, though, it’s surprisingly easy to work with.
The finished clay has a naturally warm, earthy color and a subtle coffee texture that makes it especially nice for rustic ornaments, little decorative dishes, tags, and other small craft projects. This is actually my second coffee clay recipe — if you’d rather use a glue-based method instead, my original coffee clay at home post covers that version.
Why Make Coffee Clay Without Glue?

I like this recipe because it uses simple ingredients and doesn’t require white school glue or specialty craft products.
The coffee grounds also give the finished clay its distinctive appearance. Instead of a smooth white surface, you get something naturally speckled and slightly rustic.
It’s particularly nice if you like handmade pieces that don’t look overly polished.
It’s Made With Simple Ingredients
You don’t need a long list of craft supplies to make this clay. The basic mixture relies on coffee grounds, flour, and a few everyday kitchen ingredients.
That makes it an inexpensive project to try, especially if you’re already saving used coffee grounds.
The Coffee Gives It Natural Color
You don’t necessarily need to paint the finished pieces.
Depending on the coffee you use and how concentrated it is, the clay can dry anywhere from a light tan to a deeper brown shade.
I actually prefer leaving some pieces unpainted because the natural coffee color gives them a warm, earthy finish.
It Works Well for Small Decorative Projects
I wouldn’t use this recipe for anything that needs to hold water or withstand heavy handling.
Instead, think of it as a material for small decorative projects such as ornaments, gift tags, little plaques, magnets, and simple shapes.
What You’ll Need
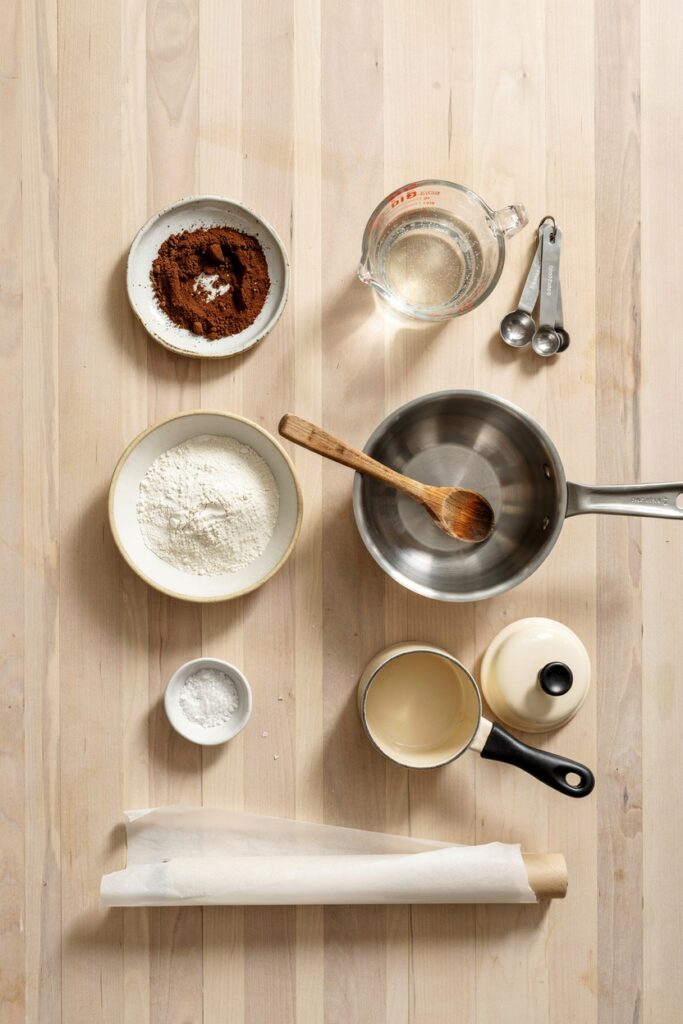
Used Coffee Grounds
You’ll need 1 cup of used coffee grounds.
I recommend using grounds that have already been brewed rather than adding dry coffee grounds straight from the package. The brewed grounds have already released some of their coffee compounds, and they provide the slightly textured appearance we’re looking for without making the mixture excessively strong.
Before measuring them, squeeze out as much excess water as you reasonably can.
They should be damp, but they shouldn’t be dripping wet.
All-Purpose Flour
You’ll need 1 cup of all-purpose flour.
The flour forms the main structure of the clay and helps the mixture bind together as it cooks.
Salt
Use ½ cup of fine salt.
Salt helps create a firmer dough and also contributes to the finished texture as the clay dries.
Water
Start with ½ cup of water, but don’t pour it all in at once.
The exact amount you’ll need can vary depending on how wet your coffee grounds are, so adding the water gradually gives you much better control.
Optional: Cinnamon
If you want an even warmer color and a subtle spiced scent, you can add 1 teaspoon of ground cinnamon.
This is completely optional. I like it when I’m making rustic ornaments or holiday decorations, but I leave it out when I want the coffee color to be the main feature.
Tools You’ll Need
You don’t need anything fancy for this project.
- Medium saucepan
- Wooden spoon or silicone spatula
- Mixing bowl
- Measuring cups and spoons
- Rolling pin
- Parchment paper
- Cookie cutters or small templates
- Straw or skewer for making holes
- Fine-grit sandpaper
- Wire rack or flat drying surface
If you’re making ornaments, you’ll also want some twine or ribbon for hanging them later.
How to Make Coffee Clay Without Glue
Step 1: Prepare the Coffee Grounds
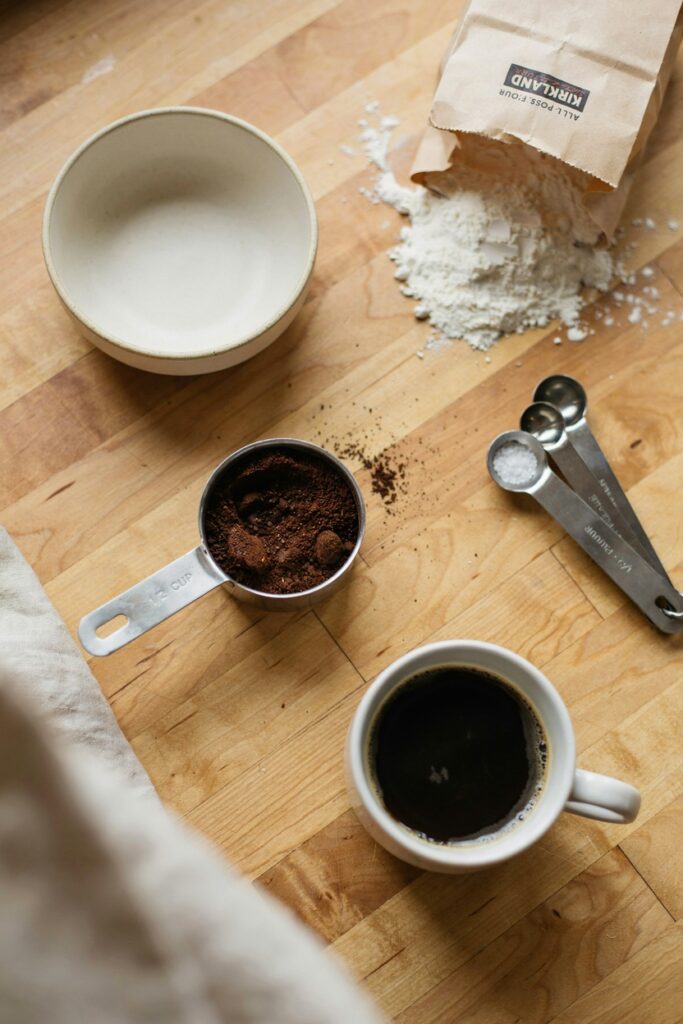
Start by measuring 1 cup of used coffee grounds.
If they’re still very wet after brewing, press them between paper towels or squeeze them gently through a clean kitchen towel to remove excess moisture.
You don’t need to dry them completely.
The goal is simply to get rid of the extra water so you don’t accidentally add too much liquid to the clay mixture.
I learned this part matters more than it seems. The first batch I made with very wet grounds needed much more flour to become workable, and the finished pieces were noticeably heavier and more prone to cracking.
Step 2: Combine the Dry Ingredients
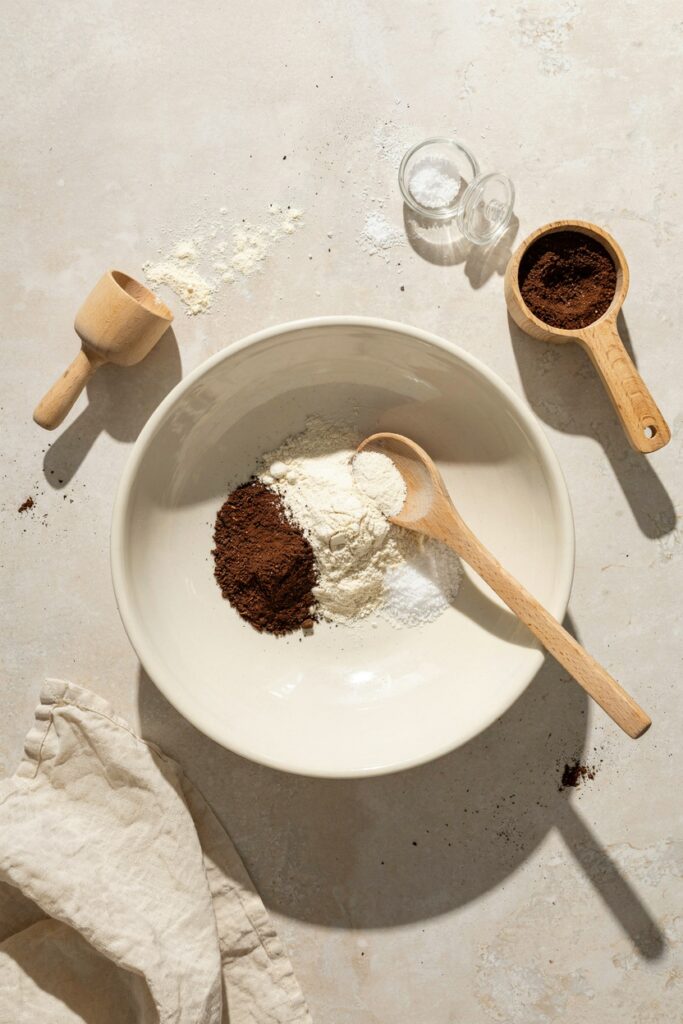
Add the coffee grounds, flour, and salt to a medium saucepan.
Stir everything together until the coffee grounds are distributed evenly throughout the flour and salt.
If you’re using cinnamon, add it at this stage too.
You want the mixture to look fairly uniform before adding any water.
Step 3: Add the Water Gradually
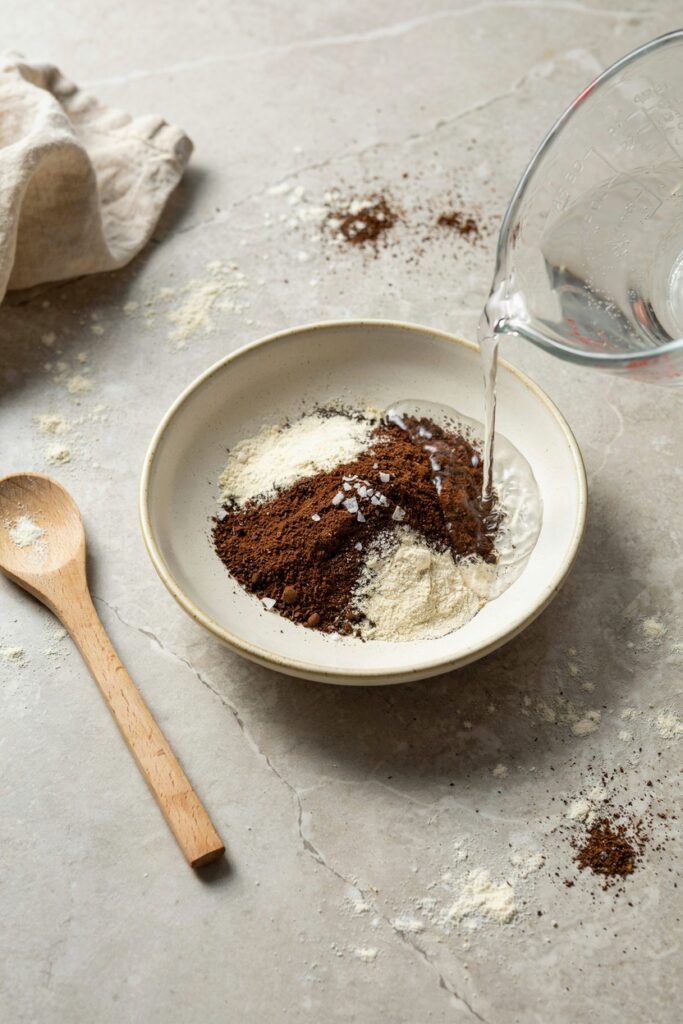
Pour in about ¼ cup of water to start and stir thoroughly.
Then continue adding the remaining water a tablespoon at a time.
Don’t worry if the mixture looks rough initially. Keep stirring until the dry flour has been incorporated and the mixture begins to resemble a thick, sticky dough.
You may not need the entire ½ cup.
That’s why I strongly recommend adding the water gradually rather than following the measurement blindly.
The final consistency should be soft and moldable but not wet enough to stick heavily to your fingers.
Step 4: Cook the Clay Mixture
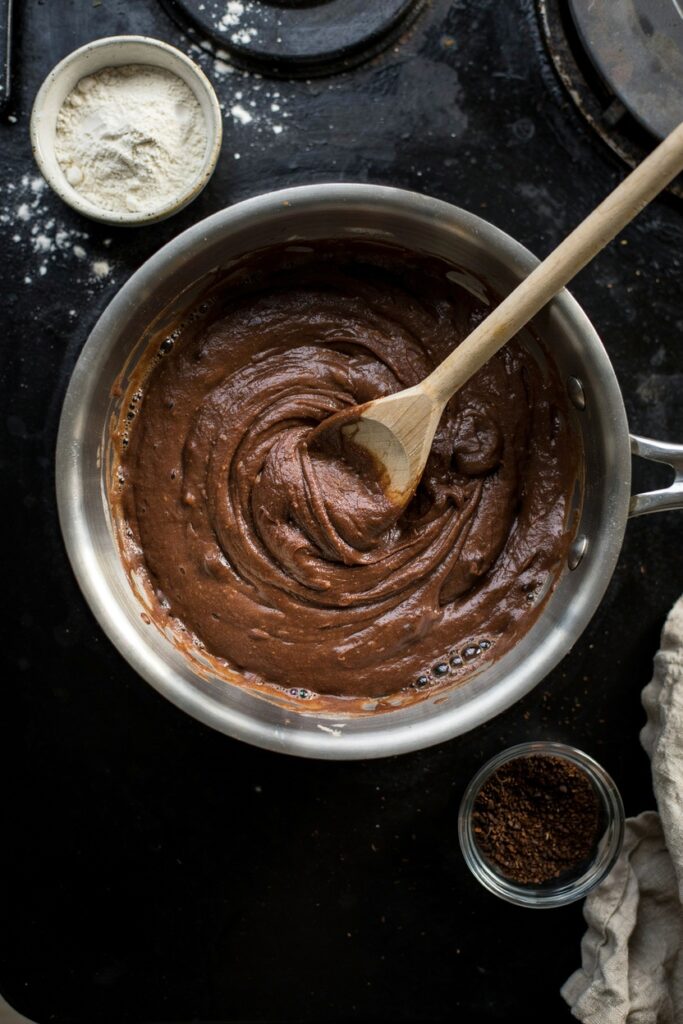
Place the saucepan over low to medium-low heat and continue stirring constantly.
As the mixture warms, the flour will begin thickening and the loose ingredients will gradually come together into a heavy dough.
Keep stirring until the mixture pulls away from the sides of the pan and starts forming one cohesive ball.
This usually takes around 3 to 5 minutes, depending on how much moisture was in your coffee grounds.
Don’t crank up the heat to speed things along. The mixture can catch on the bottom surprisingly quickly, and burnt coffee stuck to the pan is not nearly as pleasant as it sounds.
Step 5: Let the Dough Cool
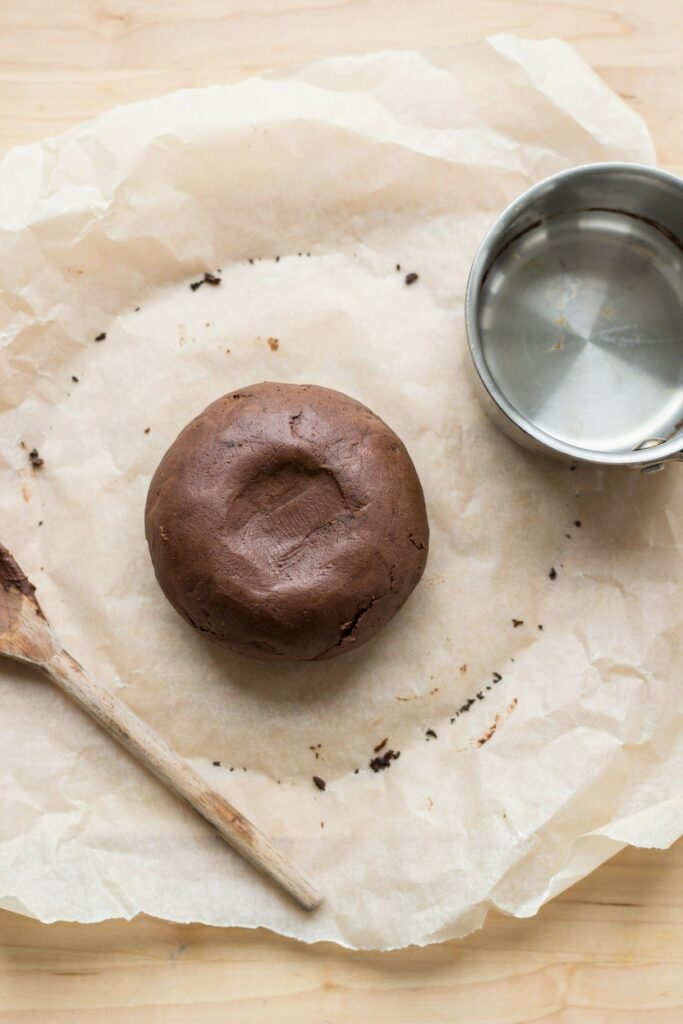
Once the mixture has formed a thick ball, remove the saucepan from the heat.
Transfer the dough onto a sheet of parchment paper or a clean work surface and allow it to cool until it’s comfortable enough to handle.
It will continue firming slightly as it cools.
Step 6: Knead Until Smooth
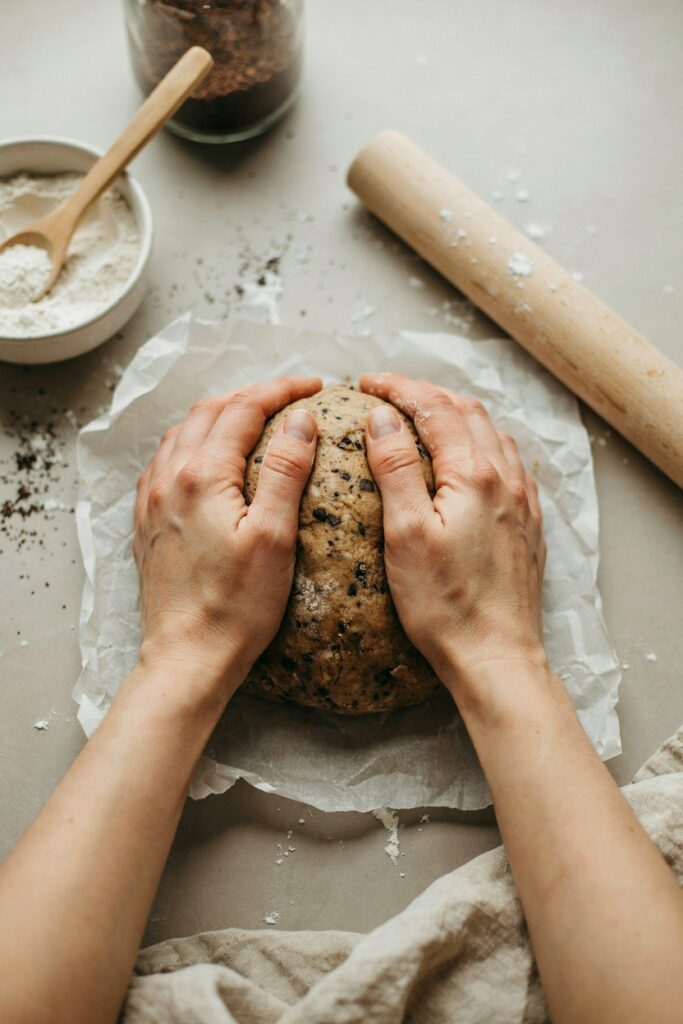
When the dough is cool enough to touch, knead it with your hands for several minutes.
At first, it may feel slightly crumbly or uneven because of the coffee grounds. Keep working it until the flour, salt, and coffee are evenly distributed.
If the dough feels too sticky, knead in a small amount of flour, about one teaspoon at a time.
If it feels too dry or cracks immediately when you bend it, dampen your hands slightly and continue kneading rather than pouring in a large amount of water at once.
You want a firm but workable dough that can be rolled without immediately breaking apart.
A quick note if you’re used to regular air dry clay: the cracking troubleshooting is similar — my how to avoid cracks in air dry clay guide covers the same moisture-balance principles that apply here too.
What Should Coffee Clay Feel Like?
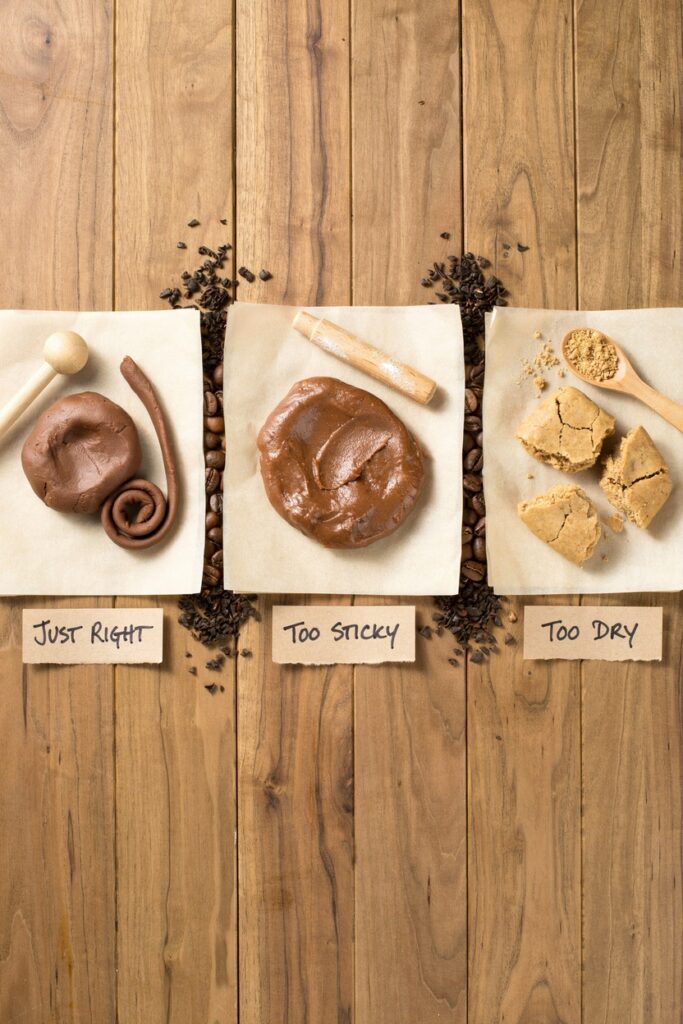
Getting the texture right is probably the most important part of this recipe.
The finished dough should feel similar to a firm modeling dough. It should hold its shape when you press it, but it shouldn’t feel wet or leave a thick layer of dough stuck to your fingers.
When you roll it out, the edges should remain relatively intact rather than crumbling apart.
If you pick up a small piece and gently bend it, it should have some flexibility while it’s still fresh.
If Your Dough Is Too Sticky
Add flour gradually.
Start with 1 teaspoon, knead it in completely, and check the texture again before adding more.
Adding too much flour at once can make the clay unnecessarily stiff and more likely to crack while drying.
If Your Dough Is Too Dry
Don’t immediately pour in another large splash of water.
Instead, lightly dampen your hands and knead the dough for another minute or two.
If it’s still too dry, add ½ teaspoon of water at a time, kneading thoroughly between additions.
This gives you much more control over the final consistency.
How to Shape Coffee Clay
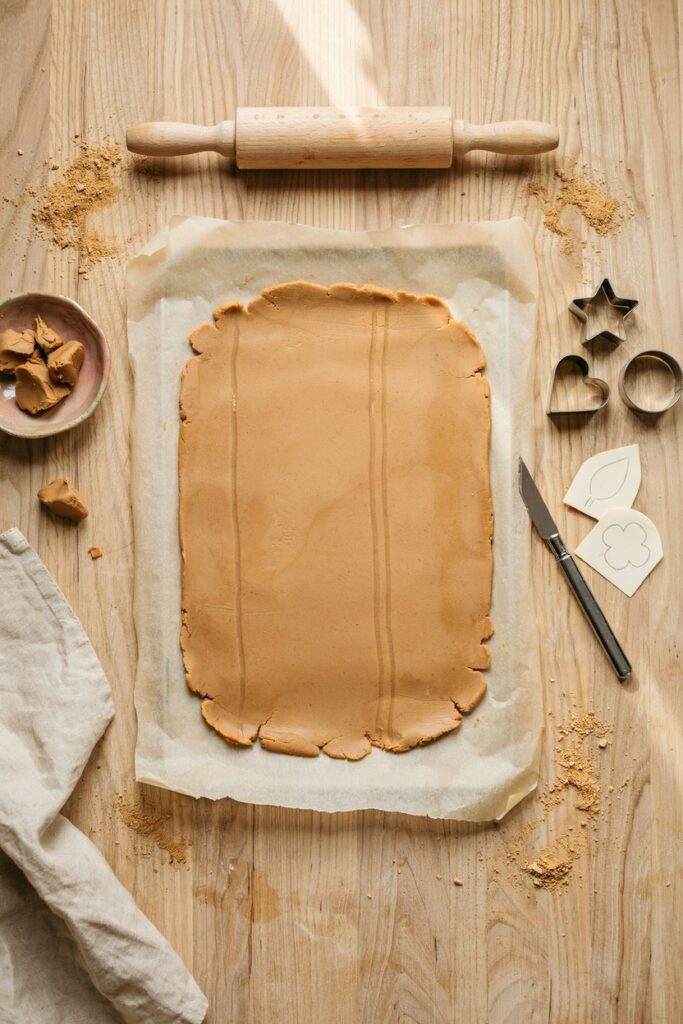
Once your dough has reached the right consistency, you can use it much like a simple handmade modeling clay for small decorative projects.
Place the dough between two sheets of parchment paper and roll it evenly with a rolling pin.
I recommend keeping it around ¼ inch thick for ornaments, tags, and small decorative shapes.
Thinner pieces can dry faster, but they’re also much easier to break. Going slightly thicker gives you a sturdier finished piece.
Use cookie cutters to create simple shapes, or place a paper template over the clay and carefully cut around it with a small craft knife.
For a more rustic look, you can also shape the clay by hand without worrying about perfectly straight edges.
Making Coffee Clay Ornaments
If you’re making hanging ornaments, cut your desired shape and then use a straw, skewer, or the end of a small round tool to create a hole near the top.
Make the hole before the clay dries.
Keep it far enough from the edge that the area around the hole doesn’t become too thin.
This little detail is easy to forget, and discovering you forgot it after the clay has completely dried is considerably more annoying.
How to Dry Coffee Clay
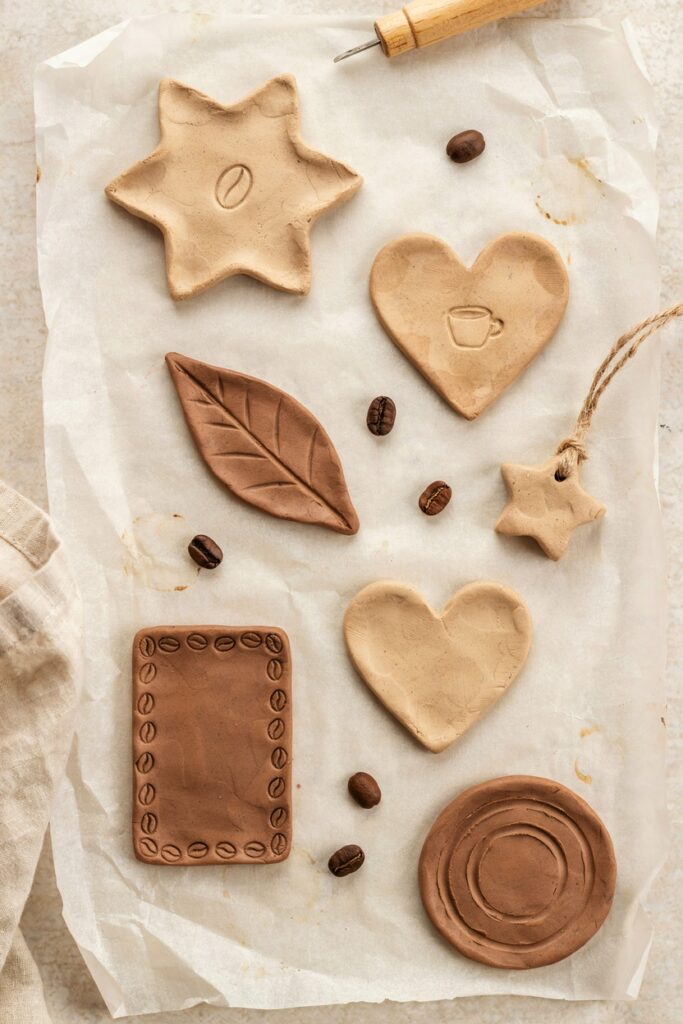
Place your finished pieces on parchment paper or a flat drying surface.
Allow them to dry at room temperature in a dry, well-ventilated area.
Turn the pieces occasionally so moisture can escape from both sides evenly.
Depending on their thickness and the humidity in your home, small pieces can take approximately 24 to 48 hours to dry completely.
Don’t rush this part.
The outside can feel hard while the center is still holding moisture, particularly with thicker pieces.
How to Tell When It’s Completely Dry
The piece should feel firm throughout rather than slightly cool or soft in the center.
It should also feel noticeably lighter than it did when you first shaped it.
If you’re unsure, give it another several hours rather than assuming it’s ready.
Tips I’ve Learned From Making Coffee Clay

Squeeze excess moisture from the coffee grounds first. This makes controlling the water much easier.
Add water slowly. You can always add more, but fixing an overly wet mixture takes considerably more flour.
Don’t make your pieces extremely thin. Thin edges are much more likely to crack during drying.
Turn pieces while they dry. This helps them dry more evenly.
Let them dry completely before sanding or painting. Working on partially dry clay can damage the surface.
Don’t expect a perfectly smooth clay surface. The coffee grounds naturally create texture, which is part of what makes this recipe interesting.
Common Mistakes to Avoid
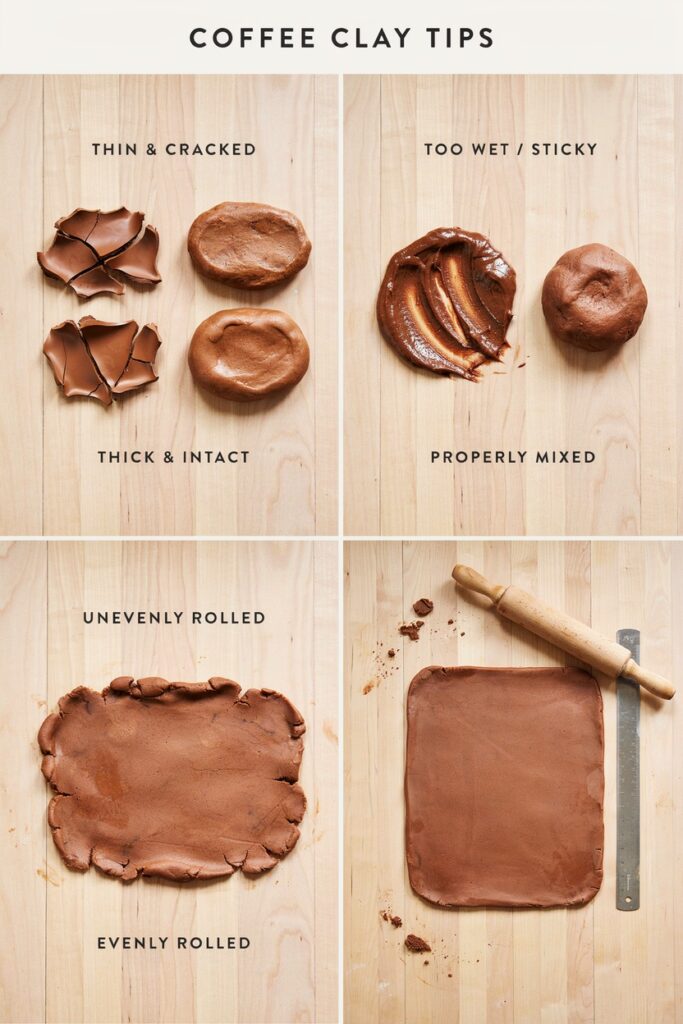
Using Extremely Wet Coffee Grounds
If your coffee grounds are dripping wet, you’re starting with much more water than the recipe accounts for.
That can leave you with a sticky mixture that needs excessive amounts of flour.
Press out as much moisture as possible before measuring.
Adding All the Water at Once
This is probably the easiest way to lose control of the consistency.
Coffee grounds can hold different amounts of moisture depending on how they were brewed and drained, so your mixture may need less water than mine.
Add it gradually.
Rolling the Clay Too Thin
Thin pieces might look delicate and pretty when you’re shaping them, but they can become extremely fragile once dry.
For most small projects, around ¼ inch gives you a much more forgiving starting point.
Drying the Clay Too Quickly
Putting the pieces directly beside a heater or in intense sunlight might seem like a good way to speed up the process, but rapid drying can encourage cracking and warping.
Slow and even is better here.
What Can You Make With Coffee Clay?
Once you have the basic dough down, there are quite a few small projects you can experiment with.
Coffee Clay Ornaments
Cut the clay into stars, hearts, leaves, circles, or seasonal shapes and add a small hanging hole before drying.
Leave them in their natural coffee color or paint them afterward.
Rustic Gift Tags
Roll the clay slightly thinner and cut simple rectangles or organic shapes.
Once dry, you can paint names or short messages onto the surface and attach them to wrapped gifts with twine.
Small Decorative Plaques
Cut larger flat shapes and press simple patterns or botanical textures into the surface before drying.
These work particularly well with the natural brown tone of the coffee clay.
Magnets
Make small flat shapes, let them dry completely, then attach an appropriately sized craft magnet to the back with a suitable adhesive.
Keep the pieces lightweight so they don’t become unnecessarily heavy on the refrigerator.
Can You Paint Coffee Clay?
Yes.
Once the piece is completely dry, acrylic paint is a simple option for adding color.
You can paint the entire surface or leave portions of the natural coffee color visible.
I especially like using cream, white, muted green, terracotta, and soft black against the brown base because the colors still feel earthy rather than overly bright.
A Simple Painted Finish
For a subtle look, paint the entire piece with one thin coat and allow it to dry.
You can then lightly dry-brush a second color over the raised areas to emphasize the texture created by the coffee grounds.
The natural texture does a lot of the decorating for you, so you don’t need a complicated painting technique.
How to Finish Coffee Clay
Once your coffee clay pieces are completely dry, you can leave them natural, paint them, or add a protective finish depending on how you want them to look.
Seal the Finished Pieces
For decorative pieces that you want to keep cleaner and slightly more durable, apply a thin coat of clear acrylic sealer once the paint is completely dry.
Let the first coat dry fully before adding another.
I prefer several thin coats over one heavy coat because thick layers can collect around textured areas and make the finished piece look uneven.
Keep in mind that sealing does not make homemade coffee clay waterproof. I would still keep finished pieces away from prolonged moisture and never use them as food-safe dishes.
Troubleshooting Coffee Clay
My Coffee Clay Is Too Sticky
The mixture probably contains too much moisture.
Knead in a small amount of flour, about a teaspoon at a time, until the dough becomes easier to handle.
Avoid adding a large amount of flour all at once because that can leave the finished clay overly stiff.
My Clay Is Crumbling
This usually means the dough is too dry or hasn’t been kneaded enough.
Work it with your hands for another few minutes first. If it still falls apart when pressed together, dampen your hands slightly and knead again.
My Finished Piece Cracked
Small cracks can happen as moisture leaves the clay during drying.
The most common things I watch for are pieces that are too thin, uneven thickness, excessively wet coffee grounds, and drying the clay too quickly.
For future pieces, keep the thickness consistent and allow them to dry gradually at room temperature.
My Clay Warped While Drying
Uneven moisture can cause the clay to pull or curl as it dries.
Try rolling the clay to an even thickness and turning flat pieces occasionally while they dry.
Avoid placing them directly beside a heater or in strong sunlight.
My Coffee Clay Is Still Soft After Two Days
Thicker pieces can take longer to dry, particularly in a humid room.
Move them somewhere dry with good airflow and give them additional time.
Don’t seal or paint them until you’re certain the center has dried completely.
Coffee Clay Variations to Try
Cinnamon Coffee Clay
Add 1 teaspoon of ground cinnamon to the mixture for a warmer color and subtle spiced aroma.
This is especially nice for Christmas ornaments and rustic autumn decorations.
Natural Coffee Brown
Skip the paint and simply seal the completely dry clay with a clear finish.
The coffee grounds create enough natural variation that the finished pieces don’t necessarily need additional decoration.
Botanical Coffee Clay
Press small leaves, flowers, or textured greenery gently into the surface while the clay is still soft.
Remove the plant material carefully before the clay dries to leave behind a natural impression.
White and Coffee Contrast
Paint selected sections of a finished piece cream or white while leaving the rest in its natural coffee color.
The contrast works particularly well on ornaments and small decorative plaques.
How to Store Leftover Coffee Clay
If you have dough left after making your project, wrap it tightly in plastic wrap and place it inside an airtight container.
Keep it refrigerated and use it as soon as possible rather than storing it indefinitely, since the recipe contains brewed coffee grounds and other food-based ingredients.
Before using refrigerated dough, allow it to soften slightly at room temperature and knead it again.
If it smells unusual, shows visible mold, or has changed significantly in appearance, discard it.
Important Things to Know Before Using Coffee Clay
Coffee clay is best treated as a decorative craft material, not a replacement for commercial polymer clay, ceramic clay, or kiln-fired pottery.
I wouldn’t use it for mugs, plates, food bowls, plant pots that will regularly get wet, or anything that needs to withstand constant handling or moisture.
It works much better for small decorative projects where its natural texture and earthy appearance are part of the appeal.
More Clay Projects to Try
- How to Make Coffee Clay at Home
- How to Avoid Cracks in Air Dry Clay
- 10 Fall Air Dry Clay Projects You’ll Love This Season
- 10 Air Dry Clay Gift Ideas That Actually Feel Thoughtful
Frequently Asked Questions
Can I make coffee clay without glue?
Yes. This recipe doesn’t require white glue or craft glue. The flour, salt, coffee grounds, and water create the dough-like mixture.
Can I use fresh coffee grounds?
I recommend used, brewed coffee grounds for this recipe. Fresh dry grounds have a different moisture level and can change the consistency considerably.
Do I have to use coffee grounds?
The coffee grounds are what give this recipe its characteristic color and texture, so removing them would essentially turn it into a different type of homemade clay.
How long does coffee clay take to dry?
Small, relatively thin pieces generally need around 24 to 48 hours, although thicker pieces or humid conditions can require additional drying time.
Can I bake coffee clay?
I prefer letting this recipe air dry rather than treating it like polymer clay or ceramic clay. It isn’t designed to be fired in a kiln, and I wouldn’t assume that baking it will make it waterproof or significantly stronger.
Can I use coffee clay for a bowl?
You can shape it into a decorative bowl or dish, but it should be considered decorative only. The finished material isn’t waterproof or food-safe, so I wouldn’t use it for serving food or holding water.
Can I make coffee clay ornaments?
Yes, and ornaments are one of my favorite uses for it. Roll the clay evenly, cut your shape, and remember to make the hanging hole while the clay is still soft.
Does coffee clay smell like coffee after it dries?
The finished pieces can retain some of the coffee aroma, although the strength will vary depending on the coffee used and how thoroughly the grounds were dried.
Final Thoughts
I really like this coffee clay recipe because it turns something as ordinary as used coffee grounds into something you can actually make with your hands.
The finished pieces aren’t meant to be perfect, and honestly, I think that’s part of the charm. The tiny coffee particles create natural texture and variation that would be difficult to recreate with a completely smooth clay.
If you’re making this for the first time, I’d start with something small like an ornament, gift tag, or simple decorative shape rather than attempting a large piece right away. That gives you a chance to learn how your particular coffee grounds behave and how much water your mixture actually needs.
Once you get the consistency right, there are plenty of ways to make the recipe your own with pressed leaves, painted details, cinnamon, different shapes, or a simple natural finish.
And if your first batch isn’t perfect, don’t throw it out too quickly. Homemade clay is one of those crafts where a slightly uneven edge or unexpected texture can end up being exactly what makes the finished piece look handmade.




One Comment