
I still remember the first time I tried making coffee clay.
It wasn’t planned. I just had leftover coffee grounds sitting in my kitchen after my morning brew, and instead of throwing them away, I thought I’d experiment a little.
What came out of that small experiment surprised me more than I expected.

The clay had this beautiful natural brown tone, a soft earthy texture, and a subtle coffee scent that made it feel completely different from regular store-bought clay.
Since then, I’ve refined the process, tested different ingredient ratios, and learned what actually works and what doesn’t.
If you’re looking for a simple, natural, and beginner-friendly clay recipe you can make at home, this guide will walk you through it step by step.
What Is Coffee Clay?
Coffee clay is a homemade modeling clay made using coffee grounds combined with basic kitchen ingredients like flour, salt, and water.
Unlike traditional clay, it has:
- A natural, earthy appearance
- A slightly textured finish
- A subtle coffee aroma
Once dried, it becomes firm enough for decorative and craft projects, making it ideal for DIY home decor, gifts, and creative projects.
Why I Prefer Coffee Clay Over Regular DIY Clay

After trying several homemade clay recipes, I found myself coming back to this one.
Here’s why:
It Uses Materials You Already Have
There’s a good chance you won’t need to buy anything new.
It Has a Unique Natural Finish
The color isn’t artificial. It comes directly from the coffee, which gives your pieces a more organic look.
It’s Easy to Work With
Even if you’ve never worked with clay before, this recipe is forgiving and easy to adjust.
It’s Suitable for Simple Home Crafts
From small decorative items to basic handmade gifts, it works well without needing special tools.
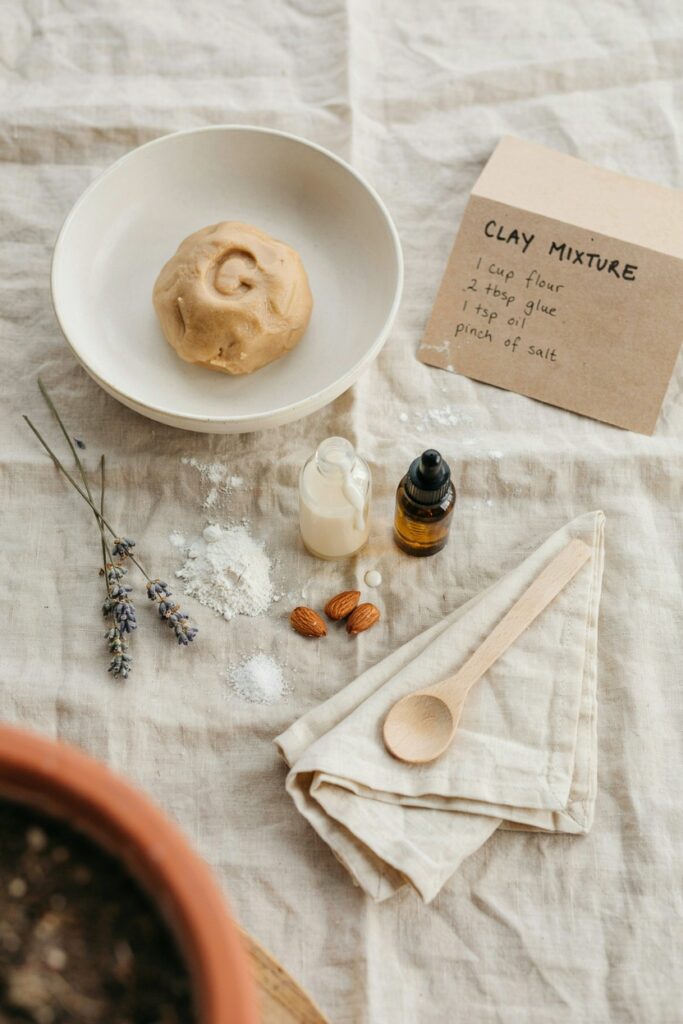
Ingredients You’ll Need
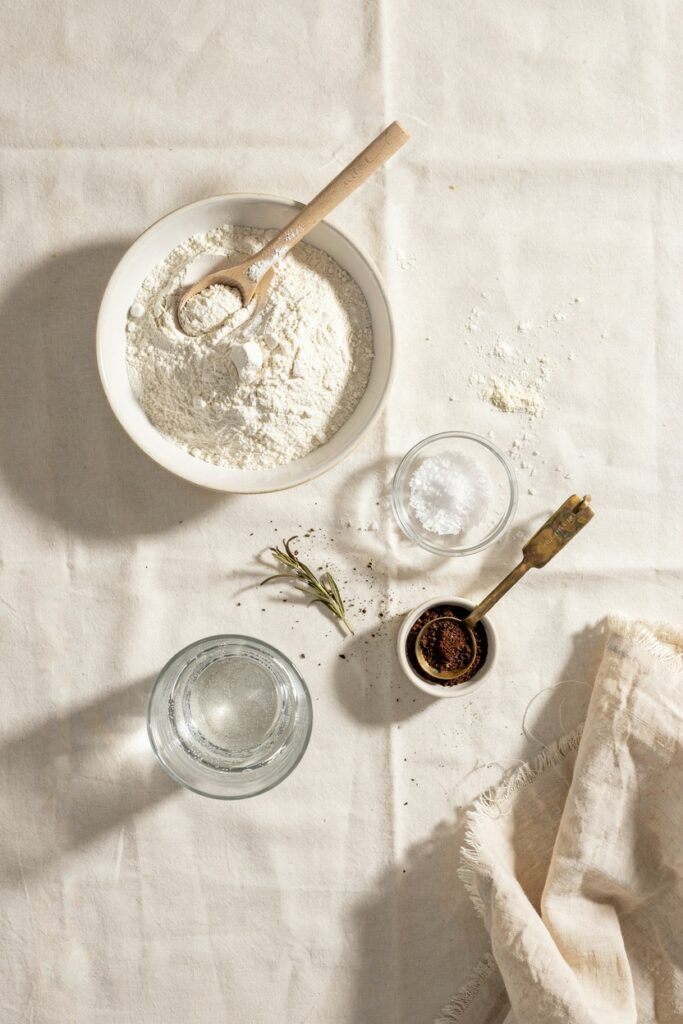
One of the reasons this recipe works so well is its simplicity.
Basic Ingredients:
- 1 cup all-purpose flour
- 1/2 cup fine salt
- 1/2 cup used coffee grounds (slightly dried)
- 1/2 cup water (added gradually)
Optional (Recommended for Better Results):
- 1–2 tablespoons white glue (adds strength)
- 1 teaspoon vegetable oil (improves smoothness)
Step-by-Step: How to Make Coffee Clay
Over time, I’ve learned that the method matters just as much as the ingredients. Follow these steps carefully for the best results.
Step 1: Prepare the Coffee Grounds
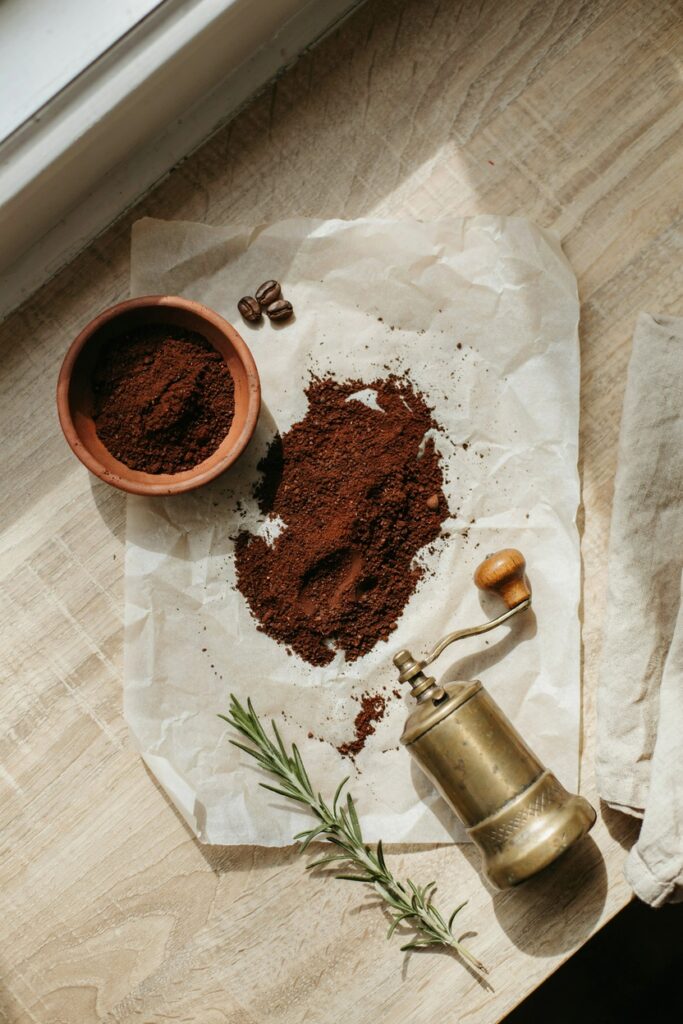
If you’re using used coffee grounds, let them dry slightly before mixing.
They shouldn’t be:
- Too wet (this makes the dough sticky)
- Completely dry (this can make it crumbly)
A slightly damp texture works best.
Step 2: Mix the Dry Ingredients
In a mixing bowl, combine:
- Flour
- Salt
- Coffee grounds
Stir thoroughly to ensure the coffee is evenly distributed.
This helps avoid uneven texture later.
Step 3: Add Water Gradually
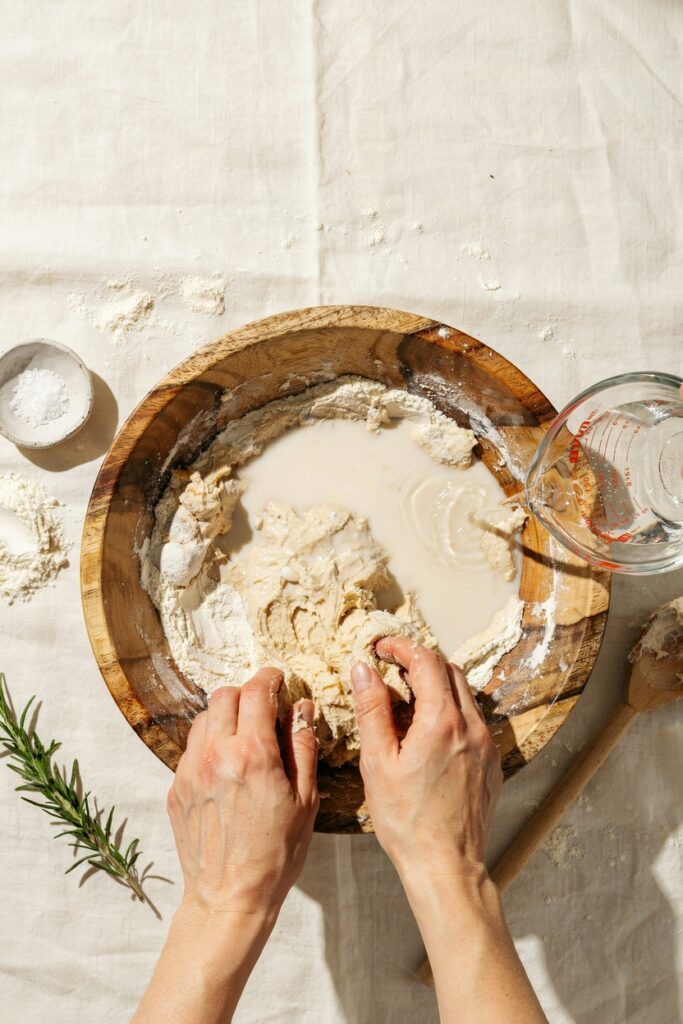
Slowly add water while mixing.
This is where most people rush, but taking your time here makes a big difference.
You’re aiming for a dough that:
- Holds together well
- Isn’t overly sticky
- Feels soft but firm
Step 4: Knead the Dough
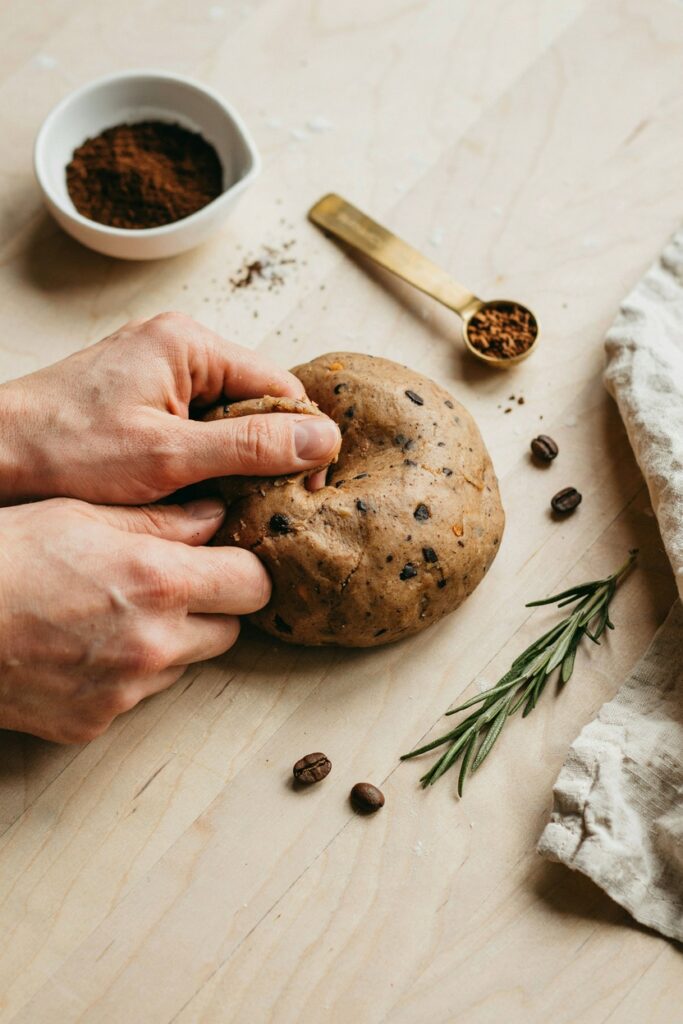
Transfer the mixture to a flat surface and knead it for about 5 to 10 minutes.
Kneading helps:
- Develop a smoother texture
- Improve flexibility
- Reduce cracking later
If the dough feels:
- Too dry → add a small amount of water
- Too sticky → add a little flour
Step 5: Let the Dough Rest (Important)
This is something I didn’t do at first, and it made a difference when I started.
Let the dough rest for about 10–15 minutes.
This allows the ingredients to fully combine and improves workability.
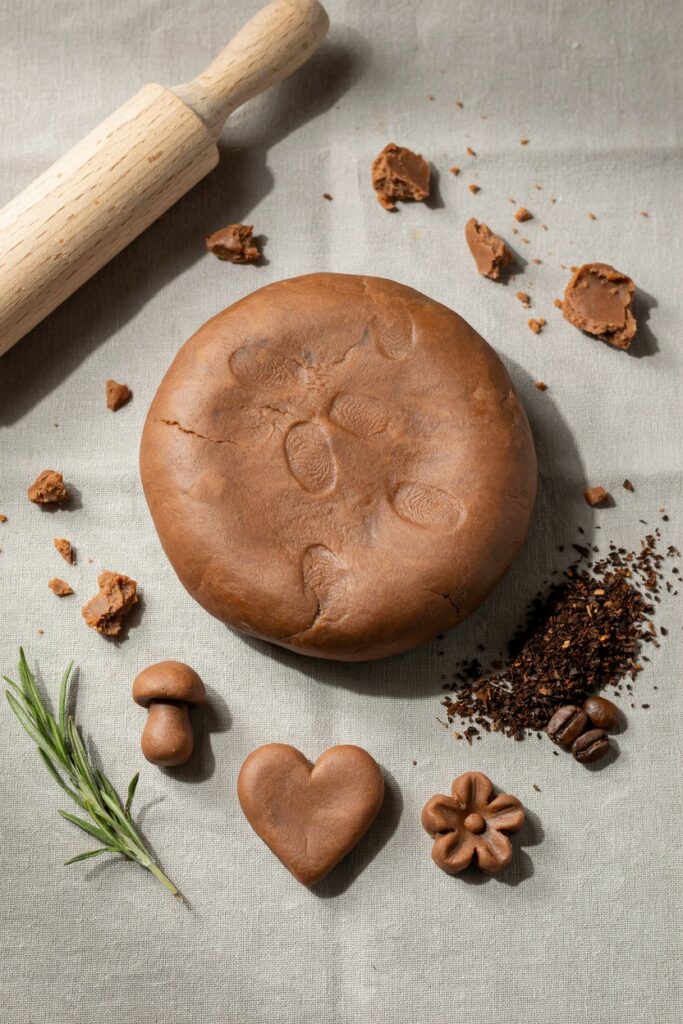
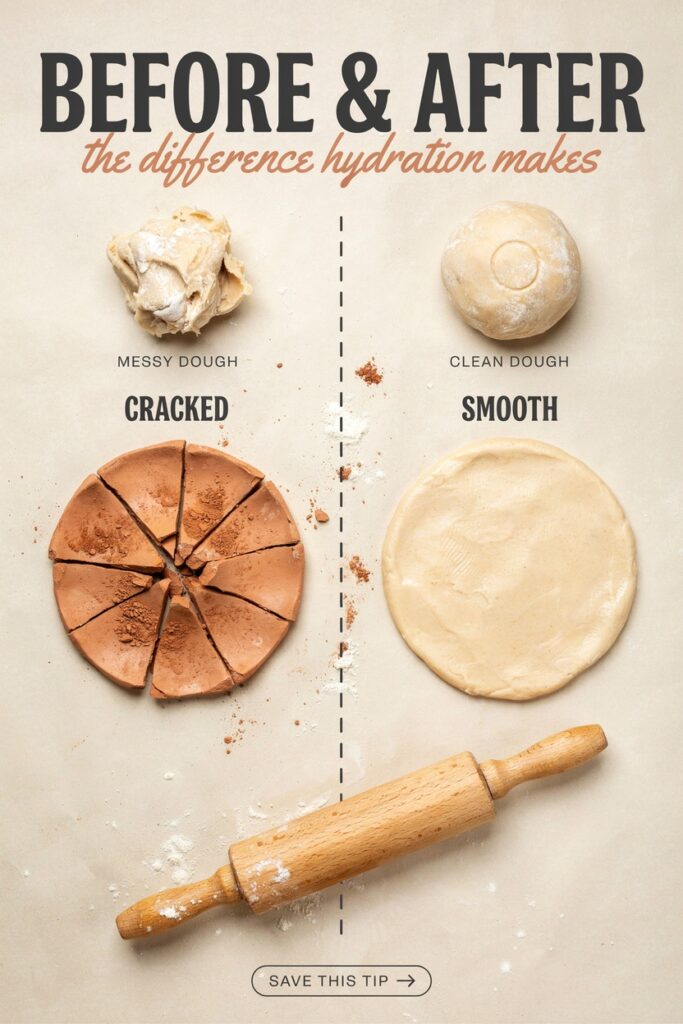
Getting the Texture Right (What Most Guides Don’t Explain)
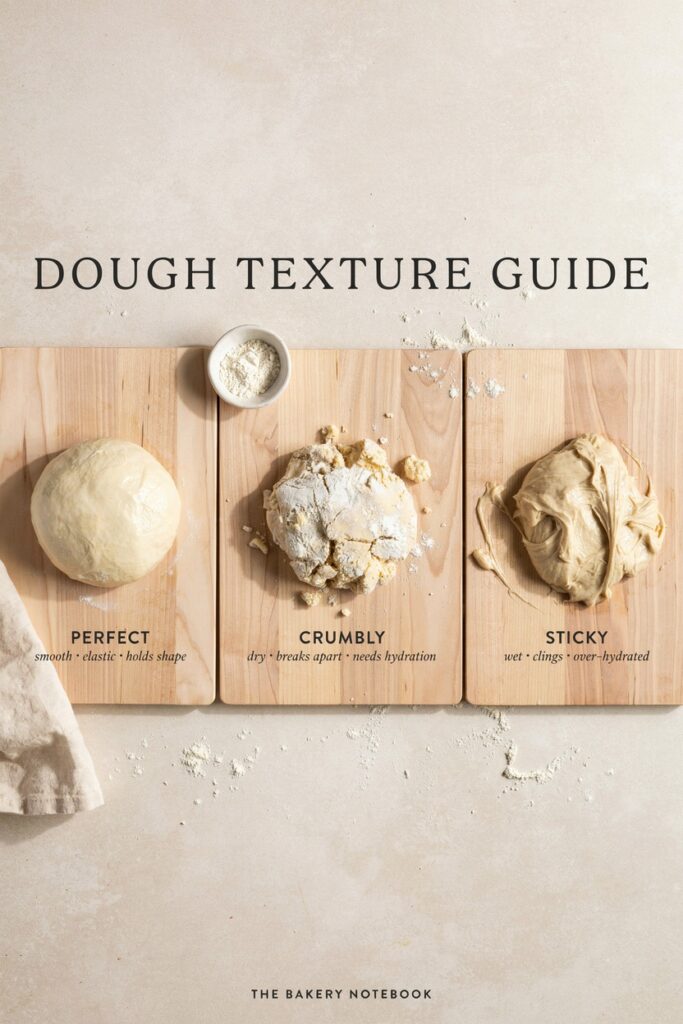
The ideal coffee clay texture should feel similar to soft modeling dough.
From my experience, here’s how to tell if it’s right:
- Smooth but slightly grainy from the coffee
- Flexible without cracking
- Easy to shape without sticking to your hands
If you get this part right, everything else becomes much easier.
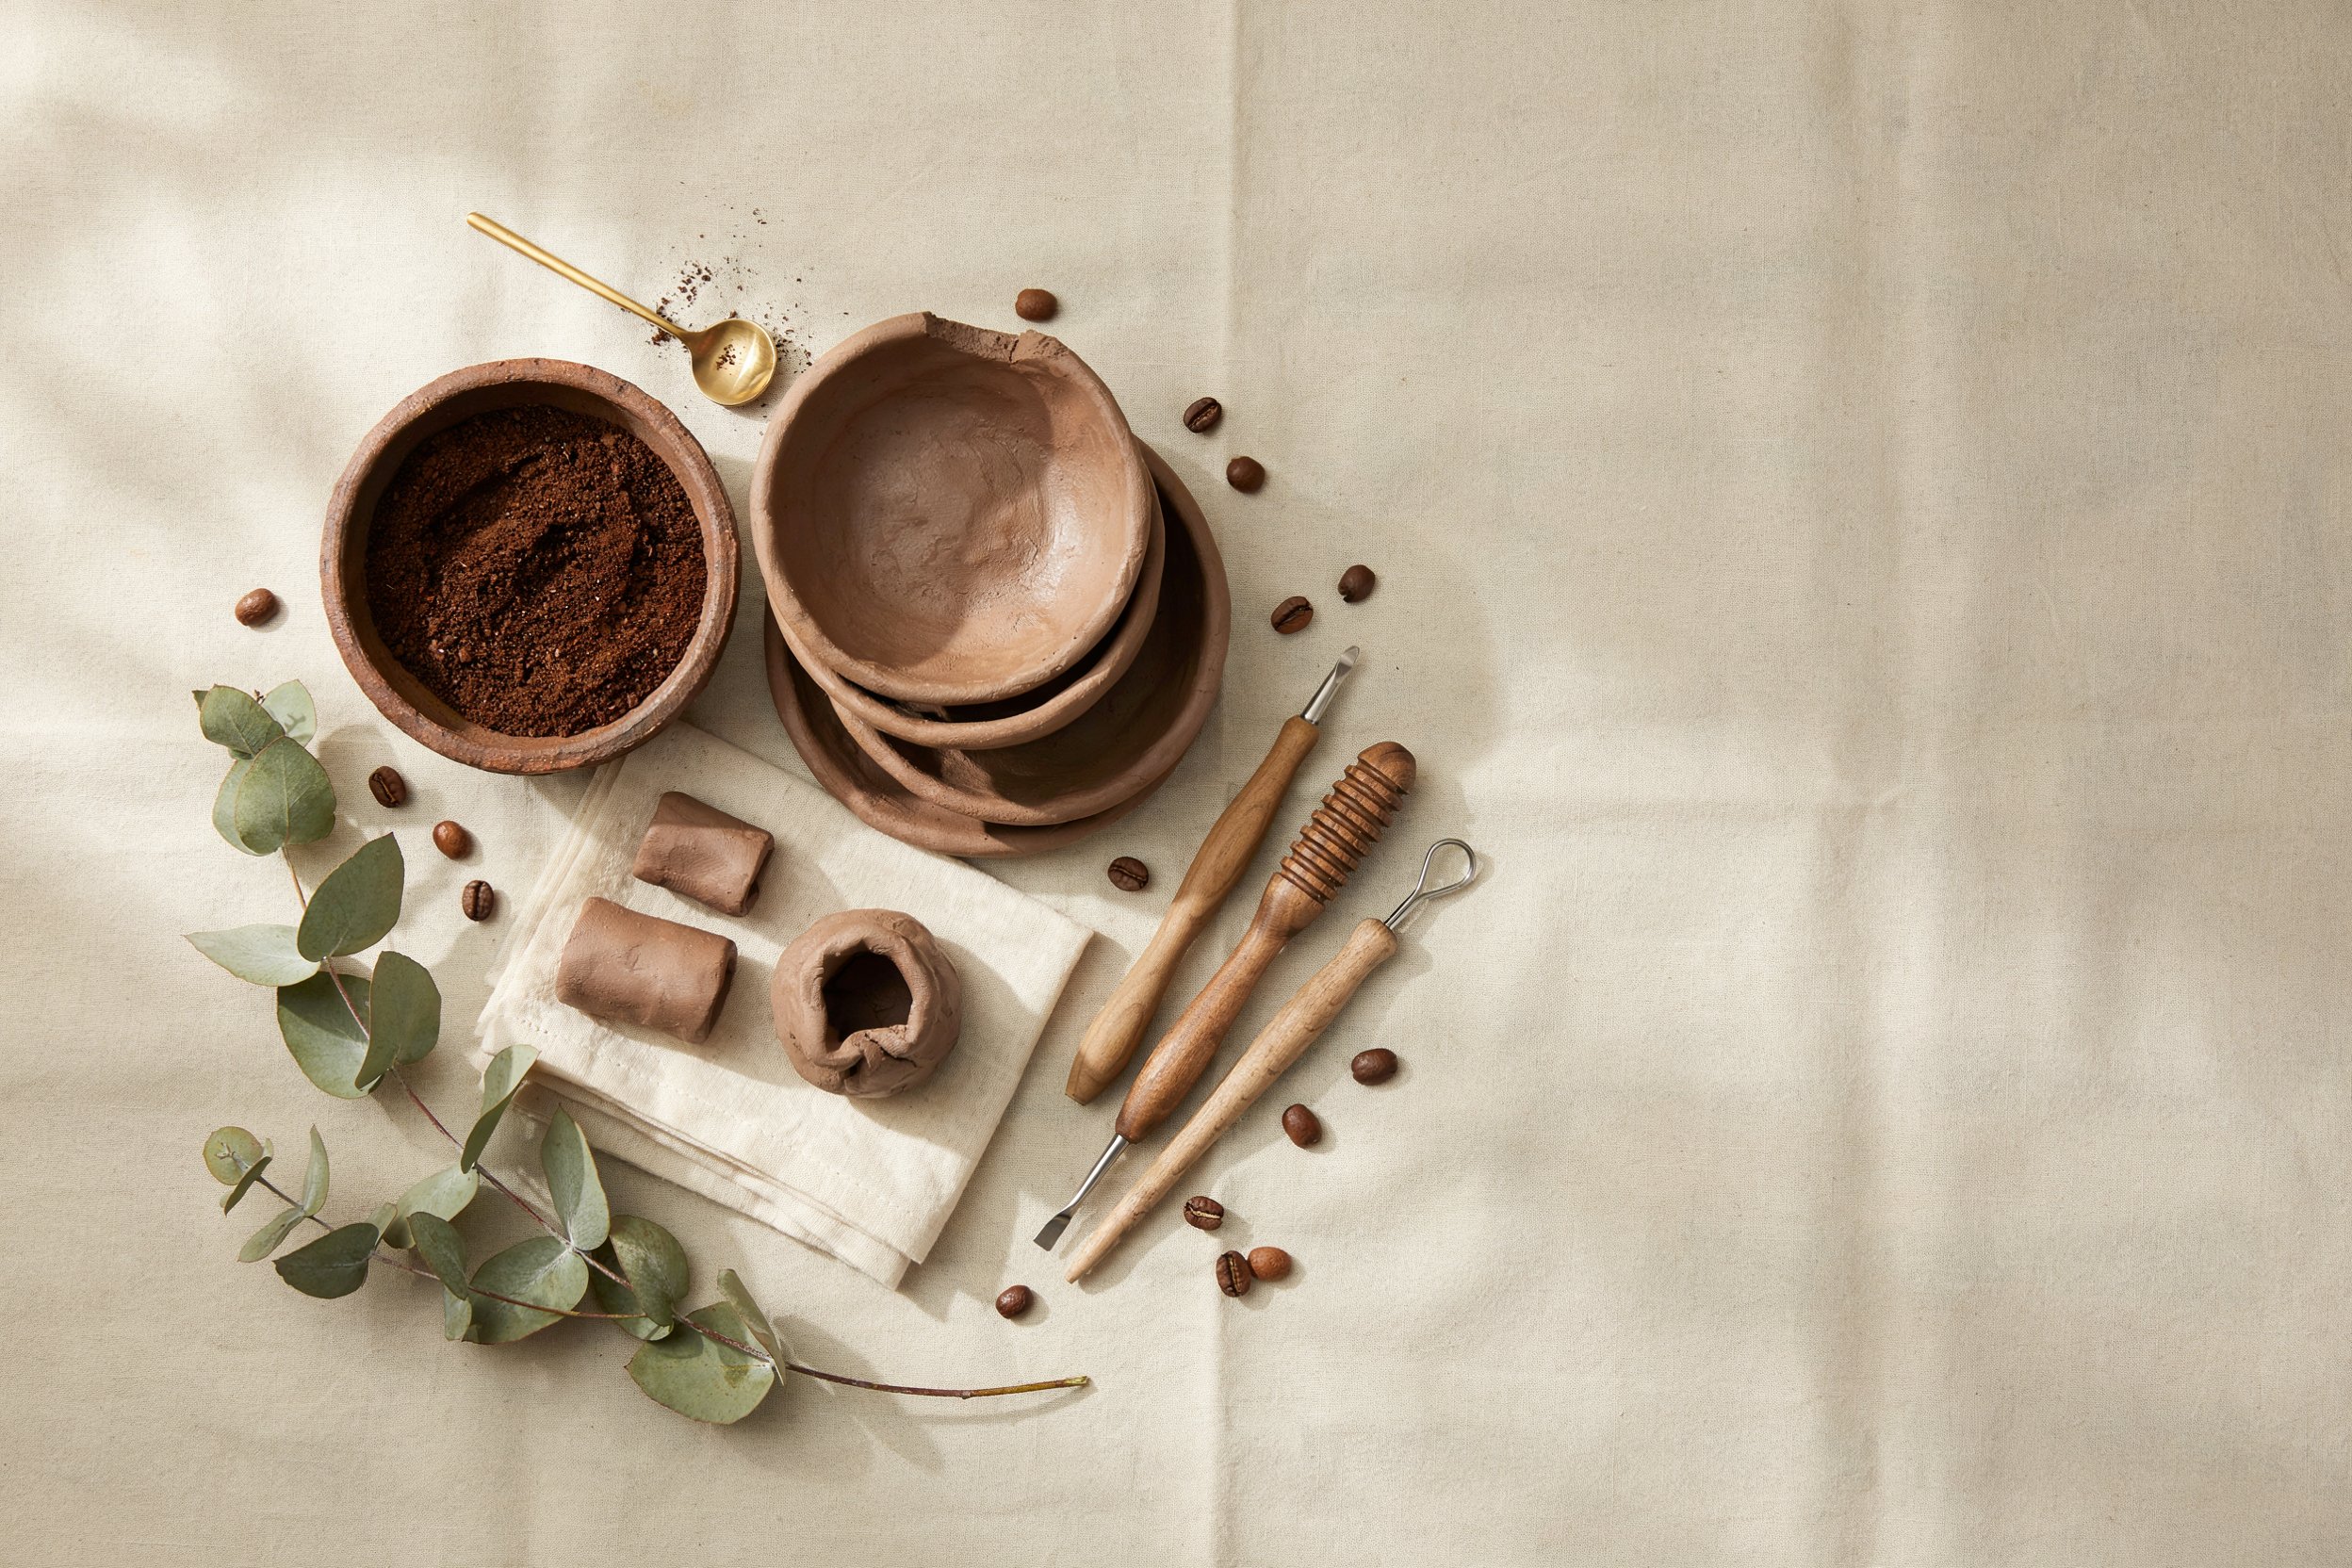
What You Can Make with Coffee Clay
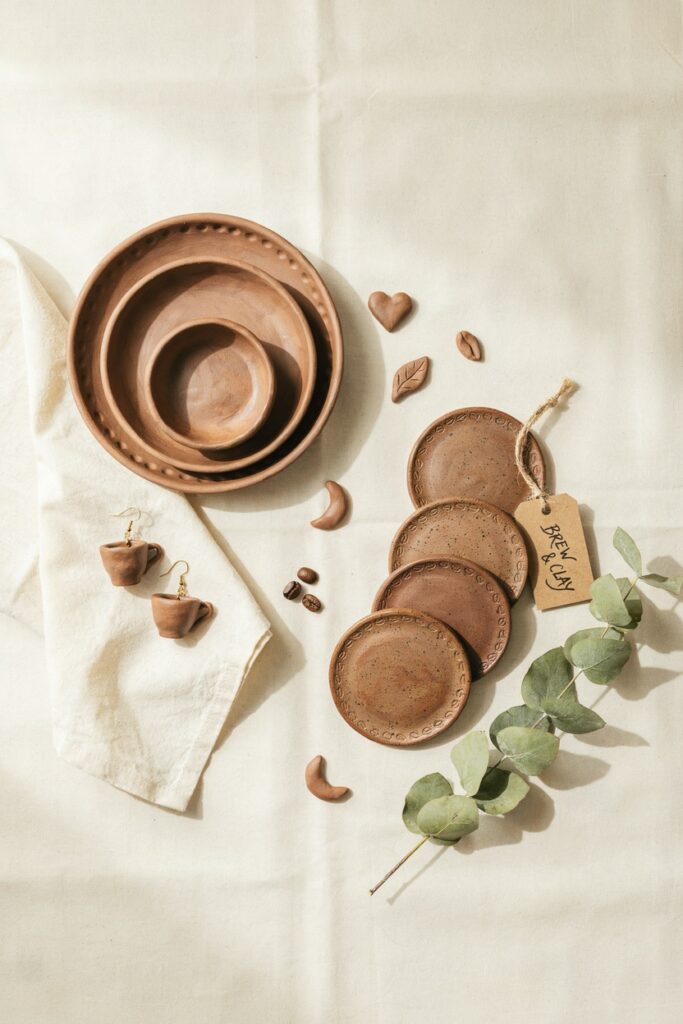
Once your clay is ready, you can shape it into a variety of simple projects.
Some practical ideas include:
- Small decorative bowls
- Coasters
- Jewelry pieces like pendants
- Simple ornaments
- Minimalist home decor items
I recommend starting with smaller pieces if you’re new, as they’re easier to manage and dry more evenly.
Drying Your Coffee Clay: Air Dry vs Oven
There are two reliable ways to harden your clay, and each has its advantages.
Air Drying (Recommended for Beginners)
- Takes 24 to 48 hours depending on thickness
- Produces a more natural finish
- Lower risk of cracking if done slowly
Oven Drying (Faster Method)
- Set oven to low heat (around 80–100°C)
- Dry for 1–2 hours
- Check regularly to avoid overheating
This method is useful if you’re short on time, but it requires more attention.
How to Make Coffee Clay Stronger and Prevent Cracking
One of the biggest issues I ran into early on was cracking.
At first, I thought I was doing something wrong with the shaping, but the real issue was in the mixture and drying process.
Here’s what actually made a difference for me:
Add a Small Amount of Glue
Mixing in 1–2 tablespoons of white glue helps bind the ingredients better.
This makes the clay:
- More durable
- Less prone to breaking
- Smoother to work with
Roll the Clay Evenly
Uneven thickness leads to uneven drying, which causes cracks.
Try to keep your pieces consistent in thickness, especially for flat items like coasters or trays.
Let It Dry Slowly
Fast drying is one of the main causes of cracks.
I’ve had the best results by:
- Letting pieces air dry naturally
- Turning them occasionally for even airflow
Avoid Overworking the Dough
Kneading is important, but too much can dry it out.
Once it feels smooth and workable, it’s ready.
Common Mistakes to Avoid (From Experience)
These are the mistakes I made when I first started, and avoiding them will save you time and frustration.
Using Coffee Grounds That Are Too Wet
This makes the dough sticky and difficult to shape.
Adding Too Much Water at Once
It’s much easier to add water than to fix a dough that’s too wet.
Always go slowly.
Skipping the Resting Time
Letting the dough rest improves the texture more than you’d expect.
Making Pieces Too Thick
Thicker pieces take longer to dry and are more likely to crack.
Drying Too Quickly in High Heat
If you’re using an oven, keep the temperature low and check regularly.
How to Paint and Seal Coffee Clay
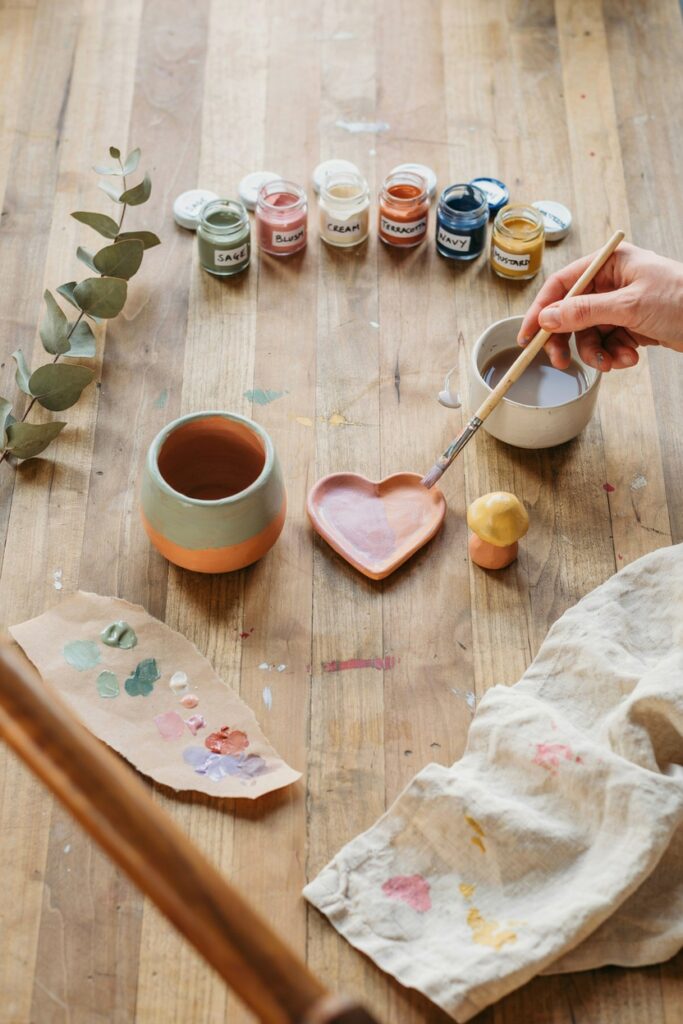
Once your pieces are fully dry, you can leave them natural or enhance them.
Personally, I like both depending on the project.
Painting Your Coffee Clay
If you want to add color:
- Use acrylic paints for best results
- Apply thin layers instead of one thick coat
- Let each layer dry before adding another
This helps maintain the texture without hiding it completely.
Sealing for a Finished Look
Sealing your clay makes it:
- More durable
- Slightly water-resistant
- Visually polished
You can use:
- Clear varnish
- Mod Podge
- Matte or gloss sealers
I usually go for a matte finish to keep that natural look.
How to Store Coffee Clay Properly

If you’re not using all your clay at once, storage matters.
Here’s what works best:
- Wrap it tightly in plastic wrap
- Store it in an airtight container
- Keep it in a cool place
This keeps it usable for a few days.
If it starts to dry out, you can:
👉 Add a tiny bit of water and knead it again
Simple Tips to Make Your Projects Look More Professional
These small details make a big difference in how your final pieces turn out.
Smooth the Surface Before Drying
Use your fingers or a small tool to remove cracks while the clay is still soft.
Use Simple Shapes First
Clean, minimal designs often look better than overly complex ones.
Pay Attention to Edges
Neat edges instantly make your work look more refined.
Let Each Step Fully Finish
Rushing drying or painting usually shows in the final result.
Final Thoughts: A Simple DIY That’s Worth Trying
What I like most about coffee clay is how simple it is.
You’re taking something you would normally throw away and turning it into something creative and useful.
It doesn’t require expensive tools or advanced skills.
Just a bit of time, patience, and willingness to experiment.
If you’re new to DIY crafts, this is a great place to start.
And if you’ve tried other clay recipes before, you’ll probably notice how different this one feels.
If you take one thing from this guide, let it be this:
👉 Getting the texture and drying process right matters more than anything else.
Once you figure that out, everything else becomes easier.
And that’s when your projects really start to look good.


