12 Super Cute Air Dry Clay Ideas to Recreate
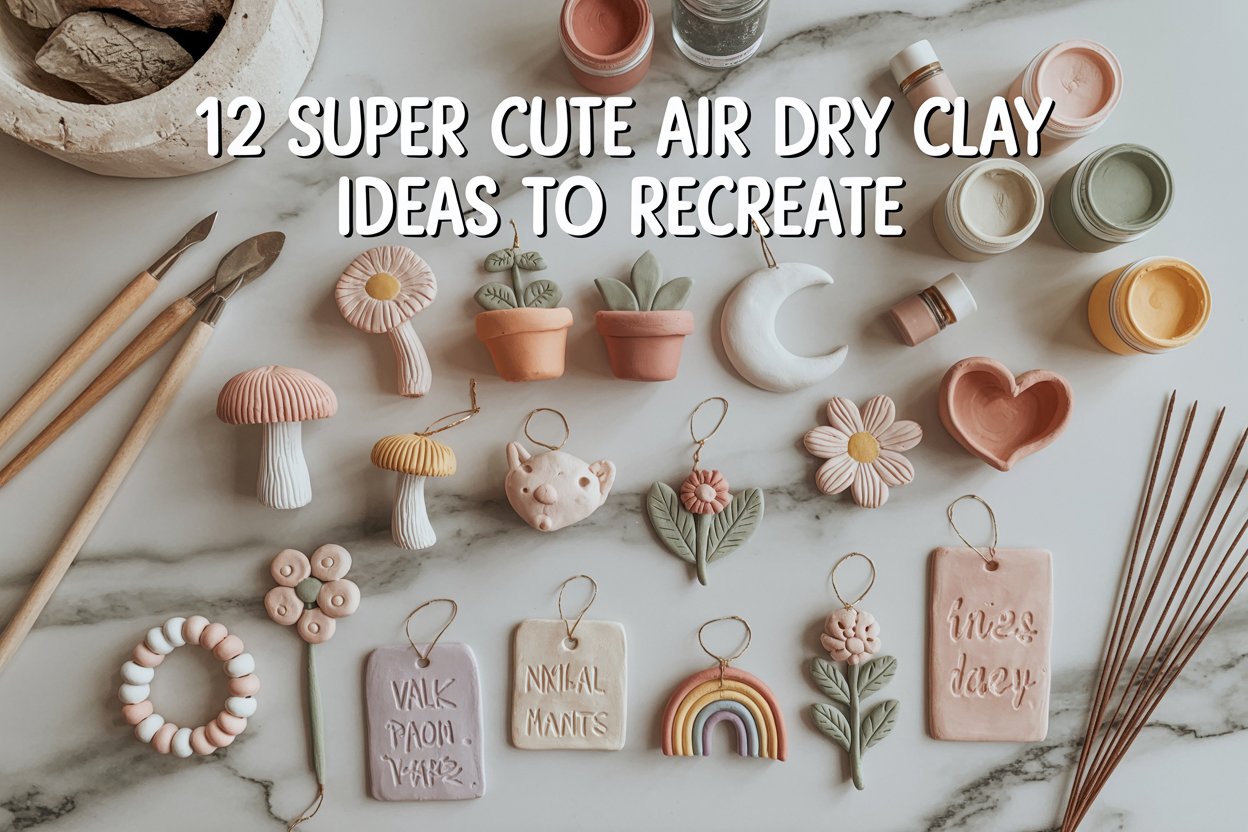
If you have ever picked up a block of air dry clay and wondered what to make, you are definitely not alone.
I remember buying my first pack because I had seen so many beautiful clay projects online.
I was excited to start crafting, but once I sat down at my table, I realized I had absolutely no idea where to begin.
The good news is that air dry clay is one of the easiest crafting materials to work with.
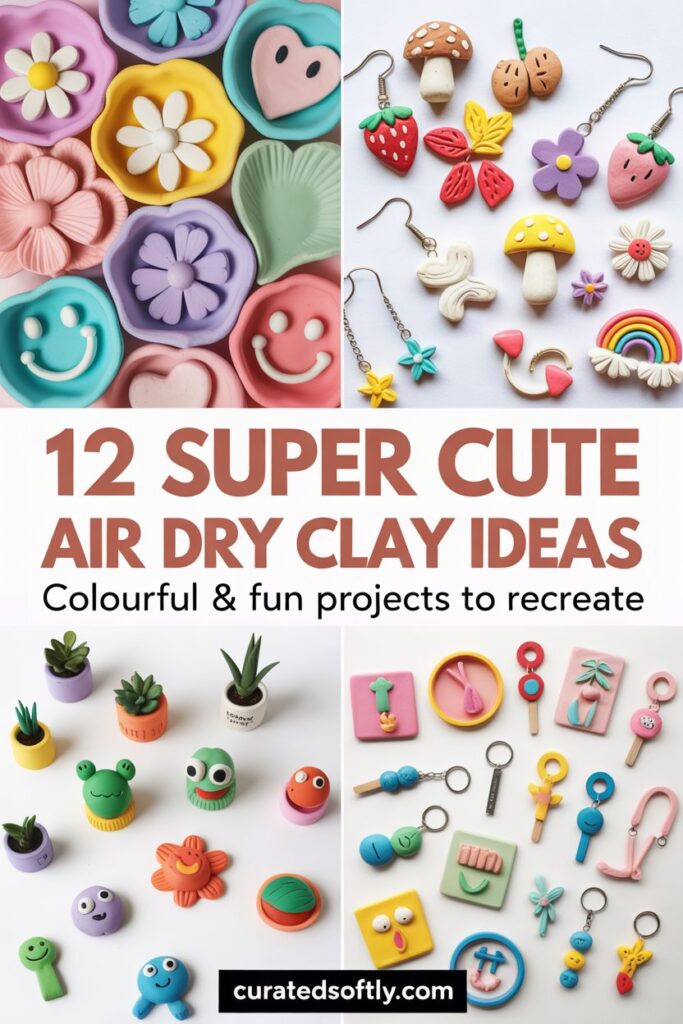
You do not need a kiln, expensive equipment, or years of experience to create projects that look beautiful enough to display in your home or give as handmade gifts.
Over the years, I have discovered that some of the cutest clay projects are also the simplest.
A few basic shapes, a little sanding, and your favorite paint color can turn an inexpensive block of clay into something that looks like it came from a boutique.
Whether you are looking for weekend craft ideas, DIY home décor, or thoughtful handmade gifts, these adorable air dry clay projects are fun to make and surprisingly beginner friendly.
Let’s start with some of my favorites.
Not sure where to start with clay? My air dry clay beginner tips post covers the basics before you dive into projects like these.
Why I Love Crafting with Air Dry Clay
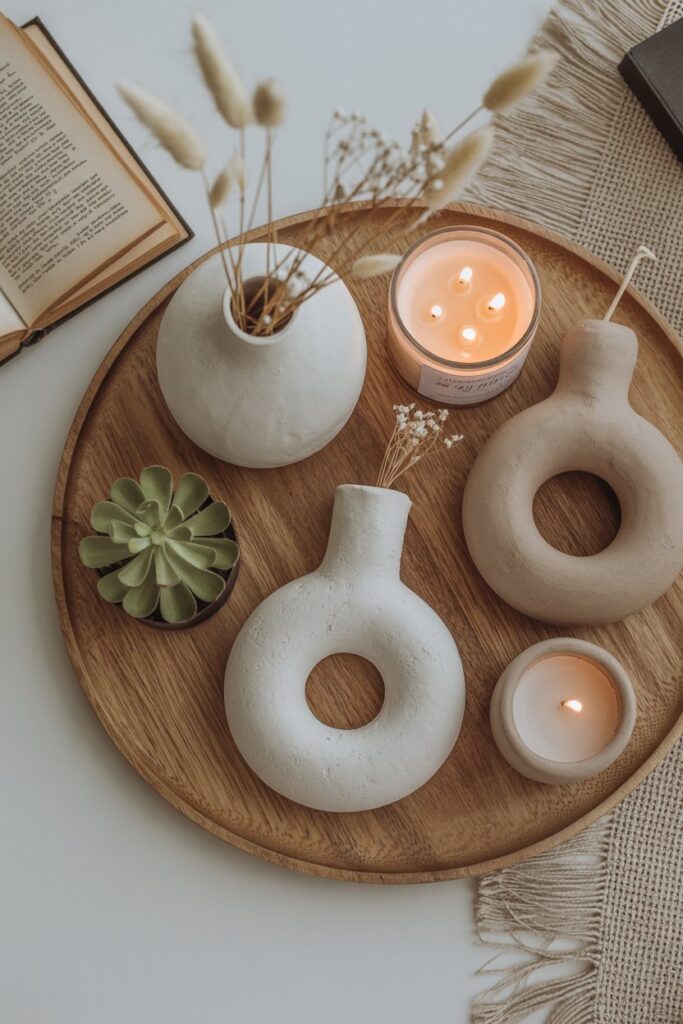
Out of all the craft supplies I have tried over the years, air dry clay is still one of my favorites.
It is affordable, easy to shape, and gives you endless opportunities to be creative.
I also love that you can create something completely unique with just a few simple tools.
Some projects take less than an hour to make, while others become relaxing weekend crafts that you can enjoy at your own pace.
Some of my favorite reasons to use air dry clay include:
- Beginner friendly
- Budget friendly
- No kiln required
- Easy to paint and decorate
- Perfect for home décor
- Great handmade gifts
- Endless design possibilities
- Fun for both adults and older kids
The best part is that there is no right or wrong style.
Every handmade piece has its own personality, and that is exactly what makes these projects so special.
1. Mini Mushroom Decorations
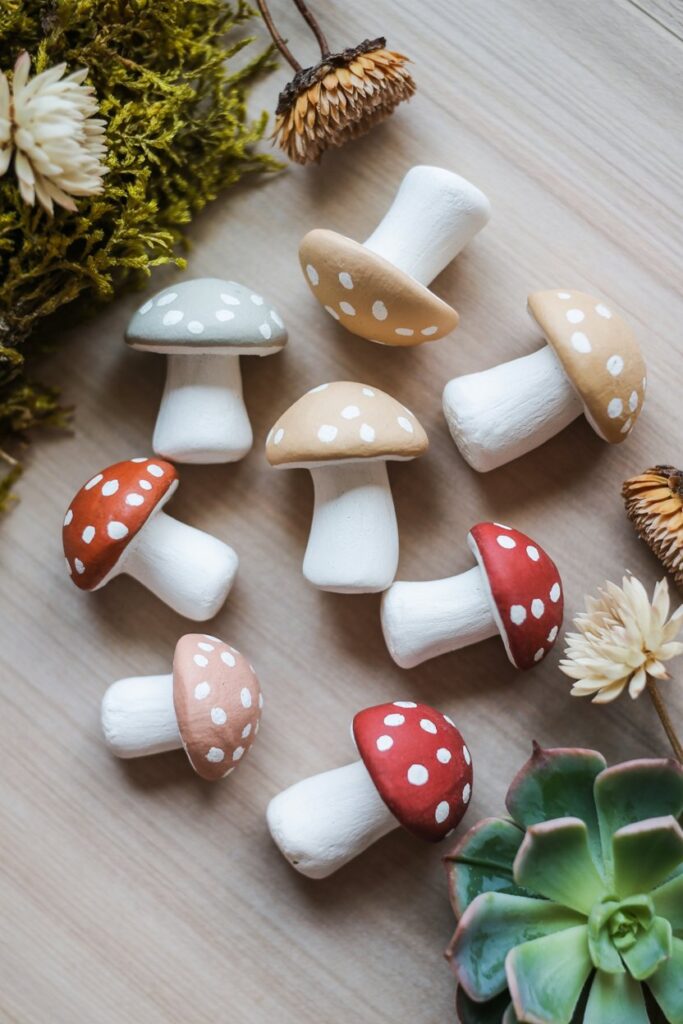
Tiny clay mushrooms are one of the cutest projects you can make.
They look beautiful displayed on shelves, tucked into houseplants, or grouped together inside a decorative bowl.
Because they only require a few simple shapes, they are perfect for beginners who are learning how air dry clay behaves.
Why I Love This Project
It is quick, relaxing, and almost impossible to mess up.
Every mushroom ends up looking slightly different, giving the finished collection plenty of handmade charm.
What You’ll Need
How I Make Them
I roll one small ball for the mushroom cap and another for the stem.
After gently pressing the pieces together, I smooth the seam with a damp fingertip before allowing the mushroom to dry completely.
Once dry, I paint the cap, add tiny white dots, and seal everything with a matte finish.
2. Daisy Trinket Dish
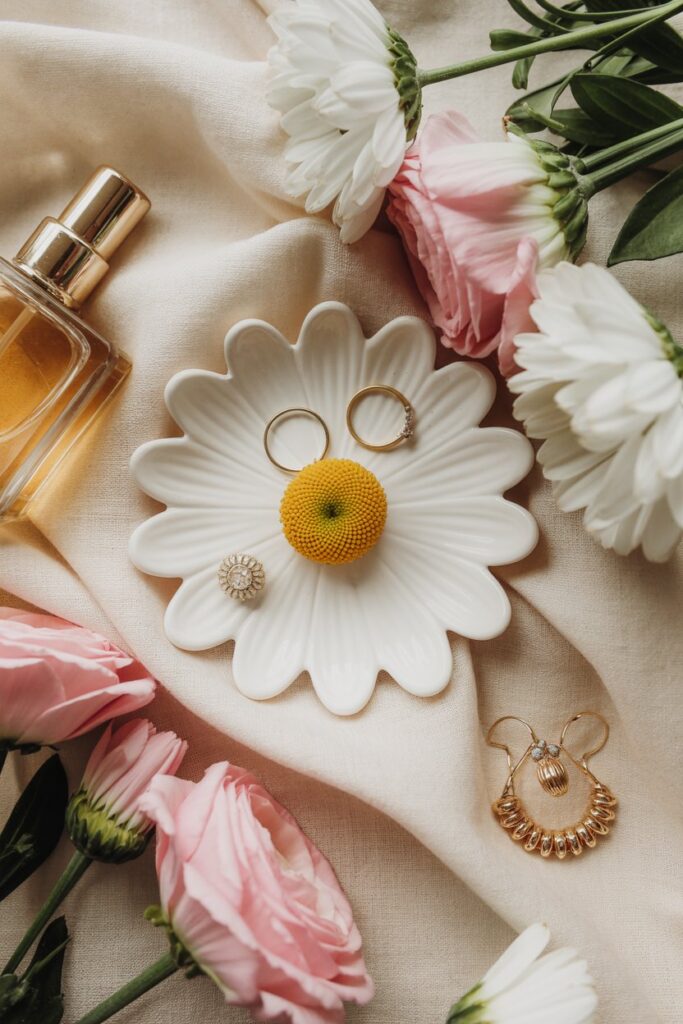
This is one of my favorite beginner projects because it is both beautiful and practical.
I keep one on my bedside table for rings and another by the front door for keys.
It also makes a thoughtful handmade gift.
Why It Is One of My Favorites
The flower shape looks elegant without being difficult to create.
Even a simple white finish gives the dish a clean, modern look.
What You’ll Need
- Air dry clay
- Rolling pin
- Daisy template
- Small bowl
- Craft knife
- Acrylic paint
- Clear sealer
How I Make It
I roll the clay evenly before cutting out a daisy shape.
Then I gently press the flower into a small bowl so the petals curve upward while drying.
Once dry, I lightly sand the edges, paint it, and finish with a protective sealer.
3. Cute Mini Plant Pots
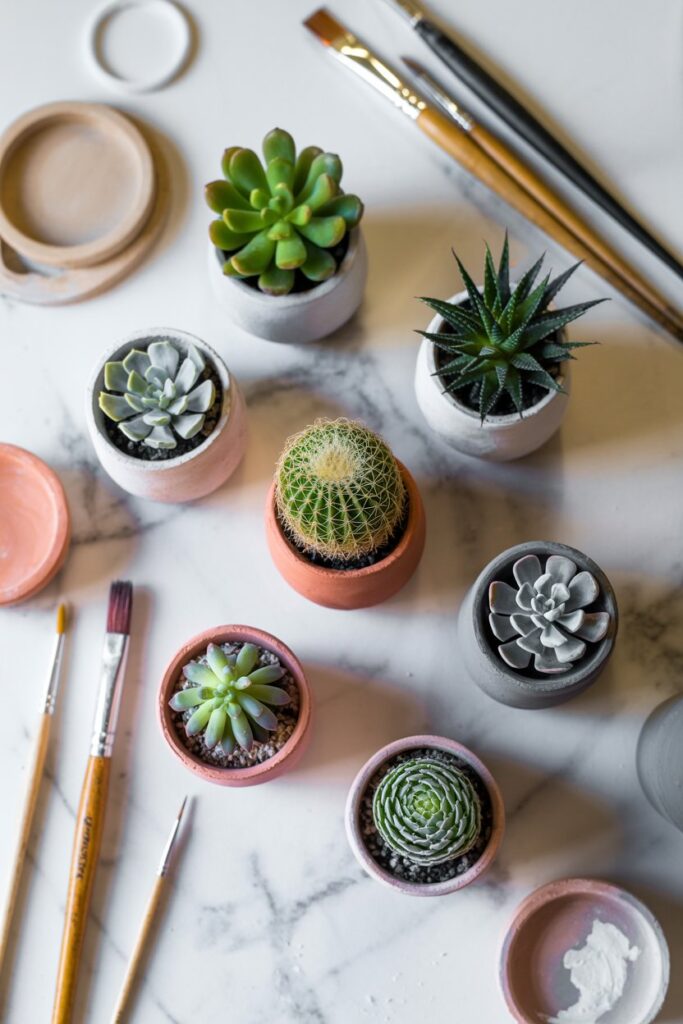
Mini clay planters are one of those projects that always look far more expensive than they actually are.
I love displaying them on shelves, desks, and windowsills with tiny succulents or dried flowers.
They instantly make a room feel more personal.
Why I Keep Making Them
They are easy to customize with different textures, paint colors, and patterns.
No two pots ever look exactly alike.
What You’ll Need
- Air dry clay
- Rolling pin
- Craft knife
- Small bowl or template
- Sandpaper
- Acrylic paint
- Waterproof sealer
How I Make Them
I roll the clay into an even slab before cutting a circular base and a long strip for the sides.
After joining the pieces together, I smooth every seam carefully before leaving the pot to dry naturally.
Once it has hardened completely, I sand, paint, and seal it for a clean professional finish.
4. Moon Phase Wall Hanging
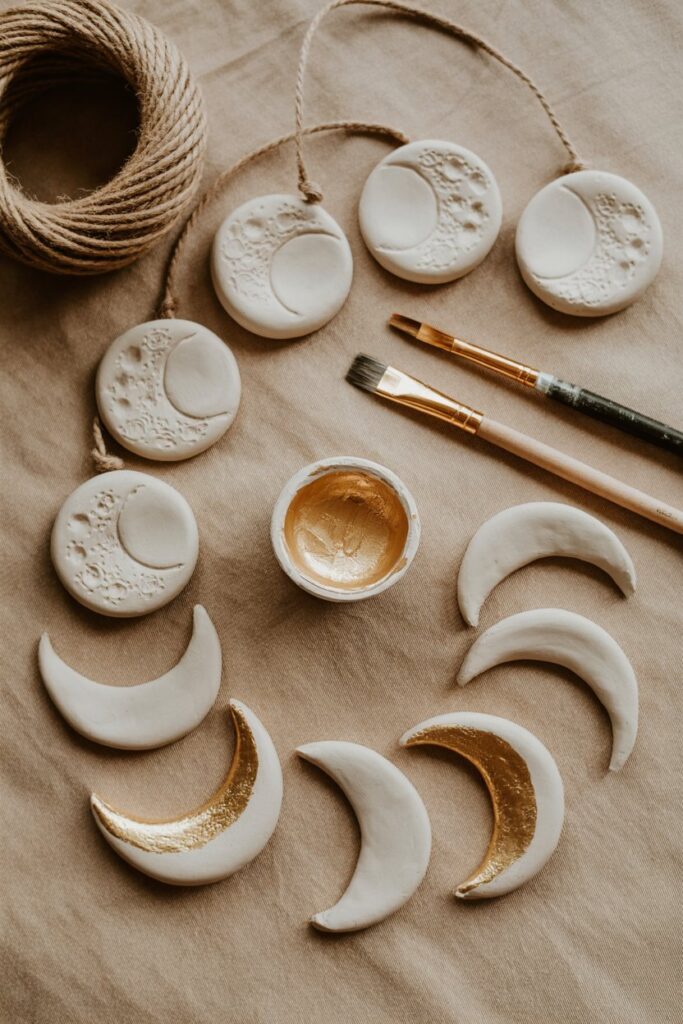
If you love modern boho home décor, this project is definitely worth trying.
The soft curves of the moon phases create a simple but elegant wall decoration that looks beautiful in a bedroom, home office, or living room.
Why I Love This Project
It looks much more complicated than it actually is.
Once you cut the moon shapes, the rest of the project comes together surprisingly quickly.
What You’ll Need
- Air dry clay
- Moon templates
- Rolling pin
- Craft knife
- Fine-grit sandpaper
- Acrylic paint
- Jute cord
- Small drill or skewer
How I Make It
I roll the clay evenly before cutting each moon shape using paper templates. After the clay has dried completely, I sand the edges, paint each piece in soft neutral colors, then thread them together with jute cord to create a modern wall hanging.
5. Heart Ring Dish
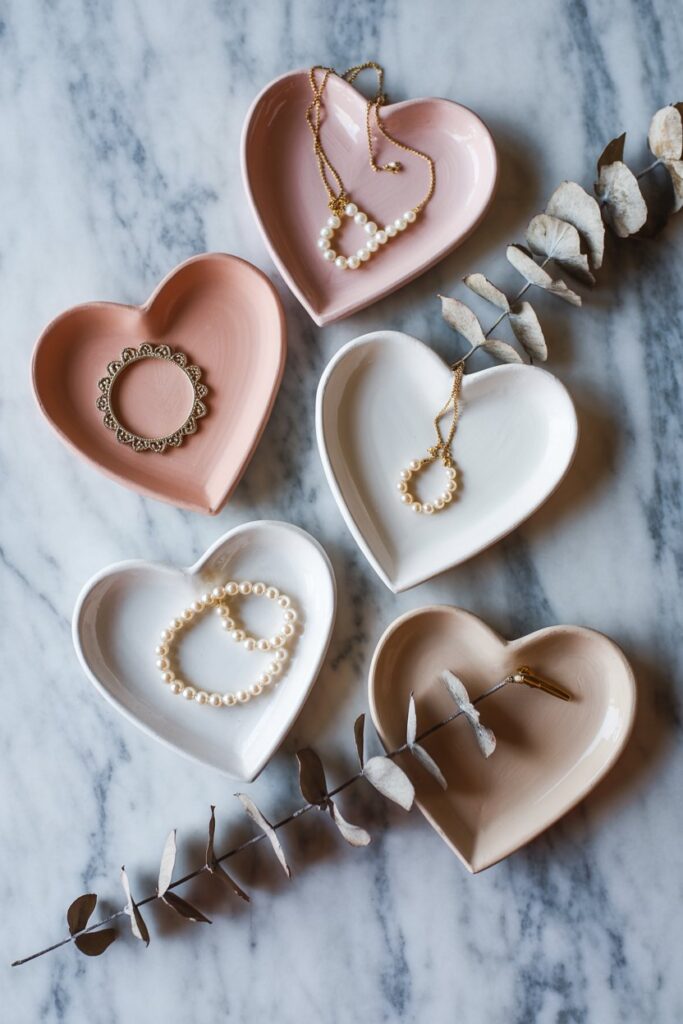
This is one of my favorite handmade gifts because it is simple, useful, and always appreciated.
Whether it sits on a bedside table or bathroom counter, it gives jewelry a beautiful place to stay.
Why I Keep Making It
It is beginner friendly, takes very little clay, and can be customized with initials, gold edging, or tiny painted details.
What You’ll Need
- Air dry clay
- Heart cookie cutter
- Rolling pin
- Small bowl
- Acrylic paint
- Gold paint pen (optional)
- Matte sealer
How I Make It
After cutting out the heart shape, I gently place it inside a small bowl so it naturally curves while drying. Once dry, I sand the edges, paint it, and sometimes finish the rim with a thin gold detail for a more elegant look.
For a similar mold-and-drape technique with a bit more detail, see my air dry clay trinket dish and ring holder tutorial.
6. Rainbow Shelf Décor
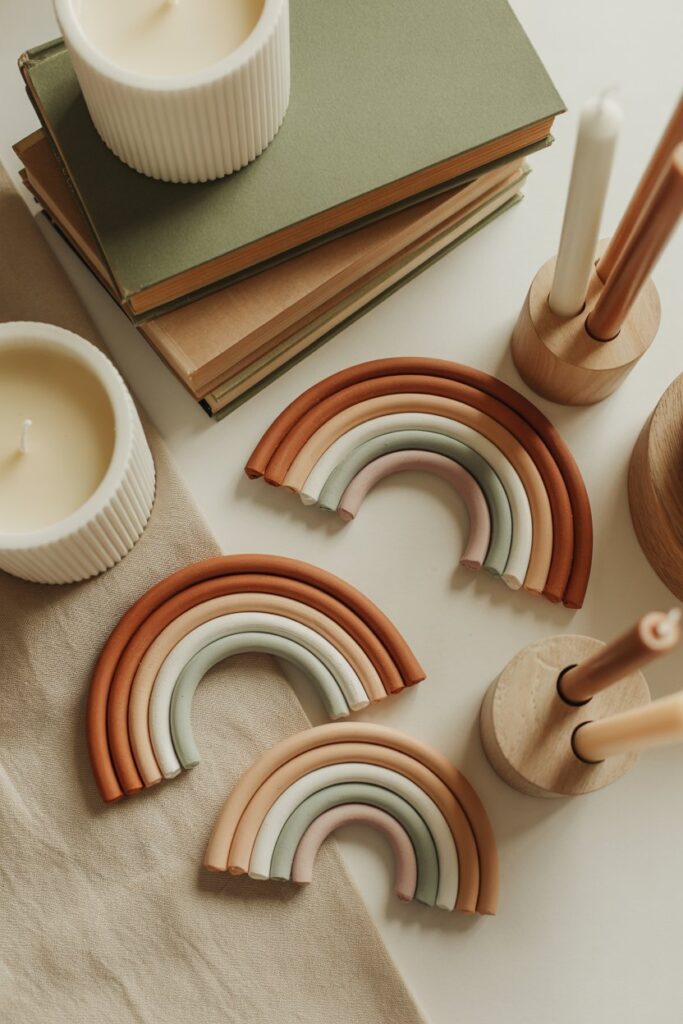
Rainbows have become one of the most popular air dry clay projects, and it is easy to see why.
They bring warmth and personality to a shelf while fitting almost any decorating style.
Why It Is So Popular
You can paint the rainbow in soft earthy tones, bright playful colors, or minimalist neutral shades depending on your home décor.
It also looks beautiful in children’s bedrooms and nurseries.
What You’ll Need
- Air dry clay
- Rolling pin
- Craft knife
- Clay sculpting tools
- Acrylic paint
- Fine sandpaper
- Clear sealer
How I Make It
I shape a thick rainbow using several curved sections before carefully blending each join together. Once everything has dried, I sand the surface until smooth and paint each arch using complementary colors.
My Favorite Tips for Creating Cute Clay Projects
One thing I have learned after making dozens of air dry clay projects is that the smallest details often make the biggest difference.
Whenever I slow down and focus on clean edges, smooth surfaces, and thin coats of paint, the finished project instantly looks more polished.
I also try to keep my color palette simple. Neutral shades like white, beige, terracotta, olive green, blush pink, and soft sage give handmade pieces a timeless look that fits almost any home.
Finally, do not worry about making every project perfect.
Tiny imperfections are part of what makes handmade crafts feel unique, and they often add more character than perfectly symmetrical pieces ever could.
7. Decorative Leaf Bowl
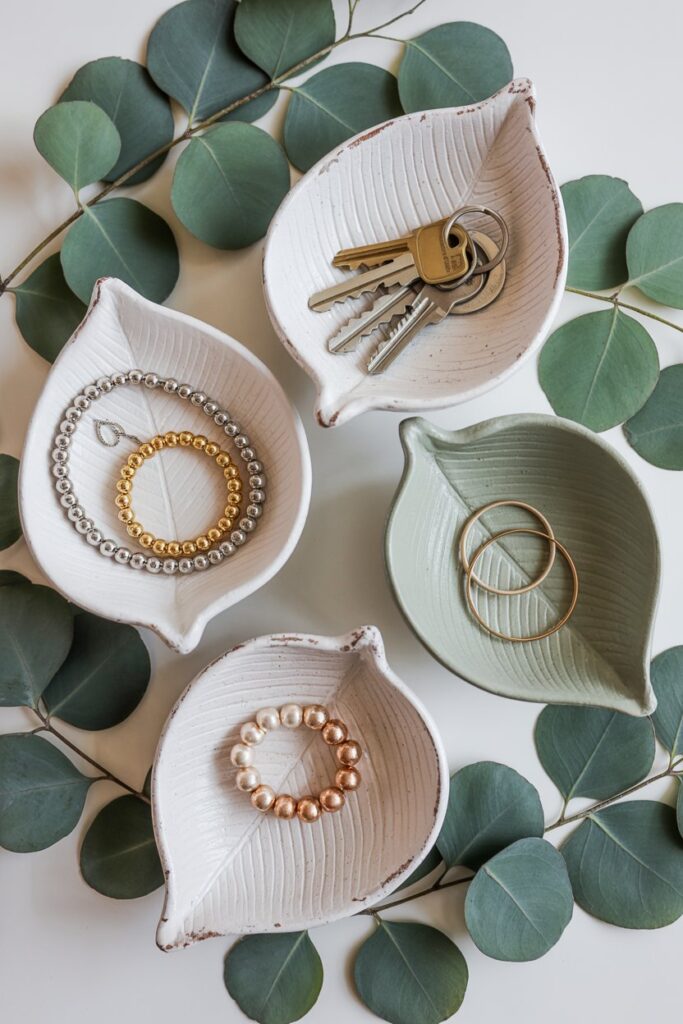
This is one of those projects that looks like something you would find in a home décor boutique.
Using a real leaf creates beautiful natural texture, making every bowl completely unique.
Why I Love It
It is incredibly easy to make, and no two bowls ever turn out exactly the same. I like using mine to hold jewelry, keys, or small decorative items.
What You’ll Need
- Air dry clay
- Large textured leaf
- Rolling pin
- Craft knife
- Small bowl
- Acrylic paint
- Matte sealer
How I Make It
I roll the clay into an even slab before pressing a fresh leaf firmly into the surface to transfer its texture.
After cutting around the leaf shape, I place it inside a bowl so it curves naturally while drying. Once dry, I sand the edges, paint it, and seal the finished piece.
8. Hanging Clay Wall Flowers
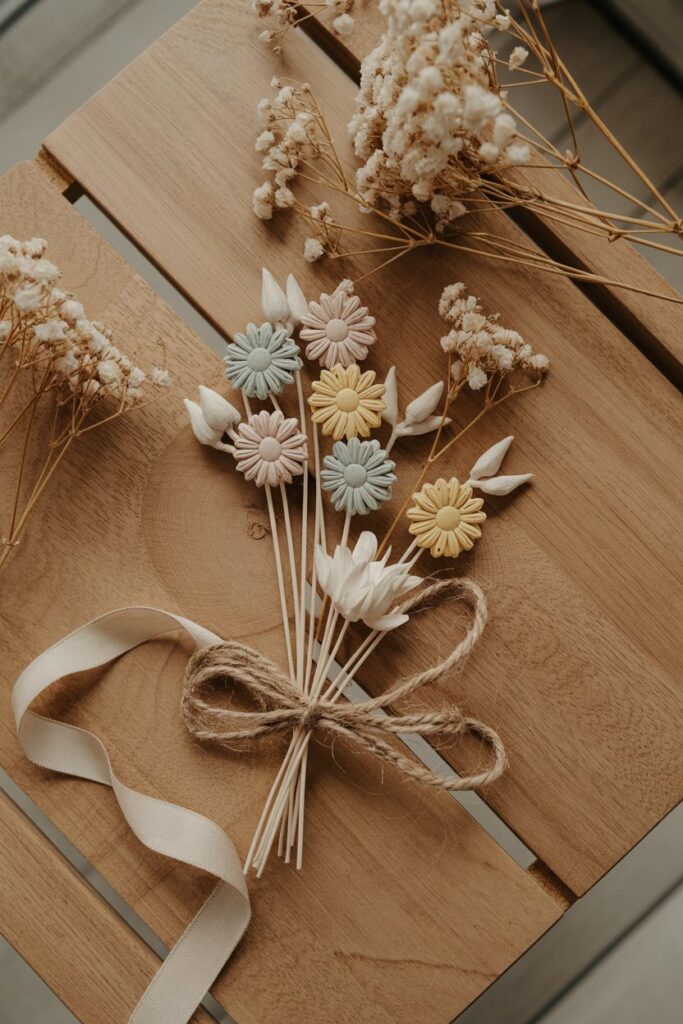
These delicate flowers make beautiful wall décor and look stunning grouped together in different sizes.
They also work well as seasonal spring or summer decorations.
Why It Is One of My Favorites
Each flower only takes a few minutes to shape, and the finished arrangement instantly brightens a room.
What You’ll Need
- Air dry clay
- Flower cutters or templates
- Sculpting tools
- Acrylic paint
- Jute twine
- Small skewer
How I Make It
I cut several flower shapes, add texture to the petals with a sculpting tool, and create a small hanging hole before drying. Once painted, I thread them onto jute twine for a simple wall display.
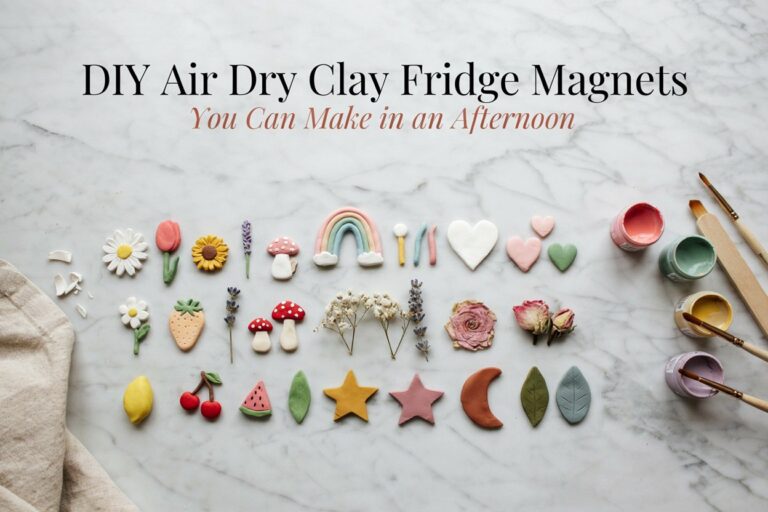
9. Cute Animal Magnets
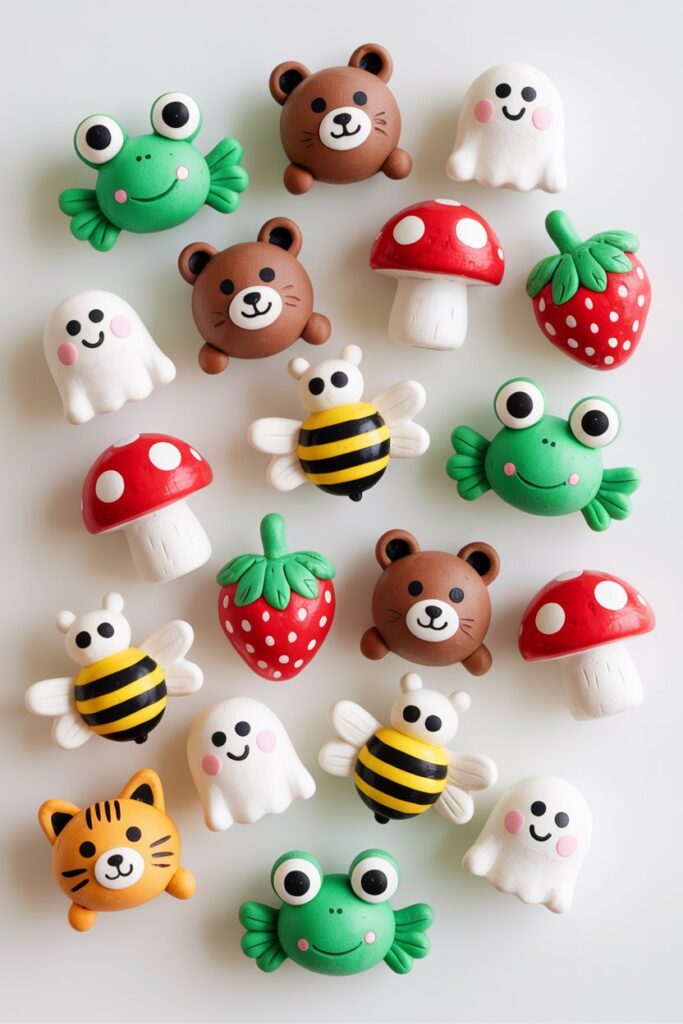
If you enjoy playful DIY projects, these tiny magnets are a fun way to decorate your refrigerator or office.
Think smiling bears, tiny cats, mushrooms, bees, strawberries, frogs, or little ghosts.
Why I Keep Making Them
They use very little clay and are perfect for practicing small sculpting details.
They also make adorable handmade gifts.
What You’ll Need
- Air dry clay
- Sculpting tools
- Acrylic paint
- Strong magnets
- Craft glue
- Matte sealer
How I Make Them
I sculpt each miniature shape, smooth the surface carefully, and allow everything to dry completely. After painting and sealing, I glue a magnet securely to the back.
I’ve got a full, in-depth walkthrough of this exact project — DIY Air Dry Clay Fridge Magnets — if you want more detail than the quick version here.
10. Personalized Name Tags
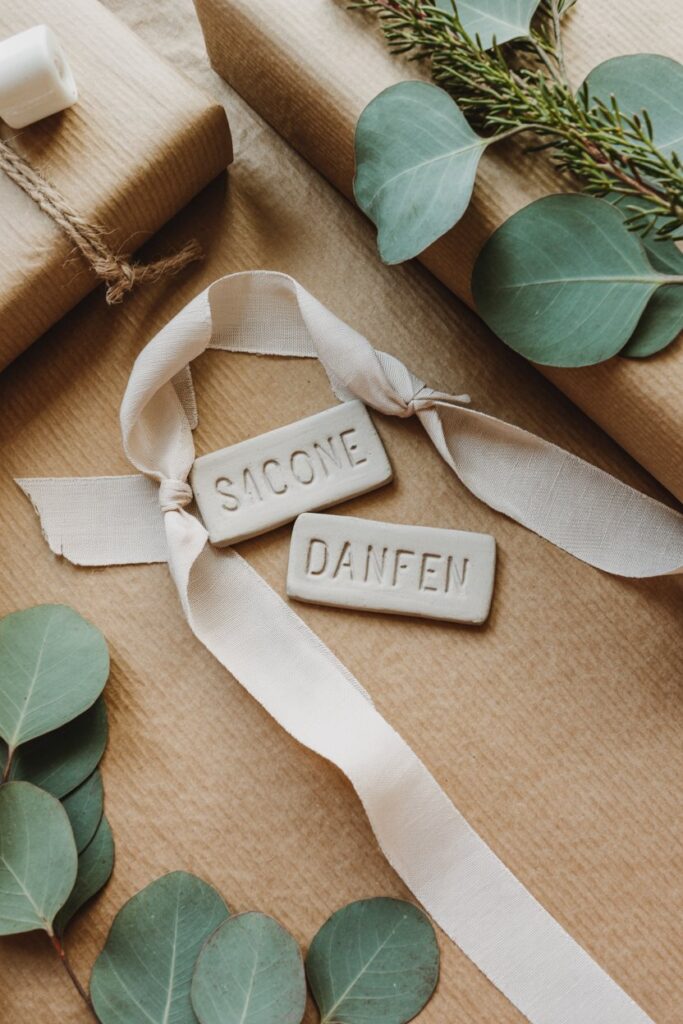
These little tags are perfect for gift wrapping, baskets, Christmas stockings, or nursery décor.
You can personalize them with names, initials, or meaningful words.
Why I Love This Project
It is simple enough for beginners but looks incredibly thoughtful once finished.
Each tag can be customized to match any occasion.
What You’ll Need
- Air dry clay
- Rolling pin
- Alphabet stamps
- Ribbon or twine
- Acrylic paint
- Sealer
How I Make It
I roll out the clay, cut simple shapes such as circles or arches, stamp each name into the clay, and make a small hole at the top before drying. Once painted, I thread ribbon through each tag.
11. Minimalist Incense Holder
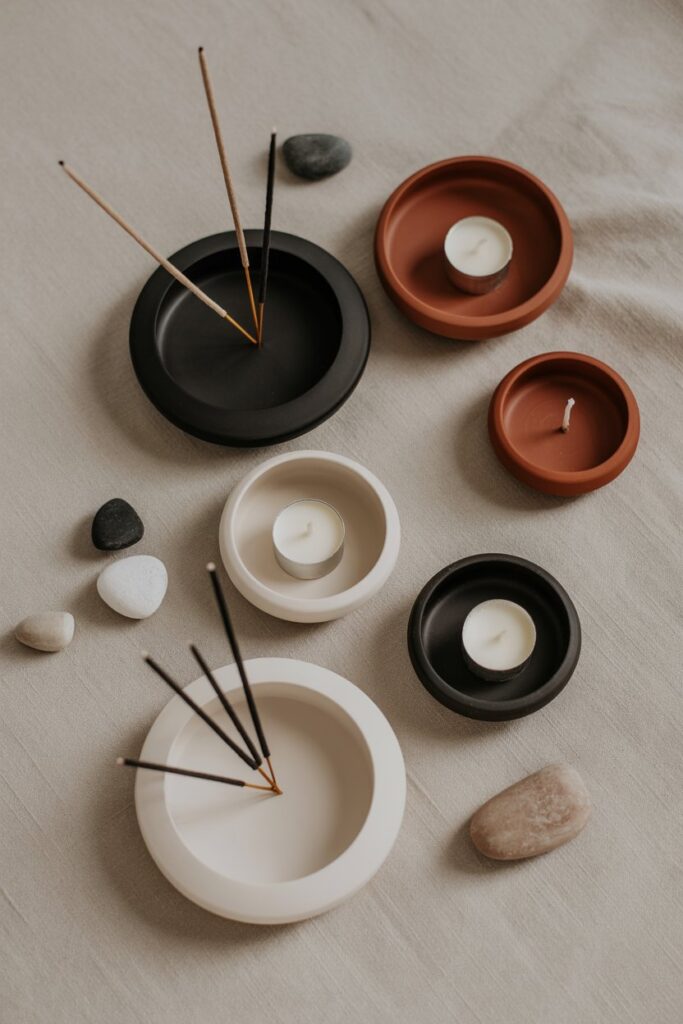
This project combines modern style with everyday function.
The clean shape looks beautiful sitting on a shelf, coffee table, or bedside cabinet.
Why It Is Worth Making
Minimalist décor never goes out of style, and this project only requires a small amount of clay.
What You’ll Need
- Air dry clay
- Rolling pin
- Sculpting tool
- Sandpaper
- Acrylic paint
- Matte sealer
How I Make It
I shape a shallow oval or arch before carefully creating a small angled hole for the incense stick. After drying, sanding, and painting, the finished holder has a clean Scandinavian-inspired look.
For the complete step-by-step on this one, check out my Air Dry Clay Incense Holder Tutorial.
12. Speckled Decorative Beads
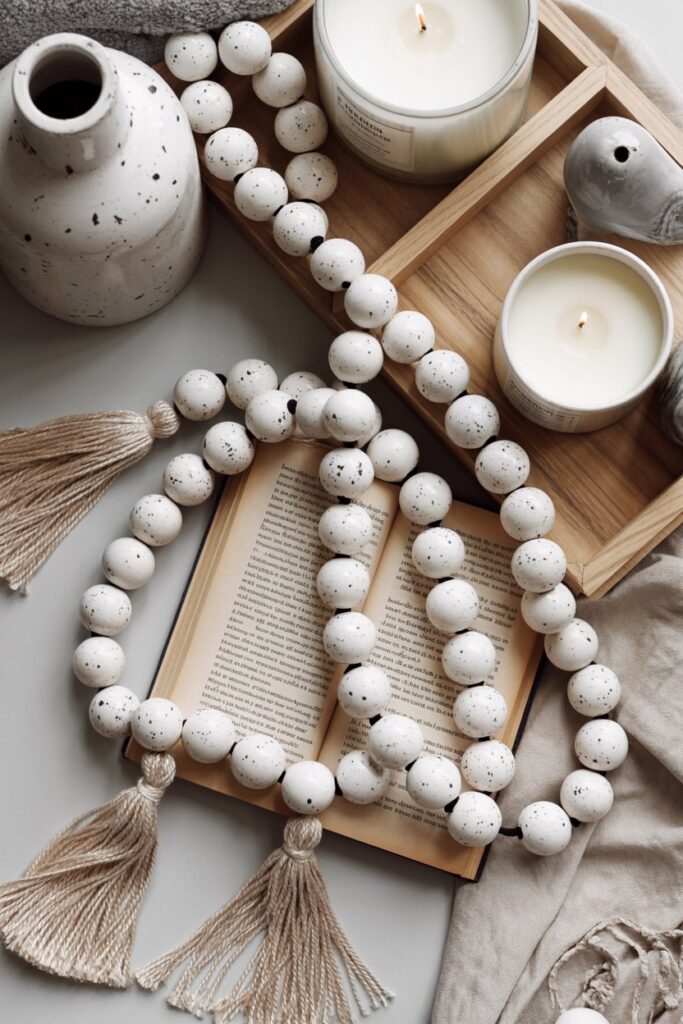
Decorative clay beads have become one of my favorite home décor projects because they can be styled in so many ways.
I drape them over stacked books, place them inside decorative bowls, or style them on trays with candles.
Why I Always Recommend This Project
It is incredibly relaxing to make and uses very little clay.
The finished beads look expensive, especially when painted in soft neutral tones with subtle black speckles.
What You’ll Need
- Air dry clay
- Wooden skewer
- Acrylic paint
- Matte sealer
- Cotton or jute cord
- Tassel (optional)
How I Make Them
I roll evenly sized clay balls, pierce each one with a skewer, and leave them to dry completely. Once hardened, I sand lightly, paint them in neutral colors, add tiny speckles with a fine brush, and string them together on cotton cord.
Expert Tips for Beautiful Air Dry Clay Projects
When I first started working with air dry clay, I thought the difference between beginner crafts and the beautiful projects I saw online came down to talent.
It really came down to technique.
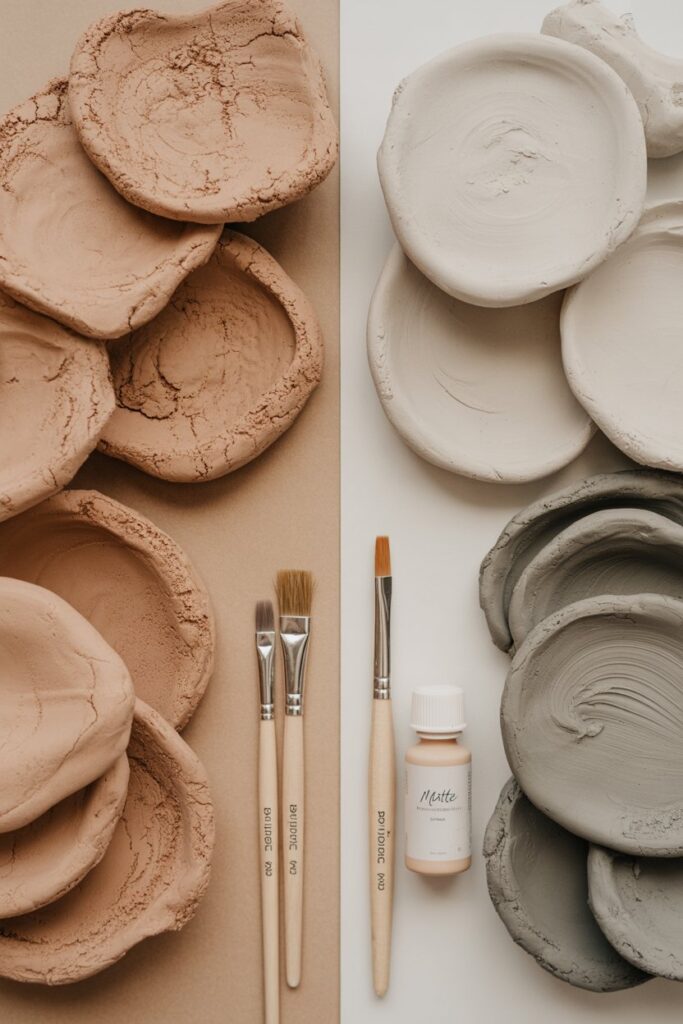
The biggest improvement in my projects happened when I slowed down and focused on the small details. Smoothing fingerprints before the clay dried, rolling the clay to an even thickness, and applying several thin coats of paint instead of one thick coat made every project look cleaner and more professional.
I also learned that a high-quality matte sealer can completely transform the finished piece. It protects the paint, gives the surface a more refined appearance, and helps handmade projects last much longer.
Want that boutique, professionally-finished look? My guide on how to make air dry clay look like real ceramic goes deeper into exactly this.
Common Mistakes to Avoid
Even simple clay projects can become frustrating if you rush the process.
These are the mistakes I see most often and the ones I made myself when I was learning.
- Rolling the clay too thin
- Skipping the sanding step
- Using too much water while smoothing
- Painting before the clay has fully dried
- Forgetting to seal the finished project
- Drying clay in direct sunlight
- Rushing decorative details
Taking a little extra time at each stage almost always produces a much better result.
Ready for a slightly bigger project next? 12 Air Dry Clay Projects That Start Simple and Look Stunning is a natural next stop.
Final Thoughts
One of the things I love most about air dry clay is that it encourages creativity without feeling complicated.
You do not need expensive tools, a dedicated craft room, or years of experience to make projects that look stylish and handmade in the best possible way.
Whether you start with a simple trinket dish, a miniature planter, or decorative clay beads, each project helps you build new skills and confidence.
Before long, you will find yourself experimenting with your own shapes, colors, and textures, creating pieces that are completely unique to your style.
The best project to start with is simply the one that makes you excited to begin. Roll out your clay, enjoy the process, and have fun creating something beautiful with your own hands.