
DIY Air Dry Clay Ghost Tutorial

I made my first clay ghost almost on a whim one October afternoon, mostly just wanting a small, non-scary Halloween decoration that didn’t involve a trip to the craft store.
It turned out to be one of the simplest shapes I’ve ever sculpted, a draped sheet, two little eye holes, and it dries into something genuinely charming sitting on a shelf or windowsill.
What started as one quick afternoon project turned into a little gathering of them in different sizes over the following week, and now they come out every fall alongside the rest of my seasonal decor.

What I love most about this project is how forgiving it is. There’s no symmetry to get exactly right, no fine detail work that takes a steady hand, just a soft, draped shape that looks better the less perfect it is.
It’s also become one of those projects I hand to anyone visiting during that first week of October, no instructions needed beyond “squeeze it into a cone and pinch the bottom around,” and somehow everyone’s version still comes out looking exactly like a tiny ghost.
If you’re brand new to air dry clay, this is a lovely first project to try, nothing about it requires experience, and my 10 Essential Tips for Getting Started post is worth a quick read first if you want to set yourself up with the right basic tools before diving in.
Why This Project Works So Well for Beginners

Before getting into the steps, it’s worth understanding why this particular shape is such a good starting point if you’ve never sculpted with clay before.
There’s no wrong way to drape it. Unlike a symmetrical bowl or dish, a ghost’s charm comes from its unevenness. Every pinch and fold reads as intentional, which takes the pressure off getting anything perfectly even.
It uses very little clay. A single small ball makes one ghost, which means you can experiment, make a mistake, and start over without wasting much material at all.
It teaches real foundational skills. Shaping, smoothing, basic detail work, and the full paint-and-seal process are all covered in this one small project, skills that carry directly into bigger pieces later.
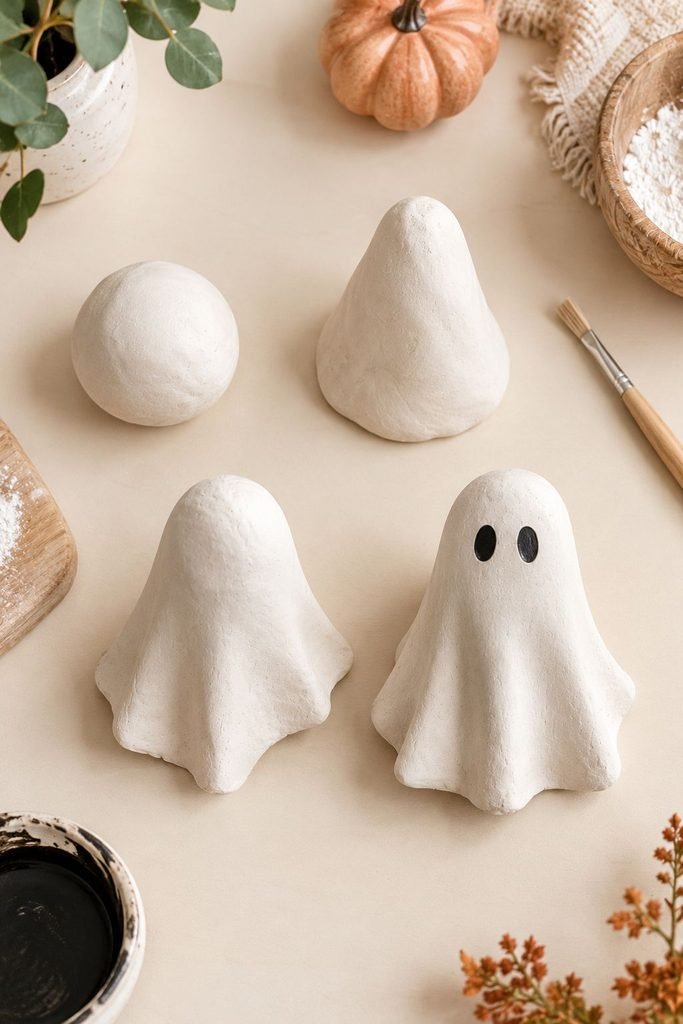
It photographs and displays beautifully in a group. A cluster of two or three, in slightly different sizes, looks far more finished than a single one on its own, which makes this an easy project to scale into a proper seasonal display.
What You’ll Need
- Air dry clay
- A small ball tool or the back of a paintbrush, for shaping the draped folds
- A toothpick, for the eyes
- Acrylic paint in black (and any accent color you like for a bow or small detail)
- A fine detail brush
- A sealant spray
- A small bowl of water, for smoothing as you work
How to Make an Air Dry Clay Ghost
Step 1: Shape the Base
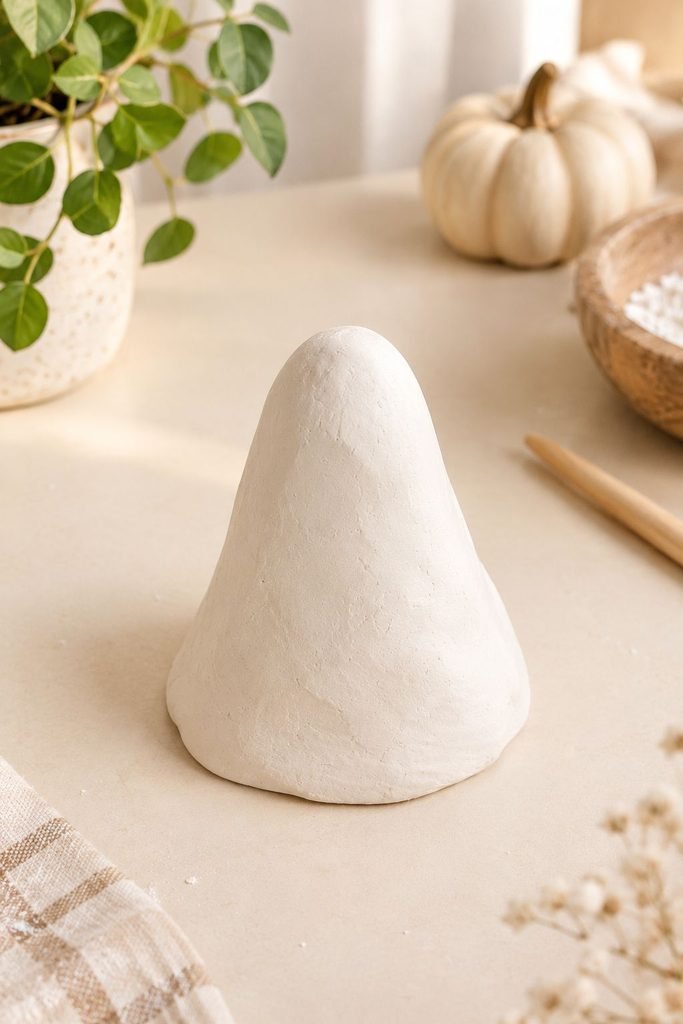
Take a ball of clay roughly the size of a golf ball and shape it into a rounded cone, a bit like a mountain with a soft peak, this is what becomes the ghost’s head and the top of its draped body.
Work the clay gently between your palms first to warm it slightly and make it easier to shape, cold, stiff clay is more likely to crack at the edges as you work it.
Step 2: Create the Draped Shape
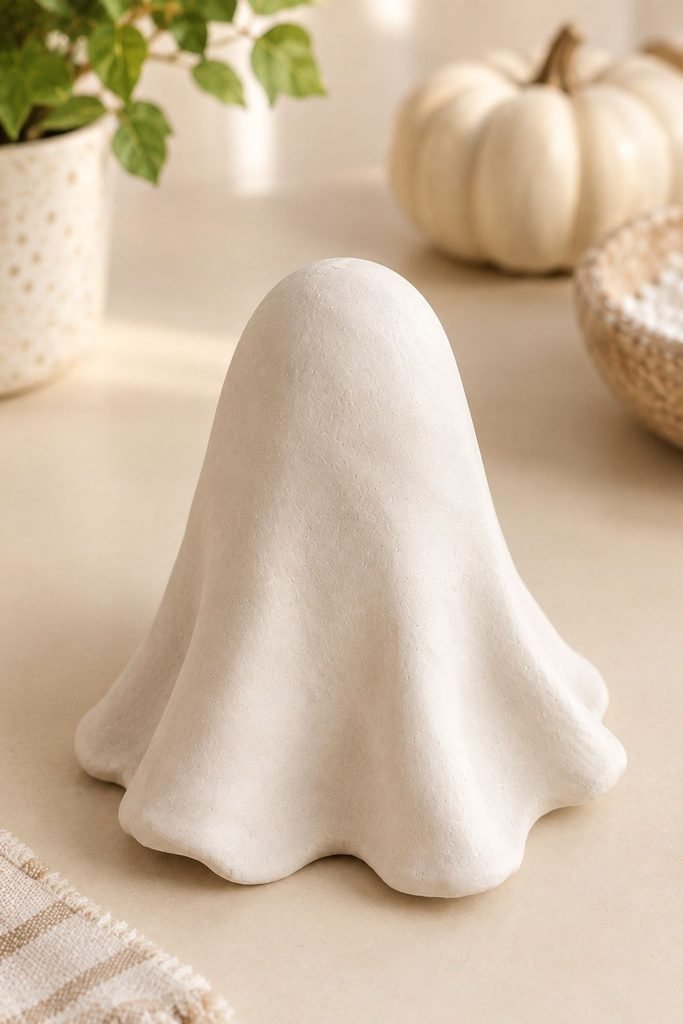
This is really the whole trick to a convincing ghost shape. Gently pinch and pull the bottom edge of the cone outward in a few spots, creating soft, uneven waves, like fabric settling under its own weight.
Don’t aim for symmetry here, real draped fabric isn’t perfectly even, and a few irregular folds actually make the shape look more natural, not less.
Work your way around the entire base rather than focusing on just one side, so the folds flow continuously rather than looking patched together.
Step 3: Smooth the Surface
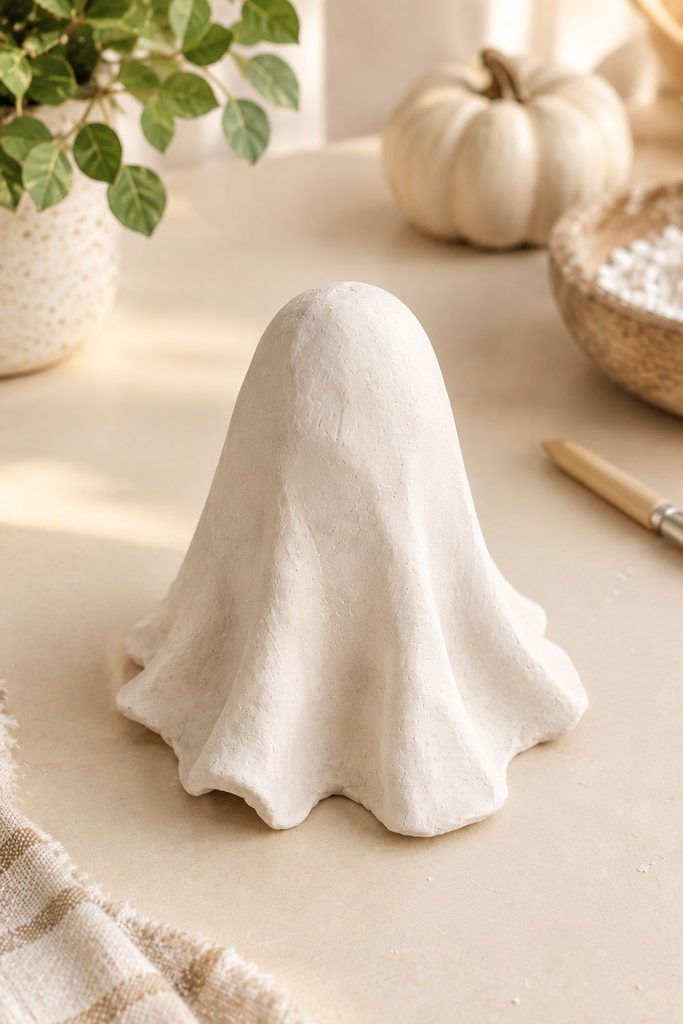
Dip your finger in a little water and smooth over the whole piece, blending any fingerprints or rough spots left from shaping.
A smoother surface here makes a real difference later when you paint, since a bumpy, uneven surface shows through paint far more than people expect, especially under direct light.
Go lightly with the water, too much can make the clay slightly mushy and harder to control, a damp fingertip is enough.
Step 4: Add the Eyes
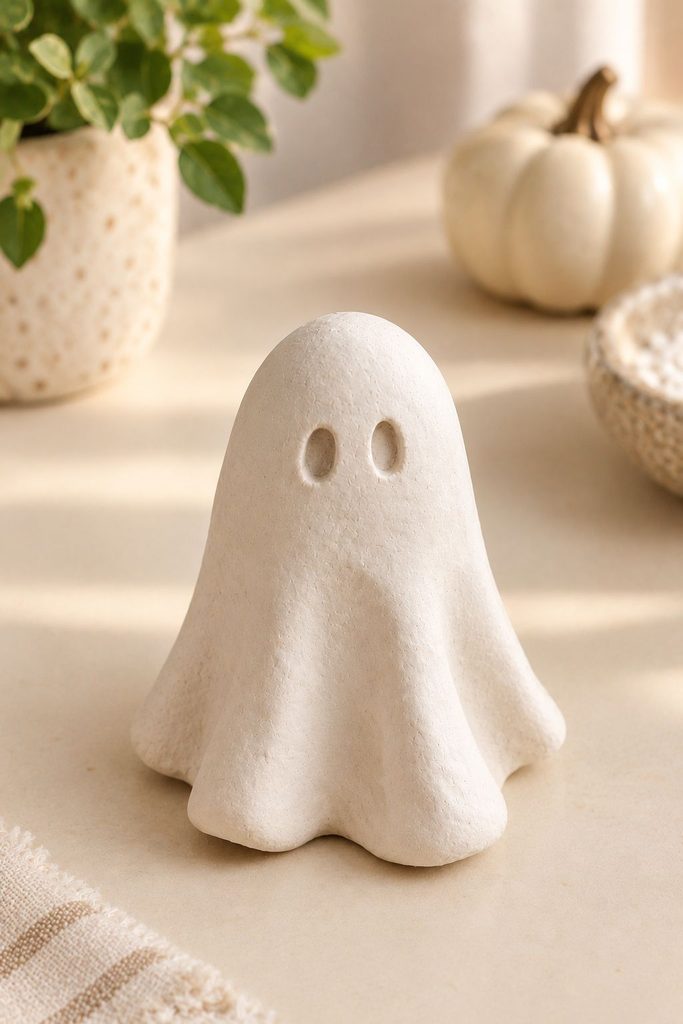
Use a toothpick or a small sculpting tool to press two simple oval indentations near the top of the shape for the eyes.
Keep them small and a little uneven, perfectly matched, geometric eyes tend to look less charming than two slightly imperfect ones.
Step back and look at the piece from a short distance after placing them, it’s much easier to adjust their spacing now than after the clay has dried.
Step 5: Let It Dry
Set the ghost somewhere flat and let it air dry fully, usually 24 to 48 hours depending on thickness.
If any thin, draped edges seem to be drying much faster than the thicker body, that’s normal, but it’s worth reading my guide on how to dry air dry clay faster without cracking if you’re working in a dry climate or want to speed the process along safely, since rushing a piece with this much variation in thickness is one of the more common ways a shape like this cracks.
Resist the urge to move or touch it much during the first several hours, when the clay is still at its most fragile.
Step 6: Paint
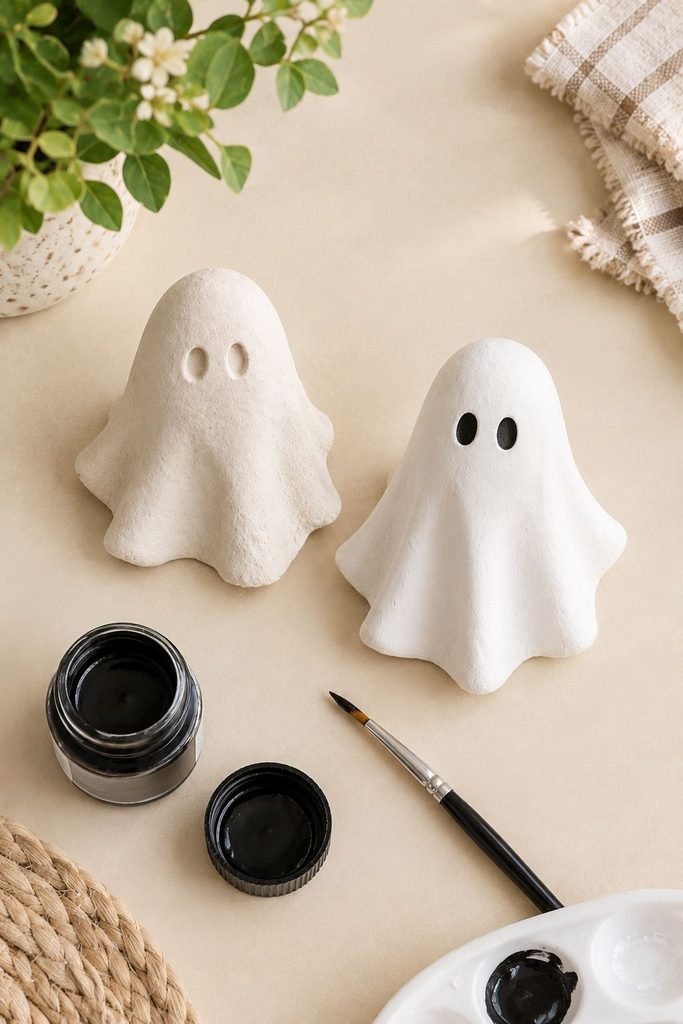
Once it’s completely dry, paint the whole shape white, even if you used white clay to start, a solid coat evens out any texture and gives you a clean surface to work on.
Let that dry fully, then use a fine brush and black paint to fill in the eye indentations. My step-by-step guide to painting air dry clay
covers the prep work that makes a real difference here, since clay is porous and soaks up paint unevenly if you skip priming the surface first.
Step 7: Seal (and Glaze, If You Want Extra Shine)
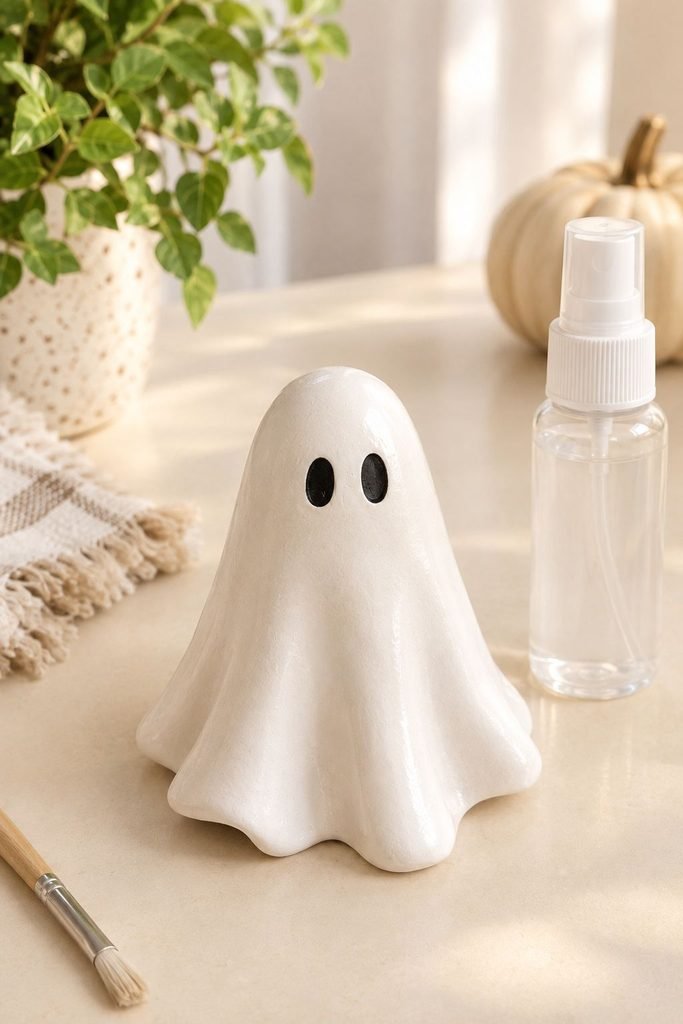
Finish with a couple of light coats of sealant spray once the paint is fully dry.
This step genuinely isn’t optional, my full guide to sealing air dry clay goes into why, air dry clay stays porous even once it’s hardened, and an unsealed piece will slowly absorb moisture and weaken over time.
If you’d like a glossier, more polished finish instead of a simple matte seal, my beginner’s guide to glazing air dry clay walks through that extra step.
Making a Whole Ghost Family

Once you’ve got the basic shape down, the real fun is in making a small cluster of them together.
Vary the size of your starting clay ball, a marble-sized piece for a tiny one, a golf ball for a medium, and something closer to a small apple for a larger centerpiece ghost.
Tilt the “head” of each one at a slightly different angle, and vary how dramatically you drape the base, some tighter and more vertical, others wider and more relaxed.
A group of three in graduated sizes, clustered together on a shelf or mantel, reads as a far more finished display than several identical ghosts lined up in a row.
Optional Details to Try
A tiny bow, a small painted heart, or a little dot of blush on the cheeks (dab a bit of pink paint on with a dry brush) all add personality without much extra effort.
A small bow is especially easy, roll a tiny strip of clay, pinch the center, and press it onto the head before the piece dries, then paint it any color you like once everything’s finished.
If you want to build a whole set, try varying the size and the tilt of the head slightly on each one, a little variety across a group makes the whole collection feel more handmade and less uniform.
Tips for the Best Results
Don’t rush the draping step. This is genuinely the part that makes or breaks how convincing the final shape looks, take your time pulling and pinching the base into natural, uneven folds rather than a smooth, even skirt.
Keep the clay moist while you work. If you’re making more than one and the clay starts to feel dry or stiff before you’ve finished shaping, a small spritz of water or a damp cloth over your remaining clay helps, the same advice I cover in more depth in my beginner tips post.
Seal every surface, not just the front. A ghost gets picked up and moved around a lot more than a piece that just sits on a shelf, so a full seal coat, front, back, and underneath, helps it hold up to handling.
Work on a surface you can leave undisturbed. Since this piece needs a day or two of uninterrupted drying time, set it up somewhere out of the way of pets, kids, or daily traffic rather than somewhere you’ll need to move it before it’s ready.
Common Mistakes to Avoid
Making the draped edges too thin. Edges pulled out too far and too thin dry much faster than the thicker body of the piece, which is exactly the kind of uneven drying that leads to cracking. Keep even thin sections at least a little substantial.
Skipping the smoothing step. It only takes a minute, but a piece that goes straight from shaping to drying without being smoothed will show every fingerprint and tool mark once painted.
Painting before the clay is fully dry. A piece that feels dry on the outside can still be damp in the center, especially somewhere as thick as the head of this shape. When in doubt, wait longer rather than risk trapping moisture under a coat of paint.
Forgetting to seal the underside. It’s easy to seal the front and sides and forget the bottom entirely, but that unsealed spot is exactly where moisture can sneak in over time.
Frequently Asked Questions
Can kids help make these? Yes, the draping and shaping steps are genuinely simple enough for kids with a little guidance, the painting step especially is a great one to hand over once the clay is dry.
How long does a finished clay ghost actually last? With a proper seal, these hold up well for years of seasonal display. If you want a glossier, more durable finish, my glazing guide is worth a look.
My ghost cracked while drying, what happened? This usually comes down to the draped edges drying much faster than the thicker body of the piece. My drying without cracking guide covers exactly why this happens and how to avoid it next time.
Can I use homemade clay instead of store-bought for this project? Yes, my homemade air dry clay recipe works well for a simple shape like this one.
Can I make these in other colors besides white? Absolutely, a pale gray, soft lavender, or even a deep black ghost all work beautifully for a slightly different, more modern take on the classic white version.
How to Display Them

A small cluster works better than scattering single ghosts around different rooms, grouping two or three together on a windowsill, a shelf, or down the center of a table reads as a far more intentional display than one lone piece.
They also pair nicely with other simple Halloween projects if you want to build out a fuller seasonal vignette, my Halloween flower pots tutorial uses the same basic painting approach and looks great sitting alongside a little ghost family, and a few painted pumpkins grouped nearby rounds the display out even further.
For a bigger seasonal setup, my Halloween outdoor decoration ideas post has more on building out a full display if you want to take this beyond a single shelf.
A string of fairy lights tucked behind a cluster of ghosts adds a nice soft glow in the evening without overwhelming the simplicity of the piece itself.
How to Store Them Between Seasons
Once the season’s over, wrap each piece individually in tissue paper or a soft cloth before boxing them up, the painted, sealed surface is fairly durable, but pieces can still chip if they knock against each other in storage.
Store the box somewhere dry rather than a damp basement or garage, since extreme humidity swings over many months can still affect even a well-sealed piece over the years.
Treated this way, there’s no reason a good batch of these shouldn’t come back out looking exactly the same for several Halloweens in a row.
Final Thoughts
There’s something genuinely satisfying about how little this project asks of you and how much it gives back.
No precise measurements, no symmetry to chase, just a soft, draped shape that gets more charming the less perfect it is.
It’s the kind of project that’s easy to return to every fall, and one of the few I’d confidently hand to a complete beginner without a single worry about how it’ll turn out.
If you end up making a whole little family of these, I’d love to see them. Start with one, get a feel for the draping, and before you know it you’ll have a small seasonal collection that comes out year after year.




2 Comments