Air Dry Clay Bathroom Decor Ideas

My bathroom counter used to be a mix of plastic bottles and whatever tray I’d grabbed on a Target run, functional, but not exactly something I enjoyed looking at every morning.
A handful of small clay pieces changed that more than I expected, a soap dish here, a little ring tray there, and suddenly the whole counter felt like it belonged to the rest of my home instead of looking like an afterthought picked up on a rushed errand.
Bathrooms are a slightly trickier room for air dry clay than most, humidity and water are both working against you in a way they simply aren’t in a living room or bedroom, so every idea below either comes with a specific note on sealing and waterproofing, or steers clear of direct water contact altogether.
I’ve pulled in a few of my favorite existing tutorials where they fit perfectly here, and added several new bathroom-specific ideas to round things out.
For each one, I’ve included what you’re actually making, the technique that makes it work, sizing guidance, and how to style it once it’s finished, not just a one-line idea to file away.
What surprised me most once I started swapping pieces in was how much a bathroom benefits from this kind of small, handmade detail compared to other rooms.
It’s usually the smallest room in the house, so every object in it carries more visual weight than the same piece would in a living room full of furniture and art. A single well-made clay tray can genuinely change how the whole space feels.
A Quick Word on Moisture First

Before the list, it’s worth being upfront about something: air dry clay is never fully waterproof, even sealed.
My full guide to making air dry clay waterproof covers this in detail, but the short version is that a good sealant makes a piece highly water-resistant, not indestructible.
That distinction matters more in a bathroom than in any other room in the house, since this is the one space where a piece is virtually guaranteed to encounter splashes, steam, and humidity on a near-daily basis.
That’s exactly why so many of the ideas below are things like trays, dishes, and holders, pieces that handle occasional moisture well, rather than anything meant to sit in standing water all day.
1. Clay Soap Dish

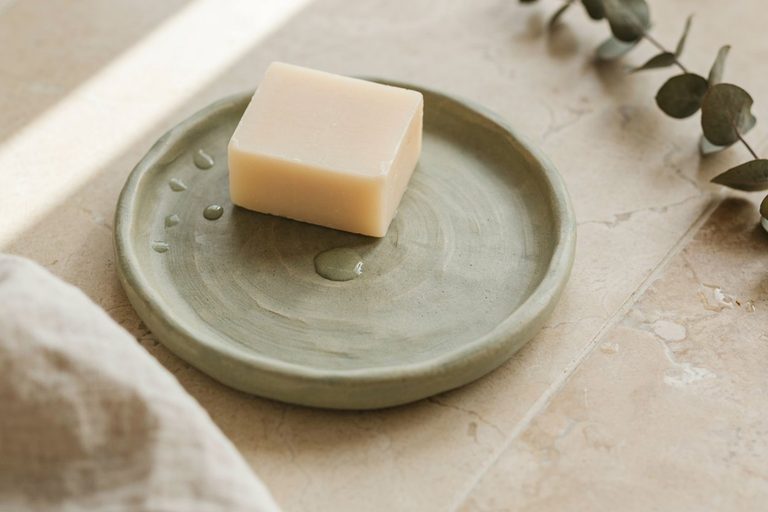
A clay soap dish with raised ridges or shallow grooves keeps a bar of soap up out of any pooled water, so it doesn’t turn into a soft, dissolving puddle by the end of the week.
The ridges aren’t just decorative, they’re doing real functional work, letting water drain away from the bar instead of pooling underneath it.
I have a full DIY Air Dry Clay Soap Dish Tutorial that walks through the exact ridge technique that makes this one actually functional, not just decorative, including how deep to carve the grooves and how to angle the dish slightly so water runs toward one edge instead of sitting in the center.
Sizing: Aim for roughly 4 to 5 inches long, large enough to hold a standard bar without it hanging off the edge.
Styling: A soap dish in a slightly different tone than your other bathroom pieces, a warm terracotta against otherwise white or sage pieces, works well as a small focal point near the sink.
2. Ring and Jewelry Dish for the Sink

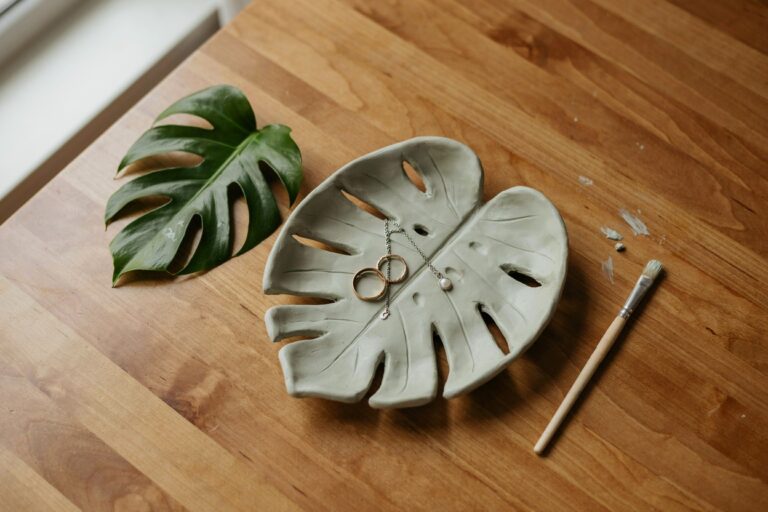
Keep a small dish right next to the sink for rings and earrings you take off before washing your hands or face, a genuinely practical habit-former once you have a spot for it, the kind of small design choice that quietly prevents a lost earring down the drain.
My Anthropologie-Inspired Trinket Dish Tutorial uses a simple draping technique that works perfectly for this, draping the clay over a small bowl to create that soft, organic curved edge.
Sizing: Keep it small, 3 to 4 inches across is plenty for a couple of rings and a pair of earrings, anything larger starts to compete with counter space.
Styling: Place it close enough to the sink edge that it’s an easy habit to reach for, out of sight means it won’t get used.
3. Cotton Swab and Cotton Ball Jar

A small, open clay vessel for cotton swabs or cotton balls looks far nicer on a counter than the plastic packaging they come in, and it turns a purely functional item into something that actually contributes to the room’s look.
Keep the design simple, a cylinder shape with a flared top, built by coiling a rope of clay upward and smoothing the seams as you go, or by wrapping a flattened sheet around a cylindrical form like a small jar or can to get the shape right before the seam is smoothed closed.
Sizing: A 3-inch diameter base with 4 to 5 inches of height comfortably holds a standard bag of cotton balls without being so large it dominates the counter.
Styling: Two matching jars, one for swabs and one for cotton balls, look more intentional as a pair than a single mismatched container next to a plastic bag.
4. Minimalist Clay Soap Dispenser Tray

Rather than a full dispenser, a simple tray underneath your existing soap pump catches drips and keeps the counter clean, solving the sticky-ring-on-the-counter problem that comes with pump bottles.
My Beautiful Air Dry Clay Bowl Ideas post covers a flat, minimalist bowl shape that adapts perfectly into a tray like this, just make it wider and shallower than a standard bowl, closer to a half-inch rim height rather than a true bowl depth.
Sizing: 4 to 5 inches in diameter gives the pump bottle a stable base with a little extra room to catch drips without looking oversized.
Styling: A slightly raised lip around the edge, even a subtle quarter-inch rise, keeps drips from running off onto the counter entirely.
5. Bath Salts or Bath Bomb Dish

A small, shallow dish for storing a few bath bombs or a scoop of bath salts on open display makes them feel like a spa amenity rather than something shoved in a cabinet, and it’s a nice way to actually enjoy products you’ve bought instead of forgetting about them in a drawer.
Keep this one away from direct water exposure, since it’s holding products rather than being splashed itself, a light seal is still worth doing for easy cleaning, since bath salts especially can leave a slightly gritty residue behind over time.
Sizing: A wider, shallower dish, around 6 inches across with a very low rim, displays a few bath bombs attractively without stacking them awkwardly.
Styling: This piece works especially well with a textured finish, a light speckled or terrazzo effect hides the inevitable bit of salt dust that settles into the dish between uses.
6. Textured Clay Coasters for Bathroom Trays

Small coasters aren’t just for drinks, they work beautifully under a perfume bottle, a reed diffuser, or a small plant on a bathroom shelf, protecting the surface underneath while adding a bit of texture to an otherwise flat shelf.
My Air-Dry Clay Coaster Ideas post has several techniques, the leaf-pressed botanical version in particular looks lovely in a bathroom setting, the natural vein pattern reads as organic and calming rather than overly decorative.
Sizing: A standard 4-inch round coaster works for most perfume or diffuser bottles, size up slightly to 5 inches for a small potted plant.
Styling: Make a small set of 3 to 4 in the same technique for a cohesive, collected look across a single shelf.
7. Mini Succulent or Plant Pot

A small clay pot with a plant inside brings a bit of life to a windowsill or shelf, and bathrooms with natural light and steady humidity are actually a surprisingly good environment for a lot of houseplants.
My DIY Air Dry Clay Mini Pots Tutorial is actually one of the posts I wrote with bathroom shelf decor specifically in mind, just remember to keep the plant in its original plastic nursery pot inside the clay one, since clay alone won’t handle regular watering well, no matter how thoroughly it’s sealed.
Sizing: A 3 to 4 inch pot suits most small succulents or a pothos cutting without needing frequent repotting.
Styling: Group two or three at slightly different heights, propped on a small stack of books or a riser, rather than lining them up flat on the shelf.
8. Toothbrush Holder
A simple cylindrical holder with two or three holes punched through the top before drying keeps toothbrushes upright and off the counter, which also just makes the whole sink area easier to wipe down.
This one sits closest to regular water contact of anything on this list, since it’s handled multiple times a day and sits right next to the faucet, so give it a thorough multi-coat seal following my full sealing guide, and expect to re-seal it every so often with regular use.
Sizing: 3 inches in diameter and about 4 inches tall accommodates two to three standard toothbrushes without them tipping over.
Styling: Punch the holes at a very slight inward angle rather than straight down, it helps toothbrush heads lean together instead of splaying outward awkwardly.
9. Q-Tip and Bobby Pin Catch-All
A small, flat dish by the mirror for bobby pins, hair ties, and loose jewelry solves the “where did all my bobby pins go” problem better than you’d expect, giving scattered small items one obvious home instead of several junk drawers. Any of the simple dish shapes from my bowl ideas post work well scaled down small for this.
Sizing: Keep this one genuinely small, 3 inches across is enough, a larger catch-all tends to become a junk pile rather than a curated spot for a few small items.
Styling: Position it directly under or beside the mirror, right where you’d naturally pull a bobby pin out of your hair, proximity to the habit matters more than the design itself.
10. Reed Diffuser Base or Tray
A small textured tray underneath a reed diffuser catches any oil drips and looks far more intentional than a bare bottle sitting directly on the counter, especially since diffuser oil can leave a lasting stain on wood or laminate if left unprotected.
This is a great candidate for the marbled or terrazzo-style technique from my coaster tutorial, since the mixed colors hide small oil stains better than a plain white piece would, a practical reason to choose a busier pattern here specifically.
Sizing: A 4-inch round or square tray comfortably holds a standard diffuser bottle with the reeds in place.
Styling: A slightly raised lip, even just an eighth of an inch, keeps the bottle from sliding if the shelf gets bumped.
11. Wall-Mounted Towel Hook Backing
A small, simple clay disc or shape mounted behind a hook adds a decorative touch to an otherwise plain hardware piece, dressing up a hook that would otherwise just be bare metal against the wall.
This one stays dry, since it’s on the wall rather than the counter, so it’s a good opportunity to experiment with a more delicate painted design without worrying about moisture at all, fine detail work or a more intricate glaze finish that wouldn’t hold up as well on a counter piece.
Sizing: A 3-inch disc is enough to sit behind most standard hook hardware without overwhelming it.
Styling: Pre-drill or press the mounting hole before the clay dries, trying to drill through fully cured clay risks cracking the piece.
12. Bathroom Shelf Bookend or Towel Stopper
A sturdy, weighted clay shape (make it thick and solid rather than hollow) works as a simple stopper to keep rolled towels from sliding around on an open shelf, solving the small but constant annoyance of a towel stack slowly collapsing sideways.
This is one of the few pieces on this list where thickness is actually an advantage, just allow extra drying time for a thicker shape and follow my notes on avoiding cracks since thicker pieces are more prone to that if rushed, often needing closer to 4 to 5 days to dry fully through the center rather than the usual 24 to 48 hours.
Sizing: A solid piece around 4 inches tall and wide has enough weight once dry to actually hold towels in place.
Styling: A simple geometric shape, a cube or a rounded dome, reads as more intentional than an irregular blob and photographs better too.
Choosing a Color Palette for a Cohesive Look
Nothing undercuts a handmade bathroom collection faster than a dozen pieces in a dozen unrelated colors, so it’s worth deciding on a palette before you start making anything.
All white or off-white. The simplest option, and one that never clashes with existing towels, tile, or fixtures. A slight variation in tone between pieces (one warmer, one cooler) actually looks more handmade than a perfectly matched set.
Soft sage or muted green. A popular, calming choice for bathrooms specifically, it pairs beautifully with wood accents and natural fiber bath mats or baskets.
Warm terracotta or clay-toned. Leaning into the material’s natural color rather than painting over it entirely gives a more earthy, organic look, and it’s genuinely less work since there’s no painting step at all, just sealing.
Two-tone with a single accent color. Keep most pieces in one neutral and let one or two, like the soap dish or a diffuser tray, carry a small pop of color. This reads as curated rather than scattered.
Which Piece to Start With
If you’re working through this list for the first time, it’s worth being strategic about the order rather than picking randomly.
Start with the ring dish or catch-all dish. Both use the simplest technique on this list and give you a quick, low-risk win before moving to anything trickier.
Move to the soap dish or diffuser tray next. Slightly more involved, since both benefit from a bit of texture or ridge work, but still forgiving if the shape comes out a little uneven.
Save the toothbrush holder and shelf stopper for last. These two are the most technically demanding, one for its constant water exposure, the other for its thickness and extended drying time, so they’re better attempted once you’ve got a feel for how the clay behaves.
Sealing Tips Specific to Bathroom Pieces
Always use multiple thin coats rather than one thick one. This matters more in a bathroom than almost anywhere else in the house, since these pieces deal with more ambient humidity than a living room shelf ever will, and a thick, uneven coat is more likely to develop weak spots over time under those conditions.
Re-seal high-contact pieces periodically. A soap dish or toothbrush holder that sees daily water contact will wear down its seal faster than a decorative tray that just sits on a shelf. A quick fresh coat every few months keeps these functional long-term, rather than waiting until you notice visible wear.
Keep anything that holds standing water to a minimum. Pieces meant to briefly drain water, like a soap dish’s ridges, hold up far better over time than anything designed to actually contain water, even sealed clay isn’t meant for that, no matter how many coats you apply.
Ventilate the room while pieces cure. A bathroom’s humidity can slow down how quickly a sealant fully cures compared to a drier room elsewhere in the house, running a fan or cracking a window while a freshly sealed piece sets helps it cure properly.
Frequently Asked Questions
Is air dry clay actually safe to use in a bathroom long-term? Yes, as long as expectations are realistic. Sealed clay handles humidity and occasional splashes well, but it’s not a substitute for ceramic or glass for anything that needs to hold standing water regularly.
What’s the most beginner-friendly bathroom project on this list? The ring dish or the catch-all dish, both use the simplest shaping technique and are quick to make even on a first attempt, with very little that can go wrong.
How often should I reseal bathroom clay pieces? High-contact pieces like a soap dish or toothbrush holder benefit from a fresh coat every few months. Decorative, low-contact pieces like a wall hook backing or a shelf bookend can go much longer between reseals, sometimes a year or more.
Can I make matching sets for a cohesive bathroom look? Yes, and it’s one of the nicest ways to use this list, pick one glaze or paint finish, matte white or a soft sage green, for example, and carry it across the soap dish, ring tray, and catch-all dish for a coordinated look that reads as a true collection rather than a handful of unrelated pieces.
Which of these pieces should a true beginner avoid starting with? The toothbrush holder and the shelf bookend are the two trickiest on this list, the holder because of its constant water exposure, and the bookend because of its thickness and longer drying time. Save both for after you’ve gotten a feel for the material on a few simpler pieces.
If You Want More Air Dry Clay Ideas to Try:
- How to Seal Air Dry Clay
- How to Make Air Dry Clay Waterproof
- DIY Air Dry Clay Soap Dish Tutorial
- Start Your Air Dry Clay Journey with These 10 Essential Tips
Final Thoughts
You don’t need to remake your entire bathroom in a weekend to see the difference a few handmade pieces make.
Start with one, the ring dish is genuinely the easiest entry point, and let the rest of the collection grow piece by piece as you get more comfortable with the material.
A bathroom built this way, slowly, with pieces that actually serve a purpose, ends up feeling far more personal than anything bought as a matching set off a shelf.