
12 Air Dry Clay Projects for Your Desk That Are Actually Useful

A desk can get cluttered surprisingly quickly. Pens end up scattered everywhere, charging cables disappear behind the monitor, sticky notes pile up, and somehow there are always a few tiny things sitting around that don’t have a proper home.
I’ve found that air dry clay is one of my favorite materials for fixing those little problems because you can make organizers that actually fit your desk instead of trying to find something the exact right size in a store.
These air dry clay desk projects are designed around function first. You’ll find pen holders, cable organizers, phone stands, paperweights, a sticky note holder, a small planter, bookends, and several other useful pieces you can make at home.
I also like that you can make the shapes as simple or decorative as you want. A plain cream clay organizer can look beautiful on a minimalist desk, while a painted pastel piece can make a craft room or home office feel much more personal.
If you’re completely new to air dry clay, I’d recommend reading my Air Dry Clay Beginner Tips first. It covers some of the basics that will make these projects much easier, especially when it comes to drying and preventing cracks.
And if you enjoy making useful clay pieces for your home, you might also like my 10 Beautiful & Easy Air Dry Clay Coaster Ideas.
What Makes a Good Air Dry Clay Desk Project?
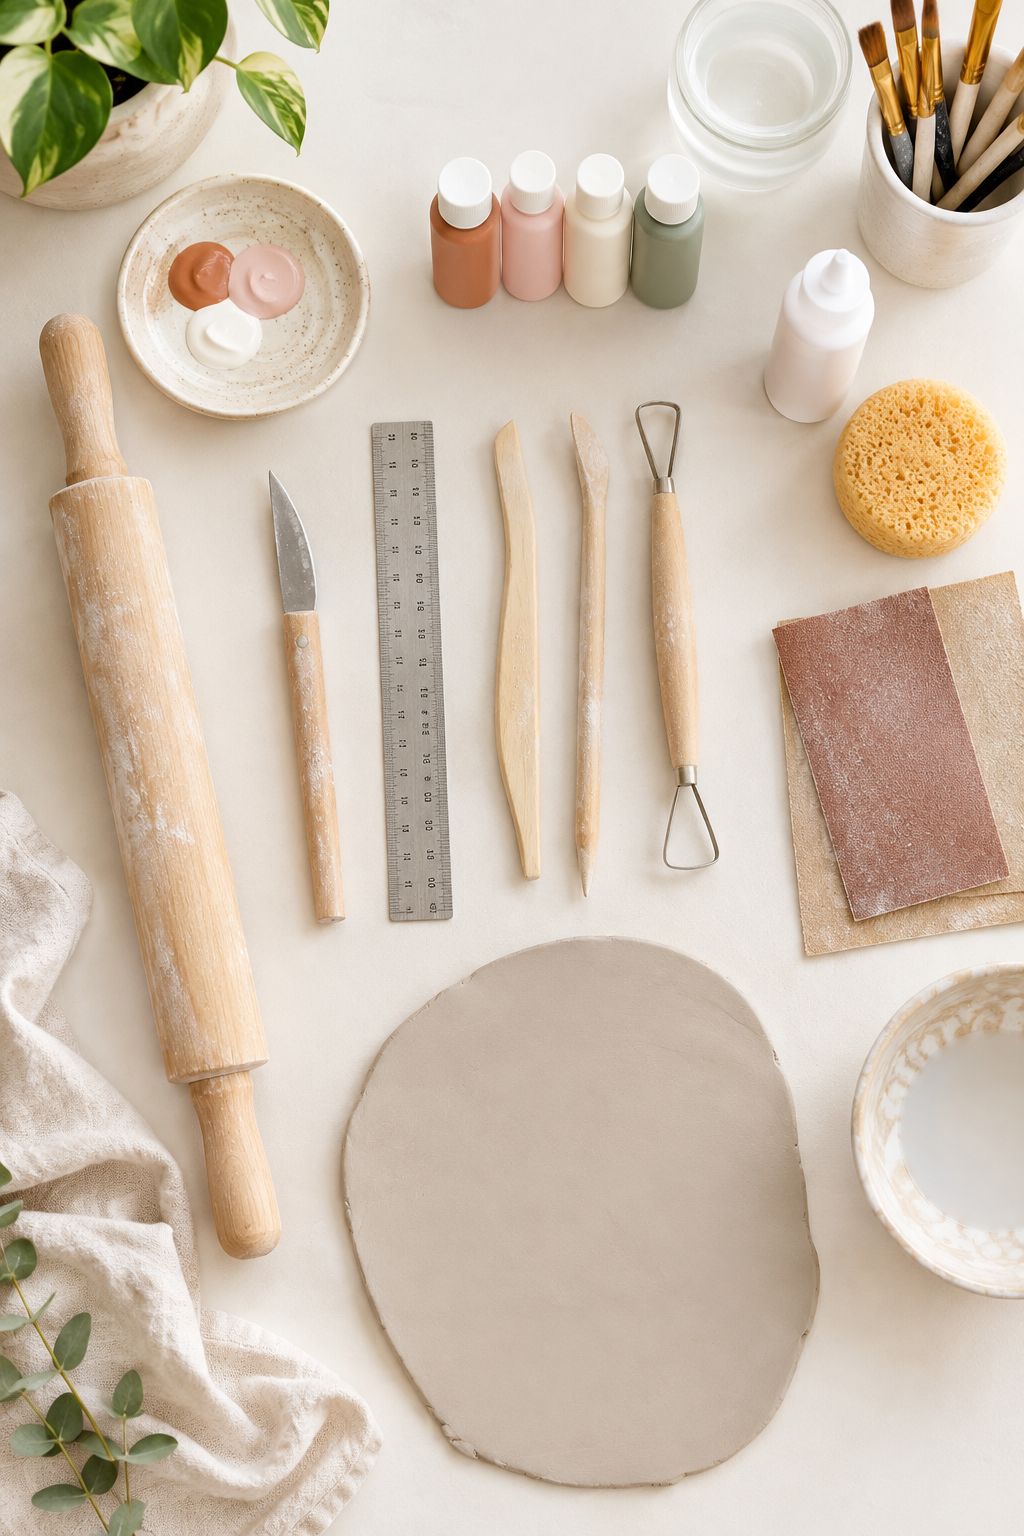
Before you start making anything, there are a few things I think are especially important when you’re creating something that will actually live on your desk.
It needs to be stable
A pen holder that tips over every time you grab a pen isn’t very useful.
For anything tall, heavy, or designed to hold objects, give the base enough width and thickness to keep it stable. I always test the balance of a piece while the clay is still soft enough to adjust.
Measure the actual item you’re making it for
This is especially important for phone stands, business card holders, washi tape holders, and cable organizers.
Don’t just estimate the size.
Use your actual phone, actual business cards, or actual tape roll while you’re shaping the clay. It takes an extra minute, but it can save you from finishing a beautiful piece that doesn’t actually work.
Make frequently handled pieces sturdy
Desk accessories get handled constantly.
A decorative clay tray can be relatively delicate, but a phone stand or bookend needs more substantial construction. Avoid making narrow sections unnecessarily thin, particularly around slots, corners, and attachment points.
Finish the surface properly
Once your clay is completely dry, you can paint it and add a suitable sealant if the finished piece will be handled frequently.
Remember that air dry clay isn’t naturally waterproof. For anything that could regularly come into contact with water, such as a planter, it’s better to use a waterproof liner or nursery pot rather than relying on sealant alone.
1. DIY Air Dry Clay Pen and Pencil Holder
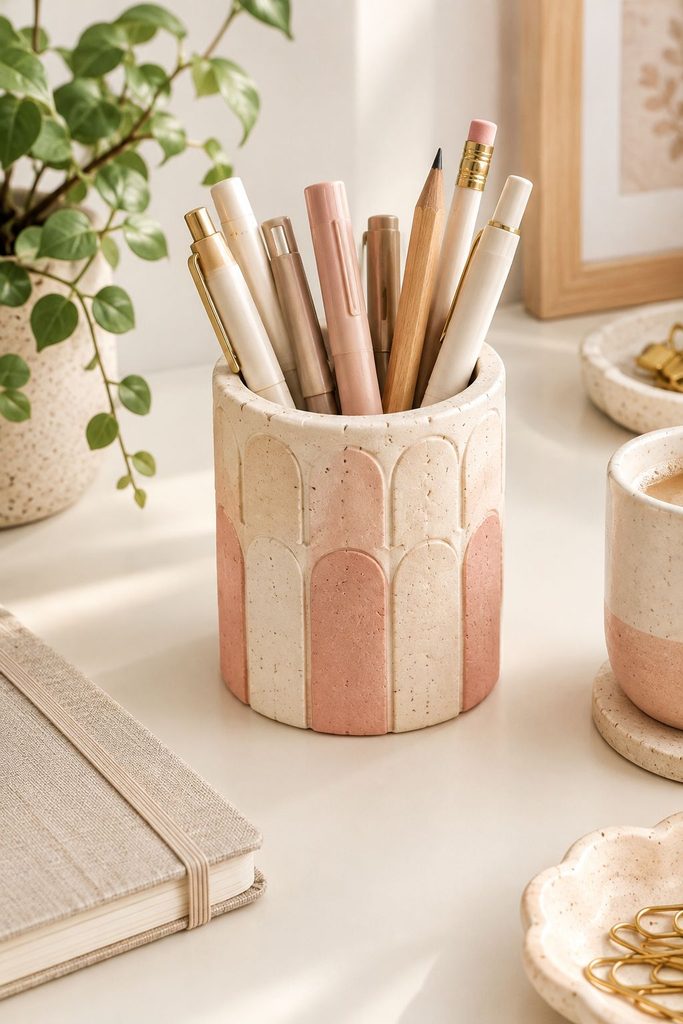
A clay pen holder is probably one of the easiest desk accessories to make, and it’s one of the ones you’ll actually use every day.
Instead of having pens scattered across your desk, you can keep them upright in one handmade container.
I particularly like this project because you can make it completely plain or add a little personality with painted stripes, tiny flowers, arches, dots, or a simple neutral finish.
What You’ll Need
- Air dry clay
- A small straight-sided can, jar, or container to use as a form
- Rolling pin
- Clay knife or butter knife
- Acrylic paint
- Paintbrush
- Clay-safe sealant
How to Make It
- Roll the air dry clay into an even slab approximately 1/4 inch thick.
- Wrap the slab around the outside of your can or jar.
- Bring the two edges together and gently smooth the seam.
- Trim the top edge so it’s even.
- Flatten the bottom edge so the finished holder will sit level.
- Allow the clay to firm up slightly around the form.
- Carefully remove the form without stretching the clay.
- Let the holder dry completely.
- Once dry, sand any rough edges lightly if needed.
- Paint and seal the finished piece.
My tip: Don’t make the holder extremely tall. A slightly wider, shorter shape is much harder to knock over when you’re reaching for a pen.
2. DIY Air Dry Clay Business Card Holder
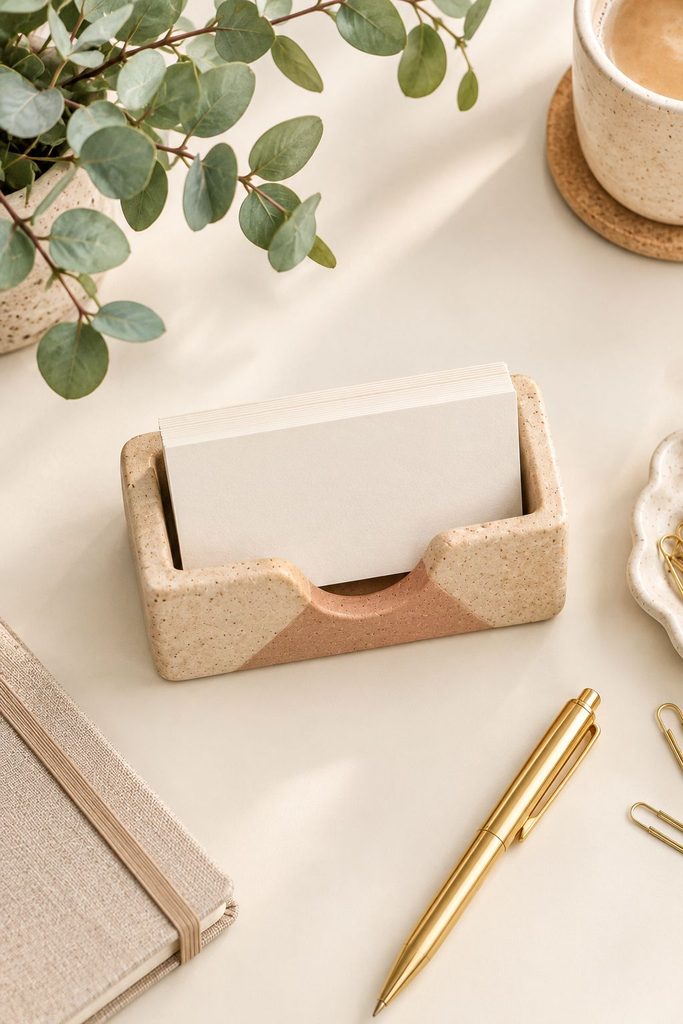
If you work from home or keep business cards on your desk, this is a really simple way to make a holder that looks much more personal than a plastic card stand.
The key is creating a slot that’s wide enough to hold several cards without making it so deep that they’re difficult to remove.
What You’ll Need
- Air dry clay
- Ruler
- Clay knife or butter knife
- Rolling pin
- Acrylic paint
- Sealant
How to Make It
- Roll a thick piece of clay into a compact rectangular block.
- Flatten the bottom so the piece sits securely.
- Mark the center of the top.
- Use a ruler to create a straight guide for the card slot.
- Cut a shallow slot into the clay.
- Test it with your actual business cards.
- Widen or deepen the slot if necessary.
- Smooth the edges carefully.
- Allow the holder to dry completely.
- Paint and seal.
Tip: Make the base fairly heavy compared with the top. A lightweight card holder can tip forward when you remove the last few cards.
3. Air Dry Clay Cable Organizer
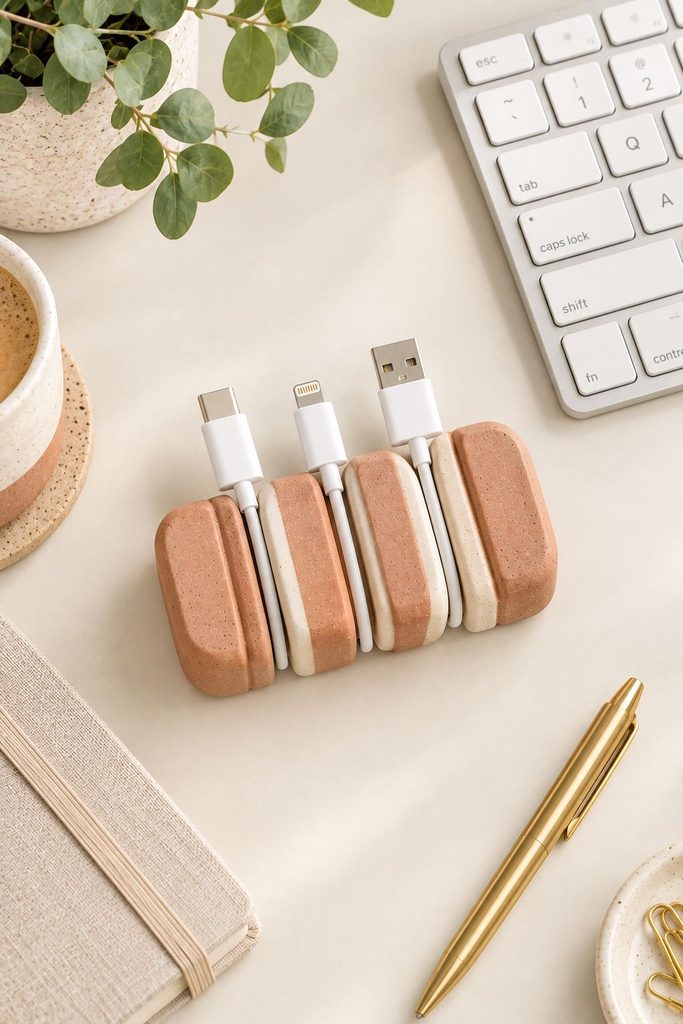
Charging cables have a talent for becoming one giant tangled mess.
A small clay cable organizer gives each cord its own place and keeps the cables from sliding completely off the back of your desk.
What You’ll Need
- Air dry clay
- Rolling pin
- Ruler
- Clay knife
- Your actual charging cables
- Acrylic paint
- Sealant
How to Make It
- Roll the clay into a thick, flat rectangle.
- Cut the edges straight or create a rounded organic shape.
- Mark three to five cable positions.
- Carve shallow channels across the top.
- Test each channel with your actual cables.
- Round and smooth the edges of each channel.
- Flatten the bottom of the organizer.
- Let it dry completely.
- Paint if desired.
- Seal once the paint is dry.
You can make one long organizer for several cables or several small individual holders.
Tip: Don’t make the channels too narrow. The cable should sit comfortably in the groove without being squeezed.
4. Handmade Air Dry Clay Paperweight
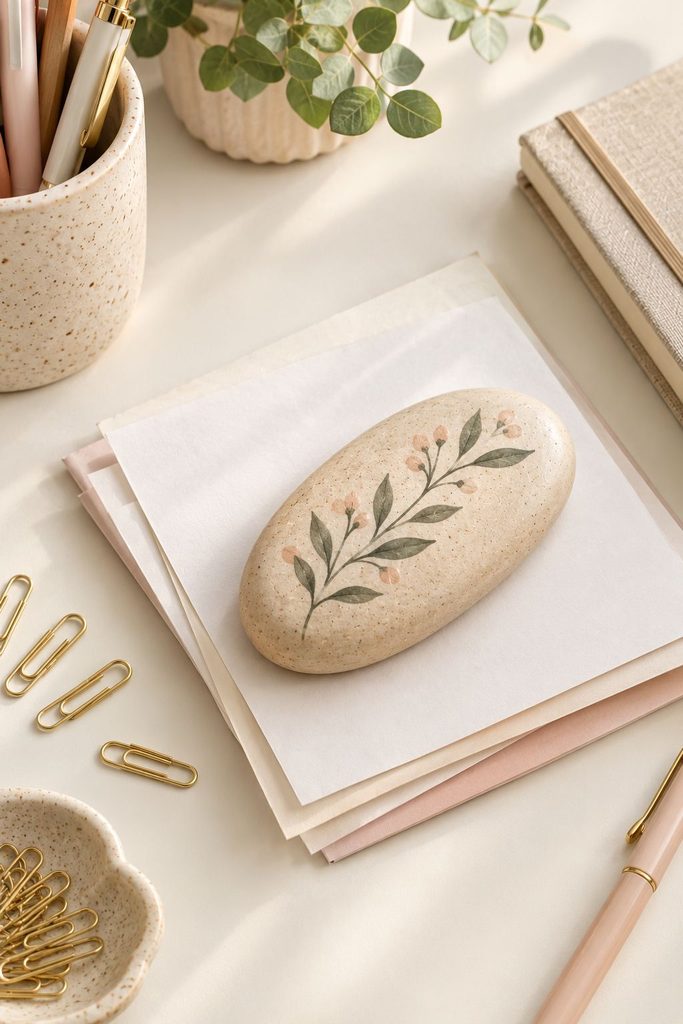
This might be the simplest project on the entire list.
A handmade clay paperweight doesn’t need complicated decoration. In fact, I think these look especially nice when they’re left mostly natural with just a small painted detail.
What You’ll Need
- Air dry clay
- Clay tools
- Acrylic paint
- Sealant
How to Make It
- Take a generous amount of clay.
- Knead it until it’s smooth.
- Shape it into a rounded or slightly flattened form.
- Press the bottom gently against your work surface to create a stable base.
- Smooth any visible cracks or fingerprints.
- Allow it to dry completely.
- Paint or leave it natural.
- Apply sealant if desired.
Because this is a solid piece, give it plenty of drying time.
Tip: A simple oval, stone shape, arch, or rounded rectangle can look much more modern than an overly complicated design.
5. DIY Air Dry Clay Washi Tape Dispenser
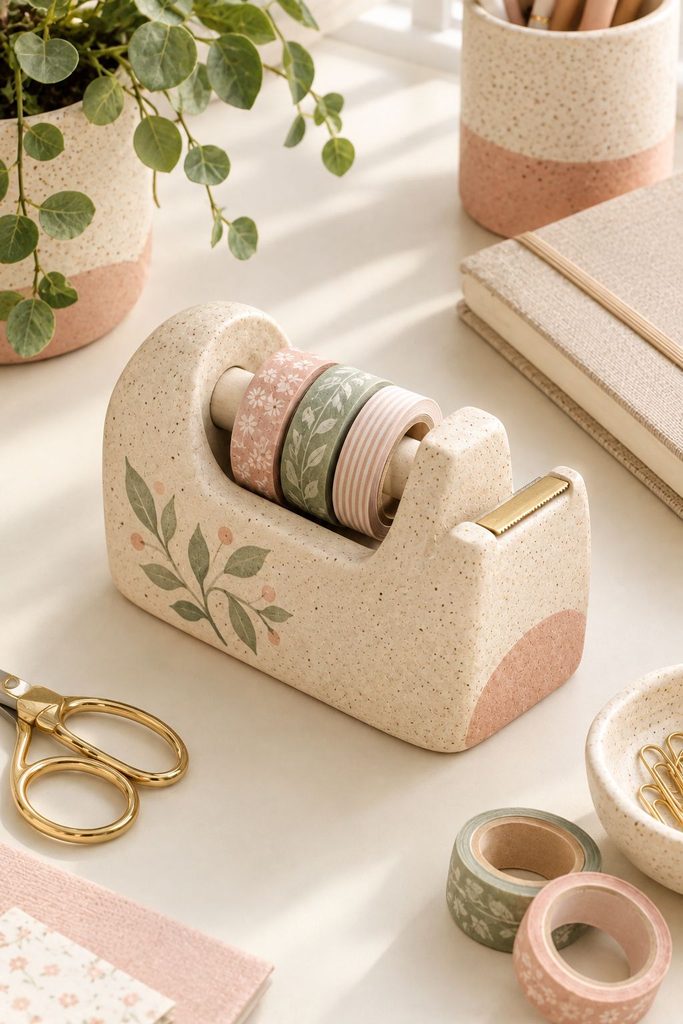
This one is especially useful if you use washi tape for planning, scrapbooking, journaling, or decorating packages.
Instead of letting rolls of tape collect in a drawer, you can keep your favorite roll right on your desk.
What You’ll Need
- Air dry clay
- Rolling pin
- Clay knife
- Small dowel or pencil
- Your actual washi tape roll
- Acrylic paint
- Sealant
How to Make It
- Roll out a thick slab of clay.
- Cut a sturdy base large enough to support your tape roll.
- Create the center section where the tape will sit.
- Add a small clay peg through the center.
- Blend the peg firmly into the base.
- Test the tape roll on the peg.
- Adjust the size before the clay becomes too firm.
- Smooth the entire piece.
- Allow it to dry thoroughly.
- Paint and seal.
Important: Let the clay around the peg dry slowly and completely. This is one of the areas most likely to crack if the attachment is too thin.
6. Air Dry Clay Sticky Note Holder
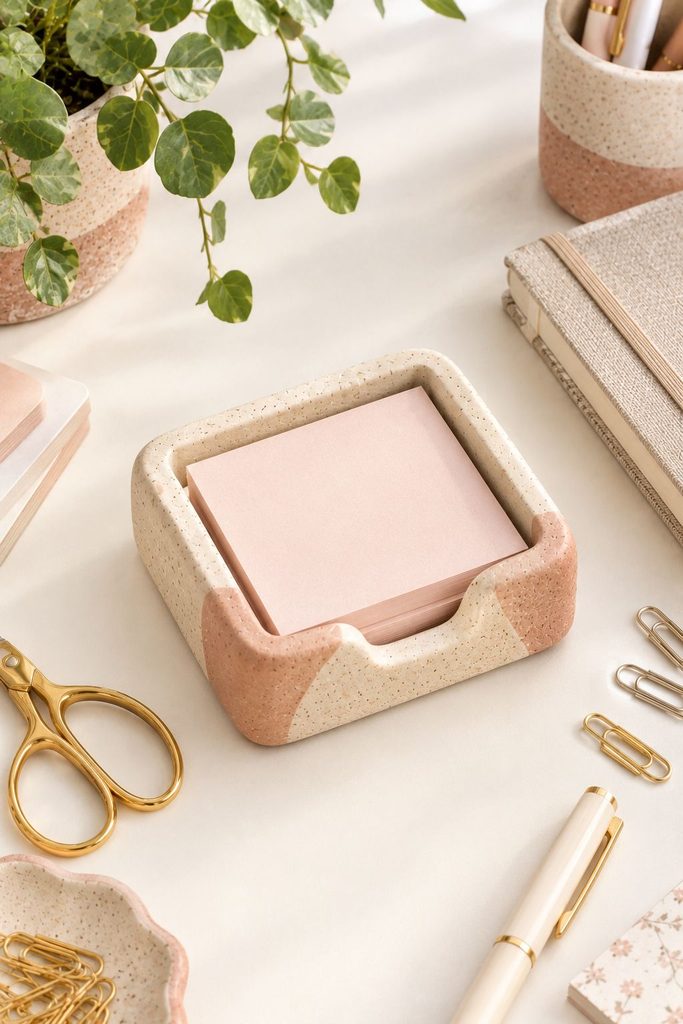
A sticky note holder is one of those little desk accessories you don’t realize you need until you have one.
A simple tray keeps your notes together and gives them a dedicated place instead of letting loose notes spread across your workspace.
What You’ll Need
- Air dry clay
- Rolling pin
- Ruler
- Clay knife
- Acrylic paint
- Sealant
How to Make It
- Roll the clay into an even slab.
- Measure it against your sticky note pad.
- Cut a rectangular base slightly larger than the notes.
- Add raised edges along three sides.
- Leave the front edge open.
- Smooth all corners and edges.
- Test your sticky note pad inside.
- Allow the tray to dry flat.
- Paint once completely dry.
- Seal the finished piece.
Tip: Keep the front lip low. You want to be able to pull individual notes out easily.
7. DIY Air Dry Clay Desk Planter
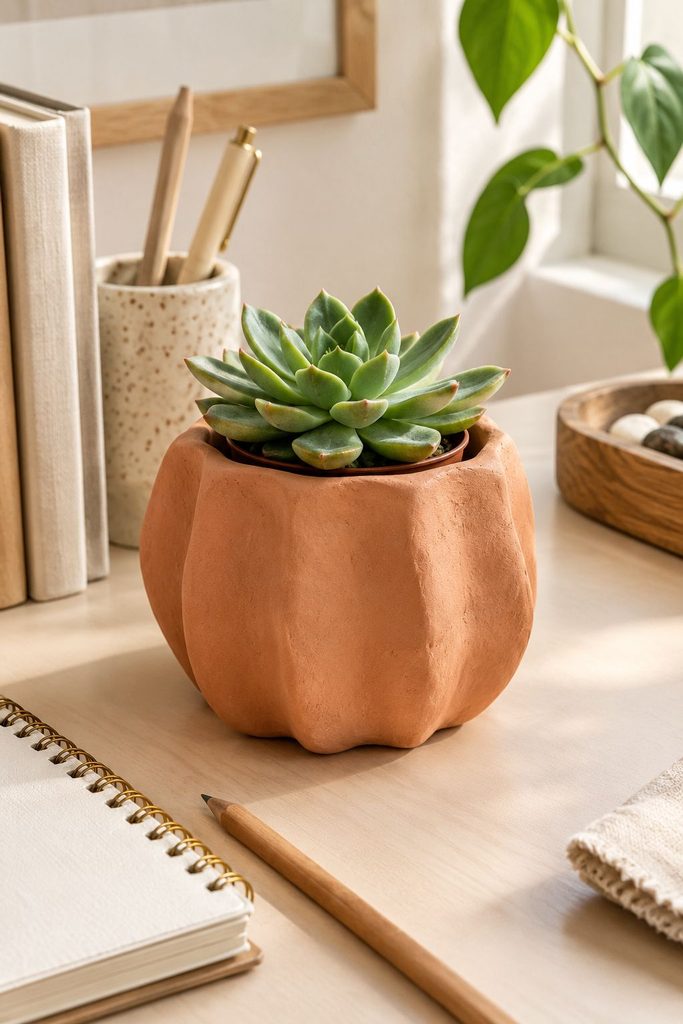
A tiny plant can make a desk feel much less sterile, and a handmade clay planter makes the whole setup feel more intentional.
For this project, I recommend using the clay pot as a decorative outer container and placing a small plastic nursery pot inside it.
What You’ll Need
- Air dry clay
- Small bowl or cup for shaping
- Rolling pin
- Straw or clay tool
- Acrylic paint
- Sealant
- Small plastic plant pot or liner
How to Make It
- Roll or press your clay into a small bowl shape.
- Keep the walls reasonably thick and even.
- Smooth the inside and outside.
- If you’re making a drainage hole, create it before the clay dries.
- Flatten the base so the pot sits securely.
- Allow it to dry completely.
- Paint and seal the outside.
- Place a waterproof plastic liner or nursery pot inside.
- Add your small succulent or desk plant.
Tip: Using a removable plastic pot inside is the easiest way to protect the clay from repeated moisture.
8. DIY Air Dry Clay Bookends
Bookends are one of the projects where sturdiness matters most.
You can make them very minimalist, using simple geometric shapes, or create curved arches and sculptural forms for a more decorative desk setup.
What You’ll Need
- A large amount of air dry clay
- Ruler
- Clay knife
- Flat work surface
- Acrylic paint
- Sealant
How to Make It
- Plan the size of your bookend around the books you want to hold.
- Build a wide, flat base.
- Add a vertical or angled section.
- Join the sections while both pieces are still workable.
- Blend the seams thoroughly.
- Check that the base sits completely flat.
- Make a second bookend to match.
- Let both pieces dry slowly and completely.
- Paint and seal.
Tip: Don’t make these hollow unless you have a specific construction method planned. Bookends need enough weight and stability to support the books.
9. Air Dry Clay Phone or Tablet Stand

A handmade phone stand is one of my favorite functional clay projects because you can customize it to the exact device you’re using.
It also makes a nice spot to keep your phone during video calls or while following a recipe or tutorial.
What You’ll Need
- Air dry clay
- Your actual phone or tablet
- Ruler
- Clay knife
- Rolling pin
- Acrylic paint
- Sealant
How to Make It
- Build a sturdy clay base.
- Shape the back portion at a slight angle.
- Create a front ledge or slot to hold the device.
- Test the stand with your actual phone.
- Adjust the slot width and angle while the clay is still workable.
- Smooth all edges.
- Flatten the bottom.
- Let the stand dry completely.
- Paint and seal.
Tip: Leave enough room around the charging port if you want to charge your phone while it’s sitting in the stand.
10. Personalized Air Dry Clay Desk Name Plate
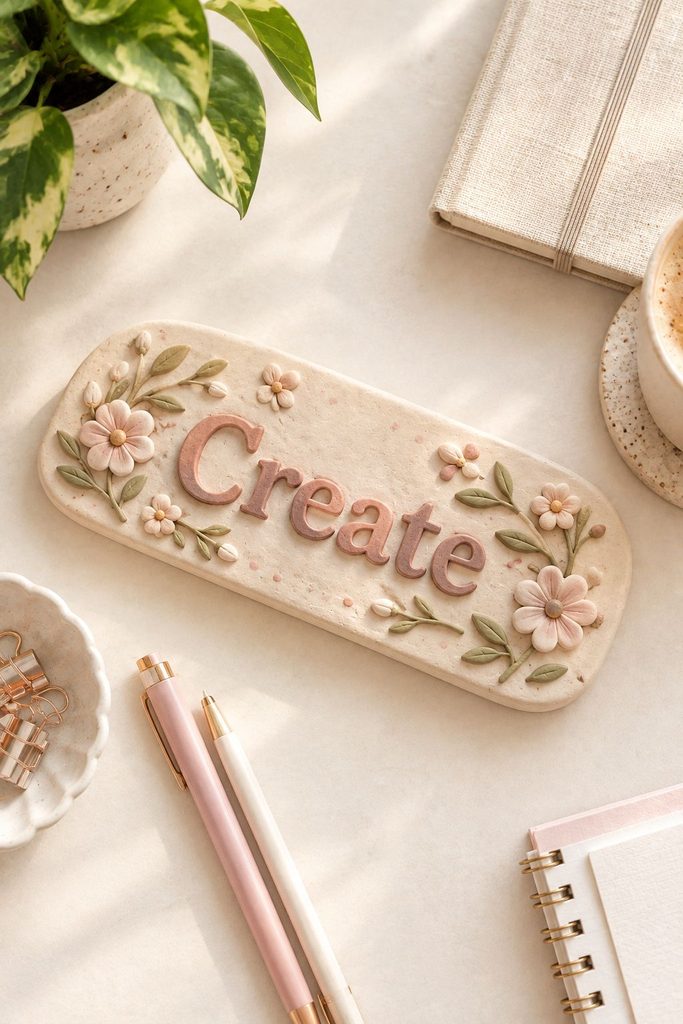
This is a fun option for a home office, craft room, child’s desk, or shared workspace.
You can keep the design simple with raised lettering or make it more decorative with small flowers, stars, hearts, arches, or painted borders.
What You’ll Need
- Air dry clay
- Rolling pin
- Clay knife
- Small letter stamps or clay tools
- Acrylic paint
- Fine paintbrush
- Sealant
How to Make It
- Roll the clay into an even slab.
- Cut it into your preferred shape.
- Smooth the edges.
- Add the name using raised clay letters or carefully carved lettering.
- Check that the plaque sits flat.
- Let it dry completely.
- Paint the base.
- Add contrasting lettering.
- Seal when all paint is completely dry.
Tip: Keep the lettering fairly large and simple. Tiny letters can become difficult to read once they’re painted.
11. Air Dry Clay Catch-All Dish
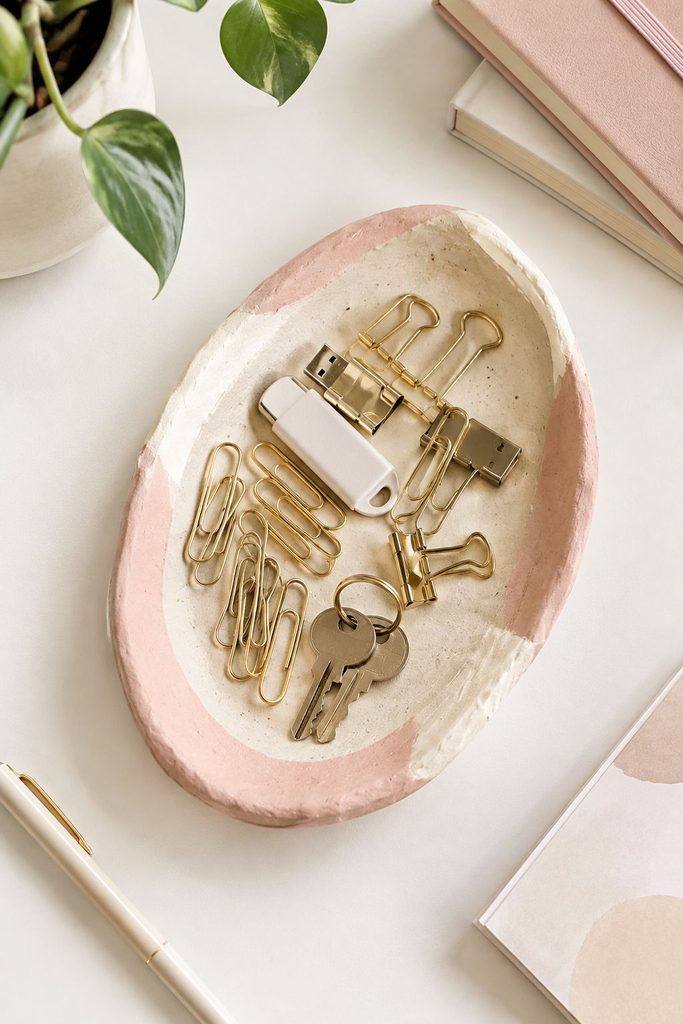
Every desk needs one little place for things that otherwise seem to disappear.
Use this shallow clay dish for paper clips, push pins, USB drives, keys, coins, or other tiny items.
What You’ll Need
- Air dry clay
- Small bowl or dish for shaping
- Rolling pin
- Clay knife
- Acrylic paint
- Sealant
How to Make It
- Roll the clay into an even slab.
- Place it over the outside of a small bowl or similar form.
- Gently press the clay into shape.
- Smooth the sides.
- Trim the rim evenly.
- Remove the form carefully.
- Let the dish dry completely.
- Sand any rough edges if necessary.
- Paint and seal.
This is also a great project for using up leftover clay from another project.
12. DIY Air Dry Clay Desk Tray
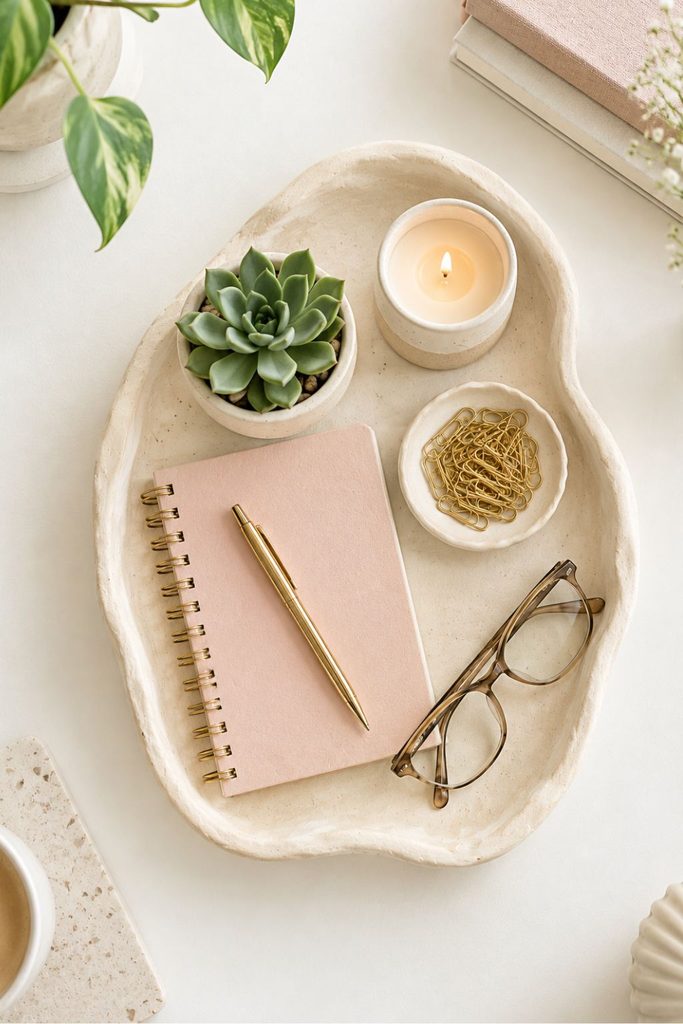
If you want something a little more decorative, make a larger tray that gives your desk a dedicated styling area.
I like using mine for a combination of functional and decorative items, such as a small plant, candle, notebook, and a few little accessories.
What You’ll Need
- Air dry clay
- Rolling pin
- Ruler or plate for shaping
- Clay knife
- Acrylic paint
- Sealant
How to Make It
- Roll out a large, even slab.
- Cut it into a rectangle, oval, arch, or organic shape.
- Carefully lift the slab onto a flat drying surface.
- Create a small raised edge around the perimeter.
- Smooth the corners and edges.
- Check that the tray is sitting completely flat.
- Allow it to dry slowly.
- Turn it carefully if needed during drying to encourage even drying.
- Paint once completely dry.
- Apply your chosen sealant.
Tip: Large flat clay pieces are more prone to warping, so don’t rush the drying process.
How to Make Air Dry Clay Desk Accessories Last Longer
Because these pieces are going to be used rather than simply displayed, I pay a little more attention to the finishing stage.
Let the clay dry completely
Don’t paint a piece simply because the outside feels hard.
Thicker clay can still contain moisture inside. Give substantial pieces extra drying time before moving on to paint.
Smooth rough edges before painting
A little sanding can make an enormous difference.
Once the piece is completely dry, lightly smooth rough edges with fine-grit sandpaper. Wipe away the dust before painting.
Use several thin coats of paint
One thick coat can hide details and may leave an uneven finish.
Two thin coats usually give you much better coverage.
Seal frequently handled pieces
A suitable sealant can help protect painted surfaces from normal handling and make them easier to wipe gently.
Just remember that sealing doesn’t automatically turn ordinary air dry clay into a waterproof material.
Don’t make functional pieces too delicate
This is probably the biggest thing I’d change if I were making these for the first time.
A decorative clay dish can have delicate edges. A cable holder or phone stand needs to survive being picked up and moved around.
Build accordingly.
How to Prevent Air Dry Clay Desk Projects From Cracking
Some of these projects have thicker areas than others, so drying technique matters.
Here are the things that have made the biggest difference for me:
- Keep the thickness as consistent as possible.
- Avoid attaching very thin pieces to very thick pieces.
- Smooth cracks while the clay is still workable.
- Don’t put freshly made clay directly beside a heater or strong heat source.
- Let thicker projects dry gradually.
- Make sure the bottom of the project isn’t significantly thicker than the sides.
- Don’t paint until you’re confident the clay is completely dry.
If you’re having trouble with cracking, my guide on How to Fix Cracked Air Dry Clay walks through what to do once a crack appears.
You can also read How to Dry Air Dry Clay Faster Without Cracking if you’re working on a project that needs a little more drying time than expected.
Easy Ways to Decorate Your Clay Desk Accessories
You don’t have to make every project colorful.
Some of my favorite clay desk pieces use very simple finishes.
Neutral and Minimal
Try:
- Cream
- White
- Beige
- Taupe
- Soft brown
These work especially well for minimalist home offices.
Soft and Feminine
Try:
- Blush pink
- Dusty rose
- Cream
- Soft peach
- Muted lavender
You can also add tiny flowers or simple painted dots.
Terracotta and Earthy
Leave some of the natural clay visible and add:
- Terracotta
- Warm beige
- Olive green
- Brown
- Cream
This works beautifully with wood desks and natural accessories.
Modern Black and White
For a cleaner office look, paint the outside white or cream and add black geometric details.
A simple black arch, stripe, checkerboard pattern, or lettering can completely change the appearance of a basic clay organizer.
Which Air Dry Clay Desk Project Should You Make First?
If you’re new to air dry clay, I wouldn’t start with the bookends or washi tape dispenser.
I’d begin with the catch-all dish or pen holder.
They’re forgiving, don’t require complicated measurements, and give you a chance to practice rolling, smoothing, shaping, drying, painting, and sealing.
Once you’re comfortable with those, move on to the phone stand, cable organizer, or sticky note holder.
And if you already have some experience with clay, the bookends and personalized desk accessories are great opportunities to make something more substantial.
Frequently Asked Questions
Can I use air dry clay for desk organizers?
Yes. Air dry clay works well for decorative and lightly handled desk organizers such as pen holders, trays, sticky note holders, cable organizers, and catch-all dishes. For pieces that need to support significant weight, build them thick and stable.
Do I have to paint air dry clay?
No. You can leave it natural if you like the look of unfinished clay.
White, beige, terracotta, and other naturally colored clay can look beautiful without paint.
How do I make air dry clay stronger?
Using sufficient thickness, allowing the piece to dry completely, and avoiding unnecessarily thin sections are some of the most important things you can do. A suitable sealant can also help protect the finished surface from normal handling.
Can I make a phone stand from air dry clay?
Yes. The most important thing is to test the stand with your actual phone while the clay is still workable. Check both the slot width and the angle before allowing it to dry.
Can I make a planter from air dry clay?
Yes, but I recommend using a plastic nursery pot or waterproof liner inside the clay planter. Regular air dry clay should not be treated as naturally waterproof.
How long do air dry clay desk accessories take to dry?
Smaller pieces may dry within a day or two, while thicker projects such as bookends and solid paperweights can take longer. Drying time depends heavily on the thickness and the clay you’re using.
Can I use these projects with kids?
Absolutely. Simple trays, catch-all dishes, name plates, and basic pen holders are particularly good choices. More structural projects, such as bookends or anything involving very thick clay, require more patience because of the longer drying time.
More Air Dry Clay Projects to Try
If you’ve enjoyed making these desk accessories, there are plenty of other useful clay projects you can try next.
For something simple and decorative, check out my 10 Beautiful & Easy Air Dry Clay Coaster Ideas.
If you’re looking for quick projects that don’t necessarily use clay, my Creative 1-Hour Craft Ideas for Adults has more small handmade projects.
And if you’re still learning the basics of air dry clay, start with my Air Dry Clay Beginner Tips.
You may also want to save these:
- How to Dry Air Dry Clay Faster Without Cracking
- How to Fix Cracked Air Dry Clay
- How to Paint Air Dry Clay: A Step-by-Step Guide
- How to Seal Air Dry Clay
Final Thoughts
I really like the idea of using air dry clay for desk accessories because you’re not just making something cute that eventually ends up sitting in a drawer.
You’re making something specifically for the way you work.
A little clay pen holder can finally give all those loose pens a home. A cable organizer can stop your charging cords from becoming a tangled mess. A small tray can collect all those tiny things that somehow end up scattered around your keyboard.
And because you’re making everything yourself, you can change the size, shape, and colors to suit your actual desk.
I’d start with one small project, especially the catch-all dish or pen holder, and then build a little collection from there. Before long, you can have a complete handmade desk setup where nearly every organizer has been shaped and finished by you.




One Comment