12 Useful Everyday Items You Can Make With Air Dry Clay
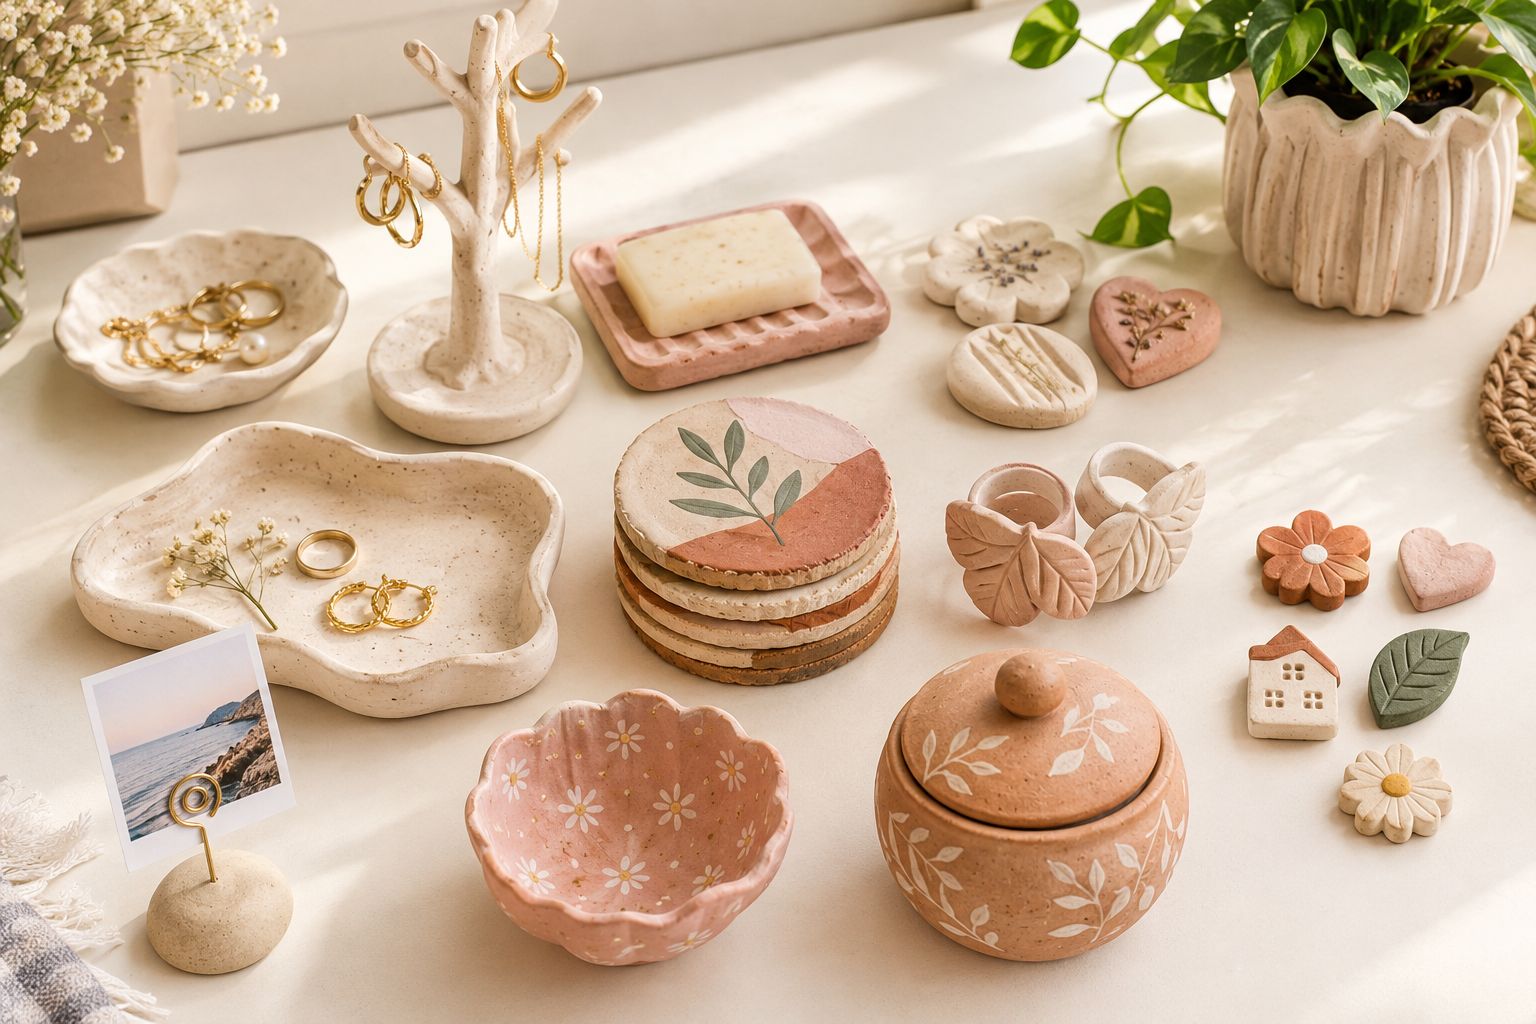
Some of my favorite air-dry clay projects aren’t necessarily the prettiest ones. They’re the little things I can actually use around the house, like a dish that keeps my rings from disappearing, a small pot for hair ties, or a tray near the front door where my keys finally have a place to go.
When I first started exploring air-dry clay, I was drawn to decorative pieces. I loved experimenting with shapes, adding textures, and choosing paint colors that matched my home. But I soon realized that some of the most satisfying projects were the ones that served a purpose beyond looking pretty.

You don’t need a pottery wheel, a kiln, or a cupboard full of expensive supplies to make useful clay items. With a little patience, some basic tools, and a suitable air-dry clay, you can create small accessories for your bedroom, bathroom, entryway, living room, and desk.
In this guide, I’m sharing 12 useful everyday items you can make with air-dry clay, including what you’ll need, step-by-step instructions, and practical tips for getting a better result.
One important note before you begin: ordinary air-dry clay is best suited to decorative items and gentle use. It isn’t inherently waterproof, food-safe, or heat-resistant, so I’ve included tips for using each project appropriately.
Supplies You’ll Need for These Air-Dry Clay Projects
You won’t need every supply for every project, but these basics will help you complete most of the ideas in this list.
- Air-dry clay
- Rolling pin
- Thickness guides or wooden craft sticks
- Craft knife or clay-cutting tool
- Small bowl of water
- Parchment paper or a suitable protected work surface
- Sandpaper for smoothing fully dried clay
- Acrylic paints and soft paintbrushes
- Clear sealer suitable for your clay
- Felt pads for the bottoms of decorative items
- Suitable craft adhesive for projects that require attachments
If you’re just starting, my 10 essential air-dry clay beginner tips can help you avoid common problems with shaping, drying, and finishing.
1. Air-Dry Clay Ring and Trinket Dish
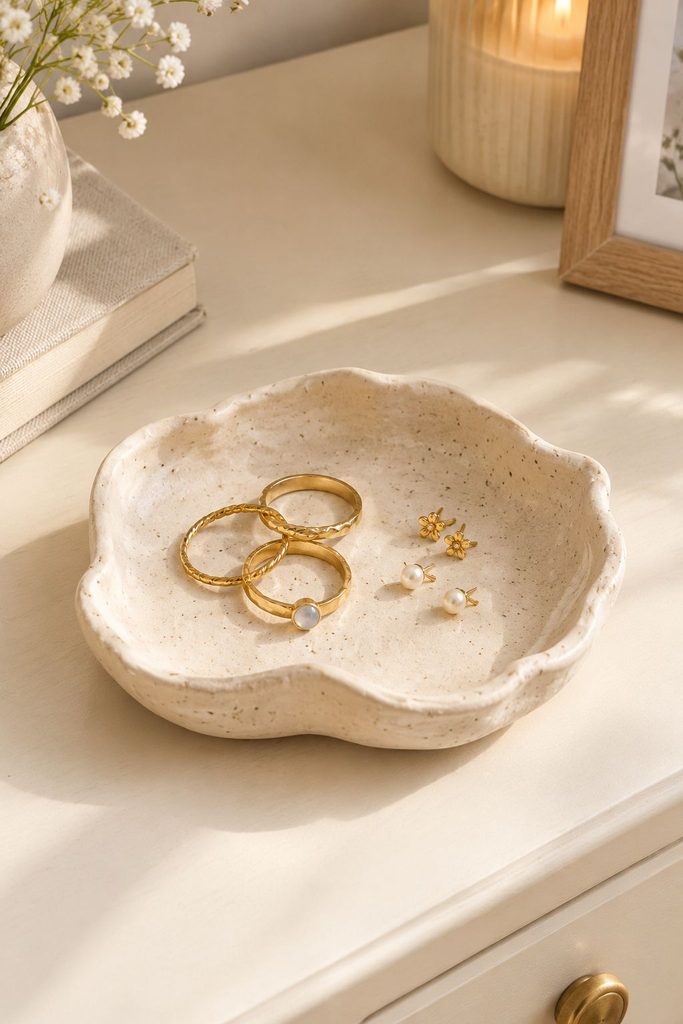
<text>This is one of the first projects I’d recommend to a beginner. A small trinket dish gives your rings, earrings, and other tiny accessories a dedicated home instead of leaving them scattered across your nightstand or dresser.</text>
<text>What makes this project especially useful is how easy it is to customize. You can make a simple round dish, create an irregular organic shape, or press a leaf into the surface for a botanical pattern.</text>
What You’ll Need
- Air-dry clay
- Rolling pin
- Small bowl or dish to use as a shaping guide
- Craft knife
- Water and a fingertip or soft sponge for smoothing
- Acrylic paint, optional
- Compatible clear sealer, optional
How to Make It
- Prepare the clay. Knead a small piece until it feels smooth and workable. Remove any dry crumbs or lumps that could leave marks on the finished surface.
- Roll it out. Roll the clay into an even slab. Aim for a thickness that feels sturdy rather than paper-thin, especially around the rim.
- Cut your shape. Use a small bowl, cookie cutter, or freehand outline to create the shape of your dish. Smooth any rough edges with a slightly damp fingertip.
- Create the bowl shape. Gently press the clay into a shallow bowl or over the outside of an inverted bowl, using a suitable release surface if necessary. Avoid sharp folds or sudden bends.
- Refine the rim. Adjust the edges so the dish looks balanced. Check that the bottom will sit flat on a table.
- Let it dry. Place the dish on a protected, level surface and allow it to dry according to the clay manufacturer’s instructions. Turn it carefully if needed so the underside can dry too.
- Sand and decorate. Once completely dry, smooth rough areas with fine sandpaper. Paint the dish if desired, then apply a compatible sealer according to its directions.
My Tip
Make the dish slightly wider than you think you need. It is much easier to find your rings when they aren’t stacked on top of each other. Add felt underneath to help protect furniture from scratches.
For more detailed instructions, see my air-dry clay trinket dish and ring holder tutorial.
2. Air-Dry Clay Jewelry Tree
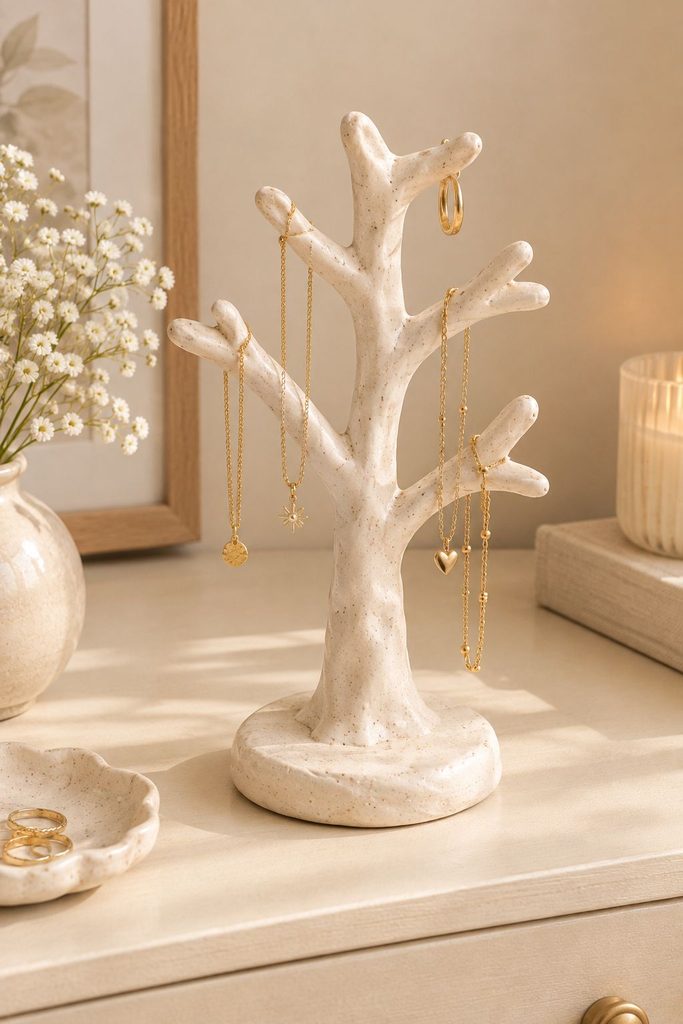
If you regularly wear necklaces, bracelets, or lightweight earrings, a jewelry tree can help keep your favorite pieces visible and organized. It also makes a lovely decorative accessory for a dresser.
This project requires a little more planning than a simple dish because the branches need to stay upright and the base must be stable.
What You’ll Need
- Air-dry clay
- Rolling surface
- Craft knife or clay tool
- Water for smoothing
- Small sculpting tool, optional
- Acrylic paint
- Compatible clear sealer, optional
How to Make It
- Shape the base. Roll a generous piece of clay into a ball, then flatten it into a thick, stable disc. Keep the base broad enough to support the finished tree.
- Make the trunk. Roll another piece of clay into a sturdy cylinder. Avoid making it too thin because the trunk will need to support the branches.
- Create the branches. Form several short branches from smaller pieces of clay. Keep them relatively thick and rounded, with enough space between them for jewelry.
- Attach the pieces. Join the trunk to the base and attach the branches using the joining technique recommended for your clay. Score the joining surfaces and use a small amount of slip if appropriate for your product.
- Smooth the joins. Blend the edges carefully so the branches don’t have obvious weak points. Check that the tree stands straight.
- Dry thoroughly. Allow the entire piece to dry completely, following the manufacturer’s instructions. Thick joins may take longer than thin details.
- Paint and finish. Sand any rough areas once dry, remove the dust, and paint the tree. Apply a compatible sealer if desired.
My Tip
Keep the branches short and the jewelry lightweight. Air-dry clay can be brittle, so don’t rely on a delicate clay tree to support heavy necklaces or several heavy pieces at once.
Follow my air-dry clay jewelry tree tutorial for more guidance.
3. Decorative Air-Dry Clay Soap Dish
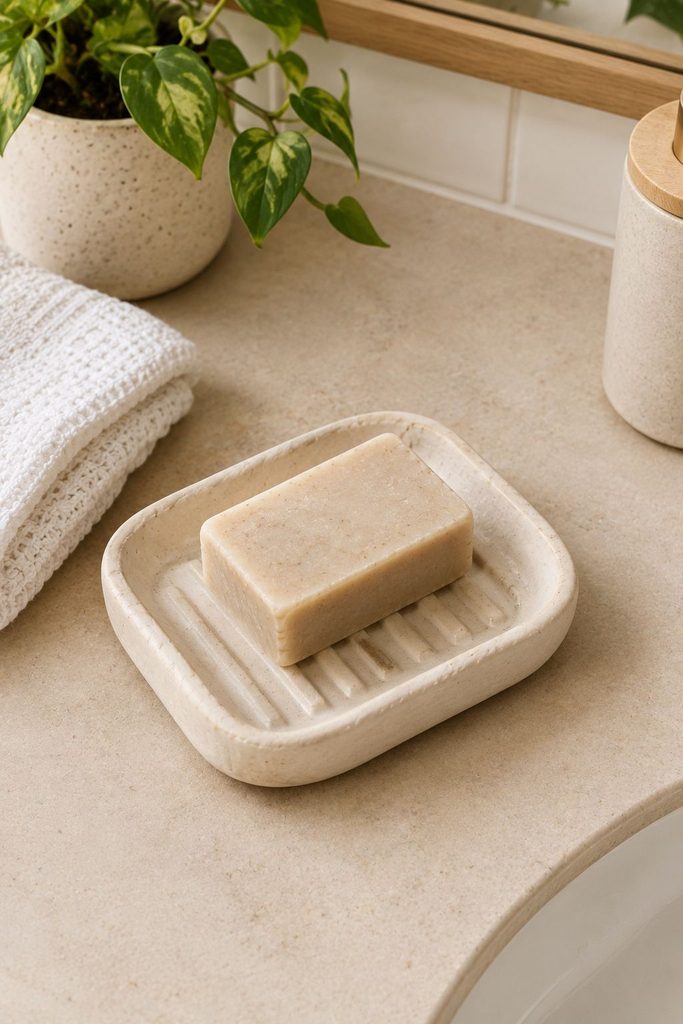
A soap dish with raised ridges can add a handmade touch to your bathroom. The ridges lift a bar of soap away from the surface and help reduce the amount of moisture sitting directly beneath it.
Because ordinary air-dry clay isn’t waterproof, this project needs more care than a decorative dish kept in a bedroom.
What You’ll Need
- Air-dry clay
- Rolling pin
- Craft knife
- Clay sculpting tool or blunt stick
- Water for smoothing
- Acrylic paint, optional
- Compatible clear sealer, optional
How to Make It
- Prepare the clay. Knead a small portion until smooth and free of lumps.
- Roll an even slab. Use thickness guides to help keep the clay consistent. An evenly rolled slab is less likely to have weak, thin areas.
- Cut the dish shape. Make a rectangle, oval, or rounded shape large enough to hold your bar of soap.
- Raise the edges. Gently lift the sides to create a shallow dish. Smooth the corners rather than pinching them into sharp points.
- Add drainage ridges. Use a blunt tool to create several shallow lines across the base. Leave enough space between the ridges so the soap can rest securely.
- Check the base. Make sure the dish sits flat and doesn’t rock. Smooth the rim and remove fingerprints.
- Dry and finish. Allow the dish to dry completely. Sand any rough areas, paint if desired, and apply a compatible sealer according to the product instructions.
My Tip
Use this as a decorative accessory rather than a permanently wet soap dish. Keep it out of standing water, wipe away splashes, and allow it to dry between uses. A craft sealer does not guarantee that the dish will be waterproof.
For the full tutorial, visit my DIY air-dry clay soap dish guide.
4. DIY Clay Scent Stones
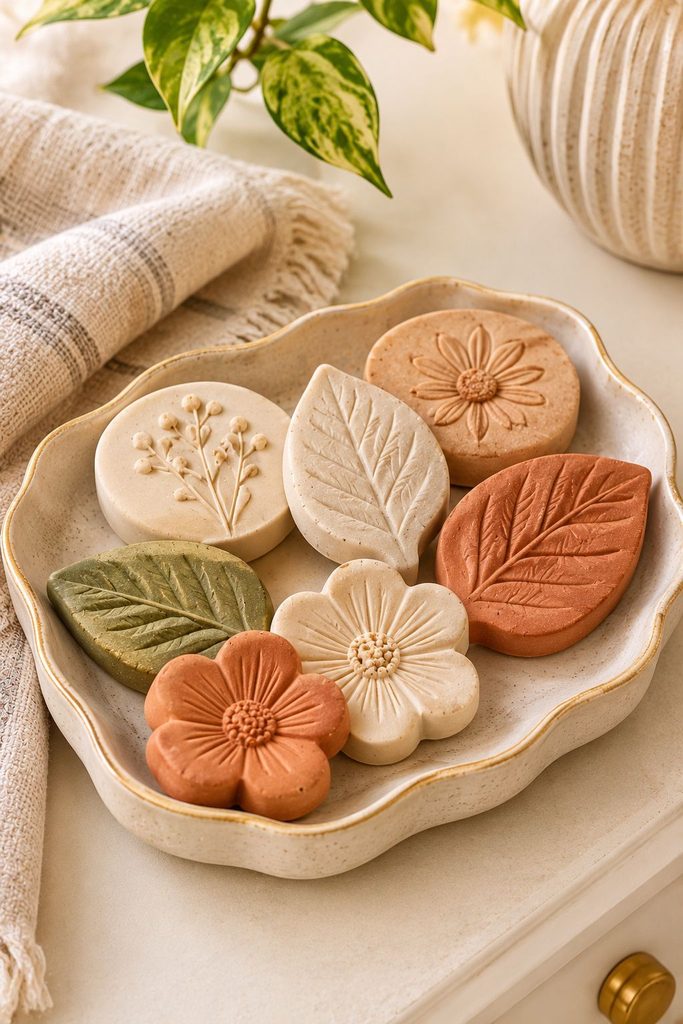
Clay scent stones are a simple project that can make use of leftover clay. Unsealed air-dry clay is porous, so it can absorb a small amount of fragrance and gradually release the scent.
You can make them as simple circles or shape them into leaves, flowers, hearts, and other decorative designs.
What You’ll Need
- Air-dry clay
- Rolling pin, optional
- Craft knife or small cutter
- Sculpting tools for texture
- Fragrance suitable for the intended use
- Small decorative dish or tray
How to Make It
- Prepare the clay. Knead a small piece until it is smooth and easy to shape.
- Choose your design. Roll the clay into a small ball and flatten it into a disc, or shape it into a simple leaf, heart, or flower.
- Add texture. Press a leaf, stamp, or sculpting tool lightly into the surface. Avoid making the stone too thin.
- Smooth the edges. Use your fingertips to remove cracks and rough areas while the clay is still workable.
- Dry completely. Place the stones on a protected surface and allow them to dry fully. Follow the manufacturer’s directions for drying time.
- Add fragrance. Once the stones are completely dry, add only a small amount of suitable fragrance and let it absorb before placing the stone in a decorative dish.
My Tip
Don’t seal the surface if you want the stone to absorb fragrance. Keep oils away from delicate fabrics, painted furniture, children, and pets. Scent stones are decorative fragrance accessories, not a replacement for a purpose-made diffuser.
Read my DIY clay diffuser stones tutorial for more details.
5. Air-Dry Clay Key and Catch-All Dish
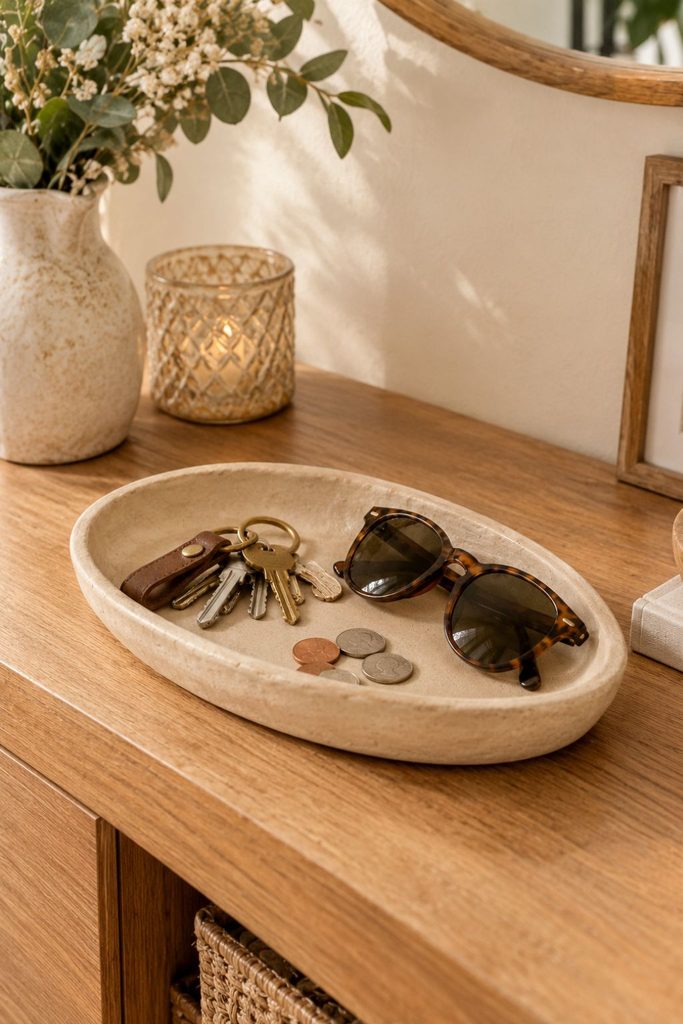
If your keys, loose change, sunglasses, and other small items tend to end up in different places, a catch-all dish near the front door can help create a simple daily routine.
This project uses the same basic technique as a ring dish, but you can make it wider and slightly deeper to accommodate larger items.
What You’ll Need
- Air-dry clay
- Rolling pin
- Bowl or dish for shaping
- Craft knife
- Water for smoothing
- Acrylic paint, optional
- Compatible sealer, optional
- Felt pads
How to Make It
- Measure the space. Check the area where you want to place the finished dish. Leave enough room for the dish without crowding your entryway table.
- Knead and roll the clay. Prepare a smooth piece of clay and roll it into an even slab.
- Cut the outline. Choose a round, oval, or irregular shape. Make sure it is large enough to hold your everyday essentials.
- Form the sides. Gently press the clay into a shallow bowl or shape the edges upward by hand. Keep the sides even so the finished dish looks balanced.
- Smooth the surface. Refine the rim, remove fingerprints, and flatten the base if necessary.
- Allow it to dry. Leave the dish on a level, protected surface until completely dry. Follow the clay manufacturer’s drying guidance.
- Finish the dish. Sand rough edges, remove the dust, and paint or seal the surface if desired. Attach felt pads after the finish has cured.
My Tip
Keep this dish for dry items. If you regularly drop damp umbrellas or wet objects on your entryway table, use a different material for that purpose.
You can follow the same shaping method in my air-dry clay trinket dish tutorial.
6. Decorative Air-Dry Clay Coasters
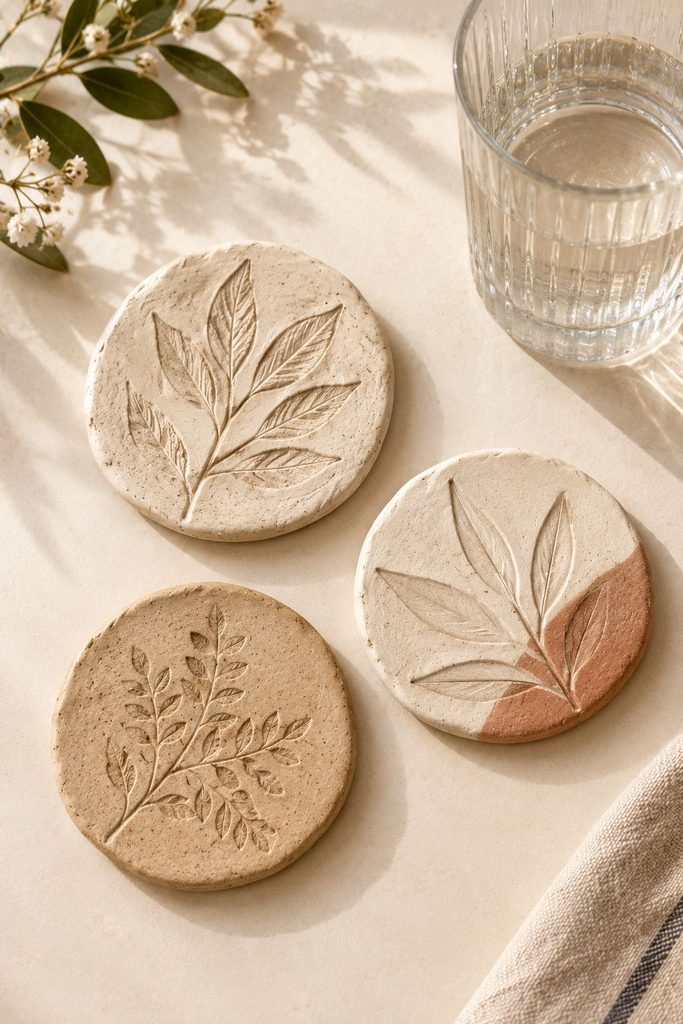
Coasters are a great way to experiment with patterns and textures. You can press leaves into the surface, create geometric designs, or use lace to make a delicate impression.
Although clay coasters can look beautiful, ordinary air-dry clay absorbs moisture and may be damaged by condensation. They’re best treated as decorative pieces unless you use a more suitable water-resistant material.
What You’ll Need
- Air-dry clay
- Rolling pin
- Thickness guides
- Round cutter or craft knife
- Leaf, lace, or texture tool
- Fine sandpaper
- Acrylic paint
- Compatible clear sealer
How to Make It
- Roll the clay. Knead the clay until smooth and roll it into an even slab. Consistent thickness helps reduce weak spots.
- Cut the coasters. Use a round cutter or trace a circular guide. You can also make square, oval, or irregular shapes.
- Add a pattern. Press a leaf, lace, or texture tool gently into the surface. Avoid pressing so deeply that you weaken the clay.
- Smooth the edges. Remove rough areas with a slightly damp fingertip. Check that each coaster lies flat.
- Dry slowly. Place the pieces on a protected surface and let them dry completely. Turn them carefully if necessary to help the underside dry.
- Sand and paint. Once fully dry, smooth the edges with fine sandpaper and remove the dust. Add paint if desired.
- Apply a finish. Use a compatible sealer according to its directions, then allow it to cure fully before handling.
My Tip
A sealer doesn’t make an ordinary clay coaster reliably waterproof. Wipe away condensation promptly and let the coaster dry completely after use. If you want coasters for frequent use with cold, wet glasses, choose a more water-resistant material.
For more inspiration, see my 10 beautiful and easy air-dry clay coaster ideas.
7. DIY Leaf Napkin Rings
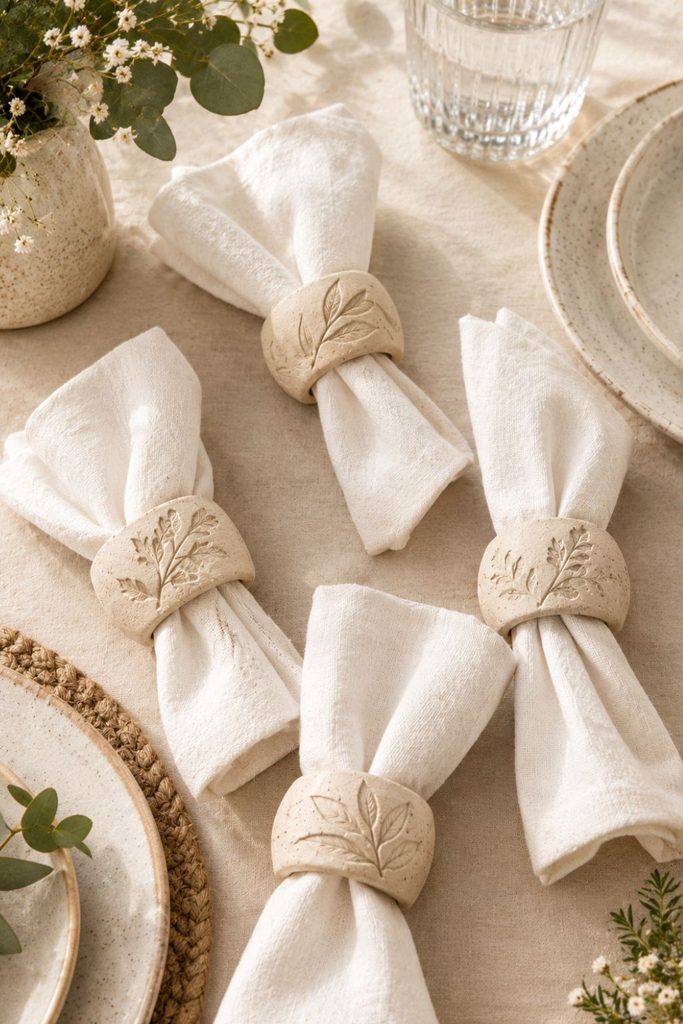
Leaf napkin rings are an easy way to bring handmade texture to your dining table. You can make simple rings and press a botanical impression into the surface, or add a small leaf detail for a more decorative look.
The main challenge is creating a ring that holds its shape without becoming too thin or fragile.
What You’ll Need
- Air-dry clay
- Rolling pin
- Craft knife
- A cylindrical shaping guide
- Real leaves or a texture tool
- Water for smoothing
- Acrylic paint, optional
- Compatible clear sealer, optional
How to Make It
- Roll out the clay. Prepare a smooth slab with an even thickness. Avoid rolling it too thin because the ring needs to hold its shape.
- Cut a strip. Cut a rectangular strip long enough to wrap around a suitable cylindrical guide, allowing a little overlap for joining.
- Add the leaf texture. Press a leaf lightly into the clay, then lift it away carefully. You can also use a clay tool to draw a simple leaf pattern.
- Form the ring. Wrap the strip around the shaping guide. Join the ends using the method recommended for your clay, smoothing the join without making it too thin.
- Check the opening. Make sure the opening is large enough for a folded napkin. Keep the ring round and avoid flattening it while handling.
- Dry carefully. Allow the ring to dry according to the manufacturer’s instructions. Follow the product’s guidance on when it is safe to remove it from the shaping guide.
- Finish the surface. Once completely dry, sand rough areas and paint or seal the ring if desired.
My Tip
Make a test ring first to check the size. A ring that looks spacious before drying may become a little smaller as the clay shrinks. Use these for decorative table settings, not as food-contact surfaces.
See my air-dry clay leaf napkin ring tutorial for more guidance.
8. DIY Air-Dry Clay Refrigerator Magnets
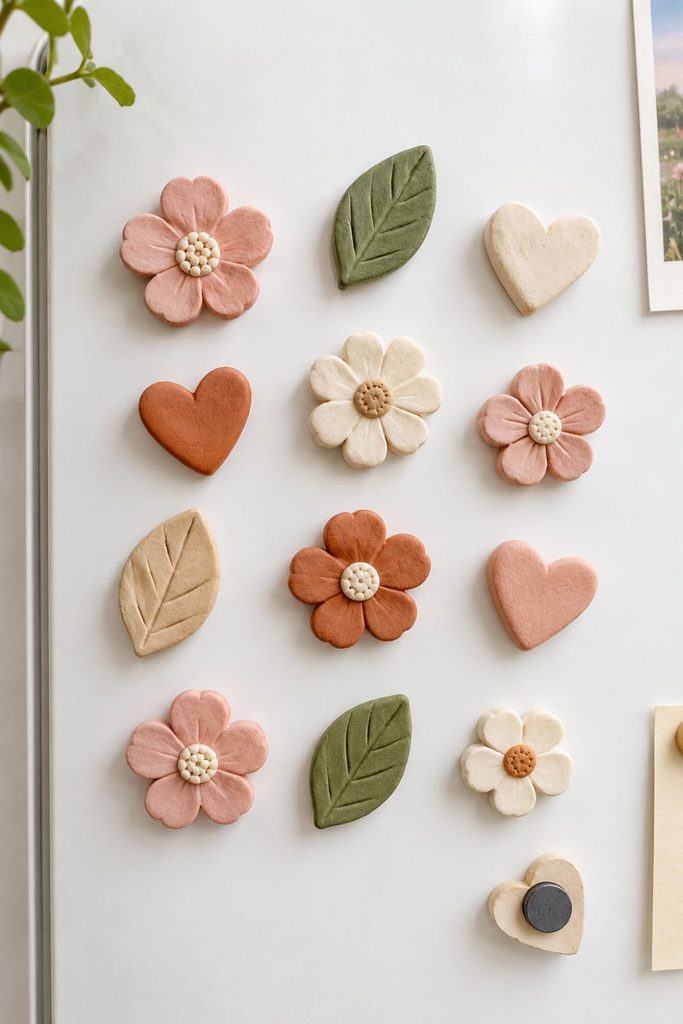
Refrigerator magnets are small, beginner-friendly projects that use very little clay. They’re a good way to practice simple shapes and experiment with paint colors without committing to a large project.
You can make flowers, hearts, leaves, fruit shapes, or minimal geometric designs to decorate a refrigerator or magnetic board.
What You’ll Need
- Air-dry clay
- Rolling pin
- Small cookie cutters or a craft knife
- Sculpting tools
- Acrylic paint
- Suitable clear sealer, optional
- Small magnets
- Adhesive compatible with the magnet and finished clay
How to Make It
- Prepare the clay. Knead a small amount until smooth, then roll it into an even slab.
- Cut your shapes. Use small cutters or a craft knife to create your chosen designs. Keep them reasonably compact and lightweight.
- Add details. Use sculpting tools to create veins, dots, lines, or other simple patterns. Keep delicate details shallow enough to avoid breaking.
- Smooth the edges. Remove rough edges and make the back as flat as possible so the magnet can sit close to the refrigerator.
- Dry completely. Leave the shapes on a protected surface until fully dry, following the clay manufacturer’s instructions.
- Paint the magnets. Apply acrylic paint and let it dry completely. Add a compatible sealer if desired and allow it to cure.
- Attach the magnets. Use an adhesive suitable for both the magnet and the finished clay. Follow the adhesive manufacturer’s curing instructions before using the magnets.
My Tip
Choose magnets that are appropriate for the size and weight of your design. Keep loose magnets away from children because swallowing magnets can cause serious injury.
For more ideas, see my DIY air-dry clay fridge magnet tutorial.
9. Air-Dry Clay Mini Planter Cover
A small clay planter cover can transform a plain plastic nursery pot into a decorative accessory for a windowsill, bookshelf, or desk.
Instead of planting directly into the clay, use the finished piece as an outer cover for a removable plastic pot. This helps prevent water from sitting against the clay.
What You’ll Need
- Air-dry clay
- Rolling pin or sculpting tools
- Craft knife
- Water for smoothing
- A plastic nursery pot to use as a size guide
- Acrylic paint, optional
- Compatible clear sealer, optional
How to Make It
- Measure the nursery pot. Check its width and height. Make the clay cover slightly wider so the plastic pot can slide in and out without forcing it.
- Prepare the clay. Knead the clay until smooth and roll it into a slab if you plan to build the sides from strips.
- Form the base. Create a sturdy base that is large enough to support the cover. Keep it level so the finished pot won’t wobble.
- Build the walls. Add clay around the base, joining the pieces carefully. Alternatively, shape the cover by pinching clay upward from a thicker base.
- Check the fit. Use the plastic nursery pot as a guide, making sure the cover is wide enough for easy removal. Avoid making the walls too thin.
- Smooth the surface. Blend the joins and refine the rim. Check that the cover stands upright.
- Dry and decorate. Allow the piece to dry fully. Sand any rough areas, paint if desired, and apply a compatible sealer according to the manufacturer’s directions.
My Tip
Always remove the plastic nursery pot when watering. Let it drain completely before putting it back into the clay cover. Never rely on a decorative air-dry clay pot to hold water.
For a simpler version, follow my air-dry clay mini pot tutorial.
10. DIY Air-Dry Clay Photo Holder
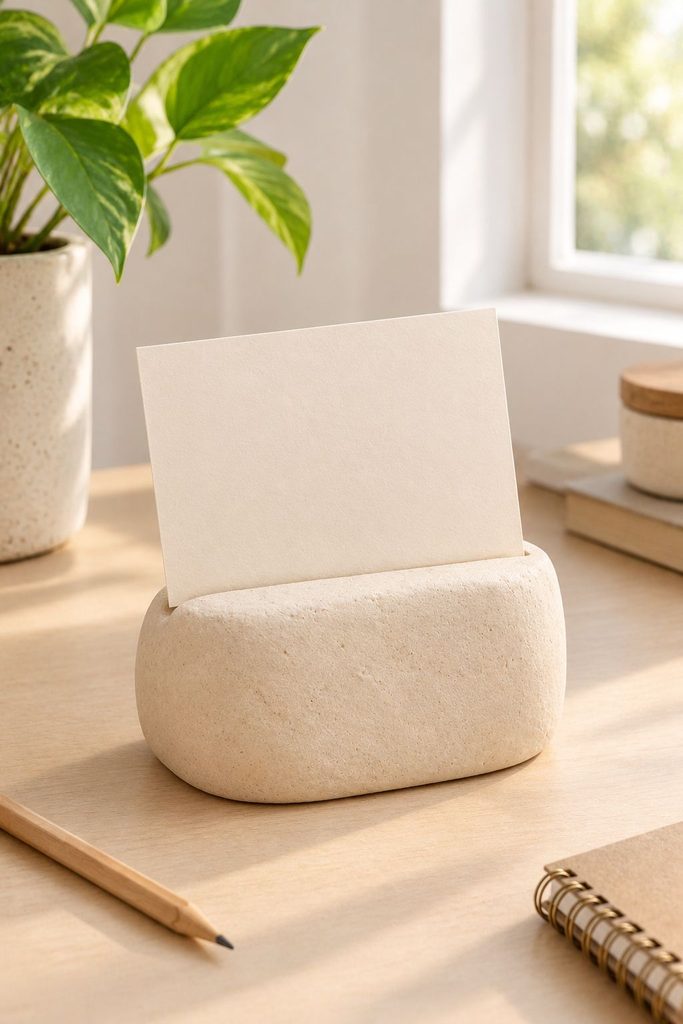
A photo holder is a simple way to display a favorite photograph, postcard, or small print without needing a traditional frame. It works nicely on a desk, nightstand, or bookshelf.
The design is straightforward, but the base needs enough weight and width to keep the card upright.
What You’ll Need
- Air-dry clay
- Rolling surface
- Craft knife
- Blunt sculpting tool
- Ruler
- Acrylic paint, optional
- Compatible clear sealer, optional
How to Make It
- Shape the base. Take a generous piece of clay and shape it into a chunky block, low arch, or rounded rectangle. Make the base broad enough to remain stable.
- Flatten the bottom. Press the base gently against your protected work surface and check that it sits evenly without rocking.
- Create the slit. Use a blunt tool to form a narrow slot across the top. Make it deep enough to hold the card upright without cutting too far into the base.
- Test the width. Check the slit with a scrap piece of card of similar thickness to your photograph. Adjust the opening while the clay is still workable.
- Smooth the holder. Round the corners and remove fingerprints. Keep the edges around the slot sturdy.
- Dry completely. Leave the holder on a level surface until the entire piece is dry. Thicker bases may need extra time.
- Paint and finish. Sand rough edges once dry, remove the dust, and paint or seal as desired. Let the finish cure completely before inserting your photograph.
My Tip
Test the slot before the clay dries. If it’s too narrow, it may damage the paper; if it’s too wide, the photograph may lean or slide out. A broad base also helps prevent the holder from tipping over.
See my air-dry clay photo holder tutorial for more inspiration.
11. Decorative Air-Dry Clay Bowl
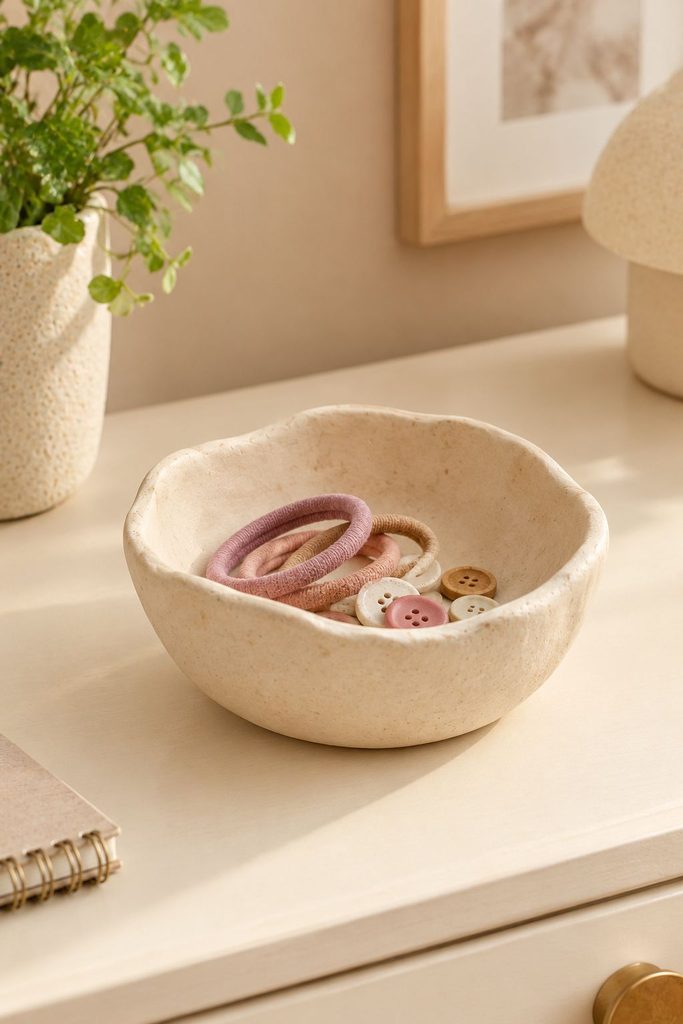
A small decorative bowl is one of the most versatile shapes you can make with air-dry clay. Depending on its size, it can hold lightweight dry items such as spare charging cables, hair accessories, buttons, or small keepsakes.
You can keep the finish minimal or decorate the bowl with leaf impressions, lace textures, or a simple painted pattern.
What You’ll Need
- Air-dry clay
- Rolling pin, optional
- Small bowl for shaping
- Craft knife
- Water for smoothing
- Fine sandpaper
- Acrylic paint
- Compatible clear sealer, optional
How to Make It
- Prepare the clay. Knead the clay until smooth and pliable. Remove any hard pieces or dry crumbs.
- Roll or shape the clay. Roll out an even slab if you want a clean, consistent shape. You can also pinch the clay into a bowl shape by hand.
- Form the bowl. Gently press the clay into a suitable bowl or shape it over the outside of an inverted bowl. Use a suitable release surface if needed.
- Refine the rim. Smooth the edge and adjust the sides so they are reasonably even. Avoid making the bottom too thin.
- Check the base. Make sure the bowl will sit flat on a table. Adjust it carefully while the clay is still workable.
- Dry slowly. Leave the bowl on a protected surface and allow it to dry completely according to the manufacturer’s instructions.
- Sand and decorate. Smooth rough areas with fine sandpaper, remove the dust, and paint the bowl. Apply a compatible sealer if desired.
My Tip
Keep this bowl for dry, non-food items. Ordinary air-dry clay isn’t designed for serving food or holding liquids, and the finished bowl shouldn’t be soaked or washed in water.
Explore more designs in my 15 beautiful air-dry clay bowl ideas, patterned air-dry clay bowl tutorial, and DIY lace clay bowl guide.
12. DIY Air-Dry Clay Lidded Pot
A small lidded pot is a good project to try once you’re comfortable making simple dishes and bowls. It can hold hair ties, clips, buttons, sewing notions, or small keepsakes while keeping them tucked away.
The lid is the trickiest part because air-dry clay shrinks as it dries. A lid that fits perfectly while the clay is wet may become too tight later, so leave enough room for the pieces to change size.
What You’ll Need
- Air-dry clay
- Rolling pin and thickness guides
- Craft knife or clay knife
- Small bowl of water
- Parchment paper or a suitable protected work surface
- Fine sandpaper
- Acrylic paint
- Compatible clear sealer, optional
How to Make It
- Shape the pot. Knead the clay until smooth. Roll it into a ball, then press your thumb into the center to create an opening. Leave enough clay at the bottom to form a sturdy base.
- Pinch the walls. Rotate the clay as you gently pinch the sides upward. Try to keep the walls even in thickness and avoid making them too thin.
- Level the rim and base. Set the pot on a protected surface and adjust it until the base sits flat. Smooth the rim so the lid can rest evenly.
- Make the lid. Roll out a separate slab of clay to an even thickness. Place the pot upside down on the slab and carefully cut around its outer edge, allowing for the fit you want.
- Add a knob. Shape a small rounded piece of clay and attach it to the lid using the joining method recommended for your clay. Smooth the join carefully so it doesn’t become a weak point.
- Check the fit. Make sure the lid can sit on the pot without being forced into place. If you add a locating ring beneath the lid, leave enough clearance for it to lift off easily after drying.
- Dry slowly. Place the pot and lid on a flat surface with good airflow, away from direct sunlight, heaters, and strong drafts. Allow both pieces to dry completely according to the manufacturer’s instructions.
- Sand and finish. Once completely dry, gently sand rough edges and remove the dust. Paint if desired, then apply a compatible sealer according to its directions. Let the finish cure fully before using the pot.
My Tip
Start with a simple shape before adding detailed decoration. A stable base and a lid that lifts off easily are much more important than an elaborate design. Keep the finished pot for dry items rather than food or liquids.
For additional help, see my guides on drying air-dry clay without cracking, avoiding cracks in air-dry clay, and painting air-dry clay.
How to Finish Air-Dry Clay Projects Properly
Once you’ve shaped your pieces, finishing them carefully can make a noticeable difference in how they look and feel.
Let the Clay Dry Completely
Don’t rush straight into painting or sealing. A piece can feel dry on the outside while still holding moisture inside, particularly if it has thick walls or joined parts.
Follow the manufacturer’s drying instructions and allow extra time for thicker projects.
Sand Rough Areas Carefully
Use fine sandpaper to smooth rough edges and small imperfections after the clay has dried completely. Work gently, and remove dust before applying paint.
Paint in Thin Coats
Acrylic paint is a convenient choice for many decorative clay projects. Apply thin, even coats and allow each coat to dry before adding another.
Choose a Suitable Sealer
A compatible clear sealer can improve the appearance of a finished piece and offer some surface protection. Follow the product’s application and curing instructions.
Remember that sealing doesn’t make ordinary air-dry clay reliably waterproof, food-safe, or heat-resistant.
For more details, read my complete guide to sealing air-dry clay.
Common Mistakes to Avoid
Even simple air-dry clay projects can develop problems if you rush the process. Here are a few mistakes worth avoiding.
- Making the clay too thin: Thin edges and narrow details can break easily. Aim for a reasonably even thickness.
- Using too much water: Excess water can soften the surface and affect drying. Use only what you need for smoothing and joining.
- Drying the clay too quickly: Strong heat and direct sunlight can contribute to uneven drying and cracking.
- Forgetting to flatten the base: A wobbly dish or pot may be frustrating to use. Check the base while the clay is still workable.
- Painting before the clay is fully dry: Trapped moisture can affect the finish. Allow the entire piece to dry first.
- Making a lid too tight: Separate parts can shrink as they dry, so leave enough room for a lid to lift off easily.
- Expecting sealer to fix cracks: Sealer can improve the finish, but it won’t repair a structurally weak piece.
- Using clay for the wrong purpose: Food contact, direct heat, standing water, and heavy loads call for more suitable materials.
Which Air-Dry Clay Project Should You Make First?
If you’re a beginner, I’d start with a ring dish or a catch-all tray. Both allow you to practice rolling, shaping, smoothing, and drying without needing to attach lots of separate pieces.
Once you’re comfortable with those, try refrigerator magnets, a photo holder, or a decorative bowl. When you’re ready for a slightly more challenging project, move on to the jewelry tree or lidded pot.
You don’t need to make all 12 projects at once. Choose one that solves a small problem in your home, gather the supplies, and take your time with the process.
Frequently Asked Questions
What useful things can you make with air-dry clay?
You can make ring dishes, catch-all trays, jewelry trees, scent stones, decorative coasters, napkin rings, refrigerator magnets, planter covers, photo holders, small bowls, and lidded pots. Choose projects that suit the material and don’t require it to withstand food contact, direct heat, standing water, or heavy loads.
Is air-dry clay strong enough for everyday use?
Air-dry clay can work well for small decorative objects and gentle use, but it is relatively brittle compared with many functional materials. It may break if dropped, bent, pulled, or overloaded.
Can I seal air-dry clay to make it waterproof?
A sealer can provide some surface protection, but ordinary craft sealers shouldn’t be assumed to make air-dry clay completely waterproof. Keep finished pieces away from standing water and use a suitable waterproof liner when needed.
Can I use air-dry clay dishes for food?
Ordinary air-dry clay and craft finishes aren’t designed for food contact. Use handmade dishes for dry, non-food items such as jewelry, keys, and small accessories.
How long does air-dry clay take to dry?
Drying time depends on the clay brand, thickness, humidity, and airflow. Thick or joined pieces usually need longer than small, thin shapes. Follow the manufacturer’s instructions and wait until the entire piece is dry before painting or sealing.
Do I need a kiln or an oven?
No. Air-dry clay hardens at room temperature. Don’t bake it unless the manufacturer specifically states that the product is suitable for that process.
Can I sell useful air-dry clay items?
Yes, decorative pieces such as trinket dishes, magnets, jewelry holders, and small pots can be sold as handmade products. Be clear about their intended use and don’t market ordinary air-dry clay items as food-safe, waterproof, or heatproof.
For more ideas, read my guide to air-dry clay business ideas and what you can actually sell.
Final Thoughts
The best air-dry clay projects aren’t always the most complicated ones. Sometimes a little dish beside your bed, a pot for hair ties, or a simple photo holder is enough to make an everyday space feel more organized and personal.
You don’t need advanced sculpting skills or a huge collection of tools to get started. Choose a project that fits your routine, give the clay enough time to dry, and finish it carefully.
Start with one item you’ll genuinely use. Once you’ve learned how the clay behaves, you can experiment with new shapes, textures, and designs.